MW810 Mobile Workstation: Administrator Guide - Motorola Solutions
MW810 Mobile Workstation: Administrator Guide - Motorola Solutions
MW810 Mobile Workstation: Administrator Guide - Motorola Solutions

You also want an ePaper? Increase the reach of your titles
YUMPU automatically turns print PDFs into web optimized ePapers that Google loves.
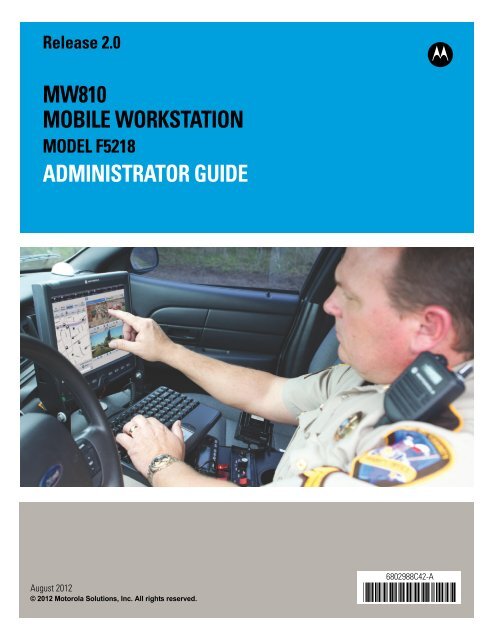
Release 2.0<br />
<strong>MW810</strong><br />
MOBILE WORKSTATION<br />
MODEL F5218<br />
ADMINISTRATOR GUIDE<br />
b<br />
August 2012<br />
© 2012 <strong>Motorola</strong> <strong>Solutions</strong>, Inc. All rights reserved.<br />
6802988C42-A<br />
@6802988C42@
i<br />
LEGAL NOTICE<br />
This media, or <strong>Motorola</strong> <strong>Solutions</strong> Product, may include <strong>Motorola</strong> <strong>Solutions</strong> Software, Commercial Third Party Software,<br />
and Publicly Available Software. The <strong>Motorola</strong> <strong>Solutions</strong> Software that may be included on this media, or<br />
included in the <strong>Motorola</strong> <strong>Solutions</strong> Product, is Copyright © by <strong>Motorola</strong> <strong>Solutions</strong>, Inc., and its use is subject to the<br />
licenses, terms and conditions of the agreement in force between the purchaser of the <strong>Motorola</strong> <strong>Solutions</strong> Product and<br />
<strong>Motorola</strong> <strong>Solutions</strong>, Inc.<br />
The Commercial Third Party Software that may be included on this media, or included in the <strong>Motorola</strong> <strong>Solutions</strong> Product,<br />
is subject to the licenses, terms and conditions of the agreement in force between the purchaser of the <strong>Motorola</strong><br />
<strong>Solutions</strong> Product and <strong>Motorola</strong> <strong>Solutions</strong>, Inc., unless a separate Commercial Third Party Software License is<br />
included, in which case, your use of the Commercial Third Party Software will then be governed by the separate Commercial<br />
Third Party License.<br />
The Publicly Available Software that may be included on this media, or in the <strong>Motorola</strong> <strong>Solutions</strong> Product, is listed<br />
below. The use of the listed Publicly Available Software is subject to the licenses, terms and conditions of the agreement<br />
in force between the purchaser of the <strong>Motorola</strong> <strong>Solutions</strong> Product and <strong>Motorola</strong> <strong>Solutions</strong>, Inc., as well as, the<br />
terms and conditions of the license of each Publicly Available Software package. Copies of the licenses for the listed<br />
Publicly Available Software, as well as, all attributions, acknowledgements, and software information details, are<br />
included below. <strong>Motorola</strong> <strong>Solutions</strong> is required to reproduce the software licenses, acknowledgments and copyright<br />
notices as provided by the Authors and Owners, thus, all such information is provided in its native language form, without<br />
modification or translation.<br />
The Publicly Available Software in the list below is limited to the Publicly Available Software included by <strong>Motorola</strong> <strong>Solutions</strong>.<br />
The Publicly Available Software included by Commercial Third Party Software or Products, that is used in the<br />
<strong>Motorola</strong> <strong>Solutions</strong> Product, are disclosed in the Commercial Third Party Licenses, or via the respective Commercial<br />
Third Party Publicly Available Software Legal Notices.<br />
For instructions on how to obtain a copy of any source code being made publicly available by <strong>Motorola</strong> <strong>Solutions</strong><br />
related to software used in this <strong>Motorola</strong> <strong>Solutions</strong> Product you may send your request in writing to:<br />
<strong>Motorola</strong> <strong>Solutions</strong>, Inc. 1301 E. Algonquin Road, Schaumburg, IL 60196 USA.<br />
In your request, please include the <strong>Motorola</strong> <strong>Solutions</strong> Product Name and Version, along with the Publicly Available<br />
Software specifics, such as the Publicly Available Software Name and Version.<br />
Note, the source code for the Publicly Available Software may be resident on the <strong>Motorola</strong> <strong>Solutions</strong> Product Installation<br />
Media, or on supplemental <strong>Motorola</strong> <strong>Solutions</strong> Product Media. Please reference and review the entire <strong>Motorola</strong><br />
<strong>Solutions</strong> Publicly Available Software Legal Notices and End User License Agreement for the details on location and<br />
methods of obtaining the source code.<br />
Note, dependent on the license terms of the Publicly Available Software, source code may not be provided. Please reference<br />
and review the entire <strong>Motorola</strong> <strong>Solutions</strong> Publicly Available Software Legal Notices and End User License<br />
Agreement for identifying which Publicly Available Software Packages will have source code provided.<br />
To view additional information regarding licenses, acknowledgments and required copyright notices for Publicly Available<br />
Software used in this <strong>Motorola</strong> Product, please select “Legal Notices” display from the GUI (if applicable), or<br />
review the Legal Notices and End User License Agreement File/README, on the <strong>Motorola</strong> Install Media, or resident in<br />
the <strong>Motorola</strong> Product.<br />
MOTOROLA, MOTO, MOTOROLA SOLUTIONS, and the Stylized M Logo are trademarks or registered trademarks of<br />
<strong>Motorola</strong> Trademark Holdings, LLC and are used under license. All other trademarks are the property of their respective<br />
owners. © <strong>Motorola</strong> <strong>Solutions</strong>, Inc. 2012.<br />
PUBLICLY AVAILABLE SOFTWARE LIST<br />
Name: EDK (EFI Developers Kit)<br />
Version: EDK_20071121-002
ii<br />
Description: EFI Developers Kit<br />
Software Site: https://www.tianocore.org<br />
Source Code: The Source Packages for this software are available from the original Software Site, or may be acquired<br />
from <strong>Motorola</strong>. To obtain the Software from <strong>Motorola</strong>, please contact <strong>Motorola</strong> using the methods described in the preamble<br />
of this Legal Notices Document/File.<br />
Credits: N/A<br />
License: BSD license from Intel<br />
Copyright (c) 2004, Intel Corporation<br />
All rights reserved.<br />
Redistribution and use in source and binary forms, with or without modification, are permitted provided that the following<br />
conditions are met:<br />
• Redistributions of source code must retain the above copyright notice, this list of conditions and the following disclaimer.<br />
• Redistributions in binary form must reproduce the above copyright notice, this list of conditions and the following disclaimer<br />
in the documentation and/or other materials provided with the distribution.<br />
• Neither the name of the Intel Corporation nor the names of its contributors may be used to endorse or promote products<br />
derived from this software without specific prior written permission.<br />
THIS SOFTWARE IS PROVIDED BY THE COPYRIGHT HOLDERS AND CONTRIBUTORS "AS IS" AND ANY<br />
EXPRESS OR IMPLIED WARRANTIES, INCLUDING, BUT NOT LIMITED TO, THE IMPLIED WARRANTIES OF<br />
MERCHANTABILITY AND FITNESS FOR A PARTICULAR PURPOSE ARE DISCLAIMED. IN NO EVENT SHALL<br />
THE COPYRIGHT OWNER OR CONTRIBUTORS BE LIABLE FOR ANY DIRECT, INDIRECT, INCIDENTAL, SPE-<br />
CIAL, EXEMPLARY, OR CONSEQUENTIAL DAMAGES (INCLUDING, BUT NOT LIMITED TO, PROCUREMENT OF<br />
SUBSTITUTE GOODS OR SERVICES; LOSS OF USE, DATA, OR PROFITS; OR BUSINESS INTERRUPTION)<br />
HOWEVER CAUSED AND ON ANY THEORY OF LIABILITY, WHETHER IN CONTRACT, STRICT LIABILITY, OR<br />
TORT (INCLUDING NEGLIGENCE OR OTHERWISE) ARISING IN ANY WAY OUT OF THE USE OF THIS SOFT-<br />
WARE, EVEN IF ADVISED OF THE POSSIBILITY OF SUCH DAMAGE.<br />
Trademarks<br />
• <strong>Motorola</strong> <strong>Solutions</strong> and the Stylized M logo are registered trademarks of <strong>Motorola</strong> <strong>Solutions</strong> Inc.<br />
• Microsoft, Windows and the Windows logo are registered trademarks of Microsoft Corporation.<br />
• The Bluetooth trademarks are owned by their proprietor and used by <strong>Motorola</strong> <strong>Solutions</strong>, Inc. under license in the<br />
U.S. and other countries.<br />
• IBM is a registered trademark of International Business Machines Corp.<br />
• PCTEL is a registered trademark of <strong>Mobile</strong> Mark Inc.<br />
• AMI and the AMI logo are registered trademarks of American Megatrends Inc.<br />
• Sierra Wireless, the Sierra Wireless logo are trademarks of Sierra Wireless.<br />
• Qualcomm is a registered trademark of Qualcomm Incorporated.<br />
• Intel, the Intel logo, Intel Core, Celeron and the Intel Core 2 Duo logo are trademarks or<br />
registered trademarks of Intel Corporation or its subsidiaries in the United States and other<br />
countries.<br />
• Trimble is a registered trademark of Trimble Navigation Limited.<br />
• u-blox, the u-blox logo, u-center, Antaris are registered trademarks of u-blox AG.<br />
• VESA is a registered trademark of the Video Electronics Standard Association.<br />
• Conexant is a registered trademark of Conexant Systems.<br />
• TI is a registered trademark of Texas Instruments Incorporated.<br />
• PIPS, Pagis are registered trademarks of PIPS Technology<br />
• Gunze is a registered trademark of Gunze International.<br />
All other product or service names are the property of their respective owners.
iii<br />
References<br />
You may need to refer to the documents listed below for further information.<br />
Publication<br />
Number<br />
6802983C01<br />
6802988C57<br />
6802988C40<br />
6802988C41<br />
6802988C56<br />
Description<br />
<strong>Motorola</strong> <strong>MW810</strong> <strong>Mobile</strong> <strong>Workstation</strong>, Product Safety and RF Exposure for mobile<br />
workstation with two-way radios installed in vehicles leaflet (multilingual)<br />
<strong>Motorola</strong> <strong>MW810</strong> <strong>Mobile</strong> <strong>Workstation</strong>, R2.0, User <strong>Guide</strong><br />
<strong>Motorola</strong> <strong>MW810</strong> <strong>Mobile</strong> <strong>Workstation</strong>, R2.0, Quick Reference <strong>Guide</strong> (multilingual)<br />
<strong>Motorola</strong> <strong>MW810</strong> <strong>Mobile</strong> <strong>Workstation</strong>, R2.0, Software Development Kit<br />
<strong>Motorola</strong> <strong>MW810</strong> <strong>Mobile</strong> <strong>Workstation</strong>, R2.0, Vehicle Installation Manual<br />
Internet Web Sites<br />
For the latest version of this guide and other <strong>MW810</strong> <strong>Mobile</strong> <strong>Workstation</strong> manuals<br />
go to: www.motorola.com/enterprisemobility/manuals<br />
<strong>Motorola</strong> <strong>Solutions</strong> Web site:<br />
http://www.motorolasolutions.com<br />
To visit <strong>MW810</strong> (for manuals, software and more) website logon to:<br />
http://www.motorola.com/<strong>MW810</strong><br />
For <strong>MW810</strong> manuals logon to:<br />
www.motorola.com/enterprisemobility/manuals<br />
Please note that the Web site location references in this manual are subject to<br />
change without notice.
.<br />
.<br />
.<br />
iv<br />
Using this Manual<br />
Who Should Use this Manual<br />
What is in this Manual<br />
Notational Conventions<br />
This manual is intended for staff who configure, upgrade or maintain the <strong>MW810</strong><br />
R2.0 <strong>Mobile</strong> <strong>Workstation</strong> (Model F5218). This manual assumes the reader is<br />
familiar with the operation of the R2.0 <strong>Mobile</strong> <strong>Workstation</strong> and basic Windows 7<br />
operations.<br />
This manual describes the tools and equipment, planning requirements, and<br />
product inspections necessary for a smooth installation of the <strong>MW810</strong>.<br />
Throughout this publication, you will notice the use of warnings, cautions, and<br />
notes. These notations are used to emphasize that safety hazards exist, and care<br />
must be taken.<br />
Warning<br />
Do not proceed beyond a WARNING or CAUTION until the indicated conditions<br />
are fully understood and met.<br />
Indicates a potentially hazardous situation which, if not avoided, COULD result in death or<br />
!<br />
serious injury.<br />
Warning<br />
Caution<br />
!<br />
Caution<br />
Indicates a potentially hazardous situation which, if not avoided, MAY result in minor or moderate<br />
injury. CAUTION may also be used to alert against unsafe practices and property-damage-only<br />
accident hazards.<br />
Note<br />
An operational procedure, practice, condition, etc., which it is essential to emphasize.<br />
Note
Contents<br />
References............................................................................................ iii<br />
Internet Web Sites................................................................................................ iii<br />
Using this Manual............................................................................... iv<br />
Who Should Use this Manual ............................................................................... iv<br />
What is in this Manual .......................................................................................... iv<br />
Notational Conventions ........................................................................................ iv<br />
Warning ................................................................................................................... iv<br />
Caution .................................................................................................................... iv<br />
Note ......................................................................................................................... iv<br />
Configuration ....................................................................................... 1<br />
Information ............................................................................................................ 1<br />
CPU Information Screen .......................................................................................... 1<br />
Display Information Screen...................................................................................... 2<br />
Status...................................................................................................................... 3<br />
Hardware Status........................................................................................................ 3<br />
Event Logger ............................................................................................................ 3<br />
Actions................................................................................................................... 5<br />
Settings................................................................................................................... 6<br />
CPU Codeplug.......................................................................................................... 6<br />
Display Codeplug ................................................................................................... 11<br />
Notifications ........................................................................................................... 13<br />
Display Buttons ...................................................................................................... 14<br />
Loaders ................................................................................................................... 15<br />
User Settings........................................................................................................... 16<br />
Help and About.................................................................................................... 16<br />
BIOS Setup .......................................................................................................... 17<br />
Settings in BIOS Setup........................................................................................... 17<br />
Operating BIOS Setup............................................................................................ 17<br />
Exiting BIOS Setup ................................................................................................ 17<br />
Copyright © 2012 <strong>Motorola</strong> All Rights Reserved.<br />
6802988C56-A<br />
August, 2012
vi<br />
<strong>MW810</strong> <strong>Mobile</strong> <strong>Workstation</strong> <strong>Administrator</strong> <strong>Guide</strong><br />
Security and Password Protection ................................................... 19<br />
Trusted Platform Module..................................................................................... 19<br />
Password Protection in BIOS Setup....................................................................... 19<br />
Set the supervisor and user password..................................................................... 20<br />
Remote Monitoring and Protection ................................................. 21<br />
Authentication and Password............................................................................... 21<br />
Protection of Information..................................................................................... 21<br />
Respond to Security Breaches ............................................................................. 21<br />
Connection Manager ......................................................................... 23<br />
Main Window ...................................................................................................... 23<br />
Connect/Disconnect................................................................................................ 23<br />
Options ................................................................................................................... 24<br />
Display Adjustment ........................................................................... 25<br />
Setting the Timing Mode ..................................................................................... 25<br />
Embedded On-Screen Control for 12.1” Display ................................................ 25<br />
Recovery of Pre-Installed Software ................................................. 27<br />
System Recovery Options.................................................................................... 27<br />
Windows Compleate PC Restore ........................................................................... 27<br />
Windows Memory Diagnostic Tool ....................................................................... 28<br />
Command Prompt................................................................................................... 28<br />
<strong>Motorola</strong> <strong>MW810</strong> R2.0 Recovery.......................................................................... 28<br />
Hard Drive Replacement ..................................................................................... 29<br />
Backward Compatibility................................................................... 31<br />
Software Drivers ................................................................................ 33<br />
<strong>MW810</strong> CPU Box................................................................................................ 34<br />
BIOS....................................................................................................................... 34<br />
CEC ........................................................................................................................ 34<br />
Operating System Image 32/64 Bit ........................................................................ 34<br />
<strong>MW810</strong> Displays ................................................................................................. 34<br />
Acronyms............................................................................................ 35
Configuration<br />
The <strong>Motorola</strong> <strong>MW810</strong> R2.0 Manager program is used to configure the operation of the<br />
<strong>MW810</strong> <strong>Mobile</strong> <strong>Workstation</strong> R2.0.<br />
On your icons tray, tap<br />
to run the <strong>Motorola</strong> <strong>MW810</strong> R2.0 Manager program.<br />
Information<br />
The Information section provides general hardware and software profile of the <strong>MW810</strong> CPU<br />
Box and the connected display(s). This information includes versions, identification<br />
numbers, type and model numbers that are mainly required for support.<br />
When support is required, use the Export to File button to save the information in a text file<br />
and email the file to the support center.<br />
CPU Information Screen<br />
The Information tab provides general hardware and software profile of the CPU Box.<br />
Figure 1 Information Screen - CPU Tab
2 <strong>MW810</strong> <strong>Mobile</strong> <strong>Workstation</strong> <strong>Administrator</strong> <strong>Guide</strong><br />
Display Information Screen<br />
The Information tab provides general hardware and software profile of the Display unit.<br />
Figure 2 Information Screen - Display Tab
Configuration 3<br />
Status<br />
Hardware Status<br />
The Status section provides real time readings of the power status of radios inside the CPU<br />
Box, status of the I/O ports of the CPU Box and on-board sensors of the CPU Box and<br />
display(s).<br />
The Status tab information is used for monitoring the performance of the <strong>MW810</strong> hardware<br />
and for troubleshooting.<br />
Figure 3 Status Screen- Hardware Tab<br />
Event Logger<br />
The Event Logger shows real-time events of the <strong>MW810</strong> controls and operations (such as a<br />
press of a display key.<br />
The Logger also shows a list of hardware faults, each with a counter that adds whenever a<br />
new event is added.<br />
The Event logger is mainly used to identify repeated hardware malfunctions. To make<br />
support easy, use the Save button to save all information in a text file and email the file to the<br />
support center if requested.
4 <strong>MW810</strong> <strong>Mobile</strong> <strong>Workstation</strong> <strong>Administrator</strong> <strong>Guide</strong><br />
Note that records will remain logged as long as the Clear button is not pressed or the <strong>MW810</strong><br />
is not restarted.<br />
Figure 4 Status Screen - Event Logger Tab
Configuration 5<br />
Actions<br />
The Actions section is used for temporary setting of the <strong>MW810</strong> Coadplug for testing<br />
purposes. Upon the next login session to the <strong>MW810</strong>, all parameters reset to the initial<br />
Codeplug setting used before testing.<br />
The Actions tab is used for:<br />
• Setting the I/O port lines as inputs or outputs.<br />
• Forcing an initial state of High or Low at an I/O port (enables connection flexibility of<br />
active high and low input or output devices)<br />
• Turning on or off the radio units inside the CPU Box<br />
• Controlling the display(s) Backlight, Volume<br />
• Turning on or off the Bluetooth radio inside the display.<br />
Figure 5 Actions Screen
6 <strong>MW810</strong> <strong>Mobile</strong> <strong>Workstation</strong> <strong>Administrator</strong> <strong>Guide</strong><br />
Settings<br />
CPU Codeplug<br />
!<br />
Caution<br />
The CPU codeplug is a protected memory area used for storing the configuration parameters<br />
accessed when you turn on the CPU Box. The binary-format data of the codeplug contains<br />
basic information about CPU Box capabilities.<br />
The CPU Codeplug tab enables the administrator to configure various parameters inside the<br />
CPU Box, such as: basic operation, inputs and outputs to and from peripheral devices<br />
connected to the CPU Box.<br />
To modify the parameters of the CPU codeplug:<br />
Step 1. Tap the Read from device button to retrieve the current Codeplug information from<br />
the CPU Box. If the codeplug is successfully read, you will see a list of parameters.<br />
Incorrect codeplug can make the workstation un-operational. Make sure to acquire the appropriate codeplug.<br />
Always make a backup copy in case you have made a mistake during the update.<br />
Step 2. Tap the Save to file button to backup the original CPU codeplug data.<br />
Step 3. Select and modify the required parameters or tap the Read from file button to copy a<br />
codeplug from a file.<br />
Step 4. Tap the Write to device button to program the CPU Box and wait for a confirmation<br />
of successful programming completion.<br />
To return to factory settings of the CPU Codeplug, tap the Restore default button.<br />
Note<br />
Figure 6 Settings Screen - CPU Codeplug Tab
Configuration 7<br />
Aux power<br />
The CPU Box can serve as a power supply source to auxiliary devices, such as a modem or a<br />
router. Use the Aux power option to enable or disable power supply output from the CPU<br />
Box. To set the Voltage level of Aux power port, refer to Aux power output voltage. Note<br />
that the current limit of the Aux power supply is 1.5 Amp.<br />
Aux power keepalive<br />
The CPU Box can serve as a power supply unit to power auxiliary devices. Use this option to<br />
enable the power supply output when the CPU Box is powered off.<br />
Aux power output voltage<br />
The CPU Box can serve as a power supply unit to power auxiliary devices. Use this option to<br />
set 5 to 27V at the power supply output of the CPU Box. Default setting is 5V.<br />
Mask RI<br />
Use this option to enable waking-up the <strong>MW810</strong> from Standby mode when triggered from<br />
one of the serial ports.<br />
Reliability Monitor<br />
Use this option to enable the Reliability Monitor. The Reliability Monitor is a tool for<br />
counting hardware and software events in the CPU Box. Log of hardware and software<br />
events can be viewed in the Status tab.<br />
Voltage Mode<br />
Use this option to specify the <strong>MW810</strong> input Voltage from the vehicle battery (9V, 12V, or<br />
24V).<br />
Display 1 Power button long press<br />
Use this option to enable forced shutdown of the <strong>MW810</strong> by holding the Power button of<br />
Display 1 pressed for more than 6 seconds. Note that the display may be set to remain turned<br />
on after CPU Box shutdown (See “Critical Turn off” on page 12).<br />
Display 2 Power button long press<br />
Use this option to enable forced shutdown of the <strong>MW810</strong> by holding the Power button of<br />
display 2 pressed for more than 6 seconds.<br />
CPU Power button long press<br />
Use this option to enable forced shutdown of the <strong>MW810</strong> by holding the Power button of the<br />
CPU Box pressed for more than 6 seconds.<br />
Display 1 Power button<br />
Use this option to enable a graceful shutdown or power up of the <strong>MW810</strong> by pressing and<br />
releasing the Power button of the display.<br />
Display 2 Power button<br />
Use this option to enable a graceful shutdown or power up of the <strong>MW810</strong> by pressing and<br />
releasing the Power button of the display.
8 <strong>MW810</strong> <strong>Mobile</strong> <strong>Workstation</strong> <strong>Administrator</strong> <strong>Guide</strong><br />
CPU Power button<br />
Use this option to enable a graceful shutdown or power up of the <strong>MW810</strong> by pressing and<br />
releasing the Power button of the CPU Box.<br />
CPU reboot on ignition on<br />
Use this option to allow the system to be shut down while the ignition switch is on (default);<br />
when disable the system will be shut down regardless ignition state, to power on the unit<br />
again the ignition should be turned off and on again.<br />
Ignition off preference<br />
Use this option to set a way of turning off the <strong>MW810</strong>.<br />
• SystemDown: Turns off the <strong>MW810</strong> when the ignition switch is turned off.<br />
• SystemSuspend: Force Suspend mode when the ignition switch is turned off.<br />
• Nothing: Ignores the ignition switch operation<br />
Ignition on preference<br />
Use this option to set a way to turn on the <strong>MW810</strong>.<br />
• Nothing: Ignores turning the ignition switch on.<br />
• SystemOn: Turns on if CPU is off; ignore if CPU is already on.<br />
• SystemResume: Wakes up the CPU from standby mode; ignore if the CPU is already<br />
active.<br />
• MixedMode: Wakes up if the CPU is in Suspend mode. Turns on if the CPU is off.<br />
• IgnitionConstrained: Blocks the operation of the Power button until the ignition switch is<br />
turned on.<br />
Ignition graceful shutdown time<br />
Use this option to set shutdown duration to the <strong>MW810</strong> when the ignition switch is turned<br />
off.<br />
Ignition graceful shutdown time units<br />
Use this option to set the time units (seconds /minutes) to the <strong>MW810</strong> shutdown time when<br />
the ignition switch is turned off (See “Ignition graceful shutdown time” on page 8).<br />
Ignition forced shutdown time<br />
Use this option to set the time from turning the ignition switch to Off position to <strong>MW810</strong><br />
shutdown. This option is only available when “Ignition off preference” option is set to<br />
“SystemDown”.<br />
Ignition forced shutdown time units<br />
Use this option to set the time units (seconds /minutes) to the <strong>MW810</strong> shutdown time when<br />
the ignition switch is turned off (See“Ignition forced shutdown time” on page 8).<br />
GPS<br />
Use this option to specify the on/off power state of the GPS receiver following <strong>MW810</strong><br />
power up.
Configuration 9<br />
GPIO1 direction<br />
Use this option to set GPIO1 port in the AUX connector of the CPU Box as an input or<br />
output.<br />
GPIO2 direction<br />
Use this option to set GPIO2 port in the AUX connector of the CPU Box as an input or<br />
output.<br />
GPIO3 direction<br />
Use this option to set GPIO3 port in the AUX connector of the CPU Box as an input or<br />
output.<br />
GPIO4 direction<br />
Use this option to set GPIO4 port in the AUX connector of the CPU Box as an input or<br />
output.<br />
GPO1<br />
Use this option to enable General Purpose Output 1in the AUX connector of the CPU Box.<br />
GPO2<br />
Use this option to enable General Purpose Output 2 in the AUX connector of the CPU Box.<br />
GPIO1 wake up<br />
Use this option to enable the CPU Box to wake up from Standby mode upon change of input<br />
state on the GPIO1 port. This option is only affective if GPIO1 is set as an input port.<br />
GPIO2 wake up<br />
Use this option to enable the CPU Box to wake up from Standby mode upon change of input<br />
state on the GPIO2 port. This option is only affective if GPIO2 is set as an input port.<br />
GPIO3 wake up<br />
Use this option to enable the CPU Box to wake up from Standby mode upon change of input<br />
state on the GPIO3 port. This option is only affective if GPIO3 is set as an input port.<br />
GPIO4 wake up<br />
Use this option to enable the CPU Box to wake up from Standby mode upon change of input<br />
state on the GPIO4 port. This option is only affective if GPIO4 is set as an input port.<br />
GPIO1 initial state<br />
Use this option to set high or low output level at the GPIO1 port after <strong>MW810</strong> power up.<br />
GPIO2 initial state<br />
Use this option to set high or low output level at the GPIO1 port after <strong>MW810</strong> power up.<br />
GPIO3 initial state<br />
Use this option to setup the GPIO3 port level to high or low after power up.<br />
GPIO4 initial state<br />
Use this option to setup the GPIO3 port level to high or low after power up
10 <strong>MW810</strong> <strong>Mobile</strong> <strong>Workstation</strong> <strong>Administrator</strong> <strong>Guide</strong><br />
GPIO output voltage<br />
Use this option to define the output Voltage at all GPIO ports (5V/Main Battery-vehicle<br />
battery/Auxiliary output - 5 to 27V).<br />
GPIO1 debounce timeout<br />
Use this option to set an input delay to overcome bouncing effects of an input device<br />
connected to GPIO1.<br />
GPIO2 debounce timeout<br />
Use this option to set an input delay to overcome bouncing effects of an input device<br />
connected to GPIO2.<br />
GPIO3 debounce timeout<br />
Use this option to set an input delay to overcome bouncing effects of an input device<br />
connected to GPIO3.<br />
GPIO4 debounce timeout<br />
Use this option to set an input delay to overcome bouncing effects of an input device<br />
connected to GPIO4.<br />
Hard disk monitoring time<br />
In extremely cold temperatures, the mechanical hard disk drive of the CPU Box requires<br />
continuous heating to enable immediate power up. When shutting down in cold conditions,<br />
getting the hard disk back to operate may take some time. Use this option to set a monitoring<br />
time for keeping the hard disk heated after shutdown in order to instantly resuming operation<br />
when powering up. (Default setting is 16 hours)<br />
Hard disk monitoring time units<br />
Use this option to set the time units of the time required to keep the hard disk heated when<br />
the CPU Box is turned off.
Configuration 11<br />
Display Codeplug<br />
Configure basic parameters of the display such as: basic operation, power modes and other<br />
general settings.<br />
Figure 7 Settings Screen - Display Codeplug Tab<br />
Power source<br />
Use this option to specify the Voltage of the vehicle battery (9V or 12/24V).<br />
Power up on USB5V<br />
Use this option to enable automatic turn on of the display when a USB5V signal is received<br />
from the CPU Box. When using a 3 rd party CPU Box with <strong>MW810</strong> display, 5Vpower signal<br />
from a USB port of the CPU Box (via extension cable) is used to turn the display on and off.<br />
Display power up options<br />
Use this option Provide several options to power on the display while the CPU is off.<br />
• TURN ON - Power on and wait for the CPU power up without any time limitation.<br />
• IGNORE - Do not power on if the CPU is Off.<br />
• WAIT - Power on and wait up to 10 seconds for any CPU power up trigger.<br />
Power up on Power button<br />
Use this option to enable turning on the display and CPU Box by using the Power Button on<br />
CPU or Display units.
12 <strong>MW810</strong> <strong>Mobile</strong> <strong>Workstation</strong> <strong>Administrator</strong> <strong>Guide</strong><br />
Power off on USB5V absence<br />
Use this option to enable an automatic turn off of the display when a USB5V signal from the<br />
CPU Box is removed. When using a 3 rd party CPU Box with <strong>MW810</strong> display, 5Vpower<br />
signal from a USB port of the CPU Box (via extension cable) is used to turn the display on<br />
and off.<br />
Power off on Power button<br />
Use this option to enable turning off the display and CPU Box by pressing the Power button<br />
on CPU or Display units.<br />
Critical Turn off<br />
Use this option to enable turning off the display by pressing and holding the Power button for<br />
at least 6 seconds.<br />
Bluetooth<br />
Use this option to set On or Off the Bluetooth radio, inside the display, after display power<br />
up.<br />
OSD Control<br />
Use this option to set full mode or limited mode on the On Screen Display (OSD) menu. The<br />
OSD menu is used to adjust the display features. The OSD menu is superimposed on the<br />
screen when rotary knob on the 12.1” is pressed. When the OSD is set to limited mode, only<br />
Brightness and Volume can be adjusted by the user.<br />
Illumination adjust mode<br />
Use this option to set the illumination of the function keys, function key labels and the<br />
emergency button on the display.<br />
• Manual: Changing the illumination level for the screen does not affect the level of<br />
illumination of the function keys, function key labels and the emergency button.<br />
• Automatic: when the display brightness is manually changed, the display automatically<br />
changes the illumination level of the function keys, function key labels and the emergency<br />
button.
Configuration 13<br />
Notifications<br />
Use this tab to enable on-screen notifications of events and extreme conditions of the CPU<br />
and Display units.<br />
Figure 8 Settings Screen - Notifications Tab<br />
Low Battery<br />
Use this option to enable Low Battery warning message if during normal operation, the<br />
battery Voltage is low or battery Voltage is below cranking threshold.<br />
If, during normal operation, the battery voltage drops below the Low Battery Threshold, the<br />
display will provide the low car battery indication. If the Voltage continues to drop, the<br />
device automatically powers off at the Critically Low Battery Limit.<br />
If battery voltage falls below the battery cranking threshold for 20 seconds or more, the<br />
workstation will execute critical shut down and power itself off.<br />
Temperature<br />
Use this option to enable high or low temperature warning if during operation the <strong>MW810</strong><br />
temperature is close to the low or high limits.<br />
The CPU hard drive is equipped with the heater that allows the hard disk to work in low<br />
temperature. The CPU automatically controls the heater and turns it on and off depending on<br />
the temperature in the HDD compartment.<br />
When the ambient temperature drops below the low hard disk operational limit, an internal<br />
heater will automatically adjust and maintain the working conditions for a pre-defined time.
14 <strong>MW810</strong> <strong>Mobile</strong> <strong>Workstation</strong> <strong>Administrator</strong> <strong>Guide</strong><br />
• If the CPU Box is turned on when hard disk heating when device is off time-out has not<br />
expired yet and the hard disk temperature is within the operating range, the CPU will boot up<br />
immediately.<br />
• If the CPU Box is turned on when hard disk heating when device is off time-out has been<br />
expired and the hard disk temperature is below the low hard disk operational limit, the CPU<br />
will activate the internal heater and will boot up only when the hard disk temperature returns<br />
to the operating range. The heating process takes some time - please wait until this process is<br />
completed.<br />
Ignition<br />
Use this option to enable Ignition Off warning if the ignition switch is turned off.<br />
Fans Fail<br />
Use this option to enable Fans Fail warning if the cooling fans of the CPU Box malfunction<br />
or jam.<br />
Over current<br />
Use this option to enable Over Current warning if the current drain of the CPU Box exceeds<br />
a critical threshold. The Over Current warning will be followed by critical shut down of the<br />
<strong>MW810</strong>.<br />
Display Buttons<br />
Use this tab to assign an operation to each of the display Function keys and Emergency<br />
button.<br />
Figure 9 Settings Screen - Display Buttons Tab
Configuration 15<br />
Select Action<br />
Use the Select Action tab to customize the operation of the Function keys and the Emergency<br />
button of the display.<br />
• No Action: Select No Action to keep the Function key non operational.<br />
• Run Application: Map the display Function key to an execution file. Use the Browse<br />
button to navigate to the file.<br />
• Function: Assign a function from the “elect function” drop list to the Function key and<br />
Emergency button of the display.<br />
• Hot Key: Assign any <strong>MW810</strong> keyboard key or combination of keys (such as: F1, Ctrl + X,<br />
etc.) to a Function key of the display.<br />
Select function<br />
Use the Select function drop list to set a specific task to a Function.<br />
• Sleep: Assigns the Function key to request windows to enter to Sleep (Suspend) state.<br />
• Shutdown: Assigns the Function key to<br />
• Shutdown state.<br />
• Hibernate: Assigns the Function key to Hibernate state.<br />
• Mute: Assigns the Function key to mute a selected display speaker.<br />
• Volume Up: Assigns the Function key as a Volume Up button of a selected display.<br />
• Volume Down: Assigns the Function key as a Volume Down button of a selected display.<br />
• Blackout: Assigns the Function key to toggle all display lights including the LCD and<br />
emergency LED. Power button light level will set to minimum level.<br />
• Night mode: Assigns the Function key to Night mode. In Night. The display colors<br />
inverted to allow better visibility at darkness. (this mode does not change the brightness<br />
level).<br />
Loaders<br />
The Loaders tab enables to update the firmware of the embedded controllers of the CPU Box<br />
(CPU embedded controller) and the Display (Display Embedded or Video controller).<br />
To update the firmware of the embedded controllers:<br />
1. Use the Choose Loader drop list to select the embedded controller that requires<br />
an update.<br />
1. If display or video embedded controllers are selected; use the Choose display drop list to<br />
select the display that requires an upgrade.<br />
2. Use the Browse button to select the new firmware file.<br />
3. Check Overwrite Codeplug to overwrite the currently used codeplug and replace it with<br />
a factory default codeplug.
16 <strong>MW810</strong> <strong>Mobile</strong> <strong>Workstation</strong> <strong>Administrator</strong> <strong>Guide</strong><br />
User Settings<br />
Help and About<br />
This tab shows the GPIO and Radio setting of the <strong>MW810</strong> as customized by the currently<br />
logged in user. Use the drop lists and tap Save to change the settings. The <strong>MW810</strong> will use<br />
the saved user settings whenever the user logs in again to the <strong>MW810</strong>.<br />
Use the Restore Default button to set factory defaults.<br />
The Help and About screen shows the copyright and version of the <strong>Motorola</strong> <strong>MW810</strong> R2.0<br />
Manager program.<br />
Figure 10 Help And About Screen
Configuration 17<br />
BIOS Setup<br />
The BIOS is stored on a Flash chip on the motherboard initializing the CPU Box prior to the<br />
start of the operating system. The BIOS parameters define the CPU system functions and the<br />
hardware configuration.<br />
Settings in BIOS Setup<br />
When you restart the CPU, the M-logo display briefly appears on the screen. To enter the<br />
BIOS Setup, press the DEL key when this display appears. If a password has been assigned,<br />
type the password and press the Enter key.<br />
The BIOS Setup Utility that enables the selection and modification of different BIOS setup<br />
parameters and contains the menus as shown next:<br />
• Main: for system information and time/date settings<br />
• Boot: for configuring the boot sequence<br />
• Security: for password and TCG settings functions<br />
• Exit: to save and exit the BIOS Setup<br />
Note<br />
Operating BIOS Setup<br />
Available BIOS menus are shown at the top of the BIOS window. Use the arrow keys to<br />
navigate between menu items.<br />
!<br />
Caution<br />
If you have forgotten the password, contact your system administrator.<br />
Available menu parameters are shown in the left-hand window of the BIOS. The description<br />
of the individual settings is shown in the upper right-hand window of the BIOS. The<br />
description of the navigation through the BIOS and selecting the menu or parameter you<br />
wish to access to make changes is shown in the bottom right-hand window.<br />
If you need to display help on the operation of BIOS Setup - press the F1 key.<br />
Be aware, incorrect BIOS configuration can make the device unworkable.<br />
Exiting BIOS Setup<br />
To exit BIOS Setup, select the Exit menu from the menu bar. You can then decide which<br />
settings you want to save. The Exit menu offers the following options:<br />
Save Changes and Exit - Exit the BIOS setup after saving the changes<br />
• Discard Changes and Exit - Exit the BIOS setup without saving of any the change<br />
• Save Changes - Save changes done so far to any of setup options<br />
• Discard Changes - Discard changes done so far to any of setup options.
18 <strong>MW810</strong> <strong>Mobile</strong> <strong>Workstation</strong> <strong>Administrator</strong> <strong>Guide</strong><br />
This page intentionally left blank
Security and Password Protection<br />
Trusted Platform Module<br />
The CPU firmware meets compliance requirements for the Trusted Platform Module (TPM)<br />
1.2 specification. TPM 1.2 is an essential level of compliance for secure start of Windows 7<br />
operating systems. When the TPM is enabled, the CPU will ensure that unauthorized code<br />
cannot invade a device in its boot process.<br />
To use the TPM, you must be sure to activate the TPM in the BIOS Setup. The condition for<br />
this is that you have entered at least the administrator's password.<br />
• Call BIOS Setup and select the Security menu<br />
• Select the entry TRUSTED COMPUTING item and press the Enter key<br />
• Select desired TPM STATE option<br />
TPM is functional when TPM STATE = ENABLED. Disabled TPM is not able to execute<br />
commands that use the resources of a TPM. TPM is not able to load keys and perform other<br />
operations. Even if a disabled TPM has a TPM Owner, it is not able to execute normal TPM<br />
commands.<br />
If you have activated the TPM, the menu item PENDING TPM OPERATION will schedule<br />
the TPM operations as follows:<br />
• NONE - no operation is pending<br />
• ENABLE TAKE OWNERSHIP - when TPM enabled but without an owner this command<br />
allows the ability to take ownership.<br />
• DISABLE TAKE OWNERSHIP - when TPM enabled but without an owner this command<br />
disallows the ability to take ownership.<br />
• TPM CLEAR - returns the TPM to factory defaults.<br />
When the TPM is activated, it initially takes control of the CPU during each start-up to check<br />
all hardware components and the BIOS Setup for trustworthiness. In the further course of<br />
operation, the TPM checks the operating system, certain drivers and applications. If a<br />
component does not have a valid certificate, the TPM refuses this component access to<br />
protected content.<br />
For example, with the TPM activated, data can be generated which can only be read or run on<br />
this device.<br />
Password Protection in BIOS Setup<br />
You can prevent unauthorized opening of the BIOS Setup with both the administrator's and<br />
the user's password.<br />
• If only the administrator password is set, then this only limits access to setup and is only<br />
asked for when entering the BIOS Setup
20 <strong>MW810</strong> <strong>Mobile</strong> <strong>Workstation</strong> <strong>Administrator</strong> <strong>Guide</strong><br />
• If only the user's password is set, then this is a power on password and must be entered to<br />
boot or enter the BIOS Setup. In Setup the user will have administrator rights. Note the<br />
following before using the password protection for your data security in the BIOS Setup:<br />
Please remember your passwords in either case, as you will not be able to access your BIOS<br />
Setup and/or your system any longer, if you forget both the user's and the administrator's<br />
passwords. Passwords are not covered by your warranty and a charge will be made for<br />
assistance.<br />
Passwords can be up to eight characters long. You can use all alphanumeric characters and<br />
need not distinguish between uppercase and lowercase characters.<br />
Set the supervisor and user password<br />
To assign the administrator's password do as follows:<br />
• Call the BIOS setup and select the Security menu<br />
• Mark the <strong>Administrator</strong> Password field and press the Enter key<br />
• Enter the password in the Create new Password field and press the Enter key<br />
• Confirm the new password when it is requested<br />
• Enter the password again and press the Enter key<br />
• Exit the BIOS setup after saving the changes<br />
To assign the user's password do as follows:<br />
• Call BIOS setup and select the Security menu<br />
• Mark the User Password field and proceed exactly as when configuring the supervisor<br />
password.<br />
• Exit the BIOS setup after saving the changes<br />
Changing administrator's or user's password<br />
• Call the BIOS setup and select the Security menu<br />
• When changing the password, proceed exactly as for password assignment<br />
• You can only change the administrator's password when you have logged in with the<br />
administrator rights and the user's password when you have logged in with the user rights<br />
Cancelling passwords<br />
To cancel passwords proceed as follows:<br />
• Call the BIOS setup and select the Security menu<br />
• Mark the <strong>Administrator</strong> Password or the User Password field and press the Enter key<br />
• With Create New Password you will then be asked to enter a password<br />
• Press the Enter key twice<br />
• Exit the BIOS setup after saving the changes
Remote Monitoring and Protection<br />
The <strong>MW810</strong> <strong>Mobile</strong> <strong>Workstation</strong> complies with Intel® vPro Technology.<br />
vPro Technology is a comprehensive suite of a built-in security solution (embedded in the<br />
<strong>MW810</strong> hardware) that protects against rootkit attacks, security breaches and threats. vPro<br />
also enables wired or wireless IT support to ensure seamless connectivity.<br />
vPro includes the following IT capabilities:<br />
• Remote and local monitoring for support, update and repair of the workstation<br />
• Identity and web site access point protection<br />
• Data protection<br />
• Threat management<br />
vPro program requires a setup and configuration by using the Intel vPro Configuration<br />
Software tool.<br />
On the <strong>MW810</strong> keyboard, press Ctrl + P to enter Intel vPro Configuration Software tool.<br />
To learn more about Intel® vPro setup and configuration, refer to:<br />
http://www.intel.com/content/www/us/en/architecture-and-technology/vpro/vprotechnology-general.html<br />
Authentication and Password<br />
Intel vPro technology provides several critical built-in defenses, including:<br />
• An embedded one-time password for secure VPN and web site access and seamless user<br />
authentication.<br />
• Embedded public key infrastructure (PKI) firmware authentication of users and servers.<br />
Protection of Information<br />
As the use of cloud computing and the number of <strong>MW810</strong> <strong>Mobile</strong> <strong>Workstation</strong>s to prevent<br />
data loss. vPro ensures that data is protected with a unique computer-generated token if the<br />
computer is lost or stolen. This technology allows IT to remotely lock down the computer,<br />
protecting both the user’s identity and sensitive data.<br />
Respond to Security Breaches<br />
The vPro technology capabilities are accessed and administered separately from the hard<br />
drive, OS, and software applications in a pre-boot environment. This makes management less<br />
susceptible to issues affecting these areas and allows remote access to the workstation,<br />
regardless of the system’s power state or OS condition.<br />
This technology:
22 <strong>MW810</strong> <strong>Mobile</strong> <strong>Workstation</strong> <strong>Administrator</strong> <strong>Guide</strong><br />
• Allows IT technicians to quickly deploy security patches across workstations, remotely<br />
unlock encrypted drives, and manage data security settings.<br />
• Gives IT help desk personnel complete control over a platform with features like KVM<br />
Remote Control with support for three simultaneous display configurations, 27 additional<br />
languages, and enhanced mouse improvements across multiple screens<br />
• Enables IT to remotely diagnose, isolate, and repair infected platforms after a security<br />
breach occurs.<br />
• Facilitate remote management of platform applications, even when the platform is turned<br />
off, as long as the platform is connected to a power.
Main Window<br />
Connection Manager<br />
The Connection Manager is a software utility that connects the WWAN radios of the<br />
<strong>MW810</strong> <strong>Mobile</strong> <strong>Workstation</strong> to carrier network(s).<br />
The Connection Manager is set to start automatically whenever the <strong>MW810</strong> starts and read<br />
connection information from the SIM Card(s) of the radio(s).<br />
The Connection Manager can also be manually launched from the desktop of the <strong>MW810</strong> or<br />
from the icon tray.<br />
Typically, no interaction between user and Connection Manager is required, unless a user<br />
authentication login process is part of the preset configuration.<br />
Help<br />
Options<br />
Connect/Disconnect Button<br />
Figure 11 Connection Manager - Main Window<br />
The Main Window shows connection information and icons related to the currently active<br />
connection.<br />
The Main Window of the Connection Manager includes the following buttons:<br />
Connect/Disconnect<br />
To manually start the connection status, press the Connect/Disconnect button and follow the<br />
instructions shown on the screen.<br />
The button is set to Connect if currently there are no active connections.
24 <strong>MW810</strong> <strong>Mobile</strong> <strong>Workstation</strong> <strong>Administrator</strong> <strong>Guide</strong><br />
Pressing Connect will start the connection action.<br />
The button is set to Disconnect when connection is active (connected). Pressing Disconnect<br />
will remove the connection.<br />
Status area contains statistics of the current visible connection and shows notifications if any.<br />
If no connection is found, notifications are shown at the center of the main window.<br />
Options<br />
Press the Options button enables the following application options:<br />
• Run Connection Manager when starting computer check box enables/disables the option to<br />
run Connection Manager application when the system starts.<br />
• Show main window when Connection Manager starts check box enables/disables the<br />
option to show Main Window when Connection Manager runs. If this option is disabled<br />
Connection Manager remains minimized to tray after startup.<br />
• Connect automatically check box enables/disables the auto connect action.<br />
• Turn the WWAN radios On/Off.
Display Adjustment<br />
Display performance can vary due to the graphics card, host computer, lighting conditions<br />
and other environmental factors. In order to get the best image on a monitor, some<br />
adjustments may be required.<br />
The <strong>MW810</strong> display provides three options for image adjustment:<br />
• Proper setting of the timing mode (refresh rate and resolution)<br />
• Embedded On-Screen Display control<br />
• Windows On-Screen Display application<br />
Setting the Timing Mode<br />
Set proper video adapter timing mode to maximize the quality of the screen image. The<br />
timing mode consists of the Resolution and Refresh Rate.<br />
Set the screen resolution in Display Properties as follows: click the right mouse button at<br />
desktop and select Properties > Settings. Select recommended resolution using the Screen<br />
Resolution slider.<br />
Set the screen refresh rate in Display Properties as follows: click the right mouse button at<br />
desktop and select Properties > Settings > Advanced > Monitor. Select recommended<br />
refresh rate in the Screen Refresh Rate field.<br />
If after setting of the video adapter timing mode the quality of the screen image needs to be<br />
improved, use Embedded or Windows On-Screen Display controls to adjust the screen<br />
image.<br />
Embedded On-Screen Control for 12.1” Display<br />
On-Screen Display (OSD) is a control panel, shown on the 12.1” Display screen.<br />
To pop-up the panel on the screen, press once on the rotary knob and scroll the knob to select<br />
the OSD menu item.<br />
The OSD enables to adjust the following:<br />
• Brightness<br />
• Contrast<br />
• Color<br />
• Night/Day View<br />
• Volume<br />
When RGB display is connected, the following menu items are available:<br />
• Auto Adjustment<br />
• Stretch (horizontal and vertical adjustment)
26 <strong>MW810</strong> <strong>Mobile</strong> <strong>Workstation</strong> <strong>Administrator</strong> <strong>Guide</strong><br />
To pop-up the OSD menu on the screen, press once on the rotary knob. To select an item,<br />
scroll to an item and press on the knob.<br />
OSD Main<br />
Menu<br />
OSD Sub Items<br />
Brightness<br />
Contrast<br />
Color<br />
Night/Day<br />
View<br />
Exit Menu<br />
Auto Adjust<br />
Stretch<br />
Exit menu<br />
TEST<br />
DEL<br />
Factory<br />
Reset<br />
aaaa<br />
Pattern<br />
Generator<br />
Volume<br />
Exit menu<br />
Exit OSD
Recovery of Pre-Installed Software<br />
If you have experienced problems that came after new software installation or the operating<br />
system cannot start, you may need to recover from problems.<br />
This section provides a view of general maintenance and recovery techniques.<br />
<strong>Motorola</strong> provides with your computer a recovery solution that allows reinstallation of the<br />
complete Windows operating system, device drivers, applications, and parameters similar to<br />
the default factory settings.<br />
System Recovery Options<br />
The System Recovery Options Menu contains several tools that can help you recover<br />
Windows from a serious error.<br />
To enter the System Recovery Options Menu, press and release the F9 key on your keyboard.<br />
Figure 12 System Recovery Options Menu<br />
Windows Compleate PC Restore<br />
Restores your computer's system files to an earlier point in time without affecting files such<br />
as e-mail, documents, or photos.<br />
Note<br />
If you use Windows Compleate PC Restore from the System Recovery Options Menu, you<br />
cannot undo the restore operation. However, you can run this operation again and choose a<br />
different restore point, if one exists.
28 <strong>MW810</strong> <strong>Mobile</strong> <strong>Workstation</strong> <strong>Administrator</strong> <strong>Guide</strong><br />
Windows Memory Diagnostic Tool<br />
Command Prompt<br />
This operation scans the computer's memory for errors.<br />
Advanced users can use Command Prompt to perform recovery-related operations and also<br />
run other command line tools for diagnosing and troubleshooting problems.<br />
<strong>Motorola</strong> <strong>MW810</strong> R2.0 Recovery<br />
Figure 13 <strong>MW810</strong> Recovery Screen<br />
The <strong>Motorola</strong> <strong>MW810</strong> R2.0 Recovery option offers the following recovery operations:<br />
Check Disk<br />
The Check Disk operation scans the integrity of the file system and attempts to repair<br />
metadata errors in the file system.<br />
System Backup<br />
The System Backup operation creates a copy of the system disk image and saves it on a<br />
specifyed hard drive. The saved system disk image can be used later to recover the<br />
workstation in case of malfunction.<br />
It is recommended to create system disk image on an external storage device that can connect<br />
to one of the USB ports of the CPU Box.
Recovery of Pre-Installed Software 29<br />
System Recovery<br />
This operation returns your system disk to previously saved (either original factory installed<br />
or customized) configuration. That operation replaces all the information, data, and files<br />
stored on the system partition. You need to have created a system image before hand to use<br />
this option.<br />
Hard Drive Replacement<br />
If your hard disk data is completely damaged and none of the mentioned procedures is<br />
effective, replace the hard disk (See <strong>Motorola</strong> <strong>MW810</strong> <strong>Mobile</strong> <strong>Workstation</strong>, R2.0, Vehicle<br />
Installation Manual P/N 6802988C56.<br />
Also you can install the operating system from supplied recovery DVD. Be aware, the<br />
installation from the recovery media may require further activation of the operating system.
30 <strong>MW810</strong> <strong>Mobile</strong> <strong>Workstation</strong> <strong>Administrator</strong> <strong>Guide</strong><br />
This page intentionally left blank
Backward Compatibility<br />
The <strong>MW810</strong> supports the following backward compatibility configurations of connecting<br />
<strong>MW810</strong> R1.2 to R2.0 components. Each configuration requires performing a different<br />
software installation procedure.<br />
The <strong>MW810</strong> R2.0 Manager and the R1.2 configuration tools supports all combinations of<br />
CPUs and Displays. When using the <strong>MW810</strong> R2.0 Manager, disable all hardware alerts to<br />
avoid duplicate alerts.<br />
When simultaneously connected to two displays, the <strong>MW810</strong> R2.0 CPU Box can only support two<br />
displays from the same release.<br />
Note<br />
When <strong>MW810</strong> R2.0 CPU Box is connected to a <strong>MW810</strong> R1.2 Display perform the following<br />
steps:<br />
Step 1. Fully uninstall <strong>MW810</strong> 2.0 Framework (MOTEC).<br />
Step 2. Install the “CPU only” option from <strong>MW810</strong> 2.0 Framework.<br />
Step 3. Install “Display only” option from <strong>MW810</strong> R1.2 Utilities version 3.32.<br />
When <strong>MW810</strong> R1.2 CPU Box is connected to a <strong>MW810</strong> R2.0 Display perform the following<br />
steps:<br />
Step 1. Fully uninstall the existing version of <strong>MW810</strong> R1.2 Utilities.<br />
Step 2. Install TI driver version 6.5.9018.1 (for MW display hardware).<br />
Step 3. Install “CPU only” option from <strong>MW810</strong> R1.2 Utilities version 3.32. After<br />
installation, if the CPU Box does not connect to a network manually, install .NET 4.0<br />
Framework.<br />
Step 4. Install “Display only” option from <strong>MW810</strong> 2.0 Framework.
32 <strong>MW810</strong> <strong>Mobile</strong> <strong>Workstation</strong> <strong>Administrator</strong> <strong>Guide</strong><br />
This page intentionally left blank
Software Drivers<br />
Generally, the drivers and the configuration utility are already pre-installed. If the drivers and<br />
the tools have not yet been installed, you can find the install package in the Dustup folder of<br />
the original <strong>MW810</strong> operating system image.
34 <strong>MW810</strong> <strong>Mobile</strong> <strong>Workstation</strong> <strong>Administrator</strong> <strong>Guide</strong><br />
<strong>MW810</strong> CPU Box<br />
BIOS<br />
Version location<br />
https://compass.motorolasolutions.com/cgi/go/427388102<br />
CEC<br />
Version location<br />
https://compass.motorolasolutions.com/cgi/go/427388102<br />
Operating System Image 32/64 Bit<br />
Software Component<br />
Intel HD Graphics 4000 Display Adapter driver<br />
Sierra Wireless radio WWAN Network Adapter<br />
(MC7750) driver<br />
Intel LAN driver<br />
Intel 7 Series/C216 Chipset driver<br />
<strong>Motorola</strong> Connection Manager<br />
<strong>Motorola</strong> TouchScreen package<br />
Intel WLAN driver<br />
<strong>MW810</strong> Software Framework<br />
(including <strong>MW810</strong> Manager)<br />
Intel Platform Information Tool (PIT)<br />
Broadcom Bluetooth Driver<br />
USB display port (TI)<br />
Intel USB 3.0 drivers<br />
Intel AMT/ME drivers<br />
Intel Rapid Storage Driver<br />
PLX<br />
(ALPR driver)<br />
Location<br />
Part of OS<br />
https://compass.motorolasolutions.com/cgi/go/<br />
427388102<br />
Part of OS<br />
Part of OS<br />
https://compass.motorolasolutions.com/cgi/go/<br />
427388102<br />
Part of OS<br />
Part of OS<br />
Part of OS<br />
Development tool, not part of the image<br />
https://compass.motorolasolutions.com/cgi/go/<br />
427388102<br />
Part of OS<br />
Part of OS<br />
Part of OS<br />
Part of OS<br />
https://compass.motorolasolutions.com/cgi/go/<br />
427388102<br />
<strong>MW810</strong> Displays<br />
Software Component<br />
Display Embedded Controller<br />
Video Controller<br />
Location<br />
https://compass.motorolasolutions.com/cgi/go/<br />
427388102<br />
https://compass.motorolasolutions.com/cgi/go/<br />
427388102
Acronyms<br />
A<br />
ACK<br />
ALPR<br />
AUX<br />
CPU<br />
CVBS<br />
DC<br />
DRAM<br />
DVI<br />
eSATA<br />
FCC<br />
GHz<br />
GPIO<br />
GPRS<br />
GPS<br />
I/O<br />
LAN<br />
LCD<br />
LP<br />
LTE<br />
MB<br />
MDR<br />
MW<br />
NIT<br />
Ampere<br />
Positive (Acknowledgment)<br />
Automatic License Plate Recognition<br />
Auxiliary<br />
Central Processing Unit<br />
Composite Video Blanking and Sync<br />
Direct Current<br />
Dynamic Random Access Memory<br />
Digital Video Interface<br />
External Serial Advanced Technology Attachment<br />
Federal Communications Commission<br />
GigaHertz<br />
General Purpose Input/Output<br />
General Packet Radio Service<br />
Global Positioning System<br />
Input/Output<br />
Local Area Network<br />
Liquid Crystal Display<br />
Liquid Propane<br />
Long Term Evolution<br />
Megabyte<br />
Mini D Ribbon<br />
<strong>Mobile</strong> <strong>Workstation</strong><br />
Near Infrared Transmission (also cd/m2, a measure of luminance)
36 <strong>MW810</strong> <strong>Mobile</strong> <strong>Workstation</strong> <strong>Administrator</strong> <strong>Guide</strong><br />
NTSC<br />
OS<br />
PA<br />
PAL<br />
PC<br />
PCMCIA<br />
PCI<br />
PRM<br />
PWR<br />
RF<br />
RFI<br />
SIM<br />
TTL<br />
UHF<br />
UL<br />
USB<br />
V<br />
VDC<br />
WLAN<br />
WWAN<br />
XGA<br />
National Television System Committee<br />
Operating System<br />
Power Amplifier<br />
Phase Alternation Line<br />
Personal Computer<br />
Personal Computer Memory Card International Association<br />
Peripheral Component Interconnect<br />
Portable Radio Modem<br />
Power<br />
Radio Frequency<br />
Radio Frequency Interference<br />
Subscriber Identity Module<br />
Transistor-Transistor Logic<br />
Ultra High Frequency<br />
Underwriter’s Laboratories<br />
Universal Serial Bus<br />
Volt<br />
Volts Direct Current<br />
Wireless Local Area Network<br />
Wireless Wide Area Network<br />
Extended Video Graphics Array
Support Information<br />
If you are in North America and require further technical support, you may call the <strong>Motorola</strong> <strong>Solutions</strong> System Support Center<br />
(SSC) at 1-800 221-7144 and choose the options for Technical Support on Data products.<br />
For Europe, the Middle East and Africa, call +420 533 336 123.<br />
Please be prepared to provide your unit model and serial number or Factory Order number for warranty entitlement verification<br />
purposes.<br />
For your convenience, the <strong>Motorola</strong> <strong>Solutions</strong> website provides up-to-date information about the <strong>MW810</strong>.<br />
To visit <strong>MW810</strong> website logon to<br />
: http://www.motorola.com/<strong>MW810</strong><br />
For <strong>MW810</strong> manuals logon to:<br />
www.motorola.com/enterprisemobility/manuals<br />
ab<br />
<strong>Motorola</strong> <strong>Solutions</strong>, Inc.<br />
1301 E. Algonquin Road, Schaumburg, IL 60196 U.S.A.<br />
http://www.motorolasolutions.com<br />
MOTOROLA, MOTO, MOTOROLA SOLUTIONS, and the Stylized M Logo are trademarks or registered trademarks of <strong>Motorola</strong> Trademark<br />
Holdings, LLC and are used under license. All other trademarks are the property of their respective owners.<br />
© <strong>Motorola</strong> <strong>Solutions</strong>, Inc. 2012.<br />
6802988C42 Revision A - August 2012