HD44780 datasheet
HD44780 datasheet
HD44780 datasheet

Create successful ePaper yourself
Turn your PDF publications into a flip-book with our unique Google optimized e-Paper software.
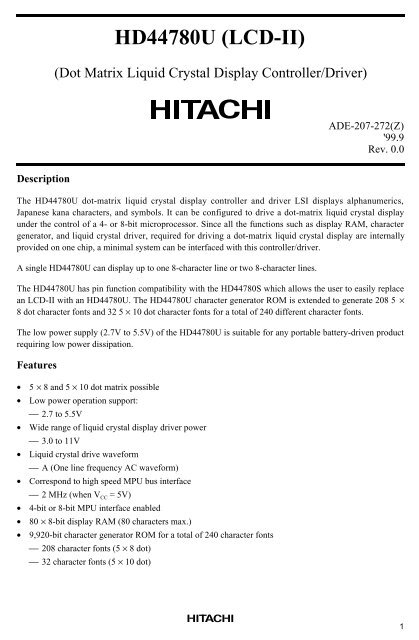
<strong>HD44780</strong>U (LCD-II)<br />
(Dot Matrix Liquid Crystal Display Controller/Driver)<br />
ADE-207-272(Z)<br />
'99.9<br />
Rev. 0.0<br />
Description<br />
The <strong>HD44780</strong>U dot-matrix liquid crystal display controller and driver LSI displays alphanumerics,<br />
Japanese kana characters, and symbols. It can be configured to drive a dot-matrix liquid crystal display<br />
under the control of a 4- or 8-bit microprocessor. Since all the functions such as display RAM, character<br />
generator, and liquid crystal driver, required for driving a dot-matrix liquid crystal display are internally<br />
provided on one chip, a minimal system can be interfaced with this controller/driver.<br />
A single <strong>HD44780</strong>U can display up to one 8-character line or two 8-character lines.<br />
The <strong>HD44780</strong>U has pin function compatibility with the <strong>HD44780</strong>S which allows the user to easily replace<br />
an LCD-II with an <strong>HD44780</strong>U. The <strong>HD44780</strong>U character generator ROM is extended to generate 208 5 ×<br />
8 dot character fonts and 32 5 × 10 dot character fonts for a total of 240 different character fonts.<br />
The low power supply (2.7V to 5.5V) of the <strong>HD44780</strong>U is suitable for any portable battery-driven product<br />
requiring low power dissipation.<br />
Features<br />
• 5 × 8 and 5 × 10 dot matrix possible<br />
• Low power operation support:<br />
⎯ 2.7 to 5.5V<br />
• Wide range of liquid crystal display driver power<br />
⎯ 3.0 to 11V<br />
• Liquid crystal drive waveform<br />
⎯ A (One line frequency AC waveform)<br />
• Correspond to high speed MPU bus interface<br />
⎯ 2 MHz (when V CC = 5V)<br />
• 4-bit or 8-bit MPU interface enabled<br />
• 80 × 8-bit display RAM (80 characters max.)<br />
• 9,920-bit character generator ROM for a total of 240 character fonts<br />
⎯ 208 character fonts (5 × 8 dot)<br />
⎯ 32 character fonts (5 × 10 dot)<br />
1
<strong>HD44780</strong>U<br />
• 64 × 8-bit character generator RAM<br />
⎯ 8 character fonts (5 × 8 dot)<br />
⎯ 4 character fonts (5 × 10 dot)<br />
• 16-common × 40-segment liquid crystal display driver<br />
• Programmable duty cycles<br />
⎯ 1/8 for one line of 5 × 8 dots with cursor<br />
⎯ 1/11 for one line of 5 × 10 dots with cursor<br />
⎯ 1/16 for two lines of 5 × 8 dots with cursor<br />
• Wide range of instruction functions:<br />
⎯ Display clear, cursor home, display on/off, cursor on/off, display character blink, cursor shift,<br />
display shift<br />
• Pin function compatibility with <strong>HD44780</strong>S<br />
• Automatic reset circuit that initializes the controller/driver after power on<br />
• Internal oscillator with external resistors<br />
• Low power consumption<br />
Ordering Information<br />
Type No. Package CGROM<br />
<strong>HD44780</strong>UA00FS<br />
HCD44780UA00<br />
<strong>HD44780</strong>UA00TF<br />
<strong>HD44780</strong>UA02FS<br />
HCD44780UA02<br />
<strong>HD44780</strong>UA02TF<br />
<strong>HD44780</strong>UBxxFS<br />
HCD44780UBxx<br />
<strong>HD44780</strong>UBxxTF<br />
Note:<br />
xx: ROM code No.<br />
FP-80B<br />
Chip<br />
TFP-80F<br />
FP-80B<br />
Chip<br />
TFP-80F<br />
FP-80B<br />
Chip<br />
TFP-80F<br />
Japanese standard font<br />
European standard font<br />
Custom font<br />
2
<strong>HD44780</strong>U<br />
<strong>HD44780</strong>U Block Diagram<br />
OSC1 OSC2<br />
CL1<br />
CL2<br />
Reset<br />
circuit<br />
ACL<br />
CPG<br />
Timing<br />
generator<br />
M<br />
8<br />
Instruction<br />
register (IR)<br />
7<br />
D<br />
RS<br />
R/W<br />
E<br />
MPU<br />
interface<br />
Instruction<br />
decoder<br />
Display<br />
data RAM<br />
(DDRAM)<br />
80 × 8 bits<br />
16-bit<br />
shift<br />
register<br />
Common<br />
signal<br />
driver<br />
COM1 to<br />
COM16<br />
DB4 to<br />
DB7<br />
DB0 to<br />
DB3<br />
Input/<br />
output<br />
buffer<br />
8<br />
7<br />
Data<br />
register<br />
(DR)<br />
Busy<br />
flag<br />
Address<br />
counter<br />
7<br />
8<br />
7<br />
8<br />
8 8<br />
40-bit<br />
shift<br />
register<br />
40<br />
40-bit<br />
latch<br />
circuit<br />
Segment<br />
signal<br />
driver<br />
LCD drive<br />
voltage<br />
selector<br />
SEG1 to<br />
SEG40<br />
GND<br />
Character<br />
generator<br />
RAM<br />
(CGRAM)<br />
64 bytes<br />
Character<br />
generator<br />
ROM<br />
(CGROM)<br />
9,920 bits<br />
Cursor<br />
and<br />
blink<br />
controller<br />
5<br />
5<br />
Parallel/serial converter<br />
and<br />
attribute circuit<br />
V CC<br />
V1 V2 V3 V4 V5<br />
3
<strong>HD44780</strong>U<br />
4<br />
<strong>HD44780</strong>U Pin Arrangement (FP-80B)<br />
1<br />
2<br />
3<br />
4<br />
5<br />
6<br />
7<br />
8<br />
9<br />
10<br />
11<br />
12<br />
13<br />
14<br />
15<br />
16<br />
17<br />
18<br />
19<br />
20<br />
21<br />
22<br />
23<br />
24<br />
80<br />
79<br />
78<br />
77<br />
76<br />
75<br />
74<br />
73<br />
72<br />
71<br />
70<br />
69<br />
68<br />
67<br />
66<br />
65<br />
64<br />
63<br />
62<br />
61<br />
60<br />
59<br />
58<br />
57<br />
56<br />
55<br />
54<br />
53<br />
52<br />
51<br />
50<br />
49<br />
48<br />
47<br />
46<br />
45<br />
44<br />
43<br />
42<br />
41<br />
25<br />
26<br />
27<br />
28<br />
29<br />
30<br />
31<br />
32<br />
33<br />
34<br />
35<br />
36<br />
37<br />
38<br />
39<br />
40<br />
FP-80B<br />
(Top view)<br />
SEG39<br />
SEG40<br />
COM16<br />
COM15<br />
COM14<br />
COM13<br />
COM12<br />
COM11<br />
COM10<br />
COM9<br />
COM8<br />
COM7<br />
COM6<br />
COM5<br />
COM4<br />
COM3<br />
COM2<br />
COM1<br />
DB7<br />
DB6<br />
DB5<br />
DB4<br />
DB3<br />
DB2<br />
SEG22<br />
SEG21<br />
SEG20<br />
SEG19<br />
SEG18<br />
SEG17<br />
SEG16<br />
SEG15<br />
SEG14<br />
SEG13<br />
SEG12<br />
SEG11<br />
SEG10<br />
SEG9<br />
SEG8<br />
SEG7<br />
SEG6<br />
SEG5<br />
SEG4<br />
SEG3<br />
SEG2<br />
SEG1<br />
GND<br />
OSC1<br />
SEG23<br />
SEG24<br />
SEG25<br />
SEG26<br />
SEG27<br />
SEG28<br />
SEG29<br />
SEG30<br />
SEG31<br />
SEG32<br />
SEG33<br />
SEG34<br />
SEG35<br />
SEG36<br />
SEG37<br />
OSC2<br />
V1<br />
V2<br />
V3<br />
V4<br />
V5<br />
CL1<br />
CL2<br />
V CC M<br />
D<br />
RS<br />
R/W<br />
E<br />
DB0<br />
DB1 SEG38
<strong>HD44780</strong>U<br />
5<br />
<strong>HD44780</strong>U Pin Arrangement (TFP-80F)<br />
1<br />
2<br />
3<br />
4<br />
5<br />
6<br />
7<br />
8<br />
9<br />
10<br />
11<br />
12<br />
13<br />
14<br />
15<br />
16<br />
17<br />
18<br />
19<br />
20<br />
80<br />
79<br />
78<br />
77<br />
76<br />
75<br />
74<br />
73<br />
72<br />
71<br />
70<br />
69<br />
68<br />
67<br />
66<br />
65<br />
64<br />
63<br />
62<br />
61<br />
60<br />
59<br />
58<br />
57<br />
56<br />
55<br />
54<br />
53<br />
52<br />
51<br />
50<br />
49<br />
48<br />
47<br />
46<br />
45<br />
44<br />
43<br />
42<br />
41<br />
21<br />
22<br />
23<br />
24<br />
25<br />
26<br />
27<br />
28<br />
29<br />
30<br />
31<br />
32<br />
33<br />
34<br />
35<br />
36<br />
37<br />
38<br />
39<br />
40<br />
TFP-80F<br />
(Top view)<br />
COM16<br />
COM15<br />
COM14<br />
COM13<br />
COM12<br />
COM11<br />
COM10<br />
COM9<br />
COM8<br />
COM7<br />
COM6<br />
COM5<br />
COM4<br />
COM3<br />
COM2<br />
COM1<br />
DB7<br />
DB6<br />
DB5<br />
DB4<br />
SEG20<br />
SEG19<br />
SEG18<br />
SEG17<br />
SEG16<br />
SEG15<br />
SEG14<br />
SEG13<br />
SEG12<br />
SEG11<br />
SEG10<br />
SEG9<br />
SEG8<br />
SEG7<br />
SEG6<br />
SEG5<br />
SEG4<br />
SEG3<br />
SEG2<br />
SEG1<br />
SEG21<br />
SEG22<br />
SEG23<br />
SEG24<br />
SEG25<br />
SEG26<br />
SEG27<br />
SEG28<br />
SEG29<br />
SEG30<br />
SEG31<br />
SEG32<br />
SEG33<br />
SEG34<br />
SEG35<br />
SEG36<br />
SEG37<br />
SEG38<br />
SEG39<br />
SEG40<br />
GND<br />
OSC1<br />
OSC2<br />
V1<br />
V2<br />
V3<br />
V4<br />
V5<br />
CL1<br />
CL2<br />
V CC M<br />
D<br />
RS<br />
R/W<br />
E<br />
DB0<br />
DB1<br />
DB2<br />
DB3
<strong>HD44780</strong>U<br />
<strong>HD44780</strong>U Pad Arrangement<br />
Chip size:<br />
Coordinate:<br />
Origin:<br />
Pad size:<br />
4.90 × 4.90 mm 2<br />
Pad center (µm)<br />
Chip center<br />
114 × 114 µm 2<br />
2 1 80 63<br />
Y<br />
Type code<br />
<strong>HD44780</strong>U<br />
23<br />
X<br />
42<br />
6
<strong>HD44780</strong>U<br />
HCD44780U Pad Location Coordinates<br />
Coordinate<br />
Coordinate<br />
Pad No. Function X (um) Y (um) Pad No. Function X (um) Y (um)<br />
1 SEG22 –2100 2313 41 DB2 2070 –2290<br />
2 SEG21 –2280 2313 42 DB3 2260 –2290<br />
3 SEG20 –2313 2089 43 DB4 2290 –2099<br />
4 SEG19 –2313 1833 44 DB5 2290 –1883<br />
5 SEG18 –2313 1617 45 DB6 2290 –1667<br />
6 SEG17 –2313 1401 46 DB7 2290 –1452<br />
7 SEG16 –2313 1186 47 COM1 2313 –1186<br />
8 SEG15 –2313 970 48 COM2 2313 –970<br />
9 SEG14 –2313 755 49 COM3 2313 –755<br />
10 SEG13 –2313 539 50 COM4 2313 –539<br />
11 SEG12 –2313 323 51 COM5 2313 –323<br />
12 SEG11 –2313 108 52 COM6 2313 –108<br />
13 SEG10 –2313 –108 53 COM7 2313 108<br />
14 SEG9 –2313 –323 54 COM8 2313 323<br />
15 SEG8 –2313 –539 55 COM9 2313 539<br />
16 SEG7 –2313 –755 56 COM10 2313 755<br />
17 SEG6 –2313 –970 57 COM11 2313 970<br />
18 SEG5 –2313 –1186 58 COM12 2313 1186<br />
19 SEG4 –2313 –1401 59 COM13 2313 1401<br />
20 SEG3 –2313 –1617 60 COM14 2313 1617<br />
21 SEG2 –2313 –1833 61 COM15 2313 1833<br />
22 SEG1 –2313 –2073 62 COM16 2313 2095<br />
23 GND –2280 –2290 63 SEG40 2296 2313<br />
24 OSC1 –2080 –2290 64 SEG39 2100 2313<br />
25 OSC2 –1749 –2290 65 SEG38 1617 2313<br />
26 V1 –1550 –2290 66 SEG37 1401 2313<br />
27 V2 –1268 –2290 67 SEG36 1186 2313<br />
28 V3 –941 –2290 68 SEG35 970 2313<br />
29 V4 –623 –2290 69 SEG34 755 2313<br />
30 V5 –304 –2290 70 SEG33 539 2313<br />
31 CL1 –48 –2290 71 SEG32 323 2313<br />
32 CL2 142 –2290 72 SEG31 108 2313<br />
33 V CC 309 –2290 73 SEG30 –108 2313<br />
34 M 475 –2290 74 SEG29 –323 2313<br />
35 D 665 –2290 75 SEG28 –539 2313<br />
36 RS 832 –2290 76 SEG27 –755 2313<br />
37 R/W 1022 –2290 77 SEG26 –970 2313<br />
38 E 1204 –2290 78 SEG25 –1186 2313<br />
39 DB0 1454 –2290 79 SEG24 –1401 2313<br />
40 DB1 1684 –2290 80 SEG23 –1617 2313<br />
7
<strong>HD44780</strong>U<br />
Pin Functions<br />
Signal<br />
No. of<br />
Lines<br />
I/O<br />
Device<br />
Interfaced with<br />
Function<br />
RS 1 I MPU Selects registers.<br />
0: Instruction register (for write) Busy flag:<br />
address counter (for read)<br />
1: Data register (for write and read)<br />
R/W 1 I MPU Selects read or write.<br />
0: Write<br />
1: Read<br />
E 1 I MPU Starts data read/write.<br />
DB4 to DB7 4 I/O MPU Four high order bidirectional tristate data bus<br />
pins. Used for data transfer and receive between<br />
the MPU and the <strong>HD44780</strong>U. DB7 can be used<br />
as a busy flag.<br />
DB0 to DB3 4 I/O MPU Four low order bidirectional tristate data bus pins.<br />
Used for data transfer and receive between the<br />
MPU and the <strong>HD44780</strong>U.<br />
These pins are not used during 4-bit operation.<br />
CL1 1 O Extension driver Clock to latch serial data D sent to the extension<br />
driver<br />
CL2 1 O Extension driver Clock to shift serial data D<br />
M 1 O Extension driver Switch signal for converting the liquid crystal<br />
drive waveform to AC<br />
D 1 O Extension driver Character pattern data corresponding to each<br />
segment signal<br />
COM1 to COM16 16 O LCD Common signals that are not used are changed<br />
to non-selection waveforms. COM9 to COM16<br />
are non-selection waveforms at 1/8 duty factor<br />
and COM12 to COM16 are non-selection<br />
waveforms at 1/11 duty factor.<br />
SEG1 to SEG40 40 O LCD Segment signals<br />
V1 to V5 5 — Power supply Power supply for LCD drive<br />
V CC –V5 = 11 V (max)<br />
V CC , GND 2 — Power supply V CC : 2.7V to 5.5V, GND: 0V<br />
OSC1, OSC2 2 — Oscillation<br />
resistor clock<br />
When crystal oscillation is performed, a resistor<br />
must be connected externally. When the pin input<br />
is an external clock, it must be input to OSC1.<br />
8
<strong>HD44780</strong>U<br />
Function Description<br />
Registers<br />
The <strong>HD44780</strong>U has two 8-bit registers, an instruction register (IR) and a data register (DR).<br />
The IR stores instruction codes, such as display clear and cursor shift, and address information for display<br />
data RAM (DDRAM) and character generator RAM (CGRAM). The IR can only be written from the MPU.<br />
The DR temporarily stores data to be written into DDRAM or CGRAM and temporarily stores data to be<br />
read from DDRAM or CGRAM. Data written into the DR from the MPU is automatically written into<br />
DDRAM or CGRAM by an internal operation. The DR is also used for data storage when reading data<br />
from DDRAM or CGRAM. When address information is written into the IR, data is read and then stored<br />
into the DR from DDRAM or CGRAM by an internal operation. Data transfer between the MPU is then<br />
completed when the MPU reads the DR. After the read, data in DDRAM or CGRAM at the next address is<br />
sent to the DR for the next read from the MPU. By the register selector (RS) signal, these two registers can<br />
be selected (Table 1).<br />
Busy Flag (BF)<br />
When the busy flag is 1, the <strong>HD44780</strong>U is in the internal operation mode, and the next instruction will not<br />
be accepted. When RS = 0 and R/W = 1 (Table 1), the busy flag is output to DB7. The next instruction<br />
must be written after ensuring that the busy flag is 0.<br />
Address Counter (AC)<br />
The address counter (AC) assigns addresses to both DDRAM and CGRAM. When an address of an<br />
instruction is written into the IR, the address information is sent from the IR to the AC. Selection of either<br />
DDRAM or CGRAM is also determined concurrently by the instruction.<br />
After writing into (reading from) DDRAM or CGRAM, the AC is automatically incremented by 1<br />
(decremented by 1). The AC contents are then output to DB0 to DB6 when RS = 0 and R/W = 1 (Table 1).<br />
Table 1<br />
Register Selection<br />
RS R/W Operation<br />
0 0 IR write as an internal operation (display clear, etc.)<br />
0 1 Read busy flag (DB7) and address counter (DB0 to DB6)<br />
1 0 DR write as an internal operation (DR to DDRAM or CGRAM)<br />
1 1 DR read as an internal operation (DDRAM or CGRAM to DR)<br />
9
<strong>HD44780</strong>U<br />
Display Data RAM (DDRAM)<br />
Display data RAM (DDRAM) stores display data represented in 8-bit character codes. Its extended<br />
capacity is 80 × 8 bits, or 80 characters. The area in display data RAM (DDRAM) that is not used for<br />
display can be used as general data RAM. See Figure 1 for the relationships between DDRAM addresses<br />
and positions on the liquid crystal display.<br />
The DDRAM address (A DD ) is set in the address counter (AC) as hexadecimal.<br />
• 1-line display (N = 0) (Figure 2)<br />
⎯ When there are fewer than 80 display characters, the display begins at the head position. For<br />
example, if using only the <strong>HD44780</strong>, 8 characters are displayed. See Figure 3.<br />
When the display shift operation is performed, the DDRAM address shifts. See Figure 3.<br />
AC<br />
(hexadecimal)<br />
High order<br />
bits<br />
Low order<br />
bits<br />
Example: DDRAM address 4E<br />
AC6 AC5 AC4 AC3 AC2 AC1 AC0 1 0 0 1 1 1 0<br />
Figure 1 DDRAM Address<br />
Display position<br />
(digit) 1 2 3 4 5 79 80<br />
DDRAM<br />
address<br />
(hexadecimal)<br />
00 01 02 03 04 . . . . . . . . . . . . . . . . . . 4E 4F<br />
Figure 2 1-Line Display<br />
Display<br />
position 1 2 3 4 5 6 7 8<br />
DDRAM<br />
address<br />
00 01 02 03 04 05 06 07<br />
For<br />
shift left<br />
01 02 03 04 05 06 07 08<br />
For<br />
shift right<br />
4F<br />
00 01 02 03 04 05 06<br />
Figure 3 1-Line by 8-Character Display Example<br />
10
<strong>HD44780</strong>U<br />
• 2-line display (N = 1) (Figure 4)<br />
⎯ Case 1: When the number of display characters is less than 40 × 2 lines, the two lines are displayed<br />
from the head. Note that the first line end address and the second line start address are not<br />
consecutive. For example, when just the <strong>HD44780</strong> is used, 8 characters × 2 lines are displayed. See<br />
Figure 5.<br />
When display shift operation is performed, the DDRAM address shifts. See Figure 5.<br />
Display<br />
position 1 2 3 4 5 39 40<br />
DDRAM<br />
address<br />
(hexadecimal)<br />
00 01 02 03 04 . . . . . . . . . . . . . . . . . . 26 27<br />
40 41 42 43 44 . . . . . . . . . . . . . . . . . . 66 67<br />
Figure 4 2-Line Display<br />
Display<br />
position 1 2 3 4 5 6 7 8<br />
DDRAM<br />
address<br />
00 01 02 03 04 05 06 07<br />
40 41 42 43 44 45 46 47<br />
For<br />
shift left<br />
01 02 03 04 05 06 07 08<br />
41 42 43 44 45 46 47 48<br />
For<br />
shift right<br />
27<br />
67<br />
00 01 02 03 04 05 06<br />
40 41 42 43 44 45 46<br />
Figure 5 2-Line by 8-Character Display Example<br />
11
<strong>HD44780</strong>U<br />
⎯ Case 2: For a 16-character × 2-line display, the <strong>HD44780</strong> can be extended using one 40-output<br />
extension driver. See Figure 6.<br />
When display shift operation is performed, the DDRAM address shifts. See Figure 6.<br />
Display<br />
position 1 2 3 4 5 6 7 8 9 10 11 12 13 14 15 16<br />
DDRAM<br />
address<br />
00 01 02 03 04 05 06 07 08 09 0A 0B0C 0D 0E 0F<br />
40 41 42 43 44 45 46 47 48 49 4A 4B4C 4D 4E 4F<br />
<strong>HD44780</strong>U display<br />
Extension driver<br />
display<br />
For<br />
shift left<br />
01 02 03 04 05 06 07 08 09 0A 0B0C 0D 0E 0F10<br />
41 42 43 44 45 46 47 48 49 4A 4B4C 4D 4E 4F 50<br />
For<br />
shift right<br />
27 00 01 02 03 04 05 06 07 08 09 0A 0B0C 0D 0E<br />
67 40 41 42 43 44 45 46 47 48 49 4A 4B4C 4D 4E<br />
Figure 6 2-Line by 16-Character Display Example<br />
12
<strong>HD44780</strong>U<br />
Character Generator ROM (CGROM)<br />
The character generator ROM generates 5 × 8 dot or 5 × 10 dot character patterns from 8-bit character<br />
codes (Table 4). It can generate 208 5 × 8 dot character patterns and 32 5 × 10 dot character patterns. Userdefined<br />
character patterns are also available by mask-programmed ROM.<br />
Character Generator RAM (CGRAM)<br />
In the character generator RAM, the user can rewrite character patterns by program. For 5 × 8 dots, eight<br />
character patterns can be written, and for 5 × 10 dots, four character patterns can be written.<br />
Write into DDRAM the character codes at the addresses shown as the left column of Table 4 to show the<br />
character patterns stored in CGRAM.<br />
See Table 5 for the relationship between CGRAM addresses and data and display patterns.<br />
Areas that are not used for display can be used as general data RAM.<br />
Modifying Character Patterns<br />
• Character pattern development procedure<br />
The following operations correspond to the numbers listed in Figure 7:<br />
1. Determine the correspondence between character codes and character patterns.<br />
2. Create a listing indicating the correspondence between EPROM addresses and data.<br />
3. Program the character patterns into the EPROM.<br />
4. Send the EPROM to Hitachi.<br />
5. Computer processing on the EPROM is performed at Hitachi to create a character pattern listing, which<br />
is sent to the user.<br />
6. If there are no problems within the character pattern listing, a trial LSI is created at Hitachi and samples<br />
are sent to the user for evaluation. When it is confirmed by the user that the character patterns are<br />
correctly written, mass production of the LSI proceeds at Hitachi.<br />
13
<strong>HD44780</strong>U<br />
Hitachi<br />
User<br />
Start<br />
Computer<br />
processing<br />
Determine<br />
character patterns<br />
1<br />
Create character<br />
pattern listing<br />
5<br />
Create EPROM<br />
address data listing<br />
2<br />
Evaluate<br />
character<br />
patterns<br />
Write EPROM<br />
3<br />
No<br />
OK?<br />
EPROM → Hitachi<br />
4<br />
Yes<br />
Art work<br />
M/T<br />
Masking<br />
Trial<br />
Sample<br />
Sample<br />
evaluation<br />
6<br />
OK?<br />
No<br />
Yes<br />
Mass<br />
production<br />
Note: For a description of the numbers used in this figure, refer to the preceding page.<br />
Figure 7 Character Pattern Development Procedure<br />
14
<strong>HD44780</strong>U<br />
• Programming character patterns<br />
This section explains the correspondence between addresses and data used to program character patterns<br />
in EPROM. The <strong>HD44780</strong>U character generator ROM can generate 208 5 × 8 dot character patterns and<br />
32 5 × 10 dot character patterns for a total of 240 different character patterns.<br />
⎯ Character patterns<br />
EPROM address data and character pattern data correspond with each other to form a 5 × 8 or 5 ×<br />
10 dot character pattern (Tables 2 and 3).<br />
Table 2<br />
Example of Correspondence between EPROM Address Data and Character Pattern<br />
(5 × 8 Dots)<br />
EPROM Address<br />
A11A10 A9 A8 A7 A6 A5 A4 A3 A2 A1 A0<br />
Data<br />
LSB<br />
O4 O3 O2 O1 O0<br />
0 1 1 0 0 0 1 0<br />
0 0 0 0<br />
0 0 0 1<br />
0 0 1 0<br />
0 0 1 1<br />
0 1 0 0<br />
0 1 0 1<br />
0 1 1 0<br />
0 1 1 1<br />
1 0 0 0<br />
1 0 0 1<br />
1 0 1 0<br />
1 0 1 1<br />
1 1 0 0<br />
1 1 0 1<br />
1 1 1 0<br />
1 1 1 1<br />
1 0 0 0 0<br />
1 0 0 0 0<br />
1 0 1 1 0<br />
1 1 0 0 1<br />
1 0 0 0 1<br />
1 0 0 0 1<br />
1 1 1 1 0<br />
0 0 0 0 0<br />
0 0 0 0 0<br />
0 0 0 0 0<br />
0 0 0 0 0<br />
0 0 0 0 0<br />
0 0 0 0 0<br />
0 0 0 0 0<br />
0 0 0 0 0<br />
0 0 0 0 0<br />
Cursor position<br />
Character code<br />
Line<br />
position<br />
Notes: 1. EPROM addresses A11 to A4 correspond to a character code.<br />
2. EPROM addresses A3 to A0 specify a line position of the character pattern.<br />
3. EPROM data O4 to O0 correspond to character pattern data.<br />
4. EPROM data O5 to O7 must be specified as 0.<br />
5. A lit display position (black) corresponds to a 1.<br />
6. Line 9 and the following lines must be blanked with 0s for a 5 × 8 dot character fonts.<br />
15
<strong>HD44780</strong>U<br />
⎯ Handling unused character patterns<br />
1. EPROM data outside the character pattern area: Always input 0s.<br />
2. EPROM data in CGRAM area: Always input 0s. (Input 0s to EPROM addresses 00H to FFH.)<br />
3. EPROM data used when the user does not use any <strong>HD44780</strong>U character pattern: According to the user<br />
application, handled in one of the two ways listed as follows.<br />
a. When unused character patterns are not programmed: If an unused character code is written into<br />
DDRAM, all its dots are lit. By not programing a character pattern, all of its bits become lit. (This is<br />
due to the EPROM being filled with 1s after it is erased.)<br />
b. When unused character patterns are programmed as 0s: Nothing is displayed even if unused<br />
character codes are written into DDRAM. (This is equivalent to a space.)<br />
Table 3<br />
Example of Correspondence between EPROM Address Data and Character Pattern<br />
(5 × 10 Dots)<br />
EPROM Address<br />
A11A10 A9 A8 A7 A6 A5 A4 A3 A2 A1 A0<br />
Data<br />
LSB<br />
O4 O3 O2 O1 O0<br />
0 1 0 1 0 0 1 0<br />
0 0 0 0<br />
0 0 0 1<br />
0 0 1 0<br />
0 0 1 1<br />
0 1 0 0<br />
0 1 0 1<br />
0 1 1 0<br />
0 1 1 1<br />
1 0 0 0<br />
1 0 0 1<br />
1 0 1 0<br />
1 0 1 1<br />
1 1 0 0<br />
1 1 0 1<br />
1 1 1 0<br />
1 1 1 1<br />
0 0 0 0 0<br />
0 0 0 0 0<br />
0 1 1 0 1<br />
1 0 0 1 1<br />
1 0 0 0 1<br />
1 0 0 0 1<br />
0 1 1 1 1<br />
0 0 0 0 1<br />
0 0 0 0 1<br />
0 0 0 0 1<br />
0 0 0 0 0<br />
0 0 0 0 0<br />
0 0 0 0 0<br />
0 0 0 0 0<br />
0 0 0 0 0<br />
0 0 0 0 0<br />
Cursor position<br />
Character code<br />
Line<br />
position<br />
Notes: 1. EPROM addresses A11 to A3 correspond to a character code.<br />
2. EPROM addresses A3 to A0 specify a line position of the character pattern.<br />
3. EPROM data O4 to O0 correspond to character pattern data.<br />
4. EPROM data O5 to O7 must be specified as 0.<br />
5. A lit display position (black) corresponds to a 1.<br />
6. Line 11 and the following lines must be blanked with 0s for a 5 × 10 dot character fonts.<br />
16
<strong>HD44780</strong>U<br />
Table 4 Correspondence between Character Codes and Character Patterns (ROM Code: A00)<br />
Lower<br />
4 Bits<br />
Upper 4<br />
Bits<br />
xxxx0000<br />
0000 0001 0010 0011 0100 0101 0110 0111 1000 1001 1010 1011 1100 1101 1110 1111<br />
CG<br />
RAM<br />
(1)<br />
xxxx0001<br />
(2)<br />
xxxx0010<br />
(3)<br />
xxxx0011<br />
(4)<br />
xxxx0100<br />
(5)<br />
xxxx0101<br />
(6)<br />
xxxx0110<br />
(7)<br />
xxxx0111<br />
(8)<br />
xxxx1000<br />
(1)<br />
xxxx1001<br />
(2)<br />
xxxx1010<br />
(3)<br />
xxxx1011<br />
(4)<br />
xxxx1100<br />
(5)<br />
xxxx1101<br />
(6)<br />
xxxx1110<br />
(7)<br />
xxxx1111<br />
(8)<br />
Note:<br />
The user can specify any pattern for character-generator RAM.<br />
17
<strong>HD44780</strong>U<br />
Table 4 Correspondence between Character Codes and Character Patterns (ROM Code: A02)<br />
Lower<br />
4 Bits<br />
Upper 4<br />
Bits<br />
xxxx0000<br />
0000 0001 0010 0011 0100 0101 0110 0111 1000 1001 1010 1011 1100 1101 1110 1111<br />
CG<br />
RAM<br />
(1)<br />
xxxx0001<br />
(2)<br />
xxxx0010<br />
(3)<br />
xxxx0011<br />
(4)<br />
xxxx0100<br />
(5)<br />
xxxx0101<br />
(6)<br />
xxxx0110<br />
(7)<br />
xxxx0111<br />
(8)<br />
xxxx1000<br />
(1)<br />
xxxx1001<br />
(2)<br />
xxxx1010<br />
(3)<br />
xxxx1011<br />
(4)<br />
xxxx1100<br />
(5)<br />
xxxx1101<br />
(6)<br />
xxxx1110<br />
(7)<br />
xxxx1111<br />
(8)<br />
18
<strong>HD44780</strong>U<br />
Table 5<br />
Relationship between CGRAM Addresses, Character Codes (DDRAM) and Character<br />
Patterns (CGRAM Data)<br />
For 5 × 8 dot character patterns<br />
Character Codes<br />
(DDRAM data)<br />
CGRAM Address<br />
Character Patterns<br />
(CGRAM data)<br />
7 6 5 4 3 2 1 0 5 4 3 2 1 0 7 6 5 4 3 2 1 0<br />
High Low High Low High Low<br />
0 0 0 0 * 0 0 0<br />
0 0 0 0 * 0 0 1<br />
0 0 0<br />
0 0 1<br />
0<br />
0<br />
0<br />
0<br />
1<br />
1<br />
1<br />
1<br />
0<br />
0<br />
0<br />
0<br />
1<br />
1<br />
1<br />
1<br />
0<br />
0<br />
0<br />
0<br />
1<br />
1<br />
0<br />
0<br />
1<br />
1<br />
0<br />
0<br />
1<br />
1<br />
0<br />
0<br />
1<br />
1<br />
0<br />
0<br />
0<br />
1<br />
0<br />
1<br />
0<br />
1<br />
0<br />
1<br />
0<br />
1<br />
0<br />
1<br />
0<br />
1<br />
0<br />
1<br />
0<br />
1<br />
*<br />
*<br />
*<br />
*<br />
*<br />
*<br />
*<br />
*<br />
*<br />
*<br />
*<br />
*<br />
*<br />
*<br />
*<br />
1<br />
1<br />
1<br />
1<br />
1<br />
1<br />
1<br />
0<br />
1<br />
0<br />
1<br />
0<br />
1<br />
0<br />
0<br />
0<br />
1<br />
0<br />
0<br />
1<br />
0<br />
0<br />
0<br />
0<br />
0<br />
1<br />
1<br />
0<br />
1<br />
0<br />
0<br />
0<br />
1<br />
0<br />
0<br />
1<br />
1<br />
0<br />
0<br />
0<br />
0<br />
0<br />
1<br />
1<br />
1<br />
1<br />
1<br />
0<br />
1<br />
0<br />
0<br />
1<br />
0<br />
1<br />
0<br />
0<br />
0<br />
1<br />
1<br />
0<br />
1<br />
0<br />
0<br />
0<br />
0<br />
1<br />
1<br />
0<br />
0<br />
0<br />
1<br />
0<br />
1<br />
0<br />
1<br />
0<br />
1<br />
0<br />
0<br />
0<br />
Character<br />
pattern (1)<br />
Cursor position<br />
Character<br />
pattern (2)<br />
Cursor position<br />
0 0 0 0 * 1 1 1<br />
1 1 1<br />
1<br />
1<br />
1<br />
1<br />
0<br />
0<br />
1<br />
1<br />
Notes: 1. Character code bits 0 to 2 correspond to CGRAM address bits 3 to 5 (3 bits: 8 types).<br />
2. CGRAM address bits 0 to 2 designate the character pattern line position. The 8th line is the<br />
cursor position and its display is formed by a logical OR with the cursor.<br />
Maintain the 8th line data, corresponding to the cursor display position, at 0 as the cursor display.<br />
If the 8th line data is 1, 1 bits will light up the 8th line regardless of the cursor presence.<br />
3. Character pattern row positions correspond to CGRAM data bits 0 to 4 (bit 4 being at the left).<br />
4. As shown Table 5, CGRAM character patterns are selected when character code bits 4 to 7 are<br />
all 0. However, since character code bit 3 has no effect, the R display example above can be<br />
selected by either character code 00H or 08H.<br />
5. 1 for CGRAM data corresponds to display selection and 0 to non-selection.<br />
* Indicates no effect.<br />
0<br />
1<br />
0<br />
1<br />
*<br />
*<br />
*<br />
19
<strong>HD44780</strong>U<br />
Table 5<br />
Relationship between CGRAM Addresses, Character Codes (DDRAM) and Character<br />
Patterns (CGRAM Data) (cont)<br />
For 5 × 10 dot character patterns<br />
Character Codes<br />
(DDRAM data)<br />
7 6 5 4 3 2 1 0<br />
CGRAM Address<br />
5 4 3 2 1 0<br />
Character Patterns<br />
(CGRAM data)<br />
7 6 5 4 3 2 1 0<br />
High Low High Low High Low<br />
0 0 0 0 * 0 0<br />
*<br />
0 0<br />
0<br />
0<br />
0<br />
0<br />
0<br />
0<br />
0<br />
0<br />
1<br />
1<br />
1<br />
1<br />
1<br />
1<br />
1<br />
1<br />
0<br />
0<br />
0<br />
0<br />
0<br />
0<br />
1<br />
1<br />
1<br />
1<br />
0<br />
0<br />
0<br />
0<br />
1<br />
1<br />
1<br />
1<br />
0<br />
0<br />
0<br />
0<br />
1<br />
1<br />
0<br />
0<br />
1<br />
1<br />
0<br />
0<br />
1<br />
1<br />
0<br />
0<br />
1<br />
1<br />
0<br />
0<br />
0<br />
1<br />
0<br />
1<br />
0<br />
1<br />
0<br />
1<br />
0<br />
1<br />
0<br />
1<br />
0<br />
1<br />
0<br />
1<br />
0<br />
1<br />
*<br />
*<br />
*<br />
*<br />
*<br />
*<br />
*<br />
*<br />
*<br />
*<br />
*<br />
*<br />
*<br />
*<br />
*<br />
0 0<br />
0 0<br />
1 0<br />
1 1<br />
1 0<br />
1 0<br />
1 1<br />
1 0<br />
1 0<br />
1 0<br />
0 0<br />
* *<br />
*<br />
*<br />
0<br />
0<br />
1<br />
0<br />
0<br />
0<br />
1<br />
0<br />
0<br />
0<br />
0<br />
*<br />
*<br />
0<br />
0<br />
1<br />
0<br />
0<br />
0<br />
1<br />
0<br />
0<br />
0<br />
0<br />
*<br />
*<br />
0<br />
0<br />
0<br />
1<br />
1<br />
1<br />
0<br />
0<br />
0<br />
0<br />
0<br />
*<br />
*<br />
Character<br />
pattern<br />
Cursor position<br />
0 0 0 0 * 1 1 *<br />
1 1<br />
1<br />
1<br />
1<br />
1<br />
1<br />
1<br />
1<br />
0<br />
0<br />
0<br />
1<br />
1<br />
1<br />
1<br />
0<br />
1<br />
1<br />
0<br />
0<br />
1<br />
1<br />
1<br />
0<br />
1<br />
0<br />
1<br />
0<br />
1<br />
*<br />
*<br />
*<br />
*<br />
*<br />
*<br />
*<br />
*<br />
*<br />
*<br />
*<br />
*<br />
*<br />
*<br />
*<br />
*<br />
*<br />
*<br />
*<br />
Notes: 1. Character code bits 1 and 2 correspond to CGRAM address bits 4 and 5 (2 bits: 4 types).<br />
2. CGRAM address bits 0 to 3 designate the character pattern line position. The 11th line is the<br />
cursor position and its display is formed by a logical OR with the cursor.<br />
Maintain the 11th line data corresponding to the cursor display positon at 0 as the cursor display.<br />
If the 11th line data is “1”, “1” bits will light up the 11th line regardless of the cursor presence.<br />
Since lines 12 to 16 are not used for display, they can be used for general data RAM.<br />
3. Character pattern row positions are the same as 5 × 8 dot character pattern positions.<br />
4. CGRAM character patterns are selected when character code bits 4 to 7 are all 0.<br />
However, since character code bits 0 and 3 have no effect, the P display example above can be<br />
selected by character codes 00H, 01H, 08H, and 09H.<br />
5. 1 for CGRAM data corresponds to display selection and 0 to non-selection.<br />
* Indicates no effect.<br />
20
<strong>HD44780</strong>U<br />
Timing Generation Circuit<br />
The timing generation circuit generates timing signals for the operation of internal circuits such as<br />
DDRAM, CGROM and CGRAM. RAM read timing for display and internal operation timing by MPU<br />
access are generated separately to avoid interfering with each other. Therefore, when writing data to<br />
DDRAM, for example, there will be no undesirable interferences, such as flickering, in areas other than the<br />
display area.<br />
Liquid Crystal Display Driver Circuit<br />
The liquid crystal display driver circuit consists of 16 common signal drivers and 40 segment signal<br />
drivers. When the character font and number of lines are selected by a program, the required common<br />
signal drivers automatically output drive waveforms, while the other common signal drivers continue to<br />
output non-selection waveforms.<br />
Sending serial data always starts at the display data character pattern corresponding to the last address of<br />
the display data RAM (DDRAM).<br />
Since serial data is latched when the display data character pattern corresponding to the starting address<br />
enters the internal shift register, the <strong>HD44780</strong>U drives from the head display.<br />
Cursor/Blink Control Circuit<br />
The cursor/blink control circuit generates the cursor or character blinking. The cursor or the blinking will<br />
appear with the digit located at the display data RAM (DDRAM) address set in the address counter (AC).<br />
For example (Figure 8), when the address counter is 08H, the cursor position is displayed at DDRAM<br />
address 08H.<br />
AC6<br />
AC5<br />
AC4<br />
AC3<br />
AC2<br />
AC1<br />
AC0<br />
AC<br />
0<br />
0<br />
0<br />
1<br />
0<br />
0<br />
0<br />
For a 1-line display<br />
Display position<br />
DDRAM address<br />
(hexadecimal)<br />
1<br />
00<br />
2<br />
01<br />
3<br />
02<br />
4<br />
03<br />
5<br />
04<br />
6<br />
05<br />
7<br />
06<br />
8<br />
07<br />
9<br />
08<br />
10<br />
09<br />
11<br />
0A<br />
For a 2-line display<br />
cursor position<br />
Display position<br />
1<br />
2<br />
3<br />
4<br />
5<br />
6<br />
7<br />
8<br />
9<br />
10<br />
11<br />
DDRAM address<br />
(hexadecimal)<br />
00<br />
40<br />
01<br />
41<br />
02<br />
42<br />
03<br />
43<br />
04<br />
44<br />
05<br />
45<br />
06<br />
46<br />
07<br />
47<br />
08<br />
48<br />
09<br />
49<br />
0A<br />
4A<br />
cursor position<br />
Note: The cursor or blinking appears when the address counter (AC) selects the character<br />
generator RAM (CGRAM). However, the cursor and blinking become meaningless.<br />
The cursor or blinking is displayed in the meaningless position when the AC is a CGRAM address.<br />
Figure 8 Cursor/Blink Display Example<br />
21
<strong>HD44780</strong>U<br />
Interfacing to the MPU<br />
The <strong>HD44780</strong>U can send data in either two 4-bit operations or one 8-bit operation, thus allowing<br />
interfacing with 4- or 8-bit MPUs.<br />
• For 4-bit interface data, only four bus lines (DB4 to DB7) are used for transfer. Bus lines DB0 to DB3<br />
are disabled. The data transfer between the <strong>HD44780</strong>U and the MPU is completed after the 4-bit data<br />
has been transferred twice. As for the order of data transfer, the four high order bits (for 8-bit operation,<br />
DB4 to DB7) are transferred before the four low order bits (for 8-bit operation, DB0 to DB3).<br />
The busy flag must be checked (one instruction) after the 4-bit data has been transferred twice. Two<br />
more 4-bit operations then transfer the busy flag and address counter data.<br />
• For 8-bit interface data, all eight bus lines (DB0 to DB7) are used.<br />
RS<br />
R/W<br />
E<br />
DB7<br />
IR7<br />
IR3<br />
BF<br />
AC3<br />
DR7<br />
DR3<br />
DB6<br />
IR6<br />
IR2<br />
AC6<br />
AC2<br />
DR6<br />
DR2<br />
DB5<br />
IR5<br />
IR1<br />
AC5<br />
AC1<br />
DR5<br />
DR1<br />
DB4<br />
IR4<br />
IR0<br />
AC4<br />
AC0<br />
DR4<br />
DR0<br />
Instruction register (IR)<br />
write<br />
Busy flag (BF) and<br />
address counter (AC)<br />
read<br />
Data register (DR)<br />
read<br />
Figure 9 4-Bit Transfer Example<br />
22
<strong>HD44780</strong>U<br />
Reset Function<br />
Initializing by Internal Reset Circuit<br />
An internal reset circuit automatically initializes the <strong>HD44780</strong>U when the power is turned on. The<br />
following instructions are executed during the initialization. The busy flag (BF) is kept in the busy state<br />
until the initialization ends (BF = 1). The busy state lasts for 10 ms after V CC rises to 4.5 V.<br />
1. Display clear<br />
2. Function set:<br />
DL = 1; 8-bit interface data<br />
N = 0; 1-line display<br />
F = 0; 5 × 8 dot character font<br />
3. Display on/off control:<br />
D = 0; Display off<br />
C = 0; Cursor off<br />
B = 0; Blinking off<br />
4. Entry mode set:<br />
I/D = 1; Increment by 1<br />
S = 0; No shift<br />
Note:<br />
If the electrical characteristics conditions listed under the table Power Supply Conditions Using<br />
Internal Reset Circuit are not met, the internal reset circuit will not operate normally and will fail to<br />
initialize the <strong>HD44780</strong>U. For such a case, initial-ization must be performed by the MPU as<br />
explained in the section, Initializing by Instruction.<br />
Instructions<br />
Outline<br />
Only the instruction register (IR) and the data register (DR) of the <strong>HD44780</strong>U can be controlled by the<br />
MPU. Before starting the internal operation of the <strong>HD44780</strong>U, control information is temporarily stored<br />
into these registers to allow interfacing with various MPUs, which operate at different speeds, or various<br />
peripheral control devices. The internal operation of the <strong>HD44780</strong>U is determined by signals sent from the<br />
MPU. These signals, which include register selection signal (RS), read/<br />
write signal (R/W), and the data bus (DB0 to DB7), make up the <strong>HD44780</strong>U instructions (Table 6). There<br />
are four categories of instructions that:<br />
• Designate <strong>HD44780</strong>U functions, such as display format, data length, etc.<br />
• Set internal RAM addresses<br />
• Perform data transfer with internal RAM<br />
• Perform miscellaneous functions<br />
23
<strong>HD44780</strong>U<br />
Normally, instructions that perform data transfer with internal RAM are used the most. However, autoincrementation<br />
by 1 (or auto-decrementation by 1) of internal <strong>HD44780</strong>U RAM addresses after each data<br />
write can lighten the program load of the MPU. Since the display shift instruction (Table 11) can perform<br />
concurrently with display data write, the user can minimize system development time with maximum<br />
programming efficiency.<br />
When an instruction is being executed for internal operation, no instruction other than the busy flag/address<br />
read instruction can be executed.<br />
Because the busy flag is set to 1 while an instruction is being executed, check it to make sure it is 0 before<br />
sending another instruction from the MPU.<br />
Note:<br />
Be sure the <strong>HD44780</strong>U is not in the busy state (BF = 0) before sending an instruction from the<br />
MPU to the <strong>HD44780</strong>U. If an instruction is sent without checking the busy flag, the time between<br />
the first instruction and next instruction will take much longer than the instruction time itself. Refer<br />
to Table 6 for the list of each instruc-tion execution time.<br />
Table 6<br />
Instructions<br />
Code<br />
Execution Time<br />
(max) (when f cp or<br />
Instruction RS R/W DB7 DB6 DB5 DB4 DB3 DB2 DB1 DB0 Description f OSC is 270 kHz)<br />
Clear<br />
display<br />
Return<br />
home<br />
Entry<br />
mode set<br />
Display<br />
on/off<br />
control<br />
Cursor or<br />
display<br />
shift<br />
Function<br />
set<br />
Set<br />
CGRAM<br />
address<br />
Set<br />
DDRAM<br />
address<br />
Read busy<br />
flag &<br />
address<br />
0 0 0 0 0 0 0 0 0 1 Clears entire display and<br />
sets DDRAM address 0 in<br />
address counter.<br />
0 0 0 0 0 0 0 0 1 — Sets DDRAM address 0 in<br />
address counter. Also<br />
returns display from being<br />
shifted to original position.<br />
DDRAM contents remain<br />
unchanged.<br />
0 0 0 0 0 0 0 1 I/D S Sets cursor move direction<br />
and specifies display shift.<br />
These operations are<br />
performed during data write<br />
and read.<br />
0 0 0 0 0 0 1 D C B Sets entire display (D) on/off,<br />
cursor on/off (C), and<br />
blinking of cursor position<br />
character (B).<br />
0 0 0 0 0 1 S/C R/L — — Moves cursor and shifts<br />
display without changing<br />
DDRAM contents.<br />
0 0 0 0 1 DL N F — — Sets interface data length<br />
(DL), number of display lines<br />
(N), and character font (F).<br />
0 0 0 1 ACG ACG ACG ACG ACG ACG Sets CGRAM address.<br />
CGRAM data is sent and<br />
received after this setting.<br />
0 0 1 ADD ADD ADD ADD ADD ADD ADD Sets DDRAM address.<br />
DDRAM data is sent and<br />
received after this setting.<br />
0 1 BF AC AC AC AC AC AC AC Reads busy flag (BF)<br />
indicating internal operation<br />
is being performed and<br />
reads address counter<br />
contents.<br />
1.52 ms<br />
37 µs<br />
37 µs<br />
37 µs<br />
37 µs<br />
37 µs<br />
37 µs<br />
0 µs<br />
24
<strong>HD44780</strong>U<br />
Table 6<br />
Instructions (cont)<br />
Code<br />
Execution Time<br />
(max) (when f cp or<br />
Instruction RS R/W DB7 DB6 DB5 DB4 DB3 DB2 DB1 DB0 Description f OSC is 270 kHz)<br />
Write data<br />
to CG or<br />
DDRAM<br />
Read data<br />
from CG or<br />
DDRAM<br />
Note:<br />
1 0 Write data Writes data into DDRAM or<br />
CGRAM.<br />
1 1 Read data Reads data from DDRAM or<br />
CGRAM.<br />
I/D = 1: Increment<br />
I/D = 0: Decrement<br />
S = 1: Accompanies display shift<br />
S/C = 1: Display shift<br />
S/C = 0: Cursor move<br />
R/L = 1: Shift to the right<br />
R/L = 0: Shift to the left<br />
DL = 1: 8 bits, DL = 0: 4 bits<br />
N = 1: 2 lines, N = 0: 1 line<br />
F = 1: 5 × 10 dots, F = 0: 5 × 8 dots<br />
BF = 1: Internally operating<br />
BF = 0: Instructions acceptable<br />
DDRAM: Display data RAM<br />
CGRAM: Character generator<br />
RAM<br />
ACG: CGRAM address<br />
ADD: DDRAM address<br />
(corresponds to cursor<br />
address)<br />
AC: Address counter used for<br />
both DD and CGRAM<br />
addresses<br />
37 µs<br />
t ADD = 4 µs*<br />
37 µs<br />
t ADD = 4 µs*<br />
Execution time<br />
changes when<br />
frequency changes<br />
Example:<br />
When f cp or f OSC is<br />
250 kHz,<br />
270<br />
37 µs × = 40 µs<br />
250<br />
— indicates no effect.<br />
* After execution of the CGRAM/DDRAM data write or read instruction, the RAM address counter<br />
is incremented or decremented by 1. The RAM address counter is updated after the busy flag<br />
turns off. In Figure 10, t ADD is the time elapsed after the busy flag turns off until the address<br />
counter is updated.<br />
Busy signal<br />
(DB7 pin)<br />
Busy state<br />
Address counter<br />
(DB0 to DB6 pins)<br />
A A + 1<br />
t ADD<br />
Note: t ADD depends on the operation frequency<br />
t ADD = 1.5/(f cp or f OSC ) seconds<br />
Figure 10 Address Counter Update<br />
25
<strong>HD44780</strong>U<br />
Instruction Description<br />
Clear Display<br />
Clear display writes space code 20H (character pattern for character code 20H must be a blank pattern) into<br />
all DDRAM addresses. It then sets DDRAM address 0 into the address counter, and returns the display to<br />
its original status if it was shifted. In other words, the display disappears and the cursor or blinking goes to<br />
the left edge of the display (in the first line if 2 lines are displayed). It also sets I/D to 1 (increment mode)<br />
in entry mode. S of entry mode does not change.<br />
Return Home<br />
Return home sets DDRAM address 0 into the address counter, and returns the display to its original status<br />
if it was shifted. The DDRAM contents do not change.<br />
The cursor or blinking go to the left edge of the display (in the first line if 2 lines are displayed).<br />
Entry Mode Set<br />
I/D: Increments (I/D = 1) or decrements (I/D = 0) the DDRAM address by 1 when a character code is<br />
written into or read from DDRAM.<br />
The cursor or blinking moves to the right when incremented by 1 and to the left when decremented by 1.<br />
The same applies to writing and reading of CGRAM.<br />
S: Shifts the entire display either to the right (I/D = 0) or to the left (I/D = 1) when S is 1. The display does<br />
not shift if S is 0.<br />
If S is 1, it will seem as if the cursor does not move but the display does. The display does not shift when<br />
reading from DDRAM. Also, writing into or reading out from CGRAM does not shift the display.<br />
Display On/Off Control<br />
D: The display is on when D is 1 and off when D is 0. When off, the display data remains in DDRAM, but<br />
can be displayed instantly by setting D to 1.<br />
C: The cursor is displayed when C is 1 and not displayed when C is 0. Even if the cursor disappears, the<br />
function of I/D or other specifications will not change during display data write. The cursor is displayed<br />
using 5 dots in the 8th line for 5 × 8 dot character font selection and in the 11th line for the 5 × 10 dot<br />
character font selection (Figure 13).<br />
B: The character indicated by the cursor blinks when B is 1 (Figure 13). The blinking is displayed as<br />
switching between all blank dots and displayed characters at a speed of 409.6-ms intervals when f cp or f OSC<br />
is 250 kHz. The cursor and blinking can be set to display simultaneously. (The blinking frequency changes<br />
according to f OSC or the reciprocal of f cp . For example, when f cp is 270 kHz, 409.6 × 250/270 = 379.2 ms.)<br />
26
<strong>HD44780</strong>U<br />
Cursor or Display Shift<br />
Cursor or display shift shifts the cursor position or display to the right or left without writing or reading<br />
display data (Table 7). This function is used to correct or search the display. In a 2-line display, the cursor<br />
moves to the second line when it passes the 40th digit of the first line. Note that the first and second line<br />
displays will shift at the same time.<br />
When the displayed data is shifted repeatedly each line moves only horizontally. The second line display<br />
does not shift into the first line position.<br />
The address counter (AC) contents will not change if the only action performed is a display shift.<br />
Function Set<br />
DL: Sets the interface data length. Data is sent or received in 8-bit lengths (DB7 to DB0) when DL is 1,<br />
and in 4-bit lengths (DB7 to DB4) when DL is 0.When 4-bit length is selected, data must be sent or<br />
received twice.<br />
N: Sets the number of display lines.<br />
F: Sets the character font.<br />
Note:<br />
Perform the function at the head of the program before executing any instructions (except for the<br />
read busy flag and address instruction). From this point, the function set instruction cannot be<br />
executed unless the interface data length is changed.<br />
Set CGRAM Address<br />
Set CGRAM address sets the CGRAM address binary AAAAAA into the address counter.<br />
Data is then written to or read from the MPU for CGRAM.<br />
27
<strong>HD44780</strong>U<br />
RS<br />
R/W<br />
DB7<br />
DB6<br />
DB5<br />
DB4<br />
DB3<br />
DB2<br />
DB1<br />
DB0<br />
Clear<br />
display<br />
Code<br />
0<br />
0<br />
0<br />
0<br />
0<br />
0<br />
0<br />
0<br />
0<br />
1<br />
RS<br />
R/W<br />
DB7<br />
DB6<br />
DB5<br />
DB4<br />
DB3<br />
DB2<br />
DB1<br />
DB0<br />
Return<br />
home<br />
Code 0 0 0 0 0 0 0 0 1 * Note: * Don’t care.<br />
RS<br />
R/W<br />
DB7<br />
DB6<br />
DB5<br />
DB4<br />
DB3<br />
DB2<br />
DB1<br />
DB0<br />
Entry<br />
mode set<br />
Code<br />
0<br />
0<br />
0<br />
0<br />
0<br />
0<br />
0<br />
1<br />
I/D<br />
S<br />
RS<br />
R/W<br />
DB7<br />
DB6<br />
DB5<br />
DB4<br />
DB3<br />
DB2<br />
DB1<br />
DB0<br />
Display<br />
on/off control<br />
Code<br />
0<br />
0<br />
0<br />
0<br />
0<br />
0<br />
1<br />
D<br />
C<br />
B<br />
RS<br />
R/W<br />
DB7<br />
DB6<br />
DB5<br />
DB4<br />
DB3<br />
DB2<br />
DB1 DB0<br />
Cursor or<br />
display shift<br />
Code<br />
0<br />
0<br />
0<br />
0<br />
0<br />
1<br />
S/C<br />
R/L<br />
*<br />
*<br />
Note:<br />
* Don’t care.<br />
RS<br />
R/W<br />
DB7<br />
DB6<br />
DB5<br />
DB4<br />
DB3<br />
DB2<br />
DB1 DB0<br />
Function set<br />
Code<br />
0<br />
0<br />
0<br />
0<br />
1<br />
DL<br />
N<br />
F<br />
* *<br />
RS<br />
R/W<br />
DB7<br />
DB6<br />
DB5<br />
DB4<br />
DB3<br />
DB2<br />
DB1 DB0<br />
Set CGRAM<br />
address<br />
Code<br />
0<br />
0<br />
0<br />
1<br />
A<br />
A<br />
A<br />
A<br />
A<br />
A<br />
Higher<br />
order bit<br />
Lower<br />
order bit<br />
Figure 11 Instruction (1)<br />
28
<strong>HD44780</strong>U<br />
Set DDRAM Address<br />
Set DDRAM address sets the DDRAM address binary AAAAAAA into the address counter.<br />
Data is then written to or read from the MPU for DDRAM.<br />
However, when N is 0 (1-line display), AAAAAAA can be 00H to 4FH. When N is 1 (2-line display),<br />
AAAAAAA can be 00H to 27H for the first line, and 40H to 67H for the second line.<br />
Read Busy Flag and Address<br />
Read busy flag and address reads the busy flag (BF) indicating that the system is now internally operating<br />
on a previously received instruction. If BF is 1, the internal operation is in progress. The next instruction<br />
will not be accepted until BF is reset to 0. Check the BF status before the next write operation. At the same<br />
time, the value of the address counter in binary AAAAAAA is read out. This address counter is used by<br />
both CG and DDRAM addresses, and its value is determined by the previous instruction. The address<br />
contents are the same as for instructions set CGRAM address and set DDRAM address.<br />
Table 7<br />
Shift Function<br />
S/C R/L<br />
0 0 Shifts the cursor position to the left. (AC is decremented by one.)<br />
0 1 Shifts the cursor position to the right. (AC is incremented by one.)<br />
1 0 Shifts the entire display to the left. The cursor follows the display shift.<br />
1 1 Shifts the entire display to the right. The cursor follows the display shift.<br />
Table 8<br />
Function Set<br />
No. of<br />
N F<br />
Display<br />
Lines Character Font<br />
Duty<br />
Factor<br />
0 0 1 5 × 8 dots 1/8<br />
0 1 1 5 × 10 dots 1/11<br />
Remarks<br />
1 * 2 5 × 8 dots 1/16 Cannot display two lines for 5 × 10 dot character font<br />
Note: * Indicates don’t care.<br />
29
<strong>HD44780</strong>U<br />
Cursor<br />
5 × 8 dot<br />
5 × 10 dot<br />
Alternating display<br />
character font<br />
character font<br />
Cursor display example<br />
Blink display example<br />
Figure 12 Cursor and Blinking<br />
RS<br />
R/W<br />
DB7<br />
DB6<br />
DB5<br />
DB4<br />
DB3<br />
DB2<br />
DB1<br />
DB0<br />
Set DDRAM<br />
address<br />
Code<br />
0<br />
0<br />
1<br />
A<br />
A<br />
A<br />
A<br />
A<br />
A<br />
A<br />
Higher<br />
order bit<br />
Lower<br />
order bit<br />
RS<br />
R/W<br />
DB7<br />
DB6<br />
DB5<br />
DB4<br />
DB3<br />
DB2<br />
DB1<br />
DB0<br />
Read busy flag<br />
and address<br />
Code<br />
0<br />
1<br />
BF<br />
A<br />
A<br />
A<br />
A<br />
A<br />
A<br />
A<br />
Higher<br />
order bit<br />
Lower<br />
order bit<br />
Figure 13 Instruction (2)<br />
30
<strong>HD44780</strong>U<br />
Write Data to CG or DDRAM<br />
Write data to CG or DDRAM writes 8-bit binary data DDDDDDDD to CG or DDRAM.<br />
To write into CG or DDRAM is determined by the previous specification of the CGRAM or DDRAM<br />
address setting. After a write, the address is automatically incremented or decremented by 1 according to<br />
the entry mode. The entry mode also determines the display shift.<br />
Read Data from CG or DDRAM<br />
Read data from CG or DDRAM reads 8-bit binary data DDDDDDDD from CG or DDRAM.<br />
The previous designation determines whether CG or DDRAM is to be read. Before entering this read<br />
instruction, either CGRAM or DDRAM address set instruction must be executed. If not executed, the first<br />
read data will be invalid. When serially executing read instructions, the next address data is normally read<br />
from the second read. The address set instructions need not be executed just before this read instruction<br />
when shifting the cursor by the cursor shift instruction (when reading out DDRAM). The operation of the<br />
cursor shift instruction is the same as the set DDRAM address instruction.<br />
After a read, the entry mode automatically increases or decreases the address by 1. However, display shift<br />
is not executed regardless of the entry mode.<br />
Note:<br />
The address counter (AC) is automatically incremented or decremented by 1 after the write<br />
instructions to CGRAM or DDRAM are executed. The RAM data selected by the AC cannot be<br />
read out at this time even if read instructions are executed. Therefore, to correctly read data,<br />
execute either the address set instruction or cursor shift instruction (only with DDRAM), then just<br />
before reading the desired data, execute the read instruction from the second time the read<br />
instruction is sent.<br />
RS<br />
R/W<br />
DB7<br />
DB6<br />
DB5<br />
DB4<br />
DB3<br />
DB2<br />
DB1<br />
DB0<br />
Write data to<br />
CG or DDRAM<br />
Code<br />
1<br />
0<br />
D<br />
D<br />
D<br />
D<br />
D<br />
D<br />
D<br />
D<br />
Higher<br />
order bits<br />
Lower<br />
order bits<br />
RS<br />
R/W<br />
DB7<br />
DB6<br />
DB5<br />
DB4<br />
DB3<br />
DB2<br />
DB1<br />
DB0<br />
Read data from<br />
CG or DDRAM<br />
Code<br />
1<br />
1<br />
D<br />
D<br />
D<br />
D<br />
D<br />
D<br />
D<br />
D<br />
Higher<br />
order bits<br />
Lower<br />
order bits<br />
Figure 14 Instruction (3)<br />
31
<strong>HD44780</strong>U<br />
Interfacing the <strong>HD44780</strong>U<br />
Interface to MPUs<br />
• Interfacing to an 8-bit MPU<br />
See Figure 16 for an example of using a I/O port (for a single-chip microcomputer) as an interface<br />
device.<br />
In this example, P30 to P37 are connected to the data bus DB0 to DB7, and P75 to P77 are connected to<br />
E, R/W, and RS, respectively.<br />
<br />
+, %&,<br />
0 )<br />
RS<br />
R/W<br />
E<br />
Internal<br />
operation<br />
DB7<br />
Functioning<br />
Data Busy Busy<br />
Instruction<br />
write<br />
Busy flag<br />
check<br />
Busy flag<br />
check<br />
Not<br />
busy<br />
Busy flag<br />
check<br />
Figure 15 Example of Busy Flag Check Timing Sequence<br />
H8/325 <strong>HD44780</strong>U<br />
P30 to P37<br />
P77<br />
P76<br />
P75<br />
8<br />
COM1 to<br />
DB0 to DB7<br />
COM16<br />
E<br />
RS<br />
R/W<br />
SEG1 to<br />
SEG40<br />
Figure 16 H8/325 Interface (Single-Chip Mode)<br />
16<br />
40<br />
Data<br />
Instruction<br />
write<br />
LCD<br />
32
<strong>HD44780</strong>U<br />
• Interfacing to a 4-bit MPU<br />
The <strong>HD44780</strong>U can be connected to the I/O port of a 4-bit MPU. If the I/O port has enough bits, 8-bit<br />
data can be transferred. Otherwise, one data transfer must be made in two operations for 4-bit data. In<br />
this case, the timing sequence becomes somewhat complex. (See Figure 17.)<br />
See Figure 18 for an interface example to the HMCS4019R.<br />
Note that two cycles are needed for the busy flag check as well as for the data transfer. The 4-bit<br />
operation is selected by the program.<br />
RS<br />
R/W<br />
E<br />
Internal<br />
operation<br />
DB7 IR7 IR3 Busy AC3<br />
Instruction<br />
write<br />
Functioning<br />
Busy flag<br />
check<br />
Note: IR7 , IR3 are the 7th and 3rd bits of the instruction.<br />
AC3 is the 3rd bit of the address counter.<br />
Not<br />
busy AC3 D7 D3<br />
#$* <br />
'./!"()<br />
Busy flag<br />
check<br />
Figure 17 Example of 4-Bit Data Transfer Timing Sequence<br />
HMCS4019R<br />
D15<br />
D14<br />
D13<br />
RS<br />
R/W<br />
E<br />
<strong>HD44780</strong><br />
COM1 to<br />
COM16<br />
16<br />
Instruction<br />
write<br />
LCD<br />
R10 to R13<br />
4 SEG1 to 40<br />
DB4 to DB7<br />
SEG40<br />
Figure 18 Example of Interface to HMCS4019R<br />
33
<strong>HD44780</strong>U<br />
Interface to Liquid Crystal Display<br />
Character Font and Number of Lines: The <strong>HD44780</strong>U can perform two types of displays, 5 × 8 dot and<br />
5 × 10 dot character fonts, each with a cursor.<br />
Up to two lines are displayed for 5 × 8 dots and one line for 5 × 10 dots. Therefore, a total of three<br />
types of common signals are available (Table 9).<br />
The number of lines and font types can be selected by the program. (See Table 6, Instructions.)<br />
Connection to <strong>HD44780</strong> and Liquid Crystal Display: See Figure 19 for the connection examples.<br />
Table 9<br />
Common Signals<br />
Number of Lines Character Font Number of Common Signals Duty Factor<br />
1 5 × 8 dots + cursor 8 1/8<br />
1 5 × 10 dots + cursor 11 1/11<br />
2 5 × 8 dots + cursor 16 1/16<br />
<strong>HD44780</strong><br />
COM1<br />
COM8<br />
SEG1<br />
SEG40<br />
<strong>HD44780</strong><br />
Example of a 5 × 8 dot, 8-character × 1-line display (1/4 bias, 1/8 duty cycle)<br />
COM1<br />
COM11<br />
SEG1<br />
SEG40<br />
Example of a 5 × 10 dot, 8-character × 1-line display (1/4 bias, 1/11 duty cycle)<br />
Figure 19 Liquid Crystal Display and <strong>HD44780</strong> Connections<br />
34
<strong>HD44780</strong>U<br />
Since five segment signal lines can display one digit, one <strong>HD44780</strong>U can display up to 8 digits for a 1-line<br />
display and 16 digits for a 2-line display.<br />
The examples in Figure 19 have unused common signal pins, which always output non-selection<br />
waveforms. When the liquid crystal display panel has unused extra scanning lines, connect the extra<br />
scanning lines to these common signal pins to avoid any undesirable effects due to crosstalk during the<br />
floating state.<br />
<strong>HD44780</strong><br />
COM1<br />
COM8<br />
COM9<br />
COM16<br />
SEG1<br />
SEG40<br />
Example of a 5 × 8 dot, 8-character × 2-line display (1/5 bias, 1/16 duty cycle)<br />
Figure 19 Liquid Crystal Display and <strong>HD44780</strong> Connections (cont)<br />
35
<strong>HD44780</strong>U<br />
Connection of Changed Matrix Layout: In the preceding examples, the number of lines correspond to the<br />
scanning lines. However, the following display examples (Figure 20) are made possible by altering the<br />
matrix layout of the liquid crystal display panel. In either case, the only change is the layout. The display<br />
characteristics and the number of liquid crystal display characters depend on the number of common<br />
signals or on duty factor. Note that the display data RAM (DDRAM) addresses for 4 characters × 2 lines<br />
and for 16 characters × 1 line are the same as in Figure 19.<br />
<strong>HD44780</strong><br />
COM1<br />
COM8<br />
SEG1<br />
SEG40<br />
COM9<br />
COM16<br />
5 × 8 dot, 16-character × 1-line display<br />
(1/5 bias, 1/16 duty cycle)<br />
Figure 20 Changed Matrix Layout Displays<br />
36
<strong>HD44780</strong>U<br />
Power Supply for Liquid Crystal Display Drive<br />
Various voltage levels must be applied to pins V1 to V5 of the <strong>HD44780</strong>U to obtain the liquid crystal<br />
display drive waveforms. The voltages must be changed according to the duty factor (Table 10).<br />
VLCD is the peak value for the liquid crystal display drive waveforms, and resistance dividing provides<br />
voltages V1 to V5 (Figure 21).<br />
Table 10<br />
Duty Factor and Power Supply for Liquid Crystal Display Drive<br />
Duty Factor<br />
1/8, 1/11 1/16<br />
Bias<br />
Power Supply 1/4 1/5<br />
V1 V CC –1/4 VLCD V CC –1/5 VLCD<br />
V2 V CC –1/2 VLCD V CC –2/5 VLCD<br />
V3 V CC –1/2 VLCD V CC –3/5 VLCD<br />
V4 V CC –3/4 VLCD V CC –4/5 VLCD<br />
V5 V CC –VLCD V CC –VLCD<br />
V CC (+5 V)<br />
V CC (+5 V)<br />
V CC<br />
V1<br />
V2<br />
V3<br />
V4<br />
V5<br />
R<br />
R<br />
R<br />
R<br />
VLCD<br />
V CC<br />
V1<br />
V2<br />
V3<br />
V4<br />
V5<br />
R<br />
R<br />
R<br />
R<br />
R<br />
VLCD<br />
VR<br />
VR<br />
–5 V<br />
–5 V<br />
1/4 bias<br />
(1/8, 1/11 duty cycle)<br />
1/5 bias<br />
(1/16, duty cycle)<br />
Figure 21 Drive Voltage Supply Example<br />
37
<strong>HD44780</strong>U<br />
Relationship between Oscillation Frequency and Liquid Crystal Display Frame<br />
Frequency<br />
The liquid crystal display frame frequencies of Figure 22 apply only when the oscillation frequency is 270<br />
kHz (one clock pulse of 3.7 µs).<br />
1/8 duty cycle<br />
COM1<br />
V CC<br />
V1<br />
V2 (V3)<br />
V4<br />
V5<br />
400 clocks<br />
1 2 3 4 8 1 2<br />
1 frame<br />
1 frame = 3.7 µs × 400 × 8 = 11850 µs = 11.9 ms<br />
1<br />
Frame frequency = = 84.3 Hz<br />
11.9 ms<br />
1/11 duty cycle<br />
COM1<br />
V CC<br />
V1<br />
V2 (V3)<br />
V4<br />
V5<br />
400 clocks<br />
1 2 3 4 11 1 2<br />
1 frame<br />
1 frame = 3.7 µs × 400 × 11 = 16300 µs = 16.3 ms<br />
1<br />
Frame frequency =<br />
= 61.4 Hz<br />
16.3 ms<br />
1/16 duty cycle<br />
COM1<br />
V CC<br />
V1<br />
V2<br />
V3<br />
V4<br />
V5<br />
200 clocks<br />
1 2 3 4 16 1 2<br />
1 frame<br />
1 frame = 3.7 µs × 200 × 16 = 11850 µs = 11.9 ms<br />
1<br />
Frame frequency = = 84.3 Hz<br />
11.9 ms<br />
Figure 22 Frame Frequency<br />
38
<strong>HD44780</strong>U<br />
Instruction and Display Correspondence<br />
• 8-bit operation, 8-digit × 1-line display with internal reset<br />
Refer to Table 11 for an example of an 8-digit × 1-line display in 8-bit operation. The <strong>HD44780</strong>U<br />
functions must be set by the function set instruction prior to the display. Since the display data RAM<br />
can store data for 80 characters, as explained before, the RAM can be used for displays such as for<br />
advertising when combined with the display shift operation.<br />
Since the display shift operation changes only the display position with DDRAM contents unchanged,<br />
the first display data entered into DDRAM can be output when the return home operation is performed.<br />
• 4-bit operation, 8-digit × 1-line display with internal reset<br />
The program must set all functions prior to the 4-bit operation (Table 12). When the power is turned on,<br />
8-bit operation is automatically selected and the first write is performed as an 8-bit operation. Since<br />
DB0 to DB3 are not connected, a rewrite is then required. However, since one operation is completed in<br />
two accesses for 4-bit operation, a rewrite is needed to set the functions (see Table 12). Thus, DB4 to<br />
DB7 of the function set instruction is written twice.<br />
• 8-bit operation, 8-digit × 2-line display<br />
For a 2-line display, the cursor automatically moves from the first to the second line after the 40th digit<br />
of the first line has been written. Thus, if there are only 8 characters in the first line, the DDRAM<br />
address must be again set after the 8th character is completed. (See Table 13.) Note that the display shift<br />
operation is performed for the first and second lines. In the example of Table 13, the display shift is<br />
performed when the cursor is on the second line. However, if the shift operation is performed when the<br />
cursor is on the first line, both the first and second lines move together. If the shift is repeated, the<br />
display of the second line will not move to the first line. The same display will only shift within its own<br />
line for the number of times the shift is repeated.<br />
Note:<br />
When using the internal reset, the electrical characteristics in the Power Supply Conditions Using<br />
Internal Reset Circuit table must be satisfied. If not, the <strong>HD44780</strong>U must be initialized by<br />
instructions. See the section, Initializing by Instruction.<br />
39
<strong>HD44780</strong>U<br />
Table 11<br />
8-Bit Operation, 8-Digit × 1-Line Display Example with Internal Reset<br />
Step<br />
Instruction<br />
No. RS R/W DB7 DB6 DB5 DB4 DB3 DB2 DB1 DB0 Display Operation<br />
1 Power supply on (the <strong>HD44780</strong>U is initialized by the internal<br />
reset circuit)<br />
2 Function set<br />
0 0 0 0 1 1 0 0 * *<br />
3 Display on/off control<br />
0 0 0 0 0 0 1 1 1 0<br />
4 Entry mode set<br />
0 0 0 0 0 0 0 1 1 0<br />
5 Write data to CGRAM/DDRAM<br />
1 0 0 1 0 0 1 0 0 0<br />
6 Write data to CGRAM/DDRAM<br />
1 0 0 1 0 0 1 0 0 1<br />
_<br />
_<br />
H_<br />
HI_<br />
Initialized. No display.<br />
Sets to 8-bit operation and<br />
selects 1-line display and 5 × 8<br />
dot character font. (Number of<br />
display lines and character<br />
fonts cannot be changed after<br />
step #2.)<br />
Turns on display and cursor.<br />
Entire display is in space mode<br />
because of initialization.<br />
Sets mode to increment the<br />
address by one and to shift the<br />
cursor to the right at the time of<br />
write to the DD/CGRAM.<br />
Display is not shifted.<br />
Writes H. DDRAM has already<br />
been selected by initialization<br />
when the power was turned on.<br />
The cursor is incremented by<br />
one and shifted to the right.<br />
Writes I.<br />
7 ·<br />
·<br />
·<br />
·<br />
·<br />
8 Write data to CGRAM/DDRAM<br />
1 0 0 1 0 0 1 0 0 1<br />
9 Entry mode set<br />
0 0 0 0 0 0 0 1 1 1<br />
10 Write data to CGRAM/DDRAM<br />
1 0 0 0 1 0 0 0 0 0<br />
·<br />
·<br />
·<br />
·<br />
·<br />
HITACHI_<br />
HITACHI_<br />
ITACHI _<br />
Writes I.<br />
Sets mode to shift display at<br />
the time of write.<br />
Writes a space.<br />
40
<strong>HD44780</strong>U<br />
Table 11<br />
8-Bit Operation, 8-Digit × 1-Line Display Example with Internal Reset (cont)<br />
Step<br />
Instruction<br />
No. RS R/W DB7 DB6 DB5 DB4 DB3 DB2 DB1 DB0 Display Operation<br />
11 Write data to CGRAM/DDRAM<br />
1 0 0 1 0 0 1 1 0 1<br />
12 ·<br />
·<br />
·<br />
·<br />
·<br />
13 Write data to CGRAM/DDRAM<br />
1 0 0 1 0 0 1 1 1 1<br />
14 Cursor or display shift<br />
0 0 0 0 0 1 0 0 * *<br />
15 Cursor or display shift<br />
0 0 0 0 0 1 0 0 * *<br />
16 Write data to CGRAM/DDRAM<br />
1 0 0 1 0 0 0 0 1 1<br />
17 Cursor or display shift<br />
0 0 0 0 0 1 1 1 * *<br />
18 Cursor or display shift<br />
0 0 0 0 0 1 0 1 * *<br />
19 Write data to CGRAM/DDRAM<br />
1 0 0 1 0 0 1 1 0 1<br />
20 ·<br />
·<br />
·<br />
·<br />
·<br />
21 Return home<br />
0 0 0 0 0 0 0 0 1 0<br />
TACHI M_<br />
·<br />
·<br />
·<br />
·<br />
·<br />
MICROKO_<br />
MICROKO _<br />
MICROKO _<br />
ICROCO _<br />
MICROCO _<br />
MICROCO_<br />
ICROCOM_<br />
·<br />
·<br />
·<br />
·<br />
·<br />
HITACHI _<br />
Writes M.<br />
Writes O.<br />
Shifts only the cursor position<br />
to the left.<br />
Shifts only the cursor position<br />
to the left.<br />
Writes C over K.<br />
The display moves to the left.<br />
Shifts the display and cursor<br />
position to the right.<br />
Shifts the display and cursor<br />
position to the right.<br />
Writes M.<br />
Returns both display and<br />
cursor to the original position<br />
(address 0).<br />
41
<strong>HD44780</strong>U<br />
Table 12<br />
4-Bit Operation, 8-Digit × 1-Line Display Example with Internal Reset<br />
Step<br />
Instruction<br />
No. RS R/W DB7 DB6 DB5 DB4 Display Operation<br />
1 Power supply on (the <strong>HD44780</strong>U is initialized by the internal<br />
reset circuit)<br />
2 Function set<br />
0 0 0 0 1 0<br />
3 Function set<br />
0 0 0 0 1 0<br />
0 0 0 0 * *<br />
4 Display on/off control<br />
0 0 0 0 0 0<br />
0 0 1 1 1 0<br />
5 Entry mode set<br />
0 0 0 0 0 0<br />
0 0 0 1 1 0<br />
_<br />
_<br />
Initialized. No display.<br />
Sets to 4-bit operation.<br />
In this case, operation is<br />
handled as 8 bits by initialization,<br />
and only this instruction<br />
completes with one write.<br />
Sets 4-bit operation and<br />
selects 1-line display and 5 × 8<br />
dot character font. 4-bit<br />
operation starts from this step<br />
and resetting is necessary.<br />
(Number of display lines and<br />
character fonts cannot be<br />
changed after step #3.)<br />
Turns on display and cursor.<br />
Entire display is in space mode<br />
because of initialization.<br />
Sets mode to increment the<br />
address by one and to shift the<br />
cursor to the right at the time of<br />
write to the DD/CGRAM.<br />
Display is not shifted.<br />
6 Write data to CGRAM/DDRAM<br />
H_<br />
1 0 0 1 0 0<br />
1 0 1 0 0 0<br />
Note: The control is the same as for 8-bit operation beyond step #6.<br />
Writes H.<br />
The cursor is incremented by<br />
one and shifts to the right.<br />
42
<strong>HD44780</strong>U<br />
Table 13<br />
8-Bit Operation, 8-Digit × 2-Line Display Example with Internal Reset<br />
Step<br />
Instruction<br />
No. RS R/W DB7 DB6 DB5 DB4 DB3 DB2 DB1 DB0 Display Operation<br />
1 Power supply on (the <strong>HD44780</strong>U is initialized by the internal<br />
reset circuit)<br />
Initialized. No display.<br />
2 Function set<br />
0 0 0 0 1 1 1 0 * *<br />
3 Display on/off control<br />
0 0 0 0 0 0 1 1 1 0<br />
4 Entry mode set<br />
0 0 0 0 0 0 0 1 1 0<br />
5 Write data to CGRAM/DDRAM<br />
1 0 0 1 0 0 1 0 0 0<br />
_<br />
_<br />
H_<br />
Sets to 8-bit operation and<br />
selects 2-line display and 5 × 8<br />
dot character font.<br />
Turns on display and cursor.<br />
All display is in space mode<br />
because of initialization.<br />
Sets mode to increment the<br />
address by one and to shift the<br />
cursor to the right at the time of<br />
write to the DD/CGRAM.<br />
Display is not shifted.<br />
Writes H. DDRAM has already<br />
been selected by initialization<br />
when the power was turned on.<br />
The cursor is incremented by<br />
one and shifted to the right.<br />
6 ·<br />
·<br />
·<br />
·<br />
·<br />
7 Write data to CGRAM/DDRAM<br />
1 0 0 1 0 0 1 0 0 1<br />
·<br />
·<br />
·<br />
·<br />
·<br />
HITACHI_<br />
Writes I.<br />
8 Set DDRAM address<br />
0 0 1 1 0 0 0 0 0 0<br />
HITACHI<br />
_<br />
Sets DDRAM address so that<br />
the cursor is positioned at the<br />
head of the second line.<br />
43
<strong>HD44780</strong>U<br />
Table 13<br />
8-Bit Operation, 8-Digit × 2-Line Display Example with Internal Reset (cont)<br />
Step<br />
Instruction<br />
No. RS R/W DB7 DB6 DB5 DB4 DB3 DB2 DB1 DB0 Display Operation<br />
9 Write data to CGRAM/DDRAM<br />
1 0 0 1 0 0 1 1 0 1<br />
10 ·<br />
·<br />
·<br />
·<br />
·<br />
11 Write data to CGRAM/DDRAM<br />
1 0 0 1 0 0 1 1 1 1<br />
12 Entry mode set<br />
0 0 0 0 0 0 0 1 1 1<br />
13 Write data to CGRAM/DDRAM<br />
1 0 0 1 0 0 1 1 0 1<br />
14 ·<br />
·<br />
·<br />
·<br />
·<br />
15 Return home<br />
0 0 0 0 0 0 0 0 1 0<br />
HITACHI<br />
M_<br />
·<br />
·<br />
·<br />
·<br />
·<br />
HITACHI<br />
MICROCO_<br />
HITACHI<br />
MICROCO_<br />
ITACHI<br />
ICROCOM_<br />
·<br />
·<br />
·<br />
·<br />
·<br />
HITACHI _<br />
MICROCOM<br />
Writes M.<br />
Writes O.<br />
Sets mode to shift display at<br />
the time of write.<br />
Writes M. Display is shifted to<br />
the left. The first and second<br />
lines both shift at the same<br />
time.<br />
Returns both display and<br />
cursor to the original position<br />
(address 0).<br />
44
<strong>HD44780</strong>U<br />
Initializing by Instruction<br />
If the power supply conditions for correctly operating the internal reset circuit are not met, initialization by<br />
instructions becomes necessary.<br />
Refer to Figures 23 and 24 for the procedures on 8-bit and 4-bit initializations, respectively.<br />
Power on<br />
Wait for more than 15 ms<br />
after V CC rises to 4.5 V<br />
Wait for more than 40 ms<br />
after V CC rises to 2.7 V<br />
RS<br />
0<br />
R/W<br />
0<br />
DB7<br />
0<br />
DB6<br />
0<br />
DB5<br />
1<br />
DB4 DB3DB2 DB1 DB0<br />
1 * * * *<br />
BF cannot be checked before this instruction.<br />
Function set (Interface is 8 bits long.)<br />
Wait for more than 4.1 ms<br />
RS<br />
0<br />
R/W<br />
0<br />
DB7<br />
0<br />
DB6<br />
0<br />
DB5<br />
1<br />
DB4 DB3 DB2 DB1 DB0<br />
1 * * * *<br />
BF cannot be checked before this instruction.<br />
Function set (Interface is 8 bits long.)<br />
Wait for more than 100 µs<br />
RS<br />
0<br />
R/W<br />
0<br />
DB7<br />
0<br />
DB6<br />
0<br />
DB5<br />
1<br />
DB4<br />
1<br />
DB3 DB2 DB1DB0<br />
* * * *<br />
BF cannot be checked before this instruction.<br />
Function set (Interface is 8 bits long.)<br />
RS<br />
0<br />
0<br />
0<br />
0<br />
R/W<br />
0<br />
0<br />
0<br />
0<br />
DB7<br />
0<br />
0<br />
0<br />
0<br />
DB6<br />
0<br />
0<br />
0<br />
0<br />
DB5<br />
1<br />
0<br />
0<br />
0<br />
DB4<br />
1<br />
0<br />
0<br />
0<br />
DB3<br />
N<br />
1<br />
0<br />
0<br />
DB2 DB1 DB0<br />
F * *<br />
0<br />
0<br />
1<br />
0<br />
0<br />
I/D<br />
0<br />
1<br />
S<br />
BF can be checked after the following instructions.<br />
When BF is not checked, the waiting time between<br />
instructions is longer than the execution instuction<br />
time. (See Table 6.)<br />
Function set (Interface is 8 bits long. Specify the<br />
number of display lines and character font.)<br />
The number of display lines and character font<br />
cannot be changed after this point.<br />
Display off<br />
Display clear<br />
Entry mode set<br />
Initialization ends<br />
Figure 23 8-Bit Interface<br />
45
<strong>HD44780</strong>U<br />
Power on<br />
Wait for more than 15 ms<br />
after V CC rises to 4.5 V<br />
Wait for more than 40 ms<br />
after V CC rises to 2.7 V<br />
RS<br />
0<br />
R/W<br />
0<br />
DB7<br />
0<br />
DB6<br />
0<br />
DB5 DB4<br />
1 1<br />
BF cannot be checked before this instruction.<br />
Function set (Interface is 8 bits long.)<br />
Wait for more than 4.1 ms<br />
RS<br />
0<br />
R/W<br />
0<br />
DB7<br />
0<br />
DB6<br />
0<br />
DB5 DB4<br />
1 1<br />
BF cannot be checked before this instruction.<br />
Function set (Interface is 8 bits long.)<br />
Wait for more than 100 µs<br />
RS<br />
0<br />
R/W<br />
0<br />
DB7<br />
0<br />
DB6<br />
0<br />
DB5 DB4<br />
1 1<br />
BF cannot be checked before this instruction.<br />
Function set (Interface is 8 bits long.)<br />
RS<br />
0<br />
0<br />
0<br />
0<br />
0<br />
0<br />
0<br />
0<br />
0<br />
R/W<br />
0<br />
0<br />
0<br />
0<br />
0<br />
0<br />
0<br />
0<br />
0<br />
DB7<br />
0<br />
0<br />
N<br />
0<br />
1<br />
0<br />
0<br />
0<br />
0<br />
DB6<br />
0<br />
0<br />
F<br />
0<br />
0<br />
0<br />
0<br />
0<br />
1<br />
DB5 DB4<br />
1 0<br />
1 0<br />
* *<br />
0 0<br />
0 0<br />
0 0<br />
0 1<br />
0 0<br />
I/D S<br />
BF can be checked after the following instructions.<br />
When BF is not checked, the waiting time between<br />
instructions is longer than the execution instuction<br />
time. (See Table 6.)<br />
Function set (Set interface to be 4 bits long.)<br />
Interface is 8 bits in length.<br />
Function set (Interface is 4 bits long. Specify the<br />
number of display lines and character font.)<br />
The number of display lines and character font<br />
cannot be changed after this point.<br />
Display off<br />
Display clear<br />
Initialization ends<br />
Entry mode set<br />
Figure 24 4-Bit Interface<br />
46
<strong>HD44780</strong>U<br />
Absolute Maximum Ratings*<br />
Item Symbol Value Unit Notes<br />
Power supply voltage (1) V CC –GND –0.3 to +7.0 V 1<br />
Power supply voltage (2) V CC –V5 –0.3 to +13.0 V 1, 2<br />
Input voltage Vt –0.3 to V CC +0.3 V 1<br />
Operating temperature T opr –30 to +75 °C<br />
Storage temperature T stg –55 to +125 °C 4<br />
Note: * If the LSI is used above these absolute maximum ratings, it may become permanently damaged.<br />
Using the LSI within the following electrical characteristic limits is strongly recommended for<br />
normal operation. If these electrical characteristic conditions are also exceeded, the LSI will<br />
malfunction and cause poor reliability.<br />
47
<strong>HD44780</strong>U<br />
DC Characteristics (V CC<br />
= 2.7 to 4.5 V, T a<br />
= –30 to +75°C* 3 )<br />
Item Symbol Min Typ Max Unit Test Condition Notes*<br />
Input high voltage (1) VIH1 0.7V CC — V CC V 6<br />
(except OSC1)<br />
Input low voltage (1)<br />
(except OSC1)<br />
Input high voltage (2)<br />
(OSC1)<br />
Input low voltage (2)<br />
(OSC1)<br />
Output high voltage (1)<br />
(DB0–DB7)<br />
Output low voltage (1)<br />
(DB0–DB7)<br />
Output high voltage (2)<br />
(except DB0–DB7)<br />
Output low voltage (2)<br />
(except DB0–DB7)<br />
Driver on resistance<br />
(COM)<br />
Driver on resistance<br />
(SEG)<br />
VIL1 –0.3 — 0.55 V 6<br />
VIH2 0.7V CC — V CC V 15<br />
VIL2 — — 0.2V CC V 15<br />
VOH1 0.75V CC — — V –I OH = 0.1 mA 7<br />
VOL1 — — 0.2V CC V I OL = 0.1 mA 7<br />
VOH2 0.8V CC — — V –I OH = 0.04 mA 8<br />
VOL2 — — 0.2V CC V I OL = 0.04 mA 8<br />
R COM — 2 20 kΩ ±Id = 0.05 mA,<br />
VLCD = 4 V<br />
R SEG — 2 30 kΩ ±Id = 0.05 mA,<br />
VLCD = 4 V<br />
Input leakage current I LI –1 — 1 µA VIN = 0 to V CC 9<br />
Pull-up MOS current<br />
(DB0–DB7, RS, R/W)<br />
–I p 10 50 120 µA V CC = 3 V<br />
Power supply current I CC — 150 300 µA R f oscillation,<br />
external clock<br />
V CC = 3 V,<br />
f OSC = 270 kHz<br />
LCD voltage VLCD1 3.0 — 11.0 V V CC –V5, 1/5 bias 16<br />
VLCD2 3.0 — 11.0 V V CC –V5, 1/4 bias 16<br />
Note: * Refer to the Electrical Characteristics Notes section following these tables.<br />
13<br />
13<br />
10, 14<br />
48
<strong>HD44780</strong>U<br />
AC Characteristics (V CC<br />
= 2.7 to 4.5 V, T a<br />
= –30 to +75°C* 3 )<br />
Clock Characteristics<br />
Item Symbol Min Typ Max Unit Test Condition Note*<br />
External External clock frequency f cp 125 250 350 kHz 11<br />
clock<br />
External clock duty Duty 45 50 55 %<br />
operation<br />
External clock rise time trcp — — 0.2 µs<br />
R f<br />
oscillation<br />
External clock fall time t fcp — — 0.2 µs<br />
Clock oscillation frequency f OSC 190 270 350 kHz R f = 75 kΩ,<br />
V CC = 3 V<br />
Note: * Refer to the Electrical Characteristics Notes section following these tables.<br />
12<br />
Bus Timing Characteristics<br />
Write Operation<br />
Item Symbol Min Typ Max Unit Test Condition<br />
Enable cycle time t cycE 1000 — — ns Figure 25<br />
Enable pulse width (high level) PW EH 450 — —<br />
Enable rise/fall time t Er , t Ef — — 25<br />
Address set-up time (RS, R/W to E) t AS 60 — —<br />
Address hold time t AH 20 — —<br />
Data set-up time t DSW 195 — —<br />
Data hold time t H 10 — —<br />
Read Operation<br />
Item Symbol Min Typ Max Unit Test Condition<br />
Enable cycle time t cycE 1000 — — ns Figure 26<br />
Enable pulse width (high level) PW EH 450 — —<br />
Enable rise/fall time t Er , t Ef — — 25<br />
Address set-up time (RS, R/W to E) t AS 60 — —<br />
Address hold time t AH 20 — —<br />
Data delay time t DDR — — 360<br />
Data hold time t DHR 5 — —<br />
49
<strong>HD44780</strong>U<br />
Interface Timing Characteristics with External Driver<br />
Item Symbol Min Typ Max Unit Test Condition<br />
Clock pulse width High level t CWH 800 — — ns Figure 27<br />
Low level t CWL 800 — —<br />
Clock set-up time t CSU 500 — —<br />
Data set-up time t SU 300 — —<br />
Data hold time t DH 300 — —<br />
M delay time t DM –1000 — 1000<br />
Clock rise/fall time t ct — — 200<br />
Power Supply Conditions Using Internal Reset Circuit<br />
Item Symbol Min Typ Max Unit Test Condition<br />
Power supply rise time t r CC 0.1 — 10 ms Figure 28<br />
Power supply off time t OFF 1 — —<br />
50
<strong>HD44780</strong>U<br />
DC Characteristics (V CC<br />
= 4.5 to 5.5 V, T a<br />
= –30 to +75°C* 3 )<br />
Item Symbol Min Typ Max Unit Test Condition Notes*<br />
Input high voltage (1) VIH1 2.2 — V CC V 6<br />
(except OSC1)<br />
Input low voltage (1)<br />
(except OSC1)<br />
Input high voltage (2)<br />
(OSC1)<br />
Input low voltage (2)<br />
(OSC1)<br />
Output high voltage (1)<br />
(DB0–DB7)<br />
Output low voltage (1)<br />
(DB0–DB7)<br />
Output high voltage (2)<br />
(except DB0–DB7)<br />
Output low voltage (2)<br />
(except DB0–DB7)<br />
Driver on resistance<br />
(COM)<br />
Driver on resistance<br />
(SEG)<br />
VIL1 –0.3 — 0.6 V 6<br />
VIH2 V CC –1.0 — V CC V 15<br />
VIL2 — — 1.0 V 15<br />
VOH1 2.4 — — V –I OH = 0.205 mA 7<br />
VOL1 — — 0.4 V I OL = 1.2 mA 7<br />
VOH2 0.9 V CC — — V –I OH = 0.04 mA 8<br />
VOL2 — — 0.1 V CC V I OL = 0.04 mA 8<br />
RCOM — 2 20 kΩ ±Id = 0.05 mA,<br />
VLCD = 4 V<br />
RSEG — 2 30 kΩ ±Id = 0.05 mA,<br />
VLCD = 4 V<br />
Input leakage current I LI –1 — 1 µA VIN = 0 to V CC 9<br />
Pull-up MOS current<br />
(DB0–DB7, RS, R/W)<br />
–I p 50 125 250 µA V CC = 5 V<br />
Power supply current I CC — 350 600 µA R f oscillation,<br />
external clock<br />
V CC = 5 V,<br />
f OSC = 270 kHz<br />
LCD voltage VLCD1 3.0 — 11.0 V V CC –V5, 1/5 bias 16<br />
VLCD2 3.0 — 11.0 V V CC –V5, 1/4 bias 16<br />
Note: * Refer to the Electrical Characteristics Notes section following these tables.<br />
13<br />
13<br />
10, 14<br />
51
<strong>HD44780</strong>U<br />
AC Characteristics (V CC<br />
= 4.5 to 5.5 V, T a<br />
= –30 to +75°C* 3 )<br />
Clock Characteristics<br />
Item Symbol Min Typ Max Unit Test Condition Notes*<br />
External External clock frequency f cp 125 250 350 kHz 11<br />
clock<br />
External clock duty Duty 45 50 55 % 11<br />
operation<br />
External clock rise time trcp — — 0.2 µs 11<br />
External clock fall time t fcp — — 0.2 µs 11<br />
R f Clock oscillation frequency f OSC 190 270 350 kHz R f = 91 kΩ<br />
oscillation<br />
V CC = 5.0 V<br />
Note: * Refer to the Electrical Characteristics Notes section following these tables.<br />
12<br />
Bus Timing Characteristics<br />
Write Operation<br />
Item Symbol Min Typ Max Unit Test Condition<br />
Enable cycle time t cycE 500 — — ns Figure 25<br />
Enable pulse width (high level) PW EH 230 — —<br />
Enable rise/fall time t Er , t Ef — — 20<br />
Address set-up time (RS, R/W to E) t AS 40 — —<br />
Address hold time t AH 10 — —<br />
Data set-up time t DSW 80 — —<br />
Data hold time t H 10 — —<br />
Read Operation<br />
Item Symbol Min Typ Max Unit Test Condition<br />
Enable cycle time t cycE 500 — — ns Figure 26<br />
Enable pulse width (high level) PW EH 230 — —<br />
Enable rise/fall time t Er , t Ef — — 20<br />
Address set-up time (RS, R/W to E) t AS 40 — —<br />
Address hold time t AH 10 — —<br />
Data delay time t DDR — — 160<br />
Data hold time t DHR 5 — —<br />
52
<strong>HD44780</strong>U<br />
Interface Timing Characteristics with External Driver<br />
Item Symbol Min Typ Max Unit Test Condition<br />
Clock pulse width High level t CWH 800 — — ns Figure 27<br />
Low level t CWL 800 — —<br />
Clock set-up time t CSU 500 — —<br />
Data set-up time t SU 300 — —<br />
Data hold time t DH 300 — —<br />
M delay time t DM –1000 — 1000<br />
Clock rise/fall time t ct — — 100<br />
Power Supply Conditions Using Internal Reset Circuit<br />
Item Symbol Min Typ Max Unit Test Condition<br />
Power supply rise time t rCC 0.1 — 10 ms Figure 28<br />
Power supply off time t OFF 1 — —<br />
53
<strong>HD44780</strong>U<br />
Electrical Characteristics Notes<br />
1. All voltage values are referred to GND = 0 V.<br />
V CC<br />
B<br />
V1<br />
V5<br />
A<br />
A = V CC –V5<br />
B = V CC –V1<br />
A ≥ 1.5 V<br />
B ≤ 0.25 × A<br />
The conditions of V1 and V5 voltages are for proper<br />
operation of the LSI and not for the LCD output level.<br />
The LCD drive voltage condition for the LCD output<br />
level is specified as LCD voltage VLCD.<br />
2. V CC ≥ V1 ≥ V2 ≥ V3 ≥ V4 ≥ V5 must be maintained.<br />
3. For die products, specified at 75°C.<br />
4. For die products, specified by the die shipment specification.<br />
5. The following four circuits are I/O pin configurations except for liquid crystal display output.<br />
Input pin<br />
Pin: E (MOS without pull-up)<br />
Pins: RS, R/W (MOS with pull-up)<br />
Output pin<br />
Pins: CL1, CL2, M, D<br />
V CC<br />
PMOS<br />
V CC V CC<br />
PMOS<br />
PMOS<br />
PMOS<br />
NMOS<br />
(pull up MOS)<br />
NMOS<br />
NMOS<br />
I/O Pin<br />
Pins: DB0 –DB7<br />
(MOS with pull-up)<br />
(pull-up MOS)<br />
V CC<br />
PMOS<br />
V CC<br />
(input circuit)<br />
PMOS<br />
Input enable<br />
NMOS<br />
V CC<br />
NMOS<br />
PMOS<br />
Output enable<br />
Data<br />
NMOS<br />
(output circuit)<br />
(tristate)<br />
54
<strong>HD44780</strong>U<br />
6. Applies to input pins and I/O pins, excluding the OSC1 pin.<br />
7. Applies to I/O pins.<br />
8. Applies to output pins.<br />
9. Current flowing through pull–up MOSs, excluding output drive MOSs.<br />
10. Input/output current is excluded. When input is at an intermediate level with CMOS, the excessive<br />
current flows through the input circuit to the power supply. To avoid this from happening, the input<br />
level must be fixed high or low.<br />
11. Applies only to external clock operation.<br />
Oscillator<br />
Open<br />
OSC1<br />
OSC2<br />
Th Tl<br />
0.7 V CC<br />
0.5 V CC<br />
t rcp<br />
t fcp<br />
Th<br />
Duty = × 100%<br />
Th + Tl<br />
12. Applies only to the internal oscillator operation using oscillation resistor R f .<br />
R f : 75 k Ω ± 2% (when V CC = 3 V)<br />
OSC1<br />
R f : 91 k Ω ± 2% (when V CC = 5 V)<br />
R f Since the oscillation frequency varies depending on the OSC1 and<br />
OSC2 pin capacitance, the wiring length to these pins should be minimized.<br />
OSC2<br />
500<br />
V CC = 5 V<br />
500<br />
V CC = 3 V<br />
400<br />
400<br />
f (kHz)<br />
OSC<br />
300<br />
300<br />
(270) (270)<br />
max.<br />
200<br />
100<br />
50 (91) 100 150<br />
R f (k Ω)<br />
typ.<br />
min.<br />
f (kHz)<br />
OSC<br />
200<br />
100<br />
min.<br />
50 (75) 100 150<br />
R f (k Ω)<br />
max.<br />
typ.<br />
55
<strong>HD44780</strong>U<br />
13. RCOM is the resistance between the power supply pins (V CC , V1, V4, V5) and each common signal pin<br />
(COM1 to COM16).<br />
RSEG is the resistance between the power supply pins (V CC , V2, V3, V5) and each segment signal pin<br />
(SEG1 to SEG40).<br />
14. The following graphs show the relationship between operation frequency and current consumption.<br />
1.8<br />
V CC = 5 V<br />
1.8<br />
V CC = 3 V<br />
1.6<br />
1.6<br />
1.4<br />
1.4<br />
1.2<br />
1.2<br />
I CC (mA)<br />
1.0<br />
0.8<br />
0.6<br />
0.4<br />
0.2<br />
max.<br />
typ.<br />
I CC (mA)<br />
1.0<br />
0.8<br />
0.6<br />
0.4<br />
0.2<br />
max.<br />
typ.<br />
0.0<br />
0 100 200 300 400 500<br />
0.0<br />
0 100 200 300 400 500<br />
f OSC or f cp (kHz)<br />
f OSC or f cp (kHz)<br />
15. Applies to the OSC1 pin.<br />
16. Each COM and SEG output voltage is within ±0.15 V of the LCD voltage (V CC , V1, V2, V3, V4, V5)<br />
when there is no load.<br />
56
<strong>HD44780</strong>U<br />
Load Circuits<br />
Data Bus DB0 to DB7<br />
For V CC = 4.5 to 5.5 V<br />
Test<br />
point<br />
90 pF 11 kΩ<br />
V CC = 5 V<br />
3.9 kΩ<br />
IS2074 H<br />
diodes<br />
For V CC = 2.7 to 4.5 V<br />
Test<br />
point<br />
50 pF<br />
External Driver Control Signals: CL1, CL2, D, M<br />
Test<br />
point<br />
30 pF<br />
57
<strong>HD44780</strong>U<br />
Timing Characteristics<br />
RS<br />
VIH1<br />
VIL1<br />
VIH1<br />
VIL1<br />
t AS<br />
t AH<br />
R/W<br />
VIL1<br />
VIL1<br />
PW EH<br />
t AH<br />
t Ef<br />
E<br />
VIH1<br />
VIL1<br />
VIH1<br />
VIL1<br />
VIL1<br />
t Er<br />
t DSW t H<br />
DB0 to DB7<br />
VIH1<br />
VIL1<br />
Valid data<br />
VIH1<br />
VIL1<br />
t cycE<br />
Figure 25 Write Operation<br />
RS<br />
VIH1<br />
VIL1<br />
VIH1<br />
VIL1<br />
t AS<br />
t AH<br />
R/W<br />
VIH1<br />
VIH1<br />
PW EH<br />
t AH<br />
t Ef<br />
E<br />
VIH1<br />
VIL1<br />
VIH1<br />
VIL1<br />
VIL1<br />
t Er<br />
t DDR<br />
t DHR<br />
DB0 to DB7<br />
VOH1<br />
VOL1 *<br />
Valid data<br />
VOH1<br />
* VOL1<br />
t cycE<br />
Note:<br />
* VOL1 is assumed to be 0.8 V at 2 MHz operation.<br />
Figure 26 Read Operation<br />
58
<strong>HD44780</strong>U<br />
CL1<br />
VOH2<br />
VOH2<br />
t CWH<br />
t ct<br />
VOL2<br />
t CWH<br />
t CSU<br />
CL2<br />
VOL2<br />
VOH2<br />
t CSU<br />
t CWL<br />
t ct<br />
t DH<br />
D<br />
VOH2<br />
VOL2<br />
t SU<br />
M<br />
VOH2<br />
t DM<br />
Figure 27 Interface Timing with External Driver<br />
V CC<br />
0.2 V<br />
0.2 V 0.2 V<br />
2.7 V/4.5 V* 2<br />
t rcc t OFF<br />
*1<br />
0.1 ms ≤ t rcc ≤ 10 ms<br />
t OFF ≥ 1 ms<br />
Notes: 1.<br />
2.<br />
3.<br />
t OFF compensates for the power oscillation period caused by momentary power supply<br />
oscillations.<br />
Specified at 4.5 V for 5-V operation, and at 2.7 V for 3-V operation.<br />
For if 4.5 V is not reached during 5-V operation, the internal reset circuit will not operate<br />
normally.<br />
In this case, the LSI must be initialized by software. (Refer to the Initializing by<br />
Instruction section.)<br />
Figure 28 Internal Power Supply Reset<br />
59
<strong>HD44780</strong>U<br />
Cautions<br />
1. Hitachi neither warrants nor grants licenses of any rights of Hitachi’s or any third party’s patent,<br />
copyright, trademark, or other intellectual property rights for information contained in this document.<br />
Hitachi bears no responsibility for problems that may arise with third party’s rights, including<br />
intellectual property rights, in connection with use of the information contained in this document.<br />
2. Products and product specifications may be subject to change without notice. Confirm that you have<br />
received the latest product standards or specifications before final design, purchase or use.<br />
3. Hitachi makes every attempt to ensure that its products are of high quality and reliability. However,<br />
contact Hitachi’s sales office before using the product in an application that demands especially high<br />
quality and reliability or where its failure or malfunction may directly threaten human life or cause risk<br />
of bodily injury, such as aerospace, aeronautics, nuclear power, combustion control, transportation,<br />
traffic, safety equipment or medical equipment for life support.<br />
4. Design your application so that the product is used within the ranges guaranteed by Hitachi particularly<br />
for maximum rating, operating supply voltage range, heat radiation characteristics, installation<br />
conditions and other characteristics. Hitachi bears no responsibility for failure or damage when used<br />
beyond the guaranteed ranges. Even within the guaranteed ranges, consider normally foreseeable<br />
failure rates or failure modes in semiconductor devices and employ systemic measures such as failsafes,<br />
so that the equipment incorporating Hitachi product does not cause bodily injury, fire or other<br />
consequential damage due to operation of the Hitachi product.<br />
5. This product is not designed to be radiation resistant.<br />
6. No one is permitted to reproduce or duplicate, in any form, the whole or part of this document without<br />
written approval from Hitachi.<br />
7. Contact Hitachi’s sales office for any questions regarding this document or Hitachi semiconductor<br />
products.<br />
Hitachi, Ltd.<br />
Semiconductor & Integrated Circuits.<br />
Nippon Bldg., 2-6-2, Ohte-machi, Chiyoda-ku, Tokyo 100-0004, Japan<br />
Tel: Tokyo (03) 3270-2111 Fax: (03) 3270-5109<br />
URL NorthAmerica : http:semiconductor.hitachi.com/<br />
Europe<br />
: http://www.hitachi-eu.com/hel/ecg<br />
Asia (Singapore) : http://www.has.hitachi.com.sg/grp3/sicd/index.htm<br />
Asia (Taiwan) : http://www.hitachi.com.tw/E/Product/SICD_Frame.htm<br />
Asia (HongKong) : http://www.hitachi.com.hk/eng/bo/grp3/index.htm<br />
Japan<br />
: http://www.hitachi.co.jp/Sicd/indx.htm<br />
For further information write to:<br />
Hitachi Semiconductor<br />
(America) Inc.<br />
179 East Tasman Drive,<br />
San Jose,CA 95134<br />
Tel: (408) 433-1990<br />
Fax: (408) 433-0223<br />
Hitachi Europe GmbH<br />
Electronic components Group<br />
Dornacher Straße 3<br />
D-85622 Feldkirchen, Munich<br />
Germany<br />
Tel: (89) 9 9180-0<br />
Fax: (89) 9 29 30 00<br />
Hitachi Europe Ltd.<br />
Electronic Components Group.<br />
Whitebrook Park<br />
Lower Cookham Road<br />
Maidenhead<br />
Berkshire SL6 8YA, United Kingdom<br />
Tel: (1628) 585000<br />
Fax: (1628) 778322<br />
Hitachi Asia Pte. Ltd.<br />
16 Collyer Quay #20-00<br />
Hitachi Tower<br />
Singapore 049318<br />
Tel: 535-2100<br />
Fax: 535-1533<br />
Hitachi Asia Ltd.<br />
Taipei Branch Office<br />
3F, Hung Kuo Building. No.167,<br />
Tun-Hwa North Road, Taipei (105)<br />
Tel: (2) 2718-3666<br />
Fax: (2) 2718-8180<br />
Hitachi Asia (Hong Kong) Ltd.<br />
Group III (Electronic Components)<br />
7/F., North Tower, World Finance Centre,<br />
Harbour City, Canton Road, Tsim Sha Tsui,<br />
Kowloon, Hong Kong<br />
Tel: (2) 735 9218<br />
Fax: (2) 730 0281<br />
Telex: 40815 HITEC HX<br />
Copyright © Hitachi, Ltd., 1998. All rights reserved. Printed in Japan.<br />
60