User's Manual Advanced Wind/Solar Hybrid Controller - Solar Bazaar
User's Manual Advanced Wind/Solar Hybrid Controller - Solar Bazaar
User's Manual Advanced Wind/Solar Hybrid Controller - Solar Bazaar

You also want an ePaper? Increase the reach of your titles
YUMPU automatically turns print PDFs into web optimized ePapers that Google loves.
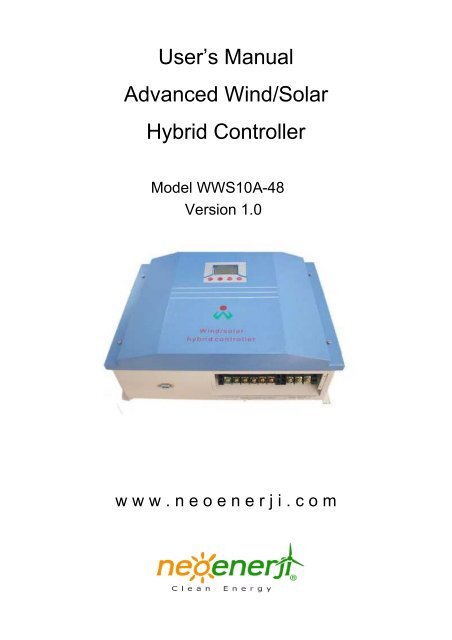
User’s <strong>Manual</strong><br />
<strong>Advanced</strong> <strong>Wind</strong>/<strong>Solar</strong><br />
<strong>Hybrid</strong> <strong>Controller</strong><br />
Model WWS10A-48<br />
Version 1.0<br />
w w w . n e o e n e r j i . c o m
Notes<br />
1. Thank you very much for purchasing <strong>Wind</strong>/<strong>Solar</strong> <strong>Hybrid</strong> <strong>Controller</strong> made by Neoenerji Corp.<br />
Please read the instructions carefully before installation and usage and keep it properly.<br />
2. The installation operation must be done by experienced technical personnel and be strictly in<br />
accordance with the using manual to ensure the product can work properly.<br />
3. This product should be avoided long-term exposure to corrosive gas and moisture environment.<br />
4. Do not put this product in wet, rain, exposure, severe dust, shock, corrosion and strong electromagnetic<br />
interference environment.<br />
5. Do not open the shell to repair this product by yourself.<br />
w w w . n e o e n e r j i . c o m
CONTENTS<br />
1. General Description………………………………………………………………………………………… 1<br />
2. Model Description…………………………………………………………………………………………….2<br />
3. Features……………………………………………………………………………………………………….3<br />
4. Operational Regulations……………………………………………………………………………………..3<br />
5. LCD Operation and Display Instructions…………………………………………………………………...4<br />
5.1 Description of the Key………………………………………………………………………………………...4<br />
5.2 Displaying Contents Description……………………………………………………………………………..5<br />
5.3 Browsing Parameters and Output Modes Description…………………………………………………….5<br />
5.4 <strong>Manual</strong> Brake Setting…………………………………………………………………………………………6<br />
6. Control Software……………………………………………………………………………………………..6<br />
7. Parameters……………………………………………………………………………………………………8<br />
8. Abnormal Phenomenon and Treatment…………………………………………………………………..10<br />
w w w . n e o e n e r j i . c o m
1. General Description<br />
The advanced wind/solar hybrid controller is specially designed for high-end small-scale<br />
wind/solar hybrid system and especially suitable for wind/solar hybrid power generation<br />
system system and wind/solar hybrid monitoring system. It can simultaneously control the<br />
wind turbines and solar batteries on the battery for safe and efficient charging.<br />
The controller adopts PWM to control wind turbine and solar cell charge the battery with<br />
voltage limitting and current limitting, namely, the controller will charge battery with current<br />
limitting when battery power is low and charge battery with voltage limitting when battery<br />
power is high. When the total charge current of wind turbine and solar cell is lower than<br />
current limitting point, the controller will charge the battery with the whole power generated by<br />
wind turbine and solar cell. When the total charge current of wind turbine and solar cell is<br />
more than current limitting point, the controller will charge the battery with the current limitting<br />
point, the excess energy will be unloaded by PWM. When battery voltage is lower than<br />
voltage limitting point, the controller will charge the battery with the whole power generated by<br />
wind turbine and solar cell. When battery voltage is up to voltage limitting point, the controller<br />
will charge battery with voltage limitting point and the excess power will be unloaded by PWM.<br />
For specify wind turbine, the controller can achieve accurate speed control, namely, you can<br />
set the stop rotation speed. When the wind turbine exceeds this speed, the controller will stop<br />
the wind turbine working and the controller will not run the wind turbine untill 10 minutes later.<br />
The controller adopts LCD module especially designed for wind/solar hybrid system. The LCD<br />
can display battery voltage, wind turbine voltage, photoelectric voltage, wind power, PV power,<br />
wind turbine current, PV current and battery power status. Users can browse the parameters<br />
through the four keys of LCD<br />
The controller is equipped with dedicated remote monitoring software. The software can<br />
monitor system status in real-time, such as battery voltage, wind turbine voltage, solar battery<br />
voltage, battery charging current, wind turbine charging current, solar charging current,<br />
battery charging power, solar charging power, wind turbine charging power, fan speed and so<br />
on. The software can configure and modify the system parameters, while the software can<br />
control running status of wind turbine and load.<br />
- 1 -<br />
w w w . n e o e n e r j i . c o m
In addition, the controller has perfect protection functions, including: solar cells reverse<br />
charging, solar cells anti-reverse, battery over charge, battery anti-reverse, lightning<br />
protecting, wind turbine current limitting, wind turbine automatic brake and manual brake.<br />
The low-voltage charging module is optional. The module will enable wind turbine to charge<br />
the battery under low-speed. Because the wind turbine has low energy at low speed, so the<br />
charging current should not be too large when the fan speed is slow. The low-voltage charging<br />
module enables the wind turbine to charge the battery with constant input impedance under<br />
low-voltage charging status, namely, the charging current is proportional to charging voltage.<br />
Depending on the different characteristics of wind turbines, the input impedance can be<br />
modified through serial communication. In addition, users can set wind turbine start charge<br />
voltage point through serial communication. Only when the wind turbine voltage is greater<br />
than the wind turbine start charging voltage, the wind turbine will charge the battery. The wind<br />
turbine start charging voltage can be modified through the serial communication.<br />
The controller has intelligent and modularized design, simple structure, powerful function. The<br />
controller use high quality industrial components and excellent production activity, which make<br />
the controller is suitable for relatively poor working environment and has reliable performance<br />
and service life.<br />
2. Model Description<br />
W W S<br />
XX A-XX<br />
Rated Battery Voltage<br />
<strong>Advanced</strong><br />
Rated <strong>Wind</strong> Power (e.g. “10” represents the rated wind power is<br />
10ⅹ100=1000W)<br />
<strong>Solar</strong> Power<br />
<strong>Wind</strong> Power<br />
Alternative Power<br />
eg. WWS 10A-48 <strong>Advanced</strong> <strong>Wind</strong>/<strong>Solar</strong> <strong>Hybrid</strong> <strong>Controller</strong>, Battery Voltage is 48V)<br />
- 2 -<br />
w w w . n e o e n e r j i . c o m
3. Features<br />
<br />
Intelligently and modularized design, simple structure, powerful function, stable<br />
performance.<br />
<br />
PW M charging with voltage limiting and current limiting, users can set the stop rotation<br />
speed of fan precisely.<br />
<br />
Optional step-up charging module, the module’s input impedance and the beginning<br />
charge voltage can be adjusted to suit the fixed feature of the different wind turbine.<br />
<br />
<br />
<br />
Optional RS232, RS485 interface output<br />
TVS lightning protection<br />
Using the LCD professionally designed for wind/solar hybrid street light .The LCD can<br />
displays all system status and system parameters with intuitive digital and graph.<br />
<br />
Perfect protection function.<br />
4. Operational Regulations<br />
The wind&solar hybrid system connection diagram a is as follows:<br />
After wind/solar hybrid generator system and the various components of photovoltaic panels<br />
installed and the construction of the external circuit completed, the following order should be<br />
carry out to make the connection and operation safely and reliably.<br />
- 3 -<br />
w w w . n e o e n e r j i . c o m
(1). Open the package and ensure whether the equipment is damaged due to transportation<br />
or not.<br />
(2). Connect the battery’s positive pole to the positive (+) of “BATTERY” terminal, and connect<br />
the battery’s negative pole to the negative(-) of “BATTERY” terminal with copper core<br />
cable(section surface ≥ 6mm 2 and length ≤ 1m). Despite the controller has the battery<br />
reversed protection, but reversing battery is still forbidden!<br />
(3). Make the wind turbine in brake status and then connect the output line of the wind turbine<br />
to the “WIND INPUT” terminal in back panel .<br />
(4). Cover the solar panel with a shelter and the connect the solar panels to the “SOLAR<br />
INPUT” terminal in back panel.<br />
(5). Install remote control software, then connect RS232 or 485 interface to computer by data<br />
connection. The computer will display the system parameters.<br />
(6). Users can check the parameters through the key of LCD.<br />
5. LCD operation and Display Instructions<br />
Picture 3, the key of LCD<br />
5.1 Description of the Key:<br />
Press any key, LCD backlight lights. The backlight will auto-off while stop pressing the key 10<br />
seconds later.<br />
● "<br />
" key symbolizes increase or next one. In browsing window, press this key to<br />
display next parameter. Press this key to look the next parameter which can be modified or<br />
increase the value of the current parameter.<br />
● "<br />
" key symbolizes decrease or previous one. In browsing window, press this key to<br />
display the previous parameter. In setting window, press this key to look the previous<br />
- 4 -<br />
w w w . n e o e n e r j i . c o m
parameter which can be modified or decrease the value of the current parameter.<br />
● "Enter" key symbolizes set or confirm key. In browsing window, press this key to access<br />
setting window. In setting window, press this key to save parameter and return to browsing<br />
window.<br />
● "Esc" key symbolizes cancel or manual switch. In setting window, press this key to return<br />
to browsing window and do not save the modification. In browsing window, the key is as a<br />
manual reset key when the load short-circuit or overload occur.<br />
5.2 Displaying Contents Description<br />
LCD screen displays the following picture.<br />
1) symbolizes the wind turbine.<br />
2) symbolizes the day, symbolizes the moon.<br />
3) symbolizes the battery,internal strip graph represents the status of battery power.<br />
When the battery is full, 5 power bars in the battery box will show all the instructions. When<br />
the battery is over-voltage, the symbol flashing ,the flashing will not stop until<br />
over-voltage's recovering.<br />
4) is parameters showing. The LCD can displays system parameters with intuitive<br />
digital.<br />
5.3 Browsing Parameters and Output Modes Description<br />
1) Turn on the power, the LCD displays browsing window and battery voltage: XX.X V;<br />
2) In browsing window, LCD will circularly display the following parameters by pressing<br />
" " key, battery voltage, wind turbine voltage, photoelectric voltage, wind power, PV<br />
power, wind turbine current PV current and so on. LCD will display parameters in reverse<br />
order by pressing “<br />
“ key. (Notes: The controller just uses liquid crystal to display some<br />
- 5 -<br />
w w w . n e o e n e r j i . c o m
functions but not all of that.)<br />
5. 4 <strong>Manual</strong> Brake Setting:<br />
Press the "Enter" key and "Esc" key simultaneously, LCD displays the symbol that<br />
suggests fan is in brake status. Press the "Enter" key and "Esc" key simultaneously in brake<br />
status, the symbol will disappear and the brake status is released. In normal situation,<br />
the fan can not be set in brake status.<br />
6. Control Software<br />
Process one: Software Installation<br />
Double-click "Win<strong>Controller</strong>.exe" file → click "Install"<br />
→ read the agreement of license,<br />
click 【I agree】if users agree to the terms and conditions →【Next】… →【Success】.<br />
(Software installation process is same as general software installation process)<br />
Process two : Usage of the software<br />
1. The choice of serial port<br />
By default, the serial port is COM1, the 9-needles serial port back in the general desktop is<br />
COM1. Connect the RS232 interface of the controller to COM1 serial port of the computer with<br />
serial cable(If it is RS485, you need is a RS485 converter RS232 , and then connect it to<br />
COM1 ). Connect the controller's power supply, then open the software and complete the<br />
connection. After the connection, the light in bottom-right corner of the software is green and<br />
the status bar up the light displays "Normal". If your computer is not COM1 ,you can set it by<br />
the following step.<br />
1 Firstly, identify your computer's serial port : Right-click "My Computer" →<br />
"Properties" → "Hardware" → "Device Manager" → "Ports"; check your serial port.<br />
2 Open the software, click "Set" menu→ "serial port", popup the dialog box and select<br />
your serial port ;<br />
- 6 -<br />
w w w . n e o e n e r j i . c o m
Graphic Displaying Instruction:<br />
● Chant P-T shows the relationship between power and time , the horizontal axis<br />
represents time T, the vertical axis represents power W.<br />
● Chart U-T shows the relationship between voltage and time , the horizontal axis<br />
represents time T, the vertical axis, said power U.<br />
● Chart P-T / U-T is a polar chart of power -time and voltage-time. The chart shows the<br />
date and the time at the same time.<br />
The interface of the software instruction<br />
Parameters Displaying Instruction:<br />
● The first column displays battery's parameters , followed by current, voltage, power,<br />
quantity of electricity .<br />
● The second column displays solar energy's parameters , followed by current, voltage,<br />
power, quantity of electricity.<br />
● The third column displays the wind turbine's parameters , followed by current, voltage,<br />
power, quantity of electricity.<br />
● The bottom- right corner shows the light and the speed of fan. The light shows yellow<br />
and character “No Signal” when there is no signal, green and character “Normal” when there<br />
is signal, red and character “Unload” when controller is unloading, red and character “Low<br />
Battery” when battery is low voltage.<br />
The interface displays the speed of fan when the system works well .<br />
Menu Bar Instruction:<br />
●Viewing, saving and deleting of power<br />
- 7 -<br />
w w w . n e o e n e r j i . c o m
(1) "File" → "The month consumption" (to see the electricity of the month )<br />
(2) "File" → " Inquire electricity" (to see the previous electricity)<br />
(3) "File" → "Save electricity" (to save the electricity of the month )<br />
(4) "File" → "Delete the electricity of the month "<br />
● “Set” menu<br />
(1)"set" menu→"Serial port" menu, select the port<br />
(2)"set" menu→”Background” menu , set the company name and main form.<br />
(3)"set" menu→"scale" menu, set the scale of P-T curve and U-T curve<br />
(4) "set" menu→"speed of fan"menu, select "fan speed showing" or "no fan speed showing"<br />
(5) "set" menu→"system selection", select 12V system or 24V system in "controller system"<br />
bar and select Chinese-English or English LCD display interface in "LCD interface".<br />
● “View” menu<br />
Users can select which curve will be displayed in the pull-down menu of "View" menu. There<br />
are battery curve, solar curve, wind energy curve or all three showing at the same time .<br />
● “Parameter” menu<br />
(1) "Parameter" menu → "Set" menu.(Users can set or modify the unload voltage point,<br />
unload current point, RMP of fan stop, input impedance range and initial charging voltage.<br />
Password is needed when modify the parameters and factory default is 123456.(<br />
(2) "Parameter" menu → "Control" menu.(It can control the wind turbine).<br />
Notes: Password is needed when modify the parameters . Enter the password and click "OK"<br />
twice, when there is "set successfully", setting parameters is succeed, otherwise it should be<br />
reset.<br />
7. Parameters<br />
Model<br />
Rated Battery Voltage<br />
Rated <strong>Wind</strong> Turbine Voltage<br />
Rated <strong>Wind</strong> Turbine Maximum Power<br />
WWS10A-48<br />
48V<br />
56VDC<br />
1000W<br />
Input Impedance Range (factory default) 2~30Ω adjustable(6Ω )<br />
Rated <strong>Wind</strong> Turbine Maximum Input<br />
current<br />
0~40A<br />
- 8 -<br />
w w w . n e o e n e r j i . c o m
Rated <strong>Wind</strong> Turbine Maximum<br />
instantaneous Input current<br />
<strong>Wind</strong> Turbine Charge Voltage( factory<br />
default)<br />
Unload Voltage ( factory default)<br />
Unload Current ( factory default)<br />
<strong>Wind</strong> Turbine over Speed( factory default)<br />
Rated PV Maximum Power<br />
Rated PV Rated Voltage<br />
PV maximum charge Current<br />
2000W<br />
Continuous Adjustable(8V)<br />
52v~60V adjustable (54V)<br />
0~20A adjustable (18A)<br />
0~600rmp adjustable, recover automaticlly 10 minutes later<br />
(500rmp)<br />
600W<br />
68V<br />
10A<br />
-5mv/℃/2V(Over-Discharge Protection, over-discharge recovery<br />
T e m p e r a t u r e C o m p e n s a t i o n<br />
voltage unload voltage compensation)<br />
Control Mode<br />
PW M<br />
Display Mode<br />
Display Parameters<br />
Communication Interface Module<br />
Range of working Temperature &Humidity<br />
Quiescent Current<br />
Protection Type<br />
LCD<br />
Battery Voltage, <strong>Wind</strong> Turbine Voltage, PV Voltage, <strong>Wind</strong> Turbine<br />
Current, PV Current, <strong>Wind</strong> Turbine Power, PV Power .Etc<br />
RS-232C (RS485 is selection)<br />
-20~+55℃/35~85%RH(Without Condensation)<br />
20±2 mA (100mA if the interface is RS485)<br />
<strong>Solar</strong> cells reverse charging, solar cells anti-reverse,<br />
battery over charge, battery over-discharge, battery<br />
anti-reverse, Overloading, lightning protecting, wind<br />
turbine current limitting, wind turbine automatic brake<br />
and manual brake.<br />
- 9 -<br />
w w w . n e o e n e r j i . c o m
8. Abnormal phenomenon and treatment<br />
Phenomenon<br />
Description<br />
The symbol<br />
without charge or<br />
flashing,<br />
Battery is over-voltage, check battery voltage, and the cable is<br />
connected or not, reconnect all components;<br />
discharge<br />
a) First of all, "Parameter" menu → "Control" menu through<br />
LCD controller always<br />
displays "brake<br />
(BRAKE)", and the<br />
manual can not cancel<br />
the software, to see if set to "brake" , cancel the brake status.<br />
b) Brake state is usually caused by over-speed of wind turbine. It will<br />
automatically return to normal after 10 minutes under normal<br />
circumstances.<br />
c)If not the above, first disconnect the fan and controller, and then<br />
disconnect the battery and controller . After a few minutes to start<br />
re-wiring work, observing whether it has returned to normal.<br />
If the phenomenon do not meet the description or can not return to normal, please contact our<br />
service department or salesman to repair or replace.<br />
- 10 -<br />
w w w . n e o e n e r j i . c o m