
You also want an ePaper? Increase the reach of your titles
YUMPU automatically turns print PDFs into web optimized ePapers that Google loves.
SoaringDigest<br />
Radi C ntr lled<br />
October <strong>2012</strong> Vol. 29, No. <strong>10</strong>
CONTENTS<br />
October <strong>2012</strong><br />
Vol. 29, No. <strong>10</strong><br />
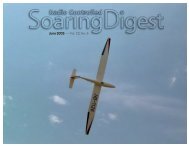
Front cover: Photo by Jeremy Fursman. David Webb's<br />
3.8m Xplorer 2 at a recent Seattle Area Soaring Society contest.<br />
David gives the details for this X2, along with a photo of his red<br />
3.5m X2 in "More about the front cover..." on page 46.<br />
Nikon Coolpix S9300, ISO 125, 1/200 sec., f13.0, 54.0 mm<br />
Francesco Meschia's Pike Perfect Electro 47<br />
3 RC Soaring Digest Editorial<br />
4 Slingsby Gull II<br />
Frederic Fisher's 1:6 scale model. By Vincenzo Pedrielli.<br />
<strong>10</strong> F5J Altitude<br />
Marc Pujol explores alternative techniques for maximizing<br />
that 30 second motor run.<br />
18 Les Ailerons First ALES Event<br />
Coverage by Dany Brazeau.<br />
25 Photo Album - F3J World<br />
Championships, South Africa<br />
Photos by Piet Rheeders.<br />
46 More about the front cover...<br />
By David Webb.<br />
Lockheed Super Constellation <strong>10</strong>49G 49<br />
Kevin Farr details the construction of his spectacular PSS<br />
model with text and numerous photos.<br />
Morphing Leading Edge Reduces Drag 76<br />
DLR and partners develop a <strong>com</strong>posite gapless<br />
adjustable "droop nose."<br />
Labor Day Sloping 78<br />
3WAMS+ up (and down) Timberwolf Mountain.<br />
By Philip Randolph.<br />
Detailing Two Meter Foamies 92<br />
Thompson Smith and kewlartdesigns.<strong>com</strong> can help you<br />
make your DG-<strong>10</strong>00, ASW-28, ASK-21 (or even Radian)<br />
look more realistic.<br />
Back cover: Mike May's beautiful SZD-9 Bocian.<br />
Nokia 67<strong>10</strong>s (camera 'phone), ISO <strong>10</strong>0, 1/156 sec., f2.8<br />
2 R/C Soaring Digest
R/C Soaring Digest<br />
October <strong>2012</strong><br />
Volume 29 Number <strong>10</strong><br />
Managing Editors, Publishers<br />
B 2 Kuhlman<br />
In the Air<br />
The <strong>RCSoaring</strong>Digest Yahoo! Group gained member 2,500 on<br />
August 26th. This is by far the largest group in the Hobbies<br />
Crafts > Models > Radio-Controlled section.<br />
From: Alex Hewson, me3d_lx@hotmail.<strong>com</strong><br />
Contact<br />
rcsdigest@centurytel.net<br />
http://www.rcsoaringdigest.<strong>com</strong><br />
Yahoo! group: <strong>RCSoaring</strong>Digest<br />
R/C Soaring Digest (<strong>RCSD</strong>) is a reader-written monthly<br />
publication for the R/C sailplane enthusiast and has been<br />
published since January 1984. It is dedicated to sharing<br />
technical and educational information. All material contributed<br />
must be original and not infringe upon the copyrights of others.<br />
It is the policy of <strong>RCSD</strong> to provide accurate information. Please<br />
let us know of any error that significantly affects the meaning<br />
of a story. Because we encourage new ideas, the content of<br />
each article is the opinion of the author and may not necessarily<br />
reflect those of <strong>RCSD</strong>. We encourage anyone who wishes to<br />
obtain additional information to contact the author.<br />
———<br />
Copyright © <strong>2012</strong> R/C Soaring Digest<br />
Published by B2Streamlines <br />
P.O. Box 975, Olalla WA 98359<br />
All rights reserved<br />
———<br />
RC Soaring Digest is published using Adobe InDesign CS6<br />
We are holding an International Invite Dynamic Soaring week/<br />
month here in Christchurch. I say week/month as people from<br />
overseas will be <strong>com</strong>ing and going all month of December, and<br />
as dynamic soaring is a wind dependant form of flying, it is a<br />
“when you can <strong>com</strong>e, <strong>com</strong>e” type affair. So far we have Joe<br />
Manor (Mr. Dynamic) confirmed as <strong>com</strong>ing for the whole month,<br />
and two or three other Americans tentative. The aim is to have<br />
fun, have a go, or just watch some good pilots in action.<br />
Time to build another sailplane!<br />
October <strong>2012</strong> 3
Slingby Gull II<br />
Vincenzo Pedrielli, vincenzopedrielli@gmail.<strong>com</strong><br />
Photos by Christian Fitze<br />
Thirty years ago my friend Frederic<br />
Fisher, during his first visit to<br />
London, bought Norman Ellison’s<br />
“British Gliders and Sailplanes” book<br />
which covered most of the famous<br />
sailplanes built before 1970. At<br />
that time it was the most <strong>com</strong>plete<br />
and <strong>com</strong>prehensive book dealing<br />
with English vintage gliders, Martin<br />
Simons’s books having not yet<br />
be<strong>com</strong>e available.<br />
4 R/C Soaring Digest
Among all those beautiful machines<br />
his eyes were captured by the Slingsby<br />
type 14 Gull II. It was love at first sight.<br />
Even so, he wondered how, with such a<br />
long wing and relatively short fuselage,<br />
it could have flown properly. Frederic<br />
was particularly fascinated by the wide<br />
canopy which reminded him of that of a<br />
model bomber he used to see when, as a<br />
child, he visited his old aunt Olga.<br />
Ten years later he decide to build<br />
the Gull II in 1/6 scale and he started<br />
designing the fuselage cross-sections,<br />
cutting and assembling them to match<br />
the tail plane. Whilst building, he realised<br />
he was missing many details, so he<br />
decided to ask for help from Chris Wills<br />
and, with his wife Regula, they paid a<br />
visit to his home.<br />
This was a great idea as they got a lot<br />
of useful information from Chris and,<br />
even more important, some pictures of<br />
the sailplane. One of these pictures was<br />
in colour, so he could see the original<br />
colour scheme.<br />
From then on Frederic <strong>com</strong>municated<br />
with Chris by mail and obtained further<br />
information about the wrecked Gull II,<br />
stored in a military warehouse in the<br />
airport at White Waltham.<br />
Meeting some difficulties in finding<br />
reliable information about the wings,<br />
he temporarily abandoned the Gull II<br />
construction and in the following years<br />
started working on new projects like<br />
Teichfuss’s Supergrifo and the Australian<br />
Pelican II. So, for a few years, the Gull II<br />
project was laid aside until the English<br />
Airplane Monthly magazine printed an<br />
interesting article about the Gull II with<br />
a perfectly detailed 3-view drawing. The<br />
wing problem no longer existed and<br />
construction could start again.<br />
Frederic asked his friend Karl Pelz, an<br />
excellent German model builder who had<br />
already done many things for his Model<br />
Museum in Trogen, to build the Gull II<br />
wings.<br />
Two more years went by and suddenly<br />
the interest and the enthusiasm for the<br />
Gull II exploded again and he restarted<br />
Archive photos courtesy of Chris Wills<br />
October <strong>2012</strong> 5
6 R/C Soaring Digest
Above: Frederic sets up the radiop prior to the first flight.<br />
Opposite page: Cockpit “glass” from a plastic salad bowl, Oracover yellow fuselage covering. Incredible cockpit interior detailing,<br />
<strong>com</strong>plete with pilot. First launch.<br />
October <strong>2012</strong> 7
8 R/C Soaring Digest
work to finish the model. With some<br />
difficulties, due to its round cross<br />
section, Frederic <strong>com</strong>pleted the fuselage<br />
with yellow Oracover film.<br />
It was actually for him great fun building<br />
the large canopy. How did he do it?<br />
No need to make a mould despite the<br />
rounded shape of that canopy. Plastic<br />
salad packaging material did a fantastic<br />
job by simply cutting tiny pieces to follow<br />
the spherical shape of the canopy.<br />
Finally, after such a long gestation<br />
period, Gull II was ready to fly and<br />
looking like the original full sized<br />
machine. The great pity is that Chris Wills<br />
did not see it, as he passed away on<br />
4th May 2011. Without his help Frederic<br />
would probably not have been able to<br />
<strong>com</strong>plete his project.<br />
On 22nd July <strong>2012</strong>, his beloved Gull II<br />
took to the air. The weather was not<br />
ideal, but his skilled friend Christian Fitze<br />
performed a superb radio controlled<br />
maiden flight. No doubt now that the<br />
Gull II was in those days an excellent<br />
sailplane, despite its long wing and short<br />
fuselage.<br />
October <strong>2012</strong> 9
F5J<br />
ALTITUDE<br />
Getting to altitude in F5J Thermal Duration (TD) contests<br />
and consequences for propulsion and strategies<br />
Marc Pujol, marc.pujol1@free.fr<br />
Getting to altitude in F5J 1<br />
Energy / power aspect 1<br />
Let us try to reach a defined point over the field 4<br />
Power involved to reach this location 5<br />
Potential new strategies for F5J discipline:<br />
The “Z climbing” strategy. 7<br />
Advantages and drawbacks of such a strategy 8<br />
Getting to altitude in F5J<br />
F5J is a new Thermal Duration category in radio-controlled<br />
activity. You have 30 seconds to get to the altitude you want<br />
with electric propulsion. If the altitude reached is lower than<br />
200m, then a penalty of 0.5 points per meter gained with the<br />
motor is applied. If the altitude reached is over 200m, a 3 point<br />
penalty is applied per meter over 200m. Of course there are a<br />
few other things to be noticed in order to avoid zoom, etc. This<br />
is the first time in our discipline where the airplane has time to<br />
reach its altitude. It is then the occasion to change our standard<br />
behavior and to explore new strategies.<br />
Look at F3B, F3J, F3K airplanes: The one who may win is the<br />
one who gets to the highest altitude or the one who climbs<br />
the fastest. So these airplanes have very thin profiles and are<br />
capable of quite high speed. They are also robust (F3J & F3B).<br />
This leads to high technology airplanes and, as a consequence,<br />
very expensive ones.<br />
The new discipline makes things different. So let us make a few<br />
calculations in order to predict the propulsion power required<br />
and let us try to establish a few possible strategies.<br />
Energy / power aspect<br />
Getting to altitude means potential energy and kinetic energy.<br />
The first one means getting to altitude where the second one<br />
means reaching a defined speed.<br />
Energy mechanic<br />
= 0.5 * m * (h / t + V z<br />
) 2 + m * 9.8 * (h + V z<br />
* t)<br />
Where h is the altitude to be reached, V is the climbing speed,<br />
V z<br />
the sinking rate of the airplane at the flying speed, t the time<br />
get to reach the altitude, and m the model mass.<br />
<strong>10</strong> R/C Soaring Digest
To determine sinking rate, we have to perform the following<br />
rational:<br />
Several measures made on airplanes show us that a factor of<br />
2 to 2.5 can be taken (let us choose an average of 2.2). This is<br />
quite impressive but don’t think that a 4m airplane can have a<br />
minimum sinking rate of 0.25m/s. It, in reality, flies with a sinking<br />
rate about 0.55 to 0.65 m/s.<br />
Note: Don’t think measures are very precise. Even the real glider<br />
polar are quite difficult to establish and if you look at measures<br />
made the dispersion is impressive (+/- 50%). So never trust<br />
graphics shown by constructors. They are advertisements! As<br />
an example, differences in sinking rate due to temperature, air<br />
moisture, and altitude can be very high.<br />
Rational to apply to <strong>com</strong>pute required motor power.<br />
Let us first define the speed of the airplane. Thanks to XFLR5<br />
you can estimate the airplane polar and thus determine the<br />
associated sinking speed associated to the flying speed.<br />
Unfortunately, XFLR5 doesn’t integrate the fuselage and all<br />
of the interaction between the wing and fuselage, tail and<br />
fuselage, etc. It could not model all the construction defects<br />
made, fences, etc., that contribute to increased drag. XFLR5<br />
is then very optimistic. We have to take an adaptive factor to<br />
transform such theoretical sinking speed into a more realistic<br />
one.<br />
The Genoma, my first F5J airplane (fully homemade), 3.65m<br />
span for 1.9 kg. A Thermal Duration airplane that can also make<br />
any aerobatic figures. And it climbs at 23m/s.<br />
October <strong>2012</strong> 11
I personally had such experiences with the Genoma. I made a<br />
full flight early in the morning at a sinking rate of 0.32 m/s and,<br />
in other days, the rate was established at 0.65 and 0.8m/s. So<br />
be very careful with data.<br />
After this small personnel remark, let us make a few<br />
calculations: Getting to 200m in 30 seconds means that the<br />
airplane has to climb at 6.7m/s (vertical rate). This means that a<br />
standard airplane can fly gently and reach this altitude without<br />
problem. No need to have a “speed” airplane.<br />
As an example, measures were made with the Genoma<br />
airplane (1.1 kw engine for 1.9 kg airplane). The climbing rate is<br />
established at 23 m/s and flight is of course vertical.<br />
Between a standard “Easy glider” and a monster such as the<br />
Genoma, there is quite some margin isn’t there?<br />
If we take the average mass of 1.9Kg, a V z<br />
of 1.5m/s<br />
(corresponding to a 15m/s speed flight) and a propulsion<br />
efficiency of 0.5, this means that the total electric energy<br />
involved is about 4900 Joules.<br />
Let us transform energy into power:<br />
Power = Energy / Time<br />
For F5J, the airplane can climb during 30 seconds.<br />
So this means that the electric power involved is 4900/30 =<br />
163W (electric).<br />
As we can see, the required power is far less than the ones we<br />
usually use for any F3x or F5x airplanes even if they are smaller.<br />
This new category really requires us to change our mind and<br />
think differently.<br />
Let us <strong>com</strong>plicate the problem a bit.<br />
Let us try to reach a defined point<br />
over the field<br />
As the engines are quiet powerful and light, why not to take<br />
such opportunity to reach a defined point “X” meters further<br />
upwind.<br />
We have then to take into account the wind speed in order to<br />
calculate the real distance the airplane has to cover in the air.<br />
Distance covered is :<br />
D covered<br />
= √ (D upwind<br />
+ V wind<br />
* 30) 2 + (200) 2<br />
Numerical application:<br />
V wind<br />
= 8m/s,<br />
D upwind<br />
= 300m.<br />
12 R/C Soaring Digest
This requires the airplane to cover a real distance of 580m. The<br />
speed required to get to altitude and reach the distance upwind<br />
is about 19 m/s.<br />
As you can see, this is quite fully feasible, but of course will<br />
require much power to <strong>com</strong>pensate for the additional gliding<br />
sinking rate.<br />
Power involved to reach this location<br />
Reaching such 19m/s speed will be quite difficult for a small<br />
airplane (2m) except if the power involved allows the airplane to<br />
climb vertically. In this case, the lift is no longer important. Only<br />
the drag is to be considered.<br />
For a 4m span airplane the sinking rate is still about 3 to 4 m/s.<br />
<strong>10</strong>00<br />
)<br />
(W<br />
900<br />
Propulsion electric power required to get at 200m altitude in 30s for a<br />
defined wind speed in order to reach a defined location upwind<br />
(W) r<br />
w 800<br />
o<br />
EP<br />
lectric 700<br />
c<br />
tric<br />
E<br />
le<br />
600<br />
500<br />
p<br />
o 400<br />
w<br />
er 300<br />
0 2 4 6 8 <strong>10</strong><br />
Wind speed(m/s)<br />
Propulsion electric power required to get to 200m altitude in<br />
30 sec. for a defined wind speed in order to reach a defined<br />
location upwind<br />
The involved power is then 23000 / 30 = 766W (electric). We<br />
can then make a graphic, as in the adjacent column, to better<br />
understand the issues (ex: depending wind speed). And of<br />
course, with a ballasted airplane, things are also different.<br />
We can then predict that a 4m airplane will adopt something<br />
like a 700 to 800 W electric motor. This is fully feasible with less<br />
than 150 g (geared motor + electronic <strong>com</strong>mand).<br />
Note: Caution! Those 750w are those at 23m/s speed. In<br />
this situation the propulsion set does not work in the same<br />
condition as if the airplane was at the speed of 15 m/s. The<br />
propeller is either well adapted at 15 m/s or at 23m/s but not at<br />
the two flight speeds. If the propulsion set is well adapted for<br />
the 15 m/s speed, at 23m/s, the propeller is running with very<br />
less load. The power delivered by the motor is then reduced...<br />
As a conclusion, except if the airplane is equipped with an<br />
in-flight controlled pitching angle propeller, it will be difficult<br />
for the airplane to reach a point 400m upwind with high wind<br />
conditions.<br />
Two prototypes of a controlled pitch angle propeller were tested<br />
with success in 2000 / 2002. The use of such a <strong>com</strong>plex device<br />
will potentially be adopted for F5J class airplanes. We will see if<br />
this is really a must.<br />
As you can see in the photos on the next page, a controlled<br />
pitch mechanism already exists. These were made more<br />
than <strong>10</strong> years ago and have been tested with good results.<br />
Acceleration is quite impressive for horizontal flight. In less than<br />
a second, the airplane is passing from the “low” speed to the<br />
new “high” speed that is the balance between the propeller<br />
work and the motor work.<br />
This then opens new strategies for F5J disciplines.<br />
October <strong>2012</strong> 13
Two prototypes of a<br />
controlled pitch angle<br />
propeller were tested with<br />
success in 2000 / 2002.<br />
A 2 m airplane with a 200 W brushless motor and a<br />
controlled pitch angle propeller. This was in 2002.<br />
Potential new strategies for F5J discipline:<br />
the “Z climbing” strategy<br />
First of all, F5J allow 30 seconds to get to altitude. That for sure<br />
has to be used. It is free flight time and it has to be used to:<br />
1. Get at the right altitude,<br />
2. Get at the right place,<br />
3. Find the lift.<br />
If the pilot had analyzed the field, it can have defined that the<br />
best thermal area is placed a bit upwind.<br />
14 R/C Soaring Digest
Depending upon when the flight occurs, he can also define the<br />
minimum altitude to be reached.<br />
He can then make the following flight:<br />
The “Z climbing” strategy.<br />
One of the new ways of getting altitude for F5J.<br />
Just after the launch, the airplane will try to reach the<br />
minimum altitude to catch a thermal. Early in the morning<br />
this is potentially over <strong>10</strong>0m, but during the afternoon, this is<br />
potentially at a lower altitude (50m or even less).<br />
Then, the pilot will continue to reach the best location he<br />
thinks where the thermals are without getting much altitude. Of<br />
course, this will be potentially done at higher speed.<br />
When this location is reached, and if no thermals are found, the<br />
pilot can take the remaining time left to get more altitude.<br />
Advantages and drawbacks<br />
of such a strategy<br />
Advantages are:<br />
• Minimum altitude which means scoring optimization<br />
• Success to reach a defined point<br />
• Feel the air during the flight in order to catch thermals, if any<br />
• Optimize climbing time using the full 30 seconds to reach<br />
higher altitude if no thermals are found<br />
• Enlarge the flying field up to 400m upwind or even more<br />
Drawbacks are:<br />
• Requires bigger propulsion set than that required to reach<br />
only 200m in 30 seconds.<br />
• High speed will require stronger wings and thus heavier<br />
airplanes. For such “Z climbing” strategy, airplanes are more<br />
expensive.<br />
• High transition speed will lead to reduced thermal detection<br />
ability. It is a matter of speed vector addition as shown on<br />
the next page, and also a question of time in the lift (ex: if a<br />
airplane takes three seconds to pass through a 24m large lift<br />
at 8m/s, it takes only one second at 24m/s). There is then a<br />
maximum speed limit that we could not overpass if we want<br />
to “feel” the lift during this sub-phase. This then also means<br />
less distance to be covered.<br />
• High climbing rates do not allow detecting lift easily. This is<br />
the same issue as for speed, but here things are vertical.<br />
If climbing at 7 m/s a 1 m/s lift can be easily detected, at<br />
20m/s, you cannot see things as well.<br />
October <strong>2012</strong> 15
Feeling a lift during flight is a matter of speed. At high<br />
speed a 1m/s lift will be very difficult to detect. This is not<br />
the case when gently climbing up to 7m/s speed.<br />
• Thermal detection requires an airplane that flies without any<br />
stick action. The airplane attitude change must be due to the<br />
air movement, not due to stick action. The pilot must then be<br />
very well trained when traveling at high speed.<br />
If the pilot wants to search for thermals during the climbing<br />
phase, it will not be possible to apply this “Z climbing” strategy<br />
and / or go very far away from the starting zone. A gentle 7m/s<br />
climbing rate at 8 to <strong>10</strong>m/s speed is sufficient. And then, a small<br />
motor is the solution.<br />
Genoma (foreground) and Genoma 2 shown together for<br />
<strong>com</strong>parison. The design, construction and flying of the<br />
Genoma 2 , specifically formulated for F5J, will be covered<br />
in detail in the next issue of RC Soaring Digest.<br />
16 R/C Soaring Digest
But if the pilot knows where thermals<br />
are, more powerful motors might be<br />
interesting to enlarge the flying field,<br />
especially upwind. And in this case,<br />
the “Z climbing” strategy or something<br />
close to it may be applied.<br />
I apply such type of climbing strategy in<br />
the following case:<br />
300 m from the starting point is located<br />
an open sand quarry. Thermals are<br />
there for sure! It’s only a matter of time<br />
to fly there and minimum altitude to be<br />
reached.<br />
The “Z climbing” strategy is for sure not<br />
the only possible strategy. It has been<br />
provided to show that the new F5J<br />
category is very different from any other<br />
Thermal Duration events.<br />
As you can see, it opens new<br />
possibilities and thus requires us to<br />
change our way of flying and inventing<br />
new <strong>com</strong>petition strategies.<br />
This of course leads us in developing<br />
new abilities.<br />
Have fun flying F5J!!!<br />
October <strong>2012</strong> 17
Les Ailerons<br />
Dany Brazeau MAAC #81249, executive@lesailerons.ca<br />
first<br />
ALES<br />
event<br />
18 R/C Soaring Digest
On August 18 <strong>2012</strong>, Les Ailerons club in Lochaber<br />
Québec Canada hosted its first ALES (Altitude Limited<br />
Electric Soaring) contest.<br />
We had 12 pilots mostly form Gatineau Quebec and<br />
Ottawa Ontario. All the pilots had ALES experience<br />
except Mike Gratton with his Radian Pro (and he<br />
performed well).<br />
We used the ALES Scoring Spreadsheet that we<br />
downloaded from <br />
and it worked flawlessly. We flew in three groups and<br />
<strong>com</strong>pleted seven rounds.<br />
Doing <strong>10</strong> minutes was really hard that day. The thermals<br />
were hard to find and the wind was strong. More than<br />
50% of the time, we couldn’t to any target points due,<br />
again, to the wind. Fortunately nobody crashed their<br />
models. I personally found the launching process hard.<br />
Here are a few highlights of the contest:<br />
- Gudmund Thompson did manage to do six landings<br />
out of seven.<br />
- Aurèle, John, Bernard, Dany, Gudmund, Jeff and Brian<br />
did manage to do at least a round with over nine minutes<br />
of gliding.<br />
- On round 7, group A, the best time was 3 minutes 45<br />
seconds. That’s a good indicator of how hard it was to<br />
stay in the air.<br />
- As for me, I messed up ALL my landings. I was too<br />
afraid of crashing my plane.<br />
We hope to redo this event next year and have even<br />
more pilots.<br />
Special thanks to Alain Rioux and his wife Lauraine for<br />
entering the contest results into the <strong>com</strong>puter, collecting<br />
the money and ordering pizza for the group and to Mike<br />
and Alex Gratton for all the nice pictures that they took.<br />
Les Ailerons ALES August 18, <strong>2012</strong><br />
Pos Name Points Model<br />
1 Dick Mills 6724 Super Ava Pro<br />
2 Gudmund Thompson 6635 Pulsar 3.2<br />
3 Aurele Alain 6547 Gracia<br />
4 Brian Buchanan 6436 Gracia<br />
5 Bernard Arseneault 6383 Champ 3.3<br />
6 Dany Brazeau 5761 Prelude<br />
7 John Blenkinsop 5735 Grafas<br />
8 Jeff Dessert 5716 Pulsar 3.2<br />
9 Martin Jetté 5453 Avia<br />
<strong>10</strong> Michel Graton 5232 Radian Pro<br />
11 Paul Penna 4916 Avia<br />
12 Jean-Claude Terrettaz 4287 Magic Asw28<br />
Thanks to our sponsors (all the pilots had a gift):<br />
Soaring Circuits<br />
Esprit Model<br />
Icare / Icarus<br />
Air Age Media<br />
Title page: The 12 pilots ready to glide.<br />
October <strong>2012</strong> 19
20 R/C Soaring Digest
October <strong>2012</strong> 21
22 R/C Soaring Digest
October <strong>2012</strong> 23
24 R/C Soaring Digest
Photo Album<br />
F3J World Championships<br />
Johannesburg, South Africa<br />
August 5-12 <strong>2012</strong><br />
Piet Rheeders, piet.rheeders@gmail.<strong>com</strong><br />
October <strong>2012</strong> 25
26 R/C Soaring Digest
October <strong>2012</strong> 27
28 R/C Soaring Digest
October <strong>2012</strong> 29
30 R/C Soaring Digest
October <strong>2012</strong> 31
32 R/C Soaring Digest
October <strong>2012</strong> 33
34 R/C Soaring Digest
October <strong>2012</strong> 35
36 R/C Soaring Digest
October <strong>2012</strong> 37
38 R/C Soaring Digest
October <strong>2012</strong> 39
40 R/C Soaring Digest
October <strong>2012</strong> 41
42 R/C Soaring Digest
October <strong>2012</strong> 43
44 R/C Soaring Digest
October <strong>2012</strong> 45
46 R/C Soaring Digest
The plane pictured on the front cover is<br />
my 3.8 meter Xplorer 2. This series was<br />
a unique run made by Nan for national<br />
team pilots. They have <strong>com</strong>e in around<br />
56 oz which is really quite amazing for<br />
a super lite aircraft. The majority of the<br />
weight savings on this SL version is in<br />
the fuse. Nan leveraged extremely light<br />
elevators and rudder surfaces as well as<br />
a <strong>com</strong>plete spread tow carbon layup.<br />
This plane did indeed fly at the World<br />
Cup in South Africa and even though it<br />
is not meant for wind speeds of over 3<br />
meters per second I had to use it at 8<br />
meters / second and it was flawless.<br />
The main difference between the<br />
Xplorer 1 and Xplorer 2 is the new<br />
airfoil which delivers much more energy<br />
retention and wind penetration. This<br />
new airfoil really covers ground easily.<br />
There was no platform change between<br />
the designs so the plane basically flies<br />
like the old one but faster and with a<br />
little more of a performance edge. The<br />
difference is indeed noticeable. Before<br />
getting my hands on this model I had<br />
hand launched and specked out with<br />
an older X1 a grand total of two times in<br />
seven years of flying. After receiving this<br />
model in July of this year I think I have<br />
done it six times. It’s like a giant DLG.<br />
More about<br />
the front cover...<br />
David Webb, webbsolution@gmail.<strong>com</strong><br />
A shot of my red 3.5 X2 from along<br />
the wing with the BC sod farm and<br />
mountains in the reflection.<br />
October <strong>2012</strong> 47
My Pike Perfect Electro soaring with the rocky background of the Sciliar, at Alpe di Siusi, Italy.<br />
Francesco Meschia, francesco.meschia@gmail.<strong>com</strong><br />
Nikon D70s, ISO 200, 1/800 sec., f7.1, 200mm<br />
48 R/C Soaring Digest
Build project<br />
Lockheed Super Constellation <strong>10</strong>49G<br />
Kevin Farr, kevin@fvdv.co.za<br />
The August issue of <strong>RCSD</strong> presented coverage of the<br />
Black Eagle Trophy PSS Festival <strong>2012</strong>, hosted by Two<br />
Oceans Slope Soarers, Cape Town, South Africa.<br />
There were several large highly detailed models flown<br />
during the event, including Steve Meusel’s Grumman<br />
Bearcat, Hans van Kamp’s Howker Hunter, and Malcolm<br />
Riley’s DC-3/Dakota. A fourth spectacular model was<br />
Kevin Farr’s Lockheed Constellation, Super G version,<br />
<strong>com</strong>pleted just in time for the event.<br />
Kevin documented his Connie build in detail on the TOSS<br />
blog ; the high<br />
points of the construction process are covered here.<br />
October <strong>2012</strong> 49
Fuselage<br />
I have taken on construction of the<br />
Connie build on a weekly basis over<br />
the last year, hopefully ending up at the<br />
same date and time as the Black Eagle<br />
Festival.<br />
Lets start at the beginning. A traditional<br />
build this is — balsa, foam core and<br />
Oracover.... Simple, light, and a pleasure<br />
to work with.<br />
In the end I am aiming at 4 Kilos or less<br />
on the 2.3 meter wingspan with the<br />
fuselage being balsa planked on an open<br />
structure, the wing being of foam core<br />
and balsa covered.<br />
Here we go!<br />
The fuselage was constructed using<br />
a built-up jig, centre lined. This was<br />
originally going to be a 2-part fuselage -<br />
made building it easier, anyway.<br />
Above left: Front end jigged up and lined<br />
up to ensure all supports are square.<br />
Above centre: Tail end of fuselage takes<br />
shape in its own jig.<br />
Above right: Stringers are added to the<br />
bulkheads. Here the aft end starts to get<br />
the stringers applied while still in the jig<br />
to ensure absolute plumb line-up. CA<br />
works a treat here, just make sure your<br />
line up properly before applying.<br />
50 R/C Soaring Digest
Fuselage<br />
Above left: Adding the little bit where the bus drivers<br />
sit.<br />
Above centre: Interior shot of the aft fuselage.<br />
Right: And walla! One fuselage out the respective<br />
jigs. Lots of wood bits, CA holding it all together.<br />
Looks reasonably straight, four bolts holding the<br />
respective halves more or less in the same place at<br />
the same time.<br />
Elegant Tuna!<br />
October <strong>2012</strong> 51
Fuselage<br />
Most of the building of the fuselage<br />
<strong>com</strong>plete and so we get to add the<br />
planking to the skeleton.<br />
Planks are 20mm wide out of the <strong>10</strong>0mm<br />
standard planks, by 2,5 mm deep as we<br />
will sand down to 1.5 mm after liberal<br />
doses of lightfill are added. Lightfill pretty<br />
much weighs the same as balsa so no<br />
need to be scared of a liberal application.<br />
Right: Planking the right hand side with<br />
20mm x 2,5 mm planks and using a<br />
balsa stripper to keep the planks uniform<br />
in size.<br />
Above right: And then the left side is planked, supplemented<br />
with lightfill, and sanded down with 80 grit paper to ensure<br />
that the lightfill and balsa even out at the same time. Final<br />
finish will be with 150 grit.<br />
Left: Checking out the front connected to the tail after<br />
planking of the tail section (covered on opposite page).<br />
52 R/C Soaring Digest
Fuselage<br />
Above: Planking the latter half of the beast, starting<br />
at centre top, then centre side as planking dictated<br />
till two halves meet, to stop any “pulling” in either<br />
direction.<br />
Right: Added the nose made of <strong>10</strong>mm balsa<br />
sandwiched cross grain for strength and sanded to<br />
shape. The cockpit area is filled in and the planking<br />
sanded to a smooth finish. Time to join the two<br />
halves!<br />
October <strong>2012</strong> 53
Fuselage<br />
So now to the joining of the two halves, and the addition of the<br />
wing saddle and the wing fairings.<br />
Above left: Wing saddle area covered with 1mm ply to take the<br />
shape as created by the formers. Note the bolts holding the<br />
two fuselage halves together<br />
Above: Rear saddle area added and holes drilled for the wing<br />
bolts to attach to the pre-0attached claw grip bolts in the<br />
fuselage. Two front ones still to be done.<br />
Left: The fillet for the wing fairing being formed onto the 1mm<br />
ply that was sticking out from the wing saddle in the last photo.<br />
Solid balsa at the front, planking in the middle...<br />
54 R/C Soaring Digest
Fuselage<br />
Above: ...and these solid balsa back fairings that lead to the<br />
wing trailing edge. That took some serious work and reference<br />
to the real thing to work out. Literally hours on each one.<br />
Above right: More and more like the real thing, fillets sanded in<br />
and <strong>com</strong>plete.<br />
Right: Right side fillet in place, contoured, spot filled and<br />
sanded.<br />
October <strong>2012</strong> 55
Tail<br />
The horizontal surface is foam core and the vertical stabs are<br />
solid 6mm balsa shaped to the tri-fin configuration.<br />
Above left: Two outside vertical stabs and the center stab, with<br />
cross balsa at the top and base to stop warping and a thin CA<br />
applied 1.5mm ply on the leading edges, just to stop those fine<br />
twig induced nicks.<br />
Above: After skinning the surfaces with 2.5mm balsa, the stab is<br />
replaced in the foam saddle and two carbon rods were applied<br />
across the joint.<br />
Left: Adding balsa tips with 1mm ply sandwiched between two<br />
6mm balsa sheets Meranti leading edge in place and sanded<br />
down, first using a hand plane to hone the edge, then 60 grit<br />
sandpaper and then much lighter paper to get edge to take<br />
nicely. Basic surface <strong>com</strong>plete and awaiting the vertical stabs.<br />
56 R/C Soaring Digest
Tail<br />
The vertical stabs were added to the tail with carbon dowels through the verticals<br />
and into the horizontal, then all wood glued together.<br />
The real trick to the tail section would be to somehow get the servo set into the<br />
base of the tail section, and so negate the need for a long fuselage push rod. This<br />
would mean creating an internal control horn system that cannot be seen as well as<br />
using knuckle joints for the Robart hinges and so making all mechanics “disappear”<br />
as it were. In the end this little piece of trickery took far longer to resolve than<br />
expected, but the final result is pretty convincing.<br />
Left: A metal gear slimline servo, pushrod and elevator linkages were placed at the<br />
base of the stab to fit...<br />
Below left: ...inside this wee little hole to the right hand side of the main fuselage<br />
keel.<br />
Above: And so the tri-tail is <strong>com</strong>pleted.<br />
October <strong>2012</strong> 57
Wing<br />
Time to start the wing. At 2.3 meters this was going to be a<br />
large job and thanks to Jeff and Steve, eventually the cores<br />
were cut very close to the original Constellation profiles. I kept<br />
the outer core saddles for <strong>com</strong>pression of the cores to the<br />
balsa later on.<br />
Above left: <strong>10</strong>0mm x 2.5mmbalsa sheets being glued together -<br />
3 sheets at a time<br />
Left: Pile a bag load of books on top and leave to cure overnight<br />
and then sand flat with 60 grit paper.<br />
Above: Nice tight vacuum doing the job and pulled the balsa in<br />
really well. This method was used on the center core, but I had<br />
done the outer panels the traditional way of leaving them sandwiched<br />
under a ton of books in-between the saddles that they<br />
came from. Still think the vac-bag came out just that bit better.<br />
58 R/C Soaring Digest
Wing<br />
Above: Center wing panel being joined with servo<br />
lead holes in place.<br />
Above right: Right outer wing panel after control<br />
surfaces were cut free and servo wells cut out. The<br />
wing profile has a rather large 16 percent ’foil so<br />
getting the balsa to get to the leading edge was going<br />
to be fun, but the meranti leading edge negated some<br />
of the leading edge issues.<br />
Right: Joining the outer panels to the center core with<br />
the dihedral in place. Due to the dihedral in the wing,<br />
the center panel would have to be separate from the<br />
outer panels with a dihedral cut on the joint and then<br />
to be “bandaged” with a light ’glass coat and 12 hour<br />
epoxy.<br />
October <strong>2012</strong> 59
Wing control surfaces<br />
The control surfaces were cut free and the servo bays<br />
cut out, all previously drawn up on tracing paper from<br />
the original foam cores, then placed over the balsa to<br />
ascertain position of servo lead channels and servos<br />
bays.<br />
<strong>10</strong>mm was cut from the trailing edge and then 0.5mm<br />
ply was placed at the trailing edge to give a good clean<br />
strong trailing edge where balsa would normally fail.<br />
60 R/C Soaring Digest
Wing control surfaces<br />
Opposite page above left: Back plate of balsa add to<br />
leading edge and outside edges of the flaps and ailerons<br />
so that no foam is left open. This aids the Orocover later<br />
on.<br />
Opposite page above right: Flap is base hinged with CA<br />
hinges. Hard points were added from light balsa before<br />
adding the back plate of balsa to the trailing and leading<br />
edges respectively. Hinges were then added at 45<br />
degree angles to ensure that they were not just hanging<br />
onto the skins.<br />
Opposite page, lower right: Ailerons get a center<br />
hinge hole for the robart hinges as well as a light balsa<br />
“knuckle” added to the leading edge to slot into 0.5mm<br />
ply casing on wing trailing edge.<br />
Right: Shows aileron deflected downward.<br />
Right below: Right wing flap in neutral position. Notice<br />
the meranti trailing edge which creates a tougher and<br />
sharper trailing edge.<br />
With the wing and all control surfaces finished,<br />
everything is ready for covering and spray paint work.<br />
October <strong>2012</strong> 61
Nacelles<br />
This part was fun - and not for the faint hearted... four times every<br />
thing and boy can that be tedious, so be careful when choosing a<br />
PSS subject with time restraints, as things like nacelles can chew<br />
up some serious time based on the amount of repeats required.<br />
Above left: The only parts that were purchased as molded on<br />
the entire plane were the nacelles and the air intakes. Expanding<br />
foam adds strength while keeping it light.<br />
Above: One week later and the magic mushrooms have risen and<br />
dried, ready to be cut and shaped.<br />
Left: Backing up the foam to ensure a nice base for the extender/<br />
joiner made with former and 2.5 mm balsa curled around the<br />
shape.<br />
62 R/C Soaring Digest
Nacelles<br />
Above left: And so we have the wing edge <strong>10</strong> degree ready for<br />
stage 2.<br />
Above: Placing a piece of sandpaper on the wing and vertically<br />
sanding a 3mm sheet to get the wing shape,<br />
then using a jigsaw to cut the shape and finally sand down to<br />
get the nacelle shape as accurate as possible for flaring into the<br />
wing via the leading edge.<br />
Left: ...and Bob’s your auntie, it all fit - kinda. Do the same for<br />
the base, solid balsa as these are likely to take a hammering<br />
when landing in the Fynbos.<br />
October <strong>2012</strong> 63
Nacelles<br />
Left: Completed nacelle fit to wing. Matches <strong>10</strong> degree leading<br />
edge sweep and wing lower surface contour.<br />
Above: There were four stages to the construction of the lower<br />
air intakes at the base of the nacelle. These were made up of<br />
three pieces of mold and took some time to work out. Balsa<br />
joined with CA reinforced the inside and then Combifill was<br />
used to cover the joints. Sprayed with base coat, sanded again<br />
until flush and then a final coat of base coat was applied. Dowel<br />
pegs were added to assist the grip in those bush landings.<br />
64 R/C Soaring Digest
Nacelles<br />
Above left: Add the air intakes to the<br />
nacelles and <strong>com</strong>bifill the joints. Good<br />
friend <strong>com</strong>bifiller, but can be heavy, so<br />
go gently with it.<br />
Above center: And do the same for the<br />
top air intakes.<br />
Above right: Engine nacelles <strong>com</strong>plete.<br />
The lower intakes installed, contoured,<br />
and with base coat applied.<br />
And after much sanding, joint filling and<br />
general make good we virtually have the<br />
<strong>com</strong>plete engine nacelle make up x 4.<br />
Phew!<br />
October <strong>2012</strong> 65
Covering and Detailing<br />
Above left: First the tail was covered in white. I find that<br />
Orocover, etc., work best when you apply say 300° heat to get<br />
the basic bind and then shoot up to 400° heat to get all the<br />
wrinkles out, and believe me, with enough patience you can.<br />
Best to apply, get some wrinkles out, go have a cup of tea and<br />
let the shrink cool down, and then have another go, and you will<br />
be pleasantly surprised at how the wrinkles clear out of Dodge<br />
Something to do with the hot/cold thing that allows the shrink to<br />
stretch better and better every time you do the hot/cold thing.<br />
Left: Another view of the covered tail.<br />
Above: The covered tail is trial fitted to the fuselage. Lookin’<br />
good!<br />
Finally, I get to the decal stage of the project, and to be honest<br />
the part I enjoy the most. Would love to paint pretty planes all<br />
66 R/C Soaring Digest
Covering and Detailing<br />
day long... if somebody else would just build the bleeding<br />
things.<br />
First set of decals I did at work were off our stock standard<br />
high end printer. Ran home, decalled an entire side of the<br />
fuselage and then went to put it in the shed... and that’s<br />
when a rain drop hit it and the decals smeared in an “oh so<br />
not pleasant” sort of a way. So back inside to take them all<br />
off and go to plan B...Find a professional printer that has<br />
solvent based digital printer and get them done there.<br />
In the end a nice thin film, hard as nails print and nice and<br />
easy to apply. So watch that the prints you get done are in<br />
fact solvent based on the clear film or you could have a bit<br />
ob a bleed on the go.<br />
Above and right: The <strong>com</strong>pleted tail with decals applied.<br />
October <strong>2012</strong> 67
Covering and Detailing<br />
Covering the fuselage amounted to a 12 hour stretch — from<br />
5:00 in the morning till 5:00 in the evening. Basically barrel<br />
wrapped in five separate pieces from tail to just behind the<br />
cockpit.<br />
The trick is to try and get the joins even, which I failed miserably<br />
at doing as the fuselage just never has a consistent shape to it.<br />
Ever. So in the end I settled for the best I could get. The nose<br />
cone was fun - cockpit done as a separate piece, and tail area<br />
of fuselage done as a smaller separate piece.<br />
Adding the little fiddly bits based on images of the actual<br />
aircraft.<br />
Above left: From the right front, fuselage covered with Oracover<br />
and tail fitted. Very sleek.<br />
Above right: Front view of the covered fuselage from the left<br />
side. The tail is more clear in this image. A beautiful aerodynamically<br />
clean shape.<br />
Opposite page left: Sprayed the nose and added windows with<br />
black vinyl. Underpart of the fuselage sprayed at this point as<br />
well. Seems best to spray Tamiya primer as a key coat and then<br />
go with whatever colour works best.<br />
68 R/C Soaring Digest
Covering and Detailing<br />
Above: I found the grey of the Oracover to be too light and<br />
so went with a spray - normal old fashioned hardware shop<br />
spray paint and the two seem to work well together.<br />
Also found that normal insulation tape - cut to a thin strip -<br />
works very well for getting around corners and shapes when<br />
masking off an area. Not too sticky - not too loose.<br />
I like to work with contrasting tape to paint colour so I can<br />
see the spray area better then a thicker strip for bind and<br />
finally whatever cover you want too use for the rest of the<br />
area. Once the paint is dry the insulation tape <strong>com</strong>es off like<br />
a dream.<br />
October <strong>2012</strong> 69
Covering and Detailing<br />
The spinners were driving me nuts as there are a specific shape<br />
so I eventually found some that were of the correct proportion.<br />
Slightly longer than normal, I had to backfill all the prop<br />
openings and spray to aluminum finish... x4.<br />
Then I had to create the sleeve that the spinners <strong>com</strong>e out of,<br />
that covers the motors. Luckily found a molded bit of plastic<br />
from servo trays and backfilled with balsa. Then borrow Andy’s<br />
drill press, fit with a toothed circle cutter, and try like hell to<br />
center the hole in said plastic bits x 4...<br />
A few whiskeys later and this was a cinch.<br />
Boy did this take time, but in the end came out all right me<br />
thinks.<br />
Left: In the drill press.<br />
Left below: Sleeve and spinner.<br />
Below: Completed nacelle with upper and lower air scoops,<br />
sleeve and spinner. Three more to go.<br />
70 R/C Soaring Digest
Covering and Detailing<br />
Above: Tip tank painted and with decals applied. These were carved out<br />
of foam, and then glassed. I was very particular about their shape. Most<br />
of the models I have seen make them round, and the plans called for<br />
that, but the more I studied the real plane the more the tip tanks took on<br />
a differing slightly goldfish sort of look and feel. So after about a week<br />
of working the glass out the final product looks pretty close to the real<br />
thing.<br />
Right: Completed wing. Wiring, servos and linkages installed. Completed<br />
nacelles attached, faired, and painted. TWA decals applied. Tip tanks<br />
need to be added as in photo above.<br />
October <strong>2012</strong> 71
Covering and Detailing<br />
This page: Various views of the <strong>com</strong>pleted fuselage.<br />
Covered, painted, decals applied. Ready to go fly!<br />
Opposite page: Kevin and his recently <strong>com</strong>pleted<br />
Lockheed Super Constellation <strong>10</strong>49G at the <strong>2012</strong><br />
Black Eagle Trophy PSS Festival.<br />
Just out of interest, the Connie’s wing on the actual<br />
airliner was based on the P-38 Lightning wing as<br />
they both came from the same Lockheed stable and<br />
the P-38 showed extraordinary gliding capabilities<br />
during wartime. So there seems to have been a<br />
natural evolution with the wing platform carried to the<br />
airliner business.<br />
72 R/C Soaring Digest
Completed!<br />
October <strong>2012</strong> 73
Flying<br />
Above: Launching for the maiden flight. The PSS festival was a blast. After hiding<br />
under trees for an hour the rain finally let up and we were able to send out the big<br />
birds. Steve first with his Bearcat, then myself with the Connie in at 5 kilos and then<br />
Mally’s large and very impressive Dakota.<br />
Opposite: Kevin’s Lockheed Super Constellation <strong>10</strong>49G in flight at the <strong>2012</strong> Black Eagle<br />
Trophy PSS Festival. Boy what fun, nerves all a jangle, adrenaline through the roof.<br />
74 R/C Soaring Digest
October <strong>2012</strong> 75
Morphing<br />
leading<br />
edge<br />
reduces<br />
drag<br />
Some years ago Joe Wurts talked<br />
about leading edge droop to increase<br />
lift, particularly during launch. How the<br />
required mechanical control system<br />
would work, and balancing increasing<br />
weight and <strong>com</strong>plexity against theoretical<br />
performance gains were two major<br />
considerations, and so far as we know<br />
were never resolved.<br />
So when we saw a recent item in<br />
Gizmag <br />
outlining a morphing leading edge we<br />
were intrigued, to say the least, and<br />
immediately thought of sharing the<br />
concept with <strong>RCSD</strong> readers. — B 2<br />
Condensed from Gizmag<br />
Passengers looking out the window of a<br />
passenger plane will likely have noticed<br />
slats on the leading edge of the wing,<br />
along with the flaps on the trailing edge<br />
of the wing, being extended during<br />
takeoff and landing. These leading<br />
edge slats provide the lift necessary at<br />
low speeds, with the gap between the<br />
wing and the slats directing air from<br />
the underside of the wing to the top.<br />
Unfortunately, this gap also generates a<br />
lot of noise. A team of researchers has<br />
now developed a morphing leading edge<br />
that eliminates the gap and reduces<br />
noise and drag during landing.<br />
The “smart droop nose” developed by<br />
researchers at the German Aerospace<br />
Center (Deutsches Zentrum für Luft- und<br />
Raumfahrt; DLR) working with partners<br />
Airbus, EADS Innovation Works and<br />
Cassidian Air Systems, literally morphs<br />
into a different shape during takeoff and<br />
landing so that no separate slats – and<br />
no gap – is necessary.<br />
In developing the new leading edge,<br />
the researchers faced a number of<br />
challenges. “On the one hand, the<br />
structure needs to be very elastic,<br />
to enable it to morph to the required<br />
shapes, but on the other it has to be very<br />
rigid,” said DLR Department Head Hans-<br />
Peter Monner. Ultimately, the leading<br />
edge must bear around one third of the<br />
weight of the aircraft during landing.”<br />
The material also had to produce wing<br />
surfaces that are as flat as possible to<br />
achieve laminar airflow. Concentrating<br />
on the glass- and carbon-fiber reinforced<br />
<strong>com</strong>posites typically used by the aviation<br />
industry, they found that glass-fiber<br />
reinforced material best fit the bill.<br />
76 R/C Soaring Digest
The droop nose design concept also<br />
sees the skin on the front edge of the<br />
wing curved, rather than stretched<br />
to minimize the stress placed on the<br />
material. Individual layers are then placed<br />
on top of each other so that the skin<br />
creates a structure with a customized<br />
rigidity distribution. The leading edge<br />
then morphs into the desired shape<br />
using actuators and support elements<br />
integrated along the wingspan.<br />
Condensed from the DLR web site<br />
<br />
Researchers at the German Aerospace<br />
Center (Deutsches Zentrum für Luftund<br />
Raumfahrt; DLR), together with<br />
partners Airbus, EADS Innovation Works<br />
and Cassidian Air Systems, have been<br />
carrying out research to reduce the<br />
aerodynamic drag of aircraft and have<br />
developed an alternative to the traditional<br />
leading-edge slat. A morphing leading<br />
edge is expected to replace slats to<br />
create an innovative high-lift system. This<br />
construction significantly reduces drag<br />
and noise during landing.<br />
Tests were carried out between 27<br />
August and 7 September in one of<br />
Europe’s largest wind tunnels at the<br />
Russian Central Aerohydrodynamics<br />
Institute’s (TsAGI) Zhukovsky research<br />
facility south of Moscow. In the wind<br />
tunnel, the system’s operation and<br />
performance were tested under realistic<br />
conditions.<br />
Normally, the flaps on the trailing edges<br />
of the wings and the slats located on the<br />
leading edges are extended during takeoff<br />
and landing to provide the necessary<br />
lift at low speeds. “The smart droop<br />
nose morphs itself during take-off and<br />
landing in such a way that no separate<br />
slats are necessary. The leading edge<br />
can be lowered by up to 20 degrees with<br />
virtually no loss of lift,” explains DLR<br />
project leader Markus Kintscher from the<br />
DLR Institute of Composite Structures<br />
and Adaptive Systems in Braunschweig.<br />
In the concept of the droop nose, the<br />
skin on the front edge of the wing is<br />
just curved, not stretched. This stresses<br />
the material as little as possible. The<br />
scientists position individual layers<br />
one on top of the other, in such a way<br />
that the skin creates a structure that<br />
has a customised rigidity distribution.<br />
The leading edge morphs into the<br />
desired shape via integrated actuators<br />
and support elements along the<br />
wingspan, thus achieving very high<br />
stability. Soon, the new wing leading<br />
edge will be further developed to meet<br />
industrial requirements such as lightning<br />
protection, de-icing and the ability to<br />
withstand bird strikes.<br />
October <strong>2012</strong> 77
3WAMS+ up (and down) Timberwolf Mountain<br />
Philip Randolph, amphioxus.philip@gmail.<strong>com</strong><br />
with some photos by Chris Erikson<br />
78 R/C Soaring Digest
Herein: Transmission fluid on road. What guys talk about. Ms.<br />
Bawdy Freedom Flutter. The Swedish String Theory Bikini<br />
Team. Vehicular resurrections. That toy airplane flying stuff. Lost<br />
pTorodactyl. Three trips down talus. Dust boy. Philip tied to the<br />
roof of Chris’s Datsun with ropes.<br />
Well, four WAMS, as intrepid slope explorer Chris Erikson is<br />
bringing his intrepid six-year-old, Jake, who will do pretty well<br />
flying Chris’s EZ Glider. Steve Allmaras and I are planning to<br />
meet them Friday evening at a campsite below Bethel Ridge.<br />
That’s southeast of Mount Rainier, in the Cascade Range of<br />
Washington State (upper left corner, USA, North America,<br />
third rock out). Steve is driving. 2000 S-<strong>10</strong> 4WD, automatic<br />
transmission, soon to be without fluid.<br />
Weather: Clear or mostly clear all weekend.<br />
Steve and I get up to Bethel about 2 PM. From the road up<br />
to the microwave tower, you can drive east along the basalt<br />
cliffs of a giant bowl, for miles, till you get down to Highway 12.<br />
Except for the rutty place left by the insufferable mudders. We<br />
get to that after a mile or two. The ruts are huge. Insufferable<br />
mudders with big tires. Mudders are them what likes to tear up<br />
wet dirt roads with big 4WD rigs and chews tobacco and drinks<br />
Budweiser and has no ancestors. We turn around. The road<br />
is so bumpy my left foot goes to sleep a little more than usual<br />
since that hit and run driver. Won’t last. Back stuff.<br />
We get back to where the road hits the top of the cliff. Steve<br />
gets out a Boomerang (48" EPP chevron). The wind is mostly<br />
blowing straight in, and this is one of the few spots where we<br />
could walk downslope for a recovery. We eat lunch. The wind<br />
dies. Thermal variability. The wind reverses. Phooey. (Phooey<br />
is a mild exclamative interjection indicating annoyance and<br />
disappointment.) Trouble is just starting.<br />
We drive down from the ridge on this microwave spur road,<br />
and stop at its intersection with Bethel Ridge Road, which<br />
actually goes around Bethel Ridge (so why is it so-called?).<br />
We’re headed for a campsite on another spur road. We never<br />
get there. Steve pushes on the accelerator. No go. He shifts out<br />
of 4WD. The engine revs. The truck stays. He gets out. “There’s<br />
a huge puddle of fluid in the road. It’s red. It appears to be<br />
transmission fluid.” Steve understands these things because of<br />
his Ph.D. in aerodynamics.<br />
So we push the truck across the gravel main road, park by a<br />
small meadow surrounded by alpine fir. It leaves another gallon<br />
of fluid. Bother. (Means about the same as Phooey.)<br />
Title page: Mt. Adams, Goat Rocks, Steve’s Herring<br />
Tranny fluid blooper threatens the trip. Jake and flying device.<br />
October <strong>2012</strong> 79
Steve actually has cell reception. He<br />
lets Chris know where we are. A bunch<br />
of calls. A tow truck will arrive in the<br />
morning. AAA. Even the Chevy dealer’s<br />
service department is closed for the<br />
Labor Day weekend. The truck will be<br />
stranded in Yakima till at least Tuesday.<br />
That means Steve’s wife will have to drive<br />
across Saturday to pick us up. Bother.<br />
Chris and Jake arrive about 9 PM. Chris<br />
and Steve agree that the leak is from a<br />
hose atop the bell housing. We camp in<br />
the meadow. Jake is rapidly asleep in the<br />
back of Chris’s Datsun 5<strong>10</strong> wagon, aka<br />
‘deathmobile.’<br />
What guys talk about: First and foremost<br />
we dis the other CEWAMS, since they<br />
are out of earshot. “They are just a<br />
bunch of pantiwaists who are only willing<br />
to show up when the weather is bad.”<br />
Similar truths.<br />
Now, mostly we fly EPP chevrons<br />
and deltas. Chris says, “A standard<br />
planform will generally beat a tailless in<br />
performance. It fights pitching moment<br />
with a horizontal stab that is small<br />
<strong>com</strong>pared to all that elevon area.” Then<br />
we’re talking about YB-35s and YB-49s,<br />
those big flying wings developed by Jack<br />
Northrop.<br />
Philip says, “Steve, are there any<br />
situations in which a tailless will<br />
outperform a standard planform?”<br />
Philip ready<br />
to launch his<br />
Javelin, Jake and<br />
Chris, Lazarus<br />
(resurrected<br />
S-<strong>10</strong>) Saturday<br />
afternoon.<br />
Javelin and Jake<br />
late Saturday<br />
afternoon.<br />
80 R/C Soaring Digest
Remember those<br />
caps with the<br />
arrow through<br />
the guy’s head?<br />
Or: Philip flies his<br />
Javelin though<br />
Steve’s head,<br />
after which Steve<br />
temporarily lost his<br />
ability to discuss<br />
aerodynamics.<br />
Photo by Chris<br />
Erikson<br />
Chris’ Datsun<br />
at the Saturday<br />
evening<br />
Timberwolf<br />
campsite.<br />
Steve says, “Jack Northrop and his<br />
designer, Bill Sears, developed an<br />
equation for the range of a fuselage/<br />
wing configuration. The equation was a<br />
cubic and had two extrema: a flying wing<br />
config and a more conventional looking<br />
planform. They assumed the flying wing<br />
gave max range and the conventional<br />
gave min range. And then they were<br />
off designing their flying wing configs,<br />
culminating in the XB-35 and XB-49.<br />
A university professor that was not<br />
affiliated with Northrop Corp. revisited<br />
the equation and determined that the<br />
flying wing actually gave min range<br />
and the conventional gave max range.<br />
Northrop and Sears never admitted their<br />
mistake (if they in fact made one).”<br />
Steve continues, “There probably are<br />
narrow situations where tailless excel.<br />
But high-aspect-ratio flying wings have a<br />
problem with ‘Bawdy Freedom Flutter.’”<br />
(Later I looked her up on the web, to try<br />
to understand what Steve was talking<br />
about. She’s a dancer at a bar near the<br />
Lockheed Skunk Works.) Steve says<br />
something about, ‘Zagi flutter.’ (Zagi<br />
sounds like she is from Egypt?) Steve<br />
says, “Our little chevrons do that at high<br />
speeds. The center and tips develop a<br />
counter-phugoid vibration that escalates<br />
unpredictably.” (So was Steve trying to<br />
make analogies between our foamy flying<br />
wings and erotic dancers? A Youtube<br />
vid shows Miss Bawdy Freedom Flutter<br />
doing an escalating counter-phugoid<br />
October <strong>2012</strong> 81
82 R/C Soaring Digest
Jake and Super Scooter in the Sunday sun. Photo by Chris Erikson<br />
Jake “rescues” Philip and Steve. Photo by Chris Erikson<br />
flutter, as well as gyrations, in patriotic<br />
bits of red, white, and blue.) Steve says,<br />
“It can tear a flying wing apart. It’s also<br />
very difficult to model. The cure is to<br />
stiffen the wings, but that adds so much<br />
weight that flying wings lose out to<br />
conventional planforms.” (Looking back,<br />
it appears Steve might just have been<br />
talking aerodynamics, in which case he<br />
probably meant, ‘Body Freedom Flutter,’<br />
referring to the lack of damping effect on<br />
wing flutter by a lack of fuselage mass. I<br />
eventually figure these things out.)<br />
Chris rattles off a list of delta-wing<br />
fighters and bombers, plus the Concord.<br />
Steve explains that the lower aspect-ratio<br />
wings are stiffer, and that the aircraft<br />
bodies help damp flutter.<br />
Philip says, “Our chevrons sure are<br />
convenient. Pull the plug and throw.”<br />
Chris: “And they’re so much harder to<br />
break.”<br />
Steve: “Yeah. I thought I’d have to build<br />
a new fuselage for my Super Scooter.<br />
It was shredded. I got it back together<br />
with Gorilla Glue.” Typical of Steve, it now<br />
looks immaculate.<br />
Philip: “Steve prevented me from napping<br />
on the way over by driving the scenic<br />
route by Mount Rainier. I’m crawling into<br />
my tent.”<br />
Javelin and Mt. Rainier. Photo by Chris Erikson<br />
October <strong>2012</strong> 83
Saturday morning:<br />
From my tent, I hear Steve say, “There is<br />
frost on my windshield. I was cold last<br />
night.” Me too. The forecast was for 49°<br />
at Naches. With another 4000' altitude,<br />
I had figured 40°. Not. I should know to<br />
always bring an extra bag to 5000'.<br />
Breakfasts. Coffee. Me, decaff. Jake<br />
wants Chris to play tag. Chris: “Not now.<br />
I’m eating my hot dog.” Jake: “Daddy, I<br />
think you don’t need a hot dog.”<br />
Jake has a lidded cardboard box. Chris<br />
explains that it contains Jake’s late pet,<br />
Cindi, who was a cat.<br />
Big dirt bikes, adorned with camp gear<br />
and riders, start drifting by. The smallest<br />
is a 650cc Triumph. The biggest is a<br />
1200cc BMW (yep, dirt-bike layout!).<br />
They’re riding gravel roads from Southern<br />
Washington’s Columbia River Gorge to<br />
Canada. Must have been a write-up in<br />
some biker rag. Five groups, totaling<br />
sixteen riders, pass.<br />
The tilt-bed tow truck arrives. Jim.<br />
Personable guy about to retire. He has<br />
Jake operate the hydraulics of the tilt<br />
bed. Great. But he charges for a round<br />
trip, when AAA is supposedly one-way.<br />
The service bay doors of Bob Hall’s<br />
Yakima Chevrolet are open. They say,<br />
“We’ve only got a couple lube techs,<br />
but we’ll put it up on the rack and see<br />
what we can see.” A young guy explains<br />
that whoever replaced this transmission<br />
didn’t properly clip a cooling hose into<br />
its upper regions, so with some vibration<br />
it just popped out. Bloop all over the<br />
road. 7-plus quarts, a couple stops, and<br />
we head back up. Chris is pleasantly<br />
surprised to see us at Timberwolf. He<br />
says, “Jake is a bit upset because we just<br />
buried Cindi.”<br />
Timberwolf:<br />
We set up camp a quarter mile down the<br />
ridge. We leave Chris’s Datsun, my tent.<br />
Steve drives the planes and RC gear up.<br />
I walk up with Jake. Chris will follow. He<br />
tells us (yes, this will be relevant) to watch<br />
for his cell phone, which he may have left<br />
on the top of his car.<br />
The lift is great. Steve flies his<br />
Boomerang. Chris flies his 48" EPP delta,<br />
that he hot-wire cut. I fly my 48" Sonic,<br />
JW airfoil. I’ve finally made the crow for<br />
the center flap work. It zips around fast.<br />
Later, as the lift glasses off, I fly my old<br />
60" EPP vee-tail Javelin, which stays up<br />
when the rest don’t. Beat up, several<br />
times rebuilt, not fast, but I like how it<br />
flies.<br />
Camping. Many elk track, and what looks<br />
like bobcat? I wake briefly to the slow<br />
crunches of elk hooves. Unless it was<br />
someone from the truck that Steve and<br />
Chris heard, about 2:00 AM, stopping<br />
just beneath us. In the middle of the night<br />
wispy clouds appear. Well before dawn it<br />
gets warmer.<br />
Sunday, and lost plane:<br />
The lift starts out light, but will increase<br />
through the day. Steve flies a Chinook,<br />
and Chris puts his EZ Glider up. After<br />
a while, I honk at the horizon on my<br />
old cornet. A couple younger women<br />
(well younger than my sixty-three) show<br />
up. Lisa and Lana. Twins. They’re after<br />
crystals. Before Chris found Peg he was<br />
always talking about how the Swedish<br />
String Theory Bikini Team might join us.<br />
Not. L&L wander off to find crystals. They<br />
find some. One dull chunk looks like it’s<br />
from a small geode. Lisa says, “We’ll<br />
take it home and dip it in crystal cleaning<br />
acid, and it will shine.” A couple more<br />
big-dirt-bike guys show up for the view. I<br />
start outfitting a doomed plane.<br />
Steve: “What’s your ETD?”<br />
Philip: “Twenty minutes.” It’s more like an<br />
hour, during which the guys hassle me.<br />
But it’s too short. I’ve cut corners.<br />
Suggestion: Unless you’re awrful durn<br />
gud, it is inadvisable to fly planes which<br />
you can’t afford to destroy or lose from<br />
Chris Erikson rock piles. Hence the<br />
following:<br />
I’m stuffing a LiFe battery into the ugliest,<br />
fairly heavy, vee-tail fuselage. Way back<br />
when fuselages were scarce, someone<br />
brought it to a SASS meeting. (Seattle<br />
Area Soaring Society.) Homebuilt thing.<br />
It looked Kevlar brown. It wasn’t. If I<br />
had whacked it against a post I could<br />
84 R/C Soaring Digest
have figured out from the mess that it<br />
was fiberglass. Its maker wrapped the<br />
tailboom fiberglass around a mandril, and<br />
the pod’s glass around a plug, with big<br />
overlaps, and some cuts to get the plug<br />
out. Narsty. But I thought it was Kevlar,<br />
so I stuck a vee tail on it, an HS81MG<br />
servo, a big NiMH battery, a venerable<br />
Hitec 555 receiver, and a 48" foam wing.<br />
I called it ‘Rock Bouncer.’ After I figured<br />
out it was fiberglass, from snapping the<br />
boom off, I patched the boom back on<br />
and covered it all with an additional layer<br />
of Kevlar, ‘tape bagged’ with 2" PVC<br />
tape, which shrinks with heat. I stuck a<br />
hand-me-down, 4' wing on it, and flew<br />
it at Table Mountain. It flew, but not with<br />
performance a Boomerang couldn’t beat.<br />
So I put it on the shelf for four years.<br />
I’ve got a pile of wings feet deep.<br />
Thursday before Labor day, I spotted<br />
a DLG wing that Tor Burkhardt bagged<br />
before he developed an allergy to epoxy.<br />
60". Two little HS 55 servos. The top side<br />
was painted with eagle feathers. So I<br />
drilled it to fit on the Rock Bouncer fuse.<br />
Up on Timberwolf, I pop the simplest<br />
program into my JR 9303; elevator,<br />
ailerons, a bit of differential. No presets,<br />
which is a fatal mistake. Bother 1<br />
. I have<br />
extra lost-model alarms. I neglect to<br />
put one in. Bother 2<br />
. I leave its old dead<br />
battery in, for balance. Jake looks at the<br />
feathers, and says, “Is it a pterodactyl?”<br />
Steve says, “It’s a pTorodactyl.”<br />
Jake wants to play with rope. So we tie<br />
a couple scraps together. See the photo<br />
of Jake pulling Philip pulling Steve, in a<br />
pretend mountaineering rescue. Then<br />
Jake tries to get Philip to play tug-of-war,<br />
but Philip starts tossing loops around<br />
Jake, till his feet are circled by half-adozen<br />
coils. Whereupon turnabout is<br />
attempted. Philip trying to walk with one<br />
foot entangled. At the end of the trip,<br />
Jake, having learned important stuff, will<br />
bungee Philip’s elbows behind his back,<br />
so that Philip has to chase Jake with little<br />
forearms sticking out from his waist like a<br />
zombie tyrannosaurus rex.<br />
I chuck the pTorodactyl off Timberwolf’s<br />
steep ridge into gentle but nearly vertical<br />
lift. Oddly, I have to trim a lot of left<br />
aileron in. Twist? But immediately, it’s<br />
amazing. It flies like a dream. Way fast.<br />
SD 7037 airfoil. Chris says, “That’s the<br />
same airfoil we use on the Scan Eagle.”<br />
That’s a UAV, by Insitu, which was gulped<br />
by Boeing. “It’s a fast foil.”<br />
So I fly it for about an hour. It screams<br />
around, tears up the sky. Tor installed<br />
little winglets for discus launch. Steve<br />
explains that to make winglets actually<br />
improve performance requires precise<br />
engineering, for a fairly narrow speed<br />
range, usually cruise. But they look<br />
good. To stop it from booming up into<br />
the clouds, I have to give it a lot of down<br />
trim. Which is how I lose it. Bother. Also, I<br />
don’t do my best thinking once there’s a<br />
crisis.<br />
I get it a little low, down the ridge. Chris<br />
says, “There’s lift out there. You can find<br />
it. Off to the left.” Long passes back and<br />
forth, and It’s further and further down.<br />
Chris says, “If you’re going to put it in,<br />
aim it for one of those open talus slopes.”<br />
He means, “So you can find it.” I do, way<br />
down and off to the left. Chris’s advice,<br />
to go looking for lift, rather than just<br />
putting it in, isn’t bad, though that’s how<br />
he lost a 6' Delta with video gear some<br />
years back off Rampart Ridge, just east<br />
of Snoqualmie Pass. But I’ve forgotten<br />
about all that down-elevator. Bother. To<br />
save its impact, I pull the stick back in<br />
the last seconds, and to make sure it’s<br />
down, I push the stick low and to the left.<br />
After, I question my skills as an RC pilot.<br />
It’s been twelve years in this sport, and<br />
I’m flying like I’m sixty-three. Which I<br />
am. Then I realize the main pilot skill I’m<br />
deficient in is preparation. Now there are<br />
guys out there who are truly expert fliers.<br />
Up Bandera Mountain I watched Adam<br />
Weston do a touch-and-go off the top<br />
of a boulder with his Encore, which he<br />
then caught. I’m far from that class. But<br />
Adam is also an expert at preparation. To<br />
make myself better, I start making up the<br />
checklists in the following sub-article.<br />
Talus:<br />
I put on my hard leather boots, and<br />
head down the talus slope for a rocky<br />
October <strong>2012</strong> 85
outreach. Talus is granite shards at what<br />
is known as ‘the angle of repose.’ That<br />
means steep. I pick my way down, often<br />
on all fours, sometimes aided by a fir<br />
branch. Little clumps of heather here<br />
and there, wildflowers where a bit of dirt<br />
pokes up, lichen (that symbiosis between<br />
a blue-green algae and a fungus) on<br />
rocky outcroppings. Mostly the basalt<br />
is a few inches to a foot across. Some<br />
steps are fairly solid, some start a slide<br />
of a foot or two, under the pressure of<br />
a boot. In a patch of one-inch scree<br />
I glissade, boot skiing. The sounds<br />
of shifting basalt, sometimes clunks,<br />
sometimes a death rattle, often wind<br />
chimes.<br />
Above, at an angle, I watch Chris’s<br />
EZ Glider and Steve’s Lumberjack tear<br />
the sky. I cover a lot of slope.<br />
Sixty-three, with a left fifth metatarsal<br />
(foot bone) that always hurts, after I broke<br />
it a couple years ago, the center of that<br />
same left foot still numb from the hit-andrun<br />
driver who tail-ended my truck late<br />
last year, 220 lbs. (The Pemco adjuster<br />
exaggerated, approximately, “Your<br />
doctors worked on strengthening your<br />
core. At 235 lbs and 5’8” your weakness<br />
was a contributing factor. 235 lbs is<br />
somewhat overweight.” Was she trying<br />
to demonstrate that Pemco discriminates<br />
against fat people? Or weak people?<br />
Gawrd.)<br />
Philip’s tent at dawn Monday morning. Time to go down the talus a third time.<br />
86 R/C Soaring Digest
Three hours and a couple miles of talus traverses later I get<br />
back to camp, guzzle water, make a sandwich, and go up to<br />
where the guys are still flying. I pant, “I have to apologize for<br />
hogging all the fun.” Chris says, “You missed some booming<br />
lift.” Six-year-old flies: Steve says, “Chris got Jake on the<br />
buddy box, flying the EZ Glider, twice, some hours apart.<br />
The first time he didn’t do real well. The second time he flew<br />
quite well. Can neurons form that fast?”<br />
A bit later, Steve and I head down the easy, upper slope.<br />
Chris is actually strong at talus, and has the boots, but he’s<br />
Jake-bound (no, not with ropes). Steve’s partly cloth boots<br />
are not talus proof, so he parks on a small outcropping and<br />
scans with big binoculars. I cut across a talus chute and<br />
down to a huge outcropping. We each scan. On the side<br />
of an outcropping, a couple hundred yards north, there<br />
is a semicirclular series of brilliant gold splotches. Rocks,<br />
sticking out of shadow, glowing in the sun, as it nears<br />
Mt. Rainier? I want to go down further, to check a couple<br />
possible bright spots, but the shadows are creeping up the<br />
valley. At least, getting back up, the top of the ridge above<br />
the outcropping is mostly dirt, so I don’t have to scramble<br />
talus where steps up are ac<strong>com</strong>panied by a slide down.<br />
Dinner. The usual mix of steaks and burgers and dogs<br />
passed around. Jake watches Clutch Cargo and Princess<br />
Mononoke on Chris’s laptop in the Datsun. It seems an<br />
integral part of this sport, that one does his best to get<br />
planes back. I go to bed early.<br />
Up in pre-dawn. Down the talus again. I’m impressed that<br />
I still have the stamina to do this. Way down, and way up.<br />
Breathing hard. Heart thumps way fast. I spurt upwards<br />
for five or ten or twenty feet, stop for a few breaths, and<br />
go again. It’s a lesson from my high-school friend, Robert<br />
Jongeneelan, ninety pounds, who would swarm up a rope.<br />
I asked him, “Why do you climb so fast?” He said, “Why<br />
waste a lot of energy just hanging there, going slow?”<br />
Mt Rainier, moon. 8 AM Monday.<br />
October <strong>2012</strong> 87
1 2<br />
3 4<br />
88 R/C Soaring Digest
The same here, that to move slowly<br />
takes energy. I zip, stop, breath, go.<br />
Longer pauses to catch breath. Above<br />
where I am sure the plane isn’t, I get a<br />
partial second wind. I cut up between<br />
two outcroppings. On the basalt are<br />
splotches of brilliant gold lichen—what I<br />
had thought were splotches of sunlight<br />
the previous evening. Up to camp,<br />
where Jake is kicking dust, and covered<br />
with it. I pant out, “This was good for<br />
me. I needed the exercise. I’m George<br />
Bushed.” That should cut it, out here in<br />
the red half of the state. Steve says, “You<br />
should crash your planes on purpose<br />
more often.” Right. He gives me a<br />
Gatoraid.<br />
Between still huffing and gulps of yellow<br />
electrolyte, I tell Jake, “Once upon a<br />
time, there was a papa who had to take<br />
a kid named Jake back to his mama. But<br />
Jake was so covered with dirt his mama<br />
thought he was just another dirty field, so<br />
she rented him to Farmer John. Farmer<br />
John got his tractor and plowed furrows<br />
in the dirt all over Jake, and planted<br />
seed, and tried to grow corn, but all that<br />
came up were corny stories.” Chris rolls<br />
his eyes and says, “Oh gawd.” Jake says,<br />
“No he didn’t,” and looks at me like I<br />
am so nuts, which at least indicates his<br />
intelligence and capability for accurate<br />
perception.<br />
And it’s past time to leave. Jake<br />
announces, “Philip, let’s tie you to the<br />
top of the ‘little car’ and take you home.<br />
We’ll tie you with ropes.” Repetitions.<br />
Insistence.<br />
Philip says, “So I can be a toy?”<br />
“No! So you can be a pet, like Blackie.<br />
And Pumpkin.” (Those persons are cats.)<br />
“You can take the place of Cindi.” I say,<br />
“Cat’s are people, too.”<br />
Now, you’ll all remember that Chris puts<br />
his cell phones on top of his car, drives<br />
off and somehow runs over them. Chris<br />
has the Guinness record for number of<br />
times running over his own cell phones.<br />
So I say, “Okay.” I climb up on top of<br />
Datsun Deathmobile. (Yes, I did, part<br />
way. But tall story begins here:)<br />
Jake ties me on. Unfortunately, the knots<br />
aren’t quite up to snuff. Jake gets into the<br />
car, and Chris too. Chris drives off, and<br />
Jake too, but Philip falls off, and Chris<br />
runs over him.<br />
Those Eriksons are always leaving stuff<br />
on the tops of their cars, and trucks, and<br />
SUVs, and are always running over them.<br />
Too bad. But like with my pile of wings,<br />
there are more Philips where that came<br />
from.<br />
Philip’s (embarrassing)<br />
Mountain Sloper’s<br />
Checklist, or, “Doist as I<br />
list, not as I didst.”<br />
Preventing loss:<br />
• Use a loud lost-model alarm. (I had a<br />
couple spares, I could have stuck one in.<br />
I didn’t.)<br />
• Tape an address sticker on, with a<br />
phone number. (I didn’t.)<br />
• Figure out a way to quickly get<br />
you plane trimmed to minimum sink<br />
(examples below). This means identifying<br />
its minimum sink trim. And that means<br />
some field testing, probably in light air.<br />
• Use presets, if your radio has them, to<br />
set up for thermaling (minimum sink) and<br />
for penetration. (I didn’t.) When a plane<br />
is far below, you can’t see it well enough<br />
for good thumb control of elevator. You’ll<br />
probably porpoise or stall, which will lose<br />
you altitude. You won’t be able to see it<br />
well enough to use your thumb to control<br />
the elevator. It needs to fly itself, with<br />
only gentle aileron controls, for turns.<br />
Opposite page: (1) Down Talus, Monday morning. Last night’s binocular perch is to<br />
lower right. (2) In center is last night’s binocular perch. (3) Same perch from below.<br />
(4) Little guys making a living<br />
October <strong>2012</strong> 89
Boots, ala Goya.<br />
They were shiny<br />
before the talus.<br />
Jake is Dustboy.<br />
Photo by Chris<br />
Erikson<br />
- If you don’t have presets, at least count<br />
the number of down-beeps you give it<br />
from minimum sink. (I didn’t. I also could<br />
have just given it a bunch of up-beeps,<br />
till it was rising.) On a radio with a sliding<br />
trim tab for the elevator, you can set your<br />
endpoint adjustments (servo centering)<br />
so the trim tab is centered for minimum<br />
sink. In a pinch, you can slide it back<br />
to center. Or you may be able to cheat.<br />
You can mechanically trim your plane<br />
for approximate minimum sink. Then<br />
fly it with your radio in function mode,<br />
so you adjust its pitch trim via elevator<br />
‘endpoint adjustments’ or servo centering<br />
(whatever your radio call this). If you need<br />
to get back to minimum-sink trim, hitting<br />
the ‘clear’ button should do it.<br />
- High skill alternative: Chris Erikson has<br />
incredibly steady thumbs, with very fine<br />
control. He sets his rates high, and still<br />
flies smoothly. But he also prefers to fly<br />
his planes close to ‘thermal’ mode. To<br />
keep them down in big air, or to keep<br />
them from zipping upward during a highspeed<br />
skim over sage, he holds forward<br />
on the stick. If he’s way down, all he has<br />
to do is let the stick go to neutral, and his<br />
planes fly close to minimum sink. Few<br />
RC pilots can fly this way.<br />
• When putting your plane in, make sure<br />
it’s down. Once you think it’s down, hold<br />
the stick low and left and count to ten. I<br />
didn’t count. It’s possible I thought it was<br />
down, gave it up-stick for gentle landing,<br />
traded speed for altitude, held the down-<br />
90 R/C Soaring Digest
Rainier from the chute.<br />
and left stick too briefly, all of which may<br />
have put it into some goofy aerobatic<br />
maneuver, followed by a glide off into<br />
distant forests. Though I didn’t see any of<br />
that, so maybe not.<br />
• Actually follow your own checklist.<br />
(Bother.)<br />
Retrieval:<br />
• Don’t go down dangerous slopes. (I<br />
did. I also, about eight years ago, went<br />
50' up a tree, with spikes, to retrieve a<br />
plane I couldn’t give away. Well, I finally<br />
gave it to Chris, who has a big shop.<br />
There it sits.)<br />
• Take a picture of where it went down,<br />
with your smart-phone or camera. (I<br />
didn’t.) Cameras have better memories<br />
than Philips.<br />
• Use a buddy system, or radios, or cell<br />
phones.<br />
Retrieval gear, for talus slopes or long<br />
walks:<br />
• Day pack.<br />
• Two-way, hand held radios, charged.<br />
(Ours weren’t.)<br />
• Water and energy bars.<br />
• Binoculars.<br />
• Boots. For talus, they need to be tough<br />
leather, and well above the ankle—not<br />
those little fabric and suede things. Mine<br />
are over 7” high. See photo.<br />
• Gloves.<br />
• Helmet. (Should have had.)<br />
• Extra clothes.<br />
• Flashlight.<br />
• First aid kit.<br />
• Climbing rope. For steep retrievals,<br />
where a belay is possible.<br />
October <strong>2012</strong> 91
Detailing 2 Meter Foamies<br />
Thompson Smith, studiors@mac.<strong>com</strong><br />
I have two foam 2 meter ST Model sailplanes; a DG-<br />
<strong>10</strong>00 and a 2 meter ASW-28. Both are detailed with my<br />
graphics, covered fuselage ( DG-<strong>10</strong>00 is Minwax & cloth,<br />
ASW-28 is Medium CA & cloth ) and the DG-<strong>10</strong>00 has a<br />
working spring fixed suspension.<br />
Detailed build threads for these two machines are at<br />
RCGroups.<strong>com</strong>.<br />
ASW-28:<br />
<br />
DG-<strong>10</strong>00:<br />
<br />
92 R/C Soaring Digest
Above: ASW-28<br />
Above right: Sample sticker sheet<br />
Right: Detailed 2 meter DG-<strong>10</strong>00<br />
Sticker sets for four 2 meter gliders are available for<br />
sale through my web site .<br />
Currently avaiable are sets for the ASW-28, Radian(!),<br />
ASK-21 and DG-<strong>10</strong>00. (The DG-<strong>10</strong>00 set is reproduced<br />
in reduced size at the upper right.) These sets can be<br />
personalized in either red or blue with your choice of<br />
registration numbers and tail letters.<br />
Sets are priced at $29.95 plus shipping and handling,<br />
an emailed PDF for printing on your media is $15.00.<br />
<br />
October <strong>2012</strong> 93