Maintenance and Repair Manual - saf-holland
Maintenance and Repair Manual - saf-holland
Maintenance and Repair Manual - saf-holland

You also want an ePaper? Increase the reach of your titles
YUMPU automatically turns print PDFs into web optimized ePapers that Google loves.
E) Installation instructions<br />
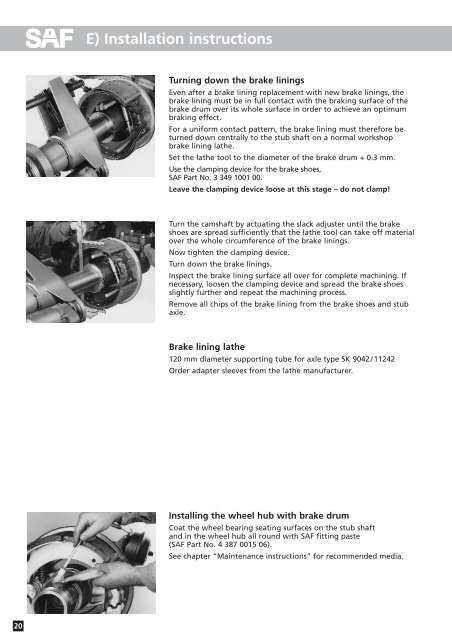
Turning down the brake linings<br />
Even after a brake lining replacement with new brake linings, the<br />
brake lining must be in full contact with the braking surface of the<br />
brake drum over its whole surface in order to achieve an optimum<br />
braking effect.<br />
For a uniform contact pattern, the brake lining must therefore be<br />
turned down centrally to the stub shaft on a normal workshop<br />
brake lining lathe.<br />
Set the lathe tool to the diameter of the brake drum + 0.3 mm.<br />
Use the clamping device for the brake shoes,<br />
SAF Part No. 3 349 1001 00.<br />
Leave the clamping device loose at this stage – do not clamp!<br />
Turn the camshaft by actuating the slack adjuster until the brake<br />
shoes are spread sufficiently that the lathe tool can take off material<br />
over the whole circumference of the brake linings.<br />
Now tighten the clamping device.<br />
Turn down the brake linings.<br />
Inspect the brake lining surface all over for complete machining. If<br />
necessary, loosen the clamping device <strong>and</strong> spread the brake shoes<br />
slightly further <strong>and</strong> repeat the machining process.<br />
Remove all chips of the brake lining from the brake shoes <strong>and</strong> stub<br />
axle.<br />
Brake lining lathe<br />
120 mm diameter supporting tube for axle type SK 9042 / 11242<br />
Order adapter sleeves from the lathe manufacturer.<br />
Installing the wheel hub with brake drum<br />
Coat the wheel bearing seating surfaces on the stub shaft<br />
<strong>and</strong> in the wheel hub all round with SAF fitting paste<br />
(SAF Part No. 4 387 0015 06).<br />
See chapter “<strong>Maintenance</strong> instructions” for recommended media.<br />
20