Create successful ePaper yourself
Turn your PDF publications into a flip-book with our unique Google optimized e-Paper software.
STANDBY/ON<br />
CD/RANDOM<br />
PROGRAM<br />
MUTING<br />
SLEEP<br />
TIMER<br />
BEAT CUT<br />
TAPE<br />
PRE UP<br />
VOLUME<br />
STANDBY<br />
/ON<br />
DISPLAY<br />
MODE<br />
TIMER<br />
ON/OFF<br />
SET<br />
PHONES<br />
PROGRAM<br />
RANDOM<br />
REPEAT<br />
PRESET<br />
BAND<br />
SEARCH/TUNING<br />
PRE EQ<br />
/HBS<br />
VOLUME<br />
OPEN<br />
/CLOSE<br />
REMAIN<br />
/RDS MODE<br />
INTRO/RDS<br />
SEARCH<br />
EJECT<br />
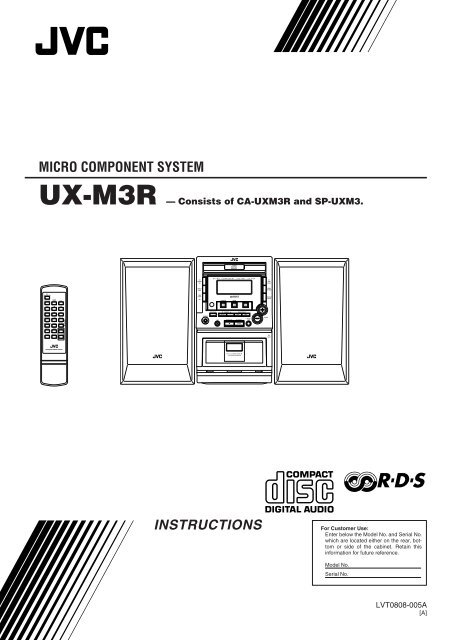
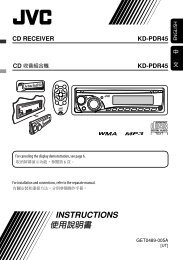
MICRO COMPONENT SYSTEM<br />
<strong>UX</strong>-<strong>M3R</strong> — Consists of CA-<strong>UX</strong><strong>M3R</strong> and SP-<strong>UX</strong>M3.<br />
MICRO COMPONENT SYSTEM <strong>UX</strong>-<strong>M3R</strong><br />
TUNER<br />
/BAND<br />
REC<br />
CD TUNER TAPE<br />
REMAIN<br />
/RDS MODE<br />
REC STOP/CLEAR PLAY/PAUSE<br />
INTRO<br />
/RDS SEARCH<br />
REPEAT<br />
/PRE DOWN<br />
DISPLAY<br />
MODE<br />
PRE EQ<br />
/HBS<br />
+<br />
–<br />
RM-S<strong>UX</strong><strong>M3R</strong> REMOTE CONTROL<br />
FULL LOGIC DECK<br />
CD SYNCHRO RECORDING<br />
INSTRUCTIONS<br />
For Customer Use:<br />
Enter below the Model No. and Serial No.<br />
which are located either on the rear, bottom<br />
or side of the cabinet. Retain this<br />
information for future reference.<br />
Model No.<br />
Serial No.<br />
LVT0808-005A<br />
[A]
Warnings, Cautions and Others<br />
Caution –– STANDBY/ON button!<br />
Disconnect the mains plug to shut the power off completely. The<br />
STANDBY/ON button in any position does not disconnect the<br />
mains line. The power can be remote controlled.<br />
IMPORTANT FOR LASER PRODUCTS<br />
REPRODUCTION OF LABELS<br />
1 CLASSIFICATION LABEL, PLACED ON REAR<br />
ENCLOSURE<br />
CAUTION<br />
To reduce the risk of electrical shocks, fire, etc.:<br />
1. Do not remove screws, covers or cabinet.<br />
2. Do not expose this appliance to rain or moisture.<br />
CLASS<br />
LASER<br />
1<br />
PRODUCT<br />
2 WARNING LABEL, PLACED INSIDE THE UNIT<br />
DANGER-Invisible laser radiation<br />
when open and interlock defeated.<br />
AVOID DIRECT EXPOSURE TO BEAM.<br />
VARO! Avattaessa ja suojalukitus ohitettaessa<br />
olet alttiina nädkmätön läsersateilylle.<br />
Älä katso säteesen.<br />
CAUTION<br />
• Do not block the ventilation openings or holes.<br />
(If the ventilation openings or holes are blocked by a newspaper<br />
or cloth, etc., the heat may not be able to get out.)<br />
• Do not place any naked flame sources, such as lighted<br />
candles, on the apparatus.<br />
• When discarding batteries, environmental problems must be<br />
considered and local rules or laws governing the disposal of<br />
these batteries must be followed strictly.<br />
• Do not expose this apparatus to rain, moistuer, dripping or<br />
splashing and that no objects filled with liquids,such as<br />
vases, shall be placed on the apparatus.<br />
VORSICHT-Unsichtbare Laserstrahlung,<br />
wenn Abdeckung geöffnet und<br />
Sicherheitsverriegelung überbrückt.<br />
Nicht dem Straht aussetzen.<br />
ADVARSEL:USYNLIG LÅSERSTRALING<br />
VED ÅBNING,NÅR SIKKERHEDSAF-<br />
BRYDERE ER UDE AF FUNKTION.<br />
UNDGÅ UDSATTELSE FOR STRÅLING.<br />
VARNING!Osymlig laserstrålning när denna<br />
del är ösppad och spärren är urkopplad.<br />
Betraka ej strålen.<br />
ADVERSEL! Usynilig laserstråling når<br />
deksel åpnes og slikkerhedslås brytes.<br />
Unngå eksponering for sirålen.<br />
A pleine puissance.I ecoute prolongee du<br />
baladeur peut endommager l'oreille de<br />
l'utilisaleur.<br />
1. CLASS 1 LASER PRODUCT<br />
2. DANGER: Invisible laser radiation when open and interlock<br />
failed or defeated. Avoid direct exposure to beam.<br />
3. CAUTION: Do not open the top cover. There are no user<br />
serviceable parts inside the Unit; leave all servicing to<br />
qualified service personnel.<br />
– G-1 –
Caution: Proper Ventilation<br />
To avoid risk of electric shock and fire, and to prevent damage, locate the apparatus as follows:<br />
1 Front:<br />
No obstructions and open spacing.<br />
2 Sides/ Top/ Back:<br />
No obstructions should be placed in the areas shown by the dimensions below.<br />
3 Bottom:<br />
Place on the level surface. Maintain an adequate air path for ventilation by placing on a stand with a height of 10 cm or more.<br />
Front view<br />
15 cm<br />
Side view<br />
1 cm 1 cm<br />
15 cm 15 cm<br />
15 cm<br />
15 cm<br />
<strong>UX</strong>-<strong>M3R</strong><br />
<strong>UX</strong>-<strong>M3R</strong><br />
10 cm<br />
– G-2 –
Introduction<br />
We would like to thank you for purchasing one of our <strong>JVC</strong> products.<br />
Before operating this unit, read this manual carefully and thoroughly to<br />
obtain the best possible performance from your unit, and retain this manual<br />
for future reference.<br />
About This Manual<br />
This manual is organized as follows:<br />
• The manual mainly explains operations using the<br />
buttons and controls on the unit. You can also use the<br />
buttons on the remote control if they have the same or<br />
similar names (or marks) as those on the unit.<br />
If operation using the remote control is different from<br />
that using the unit, it is then explained.<br />
• Basic and common information that is the same for many<br />
functions is grouped in one place, and is not repeated in<br />
each procedure. For instance, we do not repeat the<br />
information about turning on/off the unit, setting the<br />
volume, changing the sound effects, and others, which are<br />
explained in the section “Common Operations” on pages 8<br />
and 9.<br />
• The following marks are used in this manual:<br />
Precautions<br />
Gives you warnings and cautions to prevent a<br />
damage or risk of fire/electric shock.<br />
Also gives you information on operation which<br />
is not good for obtaining the best possible<br />
performance from the unit.<br />
Gives you information and hints you had better<br />
know.<br />
Installation<br />
• Install in a place which is level, dry and neither too hot nor<br />
too cold — between 5˚C and 35˚C.<br />
• Install the unit in a location with adequate ventilation to<br />
prevent internal heat built-up in the unit.<br />
• Leave sufficient distance between the unit and the TV.<br />
• Keep the speakers away from the TV to avoid interference<br />
with TV.<br />
Power sources<br />
• When unplugging from the wall outlet, always pull the<br />
plug, not the AC power cord.<br />
DO NOT handle the AC power cord with wet<br />
hands.<br />
Moisture condensation<br />
Moisture may condense on the lens inside the unit in the<br />
following cases:<br />
• After starting heating in the room<br />
• In a damp room<br />
• If the unit is brought directly from a cold to a warm place<br />
Should this occur, the unit may malfunction. In this case,<br />
leave the unit turned on for a few hours until the moisture<br />
evaporates, unplug the AC power cord, and then plug it in<br />
again.<br />
Others<br />
• Should any metallic object or liquid fall into the unit,<br />
unplug the unit and consult your dealer before operating<br />
any further.<br />
• If you are not going to operate the unit for an extended<br />
period of time, unplug the AC power cord from the wall<br />
outlet.<br />
DO NOT disassemble the unit since there are no<br />
user serviceable parts inside.<br />
If anything goes wrong, unplug the AC power cord and<br />
consult your dealer.<br />
DO NOT install the unit in a location near heat<br />
sources, or in a place subject to direct sunlight,<br />
excessive dust or vibration.<br />
– 1 –
Contents<br />
Location of the Buttons and Controls ..................... 3<br />
Front Panel ................................................................ 4<br />
Remote Control ......................................................... 5<br />
Getting Started .......................................................... 6<br />
Unpacking ................................................................. 6<br />
Putting the Batteries into the Remote Control .......... 6<br />
Connections .............................................................. 6<br />
Common Operations ................................................. 8<br />
Turning On or Off the Unit ....................................... 8<br />
Setting the Clock ....................................................... 8<br />
Adjusting the Volume ................................................ 8<br />
Digital Sound Control ............................................... 9<br />
Listening to FM and MW Broadcasts ................... 10<br />
Tuning In a Station .................................................. 10<br />
Presetting Stations................................................... 10<br />
Tuning In a Preset Station ....................................... 11<br />
Receiving FM Stations with RDS........................... 12<br />
Changing the RDS Information .............................. 12<br />
Searching for Programs by PTY Codes<br />
(PTY Search) ..................................................... 12<br />
Playing Back CDs .................................................... 13<br />
Loading a Disc ........................................................ 13<br />
Basic CD Operations .............................................. 13<br />
Program Play........................................................... 13<br />
Random Play ........................................................... 14<br />
Repeat Play ............................................................. 14<br />
Introductory Play .................................................... 14<br />
Displaying the Remaining Time during Playback .. 14<br />
Playing Back Tapes ................................................. 15<br />
Loading a Tape ........................................................ 15<br />
Tape Playback ......................................................... 15<br />
Rewind/Fast Forward .............................................. 15<br />
Recording ................................................................. 16<br />
Recording Tapes ...................................................... 16<br />
Using the Timers...................................................... 17<br />
Using Daily Timer .................................................. 17<br />
Timer Recording ..................................................... 17<br />
Using Sleep Timer .................................................. 18<br />
Description of the PTY Codes ................................ 19<br />
Troubleshooting ....................................................... 19<br />
Maintenance ............................................................ 20<br />
Specifications ........................................... Back cover<br />
– 2 –
Location of the Buttons and Controls<br />
Become familiar with the buttons and controls on your unit.<br />
Front Panel<br />
Display Window<br />
1<br />
2<br />
3<br />
4<br />
5<br />
6<br />
7<br />
8<br />
PROGRAM SLEEP HBS TOTAL REMAIN INTRO<br />
POP<br />
ON OFF<br />
CLASSIC ROCK JAZZ<br />
RANDOM<br />
REPEAT<br />
TAPE<br />
STEREO<br />
ONE<br />
ALL<br />
CD SYNC<br />
MHz<br />
kHz<br />
REC<br />
9<br />
p<br />
q<br />
w<br />
e<br />
r<br />
t<br />
y<br />
u<br />
1<br />
2<br />
w<br />
e<br />
3<br />
4<br />
STANDBY<br />
/ON<br />
DISPLAY<br />
MODE<br />
MICRO COMPONENT SYSTEM <strong>UX</strong>-<strong>M3R</strong><br />
OPEN<br />
/CLOSE<br />
REMAIN<br />
/RDS MODE<br />
r<br />
t<br />
5<br />
6<br />
7<br />
8<br />
TIMER<br />
ON/OFF<br />
SET<br />
PHONES<br />
PROGRAM<br />
RANDOM<br />
CD TUNER TAPE<br />
REPEAT<br />
PRESET<br />
BAND<br />
REC STOP/CLEAR PLAY/PAUSE<br />
SEARCH/TUNING<br />
PRE EQ<br />
/HBS<br />
INTRO/RDS<br />
SEARCH<br />
VOLUME<br />
y<br />
u<br />
i<br />
9<br />
EJECT<br />
o<br />
p<br />
;<br />
q<br />
FULL LOGIC DECK<br />
CD SYNCHRO RECORDING<br />
a<br />
– 3 –
Continued<br />
Front Panel<br />
See pages in the parentheses for details.<br />
1 Disc compartment (13)<br />
2 STANDBY/ON button (8)<br />
Turns the unit on or off (standby mode).<br />
3 CD/RANDOM button (13, 14)<br />
Selects CD mode.<br />
Starts or stops random play in CD mode.<br />
4 DISPLAY MODE button (8, 17)<br />
Displays the clock time or sets the timer.<br />
5 TIMER ON/OFF SET button (17)<br />
Activates/deactivates the timer.<br />
6 Remote sensor (5)<br />
Infrared sensor for remote control<br />
7 PROGRAM button (8, 10, 13, 17)<br />
CD: programs the track playback order.<br />
Tuner: presets radio stations.<br />
Clock/Timer: sets the clock/timer.<br />
8 REPEAT button (14)<br />
CD: repeats a track or the whole disc.<br />
PRESET ∞ / 5 buttons (10)<br />
Tuner: Selects a preset radio station.<br />
9 PHONES jack (8)<br />
Connect the headpones to this jack.<br />
p Tape deck (15)<br />
q REC (Recording) button (16)<br />
Switches to record ready state.<br />
w TUNER/BAND button (10)<br />
Selects tuner mode.<br />
Selects FM or MW in tuner mode.<br />
e TAPE button (15)<br />
Selects tape mode.<br />
r 0 OPEN/CLOSE button (13)<br />
Opens/closes the disc compartment.<br />
t REMAIN/RDS MODE button (12, 14)<br />
CD: displays the remaining time of a track/disc or<br />
elapsed time of a disc during playback.<br />
Tuner (FM): displays RDS information.<br />
y INTRO/RDS SEARCH button (12, 14)<br />
CD: starts or stops introductory play.<br />
Tuner (FM): selects RDS search.<br />
u VOLUME +/– buttons (8)<br />
Adjust the volume.<br />
i PRE EQ/HBS button (9)<br />
Selects the desired sound mode.<br />
Switches on or off the HBS system.<br />
o 0 EJECT (15)<br />
Opens the tape deck door.<br />
; SEARCH/TUNING 4 / ¢ buttons (8, 10, 13, 15, 17)<br />
CD: search backward/forward or skip to the beginning of<br />
the current/previous/next track.<br />
Tuner: tune to a lower or higher radio frequency or<br />
search radio stations.<br />
Tape: rewind or fast forward.<br />
Clock/Timer: set the hour and minute.<br />
a PLAY/PAUSE 6 button (13, 15)<br />
CD/Tape: starts or interrupts playback.<br />
STOP/CLEAR 7 button (13, 15)<br />
CD: stops playback or clears the program.<br />
Tape: stops playback or recording.<br />
Display window<br />
1 /ON/OFF (timer on/off) indicators (17)<br />
2 HBS indicator (9)<br />
3 SLEEP indicator (18)<br />
4 PROGRAM indicator (10, 13)<br />
5 RDS indicator (12)<br />
6 Main display<br />
7 Sound mode indicators (9)<br />
POP, CLASSIC, ROCK, JAZZ<br />
8 3 (play mode) indicator (13, 15)<br />
9 TOTAL/REMAIN indicators (14)<br />
p RANDOM indicator (14)<br />
q INTRO indicator (14)<br />
w STEREO indicator (10)<br />
e REPEAT ONE/ALL indicators (14)<br />
r CD SYNC (synchronous recording) indicator (16)<br />
t MHz/kHz (frequency) indicators (10)<br />
y REC/8 (recording/pause) indicators (16)<br />
u TAPE indicator (15)<br />
– 4 –
Remote Control<br />
Remote Control<br />
1<br />
2<br />
3<br />
4<br />
5<br />
6<br />
7<br />
8<br />
9<br />
p<br />
q<br />
STANDBY/ON<br />
CD/RANDOM<br />
REC<br />
PROGRAM<br />
REMAIN<br />
/RDS MODE<br />
INTRO<br />
/RDS SEARCH<br />
DISPLAY<br />
MODE<br />
MUTING<br />
TUNER<br />
/BAND<br />
SLEEP<br />
TIMER<br />
PRE EQ<br />
/HBS<br />
BEAT CUT<br />
TAPE<br />
PRE UP<br />
REPEAT<br />
/PRE DOWN<br />
+<br />
VOLUME<br />
–<br />
RM-S<strong>UX</strong><strong>M3R</strong> REMOTE CONTROL<br />
w<br />
e<br />
r<br />
t<br />
y<br />
u<br />
i<br />
o<br />
;<br />
1 STANDBY/ON button<br />
2 CD/RANDOM button<br />
3 TUNER/BAND button<br />
4 REC (Recording) button<br />
5 PROGRAM button<br />
6 REMAIN/RDS MODE button<br />
7 INTRO/RDS SEARCH button<br />
8 TIMER button<br />
9 DISPLAY MODE button<br />
p PRE EQ/HBS button<br />
q MUTING button<br />
Interrupts and resumes sound reproduction.<br />
w TAPE button<br />
e 7 button<br />
r 6 button<br />
t 4/¢ buttons<br />
y PRE UP button<br />
u SLEEP button<br />
Selects the time length until the unit is turned off.<br />
i REPEAT/PRE DOWN button<br />
o VOLUME +/– buttons<br />
; BEAT CUT button<br />
Eliminates beats during MW broadcast recording.<br />
MICRO COMPONENT SYSTEM <strong>UX</strong>-<strong>M3R</strong><br />
STANDBY<br />
OPEN<br />
/ON<br />
/CLOSE<br />
DISPLAY<br />
MODE<br />
REMAIN<br />
/RDS MODE<br />
TIMER<br />
ON/OFF<br />
INTRO/RDS<br />
SET<br />
RANDOM<br />
BAND<br />
SEARCH<br />
CD TUNER TAPE<br />
PROGRAM<br />
PRESET<br />
SEARCH/TUNING<br />
REPEAT<br />
PHONES<br />
PRE EQ<br />
VOLUME<br />
REC STOP/CLEAR PLAY/PAUSE<br />
/HBS<br />
EJECT<br />
When using the remote control, point it at the remote<br />
sensor on the front panel.<br />
– 5 –
Getting Started<br />
Continued<br />
Unpacking<br />
After unpacking, check to be sure that you have all the<br />
following items.<br />
The number in the parentheses following each item name<br />
indicates the supplied quantity.<br />
• Remote control (1)<br />
• Batteries (R03 (UM-4)/AAA (24F)) for remote control (2)<br />
• AM loop antenna (1)<br />
Connections<br />
• DO NOT connect any equipment to the unit while the<br />
unit is powered.<br />
• DO NOT plug in any equipment until all connections<br />
are completed.<br />
If any is missing, consult your dealer immediately.<br />
Putting the Batteries into the Remote Control<br />
Insert 2 batteries — R03 (UM-4)/AAA (24F) — into the<br />
battery compartment of the remote control, complying with<br />
the + and – polarity markings inside the battery compartment.<br />
When the remote control can no longer operate the unit,<br />
replace both batteries at the same time.<br />
2<br />
RIGHT<br />
3<br />
R L<br />
FM<br />
ANTENNA<br />
AM<br />
LOOP<br />
LEFT<br />
1<br />
1<br />
4<br />
2<br />
R03(UM-4)/<br />
AAA(24F)<br />
1 Connect the speakers.<br />
Connect the right speaker to the “R” terminals, with the<br />
red wire to + and the black wire to –.<br />
Connect the left speaker to the “L” terminals in the same<br />
way.<br />
Clip the stripped portion of each speaker wire as shown in<br />
the illustration.<br />
3<br />
• DO NOT use an old battery together with a new one.<br />
• DO NOT use different types of batteries together.<br />
• DO NOT expose batteries to heat or flame.<br />
• DO NOT leave the batteries in the battery<br />
compartment when you are not going to use the<br />
remote control for an extended period of time;<br />
otherwise, the remote control may be damaged by<br />
battery leakage.<br />
– 6 –
2 Connect the supplied AM loop antenna to the<br />
AM LOOP terminal.<br />
Place the antenna away from the unit and adjust its<br />
position for the best reception.<br />
1 2<br />
3<br />
3 Adjust the position of the FM antenna for the<br />
best reception.<br />
4 Connect the AC power cord of the unit to the<br />
AC outlet after all other connections have<br />
been made.<br />
– 7 –
Common Operations<br />
Continued<br />
Turning On or Off the Unit<br />
To turn on the unit<br />
Press STANDBY/ON on the<br />
unit or remote control.<br />
The unit turns on with the last source<br />
selection remaining valid.<br />
To turn off the unit (on stanby)<br />
Press STANDBY/ON on the unit or remote control.<br />
The clock time appears if the clock is already set.<br />
Setting the Clock<br />
Before operating the unit any further, first set the built-in<br />
clock.<br />
1 When the unit is in standby<br />
mode, press and hold<br />
PROGRAM until the hour<br />
indication starts blinking.<br />
• When the unit is on, press DISPLAY MODE to enter clock<br />
mode, then press and hold PROGRAM.<br />
2 Press 4 or ¢ to set the<br />
hour, then press<br />
PROGRAM.<br />
The minute indication starts<br />
blinking.<br />
3 Press 4 or ¢ to set the<br />
minute, then press<br />
PROGRAM to store the<br />
setting.<br />
The clock starts working.<br />
STANDBY<br />
/ON<br />
To change the hour or minute indication rapidly in steps 2<br />
and 3, press and hold 4 or ¢.<br />
or<br />
PROGRAM<br />
SEARCH/TUNING<br />
SEARCH/TUNING<br />
STANDBY/ON<br />
On clock resetting<br />
If a power failure occurs or the AC power cord is<br />
disconnected, the clock is reset to "0:00" (flashing). In such a<br />
case you need to set the clock again.<br />
Adjusting the Volume<br />
• You can adjust the volume only while the unit is turned on.<br />
Press VOLUME + or<br />
VOLUME – to increase or<br />
decrease the volume level.<br />
The volume can be adjusted in 41 steps<br />
between “VOL MIN” (minimum) and<br />
“VOL MAX” (maximum).<br />
To increase or decrease the volume level rapidly, press and<br />
hold VOLUME + or VOLUME –.<br />
To turn off the sound temporarily<br />
Press MUTING on the remote control.<br />
Playback continues without sound and<br />
the muting indicator appears on the<br />
display.<br />
MUTING<br />
To restore the sound, press MUTING again or increase or<br />
decrease the volume level.<br />
For private listening<br />
Connect a pair of headphones to the PHONES jack. No sound<br />
comes out of the speakers. Be sure to turn down the volume<br />
before connecting or putting on headphones.<br />
VOLUME<br />
DO NOT turn off the unit (on standby) with the volume<br />
set to an extremely high level; otherwise, a sudden blast<br />
of sound can damage your hearing and/or the speakers<br />
when you turn on the unit or start playing any source<br />
next time.<br />
To select 12-hour or 24-hour display mode<br />
In standby mode, hold down<br />
PLAY/PAUSE<br />
6 and press PROGRAM<br />
repeatedly.<br />
and<br />
With each press, the selection<br />
toggles between 12-hour and 24-<br />
hour modes.<br />
PROGRAM<br />
• In 12-hour mode, “AM 12:00” indicates midnight and “PM<br />
12:00” indicates noon.<br />
To check the clock time while the unit is on<br />
Press DISPLAY MODE.<br />
The clock time is displayed until you<br />
press any key.<br />
DISPLAY<br />
MODE<br />
To correct the clock time<br />
Carry out steps 1 to 3 above.<br />
– 8 –
Digital Sound Control<br />
The unit’s digital sound control feature enables you to select<br />
desired preset equalizer settings (selectable as sound modes)<br />
to enjoy special sound effects matching the music type.<br />
You can also use the HBS (Hyper Bass Sound) system to<br />
enjoy powerful bass sound created by emphasizing low<br />
frequencies.<br />
To select the desired sound mode<br />
Press PRE EQ/HBS repeatedly.<br />
PRE EQ<br />
/HBS<br />
Each time you press the button, the<br />
sound mode changes as follows:<br />
POP CLASSIC ROCK<br />
FLAT<br />
JAZZ<br />
POP: More presence in the vocals and midrange<br />
CLASSIC: Enriched sound with fine treble and ample bass<br />
ROCK: Powerful sound emphasizing treble and bass<br />
JAZZ: Accented lower frequencies for jazz-type music<br />
FLAT: Equalizer effect is canceled.<br />
To switch the HBS system on/off<br />
Press and hold PRE EQ/HBS until<br />
“HBS ON” or “HBS OFF” appears on<br />
the display.<br />
When the HBS system is switched on,<br />
the HBS indicator lights up on the<br />
display.<br />
PRE EQ<br />
/HBS<br />
– 9 –
Listening to FM and MW Broadcasts<br />
Continued<br />
Tuning In a Station<br />
1 When the unit is turned on,<br />
press TUNER/BAND to<br />
select tuner mode.<br />
The unit tunes in the last station<br />
tuned in (either FM or MW).<br />
2 Press TUNER/BAND to<br />
select the band, FM or MW.<br />
Each time you press the button, the<br />
band selection alternates between<br />
FM and MW.<br />
3 Press and hold 4 or ¢<br />
for more than 1 second.<br />
The unit starts searching for stations<br />
and stops when a station of sufficient<br />
signal strength is tuned in.<br />
If a program is broadcast in stereo,<br />
the STEREO indicator lights up.<br />
To stop searching, press 4 or ¢.<br />
BAND<br />
TUNER<br />
BAND<br />
TUNER<br />
SEARCH/TUNING<br />
Presetting Stations<br />
You can preset 20 FM and 20 MW stations.<br />
• There is a time limit in doing the following steps. If the<br />
setting is canceled before you finish, start from step 1<br />
again.<br />
1 Tune in the station you want to preset.<br />
• See “Tuning In a Station” on the left.<br />
2 Press PROGRAM.<br />
The PROGRAM indicator and “00”<br />
start blinking on the display.<br />
3 Press PRESET ∞ or 5 (or<br />
PRE UP or REPEAT/PRE<br />
DOWN on the remote<br />
control) to specify the<br />
desired preset number.<br />
PROGRAM<br />
REPEAT<br />
PRESET<br />
4 Wait a few seconds to confirm the preset<br />
number.<br />
When you press 4 or ¢ briefly and repeatedly<br />
The frequency changes step by step.<br />
• Alternatively, press PROGRAM.<br />
5 To preset more stations, repeat the steps<br />
above, allocating a different preset number to<br />
each station.<br />
When a new station is stored<br />
The station previously memorized with the same preset<br />
number is erased. (The frequency of the new station replaces<br />
the previous frequency in memory.)<br />
– 10 –
Tuning In a Preset Station<br />
1 Press TUNER/BAND to<br />
select tuner mode.<br />
BAND<br />
TUNER<br />
2 Press TUNER/BAND to select the band, FM<br />
or MW.<br />
3 Press PRESET ∞ or 5 (or PRE<br />
UP or REPEAT/PRE DOWN on<br />
the remote control) to select the<br />
desired preset number.<br />
REPEAT<br />
PRESET<br />
– 11 –
Receiving FM Stations with RDS<br />
RDS (Radio Data System) allows FM stations to send an<br />
additional signal along with their regular program signals.<br />
For example, the stations send their station names, as well as<br />
information about what type of program they broadcast, such<br />
as sports or music, etc.<br />
When tuned to an FM station which provides the RDS<br />
service, the RDS indicator lights up on the display.<br />
With the unit, you can receive the following types of RDS<br />
signals.<br />
PS (Program Service):<br />
Shows commonly known station names.<br />
PTY (Program Type):<br />
Shows types of broadcast programs.<br />
RT (Radio Text):<br />
Shows text messages the station sends.<br />
More about RDS<br />
• Some FM stations do not provide RDS signals.<br />
• RDS services vary among FM RDS stations. For details on<br />
RDS services in your area, check with local radio stations.<br />
• RDS may not work correctly if the received station is not<br />
transmitting the signals properly or if the signal strength is<br />
weak.<br />
Changing the RDS Information<br />
You can see RDS information on the display while listening<br />
to an FM station.<br />
Press REMAIN/RDS MODE.<br />
Each time you press the button, the<br />
display changes to show the following<br />
information:<br />
PS PTY RT<br />
Station frequency<br />
REMAIN<br />
/RDS MODE<br />
Searching for Programs by PTY Codes<br />
(PTY Search)<br />
One of the advantages of RDS is that you can locate a<br />
particular kind of program by specifying the PTY (Program<br />
Type) codes.<br />
• For details on each of the PTY codes, see “Description of<br />
the PTY Codes” on page 19.<br />
• There is a time limit in doing the following steps. If the<br />
setting is canceled before you finish, start from step 1<br />
again.<br />
1 Press INTRO/RDS<br />
SEARCH until the PTY<br />
code you want appears on<br />
the display.<br />
Each time you press the button, the<br />
PTY codes change as follows:<br />
NEWS AFFAIRS INFO SPORT<br />
CULTURE DRAMA EDUCATE<br />
SCIENCE VARIED POP M ROCK M<br />
OTHER M CLASSICS LIGHT M MOR M<br />
2 Press 4 or ¢.<br />
The unit searches FM stations, stops<br />
when it finds the one you have<br />
selected, and tunes in that station.<br />
INTRO/RDS<br />
SEARCH<br />
SEARCH/TUNING<br />
• If no program is found, the unit returns to the last received<br />
station.<br />
To stop searching during the process, press INTRO/RDS<br />
SEARCH.<br />
• If no PS, PTY, or RT signals are sent by a station,<br />
“NO PS”, “NO PTY”, or “NO TEXT” appears on the<br />
display.<br />
On the characters displayed<br />
When the display shows PS, PTY or RT signals:<br />
– The display shows upper case letters only.<br />
– The display cannot show accented letters; For example,<br />
“A” may represent accented “A’s” like “Á, Â, Ã, À, Ä and<br />
Å ”.<br />
– 12 –
Playing Back CDs<br />
This unit can play back audio CDs.<br />
Program Play<br />
You can arrange the order in which the tracks are played<br />
before you start playing. You can program up to 60 tracks.<br />
Loading a Disc<br />
1 Press CD/RANDOM to<br />
select CD mode.<br />
2 Press 0 OPEN/CLOSE.<br />
The disc tray slides out.<br />
RANDOM<br />
3 Load a disc with the label side facing up.<br />
CD<br />
OPEN<br />
/CLOSE<br />
1 In stop mode, press<br />
PROGRAM.<br />
The PROGRAM indicator starts<br />
blinking.<br />
2 Press 4 or ¢ repeatedly<br />
to select the desired track.<br />
The current program number starts blinking.<br />
3 Press PROGRAM to store<br />
the selected track.<br />
“00” and the next program number<br />
appear on the display.<br />
PROGRAM<br />
SEARCH/TUNING<br />
PROGRAM<br />
4 Press 0 OPEN/CLOSE to<br />
close the disc compartment.<br />
The total number of tracks and the<br />
playing time of the disc appear on<br />
the display.<br />
Basic CD Operations<br />
1 Press 6 to start playback.<br />
The 3 indicator lights up and the<br />
track number and elapsed playing<br />
time of the current track appear on<br />
the display.<br />
2 To stop playback, press 7.<br />
PLAY/PAUSE<br />
STOP/CLEAR<br />
OPEN<br />
/CLOSE<br />
4 Repeat steps 2 and 3 to store other tracks.<br />
• You cannot program more than 60 tracks. If you attempt to<br />
do it, “FULL” will flash on the display.<br />
To review the programed sequence<br />
Press PROGRAM repeatedly in stop mode.<br />
The program number and track number<br />
are displayed in succession.<br />
To modify the program<br />
Press PROGRAM repeatedly to select<br />
the program number with which you<br />
want to change the track, then repeat<br />
steps 2 and 3 above.<br />
To play the programed tracks<br />
Press 6.<br />
PROGRAM<br />
PROGRAM<br />
PLAY/PAUSE<br />
• During program play, you can press 4 or ¢ to select<br />
the desired track in the program.<br />
To interrupt playback<br />
Press 6.<br />
The 3 indicator and the playing time<br />
starts blinking.<br />
To resume playback, press 6 again.<br />
To select a desired track<br />
Press 4 or ¢ repeatedly until the<br />
desired track appears on the display.<br />
To search for a particular point during playback<br />
Press and hold 4 or ¢ to locate the<br />
desired point.<br />
PLAY/PAUSE<br />
SEARCH/TUNING<br />
SEARCH/TUNING<br />
If you press REPEAT during program play<br />
The current track or all programed tracks are played<br />
repeatedly.<br />
To clear the program<br />
Press 7 in stop mode.<br />
The PROGRAM indicator disappears<br />
from the display.<br />
STOP/CLEAR<br />
• The stored program is cleared when the CD compartment is<br />
opened.<br />
– 13 –
Random Play<br />
You can play all the tracks in random order.<br />
Press CD/RANDOM before or<br />
during playing.<br />
The RANDOM indicator lights up.<br />
To exit random play mode, press CD/RANDOM again.<br />
The RANDOM indicator goes off.<br />
• Activating the REPEAT ONE function during random play<br />
mode disables the random play mode.<br />
• It is not possible to activate the random play function<br />
during program play mode.<br />
Repeat Play<br />
You can play the current track or the whole disc repeatedly.<br />
Press REPEAT repeatedly to<br />
select either of the following<br />
repeat play modes:<br />
REPEAT ONE: repeats the current track.<br />
REPEAT ALL: repeats the whole disc.<br />
RANDOM<br />
The current track or the whole disc is played repeatedly until<br />
you press 7.<br />
To exit repeat play mode, press REPEAT repeatedly so that<br />
the REPEAT indicator disappears from the display.<br />
CD<br />
REPEAT<br />
Introductory Play<br />
The introductory portions of tracks can be played back<br />
automatically.<br />
Press INTRO/RDS SEARCH.<br />
The first 10-second portion of each of<br />
the tracks is played back in order.<br />
To exit introductory play mode, press INTRO/RDS<br />
SEARCH again.<br />
• The introductory play function is also available during<br />
program play mode, random play mode and repeat play<br />
mode.<br />
Displaying the Remaining Time during<br />
Playback<br />
INTRO/RDS<br />
SEARCH<br />
You can display the remaining time of the current track/disc<br />
and the elapsed time of the current track/disc during playing a<br />
CD.<br />
Press REMAIN/RDS MODE<br />
repeatedly to select one of the<br />
following time display modes:<br />
REMAIN: shows the remaining time of the current track.<br />
TOTAL REMAIN: shows the remaining time of the disc.<br />
TOTAL: shows the elapsed time of the disc.<br />
No indication: shows the elapsed time of the current track.<br />
REMAIN<br />
/RDS MODE<br />
• Activating the random play function during REPEAT ONE<br />
play mode disables the repeat play mode.<br />
– 14 –
Playing Back Tapes<br />
• Use only type I normal tapes.<br />
The use of tapes longer than 120 minutes is not<br />
recommended, since characteristic deterioration may<br />
occur and these tapes easily jam in the pinchroller and<br />
the capstan.<br />
Rewind/Fast Forward<br />
1 Press 4 or ¢ to rewind<br />
or fast forward the tape.<br />
“REW” or “FF” appears on the<br />
display.<br />
SEARCH/TUNING<br />
Loading a Tape<br />
1 Press 0 EJECT to open the<br />
tape deck door.<br />
EJECT<br />
2 Press 7 to stop rewinding or<br />
fast forwarding.<br />
STOP/CLEAR<br />
• The tape stops automatically at the end of the rewinding or<br />
fast forwarding.<br />
2 Insert a recorded tape with the open side<br />
down and playback side facing out from the<br />
unit.<br />
3 Close the tape deck door.<br />
The TAPE indicator appears on the display.<br />
Tape Playback<br />
1 When the unit is turned on,<br />
press TAPE.<br />
2 Press 6.<br />
Playback starts.<br />
“PLAY” and the 3 indicator appear<br />
on the display.<br />
3 To stop playback, press 7.<br />
To interrupt playback<br />
Press 6.<br />
The 3 indicator starts blinking and<br />
“PAUSE” appears on the display.<br />
TAPE<br />
PLAY/PAUSE<br />
STOP/CLEAR<br />
PLAY/PAUSE<br />
To resume playback, press 6 again.<br />
– 15 –
Recording<br />
IMPORTANT:<br />
• It may be unlawful to record or playback copyrighted<br />
material without the consent of the copyright owner.<br />
• The recording level is automatically set correctly, so it is<br />
not affected by the volume control. Thus, during recording<br />
you can adjust the sound you are actually listening to<br />
without affecting the recording level.<br />
• While recording, you can hear sound modes and/or the<br />
HBS sound effect through the speakers. However, the<br />
sound is recorded without these effects (see page 9).<br />
• If recordings you have made have excessive noise or static,<br />
the unit may be too close to a TV. Increase the distance<br />
between the TV and the unit.<br />
• Use only type I normal tapes for recording.<br />
• The use of tapes longer than 120 minutes is not<br />
recommended, since characteristic deterioration may occur<br />
and these tapes easily jam in the pinchroller and the<br />
capstan.<br />
To protect your recording<br />
Cassettes have two small tabs on the back to prevent<br />
unexpected erasure or re-recording.<br />
To protect your recording, remove these tabs.<br />
To re-record on a protected tape, cover the holes with<br />
adhesive tape.<br />
Recording Tapes<br />
1 Load a recordable tape into the tape deck.<br />
Insert a tape with the open side down and the side to be<br />
recorded facing out from the unit.<br />
2 Press CD/RANDOM or<br />
TUNER/BAND to select the<br />
desired recording source.<br />
3 Prepare the source.<br />
• For synchronous recording of a CD<br />
Load the disc (see page 13).<br />
– To start recording from the desired track, select the track<br />
by pressing 4 or ¢ repeatedly in stop mode.<br />
– To start recording from the desired point on a disc, play<br />
the disc and pause at the desired point by pressing 6.<br />
• For recording from the radio<br />
Tune in the desired station (see page 10).<br />
4 Press REC.<br />
“REC” is displayed. The TAPE REC<br />
indicator and “8” light up and the<br />
recording direction indicator starts<br />
blinking.<br />
RANDOM<br />
CD<br />
or<br />
REC<br />
BAND<br />
TUNER<br />
5 Press 6 for recording.<br />
Recording starts.<br />
“8” goes off. The TAPE REC<br />
indicator remains on the display.<br />
When recording a CD, the CD<br />
SYNC indicator also lights up.<br />
PLAY/PAUSE<br />
To stop recording, press 7.<br />
The selected recording source continues playing.<br />
• During recording, it is not possible to pause or listen to<br />
another source. “REC ON” appears on the display.<br />
• Recording continues to the end of the tape until you press<br />
7 even after playback of the CD has finished.<br />
Using the BEAT CUT function<br />
When recording an MW broadcast, beats may occur. If this<br />
happens, press BEAT CUT on the remote control to select the<br />
better beat-cut position, “BEAT 01” or “BEAT 02”.<br />
– 16 –
Using the Timers<br />
There are three timers available – daily timer, recording timer<br />
and sleep timer.<br />
Before using the timers, you need to set the built-in clock.<br />
(See page 8.)<br />
Using Daily Timer<br />
With the daily timer, you can wake to your favorite music or<br />
radio program.<br />
How the daily timer actually works<br />
At the timer-on time, the unit automatically turns on, sets the<br />
volume to the preset level, and starts playing the specified<br />
source (radio or CD). Then, at the timer-off time, the unit<br />
automatically turns off (on standby).<br />
The timer setting remains in memory until you change it.<br />
• There is a time limit in doing the following steps. If the<br />
setting is canceled before you finish, start from step 1<br />
again.<br />
1 Press and hold DISPLAY<br />
MODE until “ ON” starts<br />
blinking on the display, then<br />
press PROGRAM.<br />
The hour indication starts blinking.<br />
2 Press 4 or ¢ to set the<br />
timer start hour, then press<br />
PROGRAM.<br />
The minute indication starts blinking.<br />
3 Press 4 or ¢ to set the<br />
minute, then press<br />
PROGRAM.<br />
“ ON” starts blinking again.<br />
4 Press DISPLAY MODE so<br />
that “ OFF” starts<br />
blinking on the display, then<br />
press PROGRAM.<br />
The hour indication starts blinking.<br />
DISPLAY<br />
MODE<br />
DISPLAY<br />
MODE<br />
PROGRAM<br />
SEARCH/TUNING<br />
SEARCH/TUNING<br />
PROGRAM<br />
8 Prepare the source and set the volume.<br />
To listen to the radio, tune in the desired station.<br />
To listen to a CD, load the disc.<br />
9 Press TIMER ON/OFF SET<br />
(or TIMER on the remote<br />
control) to activate the timer.<br />
“ ” lights up on the display.<br />
10 Turn off the unit (on standby).<br />
When the preset time is reached, the<br />
selected source is played if the timer<br />
has been activated.<br />
To deactivate the timer, press TIMER ON/OFF SET (or<br />
TIMER on the remote control).<br />
“ ” disappears from the display.<br />
• The timer-off function is not activated if the starting and<br />
stopping times are the same.<br />
• If the selected source (CD or TAPE) is not available when<br />
preset timer is reached, TUNER is selected automatically.<br />
Timer Recording<br />
TIMER<br />
ON/OFF<br />
SET<br />
STANDBY<br />
/ON<br />
You can use the recording timer to record a preset radio<br />
station from a specified time and for a specified duration<br />
automatically.<br />
1 Load a recordable tape into the tape deck.<br />
Insert a tape with the open side down and the side to be<br />
recorded facing out from the unit.<br />
2 Follow the “Using Daily Timer” procedure on<br />
the left. Select “REC TU” as the source for<br />
timer recording.<br />
• If the preset time is reached while the unit is on, the timer<br />
is not activated for timer recording.<br />
• The recording timer is canceled once the recording is<br />
finished.<br />
5 Set the time to stop playback<br />
following the same<br />
procedure as steps 2 and 3.<br />
6 Press DISPLAY MODE so<br />
that “TUNER,” “TAPE,”<br />
“CD” or “REC TU” appears<br />
on the display, then press<br />
PROGRAM.<br />
7 Press 4 or ¢ to select<br />
the desired source, then<br />
press PROGRAM.<br />
DISPLAY<br />
MODE<br />
PROGRAM<br />
SEARCH/TUNING<br />
– 17 –
Using Sleep Timer<br />
With the sleep timer, you can fall asleep to music.<br />
You can set the sleep timer using the remote control when the<br />
unit is turned on.<br />
How the sleep timer actually works<br />
The unit automatically turns off after the specified time<br />
length passes.<br />
SLEEP<br />
1 Press and hold SLEEP on<br />
the remote control until the<br />
desired time length appears<br />
on the display.<br />
The time length changes from 90 to 10 minutes in<br />
10-minute steps.<br />
2 Wait for a moment after specifying the time<br />
length.<br />
The SLEEP indicator lights up steadily on the display.<br />
• Setting both the timer-off and sleep-off times causes the<br />
unit to enter standby mode when the earlier one of them is<br />
reached.<br />
To change the shut-off time, repeat the procedure above.<br />
To cancel the setting, press SLEEP so that the SLEEP<br />
indicator goes off.<br />
• The sleep timer is also canceled when you turn off the unit.<br />
– 18 –
Description of the PTY Codes<br />
NEWS:<br />
AFFAIRS:<br />
INFO:<br />
SPORT:<br />
News.<br />
Topical program expanding or enlarging upon the news<br />
– debate, or analysis.<br />
Program the purpose of which is to impart advice in<br />
the widest sense.<br />
Program concerned with any aspect of sports.<br />
EDUCATE: Educational programs.<br />
DRAMA:<br />
All radio plays and serials.<br />
CULTURE: Programs concerning any aspect of national or regional<br />
culture, including language, theater, etc.<br />
SCIENCE: Programs about natural sciences and technology.<br />
VARIED:<br />
Used for mainly speech-based programs such as<br />
quizzes, panel games and personality interviews.<br />
POP M:<br />
ROCK M:<br />
MOR M:<br />
Commercial music of current popular appeal.<br />
Rock music.<br />
Easy-listening music of relatively short duration.<br />
LIGHT M: Instrumental music, and vocal or choral works.<br />
CLASSICS: Performances of major orchestral works, symphonies,<br />
chamber music, etc.<br />
OTHER M: Music not fitting into any of the other categories.<br />
Classification of the PTY codes for some FM stations<br />
may be different from the above list.<br />
Troubleshooting<br />
If you are having a problem with your unit, check this list for a possible solution before calling for service.<br />
If you cannot solve the problem from the hints given here, or the unit has been physically damaged, call a qualified person,<br />
such as your dealer, for service.<br />
No sound is heard.<br />
Symptom<br />
Hard to listen to broadcasts because of<br />
noise.<br />
The disc tray does not open or close.<br />
The disc does not play.<br />
The disc sound is discontinuous.<br />
The cassette holder cannot be opened.<br />
Impossible to record.<br />
Operations are disabled.<br />
Unable to operate the unit from the remote<br />
control.<br />
Cause<br />
• Connections are incorrect or loose.<br />
• Headphones are connected.<br />
• Antennas are disconnected.<br />
• The AM loop antenna is too close to the<br />
unit.<br />
• The FM antenna is not properly extended<br />
and positioned.<br />
The AC power cord is not plugged in.<br />
The disc is placed upside down.<br />
The disc is scratched or dirty.<br />
Power supply from the AC power cord has<br />
been cut off while the tape was running.<br />
Small tabs on the back of the cassette are<br />
removed.<br />
The built-in microprocessor may<br />
malfunction due to external electrical<br />
interference.<br />
• The path between the remote control and<br />
the remote sensor on the unit is blocked.<br />
• The batteries are exhausted.<br />
Action<br />
• Check all connections and make<br />
corrections. (See pages 6 and 7.)<br />
• Disconnect the headphones.<br />
• Reconnect the antennas correctly and<br />
securely.<br />
• Change the position and direction of the<br />
AM loop antenna.<br />
• Extend the FM antenna at the best<br />
position.<br />
Plug the AC power cord.<br />
Place the disc with the label side up.<br />
Clean or replace the disc. (See page 20.)<br />
Turn on the unit.<br />
Cover the holes with adhesive tape.<br />
Unplug the AC power cord and then plug it<br />
back in.<br />
• Remove the obstruction.<br />
• Replace the batteries.<br />
– 19 –
Maintenance<br />
To get the best performance of the unit, keep your discs, tapes, and mechanism clean.<br />
Handling discs<br />
• Remove the disc from its case by<br />
holding it at the edge while pressing<br />
the center hole lightly.<br />
• Do not touch the shiny surface of the<br />
disc, or bend the disc.<br />
• Put the disc back in its case after use<br />
to prevent warping.<br />
• Be careful not to scratch the surface<br />
of the disc when placing it back in its<br />
case.<br />
• Avoid exposure to direct sunlight,<br />
temperature extremes, and moisture.<br />
Cassette decks<br />
If the heads, capstan, and pinch roller of the cassette deck<br />
become dirty, the following will occur:<br />
• Impaired sound quality<br />
• Discontinuous sound<br />
• Fading<br />
• Incomplete erasure<br />
• Difficulty in recording<br />
To clean the heads, capstan, and pinch roller<br />
Use a cotton swab moistened with alcohol.<br />
Heads<br />
Capstan<br />
To clean the disc<br />
Wipe the disc with a soft cloth in a<br />
straight line from center to edge.<br />
DO NOT use any solvent — such as conventional record<br />
cleaner, spray, thinner, or benzine — to clean the disc.<br />
Handling cassette tapes<br />
• If the tape is loose in its cassette, take<br />
up the slack by inserting a pencil in<br />
one of the reels and rotating.<br />
• If the tape is loose, it may get<br />
stretched, cut, or caught in the<br />
cassette.<br />
• Be careful not to touch the tape<br />
surface.<br />
Pinch roller<br />
To demagnetize the heads<br />
Turn off the unit, and use a head demagnetizer (available at<br />
electronics and record shops).<br />
Cleaning the unit<br />
• Stains on the unit<br />
Should be wiped off with a soft cloth. If the unit is heavily<br />
stained, wipe it with a cloth soaked in water diluted neutral<br />
detergent and wrung well, then wipe clean with a dry cloth.<br />
• Since the unit may deteriorate in quality, become<br />
damaged or get its paint peeled off, be careful about the<br />
followings.<br />
– DO NOT wipe it with a hand cloth<br />
– DO NOT wipe it strong<br />
– DO NOT wipe it with thinner of benzine.<br />
– DO NOT apply any volatile substance such as<br />
insecticides to it.<br />
– DO NOT allow any rubber of plastic to remain in contact<br />
with it for a long time.<br />
• Avoid the following places to store the<br />
tape:<br />
– In dusty places<br />
– In direct sunlight or heat<br />
– In moist areas<br />
– Near a magnet<br />
– 20 –
Specifications<br />
Amplifier section<br />
Output power<br />
24 W (12 W + 12 W) at 8 Ω (MAX.)<br />
20 W (10 W + 10 W) at 8 Ω (10% THD)<br />
Audio output level<br />
PHONES: 800 mV/32 Ω<br />
Speakers/Impedance 8 Ω - 16 Ω<br />
General<br />
Power requirement<br />
Power consumption<br />
Dimensions<br />
Mass<br />
AC 240 V Ó, 50 Hz<br />
30 W (operation mode)<br />
1.5 W (standby mode)<br />
160 mm × 269.5 mm × 300 mm<br />
(W/H/D)<br />
4.3 kg<br />
Tuner<br />
FM tuning range<br />
MW tuning range<br />
CD player<br />
Dynamic range<br />
Signal-to-noise ratio<br />
Wow and flutter<br />
87.50 MHz - 108.00 MHz<br />
522 kHz - 1 629 kHz<br />
60 dB<br />
60 dB<br />
Unmeasurable<br />
Cassette deck<br />
Frequency response<br />
Normal (type I): 100 Hz - 10 000 Hz<br />
Wow and flutter 0.35% (WRMS)<br />
Speaker<br />
Speaker unit Woofer: 10.2 cm cone × 1<br />
Tweeter: 5.1 cm cone × 1<br />
Impedance<br />
8 Ω<br />
Dimensions<br />
160 mm × 269.5 mm × 192 mm<br />
(W/H/D)<br />
Mass<br />
2 kg/each<br />
Supplied accessories<br />
See page 6.<br />
Design and specifications are subject to change without<br />
notice.<br />
EN<br />
0202NNMMACORI


