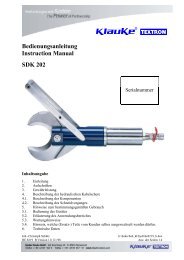
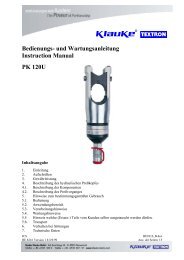
Instruction Manual
Instruction Manual
Instruction Manual

Create successful ePaper yourself
Turn your PDF publications into a flip-book with our unique Google optimized e-Paper software.
Auf dem Knapp 46 Tel.: ..49 (0)2191/907-0<br />
D-42855 Remscheid Fax: ..49 (0)2191/907-141<br />
_______________________________________________________________________________________________________________<br />
<strong>Instruction</strong> <strong>Manual</strong><br />
EK 12040<br />
JCS<br />
HE8343_B<br />
HE.8343_B Anzahl der Seiten: 7
<strong>Instruction</strong> <strong>Manual</strong> EK 12040 page 2<br />
_______________________________________________________________________________________________________________<br />
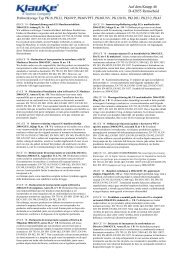
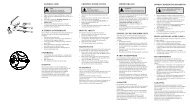
Picture 1<br />
10<br />
4<br />
3<br />
5<br />
6 2<br />
1<br />
8<br />
9<br />
7<br />
Picture 3<br />
Picture 4<br />
Crimping direction<br />
First crimp<br />
Side a<br />
Crimping direction<br />
Side b<br />
First crimp<br />
Crimping direction<br />
Side a<br />
First crimp<br />
Side b<br />
Picture 2
<strong>Instruction</strong> <strong>Manual</strong> EK 12040 page 3<br />
__________________________________________________________________________________________________________________<br />
<strong>Instruction</strong> <strong>Manual</strong><br />
for the electric-hydraulic crimping unit Type EK 12040,<br />
Serial-No. 91314VA01ff.<br />
Index<br />
1 Introduction<br />
2 Labels<br />
3 Warranty<br />
4 Description of the electric-hydraulic crimping unit<br />
4.1 Description of the components<br />
4.2 Brief description of the important features of the unit<br />
4.3 Description of the light diode display<br />
5 Remarks in respect of the determined use<br />
5.1 Operation of the units<br />
5.2 Explanation of the application range<br />
5.3 Mounting instructions<br />
5.4 Service and Maintenance instructions<br />
5.5 Remarks on the use of the Battery Cartridge and Charger<br />
5.6 Storage and transport of the crimping unit.<br />
6 Troubleshooting<br />
7 Putting out of operation/waste disposal<br />
8 Technical data<br />
Symbols<br />
1. Introduction<br />
Safety warnings<br />
Please do not disregard these instructions in order to<br />
avoid human injuries and environmental damages.<br />
Operational warnings<br />
Please do not disregard them to avoid damaging the<br />
pump unit.<br />
Before starting to use the tool please read the<br />
instruction manual carefully.<br />
Use this tool exclusively for its determined use.<br />
Mounting and assembly of connecting material with the help of<br />
this tool must only be performed by specially trained personnel.<br />
The minimum age is 16 years.<br />
This instruction manual has to be carried along during the entire<br />
life span of that tool.<br />
The operator has<br />
- to guaranty the availability of the instruction manual for the<br />
user and<br />
- to make sure, that the user has read and understood the<br />
instruction manual.<br />
2. Labels<br />
On the labels fixed on the housing of the tool you’ll find the type<br />
specification name of the manufacturer and the company logo.<br />
On the opposite side of the housing you’ll find a label with a brief<br />
presentation of the scope of manageable cross-sections for copper<br />
and aluminium and the pressing force. The serial number is on<br />
the hydraulic cylinder between the crimping head and the<br />
housing. On the crimping head you’ll find a warning against<br />
possible injuries during the crimp process.<br />
3. Warranty<br />
Table 1 (see Picture 1 page 2)<br />
Pos.-No. Description Function<br />
1 Trigger switch to start crimping procedure<br />
2 Retract<br />
button<br />
button to open the dies in case of<br />
emergency<br />
3 Ring device to secure the crimping tool<br />
4 Crimping C-shape crimping head for 120 kN<br />
head<br />
5 Housing ergonomically formed plastic<br />
housing for perfect handling with a<br />
detachable lid<br />
6 Light diode<br />
display<br />
indicator for tool functions and<br />
battery charge control<br />
7 Battery rechargeable NiCd battery<br />
cartridge<br />
8 Trigger lock safety lock to guarantee that no<br />
unintentional processes can occur.<br />
9 Removable<br />
hand guard<br />
guard to protect the operating<br />
hand, not for transportation<br />
10 Dies interchangeable crimping dies<br />
4.2. Brief description of the important features of the unit<br />
- The hydraulic unit incorporates an automatic retraction which<br />
returns the piston into its starting position when the maximum<br />
operating pressure is reached.<br />
- The unit is equipped with a special brake which stops the forward<br />
motion of the piston/dies when the trigger (Pos.-No. 1) is<br />
released.<br />
- The unit is equipped with a double piston pump which is<br />
characterised by a rapid approach of the dies (Pos.-No. 10)<br />
towards the connector and a slow crimping motion.<br />
- The crimping head can be smoothly turned by 360° around the<br />
longitudinal axis in order to gain better access to tight corners<br />
and other difficult working areas.<br />
- The EK 12040 is equipped with a microprocessor which<br />
indicated service intervals, internal checks and low battery<br />
charges. It also shuts off the motor automatically after the crimp<br />
is completed.<br />
4.3. Description of the light diode display<br />
This tool is equipped with a special circuit board incorporating<br />
several important features to inform the user about the current<br />
status of the unit. The diode (Pos.-No. 6) signals in the following<br />
cases:<br />
- The diode will signal periodically a few times while the battery<br />
(Pos.-No. 7) is being inserted into the tool. This indicates that the<br />
electronic circuit board performed its self-test successfully.<br />
- If the diode signals continuously after a crimping cycle for<br />
approx. 20 sec. the battery is discharged and must be recharged<br />
again.<br />
- Does the diode signal periodically at the end of a crimping cycle<br />
for approx. 20 sec the unit must be returned to an authorised<br />
Service Center for Service as soon as possible.<br />
- In case of an error the light diode display also signals periodically<br />
at the end of an pressing cycle. The signal indicates in this case<br />
the circuit opening by the electronic fuse. A possible reason for<br />
that is that a pressing cycle was performed with an incorrectly<br />
low battery. If the signal occurs even after changing the battery<br />
there must be a different error or a service is due. In these cases<br />
the tool must be returned to the manufacturer or an authorised<br />
service center.<br />
- Signal the LED (Pos.-No. 6) for 20 s continuously and then<br />
periodically a service is due and simultaneously the battery is<br />
discharged.<br />
If correct operation is guaranteed our warranty is 6 months from<br />
the time of delivery.<br />
4. Description of the electric-hydraulic crimping unit<br />
4.1. Description of the components<br />
The electric-hydraulic crimping unit type EK 12040 is a hand<br />
held tool and consists of the following components:
<strong>Instruction</strong> <strong>Manual</strong> EK 12040 page 4<br />
_______________________________________________________________________________________________________________<br />
Table 2 (see Picture 3, page 2)<br />
5. Remarks in respect of the determined use<br />
3 See picture 4 page 2<br />
Crimping Crimping Marking<br />
Surface of<br />
5.1. Operation of the unit<br />
range dies outside profile the dies<br />
mm²<br />
Before starting any work on electrical appliances it must be<br />
16-300 TCL and C. CU, „QS“ „QS“ chrome<br />
safeguarded that there are no live parts in the immediate<br />
Standard<br />
plated<br />
assembly area of the user. Is this not possible special precaution<br />
measures 1 Version<br />
(yellow)<br />
for working near live parts must be provided.<br />
16-240 TCL and C. CU, QS code # chrome<br />
DIN 46235 DIN<br />
plated<br />
Now you have to select the right dies (Pos.-No. 10) for the<br />
DIN 46267 46235<br />
intended application.<br />
10-240 Aluminium AL, „QS“ code # blue zinc<br />
Attention<br />
CL and C.<br />
Don’t operate the tool without dies.<br />
25-185 Aluminium<br />
C. Aldrey<br />
Al, „QS“ code # blue zinc<br />
The dies will be inserted sideways into the crimping head.<br />
25/4- Full tension Al, „QS“ code # blue zinc<br />
Afterwards the trigger lock (Pos.-No. 8) for the trigger (Pos.-No. 120/20 C. DIN ST, „QS“ code # black<br />
1) must be released, which means that it is pushed down (Picture<br />
2 Pos. B).<br />
10-240<br />
sm<br />
48085 T3<br />
Pre-rounding<br />
dies<br />
RU;<br />
QS, sm;<br />
- chrome<br />
plated<br />
Prior to operating the unit the charging level of the battery (Pos.-<br />
No. 7) should have been tested 2 . A low charging level can be<br />
detected by the flashing of the LED (Pos.-No. 6) for 20 s at the<br />
35-300 se<br />
16-150 Terminals<br />
DIN 46234<br />
QS, sm<br />
CU, QS<br />
DIN<br />
„QS“ chrome<br />
plated<br />
end of a crimping cycle.<br />
The crimping procedure is initiated by actuating the trigger (Pos.-<br />
10-95<br />
DIN 46230<br />
insulated<br />
terminals<br />
46234<br />
ISQ, QS „QS“ chrome<br />
plated,<br />
No. 1 & Picture 2 Pos. A). The crimping process is defined by the<br />
closing motion of the dies. During that process the connecting<br />
16-150 tub. CL for<br />
fine-str.<br />
F, QS „QS“ chrome<br />
plated<br />
material is positioned in the stationary half of the die whereas the<br />
moving part of the die is approaching the compression point 3 .<br />
4-50<br />
conductors<br />
C-clamps C, QS - chrome<br />
plated<br />
The crimping process is terminated when the crimping force is<br />
10-150 pre-insulated IS, QS „QS“ chrome<br />
reached. After having completed the crimp the dies return into<br />
tub. CL and<br />
plated<br />
the starting position automatically. Afterwards a second crimping<br />
connectors<br />
cycle can be initiated or the crimping procedure can be<br />
2x50- double compression<br />
CL<br />
plated<br />
DP, QS „QS“ chrome<br />
terminated.<br />
2x95<br />
10-95 Oval CU or AL, code # chrome<br />
Attention<br />
compression QS<br />
plated<br />
After having terminated the crimping process<br />
joints<br />
and prior to changing the dies the trigger<br />
10-185 WF DIN AE, QS - chrome<br />
(Pos.-No. 1) has to be locked with the trigger<br />
46228<br />
plated<br />
lock (Pos.-No. 8) to avoid unintended use.<br />
A bbreviations: T C L - T u b u la r cable lugs, C-Connectors, WF-Wire<br />
In case of error or emergency the dies can be returned into the<br />
F e rrules, QS-Cross-section<br />
starting position by actuating the retract button (Pos.-No. 2 &<br />
Attention<br />
Picture 2 Pos. C).<br />
Do only crimp those connecting materials mentioned<br />
in Tab. 2<br />
Attention<br />
The crimping process can be interrupted at any If different conducting materials have to be crimped, please contact<br />
moment by releasing the trigger.<br />
the manufacturer.<br />
5.2. Explanation of the application range<br />
The EK 12040 has a large number of various dies (Pos.-No. 10)<br />
available to crimp Klauke connecting material.<br />
Attention<br />
Do not crimp on live cables or conductors<br />
The EK 12040 is a hand held tool and it is not supposed to be<br />
restrained in a vise. It is not allowed to use the tool in a stationary<br />
application.<br />
The tool is not designed for continued crimping operations. After a<br />
sequence of approximately 30-40 completed crimps you have to<br />
make a break of 15 min. to give the tool time to cool down.<br />
Attention<br />
Too intensive use can cause heat damages for the<br />
tool<br />
Attention<br />
During the operation of electric engines sparks can<br />
occur which might ignite highly inflammable or<br />
explosive liquids and materials<br />
Attention<br />
Electric-hydraulic crimping tools should not be<br />
operated in pouring rain or under water.<br />
1 See EN 50110-1<br />
2 See Chapter 5.5 for more information of the battery and charging<br />
unit
<strong>Instruction</strong> <strong>Manual</strong> EK 12040 page 5<br />
_______________________________________________________________________________________________________________<br />
5.3. Mounting instructions<br />
Please read the assembly instructions in Chapter 12 of our<br />
general catalogue.<br />
Attention<br />
Even if the code number is identical only those<br />
dies should be used which are suitable for the<br />
material.<br />
Please use the following assembly instructions for cable lugs and<br />
connectors:<br />
1. Strip the conductor according to insertion depth (+10% due to<br />
the change of length of the crimped sleeve)<br />
2. The conductor ends must be cleaned with a cloth or brush<br />
before the assembly.<br />
3. Insert the conductor fully into the cable lug or connector<br />
4. Pay attention to the crimping directions and use the<br />
appropriate dies. The crimping directions 3 for cable lugs and<br />
connectors is indicated in the illustration below.<br />
5. After crimping, wipe away excess compound forced out of Alcable<br />
lugs and connectors.<br />
5.4 Service and maintenance instruction<br />
The electric-hydraulic crimping unit is equipped with a<br />
sophisticated electronics enabling the user to see when the next<br />
service is due. (Pls. read chapter 4.3 for more information) When<br />
the next service is due the unit must to be returned to an<br />
authorised service center.<br />
For every day service the unit has to be cleaned and dried after<br />
each use. The battery cartridge (Pos.-No. 7) and the charging unit<br />
have to be protected against humidity and dust.<br />
Within the determined use of the tool only the dies (Pos.-No. 10)<br />
are permitted to be changed by the customers.<br />
Attention<br />
Do not damage the seals of the tool.<br />
If the seals are damaged the warranty is invalidated.<br />
5.5 Remarks on the use of the battery cartridge and charging<br />
unit.<br />
The charging unit is run with a nominal voltage of 230 V and a<br />
frequency of 50-60 Hz. New batteries must be charged prior to<br />
use. To charge the battery cartridge (Pos.-No. 7) the power plug<br />
of the charging unit has to be plugged into the power supply and<br />
the battery cartridge has to be pushed into the charging unit. The<br />
charging time is one hour. The charging level of the battery<br />
cartridge can be checked by a LED 4 .<br />
green<br />
red<br />
flashing<br />
battery cartridge is charged<br />
Battery cartridge is empty and is just being charged<br />
battery cartridge is not pushed in properly or too<br />
hot, a sound signal occurs<br />
Is the battery plugged in correctly the LED changes from green to<br />
red and the charging procedure starts. When the charging<br />
procedure is terminated the LED changes again to green.<br />
Simultaneously a signal occurs for 5 seconds.<br />
No other battery cartridges e.g. dry batteries or car batteries etc.<br />
are permitted to be used neither in the tool nor in the charging<br />
unit.<br />
As soon as the speed of the machine decreases noticeably the<br />
battery must be recharged. Do not recharge a partially empty<br />
battery as a precaution.<br />
If charging a battery which has currently been used or which was<br />
laying in the sun for a longer period of time the LED might flash<br />
red. In this case wait for a while. The charging procedure starts after<br />
the battery cooled down.<br />
Does the LED flash red and green and does an audible tone occur<br />
for 20 seconds it is not possible to charge that battery. The poles of<br />
the battery or the charging unit are dirty or the battery is low or<br />
damaged. If you want to charge two batteries in a row wait for 15<br />
min before you charge the second battery.<br />
Avoid great fluctuating temperatures under 0°C and above 40°C.<br />
Through these fluctuations damages may result for the battery<br />
cartridge as well as for the charging unit. The best operation<br />
temperature is between 15-25 °C.<br />
Do not leave or operate the charging unit in rain or snow. Do not<br />
charge the battery near lightly inflammable materials or gases.<br />
Do not use the cord to transport the charging unit or to pull the plug<br />
out of a wall socket with force. Do not insert strange parts into the<br />
ducts of the charging unit.<br />
The charging of the batteries must only be done with charging units<br />
supplied by the manufacturer.<br />
Attention<br />
Do not place the battery in your pocket or in your<br />
toolbox if there are any conductive materials in it<br />
such as coins, keys, tools or other metallic parts.<br />
Pull the plug of the charging unit after charging. Do not<br />
disassemble the charging unit or battery.<br />
In order to safeguard a safe and proper performance of the charging<br />
unit the repair and service of the unit should be made through our<br />
Service Center.<br />
5.6 Storage and transport of the crimping tool<br />
In order to protect the tool against damages it has to be cleaned<br />
carefully after each use and be put into the transportation case<br />
which has to be closed safely.<br />
6. Troubleshooting<br />
a.) Flashing of the light diode display (Pos.-No. 6)<br />
=> See chapter 4.3 for more information about the special<br />
functions of the tool.<br />
b.) The tool loses oil.<br />
=> Return the tool to the manufacturer. Do not open the tool and<br />
damage the seals of the tool.<br />
c.) The crimping tool does not reach the final operating pressure.<br />
=> Stop the crimping process. Press the retract button (Pos.-No.<br />
2) and the operating switch continuously and simultaneously for<br />
about 10 sec. Is the malfunction not be eliminated by this attempt<br />
the tool has to be returned to the manufacturer.<br />
7. Putting out of operation/waste disposal<br />
The disposal of the various components of the tool has to be treated<br />
separately. First you have to dispose of the oil at special delivery<br />
points.<br />
Attention<br />
Hydraulic oils represent a danger for the groundwater.<br />
Uncontrolled draining of or improper<br />
disposal is under penalty.<br />
(environmental liability law)<br />
Next, the battery cartridge (Pos.-No. 7) has to be specially disposed<br />
of according to the EEC Battery Guideline.<br />
For the disposal of the remaining parts please reference the EC<br />
environmental guideline.<br />
4 See Picture 4 on Page 2<br />
4 The charging level of the battery can also be verified by the LED of<br />
the tool at the end of a crimping cycle. See chapter 4.3 for further<br />
information.<br />
Because of possible environmental damages we recommend to<br />
dispose of the tool by professional companies. A return of the old<br />
tool free of charge to the manufacturer cannot be granted.
<strong>Instruction</strong> <strong>Manual</strong> EK 12040 page 6<br />
_______________________________________________________________________________________________________________<br />
8. Technical Data<br />
Weight of the complete tool: approx. 7,2 kg (incl. battery)<br />
Crimping force:<br />
approx. 120 kN<br />
Driving motor:<br />
direct-current permanent field<br />
motor<br />
Battery voltage:<br />
12 V<br />
Battery capacity<br />
2 Ah<br />
Charging time:<br />
approx. 1 h, ¼ h with<br />
Quickcharger<br />
Crimping time:<br />
approx. 12 s to 16 s<br />
(depending on the connector size)<br />
Crimp per battery: approx. 30 crimps<br />
(Cu 150 mm² DIN 46235)<br />
Hydraulic oil: approx. 190 ml "AVIA HVI 15"<br />
Environmental temperature: -20°C to –40°C<br />
Sound level:<br />
75 dB (A) in 1m distance<br />
Vibrations:<br />
< 2,5 m/s²<br />
Dimensions: See Picture 2<br />
Additional instruction manuals are available free of charge. The<br />
part # is HE.8343_B.
<strong>Instruction</strong> <strong>Manual</strong> EK 12040 page 7<br />
__________________________________________________________________________________________________________________<br />
KLAUKE TEXTRON – Service Partner international<br />
FRANKREICH:<br />
KLAUKE FRANCE<br />
Mr. Cordel<br />
16, Rue Saint-Louis<br />
Z.I. Actisud<br />
57150 Creutzwald (France)<br />
Tel.: ++33-3-87298470<br />
Fax: ++33-3-87298479<br />
E-MAIL: klauke.france@free.fr<br />
GROSSBRITTANIEN Norwich Instrument Services<br />
Mr. Norman Cockburn<br />
32 Hellesdon Park Road<br />
Drayton High Road<br />
Norwich NR6 5DR (UK)<br />
Tel.: 0044-1603-416900<br />
Fax: 0044-1603-416902<br />
E-Mail: norman@nisltd.co.uk<br />
SPANIEN/ ANDORRA:<br />
Gave Electro S.A.<br />
Mrs. Amalia<br />
Paratge Coll-Blanc, S/N<br />
Aptdo. 12<br />
08430 La Roca del Valles, Barcelona<br />
(Spanien)<br />
Tel.: ++34-93-8422212<br />
Fax: ++34-93-8422227<br />
E-MAIL: gave@gave.com<br />
TSCHECHISCHE REPUBLIK/<br />
SLOVAKEI:<br />
Jiri Nitsch<br />
M. Pujmanove 1220/31<br />
14000 Praha 4 – Prankrac<br />
(Tschechische Republik)<br />
Tel.: ++42-2-61213220<br />
Fax: ++42-2-61213218<br />
ISRAEL:<br />
ITALIEN:<br />
NIEDERLANDE:<br />
ÖSTERREICH:<br />
POLEN/ UKRAINE:<br />
PORTUGAL:<br />
SLOWENIEN:<br />
Shay A.U., Ltd.<br />
Mr. Shay<br />
Ind. Zone Kiriat Arieh<br />
Embar Street 23/25<br />
P.O. BOX 10049<br />
49222 Petach Tikva (Israel)<br />
Tel.: ++972-3-9233601<br />
Fax: ++972-3-9234601<br />
E-MAIL: a_u-shay@nezvision.net.il<br />
David Brown Hydraulics Italien S.r.l.<br />
Mrs. Albani<br />
Via del Costruttore, 64<br />
41058 Vignola (MO) (Italy)<br />
Tel.: ++39-059-7700411<br />
Fax: ++39-059-7700425<br />
E-MAIL: dbhitalia@tin.it<br />
H.K. Electric B.V.<br />
Mr. Kleijn<br />
De Ateegen 7<br />
5321 JZ Hadel (Niederlande)<br />
Tel.: ++31-73-5997599<br />
Fax: ++31-73-5997590<br />
E-Mail: hke@csi.com<br />
KLAUKE Handelsgesellschaft mbH<br />
Mr. Hruschka<br />
Kaiser-Franz-Josef-Str. 9<br />
1230 Wien (Österreich)<br />
Tel.: ++43-1-8893436<br />
Fax: ++43-1-8893433<br />
E-MAIL: office@klauke.at<br />
RB Brexim S.A.<br />
Marynin 7a<br />
05-825 Grodzisk Mazowiecki (Polen)<br />
Tel.: ++48-22-7920273 oder 75<br />
Fax: ++48-22-7923055<br />
E-MAIL: RB.office@brexim.pl<br />
Palissy Galvani Electricidade Lda.<br />
Mr. Nuno Duarte<br />
Rua Serpa Pinto, 15-A/P<br />
1200 Lisboa (Portugal)<br />
Tel.: ++351-21-3223400<br />
Fax: ++351-21-3223410<br />
Isaria d. o.o.<br />
Mrs. Zorz<br />
Proizvdnja in trgovina<br />
Cece 2a<br />
1420 Trovlje (Slowenien)<br />
Tel.: ++386-356-31800<br />
Fax: ++386-356-3180<br />
VOLKSREPUBLIK CHINA: Excellence Eng. & Trade Co,<br />
(lokaler Partner)<br />
Mr. Paul Wu<br />
Rm 1207B, T.P Plaza<br />
9/109, LiuHua Road<br />
5100010 Guagzhou (P.R. China)<br />
Tel.: ++86-20-86671150<br />
Fax: ++86-20-86671141<br />
E-MAIL: excellence@21cn.com<br />
(lokaler Partner)<br />
(Service Ansprechpartner)<br />
KOREA:<br />
Geplante (planned) Service-Center in 2002:<br />
Russland:<br />
Schweden:<br />
Beijing Tian Ze Electric Power<br />
Equipment Co.Ltd.<br />
Mr. Yu Yong<br />
Room 223-225 Juan Plaza<br />
No. 18 Bai Zi Wan Road<br />
Chao Yang District<br />
100022 Beijing (P.R. China)<br />
Tel.: ++86-10-67706841<br />
Fax: ++86-10-67718723<br />
E-MAIL: yuyong@tze.com.cn<br />
Shanghai PuHuiFeng<br />
Machinery Wquipment<br />
Maintenance Co.Ltd.<br />
Mr. Zhang Yulian<br />
No.7, 234<br />
Changning Road<br />
200042 Shanghai (China ZIP)<br />
Tel.: ++86-21-62254404<br />
Fax: ++86-21-62254404<br />
E-MAIL<br />
Taehyung Hydraulic Tool<br />
Mr. Kim<br />
140-5, Gamjeun-Dong, Sasang-Gu<br />
Busan 17-060 (Korea)<br />
Tel.: ++82-51-3171507<br />
Fax: ++82-51-3171507<br />
E-Mail: thhyd@hanmail.net