Montagehinweise Mounting Instructions - BikerFactory
Montagehinweise Mounting Instructions - BikerFactory
Montagehinweise Mounting Instructions - BikerFactory

You also want an ePaper? Increase the reach of your titles
YUMPU automatically turns print PDFs into web optimized ePapers that Google loves.
1<br />
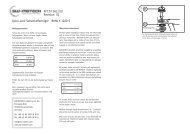
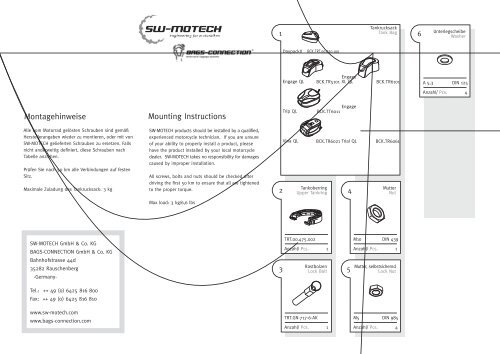
Tankrucksack<br />
Tank Bag<br />
6<br />
Unterlegscheibe<br />
Washer<br />
DaypackII<br />
BCK.TRT.00.020.100<br />
Engage QL<br />
BCK.TR5101<br />
Engage<br />
XL QL<br />
BCK.TR6101<br />
A 5,3 DIN 125<br />
Anzahl/ Pcs. 4<br />
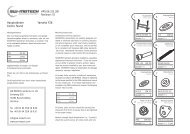
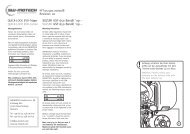
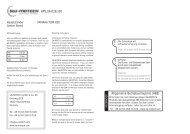
<strong>Montagehinweise</strong><br />
<strong>Mounting</strong> <strong>Instructions</strong><br />
Trip QL<br />
Engage<br />
BCK.TT6011<br />
Alle vom Motorrad gelösten Schrauben sind gemäß<br />
Herstellerangaben wieder zu montieren, oder mit von<br />
SW-MOTECH gelieferten Schrauben zu ersetzen. Falls<br />
nicht anderweitig definiert, diese Schrauben nach<br />
Tabelle anziehen.<br />
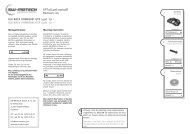
SW-MOTECH products should be installed by a qualified,<br />
experienced motorcycle technician. If you are unsure<br />
of your ability to properly install a product, please<br />
have the product installed by your local motorcycle<br />
dealer. SW-MOTECH takes no responsibility for damages<br />
caused by improper installation.<br />
Prüfen Sie nach 50 km alle Verbindungen auf festen<br />
Sitz.<br />
All screws, bolts and nuts should be checked after<br />
Maximale Zuladung des Tankrucksack: 3 kg<br />
driving the first 50 km to ensure that all are tightened<br />
to the proper torque.<br />
2<br />
Vina QL<br />
Tankoberring<br />
Upper Tankring<br />
BCK.TR6021 Trial QL<br />
4<br />
BCK.TR6061<br />
Mutter<br />
Nut<br />
Max load: 3 kg/6,6 lbs<br />
SW-MOTECH GmbH & Co. KG<br />
BAGS-CONNECTION GmbH & Co. KG<br />
Bahnhofstrasse 44d<br />
35282 Rauschenberg<br />
-Germany-<br />
3<br />
TRT.00.475.002<br />
Anzahl/ Pcs. 1<br />
Rastbolzen<br />
Lock Bolt<br />
5<br />
M10 DIN 439<br />
Anzahl/ Pcs. 1<br />
Mutter, selbstsichernd<br />
Lock Nut<br />
Tel.: ++ 49 (0) 6425 816 800<br />
Fax: ++ 49 (0) 6425 816 810<br />
www.sw-motech.com<br />
www.bags-connection.com<br />
TRT.GN-717-6-AK<br />
Anzahl/ Pcs. 1<br />
M5 DIN 985<br />
Anzahl/ Pcs. 4
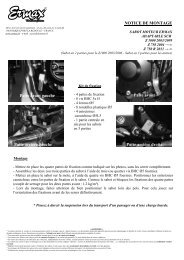
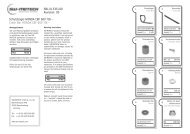
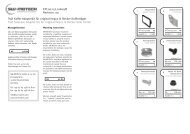
!<br />
Achtung: Nach erfolgreicher Montage<br />
des Tankunterrings den Tankoberring<br />
aufsetzen und dessen zukünftige<br />
Position am Tankrucksack ermitteln<br />
und makieren. Anschließend an den<br />
gekennzeichneten Stellen mit einem<br />
geeigneten Bohrer (5,5 mm) Löcher<br />
bohren und den Tankoberring gemäß<br />
Anbauanleitung mit dem Tankrucksack<br />
und der vernieteten Verstärkungsplatte<br />
verschrauben.<br />
TRT.00.475.102<br />
7<br />
1<br />
!<br />
Note: After the tankring assembly is<br />
complete and mounted to the<br />
motorcycle, place the tankbag on top<br />
of the motorcycle on the desired<br />
position. While the tankbag is in place,<br />
mark the position of the four drilling<br />
points. Pierce the four holes with 5,5<br />
mm drill.<br />
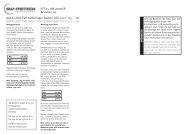
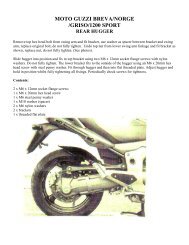
Nach erfolgreicher Montage des<br />
Tankoberrings am Tankrucksack die<br />
Zugleinen mit dem Verschlussbolzen<br />
verbinden und Überlänge entfernen.<br />
After the mounting of the tankbag is<br />
completed, tie the pull-cord on the<br />
lockbolt and trim the excess length.<br />
6mm<br />
Rastbolzen verschrauben und sicherstellen,<br />
dass der Verschlussbolzen 6mm Spiel hat.<br />
Gewinde bitte mit flüssiger Schraubensicherung<br />
(z. B. Loctite) einkleben.<br />
Tighten the lock bolt so that the tip protrudes<br />
6mm. Please use liquide thread lock (Loctite)<br />
to fix the thread of the lock bolt.<br />
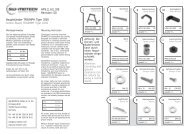
!<br />
Achtung:<br />
Fahrtrichtung<br />
Driving direction<br />
!<br />
Bitte<br />
Wir übernehmen keine<br />
Haftung bei Brüchen durch zu<br />
festes oder falsches Anziehen<br />
der Schrauben!<br />
Attention: We do not guarantee<br />
against breakage due to overtightening<br />
of screws. Once tighened,<br />
screws (7) should not protude more<br />
then 5 mm beyond the end of the<br />
lock nut (5).<br />
beim<br />
Bohren ein<br />
Holzstück auf<br />
der Gegenseite<br />
unterlegen!<br />
When drilling, use a piece<br />
of wood on the opposite<br />
side to support to material!<br />
Hier<br />
D<br />
r<br />
il<br />
bohren!<br />
l<br />
5,5<br />
mm<br />
e<br />
h<br />
!<br />
r e<br />
6<br />
5<br />
Hier<br />
D<br />
r<br />
il<br />
bohren!<br />
l<br />
5,5<br />
mm<br />
e<br />
h<br />
!<br />
r e<br />
!<br />
Mit Mutter verschrauben<br />
und kontern.<br />
Mount and secure with nut.<br />
3<br />
4<br />
2<br />
6<br />
5<br />
6<br />
5