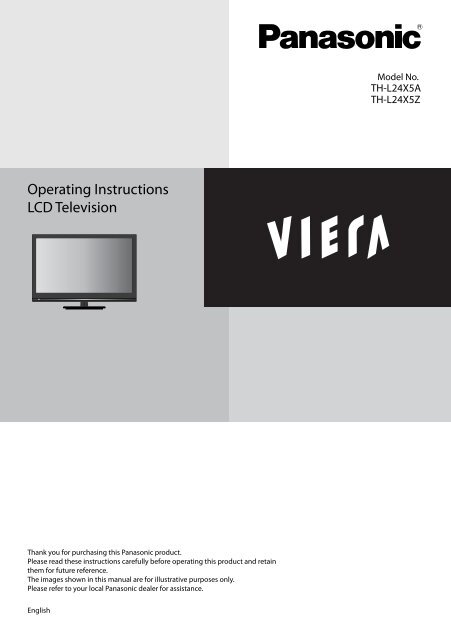
TH-L24X5Z Operating Instructions.pdf - Panasonic New Zealand
TH-L24X5Z Operating Instructions.pdf - Panasonic New Zealand
TH-L24X5Z Operating Instructions.pdf - Panasonic New Zealand

You also want an ePaper? Increase the reach of your titles
YUMPU automatically turns print PDFs into web optimized ePapers that Google loves.
Contents<br />
SAFETY PRECAUTIONS..................................................................................................... 3<br />
Warning................................................................................................................................................................................................... 3<br />
Caution.............................................................................................................................. 4<br />
Maintenance..................................................................................................................... 4<br />
Display panel, Cabinet, Pedestal..................................................................................................................................................... 4<br />
Mains plug.............................................................................................................................................................................................. 4<br />
IMPORTANT INFORMATION............................................................................................. 4<br />
Standard Accessories....................................................................................................... 5<br />
Attaching the Stand Base................................................................................................. 5<br />
Installing Stand Base........................................................................................................................................................................... 6<br />
Uninstalling Stand Base..................................................................................................................................................................... 6<br />
Wall Mounting (Not supplied)......................................................................................................................................................... 6<br />
PART NAMES AND FUNCTIONS....................................................................................... 7<br />
TV Controls/ Indicators....................................................................................................................................................................... 7<br />
TV (Side / Back)...................................................................................................................................................................................... 7<br />
Connections...................................................................................................................... 8<br />
Computer Connection........................................................................................................................................................................ 8<br />
Video Equipment Connection......................................................................................................................................................... 8<br />
AC Power Cord Connection.............................................................................................................................................................. 9<br />
Aerial or Cable Connection............................................................................................................................................................... 9<br />
Remote Control Batteries Installation............................................................................ 9<br />
Remote Control............................................................................................................... 10<br />
Turning On/Off LCD TV................................................................................................... 11<br />
Selecting Input Source................................................................................................... 11<br />
ASPECT............................................................................................................................ 11<br />
Initial Setup..................................................................................................................... 11<br />
Using the Freeview Guide (Digital TV mode)............................................................... 12<br />
View the Freeview Guide................................................................................................................................................................ 12<br />
On-Screen Display.......................................................................................................... 13<br />
Picture................................................................................................................................................................................................... 13<br />
Sound.................................................................................................................................................................................................... 14<br />
Timer...................................................................................................................................................................................................... 15<br />
Setup...................................................................................................................................................................................................... 15<br />
Multi-Media......................................................................................................................................................................................... 17<br />
TROUBLESHOOTING....................................................................................................... 18<br />
SPECIFICATIONS............................................................................................................. 19<br />
Input Signal Compatibility Chart.................................................................................. 20<br />
COMPONENT (Y, PB, PR), HDMI..................................................................................................................................................... 20<br />
PC (from D-sub terminal/ HDMI terminal)................................................................................................................................ 20<br />
Multi-media Supported Specification.......................................................................... 21<br />
Photo..................................................................................................................................................................................................... 21<br />
Music...................................................................................................................................................................................................... 21<br />
LICENSE........................................................................................................................... 22<br />
2
Warning<br />
SAFETY PRECAUTIONS<br />
Handling the mains plug and lead<br />
• Insert the mains plug fully in to the socket outlet. (If the<br />
mains plug is loose, it could generate heat and cause fire.)<br />
Ensure that the mains plug is easily accessible.<br />
• Do not touch the mains plug with a wet hand. This may<br />
cause an electrical shock.<br />
• Do not damage the mains lead, damaged lead may cause<br />
fire or electrical shock.<br />
−−<br />
Do not move the TV with the lead plugged in to a socket<br />
outlet.<br />
−−<br />
Do not place a heavy object on the lead or place the<br />
lead near a high temperature object.<br />
−−<br />
Do not twist the lead, bend it excessively or stretch it.<br />
−−<br />
Do not pull on the lead. Hold onto the mains plug body<br />
when disconnecting the plug.<br />
−−<br />
Do not use a damaged mains plug or socket outlet.<br />
−−<br />
Ensure TV does not crush the mains lead.<br />
If you find any abnormality, remove the mains plug<br />
immediately!<br />
AC 220-240 V<br />
50 Hz<br />
Do not expose to rain or excessive moisture<br />
• To prevent damage which might result in electric shock or<br />
fire, do not expose this TV to rain or excessive moisture.<br />
• This TV must not be exposed to dripping or splashing water<br />
and objects filled with liquid, such as vases, must not be<br />
placed on top of or above the TV.<br />
Do not place the TV on unstable surfaces<br />
• The TV may fall or tip over.<br />
Use only original dedicated pedestal /<br />
mounting equipment<br />
• Using an unapproved pedestal or other fixtures may make<br />
the TV unstable, risking injury. Be sure to ask your local<br />
<strong>Panasonic</strong> dealer to perform the set up or installation.<br />
• Use approved pedestals / wall-hanging brackets.<br />
Power source<br />
• This TV is designed to operate on AC 220-240 V, 50 Hz.<br />
Do not remove covers and NEVER modify the<br />
TV yourself<br />
• High voltage components may cause serious electrical<br />
shock, do not remove the rear cover as live parts are<br />
accessible when it is removed.<br />
• There are no user serviceable parts inside.<br />
• Have the TV checked, adjusted or repaired at your local<br />
<strong>Panasonic</strong> dealer.<br />
Do not expose the TV set to direct sunlight<br />
and other sources of heat<br />
• Avoid exposing the TV to direct sunlight and other sources<br />
of heat.<br />
To prevent the spread<br />
of fire, keep candles or<br />
other open flames away<br />
from this product at all<br />
times<br />
3
Caution<br />
When cleaning the TV remove the mains<br />
plug<br />
• Cleaning an energised TV may cause electrical shock.<br />
Remove the mains plug from the wall socket<br />
when TV is not in use for a prolonged period<br />
of time<br />
• The TV will still consume some power even in the off mode,<br />
as long as the mains plug is still connected.<br />
• Remove the mains plug from the wall socket before<br />
connecting or disconnecting leads.<br />
Do not expose your ears to excessive volume<br />
from the headphones<br />
• Irreversible damage can be caused.<br />
Do not apply strong force or impact to the<br />
display panel<br />
• This may cause damage resulting in injury.<br />
Transport TV set in upright position<br />
Do not block the rear air vents<br />
• Adequate ventilation is essential to prevent failure of<br />
electronic components.<br />
• Ventilation should not be impeded by covering the<br />
ventilation openings with items such as newspapers, table<br />
cloths and curtains.<br />
• We recommend that a gap of at least 10 cm is left all around<br />
this television receiver even when placed inside a cabinet or<br />
between shelves.<br />
• When using the pedestal, keep the space between the<br />
bottom of the TV and the surface where the TV is set. If<br />
pedestal is not used, ensure the vents in the bottom of the<br />
TV set are not blocked.<br />
Minimum distance<br />
10 cm<br />
10 cm 10 cm 10 cm<br />
Maintenance<br />
First, remove the mains plug from the socket<br />
outlet.<br />
Display panel, Cabinet, Pedestal<br />
Regular care :<br />
Gently wipe the surface of the display panel, cabinet, or<br />
pedestal by using a soft cloth to clean the dirt or fingerprints.<br />
For stubborn dirt :<br />
Dampen a soft cloth with clean water or diluted neutral<br />
detergent (1 part detergent to 100 parts water). Then wring<br />
the cloth and wipe the surface. Finally, wipe away all the<br />
moisture.<br />
Caution<br />
• Do not use a hard cloth or rub the surface too hard. This<br />
may cause scratches on the surface.<br />
• Take care not to subject the TV’s surfaces to water or<br />
detergent. A liquid inside the TV could lead to product<br />
failure.<br />
• Take care not to subject the surfaces to insect repellent,<br />
solvent, thinner or other volatile substances. This may<br />
degrade surface quality or cause peeling of the paint.<br />
• Take care not to tap or scratch the surface with your<br />
fingernail or other hard objects.<br />
• Do not allow the cabinet and pedestal to make contact with<br />
a rubber or PVC substance for a long time. This may degrade<br />
surface quality.<br />
Mains plug<br />
Wipe the mains plug with a dry cloth at regular intervals.<br />
Moisture and dust may lead to fire or electrical shock.<br />
IMPORTANT INFORMATION<br />
If a television is not positioned in a sufficiently stable location,<br />
it can be potentially hazardous due to falling. Many injuries,<br />
particularly to children, can be avoided by taking simple<br />
precautions such as:<br />
• Using cabinets or stands recommended by the<br />
manufacturer or the television.<br />
• Only using furniture that can safely support the television.<br />
• Ensuring the television is not overhanging the edge of the<br />
supporting furniture.<br />
• Not placing the television on tall furniture (for example,<br />
cupboards or bookcases) without anchoring both the<br />
furniture and the television to a suitable support.<br />
• Not standing the television on cloth or other materials<br />
placed between the television and supporting furniture.<br />
• Educating children about the dangers of climbing on<br />
furniture to reach the television or its controls.<br />
4
Standard Accessories<br />
Check you have all the items shown.<br />
<br />
Remote Control<br />
(TZZ00000002A)<br />
Batteries (AAA) x 2<br />
Neck and Base Screws x 3<br />
(Assembly screws for neck and base)<br />
<br />
Power Cord<br />
Warning<br />
Attaching the Stand Base<br />
Do not disassemble or modify the pedestal.<br />
• Otherwise the TV may fall over and become damaged, and<br />
personal injury may result.<br />
Caution<br />
Do not use any pedestal other than that<br />
provided with this TV.<br />
• Otherwise the TV may fall over and become damaged, and<br />
personal injury may result.<br />
Do not use the pedestal if it becomes warped or physically<br />
damaged.<br />
• If you use the pedestal while it is physically damaged, personal<br />
injury may result. Contact your nearest <strong>Panasonic</strong> dealer<br />
immediately.<br />
During assembly, use only screws supplied and make sure<br />
that all screws are securely tightened.<br />
• If sufficient care is not taken to ensure screws are properly<br />
tightened during assembly, the pedestal will not be strong<br />
enough to support the TV. It might fall over and become<br />
damaged and personal injury may result.<br />
Ensure that the TV does not fall over.<br />
• If the TV is knocked or children climb onto the pedestal with<br />
the TV installed, the TV may fall over and personal injury may<br />
result.<br />
Two or more people are required to install and remove<br />
the TV.<br />
• If two or more people are not present, the TV may be<br />
dropped, and personal injury may result.<br />
Caution<br />
Small object<br />
This product contains possibly dangerous parts that<br />
can be breathed in or swallowed by young children<br />
accidentally<br />
• Keep the dangerous parts out of reach of young children.<br />
5
Installing Stand Base<br />
1. Place the LCD TV screen facing down on a flat surface place<br />
where maintained with soft materials (such as a blanket)<br />
for protecting the display screen.<br />
2. Use the assembly screw to fasten the neck to the base<br />
securely.<br />
Wall Mounting (Not supplied)<br />
Use the screws that are threaded into the stand-mounting<br />
inserts on the back of your LCD TV to secure it to a Wall<br />
Mounting kit.<br />
Note:<br />
Wall Mounting kit is not supplied.<br />
It is safe to use long screws for this product.<br />
When using long screws, the two bottom screws may come<br />
loose, But the top two will remain tight in place, so it will not<br />
fall off the wall.<br />
3. Use only the supplied assembly screws to fasten the stand<br />
securely to the TV.<br />
Depth of screw : 7 mm<br />
Diameter : M4<br />
Screw for fixing the TV onto<br />
the wall-hanging bracket<br />
(not supplied with the TV)<br />
(View from the side)<br />
VESA standard interface<br />
75 x 75 mm<br />
Mounting screws measurements:<br />
A<br />
6<br />
Uninstalling Stand Base<br />
1. Place the LCD TV screen facing down on a flat surface place<br />
where maintained with soft materials (such as a blanket)<br />
for protecting the display screen.<br />
2. Remove screws in two holes with screw driver.<br />
Mounting Screws<br />
M4 Diameter, Length -<br />
6mm (min.); 7mm (max.)<br />
Distance between TV<br />
and wall(A)<br />
10 cm<br />
Wall-hanging bracket (Optional)<br />
Please contact your nearest <strong>Panasonic</strong> dealer to purchase the<br />
recommended optional accessories.<br />
For additional details, please refer to the manual of the<br />
optional accessories.<br />
• Using other wall-hanging brackets, or installing a wall<br />
hanging bracket by yourself have the risk of personal<br />
injury and product damage. In order to maintain the unit’s<br />
performance and safety, be absolutely sure to ask your<br />
dealer or a licensed contractor to secure the wall-hanging<br />
brackets. Any damage caused by installing without a<br />
qualified installer will void your warranty.<br />
• Do not mount the unit directly below ceiling lights (such<br />
as spotlights, floodlights or halogen lights) which typically<br />
give off high heat. Doing so may warp or damage plastic<br />
cabinet parts.<br />
• Take care when fixing wall brackets to the wall. Always<br />
ensure that there are no electrical cables or pipes in the wall<br />
before hanging bracket.<br />
• To prevent fall and injury, remove the TV from its fixed wall<br />
position when it is no longer in use.
TV Controls/ Indicators<br />
1 2<br />
TV (Side / Back)<br />
>PC<<br />
AV IN<br />
ST3<br />
PC AUDIO<br />
via AV 2<br />
PART NAMES AND FUNCTIONS<br />
Manufactured under license from Dolby<br />
Laboratories. Dolby and the double-D<br />
symbol are trademarks of Dolby Laboratories.<br />
1 2 3 4 5 6 7<br />
ST3<br />
ST3<br />
AV3 IN<br />
>PC<<br />
>PC<<br />
3<br />
4<br />
5<br />
6<br />
7<br />
8<br />
9<br />
10<br />
1 Remote Control Signal Receiver<br />
• Do not place any objects between the TV<br />
remote control signal receiver and remote<br />
control.<br />
2 Power Indicator<br />
Red: Standby<br />
Green: On<br />
Green blink: Receiving a command from<br />
the remote control<br />
3 VOL +/-<br />
• Used to change volume.<br />
• Used to adjust the value of the selected item<br />
on On-Screen Menu.<br />
4 CH a/b<br />
• Used to change channels.<br />
• Used to select item on On-Screen Menu.<br />
5 MENU<br />
• Open or close the On-Screen Menu.<br />
6 INPUT/OK<br />
• Use to select an input source.<br />
• Confirm and enter a selection.<br />
7 (POWER)<br />
• Use to turn the TV On or Off.<br />
1 HDMI 1/HDMI 2<br />
• Connect all kinds of HDMI output equipment.<br />
• When connecting a DVI device using an<br />
HDMI-DVI adapter, connect the device to the<br />
HDMI1 jack.<br />
2 AV 2 IN<br />
• Connect video and audio output from video<br />
equipment.<br />
3 AV 1 IN<br />
• Connect video and audio output from video<br />
equipment.<br />
4 DIGITAL AUDIO OUT<br />
Connect an audio amplifier to this jack.<br />
5 AUDIO OUT<br />
• Connect an external sound system to these<br />
jacks.<br />
6 ANT<br />
• For digital cable, digital terrestrial and<br />
analogue broadcasts.<br />
7 PC<br />
• Connect computer outputs to this terminal.<br />
• Connect an audio cable to L/R jacks of AV2<br />
and audio out jack on the computer.<br />
8 Headphone<br />
• Connect a headphone (stereo) to this jack and<br />
the TV speaker out will be muted.<br />
9 AV 3 IN<br />
• Connect video and audio output from video<br />
equipment.<br />
10 USB<br />
• Connect USB memory stick to this terminal to<br />
play Multimedia.<br />
7
Connections<br />
Computer Connection<br />
Cable used for connection (This cable is not supplied with this LCD<br />
TV.)<br />
PC/VGA Cable (D-SUB 15pin)<br />
HDMI Cable<br />
• Audio Cable [L/R]<br />
Note:<br />
When connecting the cable, AC Power Cords of both<br />
LCD TV and external equipment should be disconnected<br />
from AC outlet. Turn LCD TV and peripheral equipment<br />
on before your computer is switched on.<br />
Note:<br />
You can connect the DVI source to HDMI1 input terminal by using the DVI to HDMI converter then connect audio input to PC<br />
audio input terminal (L/R jacks of AV2 INPUT).<br />
Video Equipment Connection<br />
Cables used for connection (These cables are not supplied with this<br />
LCD TV.)<br />
• Component/Video, Audio Cable<br />
• HDMI Cable: HDMI Input<br />
Note:<br />
When connecting the cable, AC Power Cords of both<br />
LCD TV and external equipment should be disconnected<br />
from AC outlet.<br />
HDMI Input<br />
Digital Audio Output<br />
Manufactured under license from Dolby<br />
Laboratories. Dolby and the double-D<br />
symbol are trademarks of Dolby Laboratories.<br />
PC AUDIO<br />
via AV 2<br />
AV IN<br />
ST3<br />
ST3<br />
ST3<br />
>PC<<br />
Component/Video Source<br />
AV2 IN can accept Component<br />
or Video cable.<br />
DVD video equipment<br />
(such as DVD player or<br />
high-definition TV source)<br />
8
ST3<br />
ST3<br />
ST3<br />
AC Power Cord Connection<br />
This LCD TV uses nominal input voltages of 220-240V AC.<br />
It is designed to work with single-phase power systems. To<br />
reduce risk of electrical shock, do not plug into any other type<br />
of power system. Consult your authorised dealer or service<br />
station if you are not sure the type of power being supplied.<br />
Connect the LCD TV with all peripheral equipment before<br />
turning the LCD TV on.<br />
Caution<br />
• For safety, unplug AC power cord when the LCD TV is not<br />
in use.<br />
Remote Control Batteries Installation<br />
1. Remove the battery compartment cover.<br />
2. Insert two size AAA batteries (1.5V) according to “+” and “-”<br />
polarity markings inside the battery compartment.<br />
3. Close the battery compartment cover.<br />
AC POWER CORD<br />
Aerial or Cable Connection<br />
Cable used for connection (This Outdoor Aerial cable is not<br />
supplied with this LCD TV.)<br />
• Aerial Cable<br />
>PC<<br />
AV IN<br />
PC AUDIO<br />
via AV 2<br />
Manufactured under license from Dolby<br />
Laboratories. Dolby and the double-D<br />
symbol are trademarks of Dolby Laboratories.<br />
Caution<br />
To insure safe operation, please observe the following<br />
precautions:<br />
Replace two batteries at the same time.<br />
• Do not use a new battery with a used battery.<br />
• Avoid contacting with water or liquid.<br />
• Do not expose the Remote Control or Batteries to moisture,<br />
or heat such as sunshine, fire or the like.<br />
• Do not drop the Remote Control.<br />
• If a battery has leaked on the Remote Control, carefully wipe<br />
case clean and install new batteries.<br />
Risk of explosion if battery is replaced by an incorrect type.<br />
• Dispose of used batteries according to the instructions.<br />
• Remote control contains AAA battery and must be kept out<br />
of reach of small children to avoid accidental ingestion.<br />
Note:<br />
• For all aerial circuit problems, please consult your local<br />
dealer.<br />
9
Remote Control<br />
10<br />
1<br />
2<br />
3<br />
4<br />
5<br />
6<br />
7<br />
8<br />
9<br />
10<br />
11<br />
12<br />
13<br />
14<br />
15<br />
1 (POWER) Standby On / Off switch<br />
• Switches TV On or Off standby.<br />
2 Numeric buttons<br />
• Changes channel and teletext pages.<br />
3 GUIDE<br />
• Displays TV Guide.<br />
• Actives FreeView contents when MHEG source inputs.<br />
4 TEXT<br />
• Switches to teletext mode.<br />
5 STTL<br />
• Displays subtitles.<br />
6 VOL +/-<br />
• Press to adjust the volume.<br />
7 INPUT (TV)<br />
• Switches to TV input source.<br />
8 MUTE<br />
• Press to mute or restore the sound.<br />
16<br />
17<br />
18<br />
19<br />
20<br />
21<br />
22<br />
23<br />
24<br />
25<br />
26<br />
27<br />
28<br />
29<br />
9 ( )<br />
• Select a sound multiplex mode.<br />
10 MENU<br />
• Open or close the On-Screen Menu.<br />
11 R/G/Y/B (COLOUR BUTTON)<br />
• Used for the selection, navigation and operation of various<br />
functions.<br />
12 F.P. (Favourite Page)<br />
• Opens the favourite page list in teletext mode.<br />
Note:<br />
• Add a teletext page into the favourite page list:<br />
−−<br />
When you enter a teletext page, press F.P. button to<br />
open the favourite page list, then press OK to add the<br />
selected teletext page into the favourite page list.<br />
• View a favourite page:<br />
−−<br />
Press F.P. button to open the favourite page list, selects<br />
a teletext page, then press OK to enter the content.<br />
• Remove a favourite page from the favourite page list:<br />
−−<br />
Press F.P. button to open the favourite page list, selects<br />
the teletext page, then press OK to enter the content.<br />
−−<br />
Press F.P. button again to open the favourite page list,<br />
selects the current teletext page, then press OK to<br />
remove the teletext page from the favourite page list.<br />
13 REVEAL<br />
• Reveal hidden information such as answers to a quiz.<br />
14<br />
• Fast reverse for multi-media playback.<br />
15<br />
• Play or pause for multi-media playback.<br />
16 (INFO)<br />
• Displays channel and programme information.<br />
17 LAST VIEW<br />
• Switches to previously viewed channel or input mode.<br />
18 HOLD<br />
• Stops the scrolling of pages and hold the current page in<br />
teletext mode.<br />
• The text decoder stops receiving data.<br />
19 INDEX<br />
• Returns to the index page in teletext mode.<br />
20 CH /<br />
• Selects channel in sequence.<br />
21 INPUT (AV)<br />
• Opens input source list and switches to video input source.<br />
22 EXIT<br />
• Returns to the normal viewing screen.<br />
23 ASPECT<br />
• Changes aspect ratio.<br />
• Also possible by pressing this button repeatedly until you<br />
reach the desired aspect.<br />
24 a/b/c/d/ OK<br />
• Confirms selections and choices.<br />
25 RETURN<br />
• Returns to the previous menu/page.<br />
26 SUBPAGE<br />
• To select the subpage when the current page contains<br />
subpages.<br />
27 SIZE<br />
• Teletext size function key.<br />
28<br />
• Stop for multi-media playback.<br />
29<br />
• Fast forward for multi-media playback.
Turning On/Off LCD TV<br />
1. Complete the peripheral connections before turning on<br />
LCD TV.<br />
2. Connect LCD TV’s AC Power Cord into an AC outlet.<br />
3. Press POWER button on Side Control of LCD TV or use<br />
Remote Control to turn it ON.<br />
The POWER indicator will light up (green).<br />
Press POWER button again to enter stand-by status, the<br />
POWER indicator will become red.<br />
Note:<br />
If there is no reaction when you press (POWER) on the<br />
remote control, press (POWER) button on Side Control<br />
again to active the TV.<br />
Selecting Input Source<br />
Select mode AV 1, AV 2, AV 3, HDMI 1, HDMI 2, PC, USB,<br />
or TV by pressing INPUT(AV) button of Remote Control or<br />
INPUT/OK button of Side Control.<br />
Input Selection<br />
AV 1<br />
AV 2<br />
AV 3<br />
HDMI 1<br />
HDMI 2<br />
PC<br />
USB<br />
TV<br />
ASPECT<br />
Select screen size among “16:9”, “Just“, “4:3”,<br />
“Zoom 1”, “Zoom 2” by pressing ASPECT button on Remote<br />
Control.<br />
[16:9]<br />
Directly displays the image at 16:9<br />
without distortion (anamorphic).<br />
[Just]<br />
Displays the correct format according<br />
to the input source.<br />
[4:3]<br />
Displays the image at the standard 4:3<br />
without distortion.<br />
1 Initial Setup<br />
Initial Setup<br />
Initial Setup<br />
Welcome to use the Wizard for Initial Setup !!<br />
Please press [OK] to start the wizard.<br />
2 Mode Select (TV location setting)<br />
Initial Setup<br />
Please select your mode<br />
Home<br />
Shop<br />
Mode select<br />
Back Select Next Exit Exit<br />
Note:<br />
If you selected Shop, a message appears “Are you sure ?”<br />
Select Yes to continue, or select No to change your selection.<br />
3 Channel Scan<br />
Initial Setup<br />
First, please connect aerial.<br />
Start channel scan now ?<br />
Channel Scan<br />
If you skip this step, the channel scan could be performed in Menu.<br />
Scan<br />
Skip Scan<br />
Back Select Next Exit Exit<br />
[Zoom 1]<br />
Scales the classic 4:3 format to 14:9.<br />
[Zoom 2]<br />
Scales the classic 4:3 format to 16:9.<br />
11
4 Search for channels<br />
Initial Setup<br />
The channel scan may take a while to complete.<br />
Status: Scanning...<br />
Analogue Channels: 2<br />
Digital Channels: 0<br />
Channel Scan<br />
15%<br />
Using the Freeview Guide (Digital TV mode)<br />
Using the Freeview Guide enables you to select a programme<br />
easily, view programme information, etc.<br />
The Freeview Guide - Electronic Programme Guide (EPG)<br />
provides an on screen listing of the programmes currently<br />
broadcast and the future broadcasts over the next seven days<br />
(depending on the broadcasters).<br />
View the Freeview Guide<br />
• Each time pressed, the screen will be switched between the<br />
Freeview Guide Listing and What’s on Now / Next.<br />
5 Initial setup completed<br />
Initial Setup<br />
Congratulations !!<br />
Exit Cancel<br />
Complete<br />
Example: Freeview Guide Listing<br />
Current day & date<br />
20:30 Lost<br />
21:30 Dirty Sexy Money<br />
22:30 The Knights Of<br />
Prosperity<br />
Wed 2 Apr<br />
Programme<br />
currently viewed<br />
Completed Initial Setup.<br />
Please press [OK] to exit the wizard.<br />
22:55 Entourage<br />
23:30 Reality Bites:<br />
Bodyshock - Half Ton...<br />
Prog Chnl<br />
OK Watch TV<br />
TV ONE, 20:00<br />
Sayid confronts Ben's spy on the<br />
freighter, and Ben urges daughter<br />
Alex to flee Locke's camp in order<br />
to survive an impending attack.<br />
Parental Rating captioning Information<br />
Next Week Next Day<br />
EPG/Guide Now/Next<br />
Back<br />
Current channel’s<br />
programme listing<br />
Description<br />
Parental rating<br />
Buttons<br />
Description<br />
OK<br />
Watch TV<br />
Yellow<br />
To the previous day<br />
Blue<br />
To the next day<br />
a/b<br />
To scroll through programme<br />
c/d • To scroll through channel<br />
Example: What’s on Now / Next<br />
Current time & date<br />
What's on now/next.<br />
20:00 Wed 2 Apr<br />
2 TV2 Now 20:30 Lost<br />
Next 21:30 Dirty Sexy Money<br />
3 TV3<br />
Now 20:30 Criminal Intent<br />
Next 21:30 Law & Order<br />
4 C4<br />
Now 20:30 Celebrity Joker Poker<br />
Next 21:30 It's Always Sunny In Philadelp...<br />
5 Māori Television Now 20:30 NZ Doco : Children of the Revol...<br />
Next 21:30 Te Tepu<br />
6 TVNZ6<br />
Now 20:30 Talk Talk<br />
Next 21:30 The Gravy<br />
Chnl<br />
OK Watch TV<br />
EPG/Guide<br />
Listings<br />
Channel listing<br />
12<br />
Buttons<br />
OK<br />
a/b<br />
Description<br />
Watch TV<br />
• To scroll through channel<br />
Note:<br />
• When this TV is turned on for the first time, or the TV is<br />
switched off for more than a week, it may take some time<br />
before the Freeview Guide is completely shown.<br />
• The Freeview Guide screen and operations are subject to<br />
change without notice.<br />
• For <strong>TH</strong>-<strong>L24X5Z</strong> model only.
Picture<br />
Main Menu<br />
Select<br />
Access EXIT<br />
On-Screen Display<br />
RETURN<br />
Viewing Mode<br />
Normal<br />
Back Light<br />
90<br />
Contrast<br />
90<br />
Brightness<br />
50<br />
Colour<br />
50<br />
Sharpness<br />
50<br />
Tint 0<br />
Colour Balance<br />
Normal<br />
P-NR<br />
On<br />
3D-COMB<br />
On<br />
1. Press MENU button and ab buttons to select “Picture”, the<br />
Picture menu will be displayed.<br />
2. Press OK button to enter Picture menu.<br />
3. Press ab buttons to select item desired.<br />
4. Press cd buttons to adjust value.<br />
5. Press RETURN button to return the previous menu.<br />
6. Press EXIT button to exit menu operation.<br />
Viewing Mode<br />
• Basic viewing mode Dynamic/Normal/Cinema/User/<br />
Game.<br />
Dynamic<br />
• Provides enhanced picture contrast and sharpness when<br />
viewing in a bright room.<br />
Normal<br />
• Recommended for viewing under normal ambient room<br />
lighting conditions.<br />
Cinema<br />
• For watching movies in a darkened room with the improved<br />
performance of contrast, black and colour reproduction.<br />
User<br />
• Sets the settings for your preferred.<br />
Game<br />
• Fast response signal specifically to provide suitable images<br />
for playing games.<br />
Warning<br />
• TELEVISION IS IN SHOP MODE.<br />
Back Light<br />
• Adjusts the luminance of the back light. (0~100)<br />
Contrast<br />
• Increases or decreases the levels of contrast according to<br />
your personal preference. (0~100)<br />
Brightness<br />
• Increases or decreases the levels of brightness according to<br />
your personal preference. (0~100)<br />
Colour<br />
• Increases or decreases the levels of colour according to your<br />
personal preference. (0~100)<br />
Sharpness<br />
• Increases or decreases the levels of sharpness according to<br />
your personal preference. (0~100)<br />
Tint<br />
• With an NTSC signal source connected to the TV, the picture<br />
hue can be adjusted to suit your taste. (-50~50)<br />
• For NTSC signal reception only.<br />
Colour Balance<br />
• Allows you to set the overall colour tone of the picture<br />
Cool/Normal/Warm.<br />
P-NR<br />
• Enables or disables P-NR (Picture Noise Reduction)<br />
• Automatically reduces unwanted picture noise and flicker<br />
noise in the contoured parts of a picture.<br />
3D-COMB<br />
• Makes still or slow moving pictures look more vivid.<br />
• For CVBS signal reception only.<br />
Screen Display<br />
Turns the screen On or Off.<br />
Press any buttons (except Standby) to turn the screen on.<br />
The sound is active even if the screen turns off.<br />
• This function is effective in reducing power consumption<br />
when listening to the sound without watching the TV<br />
screen.<br />
H. pos<br />
Adjusts the horizontal position of the picture.<br />
• Only for HDMI(DVI) only.<br />
V. pos<br />
Adjusts the vertical position of the picture.<br />
• Only for HDMI(DVI) only.<br />
Advanced Settings<br />
• Provides various advanced settings for improving the<br />
picture quality.<br />
16:9 Overscan<br />
• Selects the screen area displaying the image.<br />
−−<br />
On: Enlarges the image to hide the edge of the image.<br />
−−<br />
Off: Displays the image in the original size.<br />
13
Adaptive Brightness<br />
• Automatically adjusts the brightness and contrast after<br />
analysing the input signal. This function enriches the<br />
colours and the depth of the picture.<br />
Dynamic Back Light<br />
• Automatically optimises the backlight levels for dark scenes.<br />
DVI Input Settings<br />
• Changes the black level in the image for HDMI input mode<br />
with DVI input signal manually.<br />
• For HDMI terminal with DVI input signal only.<br />
3:2 pulldown<br />
• Automatically detects a film-based source (originally<br />
encoded at 24 frames/second), analyses it then recreates<br />
each file frame for high-definition picture quality.<br />
• 3:2 pulldown function is selectable when channel display<br />
shows an input resolution of 576i, 480i, or 1080i.<br />
Sound<br />
Main Menu<br />
Select<br />
Access EXIT<br />
RETURN<br />
Mode<br />
Bass<br />
Treble<br />
Balance<br />
Headphone Volume<br />
Surround<br />
MPX<br />
SPDIF Selection<br />
SPDIF Delay<br />
Music<br />
Off<br />
Stereo<br />
Auto<br />
No<br />
1. Press MENU button and ab buttons to select “Sound”, the<br />
Sound menu will be displayed.<br />
2. Press OK button to enter Sound menu.<br />
3. Press ab buttons to select item desired.<br />
4. Press cd buttons to adjust value.<br />
5. Press RETURN button to return the previous menu.<br />
6. Press EXIT button to exit menu operation.<br />
Mode<br />
• Selects the basic sound mode Music or Speech.<br />
Music<br />
• Optimise sound quality for watching music videos, etc.<br />
Speech<br />
• Optimise sound quality for watching news, drama, etc.<br />
Bass<br />
• Increases or decreases level to enhance or minimise lower,<br />
deeper sound output. (-14~14)<br />
Treble<br />
• Increases or decreases level to enhance or minimise sharper,<br />
higher sound output. (-14~14)<br />
0<br />
0<br />
0<br />
0<br />
Balance<br />
• Adjusts volume level of right and left speakers. (-50~50)<br />
Headphone Volume<br />
• Adjusts the volume of the headphones. (0~100)<br />
Surround<br />
• Enriches (expanding and deepening) the sound quality.<br />
MPX<br />
• Selects multiplex sound mode (if available).<br />
• For analogue mode only.<br />
SPDIF Selection<br />
• Selects the initial setting for digital audio output signal from<br />
DIGITAL AUDIO OUT terminal.<br />
Auto<br />
• Outputs Dolby Digital (if available) or default audio source<br />
to DIGITAL AUDIO OUT terminal.<br />
• If the audio is recorded in Dolby Digital, the output from<br />
DIGITAL AUDIO OUT terminal will be Dolby Digital.<br />
PCM<br />
• Outputs PCM format to DIGITAL AUDIO OUT terminal.<br />
SPDIF Delay<br />
• Adjusts the delay time of the sound output from DIGITAL<br />
AUDIO OUT terminal if the sound does not synchronise the<br />
image.<br />
HDMI1 input<br />
• Selects an input way of audio signal.<br />
• For HDMI1 terminal only.<br />
Digital<br />
• Selects Digital to input audio signal from HDMI terminal.<br />
Analogue<br />
• Selects Analogue to input audio signal from L/R jack of AV2<br />
INPUT.<br />
Audio Description<br />
Audio Description<br />
−−<br />
Normal: Sets regular audio only.<br />
−−<br />
Hard of Hearing: Sets the mix of hearing impaired<br />
audio with regular audio.<br />
−−<br />
Visually Impaired: Sets the mix of visually impaired<br />
audio with regular audio.<br />
Volume<br />
• Adjusts the volume for Audio Description. (0~100)<br />
14
Timer<br />
Setup<br />
Main Menu<br />
Main Menu<br />
Off Timer<br />
Auto Standby<br />
Off<br />
Off<br />
Channels<br />
Language<br />
Display Settings<br />
HDMI Control<br />
System Menu<br />
Child Lock<br />
Other Setting<br />
On<br />
Select<br />
Access EXIT<br />
RETURN<br />
1. Press MENU button and ab buttons to select “Timer”, the<br />
Timer menu will be displayed.<br />
2. Press OK button to enter Timer menu.<br />
3. Press ab buttons to select item desired.<br />
4. Press cd buttons to adjust value.<br />
5. Press RETURN button to return the previous menu.<br />
6. Press EXIT button to exit menu operation.<br />
Off Timer<br />
• Sets the time until the TV automatically goes to Standby<br />
mode.<br />
Auto Standby<br />
• Makes non-watched or non-used connected equipment go<br />
into Standby mode to reduce the power consumption.<br />
Select<br />
Access EXIT<br />
RETURN<br />
1. Press MENU button and ab buttons to select “Setup”, the<br />
Setup menu will be displayed.<br />
2. Press OK button to enter Setup menu.<br />
3. Press ab buttons to select item desired.<br />
4. Press cd buttons to adjust value.<br />
5. Press RETURN button to return the previous menu.<br />
6. Press EXIT button to exit menu operation.<br />
PC Setup<br />
• For PC input source only.<br />
Input Resolution<br />
• Options change depending on signals.<br />
Clock<br />
• Sets to the minimum level if noise occurs.<br />
H-pos<br />
• Adjusts horizontal position.<br />
V-pos<br />
• Adjusts vertical position.<br />
Clock Phase<br />
• Eliminates flicker and distortion.<br />
Auto Adjustment<br />
• Automatically adjusts the image settings such as position<br />
and phase.<br />
Channels<br />
Auto Scan<br />
• Automatically sets the channels.<br />
Update Channel List<br />
• Updates channel list without erasing the original<br />
information.<br />
Single RF Scan<br />
• Scans single RF channels and checks the signal condition.<br />
Analogue Manual Scan<br />
• Searches and stores analogue TV channels manually.<br />
Note:<br />
TV will store scanned channels, even if the scanning for<br />
channels have not completed.<br />
15
Channel Skip<br />
• Skips one or more channels when using remote control to<br />
switch between channels.<br />
Channel Sort<br />
• Reorders the channels in the programme list.<br />
Channel Edit<br />
• Edits the channel number or the channel name.<br />
Fine tuning<br />
• Fine-tunes analogue channels manually when the reception<br />
is poor.<br />
Language<br />
Preferred Audio 1/Preferred Audio 2<br />
• Selects the first and second preferred language for DVB<br />
multi audio (depending on the broadcaster).<br />
Preferred Subtitle 1/Preferred Subtitle 2<br />
• Selects the first and second preferred language for DVB<br />
subtitles (depending on the broadcaster).<br />
Preferred Teletext<br />
• Selects the preferred language for DVB teletext service<br />
(depending on the broadcaster).<br />
Display Settings<br />
Preferred Subtitle Type<br />
• Selects the preferred subtitle type.<br />
−−<br />
Standard: Provides preset subtitles (depending on the<br />
broadcaster).<br />
−−<br />
Hearing Impaired: Provides aids in understanding<br />
and enjoyment with DVB subtitles (depending on the<br />
broadcaster).<br />
Banner Display Timeout<br />
• Sets how long the Information banner stays on screen.<br />
HDMI Control<br />
First, please connect your TV to a HDMI compliant device.<br />
• TV will be turned on and display the previous viewed input<br />
source, when the connected HDMI compliant device is<br />
switched on.<br />
• Connected HDMI compliant device will be switched to<br />
standby when TV turns to standby mode.<br />
System Menu<br />
Software License<br />
• Displays the software license information of this TV.<br />
Child Lock<br />
• Locks a channel/AV input to prevent access to it.<br />
• When the locked channel/input is selected, a message<br />
appears; you need to enter the PIN number to watch the<br />
restricted content.<br />
PIN<br />
• You need to enter the PIN when you access locked channel<br />
or inputs.<br />
• The default PIN is 0000.<br />
Channel Block<br />
• Prevents children from watching certain channels.<br />
Parental Rating<br />
• Prevents children from watching certain TV programmes,<br />
according to the rating limit set.<br />
Input Block<br />
• Disables the specific external input signals.<br />
Change PIN<br />
• Change the 4-digit parental control PIN.<br />
Clear All<br />
• Cleans child lock settings.<br />
Other Setting<br />
Power Save<br />
• Reduces brightness of picture to economise on power<br />
consumption.<br />
Time Zone<br />
Adjusts the time data.<br />
The time data will be corrected based on GMT.<br />
• For <strong>TH</strong>-L24X5A model only.<br />
Country Region<br />
• Selects the region where you live to adjust the standard<br />
time.<br />
• For <strong>TH</strong>-L24X5A model only.<br />
16<br />
Shipping Condition<br />
• Resets all settings, for example, when moving house.<br />
OAD<br />
• Turns OAD function On or Off.<br />
Auto Download<br />
• Downloads new software by air automatically.<br />
Auto Install<br />
• Installs new software automatically<br />
Manual OAD<br />
• Upgrades software by air manually.<br />
System Information<br />
• Displays the system information of this TV.
Multi-Media<br />
Media Player<br />
Contents Select<br />
Select<br />
ACCESS<br />
Storage Media<br />
Photo<br />
Music<br />
Option List<br />
• In multi- media menu, you can press Blue colour key to<br />
select one of following options.<br />
Viewing photos<br />
• Transition Effect<br />
Photo Size<br />
• Interval<br />
• Repeat<br />
Playing music<br />
• Repeat<br />
1. Insets the USB storage device to the USB port on the TV.<br />
2. Press INPUT(AV) button, and the input source list will be<br />
displayed.<br />
3. Press a/b to select USB, and press OK button to enter<br />
multi-media content.<br />
Note:<br />
• Partition: FAT32, Not support NTFS format.<br />
(FAT32—Max Partition Size: 32GB, Max File Size: 4GB)<br />
Photo<br />
• Browsing Photos<br />
Buttons<br />
Red<br />
Green<br />
Yellow<br />
Blue<br />
a/b/c/d<br />
• Playing Slideshow<br />
Buttons<br />
Blue<br />
Music<br />
Description<br />
Play slideshow.<br />
Selects viewing type.<br />
Selects Photo or Music.<br />
Opens option menu.<br />
• Selects photos.<br />
Description<br />
• Opens option menu.<br />
Buttons<br />
Blue<br />
Yellow<br />
a/b/c/d<br />
Description<br />
Opens option menu.<br />
Selects Photo or Music.<br />
• Selects musics.<br />
17
18<br />
TROUBLESHOOTING<br />
Before calling your dealer or service centre for assistance,<br />
check the matters below once again.<br />
1. Make sure you have connected LCD TV to your equipment.<br />
2. Check cable connection. Verify that all external equipment<br />
and power cords are properly connected.<br />
3. Verify that all power is switched on.<br />
4. If LCD TV still does not produce an image, re-start the<br />
external equipment.<br />
5. If the image still does not appear, unplug LCD TV from the<br />
external equipment and check the external equipment.<br />
The problem may be with your graphics controller rather<br />
than with LCD TV. (When you reconnect LCD TV, remember<br />
to turn the external equipment and TV off before you<br />
power up LCD TV. Power the equipment back on in order<br />
of LCD TV and external equipment.)<br />
6. If the problem still exists, check the following chart.<br />
Problem<br />
NO POWER<br />
Remote Control does<br />
not work<br />
No image<br />
Try these Solutions<br />
• Plug this LCD TV into the AC<br />
outlet.<br />
• Press POWER button on side<br />
control or on Remote Control to<br />
turn on LCD TV.<br />
• Check POWER Indicator. If this<br />
indicator no light, this TV has<br />
getting trouble.<br />
Check the batteries.<br />
• Make sure nothing is between<br />
the Remote Receiver and the<br />
Remote Control.<br />
• Make sure you are not too far<br />
from LCD TV when using Remote<br />
Control.<br />
• Maximum operating range is<br />
(7m and a 30 degree angle of the<br />
front of the TV).<br />
• Is direct sunlight or strong<br />
artificial light shining on LCD<br />
TV‘s Infrared Remote Receiver?<br />
Eliminate the light by closing<br />
curtains, pointing the light in a<br />
different direction, etc.<br />
• A dedicated remote control is<br />
required for this model. Basically,<br />
the remote control of other<br />
brands (including <strong>Panasonic</strong><br />
other models) cannot be used.<br />
• Check the connection between<br />
the external equipment and<br />
LCD TV.<br />
• When turning LCD TV on, it takes<br />
a few seconds to display the<br />
image.<br />
• Check the system that you<br />
select is corresponding with the<br />
external equipment or the video<br />
equipment.<br />
• Make sure the temperature<br />
is not out of the <strong>Operating</strong><br />
Temperature (0°C ~ 35°C).<br />
• Turn off power, then turn on<br />
again, re-start LCD TV.<br />
Problem<br />
No sound<br />
There are tiny black<br />
points and/ or bright<br />
point on the TV<br />
Abnormal color of<br />
image<br />
Try these Solutions<br />
• Check Audio cable connection<br />
from Audio input source.<br />
Adjust the Sound System.<br />
Press VOLUME (+) button.<br />
• Press MUTE button.<br />
• Dark or bright points of light (red,<br />
green, or blue) may appear on<br />
the screen. This is a characteristic<br />
of the LCD panel, not a<br />
malfunction of the LCD TV.<br />
• LCD panel is produced with very<br />
high accuracy technology. There<br />
is 99.99% or more dot pixel, but<br />
there is also 0.01 % or less of<br />
dot pixel lack or dot pixel that<br />
is constantly lighted. This is not<br />
defect.<br />
• Regarding LCD panel<br />
characteristic, it may occur<br />
picture remain (look like a mirror)<br />
when the screen is changed if it<br />
displays same screen for a long<br />
time. Changing the picture or<br />
turn-off the power supply may<br />
recover.<br />
• Stripe pattern (more, interference<br />
stripes) may show up on the<br />
screen depends on the reflected<br />
picture.<br />
• Adjust the value of color.<br />
Warning<br />
High voltages are used to operate this LCD TV.<br />
Do not attempt to open the cabinet.<br />
If the problem still persists after following all operating<br />
instructions, contact the sales dealer where you purchased<br />
LCD TV or the service centre. Give the model number and<br />
explain the difficulty. We will advise you how to obtain<br />
service.
SPECIFICATIONS<br />
Power Source<br />
Rated Power<br />
Consumption<br />
Standby Power<br />
Consumption<br />
<strong>TH</strong>-L24X5A<br />
AC 220-240 V, 50Hz<br />
0.4 A 0.4 A<br />
0.5 W 0.5 W<br />
<strong>TH</strong>-<strong>L24X5Z</strong><br />
Dimensions (W × H × D)<br />
With Pedestal:<br />
567 mm × 406 mm × 170 mm<br />
Without Pedestal (TV only):<br />
567 mm × 367 mm × 46 mm<br />
With Pedestal:<br />
567 mm × 406 mm × 170 mm<br />
Without Pedestal (TV only):<br />
567 mm × 367 mm × 46 mm<br />
Mass<br />
With Pedestal:<br />
4.5 kg<br />
Without Pedestal (TV only):<br />
4.0 kg<br />
With Pedestal:<br />
4.5 kg<br />
Without Pedestal (TV only):<br />
4.0 kg<br />
Display panel<br />
Aspect Ratio 16:9<br />
Visible screen size<br />
521.3 mm (H) × 293.2 mm (V)<br />
521.3 mm (H) × 293.2 mm (V)<br />
23. 5 inches (diagonal)<br />
23. 5 inches (diagonal)<br />
Number of pixels 2,073,600 (1,920 (W) × 1,080 (H)) 2,073,600 (1,920 (W) × 1,080 (H))<br />
Speaker (100 mm × 27 mm × 27 mm) × 2, 16 Ω (100 mm × 27 mm × 27 mm) × 2, 16 Ω<br />
Sound<br />
Audio Output 6 W (3 W + 3 W), 10% <strong>TH</strong>D 6 W (3 W + 3 W), 10% <strong>TH</strong>D<br />
Headphones 3.5mm stereo mini Jack × 1 3.5mm stereo mini Jack × 1<br />
Receiving System/<br />
Band name<br />
Aerial input<br />
<strong>Operating</strong> Conditions<br />
PAL B/G<br />
Digital TV<br />
VHF / UHF<br />
Temperature : 0 °C - 35 °C<br />
Humidity : 10 % - 90 % RH (non-condensing)<br />
PAL B/G<br />
Digital TV<br />
19
COMPONENT (Y, PB, PR), HDMI<br />
Input Signal Compatibility Chart<br />
Signal name COMPONENT HDMI<br />
525 (480) / 60i, 60p<br />
625 (576) / 50i, 50p<br />
750 (720) / 60p, 50p<br />
1,125 (1,080) / 60i, 50i<br />
1,125 (1,080) / 60p, 50p, 24p<br />
PC (from D-sub terminal/ HDMI terminal)<br />
Mark : Applicable input signal<br />
Signal name Horizontal frequency (kHz) Vertical frequency (Hz)<br />
640 × 400 @70 Hz 31.47 70.08<br />
640 × 480 @60 Hz 31.47 59.94<br />
640 × 480 @75 Hz 37.50 75.00<br />
800 × 600 @60 Hz 37.88 60.32<br />
800 × 600 @75 Hz 46.88 75.00<br />
800 × 600 @85 Hz 53.67 85.08<br />
1,024 × 768 @60 Hz 48.36 60.00<br />
1,024 × 768 @70 Hz 56.48 70.07<br />
1,024 × 768 @75 Hz 60.02 75.03<br />
1,024 × 768 @85 Hz 68.68 85.00<br />
1,280 × 768 @60 Hz 47.78 59.87<br />
1,280 × 1,024 @60 Hz 63.98 60.02<br />
1,366 × 768 @60 Hz 48.39 60.04<br />
Macintosh13” (640 × 480) 35.00 66.67<br />
Macintosh16” (832 × 624) 49.73 74.55<br />
Macintosh21” (1,152 × 870) 68.68 75.06<br />
Applicable input signal for PC is basically compatible to VESA standard timing<br />
Applicable input signal for PC is basically compatible to HDMI standard timing<br />
Note:<br />
Signals other than above may not be displayed properly.<br />
The above signals are reformatted for optimal viewing on your display.<br />
PC signal is magnified or compressed for display, so that it may not be possible to show fine detail with sufficient clarity.<br />
• Only HDMI 1 supports PC/DVI (co-use R/L of YPbPr RCA jack for DVI mode audio input).<br />
20
Multi-media Supported Specification<br />
Photo<br />
Format File extension<br />
JPEG<br />
.jpeg<br />
Image resolution<br />
(pixel)<br />
Baseline jpeg:<br />
4x4 to 17000 x 10000<br />
Progressive jpeg:<br />
4x4 to 4000 x 4000<br />
Details / Restrictions<br />
DCF*1 and EXIF∗2 standards<br />
Sub-sampling : 4:4:4, 4:2:2, 4:2:0<br />
∗1 : Design rule for Camera File system - unified standard established by Japan Electronics and Information Technology<br />
Industries Association (JEITA)<br />
∗2 : Exchangeable Image File - image file format used by digital cameras<br />
Music<br />
Codec File extension Restrictions<br />
MP3 .mp3 –<br />
Note:<br />
This TV also supports Dolby Digital Plus.<br />
Some files may not be played back even if they fulfill these conditions.<br />
Do not use two-byte characters or other special codes for data.<br />
• The card may become unusable with this TV if the file or folder names are changed.<br />
21
LICENSE<br />
This product incorporates the following software or technology:<br />
(1) the software based in part on the work of the Independent JPEG Group,<br />
(2) the software developed by the Free Type Project.<br />
Dolby<br />
• Manufactured under license from Dolby Laboratories. Dolby and the double-D symbol are<br />
trademarks of Dolby Laboratories.<br />
HDMI<br />
• HDMI, the HDMI logo, and High-Definition Multimedia Interface are trademarks or registered<br />
trademarks of HDMI Licensing LLC.<br />
22
<strong>Panasonic</strong> Warranty<br />
1. The product is warranted for 12 months from the date of purchase. Subject to the conditions of this warranty <strong>Panasonic</strong> or its<br />
Authorised Service Centre will perform necessary service on the product without charge for parts or labour, if in the opinion of<br />
<strong>Panasonic</strong>, the product is found to be faulty within the warranty period.<br />
2. This warranty only applies to <strong>Panasonic</strong> products purchased in Australia and sold by <strong>Panasonic</strong> Australia or its Authorised Distributors or<br />
Dealers and only where the products are used and serviced within Australia or it's territories. Warranty cover only applies to service carried<br />
out by a <strong>Panasonic</strong> Authorised Service Centre and only if valid proof of purchase is presented when warranty service is requested.<br />
3. This warranty only applies if the product has been installed and used in accordance with the manufacturer’s recommendations (as noted<br />
in the operating instructions) under normal use and reasonable care (in the opinion of <strong>Panasonic</strong>). The warranty covers normal domestic<br />
use only and does not cover damage, malfunction or failure resulting from use of incorrect voltages, incorrect installation, accident,<br />
misuse, neglect, build-up of dirt or dust, abuse, maladjustment of customer controls, mains supply problems, thunderstorm activity,<br />
infestation by insects or vermin, tampering or repair by unauthorised persons (including unauthorised alterations), introduction of sand,<br />
humidity or liquids, commercial use such as hotel, office, restaurant, or other business or rental use of the product, exposure to abnormally<br />
corrosive conditions or any foreign object or matter having entered the product.<br />
4. This warranty does not cover the following items unless the fault or defect existed at the time of purchase:<br />
(a) Cabinet Part(s)<br />
(e) DVD, Blu-ray, or Recordable Discs<br />
(b) Video or Audio Tapes<br />
(f) Video / Audio Heads from wear and tear in normal use<br />
(c) SD cards or USB devices<br />
(g) Information stored on Hard Disk Drive, USB stick or SD card<br />
(d) User replaceable Batteries<br />
(h) DTV reception issues caused by TV Aerial / Cabling / Wall socket(s)<br />
etc<br />
5. Some products may be supplied with Ethernet connection hardware. The warranty is limited on such products and will not cover<br />
(a) Internet and or DLNA connection / setup related problems<br />
(b) Access fees and or charges incurred for internet connection<br />
(c) The use of incompatible software or software not specifically stipulated in the product operations manual; and<br />
(d) Any indirect or consequential costs associated with the incorrect use or misuse of the hardware, its connection to the internet or<br />
any other device.<br />
6. To claim warranty service, when required, you should:<br />
• Telephone <strong>Panasonic</strong>’s Customer Care Centre on 132600 or visit our website referred to below and use the Service Centre Locator<br />
for the name/address of the nearest Authorised Service Centre.<br />
• Send or take the product to a <strong>Panasonic</strong> Authorised Service Centre together with your proof of purchase receipt as a proof of purchase<br />
date. Please note that freight and insurance to and / or from your nearest Authorised Service Centre must be arranged by you.<br />
• Note that home or pick-up/delivery service is available for the following products in the major metropolitan areas of Australia or the<br />
normal operating areas of the nearest Authorised Service Centres:<br />
- Plasma/LCD televisions / displays (screen size greater than 103 cm)<br />
7. The warranties hereby conferred do not extend to, and exclude, any costs associated with the installation, de-installation or<br />
re-installation of a product, including costs related to the mounting, de-mounting or remounting of any screen, (and any other ancillary<br />
activities), delivery, handling, freighting, transportation or insurance of the product or any part thereof or replacement of and do not<br />
extend to, and exclude, any damage or loss occurring by reason of, during, associated with, or related to such installation,<br />
de-installation, re-installation or transit.<br />
<strong>Panasonic</strong> Authorised Service Centres are located in major metropolitan areas and most regional centres of Australia, however, coverage<br />
will vary dependant on product. For advice on exact Authorised Service Centre locations for your product, please telephone our Customer<br />
Care Centre on 132600 or visit our website and use the Service Centre Locator.<br />
In addition to your rights under this warranty, <strong>Panasonic</strong> products come with consumer guarantees that cannot be excluded under the<br />
Australian Consumer Law. If there is a major failure with the product, you can reject the product and elect to have a refund or to have the<br />
product replaced or if you wish you may elect to keep the goods and be compensated for the drop in value of the goods. You are also entitled<br />
to have the product repaired or replaced if the product fails to be of acceptable quality and the failure does not amount to a major failure.<br />
If there is a major failure in regard to the product which cannot be remedied then you must notify us within a reasonable period by contacting<br />
the <strong>Panasonic</strong> Customer Care Centre. If the failure in the product is not a major failure then <strong>Panasonic</strong> may choose to repair or replace the<br />
product and will do so in a reasonable period of time from receiving notice from you.<br />
<strong>TH</strong>IS WARRANTY CARD AND <strong>TH</strong>E PURCHASE DOCKET (OR SIMILAR PROOF OF PURCHASE)<br />
SHOULD BE RETAINED BY <strong>TH</strong>E CUSTOMER AT ALL TIMES<br />
If you require assistance regarding warranty conditions or any other enquiries, please visit the<br />
<strong>Panasonic</strong> Australia website www.panasonic.com.au or contact by phone on 132 600<br />
If phoning in, please ensure you have your operating instructions available.<br />
<strong>Panasonic</strong> Australia Pty. Limited<br />
ACN 001 592 187 ABN 83 001 592 187<br />
1 Innovation Road, Macquarie Park NSW 2113<br />
PRO-031-F11 Issue: 4.0 01-01-2011
WARRANTY - <strong>New</strong> <strong>Zealand</strong> only<br />
Warranty<br />
NEW ZEALAND<br />
Distributed in <strong>New</strong> <strong>Zealand</strong> by <strong>Panasonic</strong> <strong>New</strong> <strong>Zealand</strong> Limited<br />
350 Te Irirangi Drive East Tamaki, Private Bag 14911, Panmure Auckland<br />
Tel. 09 272 0100<br />
Customer Care Center<br />
Email: Customerservice@nz.panasonic.com<br />
www.panasonic.co.nz<br />
Customer’s Record<br />
The model number and serial number of this product may be found on its rear panel. You should note the model number<br />
and the serial number in the space provided below and retain this book, plus your purchase receipt, as a permanent record<br />
of your purchase to aid in identification in the event of theft or loss, and for Warranty Service purposes.<br />
Model Number<br />
Serial Number<br />
Web Site : http://panasonic.net<br />
T0412-0<br />
© <strong>Panasonic</strong> Corporation 2012 Printed in China<br />
Q41G24MV03703A