SWADS-450IPC Manual - Swann Communications
SWADS-450IPC Manual - Swann Communications
SWADS-450IPC Manual - Swann Communications

You also want an ePaper? Increase the reach of your titles
YUMPU automatically turns print PDFs into web optimized ePapers that Google loves.
English<br />
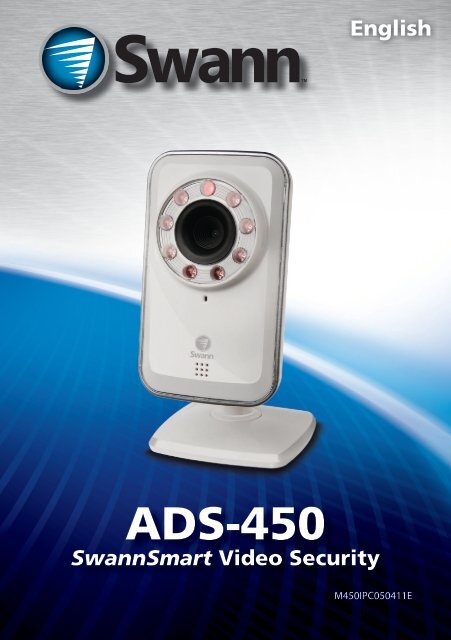
ADS-450<br />
<strong>Swann</strong>Smart Video Security<br />
M<strong>450IPC</strong>050411E<br />
1
Before You Begin<br />
FCC Verification<br />
NOTE: This equipment has been tested and found to comply with the limits for Class B digital device,<br />
pursuant to part 15 of the FCC Rules. These limits are designed to provide reasonable protection against<br />
harmful interference in a residential installation. This equipment generates, uses and can radiate radio<br />
frequency energy and, if not installed and used in accordance with the instructions, may cause harmful<br />
interference to radio or television reception, which can be determined by turning the equipment off and<br />
on, the user is encouraged to try to correct the interference by one or more of the following measures:<br />
• Reorient or relocate the receiving antenna<br />
• Increase the separation between the equipment and the receiver<br />
• Connect the equipment into an outlet on a circuit different from that to which<br />
the receiver is connected<br />
• Consult the dealer or an experienced radio/TV technician for help<br />
These devices comply with part 15 of the FCC Rules. Operation is subject to the following two conditions:<br />
1. These devices may not cause harmful interference, and<br />
2. These devices must accept any interference received, including interference<br />
that may cause undesired operation.<br />
IMPORTANT NOTE:<br />
All jurisdictions have specific laws and regulations relating to the use of cameras. Before using any<br />
camera for any purpose, it is the buyer’s responsibility to be aware of all applicable laws and regulations<br />
that prohibit or limit the use of cameras and to comply with the applicable laws and regulations.<br />
FCC Regulation (for USA): Prohibition against eavesdropping<br />
Except for the operations of law enforcement officers conducted under lawful authority, no person shall<br />
use, either directly or indirectly, a device operated pursuant to the provisions of this Part for the purpose<br />
of overhearing or recording the private conversations of others unless such use is authorized by all of the<br />
parties engaging in the conversation.<br />
WARNING<br />
Modifications not approved by the party responsible for compliance could void user’s authority to<br />
operate the equipment.<br />
IMPORTANT SAFETY INSTRUCTIONS<br />
• Make sure product is fixed correctly and stable if fastened in place<br />
• Do not operate if wires and terminals are exposed<br />
• Do not cover vents on the side or back of the camera and allow adequate space for ventilation<br />
2
Contents<br />
Before You Begin 2<br />
Contents 3<br />
Package Contents 3<br />
Introduction 4<br />
Layout 5<br />
Local WIFI Configuration: Access 6<br />
Local WIFI Configuration: Details 7<br />
Local WIFI Configuration: Connecting to Internet 8<br />
IMPORTANT: Turning off Local WIFI Configuration 8<br />
Registering Your Account with <strong>Swann</strong>Smart 9<br />
Interface: Login & Camera List 10<br />
Navigating the Mobile Interface 11<br />
Access via the <strong>Swann</strong>Smart Website 11<br />
Interface: Live View 12<br />
Interface: Events 13<br />
Interface: Camera Settings 14<br />
<strong>Swann</strong>Smart App Settings 16<br />
Expanding Your Service 17<br />
Technical Specifications 18<br />
Warranty Information 19<br />
Helpdesk / Technical Support Details 20<br />
Package Contents<br />
ADS-450 Camera<br />
Operating Instructions<br />
Ethernet Cable<br />
5V 1.5A Power Adapter<br />
3
Introduction<br />
Congratulations on your purchase of this ADS-450 camera, the central component<br />
of your <strong>Swann</strong>Smart Video Security system. This camera is versatile, powerful, easy to<br />
install and configure and looks pretty stylish, too.<br />
Best of all, it can be totally wireless - if there’s a WIFI network your camera can connect<br />
to the Internet through, then just connect the camera to power and you’re good to<br />
go.<br />
You’ll be able to view images from your camera(s) from just about anywhere you can<br />
find a mobile Internet signal.<br />
The Network LED will be constantly illuminated green when the camera is<br />
connected to a network and is working correctly.<br />
It will flash orange when the camera is connecting to a network - if the<br />
flashing persists, it indicates communication difficulties.<br />
If the Network LED is red, this indicates that it cannot connect to the<br />
network you chose, and probably needs to be re-configured.<br />
The Power LED will be constantly illuminated green when the camera is<br />
connected to power and switched on.<br />
If this turns either orange or red, this indicates a problem with your power<br />
supply - the camera is not receiving enough power. Ensure you’re using the<br />
correct power supply, that the cables are undamaged and all connections<br />
are firmly made.<br />
The Local WIFI Configuration LED will be illuminated green while the<br />
camera is set to Local WIFI Configuration mode (set by the switch of the<br />
same name).<br />
If this is either orange or red, this indicates a problem with the camera’s<br />
built-in WIFI access point.<br />
The Local WIFI Configuration Switch is located directly above the LED of<br />
the same name. Local WIFI Config will be turned on when the switch is in<br />
the up position, and will be turned off when in the down position.<br />
Reset: Located immediately above the Local WIFI Config switch is the Reset<br />
Button. Pressing this button while the camera is powered and operating will<br />
clear all settings, and reset the camera to its factory default settings.<br />
The button itself is located behind the small hole for protection against<br />
accidental bumps or knocks. You’ll need a thin (but not sharp) object, such<br />
as a bent paper clip or similar, to push the reset button.<br />
4
Layout<br />
Light Sensor<br />
Infrared LEDs<br />
Lens<br />
Microphone<br />
LAN Port<br />
DC Input<br />
Reset Button<br />
Stand<br />
Local WIFI<br />
Configuration<br />
Config LED<br />
Network LED<br />
Power LED<br />
5
Local WIFI Configuration: Access<br />
To configure the camera via the Local WIFI Configuration mode, you’ll need the<br />
following:<br />
• Your Android device or iPhone/iPad with the <strong>Swann</strong>Smart app correctly installed.<br />
• An internet connection (other than your mobile device) that the camera can use<br />
to connect to the Internet.<br />
Local WIFI<br />
The camera will act as its own WIFI access point, allowing you to connect directly<br />
to the camera from your phone/tablet using the <strong>Swann</strong>Smart app. All the local<br />
configuration is achieved through this local configuration mode.<br />
To initiate local WIFI configuration mode:<br />
• Flip the switch on the rear of the camera.<br />
• While is set to ON, the camera will act as its own<br />
WIFI server. You’ll be able to connect directly to the<br />
camera from an Android-handset or an iPhone, with<br />
the appropriate app installed correctly.<br />
Connecting to the camera locally from an<br />
iPhone/iPad or Android device:<br />
• Android: Open Settings > Wireless &<br />
networks > Wi-Fi Settings<br />
• iPhone: Choose Settings > Wi-Fi<br />
• From the list of available networks,<br />
choose CAMxxxx (where “xxxx” is a<br />
code which will vary).<br />
• Each time Local WIFI mode is turned<br />
on, the network name will change<br />
slightly (to avoid creating conflicts or<br />
creating errors when devices cache<br />
network lists).<br />
• If you’ve got multiple cameras in Local<br />
WIFI Config mode, then configure<br />
them one at a time.<br />
• Launch the <strong>Swann</strong>Smart app.<br />
6
Local WIFI Configuration: Details<br />
You will receive an on-screen message upon starting the app informing you that<br />
<strong>Swann</strong>Smart has detected the camera, asking if you would like to proceed with<br />
configuration. Choose Yes to proceed.<br />
If you don’t get this message, it indicates that either the camera’s local WIFI is not on,<br />
or that your mobile device isn’t properly connected to the local WIFI network.<br />
There are two stages to Local WIFI<br />
Configuration:<br />
• Connecting to the Internet<br />
• Configuring <strong>Swann</strong>Smart<br />
You’ll be taken to the splash screen.<br />
Choose Continue.<br />
Note: The software images shown are for<br />
illustration purposes only. We’re continually<br />
making improvements to the <strong>Swann</strong>Eye<br />
apps, and their appearance will change<br />
over time.<br />
These images are from the iOS app. The<br />
Android app will appear slightly different,<br />
but is functionally similar.<br />
The first thing you’ll see is a preview<br />
image of what your camera is seeing.<br />
If you’re not getting a picture at this stage,<br />
it indicates that something is very amiss<br />
with either the camera or your mobile<br />
device.<br />
To continue, select Connect camera to<br />
Internet.<br />
7
Local WIFI Configuration: Connecting to Internet<br />
Connect to Internet<br />
You’ll need to decide whether you’re<br />
using a wireless or a wired network to<br />
connect to the Internet. We suggest using<br />
the wireless connection as it’s one less<br />
cable to worry about - however, wired<br />
connections don’t suffer connectivity<br />
problems as often as wireless ones and<br />
are inherently more secure.<br />
Wireless networks:<br />
• Select the wireless network of your<br />
choice in the list presented onscreen.<br />
• If your chosen network is secured,<br />
then you’ll need to enter the network<br />
key. We strongly suggest using a<br />
secure wireless network.<br />
Wired Networks:<br />
• Ensure that the camera is connected<br />
to your network with a high quality<br />
ethernet cable (cat5e or higher).<br />
• Choose Use Ethernet.<br />
IMPORTANT: Turning off Local WIFI Configuration<br />
Once you’re finished configuring the camera<br />
(make sure you register an account if you have to - see the next page)<br />
ensure that you set the Local Configuration WIFI switch to OFF.<br />
Until the Local Configuration WIFI switch is OFF, the camera won’t<br />
connect to the network of your choice, as it will still be acting as an adhoc<br />
wireless network hub.<br />
8
Registering Your Account with <strong>Swann</strong>Smart<br />
To access your ADS-450 via the Internet, you’ll need to setup a <strong>Swann</strong>Smart account.<br />
• Accounts are easy to setup, and it<br />
only takes a moment.<br />
• You can create an account during<br />
the Local WIFI Configuration step,<br />
or you can do it via the <strong>Swann</strong>Smart<br />
website.<br />
Register an Account during Local WIFI<br />
Configuration<br />
• You’ll automatically be taken to the<br />
Connect to <strong>Swann</strong>Smart interface<br />
once you’ve connected the camera<br />
to the Internet.<br />
• If you’ve already registered with<br />
<strong>Swann</strong>Smart, choose Use Existing.<br />
• If you need to make a new account,<br />
enter a Username, Password (and<br />
Confirm) and a valid Email address.<br />
• Then choose Continue.<br />
Note that you can only log into one device at a time.<br />
Register an Account with <strong>Swann</strong>Smart via the Website<br />
• Open a web browser and enter www.swannsmart.com in the address bar.<br />
• On the <strong>Swann</strong>Smart website, click the button labelled “Register”.<br />
• Enter your username and a valid email address, then choose a password and<br />
confirm it.<br />
Ensure that you use a valid email address:<br />
If anything goes wrong with your account, or if you forget your password,<br />
this is how we’ll verify that you’re really you.<br />
9
Interface: Login & Camera List<br />
Logging In<br />
Once the camera has been configured and connected to the Internet, and the Local<br />
WIFI Configuration switch has been turned OFF, then you’ll be able to login to your<br />
account and view images from the camera.<br />
Remember: You may need to adjust the WIFI settings on your mobile device - some<br />
phones/tablets don’t automatically switch wireless networks when it loses connectivity.<br />
To login:<br />
• Enter your Username and Password into the fields provided.<br />
• Choose Login.<br />
The Camera List (below, left)<br />
The camera list will show you a list of all devices that you’ve registered with<br />
<strong>Swann</strong>Smart, as well as any friend’s cameras to which they’ve granted you access.<br />
The Mine camera list will show you all your camera(s). Choose the icon to adjust<br />
the settings for that camera (see “Interface: Camera Settings” on page 14 for<br />
details).<br />
Icons:<br />
The camera can be detected.<br />
<strong>Swann</strong>Smart can’t detect the<br />
state of the camera.<br />
The camera is not online.<br />
10<br />
The Camera List: Friends (right)<br />
The Friends camera list works much<br />
the same way as the Mine list. The main<br />
difference is that you can’t change the<br />
settings on friend’s cameras.
Navigating the Mobile Interface<br />
The navigation bar gives you access to the various interfaces, camera lists and<br />
settings contained within the <strong>Swann</strong>Smart app.<br />
Mine: Opens the list of cameras that are registered to you, as shown<br />
in ”Interface: Login & Camera List” on page 10.<br />
Friends: Shows a list of friend’s cameras to which they’ve granted<br />
you access, as well as “demo” cameras.<br />
Events: If you’ve expanded your service to include motion and/or<br />
event detection recording, then you’ll be able to access a log here.<br />
Settings: Opens the local settings page (see “<strong>Swann</strong>Smart App<br />
Settings” on page 16 for details). Note that the App Settings<br />
screen is quite seperate from the Camera Settings screen (see<br />
“Interface: Camera Settings” on page 14).<br />
Access via the <strong>Swann</strong>Smart Website<br />
From a web browser, you can login to your account via the <strong>Swann</strong>Smart<br />
website. You’ll be able to view images from your cameras, as well as<br />
configure the advanced aspects of your account and/or expand your<br />
service(s) - see “Expanding Your Service” on page 17 for more.<br />
Simply open a web browser and enter:<br />
www.swannsmart.com<br />
into the address bar.<br />
11
Interface: Live View<br />
The Live View interface is the default interface when you open a camera from the<br />
list. The image will always be displayed in landscape mode (where the device is held<br />
so that the screen is wider than it is tall). Other modes (such as the Event interface)<br />
use a portrait orientation.<br />
Icons<br />
Exits the camera’s feed and returns you to the camera list.<br />
Alters the size of the video. You can stretch an image across the whole screen<br />
(as pictured above) or reduce the size to “actual pixels” (if your mobile device<br />
has a high enough resolution to display the video - if your device has a low<br />
resolution, the image may actually expand).<br />
Toggles the video streaming on and off (audio will continue while video is<br />
off).<br />
Captures a shapshot of the current image, and saves it to the Gallery /<br />
Images folder on your mobile device.<br />
Triggers local recording, or stops a recording in progress.<br />
Toggles audio on and off.<br />
12
Interface: Events<br />
Shown here is an example of the Events<br />
interface as seen on an iPhone.<br />
The Android app will appear slightly<br />
different, but is functionally similar.<br />
Note that you’ll need to properly configure<br />
and upgrade your <strong>Swann</strong>Smart account<br />
before you can access the Event interface.<br />
Event List<br />
The events recorded are listed here in<br />
chronological order. Select an event to<br />
begin viewing the recorded slideshow<br />
- the number on the right hand side<br />
indicates how many images are contained<br />
within the slide show for that event.<br />
Newer/Older: Skips back or forth<br />
through events, allowing you to quickly<br />
scan through event history.<br />
The Event Playback Screen<br />
Back (Top Left): Leaves the camera<br />
interface and returns to the camera list.<br />
Previous: Changes the view to the<br />
previous image (event) on the list.<br />
Next: Changes view to the next image<br />
(event) on the list.<br />
Play: Plays/pauses the slideshow.<br />
13
Interface: Camera Settings<br />
General<br />
Name: The title you’ve selected for<br />
the camera during the Local WIFI<br />
Configuration stage.<br />
Share/Unshare: Whether you want to<br />
share access to this camera with other<br />
people using <strong>Swann</strong>Smart. There’s no<br />
requirement to share, and - if you choose<br />
to do so - you can be very specific about<br />
who has access. All users/cameras<br />
involved require properly configured<br />
<strong>Swann</strong>Smart accounts to use this<br />
feature.<br />
Status: Whether the camera is currently<br />
detected as being online or not.<br />
Online: <strong>Swann</strong>Smart can detect your<br />
camera over the Internet, and foresees<br />
no problem with connecting to it and<br />
streaming images.<br />
Offline: The camera cannot be detected<br />
by the <strong>Swann</strong>Smart server.<br />
Video<br />
Rotation: The orientation of the camera’s<br />
images on your screen. If you’ve mounted<br />
the camera on the ceiling or using the<br />
mounting bracket (i.e. upside down) then<br />
this option will flip the image “the right<br />
way up”.<br />
IR: The behavior of the infrared LEDs,<br />
which are resposible for the ADS-450’s<br />
night vision capabilities - you can think of<br />
them like an invisible spotlight that only<br />
the camera can see.<br />
14
Regular Stream<br />
The options listed under Regular Stream will affect the way that images are streamed<br />
from the camera over the Internet. These settings will affect both the perceived<br />
quality of your images, as well as the bandwidth required to send/receive them.<br />
Frame Rate: The number of images per second the camera will send over the<br />
Internet. The higher the frame rate, the “smoother” motion in your video will appear.<br />
However, high framerates require much more bandwidth than low framerates.<br />
Quality: Adjusts the bit-rate of the video being streamed. A high quality (bit-rate)<br />
will feature crisp, sharp images but requires a lot of bandwidth. A low quality setting<br />
requires much less bandwidth, but will look a little fuzzy.<br />
Video Size: The resolution of the video being streamed. The higher the resolution,<br />
the more data will be required to cleanly reproduce the image (and you’ll need a<br />
corrospondingly higher Quality setting to maintain per-pixel sharpness).<br />
Note: The three parameters above (Frame Rate, Quality and Video Size) are<br />
inextricably linked to one another. For example, if you want the maximum clarity<br />
in your images but want to reduce bandwidth, a high Video Size and a high Quality<br />
setting with a low Frame Rate may be the best combination.<br />
We suggest experimenting with these settings to figure out what works best for you.<br />
Audio<br />
Microphone: The internal microphone can be enabled or disabled here. When the<br />
microphone is off, no sound will be sent from the camera or recorded.<br />
iSecurity + Services<br />
The advanced iSecurity + Services features are available only for registered<br />
<strong>Swann</strong>Smart accounts which have additional services selected. See “Expanding Your<br />
Service” on page 17 for more informaiton.<br />
Motion Detection: Toggles motion detection on or off.<br />
Sensitivity: How much motion must occur before the camera registers motion.<br />
Email Notification: Turns email notifications on or off. The conditions that generate<br />
an email notification as well as the recipient’s email address must be correctly<br />
configured for the email function to work - you can set this up form the <strong>Swann</strong>Smart<br />
website.<br />
Phone Notification: Enables or disables notifications to be sent to your phone in<br />
the form of push notifications. You’ll need to properly upgrade and configure your<br />
<strong>Swann</strong>Smart account (see the website for up-to-date details) for phone notifications<br />
to be an available option.<br />
15
<strong>Swann</strong>Smart App Settings<br />
General<br />
Version: The version number of the mobile<br />
app you’re running. You might need to know<br />
this number if you’re in contact with <strong>Swann</strong><br />
Technical Support - however, if you’ve got<br />
auto-updates enabled for your phone/tablet,<br />
you should be using the most recent one by<br />
default. (The “x”s will be numbers.)<br />
About: The release notes and general<br />
information for the app. Basically, it’s stuff that<br />
we didn’t write here because we didn’t think of<br />
it or it hadn’t happened yet.<br />
Sign In Automatically: When enabled,<br />
<strong>Swann</strong>Smart will automatically login to your<br />
account whenever the app is booted. When<br />
disabled, the app will ask for your username and<br />
password each time, although it will remember<br />
them: you’ll need to confirm signing in.<br />
Username: The username you used when you<br />
registered with <strong>Swann</strong>Smart.<br />
Password: The password you selected when<br />
you registered with <strong>Swann</strong>Smart.<br />
Re-Sign In: Whether you want the <strong>Swann</strong>Smart<br />
app to automatically re-sign in when your<br />
connection times-out.<br />
Disable Auto-Lock: When auto-lock is disabled, your phone won’t automatically<br />
lock after a period of inactivity. This can be useful if you’re watching images in realtime<br />
and don’t want the screen to turn off. However, it can be troublesome if you<br />
leave the app running and pocket the phone - you’ll probably wind up pocket dialing<br />
someone.<br />
Sound Effects: You can turn the application’s sounds on and off here. This won’t<br />
affect the internal microphone in your camera, just the notification/warning sounds<br />
that the <strong>Swann</strong>Smart app makes.<br />
Connection<br />
Server: The server you’re using to access images from your cameras. This should<br />
be set to www.swannsmart.com (unless you’ve done something ultra-clever, like<br />
creating your own server).<br />
Connection: The type of connection that you want to use. By default - and unless<br />
you’re some kind of evil networking genius - this should be TCP.<br />
16
Expanding Your Service<br />
So, you’ve got your ADS-450 connected to the internet, you’ve signed up for your<br />
free account and are enjoying the seriously-this-was-like-totally-sci-fi-like-ten-shortyears-ago<br />
feeling of viewing images from your camera(s) from your phone... but it’s<br />
just not enough, eh?<br />
Well then: good news, everyone! <strong>Swann</strong>Smart offers loads of additional services<br />
including (but not limited to):<br />
• Secure online cloud-based data storage. Never lose a recording or risk missing<br />
an event.<br />
• Security-based event recording with motion detection. Never miss<br />
something that happens!<br />
• Push notifications. Don’t wait to find out what’s going on, have the information<br />
sent directly from <strong>Swann</strong>Smart’s secure online server direct to your phone/tablet!<br />
• Advanced video codecs. Get better quality images and/or reduce the<br />
bandwidth required to transmit them.<br />
We’re continually expanding the services that <strong>Swann</strong>Smart offers, and finding ways<br />
to improve the performance and functionality of your <strong>Swann</strong> IP camera.<br />
We offer several competitive plans that you can choose from to find the best<br />
combination of services for your unique needs. As these are continually changing,<br />
check out the website for the most up-to-date information possible.<br />
www.swannsmart.com<br />
17
Technical Specifications<br />
Video<br />
Resolution 640 x 480<br />
Frames Per Second<br />
30fps (max)<br />
Audio Microphone 1-way (camera to mobile device)<br />
Recording<br />
Snap Shot Format<br />
JPEG<br />
Video Record function<br />
MJPEG<br />
Network<br />
Connections<br />
Wireless / Wired<br />
Access<br />
HTTP<br />
18
Warranty Information<br />
<strong>Swann</strong> <strong>Communications</strong> USA Inc.<br />
12636 Clark Street<br />
Santa Fe Springs CA 90670<br />
USA<br />
<strong>Swann</strong> <strong>Communications</strong><br />
Unit 13, 331 Ingles Street,<br />
Port Melbourne Vic 3207<br />
<strong>Swann</strong> <strong>Communications</strong> LTD.<br />
Stag Gates House<br />
63/64 The Avenue<br />
SO171XS<br />
United Kingdom<br />
Limited Warranty Terms & Conditions<br />
<strong>Swann</strong> <strong>Communications</strong> warrants this product against defects in workmanship and<br />
material for a period of one (1) year from its original purchase date. You must present<br />
your receipt as proof of date of purchase for warranty validation. Any unit which<br />
proves defective during the stated period will be repaired without charge for parts<br />
or labor or replaced at the sole discretion of <strong>Swann</strong>. The end user is responsible for all<br />
freight charges incurred to send the product to <strong>Swann</strong>’s repair centers. The end user<br />
is responsible for all shipping costs incurred when shipping from and to any country<br />
other than the country of origin.<br />
The warranty does not cover any incidental, accidental or consequential damages<br />
arising from the use of or the inability to use this product. Any costs associated with<br />
the fitting or removal of this product by a tradesman or other person or any other<br />
costs associated with its use are the responsibility of the end user. This warranty<br />
applies to the original purchaser of the product only and is not transferable to any<br />
third party. Unauthorized end user or third party modifications to any component or<br />
evidence of misuse or abuse of the device will render all warranties void.<br />
By law some countries do not allow limitations on certain exclusions in this warranty.<br />
Where applicable by local laws, regulations and legal rights will take precedence.<br />
For Australia: Our goods come with guarantees which cannot be excluded under<br />
Australian Consumer Law. You are entitled to a replacement or refund for a major<br />
failure and for compensation for any other reasonably foreseeable loss or damage.<br />
You are also entitled to have the goods repaired or replaced if the goods fail to be of<br />
acceptable quality and the failure does not amount to major failure.<br />
19
<strong>Swann</strong> Technical Support<br />
All Countries E-mail: tech@swann.com<br />
Telephone Helpdesk<br />
Helpdesk / Technical Support Details<br />
USA toll free<br />
1-800-627-2799<br />
(Su, 2pm-10pm US PT)<br />
(M-Th, 6am-10pm US PT)<br />
(F 6am-2pm US PT)<br />
USA Exchange & Repairs<br />
1-800-627-2799 (Option 1)<br />
(M-F, 9am-5pm US PT)<br />
AUSTRALIA toll free<br />
1300 138 324<br />
(M 9am-5pm AUS ET)<br />
(Tu-F 1am-5pm AUS ET)<br />
(Sa 1am-9am AUS ET)<br />
NEW ZEALAND toll free<br />
0800 479 266<br />
UK<br />
0203 027 0979<br />
© <strong>Swann</strong> <strong>Communications</strong> 2012<br />
20