canada - Stampin' Up!
canada - Stampin' Up!
canada - Stampin' Up!

Create successful ePaper yourself
Turn your PDF publications into a flip-book with our unique Google optimized e-Paper software.
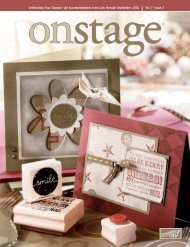
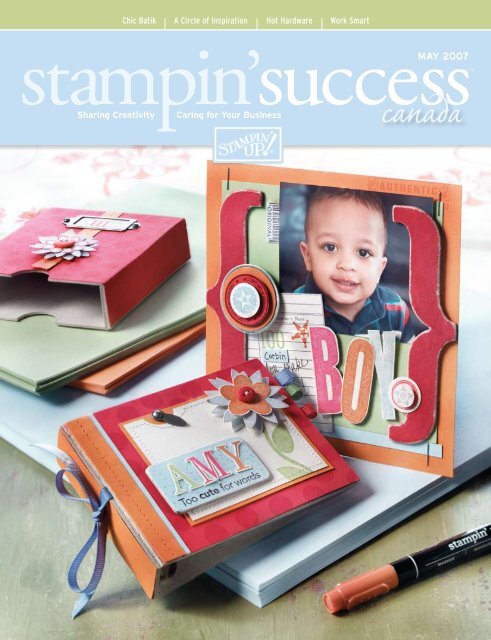
Chic Batik A Circle of Inspiration Hot Hardware Work Smart<br />
may 2007<br />
®<br />
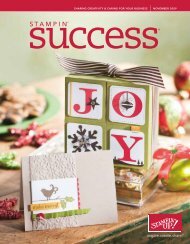
Sharing Creativity<br />
Caring for Your Business<br />
<strong>canada</strong>
share a moment with<br />
SHELLI<br />
Recently I found an old photo of our girls<br />
on their first day of school and was<br />
reminded of the power of pictures. That<br />
single photo flooded my mind with memories: I<br />
remembered the morning I took the photo,<br />
wiping away a tear as I drove away after dropping<br />
them off at school and watching them skip off to<br />
face a new year. That single photo even brought<br />
to mind specific events throughout that entire<br />
school year. And then, of course, I reflected on<br />
how quickly the girls have grown—I have<br />
grandchildren who are almost as old as the girls<br />
were in that photo.<br />
All that from a single image! No wonder scrapbooking is such a<br />
popular pastime.<br />
This month is National Scrapbooking Month. We get to spend the whole<br />
month celebrating the chance we have to preserve our memories! Although<br />
I don’t do nearly as much as I would like to, I love scrapbooking and the<br />
purpose behind it. I dream of someday having much more time to devote<br />
to it, although I don’t anticipate ever getting caught up. I’m sure many of<br />
you can relate to that.<br />
However, I think it’s important not to get discouraged or overwhelmed<br />
with the prospect of scrapbooking; I’m determined to plug away at it and<br />
do what I can. Doing something is always better than doing nothing.<br />
My personal philosophy about scrapbooking is the simpler, the better.<br />
Right now we’re seeing elaborate pages featured in scrapbooking magazines,<br />
but I think eventually we’ll see a trend back to simple. And the reason is<br />
that, for most of us, the whole purpose behind scrapbooking is to get our<br />
memories out of a shoebox and into a book where they can be easily<br />
recalled—much like the wonderful moments I relived as I looked at the<br />
photo of my girls—and shared with others.<br />
Whether we’re creating wonderful<br />
masterpieces of art or masterpieces of<br />
heart (or both), scrapbooking truly<br />
becomes one of the most priceless things<br />
we can do to preserve and strengthen our<br />
families and tie the past, present, and<br />
future together. If you haven’t tried<br />
scrapbooking, pull those photos out of<br />
the closet and give it a whirl. And if you’re<br />
already a believer, enjoy this month<br />
dedicated to one of our favourite pastimes.<br />
Features<br />
3 Art Contest Winners<br />
10 Palette o’ Prints<br />
12 Increase Support with<br />
New Reports<br />
14 Work Smart<br />
16 The Stamp in Stampin’ <strong>Up</strong>!<br />
18 Peek-a-boo!<br />
19 In the Spotlight<br />
In Every Issue<br />
2 Share a Moment with Shelli:<br />
Simple Scrapbooking<br />
4 Stampin’ Technique: Chic Batik<br />
6 Stampin’ Memories ® : A Circle of Inspiration<br />
8 Stampin’ Accessories: Hot Hardware<br />
11 Making Business Sense: The Training Expertise<br />
20 Art Show: Cooking <strong>Up</strong> a Masterpiece<br />
21 FYI<br />
22 Workshop Wow: The Look of Leather & Suede<br />
23 Dates to Remember<br />
Cover Creations<br />
These colourful projects shine<br />
the spotlight on two of our<br />
popular On Board products,<br />
the Bitty Book and cover and<br />
the On Board Accents. Combine<br />
these dimensional beauties<br />
with this bright colour palette<br />
(Real Red and Pumpkin Pie accented with Bashful Blue<br />
and Certainly Celery), and you’ve got a pair of irresistible<br />
stamping projects. Find the complete Stampin’ Supplies<br />
and step-by-step instructions on the Demonstrator Web<br />
Site under My Business>My Business Resources>Stampin’<br />
<strong>Up</strong>! Publications>Stampin’ Success>2007>May.<br />
Demo It!<br />
4<br />
Watch for projects marked with this logo.<br />
These are excellent choices for workshop<br />
demonstrations. Cards marked with this logo can<br />
be completed in 5—8 minutes. Scrapbook pages marked with<br />
this logo can be completed in under 15 minutes. You can<br />
demonstrate these pages even faster by preparing some<br />
elements of the page before the workshop.<br />
Sizes: Cards are 4-1/4" x 5-1/2" unless otherwise noted.<br />
may 2007
Art<br />
Contest<br />
Natasha Trupp<br />
Winnipeg, Manitoba<br />
November<br />
Wow! winner<br />
Winners<br />
Congratulations to our<br />
November through<br />
January Canadian art<br />
contest winners!<br />
CHERISH<br />
CARD<br />
Petal Prints and<br />
Warm Words sets; French Script background<br />
stamp; Cranberry Crisp, Garden Green, and<br />
Whisper White card stock; Close to Cocoa,<br />
Cranberry Crisp, Creamy Caramel, and Garden<br />
Green Classic Stampin’ Pads ® ; Garden Green<br />
and So Saffron Stampin’ Write ® markers;<br />
Antique Brass Hodgepodge Hardware ® ; Small<br />
Oval punch; stamping sponges; cutter kit<br />
Margie Connor<br />
Barrie, Ontario<br />
November First-Class winner<br />
ENJOY YOUR DAY PURSE<br />
Eclectic Backgrounds and Riveting sets;<br />
Bravo Burgundy and Cranberry Crisp<br />
card stock; VersaMark ® pad; Crystal<br />
Clear and Gold Glory Stampin’ Emboss ®<br />
powder; Gold cord; 1/8", 1-3/8", and 1-1/4" Circle punches<br />
Gwendolen Palmer<br />
Port Moody, British Columbia<br />
December Wonderful Winter Mini winner<br />
Jennifer Fontaine<br />
Winnipeg, Manitoba<br />
December Wow! winner<br />
ENJOY CARD<br />
Like It a Latte<br />
and Fancy<br />
Phrases<br />
Chocolate Chip, and Very Vanilla card stock;<br />
Very Vanilla Pocket Notes; Bordering Blue,<br />
Chocolate Chip, and Close to Cocoa Classic<br />
Stampin’ Pads; VersaMark pad; Chocolate Chip<br />
and Close to Cocoa Stampin’ Write markers;<br />
Word Window and 1/16" Circle punches; Stamp-ama-jig;<br />
sponge daubers; Stampin’ Dimensionals ® ;<br />
Heat & Stick powder; Dazzling Diamonds<br />
Stampin’ Glitter ® ; Vintage brads<br />
Flexible<br />
sets; Bordering Blue,<br />
FLOWER<br />
CARD<br />
Bodacious<br />
Bouquet and<br />
Simply Said sets; Apricot Appeal, Certainly<br />
Celery, Rose Red, and Whisper White card stock;<br />
Apricot Appeal, Certainly Celery, and Rose<br />
Red Classic Stampin’ Pads; Sweet Shop Ribbon<br />
Originals ; Soft Subtles ® brads; Seeing Spots<br />
Classy Brass ® template; Stampin’ Dimensionals<br />
Roxane Kryvenchuk<br />
January Wow! winner<br />
THANK YOU<br />
CARD<br />
Seeing Spots and Circle of<br />
Friendship sets; Chocolate<br />
Chip, Lovely Lilac, and<br />
Whisper White card stock; Chocolate Chip and Lovely Lilac<br />
Classic Stampin’ Pads; 1-3/8", 1-1/4", and 1/2" Circle punches;<br />
Stampin’ Dimensionals; Word Window punch; Vintage brads;<br />
Crafters’ Tool Kit; Seaside Ribbon Originals<br />
Bernice Van Loenen<br />
January Spring<br />
Fling winner<br />
I MISS YOU<br />
CARD<br />
Flower Filled and<br />
All-Year Cheer<br />
II sets; Canvas and French Script background<br />
stamps; Certainly Celery, Regal Rose, So Saffron,<br />
and Whisper White card stock; Certainly Celery,<br />
Regal Rose, and So Saffron Classic Stampin’<br />
Pads; VersaMark pad; Soft Subtles brads; Glassy<br />
Glaze Enamel Stampin’ Emboss powder; Celery,<br />
Rose, and Apricot grosgrain ribbon; Stampin’<br />
Dimensionals; Large Oval, Small Oval, and Ticket<br />
Corner punches<br />
www.stampinup.com
´<br />
TECHNIQUE<br />
Chic Batik<br />
While this technique is<br />
simple, it takes time and<br />
may be more appropriate<br />
for a technique class or a<br />
stamp camp focusing on<br />
embossing or resisting.<br />
However, you may want<br />
to bring a sample of the<br />
batik technique with you<br />
to workshops to generate<br />
interest in your event.<br />
Tips<br />
• Display your artwork<br />
backed with Whisper<br />
White card stock for<br />
added contrast. The<br />
stark difference helps<br />
the colours stand out.<br />
• You may need to heat<br />
the image several<br />
times, using clean<br />
copy paper each time,<br />
to get all the melted<br />
embossing powder off<br />
the mulberry paper.<br />
• To use Watercolor<br />
Wonder Crayons as<br />
your colour source,<br />
colour the pigment<br />
onto a damp stamping<br />
sponge, and dab<br />
the colour onto the<br />
mulberry paper.<br />
Are you ever inspired by fabric<br />
designs and textures? If so, the<br />
batik technique is for you! The<br />
art of wax-resist dyeing on cloth, batik<br />
is most common in Indonesia and Asia,<br />
where creating these beautiful cloths has<br />
become part of the culture.<br />
Artists create this fascinating look by<br />
either stamping or drawing on fabric using<br />
wax. The wax soaks through the fabric,<br />
and when the artist dyes the cloth, the<br />
areas covered in wax remain uncoloured.<br />
Artists sometimes add layers of wax after<br />
the initial dyeing, and continue dyeing<br />
the cloth in progressively darker colours.<br />
Finally, the artist melts the wax off the<br />
cloth, leaving the rich colours and bold<br />
patterns created during the process. Many<br />
batik cloths have a veined appearance<br />
depending on the type of wax used during<br />
the dyeing process.<br />
Now you can create the rich look of batik<br />
on card stock by adding an extra step to<br />
the emboss resist technique.<br />
With the batik technique, you stamp and<br />
emboss an image using VersaMark and<br />
embossing powder, which acts like wax to<br />
resist the ink. We recommend using White<br />
mulberry paper with this technique for<br />
several reasons: the veining in the paper<br />
replicates the look of cloth, and mulberry<br />
paper is porous enough that the VersaMark<br />
seeps all the way through. You’ll love the<br />
translucent effect you get!<br />
After embossing your image, wet the<br />
paper, and use stamping sponges or<br />
sponge daubers and dye ink to dab colour<br />
on the paper. You can use Classic pads,<br />
ink refills, or even Watercolor Wonder<br />
Crayons. When applying colour to your<br />
project, choose two or three colours<br />
that work well together but are different<br />
enough to get a good contrast. (Note:<br />
Colours diffuse and lighten as they dry,<br />
so if you choose two colours that are<br />
very similar, you won’t get the contrast<br />
you’re looking for. If you select too many<br />
colours, you’ll end up with a muddy<br />
appearance.) As you apply the colour, be<br />
careful not to drag the ink across your<br />
paper, or the paper will tear.<br />
You can repeat the process by stamping<br />
and embossing additional images on your<br />
mulberry paper and dyeing again. If you<br />
do this, dye with the lightest colour first,<br />
and continue dyeing in progressively<br />
darker colours. To finish, place the card<br />
stock between sheets of copy paper,<br />
and place a warm iron over it. As the<br />
embossing powder melts, it sticks to the<br />
copy paper instead of your project.<br />
Many traditional batik patterns include<br />
bolder images, like the image on our<br />
Aloha card. Our Secret card utilizes a more<br />
traditional geometric motif. However, many<br />
patterns also include a border with intricate<br />
designs characteristic of our line art.<br />
Our Hawaii page features a more delicate<br />
image and an alternate dyeing practice.<br />
For this image, our artist used ink refills<br />
and an Aqua Painter to colour in the<br />
details. The embossed edges keep the ink<br />
from running and produce a white border<br />
around the brilliantly coloured image. Once<br />
you remove the embossing, you’ll have a<br />
beautiful pattern, rich colours, and a project<br />
that’s sure to intrigue your customers!<br />
may 2007
Aloha card<br />
Do the Hula set; Old Olive,<br />
Taken with Teal, and Whisper<br />
White card stock; White<br />
mulberry paper; Always<br />
Artichoke, Old Olive, and Taken<br />
with Teal Classic Stampin’<br />
Pads; Whisper White Craft<br />
Stampin’ Pad; VersaMark pad;<br />
Crystal Clear Stampin’ Emboss<br />
powder; Earth Elements ®<br />
buttons; stamping sponges;<br />
copy paper<br />
Secret card<br />
Friendship Flowers set; Dotted<br />
background stamp; Cool<br />
Caribbean, Pumpkin Pie, and<br />
Whisper White card stock;<br />
White mulberry paper; Always<br />
Artichoke, Pumpkin Pie, and<br />
Taken with Teal Classic Stampin’<br />
Pads; Whisper White Craft<br />
Stampin’ Pad; VersaMark pad;<br />
Crystal Clear Stampin’ Emboss<br />
powder; Clear buttons; Stampin’<br />
Dimensionals; Crafters’ Tool Kit;<br />
stamping sponges; copy paper;<br />
crochet thread; sewing machine<br />
and thread<br />
Hawaii page<br />
(8-1/2" x 11")<br />
Doodle This set; Cool Caribbean,<br />
Old Olive, Pumpkin Pie, Taken with<br />
Teal, and Whisper White card stock;<br />
White mulberry paper; Old Olive,<br />
Pumpkin Pie, and Taken with Teal<br />
Classic ink refills; Whisper White<br />
Craft Stampin’ Pad; VersaMark<br />
pad; Basic Black Stampin’ Write<br />
journaler; Crystal Clear Stampin’<br />
Emboss powder; White grosgrain<br />
and White narrow organdy ribbon;<br />
Stampin’ Dimensionals; Aqua<br />
Painter ; Coluzzle ® Cutting System;<br />
Crafters’ Tool Kit; Slit punch;<br />
stamping sponges; copy paper<br />
www.stampinup.com
stampin´<br />
MEMORIES<br />
inspiration<br />
A<br />
C<br />
i r c l e<br />
People love scrapbooking for a<br />
variety of reasons. Scrapbooks<br />
preserve memories and provide<br />
the opportunity to share our deepest<br />
feelings and life experiences on paper,<br />
and with loved ones who view them.<br />
Looking at others’ scrapbooks sparks fresh<br />
inspiration for layouts and allows us a<br />
peek into their lives. With circle journals,<br />
you can record a few of your own<br />
thoughts and be inspired by the wisdom<br />
and creativity of others—all in one book!<br />
Decide from the Start<br />
Circle journals are a popular trend in<br />
scrapbooking, and it’s simple to get<br />
started. First, identify a group of friends<br />
who want to participate. Depending<br />
on geographical location, you might<br />
physically meet together, or you may just<br />
communicate by phone, mail, or e-mail.<br />
Each participant chooses a theme for<br />
her individual scrapbook and creates the<br />
o f<br />
initial page (or spread, depending on her<br />
preference). The participant then rotates<br />
her scrapbook to the next person in the<br />
group; that person then completes a page<br />
(or spread) for the book using the theme<br />
the scrapbook’s owner has identified. In<br />
turn, everyone completes a page for each<br />
member’s book, using the person’s theme<br />
as the springboard for their contributions.<br />
When the circle journal is complete, all<br />
participants receive their own finished<br />
album full of inspiration from group<br />
members’ life experiences. With circle<br />
journals, everyone wins!<br />
Keep in Mind<br />
The circle journal process is simple and<br />
incredibly fun, but you will want to<br />
consider a few things before starting<br />
your group. First, determine how many<br />
participants you want in your group.<br />
You probably won’t want more than 20<br />
because the books will get too bulky and<br />
take too long to complete. If you have<br />
12 people in your group and pass the<br />
journals each month, it will take a year<br />
to complete the process. If you choose<br />
a smaller group of 6 or 8, your books<br />
will take less time to complete but will<br />
contain fewer pages.<br />
Second, decide how long each<br />
scrapbooker will have the journal before<br />
passing it on to the next person. If<br />
you choose to do circle journals with a<br />
regular scrapbooking class or club, you<br />
can rotate journals whenever the group<br />
meets—and show a different idea, layout,<br />
or technique at each meeting to keep<br />
participants inspired! Or you can pass the<br />
journals every two to three weeks or at<br />
another interval chosen by the group.<br />
Third, your group will need a facilitator.<br />
The facilitator can check in with each<br />
participant to make sure things are going<br />
well, answer questions, resolve concerns,<br />
and ensure that the journals stay on track.<br />
Offer Your Expertise<br />
If members of your group haven’t<br />
participated in a circle journal group<br />
before, you can provide valuable tips.<br />
In the beginning of each book, the<br />
scrapbook owner should create a title<br />
page that explains the theme for her<br />
book. If a participant prefers specific<br />
colours or accessories, she may list them<br />
may 2007
here. Although each participant can<br />
choose to share as much or as little<br />
information as she chooses, remind<br />
participants that the information<br />
provided on this title page may inspire<br />
the other scrapbookers with helpful ideas<br />
and insights.<br />
The author should also create a sign-in<br />
page where participants can sign their<br />
names and the date they received the<br />
journal. We’ve provided a sample here<br />
(the 15 Things page) using an image<br />
from the Stamp of Authenticity set. Signin<br />
pages can be simple, like the one we’ve<br />
created, or complex.<br />
Make It Your Business<br />
Circle journals can easily be<br />
incorporated into your Stampin’ <strong>Up</strong>!<br />
business. Announce at your events that<br />
you are starting a circle journal group,<br />
and invite customers to sign up. You<br />
can explain the concept to captivate<br />
the interest of workshop guests. If you<br />
already have a scrapbooking club that<br />
meets regularly, introduce the circle<br />
journal concept to club members and<br />
see if they would like to give it a try. If<br />
you have current customers who haven’t<br />
started scrapbooking yet, circle journals<br />
could provide fantastic inspiration for<br />
them to make the jump!<br />
To help potential participants understand<br />
the concept, you may want to pass<br />
a page around. Imagine if you had a<br />
whole circle journal showcasing various<br />
techniques or accessories! We’ve created<br />
a chipboard page featuring options<br />
involving our On Board pieces, such as<br />
embossing chipboard, using chipboard<br />
scraps, adhering Designer Series paper to<br />
chipboard, and colouring chipboard with<br />
acrylic paint or a Craft pad.<br />
Involve Your Downline<br />
You can easily create a technique circle<br />
journal by organizing a group within<br />
your downline. Each member chooses a<br />
different technique or accessory and then<br />
creates a page for every participant. Many<br />
groups choose to make these 6" x 6" pages.<br />
Place the pages in a 6" x 6" brag<br />
book, so you have a book to pass<br />
around at events to illustrate the myriad<br />
possibilities customers can enjoy with<br />
Stampin’ <strong>Up</strong>!’s products.<br />
Circle journals provide a fresh, wonderful<br />
scrapbooking option for experienced<br />
scrapbookers and an exciting new trend for<br />
novice scrapbookers. Start incorporating<br />
circle journals into your business and get<br />
the circle of inspiration going!<br />
stampin´<br />
MEMORIES<br />
Point out to customers that our<br />
new 5" x 5" On Board Art Journal<br />
from the spring mini is the perfect<br />
size for a circle journal. And the<br />
Spiral punch makes it easy for<br />
scrapbookers to add pages to their<br />
books as necessary.<br />
Things I Love spread (5" x 5")<br />
Short Order Numbers set; Certainly Celery, Close to<br />
Cocoa, Real Red, Tempting Turquoise, and Very Vanilla<br />
card stock; Certainly Celery, Close to Cocoa, Real Red, and<br />
Tempting Turquoise Classic Stampin’ Pads; Basic Black<br />
Stampin’ Write journaler; Daisy and 3/4" and 1-3/8" Circle<br />
punches; Bold Brights ® and Fresh Favorites I buttons;<br />
Stampin’ Dimensionals<br />
15 things page (5" x 5")<br />
Short Order Alphabet and Stamp of Authenticity sets;<br />
Certainly Celery, Real Red, Tempting Turquoise, and Very<br />
Vanilla card stock; On Board Simon Lower; Certainly<br />
Celery, Close to Cocoa, Real Red, and Tempting Turquoise<br />
Classic Stampin’ Pads; Real Red Craft Stampin’ Pad; Basic<br />
Black Stampin’ Write journaler; Fresh Favorites I buttons;<br />
Taupe grosgrain ribbon; Stampin’ Dimensionals; Daisy and<br />
Spiral punches; sanding blocks<br />
Red page (6" x 6")<br />
Background Sampler, Big Deal Alphabet, and Bodacious<br />
Bouquet sets; Real Red card stock; On Board Accents;<br />
Real Red Classic Stampin’ Pad; Real Red Craft Stampin’<br />
Pad; Bold Brights brads; Bold Brights buttons; Bold<br />
Brights I eyelets; Crystal Clear Stampin’ Emboss powder;<br />
Red gingham and Red grosgrain ribbon; Stampin’<br />
Dimensionals; Crafters’ Tool Kit; 1/8" and 1-3/8" Circle and<br />
1-3/8" Square punches; Write Me a Memory ® Journaling<br />
Fonts CD, Volume II<br />
Chipboard page (6" x 6")<br />
A to Z Accents, Perennial Favorites, and<br />
Typeset Alphabet Lower sets; Certainly<br />
Celery, Close to Cocoa, Confetti White,<br />
and Tempting Turquoise card stock; Sarah<br />
Designer Series paper; Confetti White & Kraft<br />
tag sheets; On Board Accents; Certainly<br />
Celery and Close to Cocoa Classic Stampin’<br />
Pads; Certainly Celery and Close to Cocoa<br />
Craft Stampin’ Pads; Basic Black Stampin’<br />
Write journaler; Crystal Clear Stampin’<br />
Emboss powder; Bold Brights and Silver<br />
brads; Fresh Favorites I buttons; linen<br />
thread; Caramel gingham and Celery,<br />
Taupe, and Turquoise grosgrain ribbon;<br />
Stampin’ Dimensionals; Crafters’ Tool<br />
Kit; 3/4" Circle and 3/4" Square punches;<br />
sanding blocks; staples<br />
www.stampinup.com
´<br />
ACCESSORIES<br />
HotHardware<br />
Our<br />
Hodgepodge<br />
Hardware offers value,<br />
versatility, and style.<br />
As you browse through<br />
magazines and wander through<br />
craft stores, you’ll quickly see<br />
that one of the hottest trends in card<br />
making and scrapbooking is hardware.<br />
Your customers want to keep up with<br />
these trends, but they also want value<br />
for their money. With Hodgepodge<br />
Help your customers see the<br />
possibilities of hardware and<br />
encourage them to try new uses,<br />
such as:<br />
• Placing a dry embossed image in a<br />
rectangle label holder<br />
• Cutting off the sides of a square<br />
label holder to create a frame, and<br />
placing a photo in it<br />
• Cutting off one edge from a<br />
rectangle label holder to create a tag<br />
• Placing a word or image in a buckle<br />
• Putting a strip of Designer Series<br />
paper through a ribbon charm<br />
(instead of a ribbon)<br />
• Using a photo anchor as a closure<br />
for a card<br />
• Using ring clips to create a closure<br />
for a book. Fasten ring clips on the<br />
front and back of a book and tie a<br />
ribbon through them<br />
Hardware, they get both. Hodgepodge<br />
Hardware offers your customers value,<br />
versatility, and style.<br />
While some of your customers might<br />
hesitate at the price, Hodgepodge<br />
Hardware is actually a bargain at $37.95.<br />
If your customers went to a craft store<br />
and bought the equivalent number of<br />
coordinated hardware pieces (138 pieces<br />
of hardware, plus 100 matching brads),<br />
they’d probably spend more.<br />
For example, at a craft store, they<br />
would pay $4–5 for a package of four<br />
label holders. And then they’d still have<br />
to pay for coordinating brads to use<br />
with them, if they could even find<br />
brads that coordinate.<br />
When you demonstrate Hodgepodge<br />
Hardware, be sure to explain the<br />
convenience of getting hardware pieces<br />
in one kit. All the hardware pieces and<br />
brads in a kit are the same colour and<br />
style; they’re organized neatly, and your<br />
customers can tell at a glance if they have<br />
enough pieces to finish their project. Not<br />
only that, but customers can reuse the tin<br />
after all of the hardware pieces are gone.<br />
Hodgepodge Hardware is a tremendous<br />
value, but its real beauty is its versatility.<br />
Help your customers see the possibilities<br />
of the pieces. They can adapt the pieces<br />
however they want for their projects:<br />
sand them, paint them, or cut off<br />
sections to create another piece. (Use<br />
an old pair of Craft & Rubber scissors<br />
to cut off sections.) Customers can use<br />
these pieces for their obvious purposes—<br />
such as putting words in label holders<br />
and ribbon through ribbon charms—but<br />
they’ll find lots of other creative ways to<br />
use this hardware as well. Your customers<br />
are limited only by their imaginations!<br />
Demonstrate how changing a piece of<br />
hardware makes a difference in the final look<br />
of a project, as shown by our Thank You<br />
Very Much tags. Each tag is identical, with<br />
the exception of the hardware.<br />
If a customer wants to make a bunch<br />
of identical cards but add an individual<br />
touch to each, changing hardware pieces<br />
is a simple and effective way to make<br />
a difference.<br />
may 2007
Hardware elements on our Thank You<br />
Very Much tags and Sister card add<br />
interest and dimension with little effort.<br />
The hardware catches your eye and<br />
provides the finishing touch.<br />
Show your customers how to use<br />
hardware to add style, polish, and<br />
versatility to any project. They will be<br />
delighted to see how fun—and easy—it<br />
is to spice up their hand-stamped works<br />
of art.<br />
Sister card<br />
Everyday Flexible Phrases and Flower Filled stamp<br />
sets; Bashful Blue, Confetti White, and Rose Red card<br />
stock; Bashful Blue, Basic Black, and Mellow Moss<br />
Classic Stampin’ Pads; Apricot grosgrain ribbon; Pewter<br />
Hodgepodge Hardware; Crafters’ Tool Kit<br />
Thank You Very Much tags<br />
Label Classics, Much Appreciated, and Petal Pushers stamp<br />
sets; Always Artichoke, Rose Red, and Very Vanilla card<br />
stock; Apricot Appeal and Bashful Blue Classic Stampin’<br />
Pads; Light Blue gingham ribbon; Natural hemp twine;<br />
Pewter Hodgepodge Hardware; Earth Elements & Neutrals<br />
buttons; Crafters’ Tool Kit<br />
What’s That Thing Called?<br />
Have you ever been demonstrating a project and said, “Then you tie the ribbon to that swirly thing?” Or thingamabob? Or<br />
doohicky? Believe it or not, they have real names, and this is what they’re called:<br />
Small oval holder<br />
(qty.4)<br />
Big oval holder<br />
(qty. 4)<br />
Small ribbon charm<br />
(qty. 8)<br />
Oval ring clip<br />
(qty. 10)<br />
Shaped round clip<br />
(qty. 10)<br />
Shaped S clip<br />
(qty. 10)<br />
Big rectangle holder<br />
(qty. 4)<br />
Small rectangle holder<br />
(qty. 4)<br />
Large ribbon charm<br />
(qty. 8)<br />
Shaped oval clip<br />
(qty. 10)<br />
Triangle ring clip<br />
(qty. 10)<br />
Shaped square clip<br />
(qty. 10)<br />
Square holder<br />
(qty. 4)<br />
Keyhole anchor<br />
(qty. 12)<br />
Oval keyhole anchor<br />
(qty. 12)<br />
Rectangular buckle<br />
(qty. 6)<br />
Rectangular ribbon charm<br />
(qty. 6)<br />
Brads<br />
(qty. 100)<br />
Oval buckle<br />
(qty. 6)<br />
Items are pictured smaller than their actual size.<br />
www.stampinup.com
Every year, famous designers hold<br />
flashy fashion shows where they<br />
unveil hot new looks. Tickets<br />
to these events are pricey, as world<br />
trendsetters clamour for a limited number<br />
of front-row seats.<br />
Palette o’ Prints Reminders<br />
P A L E T T E<br />
o’ prints<br />
Spend $50, and qualify to purchase a sampler pad of<br />
Prints Designer Series paper; host a $600 workshop,<br />
receive the sampler free!<br />
• Orders may be placed on a customer,<br />
hostess, or demonstrator order.<br />
• Customers must spend $50 to<br />
qualify to purchase the 6" x 6"<br />
sample pad (item # 109673/$13.50).<br />
• Customers can purchase a Prints<br />
sampler pad for every $50 order or<br />
$50 increment. For example, when<br />
a customer places a $100 order<br />
(excluding shipping and taxes), she<br />
qualifies to order two sampler pads.<br />
• The pad will automatically be added<br />
to orders over $600. You won’t need<br />
to enter anything to make this<br />
happen. Orders of $1,200 will receive<br />
two sampler pads.<br />
At Stampin’ <strong>Up</strong>!, we like to unveil our<br />
new designs in grand style as well, but<br />
tickets don’t cost an arm and a leg and<br />
everyone can participate. In fact, during<br />
May, all you (or your customers) have to<br />
do is order $50 worth of merchandise,<br />
and you can qualify to receive an exclusive<br />
sneak peek sampler pad of our new Prints<br />
Designer Series paper for only $13.50.<br />
And if you (or any of your hostesses) hold<br />
a $600 workshop, you receive the pad free!<br />
This 6" x 6" Prints Designer Series<br />
sampler is specially configured and is only<br />
available during this promotion; in the<br />
Fall-Winter 2007 Collection they will be<br />
available in sheets of 12" x 12" in separate<br />
configurations. Each sampler pad contains<br />
48 sheets—12 sheets of each colour<br />
(Certainly Celery, Rose Red, So Saffron,<br />
Almost Amethyst). During your May<br />
workshops, show your guests how they can<br />
use the sheets in a variety of ways. We’ve<br />
provided three samples here with excellent<br />
ideas to showcase these papers, and you<br />
can also put your own creativity to work as<br />
you experiment with these papers.<br />
May is National Scrapbooking Month, and<br />
this promotion is a fabulous way to entice<br />
scrapbookers to qualify for this sneak<br />
peek of some of our new papers. “You’ll<br />
love these papers for scrapbooking,” you can<br />
point out to your guests. “You can use them<br />
for layering photos, creating fun borders, or<br />
covering chipboard accents, like I’ve done on<br />
this Fall page.”<br />
The promotion also appeals to<br />
nonscrappers, so be sure to incorporate the<br />
papers on your other workshop projects<br />
as well. “See how quickly I used the papers<br />
to create an eye-catching background on this<br />
card,” you might say, as you demonstrate<br />
the Thank You Very Much card. “I’ve<br />
even stamped a greeting on it for the flower<br />
centre.” The “A” box shown here makes a<br />
fantastic favour at a party; you may even<br />
want to download the pattern from the<br />
Pattern Library on the Demonstrator Web<br />
Site (Show & Tell > Pattern Library) and<br />
make copies to give to your guests.<br />
Make the most of the Palette o’ Prints<br />
promotion by showcasing it during your<br />
workshops, mentioning it during your<br />
stamp camps and classes, and notifying<br />
customers and hostesses through<br />
e-mail. The chance to get their hands<br />
on these hot new designs will get any<br />
stamper excited!<br />
• In addition to earning a free pad as<br />
a hostess, hostesses may place a $50<br />
customer order and qualify to order<br />
a pad for $13.50.<br />
• From April 15 through April 30,<br />
demonstrators may preorder a Prints<br />
sampler pad for $13.50 without<br />
placing a $50 order.<br />
10 may 2007
Thank You Very Much card<br />
All-Year Cheer II and Big Blooms sets; Almost Amethyst<br />
and Whisper White card stock; Almost Amethyst, Certainly<br />
Celery, and So Saffron Prints Designer Series paper; Basic<br />
Black and Rose Red Classic Stampin’ Pads; Sweet Shop<br />
Ribbon Originals; White Circle Metal Edge tag; Stampin’<br />
Dimensionals; 1-3/8" Circle punch<br />
“A” box<br />
Seeing Spots and Typeset Alphabet Lower sets; Certainly<br />
Celery and Rose Red Prints Designer Series paper;<br />
Certainly Celery and Rose Red Classic Stampin’ Pads; Rich<br />
Regals ® brads; linen thread; Stampin’ Dimensionals; 1/16"<br />
Circle punch<br />
Fall page (12" x 12")<br />
Chocolate Chip, Kraft, and Very Vanilla card stock;<br />
Rose Red and So Saffron Prints Designer Series paper;<br />
Certainly Celery and Chocolate Chip Classic Stampin’<br />
Pads; Chocolate Chip Stampin’ Write marker; On Board<br />
Accents; Fresh Favorites II buttons; twill tape; Tag Corner<br />
and 1/2" and 1/4" Circle punches; staples<br />
You will receive one<br />
sheet of each of the<br />
following patterns in<br />
each colour; Certainly<br />
Celery, Rose Red, So<br />
Saffron, and<br />
Almost Amethyst.<br />
Prints are shown at 50% of actual size. To view all of the colors in all of the patterns, visit the Demonstrator Web Site under Specials & Promotions.<br />
making<br />
BUSINESS SENSE<br />
The Training Expertise<br />
The importance of training can’t be<br />
overlooked in today’s world. In fact, we<br />
often benefit from the time that others<br />
take to develop and finesse their skills<br />
through specific training. Whether we’re<br />
enjoying a delicious meal cooked by a<br />
gourmet chef or an inspiring concert<br />
presented by a first-class performer, we<br />
can sense someone who is well trained<br />
and educated in their role.<br />
At Stampin’ <strong>Up</strong>!, we are dedicated to<br />
providing effective training that sets you<br />
apart and makes this kind of difference.<br />
Much of our training—especially for<br />
a newcomer—can be found on the<br />
Demonstrator Web Site under Training.<br />
This section, organized in an accessible,<br />
easy-to-follow format, makes it easy for a<br />
new recruit to grasp what she needs to do<br />
to achieve her goals.<br />
Ideally, you will walk through this<br />
section of the web site with your new<br />
recruit, providing an overview of the<br />
section, pointing out your favourite<br />
pieces of information, and answering any<br />
questions she may have. In addition, this<br />
section offers a wonderful resource for<br />
demonstrators who have been around<br />
awhile but who may be looking for a way<br />
to jump-start their businesses or promote<br />
to the next level.<br />
Every topic has valuable supporting<br />
materials, including worksheets,<br />
templates, and forms. You’ll find the<br />
following important topics covered:<br />
• Get organized<br />
• Set goals<br />
• Get bookings<br />
• Plan workshops<br />
• Sell and recruit<br />
• Improve customer service<br />
• Track sales progress<br />
• Use technology for growth<br />
Whether you’re just starting your business<br />
and need someone to walk you through<br />
step by step, or looking for a quick pickme-up<br />
to re-ignite your enthusiasm,<br />
you’ll find what you need in the Training<br />
section of the Demonstrator Web Site.<br />
www.stampinup.com 11
Increase Support<br />
with New Reports<br />
The new “I Want to Know” reports can help you be a better upline.<br />
Have you ever wished you<br />
could hire a personal assistant?<br />
Someone to inform you when a<br />
demonstrator in your downline goes into<br />
pending or notify you when a downline<br />
member is close to promoting? Well, we<br />
can’t hire assistants for all of you, but<br />
we’ve done the next best thing. We’ve<br />
created six new reports to make your job<br />
a little easier. These reports will help you<br />
identify at a glance the downline members<br />
who need you most, so you can prioritize<br />
and be more efficient. While these reports<br />
are available to every demonstrator<br />
who has a downline, they are particularly<br />
helpful for demonstrators with<br />
large downlines.<br />
You’ll find these reports on the<br />
Demonstrator Web Site under My<br />
Business>My Reports in the right column<br />
under I Want to Know Reports. Some are<br />
already available; others will be released<br />
in the coming months. Watch for current<br />
updates announcing the availability of<br />
these new reports.<br />
Who Is Not Meeting Current<br />
Quarterly Sales Minimums<br />
This report is updated daily but will<br />
be most helpful during the second and<br />
third months of the quarter. Contact<br />
demonstrators for whom you are the<br />
first-available upline and let them know<br />
how much they need to submit to meet<br />
the quarterly sales minimum. Remind<br />
them that they can find updates on<br />
their progress on their Key Stats on the<br />
Demonstrator Web Site home page. Offer<br />
tips and suggestions to help them reach<br />
the required sales.<br />
Who Is in Pending<br />
This report is available only during<br />
pending months—January, April,<br />
July, and October—and only after<br />
commissions are finalized by the tenth<br />
business day of the month. Check this<br />
report after commissions are final, and<br />
contact pending demonstrators for<br />
whom you are the first-available upline.<br />
Let them know how much they need to<br />
submit in orders to return to active status.<br />
Offer tips on how they can reach the<br />
required sales. During a pending month,<br />
this report will be updated nightly, so you<br />
can check the progress of your downline<br />
members as they come out of pending.<br />
Who Is Close to Promoting<br />
This report shows you who in your<br />
downline is close to achieving a higher<br />
title. This includes demonstrators<br />
who are close to promoting, as well<br />
as demonstrators who are close<br />
to being reinstated to a title they<br />
previously held. Pay extra attention<br />
to these demonstrators, and support<br />
and encourage them as they work to<br />
12 may 2007<br />
Screen shot 1 Screen shot 2
each their next promotion. As these<br />
demonstrators promote, your downline<br />
leadership will increase as well, helping<br />
you reach your next promotion.<br />
Who Has Promoted<br />
This report will be available after<br />
commissions are finalized by the tenth<br />
business day of the month. It will show<br />
who in your downline promoted the<br />
previous month. For example, if you<br />
check this report after the tenth business<br />
day in April, it will show you who<br />
promoted during March. Recognition<br />
is a powerful motivator. Contact each<br />
demonstrator for whom you are the firstavailable<br />
upline and congratulate her on<br />
her promotion. When your downline<br />
members see that they are valued and that<br />
others recognize and appreciate their hard<br />
work and accomplishments, they will<br />
want to continue to perform successfully.<br />
Who Is Not Meeting Title<br />
Maintenance Requirements<br />
This report shows who in your downline<br />
is at risk of retitling. To maintain a<br />
title, demonstrators must meet three<br />
requirements: 12-month rolling sales,<br />
first-level count, and downline leadership.<br />
Demonstrators will only be retitled at the<br />
end of a Stampin’ <strong>Up</strong>! year; therefore,<br />
this report shows year-to-date sales, rather<br />
than 12-month rolling sales, to provide<br />
a more accurate picture of progress. Be<br />
careful when checking this report early<br />
in the Stampin’ <strong>Up</strong>! year because most<br />
demonstrators will appear on this report<br />
for the first several months. The most<br />
crucial time for you to check out this<br />
report is in the months leading up to<br />
June, after demonstrators have had time<br />
to meet their sales requirement but while<br />
there is still time to help if they have not.<br />
Who Has No Active <strong>Up</strong>line<br />
between You and Her<br />
This report lists demonstrators for whom<br />
you are the first-available upline, not<br />
including your direct recruits. Use this<br />
information any time you are contacting<br />
your downline by e-mail, phone, or mail.<br />
Include these demonstrators in your<br />
mailing lists, group meetings, newsletters,<br />
and incentives.<br />
To access any of these new reports,<br />
visit My Business>My Reports on the<br />
Demonstrator Web Site, and click on<br />
the report you wish to view in the<br />
right column under I Want to Know<br />
Reports. You can then select what<br />
information you want to see on the<br />
report (see screen shot 1).<br />
For instance, you can select which<br />
levels of your downline you wish to<br />
view. If you only want to view your<br />
direct reports, click Level 1 and run<br />
the report (see screen shot 2). It’s as<br />
simple as that!<br />
Check out all of these new reports and<br />
discover how they can help you help your<br />
downline! You can create e-mail lists;<br />
export data to Microsoft Word, Excel, or<br />
Internet Explorer; and more. For ideas<br />
on how to use these reports, go to My<br />
Business>My Reports>I Want to Know<br />
Reports Training on the Demonstrator<br />
Web Site.<br />
Report <strong>Up</strong>dated Access and View Months<br />
Who Is Not Meeting Current<br />
Quarterly Sales Minimums<br />
Nightly*<br />
Second month of quarter—continue<br />
to monitor throughout quarter<br />
February, March, May, June, August,<br />
September, November, December<br />
First day of pending month** January 1, April 1, July 1, October 1**<br />
Who Is in Pending Nightly* (in a pending month) Every pending month January, April, July, October<br />
Who Has Promoted Monthly Monthly Every month<br />
Who Is Not Meeting Title<br />
Maintenance Requirements<br />
Nightly* Monthly beginning in January January, February, March, April, May, June<br />
Who Is Close to Promoting<br />
Who Has No Active <strong>Up</strong>line between<br />
You and Her<br />
Nightly*<br />
Nightly*<br />
Since you and your downline can promote any time during the year, access<br />
this report any time you want to focus on promoting yourself or helping your<br />
downline promote.<br />
Whenever you contact your group by e-mail, mail, or phone, you’ll want to access<br />
this report and include these downline members as well.<br />
*Nightly: There is a blackout period from the first of the month until commissions are finalized. During the blackout period, these reports will show the previous<br />
month's data. At all other times, these reports will show daily information for the current month. These reports are intended to give you current, relevant information;<br />
therefore, information from previous months isn't accessible.<br />
**Viewing the Who Is Not Meeting Current Quarterly Sales Minimums Report on the first day of a pending month will tell you who is likely to go into pending. This<br />
information will be helpful during the time before commissions are finalized. After commissions have been finalized during a pending month, you can view the Who<br />
Is in Pending Report to see who is actually in pending.<br />
www.stampinup.com 13
WorkSmart<br />
Learning to organize tasks and balance demands can produce a more efficient business.<br />
If there’s one thing most demonstrators have in common,<br />
it’s a busy schedule. Whether you’re working at a fulltime<br />
office job, as a stay-at-home mom, or somewhere in<br />
between, juggling a demonstratorship with the other aspects of<br />
your life can become a challenging balancing act. In an effort to<br />
help, we interviewed two of our demonstrators who work full<br />
time in addition to managing their Stampin’ <strong>Up</strong>! businesses. Try<br />
implementing their tips to help you simplify your processes and<br />
work smarter!<br />
Organize Your Schedule<br />
The first key to running an efficient demonstratorship is<br />
organization. Joan Banman Cristo, a counselor from Winnipeg,<br />
Manitoba, starts with her calendar. “I establish dates that are<br />
available for events,” says Joan, who also blocks out dates and<br />
times for personal or other commitments. If you know which<br />
dates are open for workshops or other events, keeping an orderly<br />
schedule will be much easier.<br />
“I always offer my events on weeknights and during the day on a<br />
weekend,” says Katie Mahr, a manager from Madison, Wisconsin.<br />
“To identify what times worked best, I surveyed my customers and<br />
asked when they would most likely come. If I hold an event, I want<br />
the maximum turnout.” Katie alternates which weeknights she<br />
holds events, so all her customers can attend her events at least part<br />
of the time.<br />
In addition to scheduling time for workshops, demonstrators often<br />
find that it helps to schedule time for phone calls and other business<br />
matters. “On days I’m not doing a workshop, I will spend an hour<br />
contacting my hostesses, prepping for an event, following up on new<br />
leads, or organizing my next meeting,” says Joan. She also sets aside<br />
time for delivering orders and dropping off hostess packets.<br />
Katie sets aside one day a month to do banking and paperwork.<br />
“If you do it consistently once a month, you don’t get behind,” she<br />
observes. “An organized demonstrator is a happy demonstrator!”<br />
Each demonstrator’s schedule is unique. Consider your needs and the<br />
needs of your family, and schedule time accordingly for workshops,<br />
phone calls, and other business items. When your needs are properly<br />
considered and your schedule is organized accordingly, you will be able<br />
to run a smoother, more efficient business.<br />
Consolidate Prep Time<br />
Once you know which dates are available for workshops and<br />
events, you need time to prepare for them. Many demonstrators<br />
find that preparing for several events at once saves time.<br />
“I prepare for a month of workshops at a time,” says Joan.<br />
“I prepare five projects and rotate those throughout the month.<br />
That way, I am always ready and can restock my ‘workshop in<br />
a box’ whenever I need to.”<br />
In addition, Joan prepares hostess and recruiting packets in<br />
advance and keeps them in her car. “Keep all of your basic<br />
supplies together,” she advises. “That way, you don’t have<br />
to worry about forgetting something at home. Once I’m<br />
home, I simply open up my workshop in a box and insert the<br />
consumables, repack, and I’m ready for the next event!”<br />
Katie agrees. “I keep everything I need in two containers ready<br />
to go, so that saves a lot of time. When I come home from work,<br />
I’m not running around wondering where stuff is.”<br />
To prepare a workshop in a box, pack all the things you’ll need<br />
for your workshop in one place. Include project supplies such<br />
as card stock, stamps, ink, adhesives, cutting instruments, and<br />
accessories. Then add hostess and recruiting packets and any<br />
other items you regularly use at your events. With everything<br />
together in one place, you will be ready to go for your next event!<br />
Time is something that no one seems to have enough of anymore—<br />
especially not busy demonstrators! Set aside one day a month to<br />
prepare for workshops. You will save time and energy and still have<br />
time for yourself, your family, and other things that matter in life.<br />
Use Stampin’ <strong>Up</strong>! Resources<br />
Finally, it’s important to realize that Stampin’ <strong>Up</strong>! provides many<br />
tools for you, so you don’t need to re-create the wheel. “The web<br />
site is a huge resource,” notes Katie. “Click on everything on the<br />
web site. Visit it, and be familiar with it. I use a lot of ideas from the<br />
Pattern Library and Stampin’ Success.®”<br />
You can find the Pattern Library on the Demonstrator Web<br />
Site under Show & Tell. Stampin’ Success is posted online each<br />
month under My Business>My Business Resources>Stampin’ <strong>Up</strong>!<br />
Publications. Both resources provide a wealth of patterns and project<br />
ideas for your next event.<br />
14 may 2007
If you are looking for additional project ideas, Workshop Wizard<br />
and Stampers’ Showcase on the Demonstrator Web Site are<br />
updated regularly with dozens of samples and templates. And<br />
don’t forget the Idea Book & Catalogue—it’s packed with timely<br />
samples you can use as a springboard for your next creation.<br />
Katie also finds that going to Stampin’ <strong>Up</strong>! events can be a<br />
tremendous source of inspiration. “I connect with demonstrators<br />
at events, and that’s important because they give you ideas.”<br />
Demonstrators you meet at events can share project ideas through<br />
swaps or e-mails, as well as tips for how they run their businesses.<br />
In addition to finding workshop templates and project<br />
samples, checking the Demonstrator Web Site<br />
regularly for news and events can be valuable.<br />
“Having Stampin’ Success online has helped me<br />
get events organized in advance, so I can<br />
be ready for things like Sell-A-Bration,”<br />
says Joan. The web site provides<br />
essential information about current<br />
promotions and other helpful<br />
news, so you always have the<br />
newest products and information<br />
for your customers and hostesses.<br />
Finally, Stampin’ <strong>Up</strong>! provides resources<br />
to help you organize your time better.<br />
You can use Customer Manager (on the<br />
Demonstrator Web Site under My Business)<br />
to organize contact information for all of your<br />
customers and hostesses, track sales, print mailing<br />
labels, and create e-mail lists. The Demonstrator Web<br />
Site is packed with forms and ideas to help you set and<br />
accomplish goals.<br />
Whether you need to better organize your contacts or find inspiration<br />
for your next workshop, chances are that Stampin’ <strong>Up</strong>! has already<br />
provided tools to help you get started!<br />
Being a demonstrator can definitely add to the demands on your<br />
time, whether your days are spent in an office or at home caring<br />
full time for your family. Work smarter, not harder, by organizing<br />
your schedule, consolidating your prep time, and using Stampin’<br />
<strong>Up</strong>! resources wisely. You’ll find that balance will help you achieve<br />
your goals and take care of the things that matter most.<br />
www.stampinup.com 15
The Stamp in<br />
Stampin’ <strong>Up</strong>!<br />
The giddy sensation of opening<br />
a new set of stamps is one of<br />
the undeniable joys of being a<br />
stamper. And when that set is designed<br />
and manufactured by Stampin’ <strong>Up</strong>!, you<br />
know that you own the finest rubber<br />
stamps on the market.<br />
Stampin’ <strong>Up</strong>!’s line of exclusive stamps<br />
gets better with each catalogue and mini<br />
catalogue, and our incredible selection<br />
that customers can’t find anywhere else<br />
keeps them coming back for more.<br />
However, while customers are falling in<br />
love with our original artwork, they may<br />
overlook the other benefits of Stampin’<br />
<strong>Up</strong>! stamps. Luckily, they have you to help<br />
them see the additional advantages our<br />
stamps offer.<br />
One thing your customers will notice<br />
when they open their new stamp set is<br />
the premium rubber. Be sure to point out<br />
that an abundance of rubber and foam<br />
is used on each stamp, so the image is<br />
raised higher from the wood block than<br />
most craft-store rubber stamps. This is<br />
one reason why they’ll enjoy a clean image<br />
with Stampin’ <strong>Up</strong>! stamps; there’s less<br />
16 may 2007
chance of accidentally inking the edge of<br />
the block. The foam also provides just the<br />
right amount of give, so the rubber that is<br />
inked leaves a strong, distinct image.<br />
At each workshop, you may encounter<br />
someone new to Stampin’ <strong>Up</strong>!, so<br />
remember to show your guests how to<br />
mount their stamps. As you mount an<br />
incentive stamp to give to your hostess,<br />
consider saying, “See how I’m mounting<br />
this stamp right at the edge of the block? It’s<br />
easier for me to place my images right where<br />
I want them if I mount the stamps this way.<br />
But you might want to mount your stamp in<br />
the centre of the block or even off to the side.<br />
It’s entirely up to you, and when you mount<br />
your own stamps, you can make that choice!”<br />
When you work features and benefits<br />
statements like these into your<br />
demonstration, you keep customers<br />
informed about the quality of our<br />
rubber stamps. Features tell customers<br />
about a product, but the benefits sell the<br />
product, so mention both!<br />
In addition to pointing out the features<br />
and benefits of our stamps, you’ll want to<br />
reinforce the value of buying stamps in<br />
sets. Our stamp sets are designed to help<br />
stampers create complete projects, so most<br />
sets include both images and greetings.<br />
Plus, the variety of images in a set makes<br />
them useful for creating lots of different<br />
looks for different projects.<br />
You might say, “From our elegant vintage<br />
sets to our cute and quirky sets, you’ll find<br />
something for everyone—and every project—<br />
in our Idea Book & Catalogue. And because<br />
you order images in sets, you never have<br />
to worry about coordinating images.<br />
Stampin’ <strong>Up</strong>! has done it for you.”<br />
Practise selling our stamp sets by<br />
using features and benefits statements<br />
in your demonstrations, and make<br />
clear to your customers the value in<br />
purchasing stamps from you, their<br />
Stampin’ <strong>Up</strong>! demonstrator. These<br />
statements will become second nature<br />
in no time at all!<br />
Learn more about<br />
our exclusive rubber<br />
stamps by reading<br />
“Life of a Rubber<br />
Stamp” on page 16<br />
of your January 2007<br />
Stampin’ Success.<br />
For more ideas on<br />
how to sell our<br />
products during a<br />
workshop, visit the<br />
Demonstrator Web Site<br />
under Training>My<br />
Workshops &<br />
Events>Workshop<br />
Wizard>During the<br />
Workshop>Sell in<br />
the Workshop.<br />
www.stampinup.com 17
eek a boo!<br />
• •<br />
How to use the Fall-Winter 2007 Preview brochure<br />
Just the Facts<br />
Here are important facts<br />
and dates about the<br />
Fall-Winter 2007 Preview<br />
brochure.<br />
• Preview brochures can<br />
be sent to customers via<br />
Mailing Selector. Make<br />
sure to finalize your list<br />
online by April 30. (The<br />
earning period for the<br />
preview brochure ended<br />
on March 31.)<br />
• A complementary<br />
brochure will be mailed<br />
to you beginning May 15.<br />
• You will be able to<br />
preorder products from<br />
the brochure June 1–30.<br />
• Preview brochures sent<br />
via Mailing Selector<br />
will begin mailing to<br />
customers the first week<br />
of June.<br />
• You may also order the<br />
preview brochure as a<br />
supply item beginning<br />
June 1 (Item # 109544 for<br />
English and 109545 for<br />
French, $3.75, pkg. of 8).<br />
• You can continue to buy<br />
the preview brochure<br />
while supplies last after<br />
the new catalogue is<br />
available. Watch Current<br />
<strong>Up</strong>dates on the web<br />
site for availability<br />
information.<br />
You’ve known about it for<br />
months, and now you get to<br />
experience for yourself what<br />
the preview brochure can do for your<br />
business! This terrific 12-page publication<br />
is designed to generate excitement for the<br />
new catalogue. And once you see it,<br />
you’ll understand the appeal it will have<br />
for customers.<br />
If you’re wondering what makes this<br />
publication so exciting, we have one<br />
response: let us count the ways!<br />
One: Sets Plus More<br />
In the past, we’ve offered demonstrators a<br />
sneak peek at some of our stamp sets. The<br />
preview brochure is based on a similar<br />
principle, but instead of previewing only<br />
stamp sets, you and your customers will<br />
see stamp sets plus a selection of our<br />
wonderful new accessories, including<br />
the six new colours that make up our In<br />
Color palette.<br />
Two: Sizing It <strong>Up</strong><br />
The brochure’s size makes it easy to<br />
distribute during workshops or mail to<br />
customers (only 75 cents through Mailing<br />
Selector). Use the preview brochure as<br />
your calling card during the weeks before<br />
the new catalogue is unveiled to fuel the<br />
fire of anticipation. People whom you<br />
give it to can tuck it in a purse or planner<br />
and look through it whenever time<br />
permits.<br />
Three: No Need to Wait<br />
You’ll be able to preorder select items in<br />
the brochure! The preorder opportunity<br />
offers multiple advantages to your<br />
business. It means you’ll have time to<br />
preorder stamp sets and accessories<br />
and have them ready to demonstrate at<br />
workshops by July 2, the date the new<br />
catalogue becomes effective. No need<br />
to wait until after the new catalogue is<br />
available. You’ll get your hands on the<br />
products early, which means you’ll be in a<br />
better position to be an expert, spotlight<br />
hot stuff, and get your business off to a<br />
new start!<br />
Four: Hands-On Enthusiasm<br />
Although customers will not be able to<br />
order the products, once they see you<br />
demonstrating them, they’ll be eager to<br />
book a workshop and place an order.<br />
Give your customers a chance to use as<br />
many of the new sets and accessories<br />
as possible through Make & Takes and<br />
project demonstrations.<br />
Five: Pick <strong>Up</strong> the Phone<br />
The preview brochure is a prime<br />
opportunity to make contact with your<br />
customers. Send it to past customers<br />
and hostesses, and then follow up with<br />
a phone call to introduce the idea of<br />
the preview brochure. Talk about your<br />
favourite products—especially any you’ve<br />
had a chance to use—and invite loyal<br />
Stampin’ <strong>Up</strong>! fans to enjoy these new<br />
products themselves<br />
These are only a handful of the reasons<br />
you’ll fall in love with the preview<br />
brochure; we’re certain you’ll find<br />
even more as you take advantage of this<br />
exciting new publication that’s sure<br />
to make customers clamour for the<br />
new catalogue!<br />
18 may 2007
I N T H E S PoT L I G H T<br />
Jennifer Tinline • Instructor • Burlington, Ontario<br />
Start date:<br />
May 2003<br />
Monthly sales:<br />
$3,600<br />
Monthly workshops:<br />
7-9<br />
Family: Husband, Tom;<br />
sons Cass (10) and<br />
Duncan (5)<br />
Jennifer Tinline has built a successful business through<br />
goal setting and paying effective one-on-one attention<br />
to customers and hostesses. Shortly after signing up as a<br />
demonstrator, Jennifer went back to work following her<br />
maternity leave. “I wanted to stay home with my kids. So I<br />
figured out how much income I needed, and I set goals.”<br />
The first change Jennifer had to make was to hold enough<br />
workshops. “I made sure I got two bookings at every<br />
workshop,” she shares. “I believe booking statements and fun<br />
workshops are the key to consistent bookings.” In<br />
addition, Jennifer always invites customers to book<br />
a workshop when they place orders. As a result, her<br />
calendar is usually full two months in advance.<br />
Once a customer places an order or books a<br />
workshop, Jennifer’s superior customer service<br />
shines through—and keeps her business growing!<br />
She contacts hostesses by phone a couple times<br />
before their workshops to encourage them to<br />
overinvite, to find out guest count, and to ask<br />
about the workshop setup. She maintains regular<br />
contact with customers through e-newsletters packed with<br />
information about current promotions and events, links<br />
to her web site, and stamping tips. “I go the extra mile for<br />
customer service,” she says. “If someone needs something, I<br />
make sure I deliver it as quickly as possible.<br />
“Stamping used to be my private hobby,” she concludes.<br />
“Now I get to share it with people. All my friends are<br />
stampers now, and I wonder why I waited so long to tell<br />
them about it.”<br />
Maureen McGrail • Instructor • Dover Centre, Ontario<br />
Start date:<br />
April 2002<br />
Monthly sales:<br />
$3,400<br />
Monthly workshops:<br />
6-8<br />
Family: husband, Pat;<br />
daughters Meghan (17)<br />
and Shannon (10); sons<br />
Ethan (14) and Cullen (12)<br />
During her five years as a demonstrator, Maureen McGrail’s<br />
business has gone through different stages. “I made it my<br />
mission to go anywhere for a workshop the first year,” she<br />
says. “That year was about building business.”<br />
Her second year Maureen still focused on sales, but her<br />
calendar became more full and she also began to recruit.<br />
“I could honestly say that I needed someone in an<br />
area to be a demonstrator,” Maureen explains. As<br />
her business grew, her next step was to simplify. “I<br />
had to start doing the same workshop repeatedly,”<br />
she says. “Streamlining became critical.” Now<br />
Maureen runs a balanced business, and she focuses<br />
on building camaraderie in her downline and<br />
coaching recruits one-on-one.<br />
Because of her experience, Maureen has sage tips<br />
to share. “I just assume people will want to book<br />
a workshop. I’ll e-mail someone and tell them I’m<br />
filling my calendar and want to give my best customers and<br />
hostesses the first opportunity. I offer two dates, and they<br />
almost always want to host a workshop.”<br />
Finally, Maureen recommends perseverance. “Slumps come to<br />
all of us, even to the best. Have the courage to get yourself out<br />
of it, and know you’re not the only person to get in a slump.”<br />
www.stampinup.com 19
art show<br />
Cooking up a masterpiece<br />
This tasty-looking, multilayer<br />
cake looks good enough to eat,<br />
but your party guests will find<br />
more than flavour inside each piece! In<br />
fact, the ingredients for this magnificent<br />
cake include card stock, ink, and ribbon,<br />
instead of flour, sugar, and eggs. And<br />
depending on what you hide inside each<br />
piece, the party favour your guests take<br />
home may not even contain any calories!<br />
Keep in mind that you can adapt this<br />
cake to any occasion by substituting<br />
a different colour palette and using a<br />
different stamp set. You can also adjust<br />
the size of the cake by adding or taking<br />
away layers. You’ll find a complete list of<br />
Stampin’ Supplies for this cake, as well as<br />
a pattern for each cake piece and step-bystep<br />
instructions for cooking up this handstamped<br />
creation, on the Demonstrator<br />
Web Site under My Business>My<br />
Business Resources>Stampin’ <strong>Up</strong>!<br />
Publications>Stampin’ Success>2007>May.<br />
20 may 2007
for your information<br />
FYI<br />
Shuffling for Recruits<br />
Just a reminder about this months’<br />
recruiting promotion—from April 1<br />
through May 31, new recruits and the<br />
demonstrators who recruited them will<br />
receive hostess stamp sets from the new<br />
Fall-Winter 2007 Collection absolutely<br />
free. In addition, the top recruiter in each<br />
province will receive an iPod Shuffle®.<br />
New recruits will automatically receive<br />
the All About Occasions Hostess Bundle<br />
(includes a four piece stamp set and<br />
two jumbo wheels) and In the Spotlight<br />
stamp set, which will be shipped with<br />
their starter kits. As the recruiting<br />
demonstrator, you get to choose a hostess<br />
set for every recruit you sign up. You’ll<br />
be able to choose from any hostess set<br />
available in the new catalogue (excluding<br />
the Level 3 Simply Scrappin’ kit), and<br />
you can redeem these sets after the<br />
commission run in June.<br />
To view these sets—and find out complete<br />
details about this exciting opportunity<br />
to receive free hostess-only sets—visit<br />
the Demonstrator Web Site under<br />
Specials & Promotions.<br />
Sell-A-Bration Redemption<br />
Now is the time to order the free products<br />
you earned during Sell-A-Bration; you<br />
can place your order any time through<br />
May 15. If you are waiting to make your<br />
decision after you see which sets will be<br />
retiring this year, you’ll find the list<br />
posted on the Demonstrator Web Site on<br />
May 1. Also, as you decide which sets to<br />
order, remember that you can order sets<br />
from the Spring Mini Catalogue!<br />
For more information, including the<br />
tables that show what you can earn<br />
based on your sales and recruiting during<br />
the Sell-A-Bration period, visit the<br />
Demonstrator Web Site under Specials<br />
& Promotions>Sell-A-Bration<br />
Redemption Details.<br />
Ready Set Start Newsletters<br />
Posted Online<br />
We are currently in the process of<br />
evaluating our training resources,<br />
including the Ready Set Start<br />
newsletters, to ensure that we offer our<br />
new demonstrators the right information<br />
at the right time.<br />
As a result, we will no longer mail<br />
copies of the Ready Set Start newsletters<br />
to new demonstrators. Instead, the<br />
newsletters will be available on the<br />
Demonstrator Web Site under the New<br />
Demonstrator Corner (Training><br />
New Demonstrator Corner).<br />
The Canadian Office<br />
Is Moving!<br />
The Calgary office is moving to a new<br />
location this summer. Unfortunately,<br />
our new office will not be ready by the<br />
time we have to move from our current<br />
location, so we will be moving twice<br />
over the next few months! We don’t want<br />
anything to get lost in the shuffle, so here<br />
are some details you’ll want to remember.<br />
Our phone number (403-291-4585) and<br />
fax number (403-291-4588) will always<br />
remain the same.<br />
Our mailing address will not change<br />
until we move into our final office; we’ll<br />
let you know when we have settled in.<br />
We have arranged to have all of our mail<br />
forwarded to our interim office. To make<br />
sure that your new-recruit paperwork,<br />
exchanges, and corrections do not get lost,<br />
please include the Calgary office phone<br />
number at the bottom of our address on<br />
all packages.<br />
Stampin’ <strong>Up</strong>! Canada<br />
110, 3636 - 23rd Street NE<br />
Calgary, Alberta<br />
T2E 8Z5<br />
(403) 291-4585<br />
www.stampinup.com 21
workshop<br />
WOW<br />
The Look of<br />
leather & suede<br />
Any time you can show your guests a quick way to add class<br />
to their projects, you’ll catch their eye. This workshop wow<br />
does exactly that. Leather or suede is a stylish addition to any<br />
project, and with the swipe of an ink pad or the dab of a sponge, your<br />
guests will be able to add either of these first-class looks to their projects.<br />
To create the suede accent, choose three colours; we’ve selected Close to<br />
Cocoa, Creamy Caramel, and More Mustard Craft ink for this accent.<br />
Completely ink the On Board “d” with Close to Cocoa, using the directto-paper<br />
technique, then allow the accent to dry. Follow up by applying<br />
Creamy Caramel ink randomly on the accent, again using the direct-topaper<br />
technique. Don’t worry about entirely covering the letter; in fact,<br />
it’s the uneven application of ink, with some light areas and some dark<br />
areas, that creates the suede look. Finally, repeat the same step with More<br />
Mustard ink.<br />
Clearly, if you’ve got to allow time for the accent to dry between each<br />
application of ink, you won’t be able to demonstrate this from beginning<br />
to end at your workshop. Instead, you may want to show a chipboard<br />
accent at the three different stages of inking, so your customers can see<br />
the evolution, but they don’t have to wait for the drying process.<br />
Creating the leather look is similar, but<br />
instead of using the direct-to-paper<br />
technique, you apply the inks to the accent<br />
with a stamping sponge. Again, don’t worry<br />
about making sure the ink completely covers<br />
all of the accent; the uneven application of<br />
ink is what mimics the leather look.<br />
Rely on this wow at your next workshop, and<br />
show your guests that the look of leather—or<br />
suede—can be part of their next project with<br />
a simple swipe or wipe.<br />
You’re Invited card<br />
Amazing to Zany and Ladybuds sets; Bashful Blue, More<br />
Mustard, Naturals Ivory, and Old Olive card stock; Four Seasons<br />
Designer Series paper; Chocolate Chip Classic Stampin’ Pad;<br />
Spring Moss grosgrain ribbon; Earth Elements brads<br />
may<br />
contest categories<br />
wow! art file<br />
projects with punch<br />
Samples made using our<br />
exclusive punches<br />
march<br />
contest winners<br />
wow! art file<br />
Heather Neidig<br />
Delta, British Columbia<br />
A BREATH OF SPRING<br />
Susan Farrant<br />
Vancouver, British Columbia<br />
monthly contest deadlines<br />
• Contests run for a single month at a time, with the deadline falling<br />
on the 15th. This May Contest runs April 16–May 15.<br />
• Entries for the May Contest must be received in our office on or<br />
before May 15, 2007.<br />
• Please pack all entries carefully and label the box or envelope with<br />
the contest month and category. (See address below.) Contest<br />
entries will not be returned.<br />
monthly contest rules and information<br />
• Winning projects often share the following features: They use only<br />
one set along with a greeting set, plus backgrounds, borders, or<br />
frames. Use of the Journaling Fonts CDs is limited to journaling<br />
only (not titles). Scrapbook pages include photos and journaling.<br />
• Include a list of Stampin’ Supplies used to make your entry:<br />
Specify stamp set or wheel names; the types and colours of papers,<br />
card stock, markers, pens, pads; and any accessories or tools used.<br />
Stamps and accessories used must be in the current catalogue.<br />
Give clear directions, if necessary. Also write your name,<br />
demonstrator number, the category you are entering, and the<br />
month of the contest. Write this information directly on the back of<br />
the card or item, if possible.<br />
• All scrapbook layouts must contain photos. When submitting photos<br />
of you or members of your immediate family, you grant Stampin’ <strong>Up</strong>!<br />
the right to publish those photos. However, if you’d like to submit<br />
a project with photos of individuals other than immediate family<br />
members, please have all main subjects in the photo fill out a photo<br />
waiver form, which can be found on the Demonstrator Web Site<br />
under Business Tools > Business Aids. Make sure those photo waivers<br />
are included with any projects you submit to Stampin’ <strong>Up</strong>! Do not<br />
send photos taken by professional photographers unless you have<br />
obtained a release of the copyright in writing. Please include that<br />
release with your submission.<br />
• Mail to: Stampin’ <strong>Up</strong>! Contest: Canada<br />
12907 South 3600 West<br />
Riverton, UT 84065<br />
USA<br />
• Submission of artwork to Stampin’ <strong>Up</strong>! constitutes agreement<br />
with Stampin’ <strong>Up</strong>!’s payment policy and acknowledgment that the<br />
artwork becomes the property of Stampin’ <strong>Up</strong>! to be used by the<br />
company as desired.<br />
• Submit as many entries as you wish. Do not submit projects made<br />
with patterns or images known to be copyrighted. Contest winners<br />
may select any three stamp sets (excluding hostess sets) from the<br />
current catalogue and/or mini catalogue. (Demonstrator Support<br />
will call winners and take their free stamp orders within 10 business<br />
days of publication date.)<br />
• Stampin’ <strong>Up</strong>! cannot answer inquiries about whether or not contest<br />
entries arrived in the office. If proof of delivery is needed, please<br />
send by registered mail or a similar option.<br />
Suede Look (top)<br />
Close to Cocoa, Creamy Caramel, and More Mustard Craft<br />
Stampin’ Pads<br />
Leather Look (bottom)<br />
Chocolate Chip, Close to Cocoa, Creamy Caramel, More Mustard,<br />
and Old Olive Craft Stampin’ Pads<br />
22 may 2007<br />
Stampin’ Success ® is published jointly through a cooperative effort of Stampin’ <strong>Up</strong>!, Inc., a Utah USA<br />
corporation, and Stampin’ <strong>Up</strong>! Canada, ULC, a Nova Scotia unlimited liability company.
please note<br />
If you try to submit your orders or new recruit<br />
Starter Kit Order Forms on the last day of a<br />
commission, incentive, or sales period, you risk not<br />
getting your order in before the deadline due to<br />
heavy order volumes.<br />
All materials that are mailed in to Stampin’ <strong>Up</strong>!, such<br />
as kit orders, contest entries, etc., must be received<br />
in the office by the date specified. Please plan<br />
accordingly and send this date-sensitive material<br />
several days earlier than the deadline given or use a<br />
delivery service with a guaranteed delivery date.<br />
policy updates on<br />
the demonstrator web site<br />
Check out your 2006–2007 Demonstrator Manual<br />
online if you have any questions about running<br />
your Stampin’ <strong>Up</strong>! business. It can be found under<br />
My Business>My Business Resources>Stampin’ <strong>Up</strong>!<br />
Publications>Demonstrator Manual.<br />
supply write-ins<br />
For an updated supply list, please see the<br />
Demonstrator Web Site under My Business>My<br />
Business Resources. This supply list is updated<br />
whenever a new supply product is offered.<br />
catalogue corrections<br />
See the Demonstrator Web Site for any catalogue<br />
corrections on the 2006–2007 Idea Book & Catalogue.<br />
Make a note of these corrections in your catalogues.<br />
dates to remember<br />
April 1—30<br />
April 1—May 31<br />
April 30<br />
May 1—May 31<br />
May 1<br />
May 28 (Memorial Day)<br />
May 31<br />
June 29<br />
July 2 (Canada Day)<br />
July 4 (Independence Day)<br />
July 31<br />
catalogue dates<br />
March 1—July 1<br />
April 1—30<br />
April 1—June 30<br />
June 1—30<br />
July 2—January 1<br />
Say It with Stamps promotion<br />
Share What You Love promotion<br />
BUSINESS<br />
Last business day of the month; last day of pending<br />
Palette o’ Prints promotion<br />
Retiring stamp sets list posted online<br />
Stampin’ <strong>Up</strong>! Riverton offices closed<br />
Last business day of the month<br />
Last business day of the month; last day of Stampin’ <strong>Up</strong>! year;<br />
last day to place orders to count toward this quarter’s Consistency<br />
Counts promotion<br />
Stampin’ <strong>Up</strong>! Canada offices closed<br />
Stampin’ <strong>Up</strong>! Riverton offices closed<br />
Last business day of the month; last day of pending<br />
Spring Mini Catalogue sales period<br />
Fall/Winter 2007 Preview brochure Mailing Selector period<br />
Holiday Mini Collection performance period<br />
Fall/Winter 2007 Preview brochure pre-order period, Holiday Mini<br />
Collection Mailing Selector period<br />
Fall/Winter 2007 Collection sales period<br />
ITEM DESCRIPTION PRICE<br />
105527 8-1/2 x 11 Paper Holder $9.95<br />
105526 8-1/2 x 11 Paper Holder Dividers $7.50<br />
105528 12 x 12 Paper Holder $11.50<br />
105529 12 x 12 Paper Holder Dividers $8.50<br />
catalogue write-ins<br />
ITEM# DESCRIPTION PRICE<br />
107886 CRANBERRY CRISP GROSGRAIN RIBBON $10.95<br />
107884 TRUE THYME GROSGRAIN RIBBON $10.95<br />
107885 VINTAGE VIOLET GROSGRAIN RIBBON $10.95<br />
event dates<br />
April 13<br />
April 13, 14<br />
April 14—22<br />
April 20<br />
April 20, 21<br />
April 27, 28<br />
July 25—28<br />
July 30—August 2<br />
Salt Lake City, UT Opportunity Night<br />
Salt Lake City, UT Regionals<br />
Cruise 2007 (Panama)<br />
Virginia Beach, VA Opportunity Night<br />
Virginia Beach, VA Regionals<br />
Vancouver, BC Regionals<br />
Convention 2007: Session One (Denver, Colorado)<br />
Convention 2007: Session Two (Denver, Colorado)<br />
(registration for both sessions begins May 9)<br />
Limited Copy Permission<br />
Stampin’ <strong>Up</strong>! ® publications and original art work are trademark<br />
and copyright protected. Nevertheless, Stampin’ <strong>Up</strong>! hereby grants<br />
permission to active demonstrators of the company to copy pages of<br />
Stampin’ Success ® Canada or the Stampin’ <strong>Up</strong>! Demonstrator Web Site<br />
for personal use (such as copying revised policy statements from the<br />
Demonstrator Manual or enlarging patterns); for training purposes<br />
(for Stampin’ <strong>Up</strong>! recruits only); and for business purposes (as in the<br />
distribution of sales promotion flyers). Pages may not be copied for<br />
distribution to customers or others without specific permission.<br />
© 2007 Stampin’ <strong>Up</strong>! Canada All rights reserved.<br />
Send Contest Entries to:<br />
Contest: Canada<br />
Stampin’ <strong>Up</strong>!<br />
12907 South 3600 West<br />
Riverton, UT 84065<br />
USA<br />
Send Written Correspondence to:<br />
Stampin’ <strong>Up</strong>!<br />
P.O. Box 550<br />
Riverton, UT 84065-0550<br />
USA<br />
Send Canadian Starter Kit Orders, Tax-Exempt Orders,<br />
Written Correspondence, and Exchange Orders to:<br />
Stampin’ <strong>Up</strong>! Canada ULC<br />
Suite 110<br />
3636–23 rd Street N.E.<br />
Calgary, AB T2E 8Z5<br />
Canada<br />
contact information<br />
(800) stamp up<br />
Demonstrator Support and<br />
Phone Orders<br />
(MC, Visa, Discover,<br />
Electronic Funds Transfer)<br />
7:00 am–7:00 Pm (MT) M–F<br />
(403) 291-4588<br />
Correspondence Fax<br />
www.stampinup.com<br />
Stampin’ <strong>Up</strong>! Web Site Address<br />
ds@stampinup.com<br />
Demonstrator Support<br />
E-Mail Address<br />
www.stampinup.com 23
12907 9350 South 150 3600 East West<br />
Riverton, Fifth Floor UT 84065<br />
Sandy, UT 84070<br />
If you thought you<br />
had big dreams now,<br />
wait until after Convention 2007!<br />
With classes, presentations, and<br />
activities designed to help you turn your<br />
dreams into reality, this is one event<br />
you definitely won’t want to miss!<br />
Find out all about convention by visiting<br />
the Demonstrator Web Site under<br />
Events on April 16, and plan to register<br />
beginning May 9.