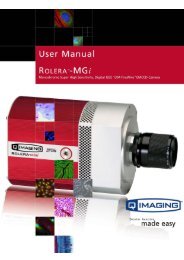
Retiga 1300R Fast 1394 User's Manual - QImaging
Retiga 1300R Fast 1394 User's Manual - QImaging
Retiga 1300R Fast 1394 User's Manual - QImaging

You also want an ePaper? Increase the reach of your titles
YUMPU automatically turns print PDFs into web optimized ePapers that Google loves.
To attach a C-mount lens to the camera:<br />
Carefully thread the C-mount lens onto the camera’s lens ring, rotating the lens in a clockwise<br />
direction until it is mounted securely. Use the lens controls to adjust focus.<br />
To attach F-mount optics:<br />
If you have a monochrome camera and you have purchased the optional color filter, then carefully<br />
thread the color filter to the C-mount ring on the camera. The opposite end of the color filter is a<br />
female F-mount connector. Carefully connect your F-mount optics to the open connector of the color<br />
filter until it is mounted securely. Use your optics controls to adjust focus.<br />
NOTE: If you did not purchase a color filter, then you will need to purchase a C to F mount adapter<br />
to allow the connection of F-mount optics. Your camera does not need to be monochrome in this<br />
situation.<br />
Understanding the LED Indicators<br />
The LED indicators at the back of the camera give you important information about what your camera<br />
is doing:<br />
• GREEN: The green LED is the power indicator. This LED should always be lit when the<br />
camera is connected to your computer and is turned on.<br />
• RED: The red LED is the exposure/integration indicator. It flashes briefly when the CCD is<br />
exposing.<br />
• AMBER: The amber LED is the cooling indicator. It illuminates only on cooled cameras - and<br />
only when cooling is turned on. If you turn off cooling (a setting in your imaging software),<br />
the amber LED will turn off too.<br />
Capturing Images with the <strong>Retiga</strong> <strong>1300R</strong> <strong>Fast</strong> <strong>1394</strong><br />
Consult your imaging application’s user’s manual for more details.<br />
10