Updating Your Firmware - OCZ Technology
Updating Your Firmware - OCZ Technology
Updating Your Firmware - OCZ Technology

You also want an ePaper? Increase the reach of your titles
YUMPU automatically turns print PDFs into web optimized ePapers that Google loves.
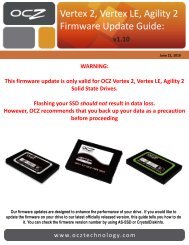
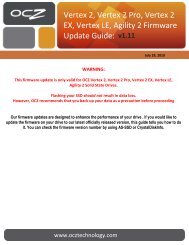
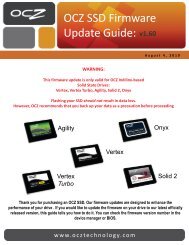
<strong>Updating</strong> <strong>Your</strong> <strong>Firmware</strong><br />
WARNING:<br />
This firmware update is only valid for <strong>OCZ</strong> VERTEX Solid State<br />
Drives<br />
Flashing your Vertex will result in complete data loss. Please back<br />
up your drive before proceeding<br />
Tip:<br />
Testing any SSD under the current Windows operating systems will<br />
leave data blocks behind that are no longer valid but have to be<br />
erased before the blocks can be re‐used. If you want to test your<br />
SSD, we advise to do this before installing an operating system and<br />
then to recondition the drive by running the flash utility to erase all<br />
invalid data on the drive. This will restore maximum performance.<br />
<strong>OCZ</strong> Engineering<br />
Q2, 2009
Thank you for purchasing an <strong>OCZ</strong> Vertex SSD. Our firmware updates are designed to enhance the<br />
performance of your Vertex . If you would like to update the firmware on your drive to our latest officially<br />
released version, this guide tells you how to do it. You can check the firmware version number in the device<br />
manager or BIOS.<br />
Before you begin:<br />
Make sure you have a jumper handy<br />
If you have data on your Vertex that you do not want to lose, don’t forget to back it up before updating the firmware<br />
The Vertex you are updating will have to be connected as a spare drive to a notebook or desktop with a functioning OS<br />
Confirm the capacity of your drive (it is listed on the back of the drive)<br />
Make sure your system is stable. Just like flashing a BIOS, it is best to do so at stock CPU/RAM/GPU speeds<br />
You are now ready to begin:<br />
1. Boot your computer with your old Hard Disk Drive (HDD)<br />
2. Download the latest firmware for VERTEX SSD from www.ocztechnology.com<br />
3. Extract (unzip) the downloaded file and remember the location of extracted files and folders.<br />
4. Turn off the computer.<br />
5. Install the jumper to set the drive to factory mode (Appendix I, II)<br />
6. The drive needs to be connected to any SATA ports 0~3 on Intel SATA controllers (Appendix III)<br />
7. Turn on the computer, enter the CMOS setup and change the SATA controller to IDE mode.<br />
8. Save the CMOS settings and exit the BIOS setup to reboot the computer.<br />
Flashing the <strong>Firmware</strong>:<br />
(The following example is for 120GB VERTEX SSD)<br />
1.Turn on the computer and follow the instructions below. If you are using<br />
Windows VISTA, you will need to turn off UAC (User Account Control).<br />
2.Double click the unzipped folder:<br />
3. You will see the following folders; in the case of the 120GB drive, please double click the 120GB folder.
4. The folder should contain the following files:<br />
5. Double‐click on the “start” file to run the firmware update program –the following screen will appear:<br />
6. Click on the OK button to start the program. The drive will now address all data blocks to re‐flash them.<br />
7. In the unlikely event that you encounter any hanging or freezing during the flashing or the VERTEX, please<br />
repeat the flashing process.
8. Remove the jumper from the VERTEX and click on the OK button to confirm normal mode of the VERTEX.<br />
9. Next, simply click on the OK button. Congratulations, you have completed the flashing process.
10. To exit the program, press “Cancel.” Shut down your computer.<br />
(If you want to flash multiple VERTEX SSDs, follow step 1~10 again.)<br />
Verification of Successful <strong>Firmware</strong> Update:<br />
a. Turn off your computer<br />
b. Verify that the jumper has been removed from the VERTEX SSD.<br />
c. Restart the computer and enter the CMOS setup to restore the original SATA settings.<br />
On the Fly Verification of <strong>Firmware</strong> Update:<br />
(Successful flashing of the firmware can be verified without disconnecting or rebooting)<br />
*In the example version the number should be "1275"<br />
a. After completing the flash procedure, simply remove the jumper and click OK at the prompt.<br />
b. Open the control panel/system/hardware/device manager<br />
c. Right click on disk drive / scan for hardware changes 2 times (Windows XP). The firmware<br />
version number should now appear next to the drive in the device manager. It is “1275”<br />
<strong>Your</strong> drive is now ready for the installation of the OS.
Hot Plugging Method<br />
• This method is useful only when steps 1‐10 are not working.<br />
This method is also useful when your computer does not recognize the SSD or hangs on boot if an SSD in<br />
factory‐mode is attached.<br />
How to Flash the VERTEX SSD<br />
a. Follow steps 1~5 except for the SSD connection.<br />
b. Connect the SSD (jumpered) as shown in Appendix III.<br />
c. Press OK button as shown in step 6.<br />
d. Program starts automatically.<br />
e. Remove the jumper from the SSD when “Change the jumper setting”<br />
screen pops up.<br />
d. Press the OK button as shown in step 8.<br />
e. Press the OK button as shown in step 9.<br />
f. Press “Cancel” button as shown in step 10.<br />
g. Disconnect the SSD from your computer.<br />
h. You have completed the flashing process of the Vertex.<br />
i. Close all programs, shut down the computer, and restart.<br />
j. Please verify correct execution of the flashing.
APPENDIX I (top), II (bottom)<br />
<strong>Firmware</strong> update Jumper<br />
Jumper installed
APPENDIX III. SATA Power and data cable connection (Notebook is different)<br />
SATA POWER Cable<br />
SATA DATA Cable<br />
*For Notebook users, please refer to the manufacturer’s notebook manual<br />
for the disk drive location.
<strong>Firmware</strong> Revision History<br />
• Version 0112<br />
• Version 1199<br />
• Internal "write join" was implemented for better performance<br />
• SMART basic features can be performed without error log monitoring<br />
(to reduce overhead of log data collection)<br />
• ATA power management commands (IDLE, STANDBY, SLEEP) are enabled for compatibility<br />
(Actually these are dummy, while SATA based Power Management is fully supported)<br />
• Bug fix for power management<br />
• Bug fix for internal data processing error<br />
• Bug fix for run‐time bad block handling<br />
• Bug fix for PIO mode data transfer<br />
• Bug fix for re‐worked NAND handling<br />
• Version 1275<br />
• Performance is improved when drive is installed on RAID0 mode host<br />
• Maximum LBA number is modified according to the JEDEC standard<br />
• Modifications of internal data structure used by FW (stamp)<br />
• Bug fix for “write join” implementation<br />
• Bug fix for FPDMA transfer mode<br />
• Bug fix for firmware update