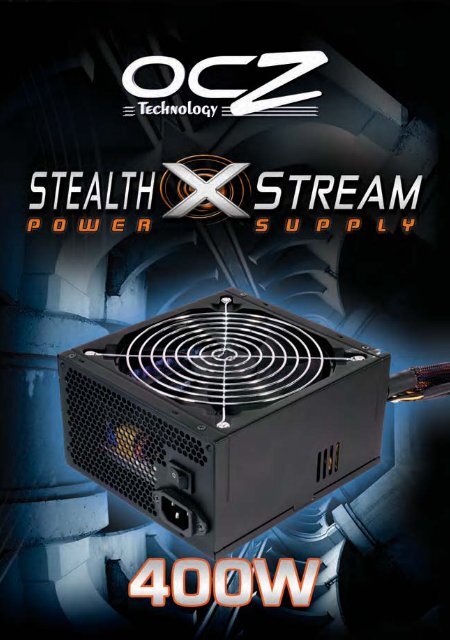
stealth x stream 400w - OCZ
stealth x stream 400w - OCZ
stealth x stream 400w - OCZ
You also want an ePaper? Increase the reach of your titles
YUMPU automatically turns print PDFs into web optimized ePapers that Google loves.
400W<br />
CONTENT - INDEX<br />
Technical Specifications<br />
Installation of Power Supply<br />
Connectors<br />
Troubleshooting/ Warranty and RMA<br />
2<br />
3<br />
4<br />
5<br />
01
400W<br />
TECHNICAL SPECIFICATION<br />
INPUT TABLE<br />
PARAMETER<br />
NOMINAL MAXIMUM MAX CURRENT<br />
Voltage [115V]<br />
Voltage [230 v]<br />
Frequency<br />
100-120 V ac<br />
200-240 V ac<br />
50/60 Hz<br />
264V ac<br />
63 Hz<br />
5 A<br />
2.5 A<br />
-<br />
OUTPUT TABLE<br />
MODEL<br />
550W<br />
OUTPUT<br />
SPECS<br />
MAX. LOAD<br />
MIN. LOAD<br />
COMBINED<br />
TOTAL OUTP.<br />
+5V<br />
15 A<br />
0.2 A<br />
120W<br />
+3.3V<br />
24A<br />
0.1A<br />
OUTPUT VOLTAGE<br />
+12V1 +12V2<br />
17A 14A<br />
0.1A 0.5A<br />
372W<br />
400W<br />
-12V +5VSB<br />
0.3A 3.0A<br />
0A 0A<br />
3.6W 15W<br />
02
400W<br />
INSTALLATION OF THE POWER SUPPLY<br />
NOTE: You will need a Philips screwdriver to install your new power supply.<br />
To install a new power supply you first need to remove the old one. Please proceed as<br />
follow<br />
1. Unplug the AC power cable from your old power supply.<br />
2. Make sure to disconnect all other cables from the PC and remove the cover from the<br />
PC case. Remove any screws holding the cover in place; specifics will vary by<br />
computer case design.<br />
3. Disconnect the power supply from all the components in the PC- make sure that all<br />
the connectors are unplugged.<br />
4. You can now remove the screws securing the old power supply to your case; normally,<br />
there are four screws at the back of the chassis. After removing all the screws, slowly<br />
take the power supply out of the PC case. Be careful that you do not damage any<br />
other components during this action.<br />
INSTALLING THE NEW PC POWER & COOLING POWER SUPPLY:<br />
1. Place your new power supply in the appropriate space in the PC case and<br />
secure it by screwing the four screws into the rear of the power supply.<br />
2. Guide the 24-pin atx connector through the case and connect it to your<br />
motherboard. If your motherboard supports only a 20-pin jack, connect only<br />
the 20-pin portion of the connector to your motherboard.<br />
3. Connect the 4-pin power cable to the motherboard.<br />
4. If you are using a graphics card with a 6-pin connector please connect the<br />
respective connector to the jack on the card. If your card supports more than<br />
one jack connect the second 6-pin connector. If your card has an 8-pin jack<br />
mounted just use the additional two pins beside the regular 6-pin connector<br />
to form an 8-pin connector.<br />
5. Proceed with connecting all Molex and SATA connectors to your hard<br />
drives and optical drives.<br />
6. Connect any other internal components that require power to the<br />
appropriate connector- i.e. fans and/or case lighting.<br />
7. You may replace the cover on the PC case now, or you can leave it off<br />
initially while you verify everything works properly.<br />
8. Connect your display, keyboard, mouse, speakers, printer, and any other<br />
peripherals to your computer.<br />
9. Plug in the main AC power cable into the back of the power supply and turn<br />
on your computer.<br />
10. If everything works properly and you have not already done so, turn your<br />
computer off and replace the cover on the case.<br />
03
400W<br />
CONNECTORS DESCRIPTION AND ILLUSTRATION<br />
(20+4Pin)<br />
20 10<br />
+12V1DC<br />
+12V1DC<br />
+12V1DC<br />
+12V1<br />
+12V1<br />
+3.3 V<br />
+12V1DC<br />
+12V2<br />
+12V2<br />
+12V1DC<br />
+12V1DC<br />
04
TROUBLESHOOTING/WARRANTY AND RMA<br />
If you experience any problems with your new power supply, please check these simple<br />
trouble-shooting steps or consult the retailer where the product was purchased.<br />
Caution: Working on electrical devices can be life-threatening. If you are not familiar with<br />
the steps taken please consult a professional. If your power supply has developed traces<br />
of smoke, broken cables, or was exposed to liquids it should not under any<br />
circumstances be brought back into operation.<br />
If you installed a new power supply and the system will no longer start, please check<br />
the following steps:<br />
1. Make sure the AC input is plugged in correctly and the wall outlet distributes power.<br />
[ Try another device in the electrical outlet to verify it is working properly.]<br />
2. Check that all connectors from the power supply are correctly plugged into the<br />
motherboard.<br />
3. Are the cables from the power switch of the computer case properly connected to<br />
the motherboard?<br />
4. Make sure there are no short circuits within the systems that could result from<br />
defective hardware or misplaced connectors.<br />
5. If you are not sure take all parts out of the housing and only leave the motherboard<br />
inside together with the power supply. Disconnect all plugs, check them and then<br />
connect them again to the respective sockets.<br />
If you needfurther assistance please visit:<br />
http://www.ocztechnology.com/support/ticket.html<br />
3- Year Warranty<br />
400W<br />
Your <strong>OCZ</strong> Z Series PSU is covered by an industry-leading 3-Year Warranty. This product<br />
is warranted to be free from defects in material and workmanship for a period of three<br />
[3] years from the date of purchase. If any defects should occur during this period,<br />
contact <strong>OCZ</strong> Technology for further assistance and to take advantage of your warranty.<br />
To place a Returned Merchandise Authorization [RMA] request, you may simply submit<br />
a ticket through our website at: http://www.ocztechnology.com/support/ticket.html<br />
05


