BX Series - Oriental Motor
BX Series - Oriental Motor
BX Series - Oriental Motor

Create successful ePaper yourself
Turn your PDF publications into a flip-book with our unique Google optimized e-Paper software.
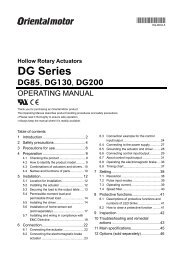
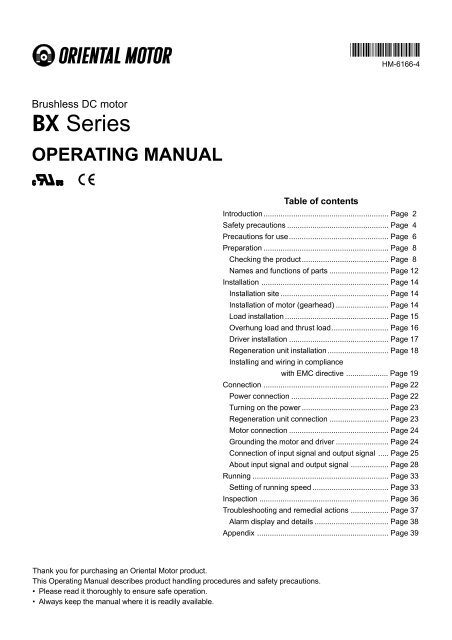
HM-6166-4<br />
Brushless DC motor<br />
<strong>BX</strong> <strong>Series</strong><br />
OPERATING MANUAL<br />
Table of contents<br />
Introduction ........................................................... Page 2<br />
Safety precautions ................................................ Page 4<br />
Precautions for use............................................... Page 6<br />
Preparation ........................................................... Page 8<br />
Checking the product......................................... Page 8<br />
Names and functions of parts ............................ Page 12<br />
Installation ............................................................ Page 14<br />
Installation site ................................................... Page 14<br />
Installation of motor (gearhead) ......................... Page 14<br />
Load installation ................................................. Page 15<br />
Overhung load and thrust load........................... Page 16<br />
Driver installation ............................................... Page 17<br />
Regeneration unit installation ............................. Page 18<br />
Installing and wiring in compliance<br />
with EMC directive .................... Page 19<br />
Connection ........................................................... Page 22<br />
Power connection .............................................. Page 22<br />
Turning on the power ......................................... Page 23<br />
Regeneration unit connection ............................ Page 23<br />
<strong>Motor</strong> connection ............................................... Page 24<br />
Grounding the motor and driver ......................... Page 24<br />
Connection of input signal and output signal ..... Page 25<br />
About input signal and output signal .................. Page 28<br />
Running ................................................................ Page 33<br />
Setting of running speed .................................... Page 33<br />
Inspection ............................................................. Page 36<br />
Troubleshooting and remedial actions .................. Page 37<br />
Alarm display and details ................................... Page 38<br />
Appendix .............................................................. Page 39<br />
Thank you for purchasing an <strong>Oriental</strong> <strong>Motor</strong> product.<br />
This Operating Manual describes product handling procedures and safety precautions.<br />
• Please read it thoroughly to ensure safe operation.<br />
• Always keep the manual where it is readily available.<br />
1
100-<br />
115V<br />
SPEED<br />
SS<br />
SD<br />
Introduction<br />
Before using the motor unit<br />
Only qualified personnel should work with the product.<br />
Before using it, carefully read the “Safety precautions” to ensure correct operation.<br />
This product is designed to be incorporated into general industrial machinery, and must not be used for other purposes.<br />
It should be noted that we are not responsible for any damages caused by ignoring this warning.<br />
Overview of the product<br />
The <strong>BX</strong> series is a brushless DC motor adopting a thin, high torque motor with encoder and high-precision driver. This<br />
product is available in two types; a combination type equipped with a special-purpose gearhead, which is best, suited<br />
to high-torque operation by gear speed reduction and a round shaft type which is the optimum for high speed<br />
requirements.<br />
Characteristics<br />
• A wide speed range from 30 to 3000 r/min<br />
• Flat torque characteristics free of torque reduction in the low speed range<br />
• Compatible with global power input<br />
• Operations in 2-step speed change ensured by the internal potentiometer and external potentiometer<br />
• Interlock between motor start/stop and application/release of electromagnetic brake<br />
• Digital speed setting: 3 to 3000 r/min<br />
• Speed control mode: 8-step speed setting<br />
Functions may be further enhanced by a system<br />
• Position control mode<br />
upgrading tool<br />
Positioning: setting 6 points movement<br />
Return to mechanical home position<br />
System upgrading tool (sold separately)<br />
Return to electrical home position<br />
• Data setter OPX-1A<br />
• Digital setting of slow start time and slowdown time: 0 to 30 sec.<br />
• Torque limiting function<br />
∗ For details, see the operating manual for<br />
• Servo lock function at motor standstill (speed control mode)<br />
<strong>BX</strong> series extension functions.<br />
• Operation monitor function<br />
• Data copy function<br />
• Permits abrupt braking of the inertial load and operations<br />
Regeneration unit (sold separately)<br />
in the vertical direction.<br />
EPRC-400P, RGB100<br />
System configuration<br />
A sample system configuration using the <strong>BX</strong> series is provided below.<br />
Driver<br />
<strong>BX</strong>D120A-A<br />
OPERATION<br />
GEAR HEAD<br />
GFH4G5<br />
Junction cable (sold separately)<br />
ALARM<br />
CN1<br />
CN2<br />
Operating data<br />
Data setter<br />
OPX-1A (sold separately)<br />
SENSOR<br />
<strong>Motor</strong><br />
Junction cable (sold separately)<br />
Regeneration unit (sold separately)<br />
EPRC-400P, RGB100<br />
RG<br />
RG<br />
NC<br />
NC<br />
CN3<br />
MOTOR<br />
Input signals and output signals<br />
Host controller<br />
AC power supply<br />
L<br />
~<br />
N<br />
VEXTA CN4<br />
I/<br />
O<br />
• Three types of input power sources can be used: single-phase 100-115 V, single-phase 200-230 V and three-phase<br />
200-230 V.<br />
• The mechanical home seeking function requires home-position detection sensors.<br />
2
For EC directives<br />
This product conforms with the EC’s low voltage directive and EMC directive under the following conditions.<br />
Take the following measures to ensure conformance with the EC’s low voltage directive and EMC directive.<br />
•For low voltage directive<br />
This product is designed for use as a built-in component.<br />
• Install the product within an enclosure in order to avoid contact with the hands.<br />
• Be sure to maintain a protective earth in case the hands should make contact with the product. Securely ground the<br />
protective earth terminals of the motor and driver.<br />
Item<br />
Protective range<br />
Ambient temperature<br />
Humidity<br />
Operation<br />
Altitude<br />
environment<br />
Surrounding<br />
atmosphere<br />
Ambient temperature<br />
Humidity<br />
Storage<br />
Altitude<br />
environment<br />
Surrounding<br />
atmosphere<br />
Ambient temperature<br />
Humidity<br />
Shipping<br />
Altitude<br />
environment<br />
Surrounding<br />
atmosphere<br />
Applicable standards<br />
Installation conditions<br />
<strong>Motor</strong><br />
Driver<br />
IP54 (except for the shaft of the round shaft motor) IP10<br />
0 to +50 °C (+32 to +122 °F) (non-freezing)<br />
85% or less (non-condensing)<br />
Up to 1000 m (3280 ft.) above sea level<br />
No corrosive gas, dust, water or oil<br />
-20 to +60 °C (-4 to +140 °F) (non-freezing) -25 to +70 °C (-13 to +158 °F) (non-freezing)<br />
85% or less (non-condensing)<br />
Up to 3000 m (9840 ft.) above sea level<br />
No corrosive gas, dust, water or oil<br />
-20 to +60 °C (-4 to +140 °F) (non-freezing) -25 to +70 °C (-13 to +158 °F) (non-freezing)<br />
85% or less (non-condensing)<br />
Up to 3000 m (9840 ft.) above sea level<br />
No corrosive gas, dust, water or oil<br />
EN60034-1, EN60034-5<br />
EN50178<br />
<strong>Motor</strong> is to be used as a component within other Driver is to be used as a component within<br />
equipment.<br />
other equipment.<br />
Overvoltage category: III<br />
Overvoltage category: III<br />
Pollution degree: Class 3<br />
Pollution degree: Class 2<br />
Protection against electric shock: Class I Protection against electric shock: Class I<br />
•For EMC directive<br />
This product has received EMC measures under the conditions specified in “Example of motor and driver installation<br />
and wiring” on page 21.<br />
Be sure to conduct EMC measures with the product assembled in your equipment by referring to “Installing and wiring<br />
in compliance with EMC directive” on page 19.<br />
•UL/CSA standards<br />
Item<br />
<strong>Motor</strong><br />
<strong>BX</strong>M230, <strong>BX</strong>M460, <strong>BX</strong>M5120 <strong>BX</strong>M6200, <strong>BX</strong>M6400<br />
Certification body<br />
Applicable<br />
standards<br />
File No.<br />
UL<br />
UL60950<br />
CSA C22.2 No.60950<br />
E208200<br />
UL<br />
UL1004<br />
CSA C22.2 No.100<br />
E62327<br />
Driver<br />
UL<br />
UL508C<br />
CSA C22.2 No.14<br />
E171462<br />
3
Safety precautions<br />
The precautions described below are intended to prevent danger or injury to the user and other personnel through safe,<br />
correct use of the product.<br />
Use the product only after carefully reading and fully understanding these instructions.<br />
Warning<br />
Failure to observe the warnings contained herein may result in a situation leading to serious injury or death.<br />
Caution<br />
Failure to observe the following precautions may result in injury or property damage.<br />
Note<br />
The items under this heading contain important handling instructions that the user should observe to ensure the safe<br />
use of the product.<br />
Warning<br />
General<br />
• Do not use the product in an explosive, flammable, or corrosive atmosphere to avoid possible fire, an electric shock<br />
or personal injury. Do not use it where it may be splashed with water, or near the combustible substances.<br />
• Only qualified installers should be assigned to the work of installation, connection, running, operation, inspection and<br />
trouble diagnosis. This is intended to prevent fire, an electric shock and injury.<br />
• Do not move, install, connect or inspect the product when power is applied. Turn off power before starting such work.<br />
This caution is to prevent possible an electric shock.<br />
• Do not touch the marked positions when power is turned on. Marks and on the driver front panel indicate the<br />
terminal where high voltage is applied. This is prevent fire and an electric shock.<br />
• The equipment provided with electromagnetic brake should be used when you want to utilize it for vertical<br />
application. If the motor has no electromagnetic brake, the holding force of the motor is insufficient when power is off,<br />
the movable parts may fall and cause injuries or damage of the equipment.<br />
• Do not use the brake mechanism of the motor with electromagnetic brake as a safety brake. It is intended to hold the<br />
movable parts and motor position. This caution is to avoid personal injury or damage to the equipment.<br />
• When the driver’s protection function is triggered, first remove the cause and then clear the protection function.<br />
Continuing the operation without removing the cause of the problem may cause malfunction of the motor, leading to<br />
injury or damage to equipment.<br />
Installation<br />
• To prevent the risk of electric shock, use the motor and driver for class I equipment only.<br />
• Install the motor (gearhead) and driver inside a cabinet. This is to prevent an electric shock and injury.<br />
• Install the motor and driver so as to avoid contact with hands, or ground them to prevent the risk of electric shock.<br />
Electrical connections<br />
• The driver power input voltage should be within the rated range. Otherwise, fire and an electric shock may occur.<br />
• Electrical connections must be made in strict accordance with the connection diagram. Otherwise, fire and an<br />
electric shock may occur.<br />
• Do not forcibly bend, pull or pinch the connection cable. Doing so may fire and electric shock.<br />
• To prevent electric shock, be sure to install the terminal cover (supplied) over the driver’s power supply terminals after<br />
making connections.<br />
Running<br />
• Turn off drive power in the event of power interruption. When the power is restored, the motor may start up suddenly<br />
and cause injuries or damage to the equipment.<br />
• Do not turn ON the FREE input when the position is held in the vertical direction. Otherwise, the holding force of the<br />
motor and electromagnetic brake will be lost, causing personal injury and equipment damage.<br />
Maintenance and inspection<br />
• Do not touch the connection terminals of the driver immediately after the power is turned off (for a period of 1 minute).<br />
The residual voltage may cause electric shock.<br />
Repair, disassembly and modification<br />
• Do not disassemble or modify the motor, (gearhead) and driver. Otherwise you may get an electric shock or injury.<br />
When internal inspection and repair must be made, contact your local sales office.<br />
4
Caution<br />
General<br />
• Do not use the motor (gearhead), driver and the regeneration unit beyond their specifications, or electric shock, injury<br />
or damage to equipment may result.<br />
• Keep your fingers and objects out of the openings in the motor and driver. Failure to do so may result in fire, electric<br />
shock or injury.<br />
• During running and for some time after stopping the equipment, do not touch the motor, driver and the regeneration<br />
unit. You may be burnt by high temperature on the surfaces of the motor, driver and the regeneration unit.<br />
Transport<br />
• Do not grip the motor (gearhead) output shaft and cable. Otherwise, injury may occur.<br />
Installation<br />
• Do not place combustibles around the motor and driver. Otherwise, fire may occur or you may be burnt.<br />
• Do not place around the motor and driver any obstacle which may interfere with ventilation. Otherwise, the<br />
equipment may be damaged.<br />
• The motor and driver should be firmly secured on the metallic plate in order to prevent personal injury and damage to<br />
the equipment.<br />
• The rotating part (output shaft) of the motor (gearhead) should be provided with a cover. Otherwise, injury may occur.<br />
• Do not allow your finger to be caught between the equipment and motor or gearhead when installing the motor with<br />
or without gearhead on the equipment. Otherwise, injury may occur.<br />
Running<br />
• Use the motor and driver in it‘s specified combination. This is to prevent fire.<br />
• Start running after making sure that the emergency stop can be used whenever required. Otherwise, injury may<br />
occur.<br />
• To prevent bodily injury, do not touch the rotating parts (output shaft) of the motor during operation.<br />
• When an abnormality is noted, stop the operation immediately, or fire, electric shock or injury may occur.<br />
• To prevent electric shock, use only an insulated screwdriver to adjust the internal switches.<br />
Maintenance and inspection<br />
• When testing the insulation resistance or dielectric strength, do not touch the terminal. Otherwise, an electric shock<br />
may occur.<br />
Scrapping<br />
• When scrapping the motor (gearhead) and driver, scrap them as industrial waste<br />
5
Precautions for use<br />
This section covers limitations and requirements the user should consider when using the <strong>BX</strong> series.<br />
•Do not apply an overhung load in excess of the specified permissible limit.<br />
Be sure to operate the motor within the specified permissible limit of overhung load. Operating it under an excessive<br />
overhung load may damage the motor bearings (ball bearings).<br />
•Use an electromagnetic brake motor for an application involving up/down travel.<br />
When the motor is used in an application involving up/down travel, use an electromagnetic brake motor to hold the load<br />
in position. To hold the load in position, apply the electromagnetic brake only after the motor has stopped. Do not use<br />
the brake to bring the moving motor to a halt. Repeated braking for such a purpose will wear the brake hub excessively,<br />
causing its holding ability to drop.<br />
Since the electromagnetic brake is of the non-excitation type, it can also be used to hold the load in position upon the<br />
occurrence of a power failure. However, this is not a secure means of holding the load.<br />
Do not use the electromagnetic brake as a safety brake.<br />
•Install the driver in a vertical orientation.<br />
The driver’s heat-dissipation function is designed according to vertical orientation. Installing the driver in any other<br />
orientation may shorten the life of electronic parts due to temperature increases within the driver.<br />
•Use a regeneration unit (sold separately) for vertical drive applications and those involving high<br />
inertial loads.<br />
The driver may be damaged if the energy that is regenerated during a vertical (gravitational) operation or due to an<br />
abrupt start/stop involving a large inertial load exceeds the maximum level that can be absorbed by the driver. The<br />
optional regeneration unit (sold separately) is designed to discharge the regenerated energy, thereby protecting the<br />
driver.<br />
•Measures against leakage current<br />
Stray capacitance is present between current-carrying cable of the driver and other current-carrying cables, and<br />
between the ground and motor, and high frequency leakage current may flow through this, adversely affecting the<br />
peripheral equipment. This depends on driver switching frequency and wire length between the driver and motor.<br />
When you want to install a ground fault interrupt circuit, use product provided with high frequency measures:<br />
• NV series by Mitsubishi Electric Corporation<br />
• EG and SG series by Fuji Electric FA Components & Systems Co., Ltd.<br />
•Measures against noise<br />
To prevent possible driver and motor operation errors due to external noise, take the following measures against noise:<br />
• Electrical connection of the motor<br />
For electrical connection of the driver and motor, use an optional junction cable.<br />
• Electrical connection of input/output signal cable<br />
• Connect the input/output signal cable in the shortest possible distance.<br />
• Connect the input/output signal cable 300 mm (12 in.) or more away from the induction load such as<br />
electromagnetic relay and current carrying cables (for power supply, motor, etc.). Do not connect it together with the<br />
current carrying cable, for example, by routing them together through the same duct or conduit.<br />
• Furthermore, use the braided-screen cable as the input/output signal cable. When the braided-screen cable cannot<br />
be used, it will be effective to install a Ferrite core on each of the controller and driver sides.<br />
6
100-<br />
115V<br />
SPEED<br />
SS<br />
SD<br />
GFH4G5<br />
• Connection of mains filter for power supply line<br />
To prevent external noise from being transferred through the power line, connect a mains filter to the driver AC power<br />
supply line input section.<br />
Ground the mains filter ground terminal using a cable with a diameter of equivalent to AWG18 (0.75 mm 2 ) or greater.<br />
Enclosure (control panel)<br />
Driver<br />
<strong>BX</strong>D120A-A<br />
OPERATION<br />
ALARM<br />
CN2<br />
SENSOR<br />
CN1<br />
Junction cable<br />
(sold separately)<br />
CN3<br />
MOTOR<br />
RG<br />
AC power supply<br />
Three-phase<br />
Single-phase <br />
Non-fuse breaker<br />
Mains filter<br />
RG<br />
NC<br />
NC<br />
L<br />
~<br />
N<br />
VEXTA CN4<br />
I/<br />
O<br />
<strong>Motor</strong><br />
GEAR HEAD<br />
PE<br />
PE<br />
Illustration shows the<br />
<strong>BX</strong>5120 type motor.<br />
PE<br />
•About grease of geared motor<br />
On rare occasions, a small amount of grease may ooze out from the geared motor. If there is concern over possible<br />
environmental damage resulting from the leakage of grease, check for grease stains during regular inspections.<br />
Alternatively, install an oil pen or other device to prevent leakage from causing further damage. Oil leakage may lead<br />
to problems in the customer’s equipment or products.<br />
7
100-<br />
115V<br />
~<br />
N<br />
L<br />
CN2<br />
CN1<br />
CN3<br />
SS<br />
SD<br />
SPEED<br />
30<br />
40<br />
50<br />
100<br />
Preparation<br />
This section covers the points to be checked along with the names and functions of respective parts.<br />
Checking the product<br />
Upon opening the package, verify that the items listed below are included.<br />
Report any missing or damaged items to the branch or sales office from which you purchased the product.<br />
The unit name of the product you bought should be checked by reference to the name on the label of the package.<br />
Check the names of the gearhead, motor and driver by reference to the names on the name plate of each product.<br />
The table on pages 9 to 11 show the combination of the gearhead, motor and driver according to unit names.<br />
GFH4G5<br />
GEAR HEAD<br />
<strong>BX</strong>D120A-A<br />
20<br />
60<br />
OPERATION<br />
10<br />
70<br />
ALARM<br />
0<br />
SPEED CONTROL<br />
80<br />
90<br />
SENSOR<br />
RG<br />
RG<br />
NC<br />
NC<br />
MOTOR<br />
• One external<br />
potentiometer ∗3<br />
• Two driver mounting<br />
brackets<br />
• One motor ∗1<br />
• One driver ∗2<br />
• One signal cable for<br />
connecting external<br />
potentiometer<br />
[1 m (3.3 ft.)]<br />
• Four screws for driver<br />
mounting brackets M3<br />
• One set of hexagon socket head bolts ∗4<br />
(four each of bolts, plain washers and nuts)<br />
• One manual<br />
∗1 One shaft key is supplied for the combination type.<br />
∗2 One combination type connector is supplied.<br />
∗3 The external potentiometer in the illustration indicates the setter in the assembled state.<br />
∗4 Supplied for the motor/gearhead combination type only<br />
How to identify the product model<br />
<strong>BX</strong> 5 120 A M - 5<br />
Power input<br />
<strong>Motor</strong> type<br />
Number: Gear ratio of motor/gearhead combination type<br />
A: Round shaft type<br />
M: With electromagnetic brake<br />
None: Standard type<br />
A: Single-phase 100-115 V<br />
C: Single-phase 200-230 V / Three-phase 200-230 V<br />
S: Three-phase 200-230 V<br />
Output power 30: 30 W 60: 60 W 120: 120 W<br />
200: 200 W 400: 400 W<br />
<strong>Motor</strong> size<br />
2: 60 mm (2.36 in.) square<br />
4: 80 mm (3.15 in.) square<br />
5: 90 mm (3.54 in.) square<br />
6: 104 mm (4.09 in.) square<br />
<strong>Series</strong> name<br />
<strong>BX</strong> series<br />
8
Combinations of gearheads, motors and drivers<br />
• <strong>Motor</strong>/gearhead combination type, standard model<br />
Unit model Gearhead model <strong>Motor</strong> model Driver model<br />
<strong>BX</strong>230A-5 GFH2G5 <strong>BX</strong>M230-GFH2 <strong>BX</strong>D30A-A<br />
<strong>BX</strong>230A-10 GFH2G10 <strong>BX</strong>M230-GFH2 <strong>BX</strong>D30A-A<br />
<strong>BX</strong>230A-15 GFH2G15 <strong>BX</strong>M230-GFH2 <strong>BX</strong>D30A-A<br />
<strong>BX</strong>230A-20 GFH2G20 <strong>BX</strong>M230-GFH2 <strong>BX</strong>D30A-A<br />
<strong>BX</strong>230A-30 GFH2G30 <strong>BX</strong>M230-GFH2 <strong>BX</strong>D30A-A<br />
<strong>BX</strong>230A-50 GFH2G50 <strong>BX</strong>M230-GFH2 <strong>BX</strong>D30A-A<br />
<strong>BX</strong>230A-100 GFH2G100 <strong>BX</strong>M230-GFH2 <strong>BX</strong>D30A-A<br />
<strong>BX</strong>230A-200 GFH2G200 <strong>BX</strong>M230-GFH2 <strong>BX</strong>D30A-A<br />
<strong>BX</strong>230C-5 GFH2G5 <strong>BX</strong>M230-GFH2 <strong>BX</strong>D30A-C<br />
<strong>BX</strong>230C-10 GFH2G10 <strong>BX</strong>M230-GFH2 <strong>BX</strong>D30A-C<br />
<strong>BX</strong>230C-15 GFH2G15 <strong>BX</strong>M230-GFH2 <strong>BX</strong>D30A-C<br />
<strong>BX</strong>230C-20 GFH2G20 <strong>BX</strong>M230-GFH2 <strong>BX</strong>D30A-C<br />
<strong>BX</strong>230C-30 GFH2G30 <strong>BX</strong>M230-GFH2 <strong>BX</strong>D30A-C<br />
<strong>BX</strong>230C-50 GFH2G50 <strong>BX</strong>M230-GFH2 <strong>BX</strong>D30A-C<br />
<strong>BX</strong>230C-100 GFH2G100 <strong>BX</strong>M230-GFH2 <strong>BX</strong>D30A-C<br />
<strong>BX</strong>230C-200 GFH2G200 <strong>BX</strong>M230-GFH2 <strong>BX</strong>D30A-C<br />
<strong>BX</strong>460A-5 GFH4G5 <strong>BX</strong>M460-GFH2 <strong>BX</strong>D60A-A<br />
<strong>BX</strong>460A-10 GFH4G10 <strong>BX</strong>M460-GFH2 <strong>BX</strong>D60A-A<br />
<strong>BX</strong>460A-15 GFH4G15 <strong>BX</strong>M460-GFH2 <strong>BX</strong>D60A-A<br />
<strong>BX</strong>460A-20 GFH4G20 <strong>BX</strong>M460-GFH2 <strong>BX</strong>D60A-A<br />
<strong>BX</strong>460A-30 GFH4G30 <strong>BX</strong>M460-GFH2 <strong>BX</strong>D60A-A<br />
<strong>BX</strong>460A-50 GFH4G50 <strong>BX</strong>M460-GFH2 <strong>BX</strong>D60A-A<br />
<strong>BX</strong>460A-100 GFH4G100 <strong>BX</strong>M460-GFH2 <strong>BX</strong>D60A-A<br />
<strong>BX</strong>460A-200 GFH4G200 <strong>BX</strong>M460-GFH2 <strong>BX</strong>D60A-A<br />
<strong>BX</strong>460C-5 GFH4G5 <strong>BX</strong>M460-GFH2 <strong>BX</strong>D60A-C<br />
<strong>BX</strong>460C-10 GFH4G10 <strong>BX</strong>M460-GFH2 <strong>BX</strong>D60A-C<br />
<strong>BX</strong>460C-15 GFH4G15 <strong>BX</strong>M460-GFH2 <strong>BX</strong>D60A-C<br />
<strong>BX</strong>460C-20 GFH4G20 <strong>BX</strong>M460-GFH2 <strong>BX</strong>D60A-C<br />
<strong>BX</strong>460C-30 GFH4G30 <strong>BX</strong>M460-GFH2 <strong>BX</strong>D60A-C<br />
<strong>BX</strong>460C-50 GFH4G50 <strong>BX</strong>M460-GFH2 <strong>BX</strong>D60A-C<br />
<strong>BX</strong>460C-100 GFH4G100 <strong>BX</strong>M460-GFH2 <strong>BX</strong>D60A-C<br />
<strong>BX</strong>460C-200 GFH4G200 <strong>BX</strong>M460-GFH2 <strong>BX</strong>D60A-C<br />
<strong>BX</strong>5120A-5 GFH5G5 <strong>BX</strong>M5120-GFH2 <strong>BX</strong>D120A-A<br />
<strong>BX</strong>5120A-10 GFH5G10 <strong>BX</strong>M5120-GFH2 <strong>BX</strong>D120A-A<br />
<strong>BX</strong>5120A-15 GFH5G15 <strong>BX</strong>M5120-GFH2 <strong>BX</strong>D120A-A<br />
<strong>BX</strong>5120A-20 GFH5G20 <strong>BX</strong>M5120-GFH2 <strong>BX</strong>D120A-A<br />
<strong>BX</strong>5120A-30 GFH5G30 <strong>BX</strong>M5120-GFH2 <strong>BX</strong>D120A-A<br />
<strong>BX</strong>5120A-50 GFH5G50 <strong>BX</strong>M5120-GFH2 <strong>BX</strong>D120A-A<br />
<strong>BX</strong>5120A-100 GFH5G100 <strong>BX</strong>M5120-GFH2 <strong>BX</strong>D120A-A<br />
<strong>BX</strong>5120A-200 GFH5G200 <strong>BX</strong>M5120-GFH2 <strong>BX</strong>D120A-A<br />
<strong>BX</strong>5120C-5 GFH5G5 <strong>BX</strong>M5120-GFH2 <strong>BX</strong>D120A-C<br />
<strong>BX</strong>5120C-10 GFH5G10 <strong>BX</strong>M5120-GFH2 <strong>BX</strong>D120A-C<br />
<strong>BX</strong>5120C-15 GFH5G15 <strong>BX</strong>M5120-GFH2 <strong>BX</strong>D120A-C<br />
<strong>BX</strong>5120C-20 GFH5G20 <strong>BX</strong>M5120-GFH2 <strong>BX</strong>D120A-C<br />
<strong>BX</strong>5120C-30 GFH5G30 <strong>BX</strong>M5120-GFH2 <strong>BX</strong>D120A-C<br />
<strong>BX</strong>5120C-50 GFH5G50 <strong>BX</strong>M5120-GFH2 <strong>BX</strong>D120A-C<br />
<strong>BX</strong>5120C-100 GFH5G100 <strong>BX</strong>M5120-GFH2 <strong>BX</strong>D120A-C<br />
<strong>BX</strong>5120C-200 GFH5G200 <strong>BX</strong>M5120-GFH2 <strong>BX</strong>D120A-C<br />
<strong>BX</strong>6200A-5 6GH5K <strong>BX</strong>M6200-GH <strong>BX</strong>D200A-A<br />
<strong>BX</strong>6200A-10 6GH10K <strong>BX</strong>M6200-GH <strong>BX</strong>D200A-A<br />
<strong>BX</strong>6200A-15 6GH15K <strong>BX</strong>M6200-GH <strong>BX</strong>D200A-A<br />
<strong>BX</strong>6200A-20 6GH20K <strong>BX</strong>M6200-GH <strong>BX</strong>D200A-A<br />
<strong>BX</strong>6200A-30 6GH30K <strong>BX</strong>M6200-GH <strong>BX</strong>D200A-A<br />
<strong>BX</strong>6200A-50 6GH50K <strong>BX</strong>M6200-GH <strong>BX</strong>D200A-A<br />
<strong>BX</strong>6200A-100 6GH100K <strong>BX</strong>M6200-GH <strong>BX</strong>D200A-A<br />
<strong>BX</strong>6200A-200 6GH200K <strong>BX</strong>M6200-GH <strong>BX</strong>D200A-A<br />
<strong>BX</strong>6200C-5 6GH5K <strong>BX</strong>M6200-GH <strong>BX</strong>D200A-C<br />
<strong>BX</strong>6200C-10 6GH10K <strong>BX</strong>M6200-GH <strong>BX</strong>D200A-C<br />
<strong>BX</strong>6200C-15 6GH15K <strong>BX</strong>M6200-GH <strong>BX</strong>D200A-C<br />
<strong>BX</strong>6200C-20 6GH20K <strong>BX</strong>M6200-GH <strong>BX</strong>D200A-C<br />
<strong>BX</strong>6200C-30 6GH30K <strong>BX</strong>M6200-GH <strong>BX</strong>D200A-C<br />
<strong>BX</strong>6200C-50 6GH50K <strong>BX</strong>M6200-GH <strong>BX</strong>D200A-C<br />
<strong>BX</strong>6200C-100 6GH100K <strong>BX</strong>M6200-GH <strong>BX</strong>D200A-C<br />
<strong>BX</strong>6200C-200 6GH200K <strong>BX</strong>M6200-GH <strong>BX</strong>D200A-C<br />
<strong>BX</strong>6400S-5 6GH5K <strong>BX</strong>M6400-GH <strong>BX</strong>D400B-S<br />
<strong>BX</strong>6400S-10 6GH10K <strong>BX</strong>M6400-GH <strong>BX</strong>D400B-S<br />
<strong>BX</strong>6400S-15 6GH15K <strong>BX</strong>M6400-GH <strong>BX</strong>D400B-S<br />
<strong>BX</strong>6400S-20 6GH20K <strong>BX</strong>M6400-GH <strong>BX</strong>D400B-S<br />
<strong>BX</strong>6400S-30 6GH30K <strong>BX</strong>M6400-GH <strong>BX</strong>D400B-S<br />
<strong>BX</strong>6400S-50 6GH50K <strong>BX</strong>M6400-GH <strong>BX</strong>D400B-S<br />
<strong>BX</strong>6400S-100 6GH100K <strong>BX</strong>M6400-GH <strong>BX</strong>D400B-S<br />
<strong>BX</strong>6400S-200 6GH200K <strong>BX</strong>M6400-GH <strong>BX</strong>D400B-S<br />
9
• <strong>Motor</strong>/gearhead combination type, electromagnetic brake model<br />
Unit model Gearhead model <strong>Motor</strong> model Driver model<br />
<strong>BX</strong>230AM-5 GFH2G5 <strong>BX</strong>M230M-GFH2 <strong>BX</strong>D30A-A<br />
<strong>BX</strong>230AM-10 GFH2G10 <strong>BX</strong>M230M-GFH2 <strong>BX</strong>D30A-A<br />
<strong>BX</strong>230AM-15 GFH2G15 <strong>BX</strong>M230M-GFH2 <strong>BX</strong>D30A-A<br />
<strong>BX</strong>230AM-20 GFH2G20 <strong>BX</strong>M230M-GFH2 <strong>BX</strong>D30A-A<br />
<strong>BX</strong>230AM-30 GFH2G30 <strong>BX</strong>M230M-GFH2 <strong>BX</strong>D30A-A<br />
<strong>BX</strong>230AM-50 GFH2G50 <strong>BX</strong>M230M-GFH2 <strong>BX</strong>D30A-A<br />
<strong>BX</strong>230AM-100 GFH2G100 <strong>BX</strong>M230M-GFH2 <strong>BX</strong>D30A-A<br />
<strong>BX</strong>230AM-200 GFH2G200 <strong>BX</strong>M230M-GFH2 <strong>BX</strong>D30A-A<br />
<strong>BX</strong>230CM-5 GFH2G5 <strong>BX</strong>M230M-GFH2 <strong>BX</strong>D30A-C<br />
<strong>BX</strong>230CM-10 GFH2G10 <strong>BX</strong>M230M-GFH2 <strong>BX</strong>D30A-C<br />
<strong>BX</strong>230CM-15 GFH2G15 <strong>BX</strong>M230M-GFH2 <strong>BX</strong>D30A-C<br />
<strong>BX</strong>230CM-20 GFH2G20 <strong>BX</strong>M230M-GFH2 <strong>BX</strong>D30A-C<br />
<strong>BX</strong>230CM-30 GFH2G30 <strong>BX</strong>M230M-GFH2 <strong>BX</strong>D30A-C<br />
<strong>BX</strong>230CM-50 GFH2G50 <strong>BX</strong>M230M-GFH2 <strong>BX</strong>D30A-C<br />
<strong>BX</strong>230CM-100 GFH2G100 <strong>BX</strong>M230M-GFH2 <strong>BX</strong>D30A-C<br />
<strong>BX</strong>230CM-200 GFH2G200 <strong>BX</strong>M230M-GFH2 <strong>BX</strong>D30A-C<br />
<strong>BX</strong>460AM-5 GFH4G5 <strong>BX</strong>M460M-GFH2 <strong>BX</strong>D60A-A<br />
<strong>BX</strong>460AM-10 GFH4G10 <strong>BX</strong>M460M-GFH2 <strong>BX</strong>D60A-A<br />
<strong>BX</strong>460AM-15 GFH4G15 <strong>BX</strong>M460M-GFH2 <strong>BX</strong>D60A-A<br />
<strong>BX</strong>460AM-20 GFH4G20 <strong>BX</strong>M460M-GFH2 <strong>BX</strong>D60A-A<br />
<strong>BX</strong>460AM-30 GFH4G30 <strong>BX</strong>M460M-GFH2 <strong>BX</strong>D60A-A<br />
<strong>BX</strong>460AM-50 GFH4G50 <strong>BX</strong>M460M-GFH2 <strong>BX</strong>D60A-A<br />
<strong>BX</strong>460AM-100 GFH4G100 <strong>BX</strong>M460M-GFH2 <strong>BX</strong>D60A-A<br />
<strong>BX</strong>460AM-200 GFH4G200 <strong>BX</strong>M460M-GFH2 <strong>BX</strong>D60A-A<br />
<strong>BX</strong>460CM-5 GFH4G5 <strong>BX</strong>M460M-GFH2 <strong>BX</strong>D60A-C<br />
<strong>BX</strong>460CM-10 GFH4G10 <strong>BX</strong>M460M-GFH2 <strong>BX</strong>D60A-C<br />
<strong>BX</strong>460CM-15 GFH4G15 <strong>BX</strong>M460M-GFH2 <strong>BX</strong>D60A-C<br />
<strong>BX</strong>460CM-20 GFH4G20 <strong>BX</strong>M460M-GFH2 <strong>BX</strong>D60A-C<br />
<strong>BX</strong>460CM-30 GFH4G30 <strong>BX</strong>M460M-GFH2 <strong>BX</strong>D60A-C<br />
<strong>BX</strong>460CM-50 GFH4G50 <strong>BX</strong>M460M-GFH2 <strong>BX</strong>D60A-C<br />
<strong>BX</strong>460CM-100 GFH4G100 <strong>BX</strong>M460M-GFH2 <strong>BX</strong>D60A-C<br />
<strong>BX</strong>460CM-200 GFH4G200 <strong>BX</strong>M460M-GFH2 <strong>BX</strong>D60A-C<br />
<strong>BX</strong>5120AM-5 GFH5G5 <strong>BX</strong>M5120M-GFH2 <strong>BX</strong>D120A-A<br />
<strong>BX</strong>5120AM-10 GFH5G10 <strong>BX</strong>M5120M-GFH2 <strong>BX</strong>D120A-A<br />
<strong>BX</strong>5120AM-15 GFH5G15 <strong>BX</strong>M5120M-GFH2 <strong>BX</strong>D120A-A<br />
<strong>BX</strong>5120AM-20 GFH5G20 <strong>BX</strong>M5120M-GFH2 <strong>BX</strong>D120A-A<br />
<strong>BX</strong>5120AM-30 GFH5G30 <strong>BX</strong>M5120M-GFH2 <strong>BX</strong>D120A-A<br />
<strong>BX</strong>5120AM-50 GFH5G50 <strong>BX</strong>M5120M-GFH2 <strong>BX</strong>D120A-A<br />
<strong>BX</strong>5120AM-100 GFH5G100 <strong>BX</strong>M5120M-GFH2 <strong>BX</strong>D120A-A<br />
<strong>BX</strong>5120AM-200 GFH5G200 <strong>BX</strong>M5120M-GFH2 <strong>BX</strong>D120A-A<br />
<strong>BX</strong>5120CM-5 GFH5G5 <strong>BX</strong>M5120M-GFH2 <strong>BX</strong>D120A-C<br />
<strong>BX</strong>5120CM-10 GFH5G10 <strong>BX</strong>M5120M-GFH2 <strong>BX</strong>D120A-C<br />
<strong>BX</strong>5120CM-15 GFH5G15 <strong>BX</strong>M5120M-GFH2 <strong>BX</strong>D120A-C<br />
<strong>BX</strong>5120CM-20 GFH5G20 <strong>BX</strong>M5120M-GFH2 <strong>BX</strong>D120A-C<br />
<strong>BX</strong>5120CM-30 GFH5G30 <strong>BX</strong>M5120M-GFH2 <strong>BX</strong>D120A-C<br />
<strong>BX</strong>5120CM-50 GFH5G50 <strong>BX</strong>M5120M-GFH2 <strong>BX</strong>D120A-C<br />
<strong>BX</strong>5120CM-100 GFH5G100 <strong>BX</strong>M5120M-GFH2 <strong>BX</strong>D120A-C<br />
<strong>BX</strong>5120CM-200 GFH5G200 <strong>BX</strong>M5120M-GFH2 <strong>BX</strong>D120A-C<br />
<strong>BX</strong>6200AM-5 6GH5K <strong>BX</strong>M6200M-GH <strong>BX</strong>D200A-A<br />
<strong>BX</strong>6200AM-10 6GH10K <strong>BX</strong>M6200M-GH <strong>BX</strong>D200A-A<br />
<strong>BX</strong>6200AM-15 6GH15K <strong>BX</strong>M6200M-GH <strong>BX</strong>D200A-A<br />
<strong>BX</strong>6200AM-20 6GH20K <strong>BX</strong>M6200M-GH <strong>BX</strong>D200A-A<br />
<strong>BX</strong>6200AM-30 6GH30K <strong>BX</strong>M6200M-GH <strong>BX</strong>D200A-A<br />
<strong>BX</strong>6200AM-50 6GH50K <strong>BX</strong>M6200M-GH <strong>BX</strong>D200A-A<br />
<strong>BX</strong>6200AM-100 6GH100K <strong>BX</strong>M6200M-GH <strong>BX</strong>D200A-A<br />
<strong>BX</strong>6200AM-200 6GH200K <strong>BX</strong>M6200M-GH <strong>BX</strong>D200A-A<br />
<strong>BX</strong>6200CM-5 6GH5K <strong>BX</strong>M6200M-GH <strong>BX</strong>D200A-C<br />
<strong>BX</strong>6200CM-10 6GH10K <strong>BX</strong>M6200M-GH <strong>BX</strong>D200A-C<br />
<strong>BX</strong>6200CM-15 6GH15K <strong>BX</strong>M6200M-GH <strong>BX</strong>D200A-C<br />
<strong>BX</strong>6200CM-20 6GH20K <strong>BX</strong>M6200M-GH <strong>BX</strong>D200A-C<br />
<strong>BX</strong>6200CM-30 6GH30K <strong>BX</strong>M6200M-GH <strong>BX</strong>D200A-C<br />
<strong>BX</strong>6200CM-50 6GH50K <strong>BX</strong>M6200M-GH <strong>BX</strong>D200A-C<br />
<strong>BX</strong>6200CM-100 6GH100K <strong>BX</strong>M6200M-GH <strong>BX</strong>D200A-C<br />
<strong>BX</strong>6200CM-200 6GH200K <strong>BX</strong>M6200M-GH <strong>BX</strong>D200A-C<br />
<strong>BX</strong>6400SM-5 6GH5K <strong>BX</strong>M6400M-GH <strong>BX</strong>D400B-S<br />
<strong>BX</strong>6400SM-10 6GH10K <strong>BX</strong>M6400M-GH <strong>BX</strong>D400B-S<br />
<strong>BX</strong>6400SM-15 6GH15K <strong>BX</strong>M6400M-GH <strong>BX</strong>D400B-S<br />
<strong>BX</strong>6400SM-20 6GH20K <strong>BX</strong>M6400M-GH <strong>BX</strong>D400B-S<br />
<strong>BX</strong>6400SM-30 6GH30K <strong>BX</strong>M6400M-GH <strong>BX</strong>D400B-S<br />
<strong>BX</strong>6400SM-50 6GH50K <strong>BX</strong>M6400M-GH <strong>BX</strong>D400B-S<br />
<strong>BX</strong>6400SM-100 6GH100K <strong>BX</strong>M6400M-GH <strong>BX</strong>D400B-S<br />
<strong>BX</strong>6400SM-200 6GH200K <strong>BX</strong>M6400M-GH <strong>BX</strong>D400B-S<br />
10
• Round shaft type, standard model<br />
Unit model <strong>Motor</strong> model Driver model<br />
<strong>BX</strong>230A-A <strong>BX</strong>M230-A2 <strong>BX</strong>D30A-A<br />
<strong>BX</strong>230C-A <strong>BX</strong>M230-A2 <strong>BX</strong>D30A-C<br />
<strong>BX</strong>460A-A <strong>BX</strong>M460-A2 <strong>BX</strong>D60A-A<br />
<strong>BX</strong>460C-A <strong>BX</strong>M460-A2 <strong>BX</strong>D60A-C<br />
<strong>BX</strong>5120A-A <strong>BX</strong>M5120-A2 <strong>BX</strong>D120A-A<br />
<strong>BX</strong>5120C-A <strong>BX</strong>M5120-A2 <strong>BX</strong>D120A-C<br />
<strong>BX</strong>6200A-A <strong>BX</strong>M6200-A <strong>BX</strong>D200A-A<br />
<strong>BX</strong>6200C-A <strong>BX</strong>M6200-A <strong>BX</strong>D200A-C<br />
<strong>BX</strong>6400S-A <strong>BX</strong>M6400-A <strong>BX</strong>D400A-S<br />
• Round shaft type, electromagnetic brake model<br />
Unit model <strong>Motor</strong> model Driver model<br />
<strong>BX</strong>230AM-A <strong>BX</strong>M230M-A2 <strong>BX</strong>D30A-A<br />
<strong>BX</strong>230CM-A <strong>BX</strong>M230M-A2 <strong>BX</strong>D30A-C<br />
<strong>BX</strong>460AM-A <strong>BX</strong>M460M-A2 <strong>BX</strong>D60A-A<br />
<strong>BX</strong>460CM-A <strong>BX</strong>M460M-A2 <strong>BX</strong>D60A-C<br />
<strong>BX</strong>5120AM-A <strong>BX</strong>M5120M-A2 <strong>BX</strong>D120A-A<br />
<strong>BX</strong>5120CM-A <strong>BX</strong>M5120M-A2 <strong>BX</strong>D120A-C<br />
<strong>BX</strong>6200AM-A <strong>BX</strong>M6200M-A <strong>BX</strong>D200A-A<br />
<strong>BX</strong>6200CM-A <strong>BX</strong>M6200M-A <strong>BX</strong>D200A-C<br />
<strong>BX</strong>6400SM-A <strong>BX</strong>M6400M-A <strong>BX</strong>D400A-S<br />
11
Names and functions of parts<br />
The following describes the names and functions of individual components of the driver and motor, and the<br />
specifications.<br />
For detailed information of each unit, see the page described in the [ ].<br />
•Driver (common to round shaft type and combination type)<br />
Power input indication (green)<br />
Lights up when current is applied.<br />
Alarm output indication LED (red) [P.38]<br />
When the protection function has activated,<br />
the LED flashes.<br />
Data setter connector<br />
Connect it to the OPX-1A.<br />
<strong>Motor</strong> connector [P.24]<br />
Connect the motor cable.<br />
<strong>BX</strong>D120A-A<br />
OPERATION<br />
ALARM<br />
CN1<br />
CN2<br />
SENSOR<br />
CN3<br />
MOTOR<br />
SPEED<br />
SS<br />
SD<br />
Internal potentiometer [P.33]<br />
Set the motor speed. The speed is set to "0"<br />
at the time of shipment.<br />
Slow start time setter [P.34]<br />
Set the acceleration time for motor operation.<br />
It is set to "0" at the time of shipment.<br />
Slowdown time setter [P.34]<br />
Set the deceleration time when the motor is<br />
stopped. It is set to "0" at the time of<br />
shipment.<br />
Encoder connector [P.24]<br />
Connect the encoder cable.<br />
Power connection terminal [P.22]<br />
Connect the AC power and regeneration unit<br />
to this terminal.<br />
Protective earth terminal [P.24]<br />
Install the ground cable with a diameter<br />
equivalent to AWG18 (0.75 mm 2 ) or greater,<br />
and connect it to the ground.<br />
100-<br />
115V<br />
~<br />
RG<br />
RG<br />
NC<br />
NC<br />
L<br />
N<br />
Input/output signal connector [P.26]<br />
Connect it to the controller such as the PLC.<br />
Power supply connection terminal cover [P.22]<br />
This is a cover to protect the power supply<br />
connection terminal.<br />
Be sure to install this cover before turning<br />
on power.<br />
12
•<strong>Motor</strong><br />
• <strong>BX</strong>230, <strong>BX</strong>460, <strong>BX</strong>5120<br />
Illustration shows the combination type motor, standard model.<br />
Installation holes (4 positions) [P.14]<br />
Gearhead<br />
Boss [P.14]<br />
<strong>Motor</strong><br />
Encoder<br />
Key (accessory)<br />
GEAR HEAD<br />
GFH4G5<br />
Output shaft<br />
Encoder cable [P.24]<br />
<strong>Motor</strong> cable [P.24]<br />
Frame Ground terminal<br />
This terminal is used to reduce electrical noise.<br />
• <strong>BX</strong>6200, <strong>BX</strong>6400<br />
Illustration shows the round shaft type motor, electromagnetic brake model.<br />
Installation holes (4 positions) [P.14]<br />
Mounting pilot<br />
Electromagnetic brake (electromagnetic brake model only)<br />
Encoder<br />
Encoder cable [P.24]<br />
Output shaft<br />
<strong>Motor</strong> cable [P.24]<br />
Protective earth terminal [P.24]<br />
Install the ground cable with a diameter equivalent to<br />
AWG18 (0.75 mm 2 ) or greater, and connect it to the ground.<br />
13
Installation<br />
The following shows the motor (gearhead) and driver installation environment, installation method<br />
and load installation.<br />
Installation site<br />
The motor (gearhead) and driver are designed and manufactured to be incorporated into the<br />
equipment.<br />
To ensure effective ventilation and easy inspection, install it in the following site.<br />
• In the indoor housing (where a ventilation port must be provided)<br />
• Ambient temperature: 0 to +50 °C (+32 to +122 °F) (non-freezing)<br />
• Ambient humidity: 85% or less (non-condensing)<br />
• Not in the explosive atmosphere with hazardous gas or liquid<br />
• Not exposed to sunlight<br />
• Not at the site exposed to much dust or metallic particles<br />
• Not at the place splashed with water (rain or water drop), oil (oil drop) or other liquid<br />
• Not at the site containing much salt<br />
• Not subjected to continuous vibration or excessive shock<br />
• Not at the position exposed to much electromagnetic noise (caused by welder and power<br />
driven equipment)<br />
• Not at the site near radiation, magnetic field or vacuum environment<br />
Note<br />
• The mounting pilot located on the<br />
motor installation surface should<br />
be inserted into a countersunk or<br />
drilled through hole.<br />
• The boss on the gearhead<br />
installation surface should be<br />
inserted into a countersunk or<br />
drilled through hole.<br />
• To ensure that the motor case<br />
temperature will not exceed<br />
90°C (194°F), install the round<br />
shaft type on a metallic plate<br />
having the following dimensions:<br />
Installation of motor (gearhead)<br />
•Method of installation<br />
Install the motor (gearhead) on a flat metallic plate having an excellent resistance to vibration<br />
and heat conduction.<br />
• Combination type<br />
To install the motor with gearhead, use the four installation holes and mount the motor with four<br />
hexagon socket head bolts (provided) so that there is no gap with the metallic plate.<br />
Frame size<br />
60 mm (2.36 in.)<br />
80 mm (3.15 in.)<br />
90 mm (3.54 in.)<br />
104 mm (4.09 in.)<br />
Bolt size<br />
M4<br />
M6<br />
M8<br />
M8<br />
Tightening torque<br />
2 N·m (280 oz-in)<br />
3 N·m (420 oz-in)<br />
4 N·m (560 oz-in)<br />
4 N·m (560 oz-in)<br />
<strong>BX</strong>230-A: 115 mm × 115 mm<br />
(4.53 in. × 4.53 in.)<br />
<strong>BX</strong>460-A: 135 mm × 135 mm<br />
(5.31 in. × 5.31 in.)<br />
<strong>BX</strong>5120-A: 165 mm × 165 mm<br />
(6.5 in. × 6.5 in.)<br />
<strong>BX</strong>6200-A: 200 mm × 200 mm<br />
(7.87 in. × 7.87 in.)<br />
Thickness: 5 mm (0.2 in.)<br />
Material: aluminum<br />
<strong>BX</strong>6400-A: 250 mm × 250 mm<br />
(9.84 in. × 9.84 in.)<br />
Thickness: 6 mm (0.24 in.)<br />
Material: aluminum<br />
• Round shaft type<br />
To install the motor, use the four installation holes and mount the motor with four bolts (not<br />
provided) so that there is no gap with the metallic plate.<br />
Frame size<br />
60 mm (2.36 in.)<br />
80 mm (3.15 in.)<br />
90 mm (3.54 in.)<br />
104 mm (4.09 in.)<br />
Bolt size<br />
M4<br />
M6<br />
M8<br />
M8<br />
Tightening torque<br />
2 N·m (280 oz-in)<br />
3 N·m (420 oz-in)<br />
4 N·m (560 oz-in)<br />
4 N·m (560 oz-in)<br />
14
Load installation<br />
When installing the load to the motor or gearhead, ensure that the motor output shaft or gearhead<br />
output shaft and load shaft are aligned with each other.<br />
The round shaft type motor output shaft is provided with a flat. Use double point screws on the<br />
flat and provide reliable locking to prevent idle rotation of the load. The combination type gearhead<br />
output shaft is provided with a key groove. A key groove must also be provided on the side of<br />
the load to be installed. Use the attached key to lock it in position.<br />
Key dimensions<br />
<strong>BX</strong>230-: 4 mm (0.16 in.)<br />
<strong>BX</strong>460-: 5 mm (0.2 in.)<br />
<strong>BX</strong>5120-: 6 mm (0.24 in.)<br />
<strong>BX</strong>6200-: 6 mm (0.24 in.)<br />
<strong>BX</strong>6400-: 6 mm (0.24 in.)<br />
•Direct connection of coupling<br />
Ensure that the motor (gearhead) output shaft and load shaft are aligned with each other.<br />
Note<br />
• When connecting the motor<br />
(gearhead) with a load, care must<br />
be taken to ensure adequate<br />
alignment, belt tension and<br />
pulley parallelism. The coupling<br />
and pulley locking screws must<br />
be clamped firmly in position.<br />
• To install a coupling or pulley to<br />
the motor output shaft or gear<br />
output shaft, sufficient care must<br />
be taken not to damage the<br />
output shaft and bearing.<br />
• Do not modify or machine the<br />
motor (gearhead) output shaft. It<br />
may damage the bearing, which<br />
may result in motor (gearhead)<br />
failure.<br />
•Belt connection<br />
Ensure that the centerlines of the motor (gearhead) output shaft and load shaft are parallel with<br />
each other, and that the line connecting the centers of both pulleys and shaft are at a right angle<br />
to each other.<br />
•Gear connection<br />
Provide correct engagement with the center of the gear tooth surface to ensure that the motor<br />
(gearhead) output shaft and gear shaft are parallel to each other.<br />
15
Note<br />
If the overhung load and thrust load<br />
exceeds the tolerance, the motor<br />
(gearhead) bearing and output<br />
shaft may be subjected to failure<br />
damage.<br />
Overhung load and thrust load<br />
Ensure that the overhung load and thrust load applied to the motor shaft or gearhead do not<br />
exceed the tolerances shown in the table below.<br />
Overhung load N (lb.)<br />
Unit model<br />
Distance from shaft tip<br />
Thrust load<br />
10 mm (0.39 in.) 20 mm (0.79 in.)<br />
N (lb.)<br />
<strong>BX</strong>230A(C)-A, <strong>BX</strong>230A(C)M-A<br />
<strong>BX</strong>460A(C)-A, <strong>BX</strong>460A(C)M-A<br />
<strong>BX</strong>5120A(C)-A, <strong>BX</strong>5120A(C)M-A<br />
<strong>BX</strong>6200A(C)-A, <strong>BX</strong>6200A(C)M-A<br />
<strong>BX</strong>6400S-A, <strong>BX</strong>6400SM-A<br />
<strong>BX</strong>230A(C)-5<br />
<strong>BX</strong>230A(C)M-5<br />
<strong>BX</strong>230A(C)-10, 15, 20<br />
<strong>BX</strong>230A(C)M-10, 15, 20<br />
<strong>BX</strong>230A(C)-30, 50, 100, 200<br />
<strong>BX</strong>230A(C)M-30, 50, 100, 200<br />
<strong>BX</strong>460A(C)-5<br />
<strong>BX</strong>460A(C)M-5<br />
<strong>BX</strong>460A(C)-10, 15, 20<br />
<strong>BX</strong>460A(C)M-10, 15, 20<br />
<strong>BX</strong>460A(C)-30, 50, 100, 200<br />
<strong>BX</strong>460A(C)M-30, 50, 100, 200<br />
<strong>BX</strong>5120A(C)-5<br />
<strong>BX</strong>5120A(C)M-5<br />
<strong>BX</strong>5120A(C)-10, 15, 20<br />
<strong>BX</strong>5120A(C)M-101520<br />
<strong>BX</strong>5120A(C)-30, 50, 100, 200<br />
<strong>BX</strong>5120A(C)M-30, 50, 100, 200<br />
<strong>BX</strong>6200A(C)-5, 10, 15<br />
<strong>BX</strong>6200A(C)M-5, 10, 15<br />
<strong>BX</strong>6200A(C)-20, 30, 50, 100, 200<br />
<strong>BX</strong>6200A(C)M-20, 30, 50, 100, 200<br />
87.2 (19.6)<br />
117 (26)<br />
156 (35)<br />
197 (44)<br />
197 (44)<br />
100 (22)<br />
150 (33)<br />
200 (45)<br />
200 (45)<br />
300 (67)<br />
450 (101)<br />
300 (67)<br />
400 (90)<br />
500 (112)<br />
550 (123)<br />
650 (146)<br />
107 (24)<br />
137 (30)<br />
176 (39)<br />
221 (49)<br />
221 (49)<br />
150 (33)<br />
200 (45)<br />
300 (67)<br />
250 (56)<br />
350 (78)<br />
550 (123)<br />
400 (90)<br />
500 (112)<br />
650 (146)<br />
800 (180)<br />
1000 (220)<br />
0.7 [1] (1.54 [2.2])∗<br />
1 [1.5] (2.2 [3.3])∗<br />
1.6 [2.2] (3.5 [4.8])∗<br />
2.5 [3.5] (5.5 [7.7])∗<br />
2.5 [3.5] (5.5 [7.7])∗<br />
40 (9)<br />
40 (9)<br />
40 (9)<br />
100 (22)<br />
100 (22)<br />
100 (22)<br />
150 (33)<br />
150 (33)<br />
150 (33)<br />
200 (45)<br />
200 (45)<br />
<strong>BX</strong>6400S-5, 10, 15<br />
<strong>BX</strong>6400SM-5, 10, 15<br />
<strong>BX</strong>6400S-20, 30, 50, 100, 200<br />
<strong>BX</strong>6400SM-20, 30, 50, 100, 200<br />
550 (123)<br />
650 (146)<br />
800 (180)<br />
1000 (220)<br />
200 (45)<br />
200 (45)<br />
• The figures indicated by ∗ are the motor’s mass [kg (lb.)]. The thrust load should not exceed the motor’s<br />
dead mass.<br />
• The figures in parenthesis [ ] are the values for the electromagnetic brake motor.<br />
16
RG<br />
RG<br />
N<br />
N<br />
L<br />
15V<br />
OPERATION<br />
CN2<br />
SENSOR<br />
SPEED<br />
SS<br />
SD<br />
RG<br />
RG<br />
NC<br />
NC<br />
RG<br />
RG<br />
NC<br />
NC<br />
L<br />
100-<br />
115V<br />
~<br />
N<br />
OPERATION<br />
ALARM<br />
CN2<br />
SENSOR<br />
CN1<br />
CN3<br />
MOTOR<br />
OPERATION<br />
ALARM<br />
CN2<br />
SENSOR<br />
CN1<br />
CN3<br />
MOTOR<br />
SPEED<br />
SS<br />
SD<br />
SPEED<br />
SS<br />
SD<br />
RG<br />
RG<br />
NC<br />
NC<br />
L<br />
100-<br />
115V<br />
~<br />
N<br />
L<br />
100-<br />
115V<br />
~<br />
N<br />
RG<br />
RG<br />
NC<br />
NC<br />
L<br />
100-<br />
115V<br />
~<br />
N<br />
OPERATION<br />
ALARM<br />
CN2<br />
SENSOR<br />
CN1<br />
CN3<br />
MOTOR<br />
OPERATION<br />
ALARM<br />
CN2<br />
SENSOR<br />
CN1<br />
CN3<br />
MOTOR<br />
SS<br />
SD<br />
SPEED<br />
SS<br />
SD<br />
Driver installation<br />
•Direction of installation<br />
The driver is designed on the basis of heat<br />
radiation by air convection and heat conduction<br />
to the housing.<br />
When installing the driver in the housing, be sure<br />
to mount it in a vertical orientation using the<br />
mounting holes provided on the driver.<br />
The driver should be installed 25 mm (1 in.) or<br />
more in the horizontal direction away from the<br />
housing sides and other equipment inside the<br />
housing, and 25 mm (1 in.) or more away from<br />
them in the vertical direction.<br />
When two or more drivers are to be installed in<br />
parallel, separate them by 20 mm (0.8 in.) or more<br />
in the horizontal direction and by 25 mm (1 in.) or<br />
more in the vertical direction as illustrated.<br />
20 mm (0.8 in.) or more<br />
25 mm (1 in.) or more<br />
<strong>BX</strong>D120A-A<br />
VEXTA CN4<br />
I O<br />
<strong>BX</strong>D120A-A<br />
<strong>BX</strong>D120A-A<br />
SPEED<br />
/ VEXTA CN4<br />
I/<br />
O<br />
<strong>BX</strong>D120A-A<br />
Note<br />
• Install the driver in an enclosure.<br />
• Do not install any equipment that<br />
generates a large amount of heat<br />
near the driver.<br />
• Check ventilation if the ambient<br />
temperature of the driver<br />
exceeds 50°C (122°F).<br />
VEXTA CN4<br />
I/<br />
O<br />
VEXTA CN4<br />
I/<br />
O<br />
•How to install the driver<br />
Install the driver on a flat metal plate having excellent vibration resistance and heat<br />
conductivity.<br />
• Using driver mounting brackets<br />
1. Using the attached driver fitting screws (four<br />
M3 screws), install the driver fittings on the<br />
back of the driver.<br />
Tightening torque: 0.5 to 0.6 N·m<br />
(71 to 85 oz-in)<br />
Holes for mounting brackets<br />
(M3: four locations)<br />
Mounting brackets (two pieces)<br />
Note<br />
• Do not use the mounting holes<br />
(M3: four locations) for the driver<br />
mounting brackets provided in<br />
the back of the driver for any<br />
purpose other than securing the<br />
driver mounting brackets.<br />
• Be sure to use the supplied<br />
screws when securing the driver<br />
mounting brackets.<br />
Screws for driver mounting brackets M3 (provided)<br />
2. Using the driver mounting hole, fix the driver<br />
with four M4 screws (not attached) so that<br />
there will be no gap with the metallic plate.<br />
<strong>BX</strong>D120A-A<br />
ALARM<br />
CN1<br />
CN3<br />
MOTOR<br />
1 CW<br />
2 CCW<br />
3 M0<br />
4 M1<br />
5 M2<br />
6 FREE<br />
7 BRAKE<br />
8<br />
9 H<br />
10 M<br />
L<br />
IN-COM<br />
11<br />
12<br />
13<br />
14<br />
15<br />
16<br />
ALM<br />
BUSY<br />
ASG<br />
BSG<br />
OUT-COM<br />
M4 (not supplied)<br />
17
RG<br />
RG<br />
NC<br />
NC<br />
L<br />
100-<br />
115V<br />
~<br />
N<br />
OPERATION<br />
ALARM<br />
CN2<br />
SENSOR<br />
CN1<br />
CN3<br />
MOTOR<br />
SPEED<br />
SS<br />
SD<br />
RG<br />
RG<br />
NC<br />
NC<br />
L<br />
1 0-<br />
15V<br />
~<br />
N<br />
ALARM<br />
CN1<br />
CN3<br />
MOTOR<br />
SPEED<br />
SS<br />
SD<br />
• Mounting to DIN rail<br />
When mounting the driver to a DIN rail, use a separately sold DIN rail mounting plate (model<br />
number: PADP01) and attach it to a 35 mm (1.38 in.) wide DIN rail.<br />
Note<br />
• Do not use the mounting holes<br />
(M3: three locations) for the DIN<br />
rail mounting plate provided in<br />
the back of the driver for any<br />
purpose other than securing the<br />
DIN rail mounting plate.<br />
• Be sure to use the supplied<br />
screws when securing the DIN<br />
rail mounting plate. The use of<br />
screws that would penetrate 3<br />
mm (0.118 in.) or more through<br />
the surface of the driver may<br />
cause damage to the driver.<br />
1. Attach the DIN rail mounting plate to the rear<br />
panel of the driver by tightening the supplied<br />
mounting screws into the mounting holes<br />
provided (three locations).<br />
Tightening torque: 0.3 to 0.4 N·m<br />
(42 to 56 oz-in)<br />
2. Pulling the DIN lever downward, hook the tab of<br />
the DIN rail mounting plate on the DIN rail and<br />
push the driver until the DIN lever locks.<br />
Mounting screws<br />
(M3)<br />
DIN rail mounting<br />
plate<br />
Tab<br />
Holes for DIN rail<br />
mounting plate<br />
(M3: three locations)<br />
DIN rail<br />
3. Secure the driver using end plates (not supplied).<br />
<strong>BX</strong>D120A-A<br />
DIN lever<br />
End plate<br />
VEXTA CN4<br />
I/O<br />
• Removing from DIN rail<br />
Pull the DIN lever down until it locks using a flat<br />
blade-parallel tip type screwdriver, and lift the<br />
bottom of the driver to remove it from the rail. Use<br />
force of about 10 to 20 N (2.2 to 4.5 lb.) to pull the<br />
DIN lever to lock it. Excessive force may damage<br />
the DIN lever.<br />
DIN lever<br />
Regeneration unit installation<br />
• EPRC-400P, RGB100 (sold separately)<br />
Using two screws (not attached), secure the<br />
regeneration unit on a flat metal plate having<br />
excellent heat conductivity.<br />
Regeneration unit<br />
<strong>BX</strong>D400A-S<br />
OPERATION<br />
CN2<br />
SENSOR<br />
18
Installing and wiring in compliance with EMC directive<br />
General<br />
•EMC directive (89/336/EEC, 92/31/EEC)<br />
The <strong>BX</strong> series has been designed and manufactured for incorporation in general industrial<br />
machinery. The EMC directive requires that the equipment incorporating this product comply<br />
with these directives.<br />
The installation and wiring method for the motor and driver are the basic methods that would<br />
effectively allow the customer’s equipment to be compliant with the EMC directive.<br />
The compliance of the final machinery with the EMC directive will depend on such factors as the<br />
configuration, wiring, layout and risk involved in the control-system equipment and electrical<br />
parts. It therefore must be verified through EMC measures by the customer of the machinery.<br />
•Applicable standards<br />
EMI<br />
Emission Tests<br />
Radiated Emission Test<br />
Conducted Emission Test<br />
EMS<br />
Immunity Tests<br />
Radiation Field Immunity Test<br />
Electrostatic Discharge Immunity Test<br />
Fast Transient / Burst Immunity Test<br />
Conductive Noise Immunity Test<br />
Surge Immunity Test<br />
Voltage Dip Immunity Test<br />
Voltage Interruption Immunity Test<br />
EN61000-6-4<br />
EN55011<br />
EN55011<br />
EN61000-6-2<br />
IEC61000-4-3<br />
IEC61000-4-2<br />
IEC61000-4-4<br />
IEC61000-4-6<br />
IEC61000-4-5<br />
IEC61000-4-11<br />
IEC61000-4-11<br />
Installing and wiring<br />
Effective measures must be taken against the EMI that the <strong>BX</strong> series may give to adjacent<br />
control-system equipment, as well as the EMS of the <strong>BX</strong> series itself, in order to prevent a<br />
serious functional impediment in the machinery.<br />
The use of the following installation and wiring methods will enable the <strong>BX</strong> series to be<br />
compliant with the EMC directive (the aforementioned compliance standards).<br />
•Connecting mains filter for power source line<br />
Connect a mains filter in the AC input line to prevent the noise generated in the driver from<br />
propagating externally through the power-source line.<br />
Use a mains filter or equivalent as below table.<br />
Maker<br />
Schaffner Electronics AG<br />
EPCOS<br />
TDK Corporation<br />
Single-phase 100 V<br />
FN2070-10-06<br />
B84113-C-B110<br />
-<br />
Single-phase 200 V<br />
-<br />
-<br />
ZAG2210-11S<br />
Three-phase 200 V<br />
FN251-8-07<br />
-<br />
-<br />
• Install a mains filter at a point as close to the driver as possible. Further, secure the input and<br />
output cables with cable clamps or the like so that they won’t rise from the surface of the<br />
enclosure panel.<br />
• Use as thick a cable as possible to connect the mains filter’s ground terminal with the<br />
grounding point, and do so using the shortest possible distance.<br />
• Do not wire the AC input-side cable (AWG18: 0.75 mm 2 or more) and the mains filter’s output<br />
cable (AWG18: 0.75 mm 2 or more) in parallel. If they are wired in parallel, noise occurring<br />
within the enclosure will be transmitted to the power-source cable via stray capacitance,<br />
thereby reducing the mains filter’s effectiveness.<br />
19
•How to ground<br />
The cable used to ground the driver, motor and mains filter must be as thick and short to the<br />
grounding point as possible so that no potential difference is generated. Choose a large, thick<br />
and uniformly conductive surface for the grounding point.<br />
• Grounding the driver<br />
Use the protective earth terminal located on the side of the driver.<br />
See page 24, for details on how to ground the driver.<br />
• Grounding the motor<br />
• <strong>BX</strong>230, <strong>BX</strong>460, <strong>BX</strong>5120<br />
Ground the Frame Ground terminal of the motor cable.<br />
• <strong>BX</strong>6200, <strong>BX</strong>6400<br />
Ground the motor’s protective earth terminal.<br />
See page 24, for details on how to ground the driver.<br />
•Wiring the signal cable<br />
Use a braided screen cable with a wire of a size ranging between AWG24 to 22 (0.2 to 0.3 mm 2 )<br />
for the driver signal cable, and keep it as short as possible.<br />
When grounding the braided screen cable, use a metal cable clamp and ensure that it contacts<br />
the braided screen cable along the cable’s entire circumference. Install the cable clamp at the<br />
end of the braided screen cable and secure it to an appropriate grounding point<br />
Braided screen cable<br />
Cable clamp<br />
•Notes about installation and wiring<br />
• Grounding connections should be made directly to the grounding points so that differences<br />
won’t occur between the grounding potentials of the motor and driver and those of<br />
surrounding control-systems equipment.<br />
• When relays or electromagnetic switches are used together with the system, use mains filter<br />
and CR circuits to suppress surges generated by them.<br />
• Wire the cables along the shortest possible distance, being sure not to wind or bundle excess<br />
lengths.<br />
• Separate the signal cables from the power cables such as the motor cable and power-source<br />
cable, and wire them so that they’re separated by a distance approximately 100 to 200 mm<br />
(4 to 8 in.). If a power cable and signal cable must cross, let them cross at a right angle.<br />
Additionally, keep a distance between the mains filter’s AC input-side cable and output-side<br />
cable.<br />
• If an extension cable is required between the motor and driver, it is recommended that an<br />
optional junction cable (sold separately) be used, since the EMC measures are conducted<br />
using the <strong>Oriental</strong> <strong>Motor</strong> junction cable.<br />
20
100-<br />
115V<br />
SPEED<br />
SS<br />
SD<br />
•Example of motor and driver installation and wiring<br />
<strong>Motor</strong><br />
Power input<br />
L<br />
N<br />
For <strong>BX</strong>6200<br />
and <strong>BX</strong>6400<br />
I<br />
For <strong>BX</strong>230, <strong>BX</strong>460<br />
and <strong>BX</strong>5120<br />
D<br />
PE<br />
D<br />
F<br />
A<br />
Driver<br />
<strong>BX</strong>D120A-C<br />
OPERATION<br />
ALARM<br />
E<br />
CN1<br />
PE<br />
PE<br />
CN2<br />
SENSOR<br />
B H∗ F<br />
CN3<br />
MOTOR<br />
RG<br />
RG<br />
C<br />
C<br />
NC<br />
NC<br />
L<br />
~<br />
N<br />
G<br />
VEXTA CN4<br />
I/O<br />
PE<br />
∗ When operating the product with a single-phase 200-230 V<br />
or three-phase 200-230 V power source under overvoltage<br />
category III, install and connect a surge absorber on the<br />
primary side of a mains filter.<br />
PE<br />
D<br />
A : <strong>Motor</strong> cable<br />
B : Mains filter<br />
C : Cable clamp<br />
D : Protective earth cable<br />
E : Encoder cable<br />
F : Power cable<br />
G : Signal cable<br />
H : Surge absorber<br />
I : Frame Ground terminal lead<br />
Precautions about static electricity<br />
Static electricity may cause the driver to malfunction or suffer damage. Be careful when<br />
handling the driver with the power on.<br />
Always use an insulated screwdriver to adjust the driver’s built-in motor current switch.<br />
Note<br />
Do not come close to or touch the<br />
driver while the power is on.<br />
21
Connection<br />
The following shows the method of connecting the driver and power source/regeneration unit/<br />
motor/external controller, earth connection method, an example of connection and input/output<br />
signals.<br />
Warning<br />
• Do not make connections when the power is on. Always turn the power off<br />
before carrying out these operations. Failure to do so may result in electric<br />
shock.<br />
• To prevent electric shock, be sure to install the terminal cover (supplied)<br />
over the driver’s power supply terminals after making connections.<br />
Note<br />
• Do not route the driver power<br />
cable in the same conduit with<br />
other power lines or motor<br />
cables.<br />
• Prepare a power supply which is<br />
capable of supplying a sufficient<br />
amount of driver power input<br />
current. In the event of<br />
insufficient current capacitance,<br />
the transformer may be damaged<br />
or motor torque may be reduced,<br />
thereby resulting in motor driving<br />
failure.<br />
Power connection<br />
Connect the power cable to the driver power connection terminal L and N or terminal L1, L2 and L3.<br />
•Single-phase 100 V<br />
Live side<br />
Single-phase 100-115 V<br />
Neutral side<br />
Unit model<br />
<strong>BX</strong>230<br />
<strong>BX</strong>460<br />
<strong>BX</strong>5120<br />
<strong>BX</strong>6200<br />
Rated current capacity<br />
1.4 A<br />
2.2 A<br />
3.7 A<br />
4.7 A<br />
RG<br />
RG<br />
NC<br />
NC<br />
L<br />
100-<br />
115V<br />
~<br />
N<br />
Maximum current capacity<br />
2.4 A<br />
3.5 A<br />
6.7 A<br />
9 A<br />
Connect the live side (phase wire side)<br />
of the single-phase 100-115 V power<br />
supply to the terminal L, and the<br />
neutral side (neutral line) to the<br />
terminal N.<br />
Connect the terminal to the ground<br />
point on the power supply side.<br />
Each of the square boxes will contain<br />
number representing the availability of<br />
the electromagnetic brake, power<br />
supply input or gear ratio.<br />
•Single-phase 200 V<br />
Live side<br />
Single-phase 200-230 V<br />
Neutral side<br />
RG<br />
RG<br />
NC<br />
L1<br />
L2<br />
L3<br />
Connect the live side (phase wire side)<br />
of the single-phase 200-230 V power<br />
supply to the terminal L2, and the<br />
neutral side (neutral line) to the<br />
terminal L3.<br />
Connect the terminal to the ground<br />
point on the power supply side.<br />
Unit model<br />
<strong>BX</strong>230<br />
<strong>BX</strong>460<br />
<strong>BX</strong>5120<br />
<strong>BX</strong>6200<br />
Rated current capacity<br />
0.8 A<br />
1.4 A<br />
2.3 A<br />
2.8 A<br />
Maximum current capacity<br />
1.6 A<br />
2.2 A<br />
4.1 A<br />
5.3 A<br />
Each of the square boxes will contain<br />
number representing the availability of<br />
the electromagnetic brake, power<br />
supply input or gear ratio.<br />
•Three-phase 200 V<br />
U<br />
Three-phase 200-230 V V<br />
W<br />
RG<br />
RG<br />
NC<br />
L1<br />
L2<br />
L3<br />
Connect the U, V and W phases of<br />
the three-phase 200-230 V power<br />
supply to terminals L1, L2 and L3,<br />
respectively.<br />
Connect the terminal to the ground<br />
point on the power supply side.<br />
Unit model<br />
<strong>BX</strong>230<br />
<strong>BX</strong>460<br />
<strong>BX</strong>5120<br />
<strong>BX</strong>6200<br />
<strong>BX</strong>6400<br />
Rated current capacity<br />
0.5 A<br />
0.7 A<br />
1.1 A<br />
1.7 A<br />
2.8 A<br />
Maximum current capacity<br />
0.8 A<br />
1.2 A<br />
2 A<br />
3.2 A<br />
Combination type: 3.2 A<br />
Round shaft type: 4.4 A<br />
Each of the square boxes will contain<br />
number representing the availability of<br />
the electromagnetic brake, power<br />
supply input or gear ratio.<br />
22
•Dimensions of power supply connection terminal screw and cable<br />
For connection, use an insulated round crimp terminal.<br />
• Terminal screw: M3<br />
• Tightening torque: 0.8 to 1 N·m (113 to 142 oz-in)<br />
• Connectable cable: AWG16 to 18 (1.25 to 0.75 mm 2 )<br />
6.2 mm (0.24 in.) or less<br />
Ø3.2 mm (0.13 in.) or more<br />
9 mm (0.35 in.) or more<br />
Turning on the power<br />
Power supply<br />
ON<br />
1 sec or less<br />
30 sec or more<br />
Turn on power again<br />
ON<br />
Note<br />
After shutting down the power, wait<br />
at least 30 seconds before turning<br />
it back on.<br />
ALM output<br />
ON<br />
ON<br />
Enable<br />
Enable<br />
Regeneration unit connection<br />
• EPRC-400P, RGB100 (sold separately) with thermal protector<br />
• Connect the two thick lead wires (AWG18) of the regeneration unit to the driver’s RG<br />
terminals.<br />
• The thin lead wires (AWG22) of the regeneration unit are thermal protector output.<br />
Provide a measure on the thermal protector contact to shut off the power supply in the event<br />
an error is detected.<br />
Action of thermal protector:<br />
• The thermal protector (N.C.) will open when the temperature of the regeneration unit exceeds<br />
150°C (302°F).<br />
• The thermal protector will automatically return to the normal state when the temperature of<br />
the regeneration unit drops to 140°C (284°F).<br />
RGB100<br />
Driver<br />
∗ EPRC-400P<br />
R: 400 Ω<br />
R: 150 W<br />
150°C (N.C.)<br />
∗ The RG has<br />
no polarity.<br />
RG<br />
AWG18<br />
RG<br />
AWG22<br />
CN4<br />
Warning<br />
• In the event the thermal protector is triggered, shut off the power.<br />
23
1 0-<br />
15V<br />
~<br />
N<br />
NC<br />
NC<br />
L<br />
RG<br />
RG<br />
ALARM<br />
CN1<br />
CN3<br />
MOTOR<br />
SS<br />
SD<br />
SPEED<br />
GFH4G5<br />
Note<br />
Firmly insert the connector in<br />
position.<br />
Incomplete connection of the<br />
connector may cause operation<br />
failure, or may damage the motor<br />
or driver.<br />
<strong>Motor</strong> connection<br />
Insert the motor cable connector into the driver motor connector (CN3). Insert the encoder<br />
connector cable into the driver encoder connector (CN2).<br />
To increase the distance between the motor and driver, use the optional junction cable.<br />
For the details of this cable, see page 39.<br />
Driver<br />
<strong>BX</strong>D120A-A<br />
OPERATION<br />
Encoder connector (CN2)<br />
CN2<br />
SENSOR<br />
<strong>Motor</strong> connector (CN3)<br />
Extension cable for motor<br />
Extension cable for encoder<br />
<strong>Motor</strong><br />
GEAR HEAD<br />
Grounding the motor and driver<br />
•Grounding the motor<br />
• <strong>BX</strong>230, <strong>BX</strong>460, <strong>BX</strong>5120<br />
Ground the motor using one of its four mounting<br />
holes.<br />
Use a grounding cable of AWG18 (0.75 mm 2 ) or<br />
more in diameter.<br />
Use a round, insulated crimp terminal in combination<br />
with an inner-clip washer and bolt it in place to<br />
secure the grounding connection.<br />
PE<br />
• <strong>BX</strong>6200, <strong>BX</strong>6400<br />
Be sure to ground the motor’s protective earth<br />
terminal (screw size: M4).<br />
Use a grounding cable of AWG18 (0.75 mm 2 ) or<br />
more in diameter.<br />
Use a round, insulated crimp terminal in<br />
combination with an inner-clip washer and bolt it in<br />
place to secure the grounding connection.<br />
PE<br />
•Grounding the driver<br />
Be sure to ground the protective earth terminal<br />
(screw size: M4) located on the driver side.<br />
Use a grounding cable of AWG18 (0.75 mm 2 ) or<br />
more in diameter.<br />
Do not share the grounding cable with a welder or<br />
power equipment.<br />
Use a round, insulated crimp terminal to ground the<br />
cable near the driver.<br />
PE<br />
RG<br />
RG<br />
100-<br />
115V<br />
~<br />
NC<br />
NC<br />
L<br />
N<br />
Protective earth terminal<br />
24
Connection of input signal and output signal<br />
•Input/output signal connector connection<br />
The combination type connector is used for the input/output signal connection (CN4).<br />
The combination connector may be installed and removed with the lead wire connected, as<br />
shown below, thereby offering better work efficiency for driver installation and maintenance.<br />
1 CW<br />
2 CCW<br />
3 M0<br />
4 M1<br />
5 M2<br />
6 FREE<br />
7 BRAKE<br />
8<br />
9 H<br />
10 M<br />
L<br />
IN-COM<br />
11<br />
12<br />
13<br />
14<br />
15<br />
16<br />
ALM<br />
BUSY<br />
ASG<br />
BSG<br />
OUT-COM<br />
CN4<br />
I<br />
/O<br />
1. Strip the lead wire and twist the cable conductor.<br />
Applicable lead wire diameter: AWG24 to 20 (0.2 to 0.5 mm 2 )<br />
Length of the lead wire which can be peeled: 4 mm (0.16 in.)<br />
4 mm (0.16 in.)<br />
2. Loosen the combination connector screw.<br />
3. Insert the peeled cable conductor into the combination connector, and tighten the screw.<br />
Use a 3 mm (0.12 in.) wide slotted head screwdriver.<br />
Tightening torque: 0.5 to 0.8 N·m (71 to 113 oz-in)<br />
25
Note<br />
The output signal voltage must be<br />
no less than 4.5 VDC and no<br />
greater than 26.4 VDC.<br />
Since output signals are open<br />
collector outputs, be sure to<br />
connect an external resistance and<br />
limit the output current as follows:<br />
ALM output, BUSY output:<br />
40 mA or less<br />
ASG output, BSG output:<br />
20 mA or less<br />
•Connection diagram<br />
Using the driver input/output signal connector (CN4), make a connection as illustrated below:<br />
<strong>BX</strong>D120A-A<br />
OPERATION<br />
ALARM<br />
CN2<br />
SENSOR<br />
CN1<br />
CN3<br />
MOTOR<br />
SPEED<br />
SS<br />
SD<br />
RG<br />
RG<br />
NC<br />
NC<br />
100-<br />
115V<br />
~<br />
N<br />
L<br />
CN4<br />
ON: CW Start OFF: Stop<br />
ON: CCW Start OFF: Stop<br />
ON: External potentiometer<br />
OFF: Internal potentiometer<br />
OFF<br />
OFF<br />
OFF<br />
ON<br />
ON<br />
ON<br />
1<br />
2<br />
3<br />
CW input (requisite)<br />
CCW input (requisite)<br />
M0 input<br />
ON: <strong>Motor</strong> excitation is canceled.<br />
OFF: <strong>Motor</strong> operation is enabled.<br />
ON: Operation of the electromagnetic brake released<br />
OFF: Instantaneous stop<br />
∗ Be sure to turn the BRAKE input to ON<br />
when operating the motor<br />
External potentiometer (supplied) or<br />
external DC voltage is connected.<br />
See setting the running speed (Page 34).<br />
External potentiometer 20 kΩ 1/4 W or 0 to 5 VDC<br />
3<br />
1<br />
2<br />
OFF<br />
ON<br />
ON<br />
OFF<br />
Shielded<br />
4<br />
5<br />
6<br />
7<br />
8<br />
9<br />
10<br />
11<br />
M1 input (used for function<br />
expansion)<br />
M2 input (used for function<br />
expansion)<br />
FREE input<br />
BRAKE input (requisite)<br />
IN-COM<br />
H input<br />
M input<br />
L input<br />
Analog input<br />
Alarm output (photocoupler and open collector outputs)<br />
When alarm is output "OFF"<br />
Busy output (photocoupler and open collector outputs)<br />
When motor rotates "ON"<br />
12<br />
13<br />
ALM output<br />
BUSY output<br />
ASG output (transistor and open collector outputs)<br />
14<br />
ASG output<br />
15<br />
BSG output<br />
GND<br />
16<br />
OUT-COM<br />
• Input signal<br />
The CW, CCW, M0, M1, M2, FREE and BRAKE inputs are photocoupler inputs.<br />
Internal resistor: 2.3 kΩ Internal voltage: +15 V<br />
The M1 and M2 inputs are connected when using the system upgrading tool (OPX-1A).<br />
• Output signal<br />
ALM and BUSY outputs are photocoupler and open collector outputs.<br />
ASG and BSG output are transistor and open collector outputs.<br />
External operating conditions:<br />
ALM and BUSY outputs: 4.5 to 26.4 VDC without exceeding 40 mA<br />
ASG and BSG outputs: 4.5 to 26.4 VDC without exceeding 20 mA<br />
26
•External potentiometer connection<br />
Optional external potentiometer is connected as below.<br />
External potentiometer PAVR-20KZ<br />
Low speed<br />
1<br />
3<br />
1 2 3<br />
1<br />
2<br />
3<br />
4<br />
5<br />
High speed<br />
6<br />
7<br />
8<br />
H Red 9<br />
M White 10<br />
L Yellow 11<br />
12<br />
13<br />
14<br />
15<br />
16<br />
CN4<br />
To connect the external potentiometer, use the<br />
attached external potentiometer and the signal<br />
cable [1 m (3.3 ft.)] for connection of the external<br />
potentiometer.<br />
1. Connect the red lead wire of the signal cable<br />
for connection of the external potentiometer<br />
(hereinafter referred to as “signal cable”) to the<br />
terminal 3 of the external potentiometer and<br />
input terminal H.<br />
2. Connect the white lead wire of the signal cable<br />
to the terminal 2 of the external potentiometer<br />
and input terminal M.<br />
3. Connect the yellow lead wire of the signal cable<br />
to the terminal 1 of the external potentiometer<br />
and input terminal L.<br />
4. Connect the shielded cable of the signal cable<br />
to the input terminal L. (Make sure that the<br />
shielded cable of the signal cable does not<br />
touch other terminals).<br />
Note<br />
• The external DC power supply<br />
voltage must not exceed 5 VDC.<br />
Otherwise, the driver may be<br />
damaged.<br />
• When connecting the external<br />
DC power supply, sufficient care<br />
must be taken not to mistake<br />
power polarity. Connection with<br />
incorrect polarity may damage<br />
the driver<br />
•External DC power supply connection<br />
External DC power supply<br />
0 to 5 VDC +<br />
1 mA or more-<br />
1<br />
2<br />
3<br />
4<br />
5<br />
6<br />
7<br />
8<br />
9<br />
M White 10<br />
L Yellow 11<br />
12<br />
13<br />
14<br />
15<br />
16<br />
CN4<br />
For external DC voltage, use the DC power<br />
supply (0 to 5 VDC) having the primary and<br />
secondary sides provided with reinforced<br />
insulation.<br />
1. Connect the lead wire of the signal cable for<br />
connection of the external potentiometer<br />
(hereinafter referred to as “signal cable”) to the<br />
positive terminal of the external DC power<br />
supply and input terminal M.<br />
2. Connect the lead wire of the signal cable to<br />
the negative terminal of the external DC power<br />
supply and input terminal L.<br />
3. Connect the shielded cable of the signal cable<br />
to the input terminal L. (Make sure that the<br />
shielded cable on the external<br />
potentiometer side does not touch other<br />
terminals.)<br />
Input impedance between input M and input L<br />
is about 15 kΩ.<br />
Input L is connected with the IN-COM inside<br />
the driver.<br />
27
Photocoupler state<br />
H<br />
Terminal level<br />
L<br />
Photocoupler state OFF ON<br />
Note<br />
• If both CW and CCW inputs are<br />
turned ON simultaneously, the<br />
motor stops after deceleration.<br />
• If the brake input is turned OFF<br />
concurrently as the CW or CCW<br />
input is turned OFF, brake is<br />
applied to stop the operation.<br />
Input signals and output signals<br />
•Input signal<br />
All input signals of the driver are photocoupler inputs.<br />
The signal state represents the “ON: Carrying current” or “OFF: Not carrying current” state of<br />
the internal photocoupler rather than the voltage level of the signal.<br />
<br />
Driver internal circuit<br />
CW input<br />
CCW input<br />
M0, M1, M2 input<br />
FREE input<br />
BRAKE input<br />
IN-COM<br />
2.3 kΩ<br />
+15 V<br />
0 V<br />
• CW input<br />
When the brake input is ON, motor operation is enabled (See the description of brake input).<br />
If the CW input is turned ON, acceleration and operation are performed in the clockwise<br />
direction for the time set on the slow start time setter.<br />
If it is turned OFF, deceleration takes place and the operation stops at the time set on the slow<br />
start time setter.<br />
• CCW input<br />
When the brake input is ON, motor operation is enabled (See the description of brake input).<br />
If the CCW input is turned ON, acceleration and operation are performed in the clockwise<br />
direction for the time set on the slow start time setter.<br />
If it is turned OFF, deceleration takes place and the operation stops at the time set on the slow<br />
start time setter.<br />
• Rotation direction of the gear output shaft<br />
Rotation direction is shown as viewed from the flange surface of the motor.<br />
Depending on the gearhead ratio, the ration direction of the gear output shaft is as follows:<br />
Gear ratio<br />
Frame size<br />
60 mm (2.32 in.) 80 mm (3.15 in.) 90 mm (3.54 in.) 104 mm (4.09 in.)<br />
5<br />
10 Same direction<br />
15<br />
20 Same direction Opposite direction<br />
30<br />
50<br />
Opposite direction<br />
100 Opposite direction Same direction<br />
200 Same direction<br />
• Brake input and ACL input<br />
If the brake input and driver protection functions have activated during normal times, they will<br />
work as ACL input.<br />
• Normal times (Brake input)<br />
Function will be activated as brake input function (Signal name “BRAKE” is indicated on the<br />
right of the driver).<br />
When the brake input is ON, the motor is enabled.<br />
If it is OFF, brake is applied to the running motor to stop it.<br />
To start motor operation, be sure to set the brake input to ON.<br />
28
CW input<br />
ON<br />
ON<br />
CCW input<br />
ON<br />
ON<br />
BRAKE input<br />
ON<br />
ON<br />
Deceleration stop<br />
Instantaneous stop<br />
CW<br />
CW<br />
<strong>Motor</strong> behavior<br />
CCW<br />
Deceleration stop<br />
CCW<br />
Instantaneous<br />
stop<br />
• Activation of protection function (ACL input)<br />
The function is performed as ACL (Alarm Clear) input. The protection function is reset and the<br />
driver restarts.<br />
This is used to reset the protection function when power is applied.<br />
However, if protection functions for overcurrent, EEPROM data failure, system failure and<br />
encoder failure have activated, resetting will be disabled. Turn on the power again to perform<br />
resetting.<br />
If one shot (0.5 sec.) is input to ACL input, the driver will be restarted.<br />
ACL input<br />
BRAKE input<br />
ON or OFF<br />
ACL input<br />
ON<br />
BRAKE input<br />
ON<br />
Alarm has occurred.<br />
0.5 sec<br />
or more<br />
0.5 sec<br />
or more<br />
Alarm has released.<br />
ALM output<br />
ON<br />
It will be turned OFF<br />
when the ALM is output.<br />
Within 0.5 sec<br />
ON<br />
You can reset the protection function by cycling on the power supply.<br />
Be sure to turn on power again after removing the cause for the operation of protection function;<br />
then reset ALM output.<br />
For the output conditions of the protection function, see the description on page 30, 31.<br />
• FREE input<br />
Warning<br />
• Do not turn ON the FREE input when the position is held in the vertical<br />
direction. Otherwise, the holding force of the motor and electromagnetic<br />
brake will be lost, causing personal injury and equipment damage.<br />
If FREE input is turned ON, motor excitation will be canceled, and the electromagnetic brake ∗<br />
will be released.<br />
When FREE input is turned OFF, the driver excites the motor and activates the electromagnetic<br />
brake ∗ .<br />
The FREE input function takes precedence, independently of other inputs.<br />
Even if a protection function activates, the FREE input function works.<br />
∗ The electromagnetic brake refers to the case where the motor equipped with an<br />
electromagnetic brake.<br />
29
• M0 input<br />
Switch the speed setting in motor startup to the external or internal potentiometer.<br />
Turning ON of the M0 input enables the external potentiometer or external DC voltage setting<br />
speed.<br />
Turning OFF of the M0 input enables the setting speed of the internal potentiometer.<br />
Switching of the M0 input allows two-speed switching operation according to the external<br />
potentiometer or a combined use of external DC voltage.<br />
The M1 and M2 inputs are connected when using the system upgrade tool (OPX-1A).<br />
Do not make a connection if you do not use the external potentiometer.<br />
CW input<br />
ON<br />
ON<br />
CCW input<br />
ON<br />
BRAKE input<br />
ON<br />
M0 input<br />
ON<br />
External<br />
potentiometer<br />
<strong>Motor</strong> behavior<br />
Internal<br />
potentiometer<br />
CW<br />
Deceleration stop<br />
CCW<br />
CW<br />
Instantaneous stop<br />
External potentiometer<br />
Photocoupler state<br />
H<br />
Terminal level<br />
L<br />
•Output signal<br />
The signal state represents the “ON: Carrying current” or “OFF: Not carrying current” state of<br />
the internal photocoupler rather than the voltage level of the signal.<br />
Driver internal circuit<br />
Photocoupler state OFF ON<br />
ALM output<br />
BUSY/ALP output<br />
OUT-COM<br />
ASG output<br />
BSG output<br />
OUT-COM<br />
0 V<br />
0 V<br />
• ALM output: photocoupler and open collector outputs<br />
Warning<br />
• When the driver’s protection function is triggered, first remove the cause<br />
and then clear the protection function. Continuing the operation without<br />
removing the cause of the problem may cause malfunction of the motor,<br />
leading to injury or damage to equipment.<br />
30<br />
When the protection function has activated, the ALM (Alarm) output is turned off to stop the<br />
motor.<br />
If the electromagnetic brake is not supplied, stop is provided by inertia. When the<br />
electromagnetic brake is supplied, stop is provided by application of the electromagnetic brake.<br />
In this case, you can confirm the type of the activated protection function by counting the ALARM<br />
LED flashings [After flashing by the specified number of times (LED is on for 0.25 sec. and off<br />
for 0.25 sec.), the LED repeats flashing at intervals of 1.25 sec.].
ALM output<br />
<strong>Motor</strong> behavior<br />
ON<br />
Run<br />
It will be turned OFF when the ALM is output.<br />
Stop<br />
0.25 s<br />
1.25 s<br />
State of the ALARM LED<br />
flashings<br />
On On On On On On<br />
Off<br />
0.25 s<br />
[e.g.: three flashings (overvoltage protection)]<br />
Once Twice Three times<br />
Number of times<br />
Protection function of the ALARM Assumed causes<br />
LED flashings<br />
Overload protection 2 times<br />
Load in excess of the rated torque is applied to the<br />
motor for about five seconds or more.<br />
Overvoltage<br />
Primary voltage of the driver inverter has exceeded the<br />
3 times<br />
protection<br />
upper limit of voltage specification range.<br />
Excessive<br />
The motor during operation in the position control<br />
4 times<br />
displacement<br />
mode ∗ cannot follow the command.<br />
Overcurrent<br />
Excessive current has flown to driver inverter power<br />
5 times<br />
protection<br />
element.<br />
Excessive speed 6 times The speed has exceeded 4000 r/min on the motor shaft.<br />
EEPROM data error 7 times The parameter has been damaged.<br />
Encoder failure 8 times<br />
A trouble has occurred to the feedback signal of the<br />
encoder.<br />
Low voltage<br />
Power supply voltage has reduced below the specified<br />
9 times<br />
protection<br />
voltage range.<br />
∗ The position control mode is enabled when the system upgrading tool (OPX-1A) is connected.<br />
• Resetting the protection function<br />
Reset any of the protection functions via the ACL input or by turning the power off and back on<br />
again only after removing the cause of the problem and ensuring safety.<br />
One-shot ACL input (0.5 sec.) will restart the driver.<br />
However, if protection functions for overcurrent, EEPROM data failure and encoder failure have<br />
activated, resetting will be disabled. Turn on the power again to perform resetting.<br />
Wait at least 30 seconds after turning off the power before turning it back on again.<br />
31
• BUSY output and ALP output: photocoupler and open collector outputs<br />
If the BUSY output and driver protection functions have activated during normal times, they will<br />
work as ALP output.<br />
• Normal times (BUSY output)<br />
Function will be activated as BUSY output.<br />
When the motor is running, the following output will be given:<br />
If CW or CCW input and BRAKE input are turned ON simultaneously, the BUSY output will be<br />
turned ON.<br />
It will be turned OFF when the motor has stopped by deceleration.<br />
CW input<br />
ON<br />
ON<br />
CCW input<br />
ON<br />
ON<br />
BRAKE input<br />
ON<br />
BUSY output<br />
ON<br />
ON<br />
ON<br />
<strong>Motor</strong> behavior<br />
CW<br />
CW<br />
CCW<br />
CCW<br />
• Activation of protection function (ALP output)<br />
The function is performed as ALP (Alarm Pulse) output, and the causes for the protection<br />
function having been activated are conveyed to the controller in terms of the number of pulses.<br />
If one shot (0.1 sec. or more) is given to the CW input, the number of ALARM LED flashings in<br />
response to the activation of the protection function and the pulses (5 Hz) corresponding to the<br />
number of ALARM LED flashings are output. The causes for the protection function having<br />
been activated is identified by the controller counting the output pulses.<br />
ALM output<br />
ON<br />
0.1 sec or more<br />
It will be turned OFF when the ALM is output.<br />
CW input<br />
ON<br />
ALP output<br />
Maximum of 0.1 sec<br />
0.1 s<br />
ALP output is finished.<br />
ON<br />
ON<br />
ON<br />
0.1 s<br />
Once Twice Three times<br />
[e.g.: three outputs (overvoltage protection)]<br />
Note<br />
When you want to the encoder<br />
feedback pulses, count both the<br />
ASG output and BSG output in the<br />
phase difference mode of the up/<br />
down counter.<br />
• ASG output and BSG output: Transistor and open collector outputs<br />
Outputs feedback pulses from the encoder (500 p/r).<br />
ASG<br />
BSG<br />
CW direction rotation<br />
CCW direction rotation<br />
32
Running<br />
Setting the motor running speed and running operation are as follows.<br />
Setting the running speed<br />
The motor’s running speed can be set using the driver’s internal potentiometer, external<br />
potentiometer or an external DC voltage.<br />
The motor speed range is from 30 to 3000 r/min.<br />
Two running speeds can be set by combining the internal potentiometer and external<br />
potentiometer, or the internal potentiometer and external DC voltage.<br />
•Setting by internal potentiometer<br />
Use a precision screw-driver for this adjustment. Clockwise rotation will increase the set speed.<br />
The speed is set to 0 r/min at time of shipment.<br />
SPEED (speed)<br />
<strong>BX</strong>D120A-A<br />
OPERATION<br />
SPEED<br />
Internal potentiometer<br />
Fast<br />
Slow<br />
ALARM<br />
SS<br />
CN1<br />
SD<br />
•Setting by external potentiometer<br />
To drive the motor at the speed set on the external<br />
potentiometer, turn on the M0 input.<br />
Clockwise rotation will increase the set speed.<br />
3000<br />
Speed [r/min]<br />
2000<br />
1000<br />
•Setting by external DC voltage<br />
To drive the motor set at the external DC voltage,<br />
turn on the M0 input. 3000<br />
0<br />
20 40 60 80 100<br />
Scale<br />
External potentiometer scale-speed characteristics<br />
(typical value)<br />
Speed [r/min]<br />
2000<br />
1000<br />
0<br />
1 2 3 4 5<br />
External DC voltage [V]<br />
External DC voltage-speed characteristics<br />
33
•How to set the slow start and slowdown time<br />
You can set the slow start time (acceleration time) and slowdown time (deceleration time)<br />
separately when you want to start and stop the motor.<br />
When the slow start and slowdown time has been set, it is valid to any of the setting speeds by<br />
the internal potentiometer, external potentiometer and external DC voltage.<br />
Use a precision screw-driver for this adjustment.<br />
SS (Slow start)<br />
Sudden start<br />
Gradual start<br />
<strong>BX</strong>D120A-A<br />
OPERATION<br />
ALARM<br />
CN1<br />
SPEED<br />
SS<br />
SD<br />
Slow start time setter<br />
Slowdown time setter<br />
Sudden start<br />
SD (Slowdown)<br />
Gradual start<br />
• How to set the slow start time<br />
The slow start time setter (SS) is used to set<br />
the time required from the start of motor<br />
operation to attainment of the set speed.<br />
Turn the setter in the clockwise direction, and<br />
the time will be prolonged.<br />
Time setting range is from 0 to 15 sec. (Time<br />
is set to 0 sec. at the time of shipment).<br />
3000 [r/min]<br />
Preset speed<br />
Actual slow start time<br />
Preset slow start time<br />
• How to set the slowdown time<br />
The slowdown time setter (SD) is used to set<br />
the time required from the set speed to the<br />
stop of motor operation.<br />
Turn the setter in the clockwise direction, and<br />
the time will be prolonged.<br />
Time setting range is from 0 to 15 sec. (Time<br />
is set to 0 sec. at the time of shipment).<br />
3000 [r/min]<br />
Preset speed<br />
Actual slow start time<br />
Preset slow start time<br />
Note<br />
When you have changed the<br />
rotation direction, the speed is<br />
decelerated and accelerated in<br />
conformity to the slow start setting<br />
time.<br />
CW input<br />
CCW input<br />
BRAKE input<br />
ON<br />
ON<br />
ON<br />
ON<br />
ON<br />
CW<br />
CW<br />
<strong>Motor</strong> behavior<br />
CCW<br />
CCW<br />
Slow start time<br />
Slowdown time<br />
Slow start time<br />
34
•Changing the speed<br />
CW input<br />
CCW input<br />
BRAKE input<br />
ON<br />
ON<br />
Note<br />
When the speed of rotation is<br />
changed over to the low speed by<br />
the M0 input, the speed is reduced<br />
according to slow start setting time,<br />
not according to slowdown setting<br />
time.<br />
M0 input<br />
ON<br />
CW<br />
<strong>Motor</strong> behavior<br />
Slow start time<br />
Slow start time<br />
Slow start time<br />
Slowdown time<br />
35
Note<br />
• To prevent the encoder from<br />
being damaged, never measure<br />
the insulation resistance or<br />
dielectric strength of the encoder<br />
as an independent unit.<br />
• Semiconducting elements are<br />
used for the driver. Carefully<br />
handle the driver, because the<br />
driver may be damaged by static<br />
electricity.<br />
Inspection<br />
It is recommended to check the following four items after motor operation.<br />
If any failure is found, stop the operation, and please contact your local sales office.<br />
Inspection items<br />
• Check if the motor and gearhead installation screws are loosened or not.<br />
• Check if abnormal noise is produced from the motor bearing section (ball bearing).<br />
• Check if abnormal noise is produced from the gearhead bearing (ball bearing) and gear<br />
meshing section.<br />
• Check if the motor/gearhead output shaft and load shaft are misaligned or not.<br />
• Check if the motor cable or encoder cable are damaged or stressed. Also check if the<br />
connections with the driver are loosened.<br />
• Check if the driver opening is clogged or not.<br />
• Check if the driver installation screw is loosened or not.<br />
• Check if the driver internal power element smoothing capacitor have abnormal smell or other<br />
failures.<br />
36
Troubleshooting and remedial actions<br />
During motor running, the motor and driver may not operate correctly due to speed setting error or connection error. If<br />
normal motor operation cannot be ensured, see the following description and take appropriate countermeasures. If<br />
normal operation cannot be ensured even after that, please contact your local sales office.<br />
Phenomenon<br />
Possible cause<br />
Remedial action<br />
The motor fails to turn.<br />
The motor is driven<br />
opposite of the specified<br />
direction.<br />
Unstable motor<br />
operation with big<br />
vibration.<br />
The motor fails to stop<br />
instantaneously.<br />
BRAKE input turned OFF.<br />
FREE input turned ON.<br />
Both of CW input and CCW input<br />
turned OFF.<br />
Both of CW input and CCW input<br />
turned ON.<br />
The internal potentiometer is not<br />
adjusted.<br />
M0 input is not turned OFF.<br />
The external potentiometer contact<br />
is faulty.<br />
M0 input is not turned ON.<br />
M1 input and M2 input is turned ON.<br />
The external DC voltage contact is<br />
faulty.<br />
Incorrect CW/CCW input or faulty<br />
connection.<br />
Speed reduction ratios 30:1, 50:1<br />
and 100:1 are used in the<br />
combination type.<br />
The motor (gearhead) output shaft<br />
and load shaft are not aligned with<br />
each other.<br />
Affected by noise.<br />
Turn OFF the set CW input or CCW<br />
input to stop the motor.<br />
Turn on the BRAKE input.<br />
Turn off the FREE input.<br />
Turn on the CW input or CCW input.<br />
Turn on either of the CW input or CCW input.<br />
Turn the internal potentiometer slightly in the<br />
clockwise direction. The speed is set to 0 r/min at<br />
time of shipment.<br />
When the M0 input is off, the internal potentiometer<br />
is selected.<br />
Check for connection of the external potentiometer.<br />
When the M0 input is on, the external potentiometer<br />
is selected.<br />
Turn off the M1 input and M2 input.<br />
Check for connection of the external DC voltage.<br />
The motors driven in the CW direction when the CW<br />
input is turned on and CCW direction when the<br />
CCW input is turned on.<br />
When speed reduction ratios 30:1, 50:1 and 100:1<br />
are used in the combination type, drive direction is<br />
opposite to that of the motor.<br />
Reverse the CW/CCW input operation.<br />
Make sure that the motor (gearhead) output shaft and<br />
load shaft are connected in an appropriate manner.<br />
Check for running only with the motor, driver and<br />
controller required for running.<br />
If noise influence has been confirmed, take the<br />
appropriate measures such as separation from noise<br />
generating source, re-connection of wiring,<br />
replacement of the signal cable by a shielded cable,<br />
and installation of a Ferrite core.<br />
To stop the motor instantaneously, turn off the BRAKE<br />
input. If the motor does not stop instantaneously after<br />
that, load inertia may be excessive. Increase friction<br />
load or reduce load inertia, and check the result.<br />
37
Alarm display and details<br />
When the driver’s ALARM LED is flashing, check the number of flashes and take an appropriate measure according to<br />
the table below.<br />
The ALARM LED’s flashing pattern is as shown in the figure below:<br />
Flashing pattern example: Overvoltage protection function (three flashes)<br />
1 2 3 1 2 3<br />
0.25 s 0.25 s<br />
1.25 s<br />
Number of times of<br />
the ALARM LED<br />
flashings<br />
2 times<br />
Protection<br />
function<br />
Overload<br />
protection<br />
Re-examine the load.<br />
Remedial action<br />
3 times<br />
Overvoltage<br />
protection<br />
When it has occurred to slow start/slowdown of the motor, reduce the load<br />
inertia or prolong slow start/slowdown time. Or connect the optional<br />
regeneration unit (available at extra cost).<br />
If this trouble has occurred in the gravitational application, reduce the load<br />
or speed. Or connect the optional regeneration unit (available at extra cost).<br />
4 times<br />
5 times<br />
6 times<br />
7 times<br />
8 times<br />
9 times<br />
Excessive<br />
displacement<br />
Overcurrent<br />
protection<br />
Excessive speed<br />
EEPROM<br />
data error<br />
Encoder failure<br />
Low voltage<br />
Protection<br />
Reduce load inertia and load torque or prolong the slow start and<br />
slowdown time.<br />
Any one of motor cable, motor winding and driver output element is short<br />
circuited.<br />
Reduce the motor speed below 3000 r/min.<br />
Turn on the driver power supply again. If the problem cannot be solved by<br />
it, contact our branch office or sales office from which you purchased our<br />
product, and request the product to be repaired.<br />
Check the encoder cable for connection.<br />
Check the power voltage.<br />
∗ Turn on the driver power supply again. If the problem cannot be solved by it, contact our branch office or sales office<br />
from which you purchased our product, and request the product to be repaired.<br />
38
MON<br />
PROG TEST<br />
VEXTA R<br />
Appendix<br />
Option (sold separately)<br />
•Data setter OPX-1A (Supplied with modular cable)<br />
This data setter provides a substantial extension of the <strong>BX</strong> series functions.<br />
It allows digital setting of the speed in eight steps, positioning operation (setting of movements at 6 points) and<br />
mechanical home position resetting. It also has a great variety of additional functions including driver data copying<br />
function and operation monitoring function.<br />
OPERATIONAL UNIT OPX-1<br />
IDX RET HOME BUSY ALM<br />
MODE SET<br />
ORIENTAL MOTOR CO.,LTD. MADE IN JAPAN<br />
•Regeneration unit (Supplied with two mounting screws)<br />
EPRC-400P (for <strong>BX</strong>230, <strong>BX</strong>460, <strong>BX</strong>5120)<br />
RGB100 (for <strong>BX</strong>6200, <strong>BX</strong>6400)<br />
This regeneration unit consumes and discharges regeneration energy generated during gravitational operation or<br />
sudden stop of large load inertial, thereby protecting the driver.<br />
•Extension cable and movable cable<br />
We have available the junction cable and movable cable required to extend the distance between the motor and driver.<br />
These cables for motor cable and encoder cable are available as one set.<br />
Junction cable<br />
CC01SBF<br />
CC02SBF<br />
CC03SBF<br />
CC05SBF<br />
CC07SBF<br />
CC10SBF<br />
CC15SBF<br />
CC20SBF<br />
Model<br />
Movable cable<br />
CC01SBR<br />
CC02SBR<br />
CC03SBR<br />
CC05SBR<br />
CC07SBR<br />
CC10SBR<br />
CC15SBR<br />
CC20SBR<br />
Length<br />
m (ft.)<br />
1 (3.3)<br />
2 (6.6)<br />
3 (9.8)<br />
5 (16.4)<br />
7 (23.0)<br />
10 (32.8)<br />
15 (49.2)<br />
20 (65.6)<br />
• For motor cable<br />
• For encoder cable<br />
•DIN rail mounting plate (Supplied with three mounting screws)<br />
Plate for mounting the driver to a DIN rail [35 mm (1.38 in.)].<br />
Model: PADP01<br />
39
• Unauthorized reproduction or copying of all or part of this Operating Manual is prohibited.<br />
If a new copy is required to replace an original manual that has been damaged or lost, please contact your nearest branch or<br />
sales office.<br />
• This Operating Manual is subject to change without prior notice for the purpose of product improvement or changes in<br />
specifications, or to improve its general content.<br />
• While we make every effort to offer accurate information in the manual, we welcome your input. Should you find unclear<br />
descriptions, errors or omissions, please contact the nearest office.<br />
• , , and are trademarks of <strong>Oriental</strong> <strong>Motor</strong> Co., Ltd., and are registered in Japan and other countries.<br />
Other product names and company names mentioned in this manual may be trademarks or registered trademarks of their<br />
respective companies and are hereby acknowledged. The third-party products mentioned in this manual are recommended<br />
products, and references to their names shall not be construed as any form of performance guarantee. <strong>Oriental</strong> <strong>Motor</strong> is not<br />
liable whatsoever for the performance of these third-party products.<br />
© Copyright ORIENTAL MOTOR CO., LTD. 2005<br />
• Please contact your nearest ORIENTAL MOTOR office for further information.<br />
ORIENTAL MOTOR U.S.A. CORP.<br />
Technical Support Line Tel:(800)468-3982<br />
Available from 7:30 AM to 5:00 PM, P.S.T.<br />
E-mail: techsupport@orientalmotor.com<br />
www.orientalmotor.com<br />
ORIENTAL MOTOR (EUROPA) GmbH<br />
Headquarters and Düsseldorf Office<br />
Tel:0211-5206700 Fax:0211-52067099<br />
Munich Office<br />
Tel:08131-59880 Fax:08131-598888<br />
Hamburg Office<br />
Tel:040-76910443 Fax:040-76910445<br />
ORIENTAL MOTOR (UK) LTD.<br />
Tel:01256-347090 Fax:01256-347099<br />
ORIENTAL MOTOR (FRANCE) SARL<br />
Tel:01 47 86 97 50 Fax:01 47 82 45 16<br />
ORIENTAL MOTOR ITALIA s.r.l.<br />
Tel:02-93906346 Fax:02-93906348<br />
TAIWAN ORIENTAL MOTOR CO., LTD.<br />
Tel:(02)8228-0707 Fax:(02)8228-0708<br />
SINGAPORE ORIENTAL MOTOR PTE. LTD.<br />
Tel:(6745)7344 Fax:(6745)9405<br />
ORIENTAL MOTOR (MALAYSIA) SDN. BHD.<br />
Tel:(03)79545778 Fax:(03)79541528<br />
INA ORIENTAL MOTOR CO., LTD.<br />
KOREA<br />
Tel:(032)822-2042~3 Fax:(032)819-8745<br />
ORIENTAL MOTOR CO., LTD.<br />
Headquarters Tokyo, Japan<br />
Tel:(03)3835-0684 Fax:(03)3835-1890<br />
40<br />
Printed on Recycled Paper