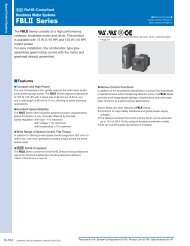
Connection and Operation - Oriental Motor
Connection and Operation - Oriental Motor
Connection and Operation - Oriental Motor

Create successful ePaper yourself
Turn your PDF publications into a flip-book with our unique Google optimized e-Paper software.
<strong>Connection</strong> <strong>and</strong> <strong>Operation</strong><br />
Names <strong>and</strong> Function of Parts<br />
The illustration has the cover removed. Install the cover after connection.<br />
Installation<br />
hole<br />
1 2 3 4 5<br />
LED1<br />
VR1<br />
POWER SPEED ACCEL DECEL<br />
VR3 VR2 TB3<br />
S1 S2 S3 S4 S5 S6<br />
STOP<br />
BRAKE<br />
INT-VR<br />
EXT-VR<br />
G<br />
7 8 10 11<br />
NC BLU BLU<br />
1 2 3 4 5 6<br />
FG N L BLK RED WHT<br />
MOTOR<br />
9 6<br />
DIN lever<br />
Installation<br />
hole<br />
8<br />
7<br />
1<br />
2<br />
3<br />
4<br />
5<br />
6<br />
7<br />
8<br />
POWER LED<br />
Turns on (green) while power is being supplied.<br />
Internal speed potentiometer<br />
Set the motor’s operating speed.<br />
Acceleration time potentiometer<br />
Set the acceleration time for motor startup.<br />
Deceleration time potentiometer<br />
Set the deceleration time for motor stop.<br />
Control input terminal<br />
S1 Common terminal for running <strong>and</strong> braking<br />
S2 Run/Stop input<br />
Runs (OFF) or stops (ON) the motor.<br />
S3 Run/Brake input<br />
Runs (OFF) or brakes (ON) the motor.<br />
S4, S5, S6 Speed potentiometer inputs<br />
When S4 <strong>and</strong> S5 are shorted, the speed<br />
can be set using the internal speed<br />
potentiometer (INT-VR).<br />
When S4 <strong>and</strong> S5 are open, the speed<br />
can be set using an external speed<br />
potentiometer (EXT-VR).<br />
When using an external speed potentiometer,<br />
connect it to S4 <strong>and</strong> S6.<br />
Power connection terminal<br />
(terminals 2 <strong>and</strong> 3)<br />
<strong>Motor</strong> connection terminal<br />
(terminals 4, 5 <strong>and</strong> 6)<br />
Generator connection terminal<br />
(terminals 10 <strong>and</strong> 11)<br />
Connect the blue generator lead wires.<br />
9 FG terminal (terminal 1)<br />
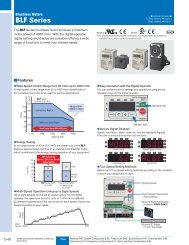
Speed Control Systems<br />
Introduction<br />
BX FBL2 AXU AXH BHF ES US<br />
Before Using a<br />
Speed Control<br />
System<br />
Brushless DC <strong>Motor</strong> Systems<br />
AC Input<br />
DC Input<br />
AC <strong>Motor</strong> Systems<br />
Dimensions B-103 <strong>Connection</strong> <strong>and</strong> <strong>Operation</strong> B-111 <strong>Motor</strong> <strong>and</strong> Gearhead Combinations B-115<br />
ORIENTAL MOTOR GENERAL CATALOG 2003/2004 B-111
Speed Control Systems<br />
<strong>Connection</strong> Diagrams<br />
◆ Uni-directional <strong>Operation</strong><br />
(When using internal speed potentiometer)<br />
Run SW3<br />
Brake<br />
Run<br />
SW2<br />
Stop<br />
LED1<br />
VR1<br />
VR3 VR2 TB3<br />
POWER SPEED ACCEL DECEL<br />
S1 S2 S3 S4 S5 S6<br />
STOP<br />
INT-VR<br />
BRAKE<br />
EXT-VR<br />
AWG18 (0.75 mm 2 ) min.<br />
7 8 10 11<br />
NC BLU BLU<br />
1 2 3 4 5 6<br />
FG N L BLK RED WHT<br />
MOTOR<br />
G<br />
Power Supply<br />
Voltage<br />
ES01<br />
110 VAC 60 Hz<br />
115 VAC 60 Hz<br />
ES02<br />
220 VAC 50/60 Hz<br />
230 VAC 50/60 Hz<br />
AWG18 (0.75 mm 2 )<br />
min.<br />
Capacitor<br />
Frame Ground<br />
Power Supply Fuse<br />
SW1<br />
AWG18 (0.75 mm 2 ) min.<br />
Blue<br />
White<br />
Red<br />
Black<br />
Orange ✽<br />
Orange ✽<br />
Blue<br />
✽<br />
<strong>Motor</strong><br />
These are lead wires for the cooling fan.<br />
These should be connected only when<br />
using 60 <strong>and</strong> 90 W type.<br />
● For uni-directional operation, connect the lead wires of the motor to the controller in this order: For CW operation, connect the Red wire to terminal #5 <strong>and</strong> the White wire to<br />
terminal #6. For CCW operation, connect the White wire to terminal #5 <strong>and</strong> the Red wire to terminal #6.<br />
● When using external speed potentiometer,see page B-114.<br />
◆ Bi-directional <strong>Operation</strong><br />
(When using internal speed potentiometer)<br />
Run SW3<br />
Brake<br />
Run<br />
SW2<br />
Stop<br />
LED1<br />
VR1<br />
VR3 VR2 TB3<br />
POWER SPEED ACCEL DECEL<br />
S1 S2 S3 S4 S5 S6<br />
STOP<br />
INT-VR<br />
BRAKE<br />
EXT-VR<br />
7 8 10 11<br />
NC BLU BLU<br />
1 2 3 4 5 6<br />
FG N L BLK RED WHT<br />
MOTOR<br />
G<br />
Power Supply<br />
Voltage<br />
ES01<br />
110 VAC 60 Hz<br />
115 VAC 60 Hz<br />
AWG18 (0.75 mm 2 ) min.<br />
Frame Ground<br />
AWG18 (0.75 mm 2 ) min.<br />
ES02<br />
Power Supply Fuse<br />
220 VAC 50/60 Hz SW1<br />
230 VAC 50/60 Hz<br />
Co Ro<br />
CW<br />
CCW<br />
Co Ro<br />
Blue<br />
Blue<br />
<strong>Motor</strong><br />
Co<br />
Ro<br />
CW<br />
CCW<br />
SW4<br />
Co Ro<br />
AWG18 (0.75mm 2 ) min.<br />
White<br />
Red<br />
Black<br />
Orange ✽<br />
Orange ✽<br />
✽<br />
These are lead wires for the cooling fan.<br />
These should be connected only when<br />
using 60 W <strong>and</strong> 90 W type.<br />
● When using external speed potentiometer,see page B-114.<br />
Capacitor<br />
B-112 ORIENTAL MOTOR GENERAL CATALOG 2003/2004 Features B-86<br />
System Configuration B-87<br />
Specifications B-86 Characteristics B-100
Specifications of the Switches <strong>and</strong> Fuse<br />
Power Supply Voltage<br />
SW1<br />
SW2, SW3<br />
SW4<br />
R0, C0<br />
(Surge suppressor)<br />
Fuse<br />
Precaution for wiring<br />
● The control input terminals are not insulated from the AC power supply. Any equipment (sequencer, relay <strong>and</strong>/or switch) that will be connected to the<br />
control input terminals must have contact ratings of 18 VDC <strong>and</strong> 1 mA min. The control input terminals are not insulated from the AC power supply. Do<br />
not use a transistor output type controller.<br />
● The length of the cable connecting the motor <strong>and</strong> speed controller should be no more than 32.8 feet (10 m).<br />
● The length of the control cable should be no more than 6.6 feet (2 m) <strong>and</strong> as short as possible.<br />
● Connect a surge suppressor across SW4. <strong>Oriental</strong> <strong>Motor</strong> also provides an optional EPCR1202-2 CR circuit for surge suppression. ➝Page A-218<br />
Timing Chart<br />
The timing chart below shows an example of switching between two speed levels when the high speed <strong>and</strong> low speed are<br />
selected via the internal <strong>and</strong> external speed potentiometers, respectively.<br />
SW1<br />
SW2<br />
SW3<br />
SW4<br />
CW (Clockwise Direction)<br />
<strong>Motor</strong> <strong>Operation</strong><br />
CCW<br />
(Counter-Clockwise<br />
Direction)<br />
ON<br />
Power Supply<br />
OFF<br />
Run/Stop Input∗2<br />
OFF<br />
Run/Brake Input∗2<br />
ON<br />
CW/CCW Input<br />
Internal/<br />
External Speed<br />
Setting<br />
110/115 VAC (ES01)<br />
125 VAC 10 A<br />
18 VDC 1 mA<br />
125 VAC 10 A<br />
R0=5200 Ω<br />
C0=0.10.2 µF, 200 WV<br />
Product certified under the UL/CSA248-14 st<strong>and</strong>ard or<br />
equivalent 250 VAC 10 A<br />
OFF<br />
ON<br />
OFF<br />
ON<br />
OFF<br />
ON<br />
Run/Stop Immediately<br />
Run<br />
High Speed<br />
Run Brake Run Brake Run<br />
CW<br />
Internal<br />
0.5s min.<br />
Low Speed<br />
CCW<br />
CW<br />
Switching between<br />
Two Speed Levels/Stop<br />
R0=5200 Ω<br />
C0=0.10.2 µF, 400 WV<br />
High Speed<br />
Low Speed<br />
Stop<br />
Acceleration/<br />
Deceleration <strong>Operation</strong>∗1<br />
Run<br />
Internal<br />
External External Internal<br />
220/230 VAC (ES02)<br />
250 VAC 5 A<br />
250 VAC 5 A<br />
Product certified under the UL/CSA248-14 st<strong>and</strong>ard or<br />
equivalent 250 VAC 5 A<br />
Stop<br />
Speed Control Systems<br />
Introduction<br />
BX FBL2 AXU AXH BHF ES US<br />
Before Using a<br />
Speed Control<br />
System<br />
Brushless DC <strong>Motor</strong> Systems<br />
AC Input<br />
DC Input<br />
AC <strong>Motor</strong> Systems<br />
∗1 Case where the acceleration <strong>and</strong> deceleration times are set longer by turning each potentiometer clockwise.<br />
∗2 In case SW2 <strong>and</strong> SW3 are turned on at the same time, Stop Input is given priority.<br />
Run/Brake, Stop<br />
Setting SW2/SW3 to “Run” (OFF) causes the motor to rotate at the speed set<br />
via the speed potentiometers.<br />
Setting SW2 to “Stop” (ON) during operation<br />
causes the motor to coast to a stop.<br />
Setting SW3 to “Brake” (ON) during operation<br />
causes the motor to stop immediately.<br />
Run/Stop Input Run/Brake Input <strong>Motor</strong> <strong>Operation</strong><br />
OFF<br />
OFF<br />
Runs<br />
OFF<br />
ON Stops Immediately<br />
ON<br />
OFF Coasts to a Stop ✽<br />
✽ The slow down time set with a potentiometer is longer than<br />
the time which motor coasts to a stop, motor will stop with<br />
slow down time.<br />
The braking function (current through the motor) is only active for approximately 0.4 seconds after the Run/Brake input is turned<br />
ON. Do not switch over (to any of the input switches) for 0.5 seconds. Otherwise, damage to the speed controller may result.<br />
Switching the Direction of Rotation<br />
SW4 is used to switch the motor’s direction of rotation.<br />
When SW4 is set to CW, the motor rotates in the clockwise direction, as seen from the motor’s output-shaft side.<br />
When SW4 is set to CCW, the motor rotates in the counterclockwise direction, as seen from the motor’s output-shaft side.<br />
The rotating direction of the gear output shaft is opposite that of the motor shaft, depends on the gear ratio.<br />
● Instant switching between forward <strong>and</strong> reverse operations is possible with a reversible motor. Connect a surge suppressor between the relay contacts. <strong>Oriental</strong> <strong>Motor</strong> also<br />
provides an optional EPCR1201-2 CR circuit for surge suppression.➝Page A-218<br />
● For bi-directional operation of an induction motor, switch the rotating direction after the motor has come to a complete stop.<br />
Dimensions B-103 <strong>Connection</strong> <strong>and</strong> <strong>Operation</strong> B-111 <strong>Motor</strong> <strong>and</strong> Gearhead Combinations B-115<br />
ORIENTAL MOTOR GENERAL CATALOG 2003/2004 B-113
Speed Control Systems<br />
Speed Setting Methods<br />
The following two methods of setting speed can be used.<br />
Internal Speed Potentiometer<br />
The setting range is from 90 to 1400 r/min at 50 Hz or 90 to<br />
1600 r/min at 60 Hz. Short the speed potentiometer input<br />
terminals S4 <strong>and</strong> S5.<br />
Turning the potentiometer clockwise will set a faster speed.<br />
The factory setting is 0 r/min.<br />
2000<br />
60 Hz<br />
External Speed Potentiometer (included)<br />
Open the speed potentiometer input terminals S4 <strong>and</strong> S5.<br />
Before connecting, turn the dial on the external speed<br />
potentiometer counterclockwise to set the speed to 0 r/min.<br />
Turning the dial clockwise will set a faster speed.<br />
External<br />
Speed Potentiometer<br />
1<br />
3<br />
20 kΩ 1/4 W<br />
with a linear resistance vs.<br />
angle curve<br />
2000<br />
60 Hz<br />
1500<br />
50 Hz<br />
1<br />
2<br />
3<br />
1500<br />
50 Hz<br />
0 10<br />
Internal Speed Potentiometer<br />
Speed [r/min]<br />
1000<br />
Speed [r/min]<br />
1000<br />
500<br />
500<br />
TB3<br />
0 2 4 6 8 10<br />
Internal speed potentiometer position<br />
Internal speed potentiometer positionspeed<br />
characteristics (typical value)<br />
S1 S2 S3 S4 S5 S6<br />
0 5 10 15 20<br />
Speed potentiometer resistance [kΩ]<br />
External speed potentiometer resistancespeed<br />
characteristics (typical value)<br />
Note:<br />
Do not operate multiple speed controllers with a single external speed<br />
potentiometer. Doing so may damage the speed controllers.<br />
Acceleration <strong>and</strong> Deceleration <strong>Operation</strong><br />
Equipment <strong>and</strong> loads are subject to large acceleration/deceleration force when starting, stopping, <strong>and</strong> changing speeds. When<br />
you want to accelerate/decelerate without any accompanying shock, the acceleration/deceleration time can be extended using<br />
the slow start/slow down function. The slow start/slow down time can be set using acceleration/deceleration time potentiometers<br />
built into the control pack. However, when the load inertia is large, the deceleration time cannot be set at a shorter time than<br />
when the motor is stopped naturally.<br />
Acceleration<br />
The acceleration function is actuated at start or when the<br />
speed is switched to the higher setting in a two-level speed<br />
control system.<br />
Turning the acceleration time potentiometer clockwise will<br />
increase the set time.<br />
The factory setting is 0 (no acceleration).<br />
Deceleration<br />
The deceleration function is actuated during natural stop or<br />
when the speed is switched to the lower setting in a two-level<br />
speed control system.<br />
Turning the deceleration time potentiometer clockwise will<br />
increase the set time.<br />
The factory setting is 0 (no deceleration).<br />
15<br />
20<br />
0 10<br />
Acceleration Time Potentiometer<br />
Acceleration time [sec/1000 r/min]<br />
10<br />
5<br />
0 10<br />
Deceleration Time Potentiometer<br />
Deceleration time [sec/1000 r/min]<br />
15<br />
10<br />
5<br />
0<br />
2 4<br />
6 8 10<br />
Acceleration time potentiometer positionspeed<br />
characteristics (typical value)<br />
0 2 4<br />
6 8 10<br />
Deceleration time potentiometer positionspeed<br />
characteristics (typical value)<br />
B-114 ORIENTAL MOTOR GENERAL CATALOG 2003/2004 Features B-86<br />
System Configuration B-87<br />
Specifications B-86 Characteristics B-100
Repeated <strong>Operation</strong>/Braking Cycle<br />
When running/braking of the motor is repeated in short cycles, the rise in motor temperature will increase <strong>and</strong> the continuousoperation<br />
time will be limited.<br />
Use the following values as a guideline:<br />
<strong>Motor</strong> Output<br />
HP W<br />
1/1251/19 640<br />
1/12, 1/8 60, 90<br />
Braking Current<br />
When the motor is comm<strong>and</strong>ed to stop immediately, the following braking current will flow. Provide an appropriate power supply<br />
by referring to these values.<br />
<strong>Motor</strong> Output<br />
1/125<br />
1/50<br />
1/30<br />
1/19<br />
1/12<br />
Output Power<br />
HP W<br />
1/125<br />
1/50<br />
1/30<br />
1/19<br />
1/12<br />
1/8<br />
Model <strong>Motor</strong> Model Gearhead Model<br />
VSI206A-U<br />
VSI206C-E<br />
VSI315A-U<br />
VSI315C-E<br />
VSI425A-U<br />
VSI425C-E<br />
VSI540A-U<br />
VSI540C-E<br />
VSI560A-U<br />
VSI560C-E<br />
VSI590A-U<br />
VSI590C-E<br />
Repetition Cycle<br />
2 seconds min. (Running 1 second, stopping 1 second)<br />
4 seconds min. (Running 2 seconds, stopping 2 seconds)<br />
Note:<br />
The motor may generate heat, depending on the conditions in which it is driven. Ensure that the temperature of the motor case does not exceed 194°F (90°C).<br />
HP<br />
W<br />
6<br />
15<br />
25<br />
40<br />
60<br />
Braking Current (Peak Value) [A]<br />
Single-Phase 110/115 VAC Single-Phase 220/230 VAC<br />
1.5<br />
1.0<br />
3.5<br />
2.0<br />
5.5<br />
3.0<br />
8.5<br />
6.0<br />
15.5<br />
8.0<br />
1/8 90<br />
20.5 12.0<br />
List of <strong>Motor</strong> <strong>and</strong> Gearhead Combinations<br />
Model names for motor/gearhead combinations are shown below.<br />
Induction <strong>Motor</strong>s<br />
6<br />
15<br />
25<br />
40<br />
60<br />
90<br />
VSI206A-GV<br />
VSI206C-GV<br />
VSI315A-GV<br />
VSI315C-GV<br />
VSI425A-GV<br />
VSI425C-GV<br />
VSI540A-GVH<br />
VSI540C-GVH<br />
VSI560A-GVH<br />
VSI560C-GVH<br />
VSI590A-GVR<br />
VSI590C-GVR<br />
GV2G<br />
GV3G<br />
GV4G<br />
GVH5G<br />
GVH5G<br />
GVR5G<br />
Speed Control Systems<br />
Introduction<br />
BX FBL2 AXU AXH BHF ES US<br />
Before Using a<br />
Speed Control<br />
System<br />
Brushless DC <strong>Motor</strong> Systems<br />
AC Input<br />
DC Input<br />
AC <strong>Motor</strong> Systems<br />
● Enter the gear ratio in the box () with in the model name.<br />
Reversible <strong>Motor</strong>s<br />
Output Power<br />
HP<br />
1/125<br />
1/50<br />
1/30<br />
1/19<br />
1/12<br />
1/8<br />
W<br />
Model <strong>Motor</strong> Model Gearhead Model<br />
6<br />
VSR206A-U VSR206A-GV<br />
VSR206C-E VSR206C-GV<br />
GV2G<br />
15<br />
VSR315A-U VSR315A-GV<br />
VSR315C-E VSR315C-GV<br />
GV3G<br />
25<br />
VSR425A-U VSR425A-GV<br />
VSR425C-E VSR425C-GV<br />
GV4G<br />
40<br />
VSR540A-U VSR540A-GVH<br />
VSR540C-E VSR540C-GVH<br />
GVH5G<br />
60<br />
VSR560A-U VSR560A-GVH<br />
VSR560C-E VSR560C-GVH<br />
GVH5G<br />
90<br />
VSR590A-U VSR590A-GVR<br />
VSR590C-E VSR590C-GVR<br />
GVR5G<br />
● Enter the gear ratio in the box () with in the model name.<br />
Dimensions B-103 <strong>Connection</strong> <strong>and</strong> <strong>Operation</strong> B-111 <strong>Motor</strong> <strong>and</strong> Gearhead Combinations B-115<br />
ORIENTAL MOTOR GENERAL CATALOG 2003/2004 B-115