

Inion OTPS Biodegradable Pins - Stryker
Inion OTPS Biodegradable Pins - Stryker
Inion OTPS Biodegradable Pins - Stryker

Create successful ePaper yourself
Turn your PDF publications into a flip-book with our unique Google optimized e-Paper software.
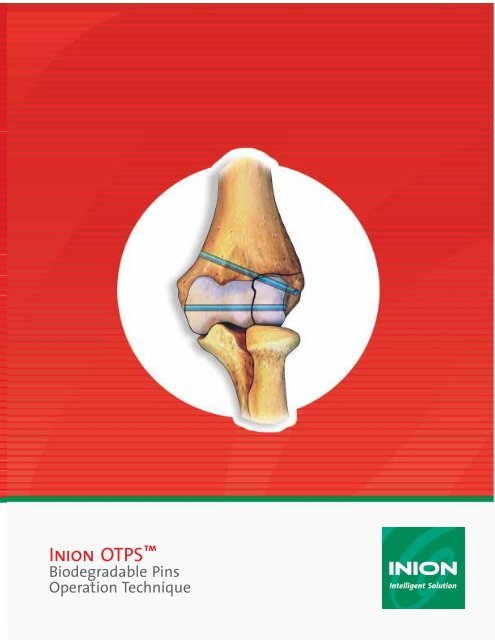
<strong>Inion</strong> <strong>OTPS</strong><br />
<strong>Biodegradable</strong> <strong>Pins</strong><br />
Operation Technique
<strong>Inion</strong> <strong>OTPS</strong><br />
<strong>Biodegradable</strong> <strong>Pins</strong><br />
DESCRIPTION<br />
The <strong>Inion</strong> <strong>OTPS</strong> <strong>Biodegradable</strong> <strong>Pins</strong> are intended to<br />
maintain accurate alignment of fragments of fractured<br />
bone in the presence of appropriate immobilization.<br />
The <strong>Inion</strong> <strong>OTPS</strong> implants are made of biodegradable<br />
copolymers composed from L-Lactide, D-Lactide<br />
and TMC monomers. These have long histories of safe<br />
medical use and degrade in-vivo by hydrolysis and are<br />
metabolised by the body into CO 2 and water. The<br />
coloured pins are dyed green for better visualisation<br />
during the surgical procedure. The colour is achieved<br />
by using a minimal amount of Drug and Cosmetic<br />
(D&C) Green No. 6, which is used in several biodegradable<br />
sutures. The <strong>Pins</strong> gradually lose most of their<br />
strength within 18-36 weeks. Bioresorption takes place<br />
within two to four years.<br />
The <strong>Pins</strong> are offered in different sizes and they are<br />
designed to be used with customized instrumentation,<br />
The <strong>Pins</strong> are sterile, non-collagenous, and nonpyrogenic.<br />
INDICATIONS<br />
The <strong>Pins</strong> are indicated for maintenance of alignment<br />
and fixation of bone fractures, osteotomies, arthrodeses<br />
or bone grafts in the presence of appropriate additional<br />
immobilization (for example, rigid fixation implants,<br />
cast, brace).<br />
CONTRAINDICATIONS<br />
The <strong>Pins</strong> shoud not be used in fractures and osteotomies<br />
of diaphyseal bone or in cases with insufficient quality or<br />
quantity of bone. Other contraindications are active<br />
or potential infections, patient conditions including limited<br />
blood supply, and where patient cooperation cannot be<br />
guaranteed (for example, alcoholism, drug abuse). There<br />
are currently no known additional contraindications to the<br />
use of the <strong>Inion</strong> <strong>OTPS</strong> <strong>Biodegradable</strong> <strong>Pins</strong>.<br />
INFORMATION FOR USE<br />
Surgical considerations and reminders<br />
• Prophylactic perioperative antibiotic treatment is<br />
recommended.<br />
• Use proper local, regional or general anaesthesia.<br />
• Maintain sterile field throughout the procedure.<br />
• Proper exposure using standard surgical procedure.<br />
• Thoroughly prepare the surgical site preserving the<br />
neurovascular structures by careful dissection.<br />
• Good alignment/reduction of the fracture/osteotomy<br />
followed by fixation with clamp(s).<br />
• Radiographs can be taken before wound closure to<br />
check the alignment/reduction after fixation.<br />
• Meticulous hemostasis and complete primary skin<br />
closure over the implant are essential.<br />
BENEFITS<br />
• Improved visibility.<br />
• No need for removal upon remobilisation<br />
reducing patient trauma and costs.<br />
• Degradation profile tailored to progressively<br />
load the bone to improve bone regeneration.<br />
• Implants are supplied sterile.<br />
• Can be easily cut.<br />
SURGICAL TECHNIQUE*<br />
1) Reduce and stabilize the fracture.<br />
2) Insert two diverging 1.5 mm or 2.0 mm <strong>Inion</strong> K-<br />
wires (Trocar Tip Drill) through the fragment and 1<br />
both cortexes to secure the fragment (1).<br />
3) Check the correct anatomical reduction by using<br />
AP and lateral radiographic views.<br />
4) Remove one K-wire. Flush and measure the depth<br />
of the channel.<br />
5) Select an appropriate length <strong>OTPS</strong> Pin of the<br />
same diameter as the K-wire used (1.5 or 2.0 mm).<br />
2<br />
6) Using <strong>Inion</strong> Pin Applicator (1.5 or 2.0 mm), insert<br />
the <strong>OTPS</strong> Pin by tapping it gently in to the channel (2).<br />
7) Replace the other K-wire with an appropriate size<br />
<strong>OTPS</strong> Pin in the same manner (3).<br />
* <strong>Biodegradable</strong> fixation in traumatology and orthopaedics.<br />
2nd edition. University of Helsinki, 2002: 47-51.<br />
PRECAUTIONS:<br />
Before using <strong>Inion</strong> implants, study carefully the Instructions<br />
For Use booklet that is included in the <strong>Inion</strong> implant box.<br />
3<br />
2
1<br />
ARTHROSCOPIC TECHNIQUE<br />
Insert the <strong>Inion</strong> Arthroscopic Tip into the joint. (1)<br />
Select the instrument size corresponding to the <strong>OTPS</strong> Pin required<br />
(1.5 or 2.0mm).<br />
2<br />
Drill hole for the <strong>OTPS</strong> Pin with corresponding size (1.5mm or 2.0mm)<br />
<strong>Inion</strong> K-Wire (Trocar Tip Drill) through the Arthroscopic Tip . (2)<br />
Check the channel depth from the drill bit. Depth marks on<br />
the Trochar Tip Drill bit (1.5/2.0mm) are every 10 mm.<br />
Channel should be 1-2mm deeper than the Pin length.<br />
ALTERNATIVELY: Place one <strong>Inion</strong> K-wire and then slide<br />
Arthroscopic Tip over it.<br />
3<br />
IF REQUIRED: The bone fragments can be secured before preparing<br />
the first pin channel. Drill in one 1.5mm <strong>Inion</strong> K-wire to hold the bones<br />
and insert this wire through the hole in the instrument handle. This will<br />
maintain the alignment while drilling and placing the first pin through the<br />
Arthroscopic Tip.<br />
Select the correct Pin length. (3) If required, the Pin can be cut by using<br />
sterile surgical scissors. Remove the K-wire, keeping the Arthroscopic Tip in<br />
place and insert the selected <strong>OTPS</strong> Pin (1.5/2.0mm) into the cannula.<br />
4<br />
Gently tap <strong>Inion</strong> Arthroscopic Piston (1.5/2.0mm) to insert the Pin<br />
into the bone. (4)<br />
Pin insertion may be observed from the window on the side of<br />
Arthroscopic Tip. (5)<br />
Insert at least two pins at diverging angles. (6)<br />
5<br />
Note! The <strong>Pins</strong> must be inserted completely inside the bone especially<br />
if they are in the articular surface. Otherwise<br />
they may cause damage to the cartilage and<br />
other tissue.<br />
TIP: If the end result is not satisfactory,<br />
the <strong>Pins</strong> and fixation can be removed by<br />
overdrilling them.<br />
6<br />
It is essential to select the correct Pin length<br />
before inserting the Pin when operating<br />
arthroscopically in the articular surface.<br />
3
1.5 mm pins<br />
2.0 mm pins<br />
PIN-1520<br />
PIN-1530<br />
PIN-1540<br />
PIN-1550<br />
1.5 x 20 mm<br />
1.5 x 30 mm<br />
1.5 x 40 mm<br />
1.5 x 50 mm<br />
PIN-2020 2.0 x 20 mm<br />
PIN-2025 2.0 x 25 mm<br />
PIN-2030 2.0 x 30 mm<br />
PIN-2035 2.0 x 35 mm<br />
PIN-2040 2.0 x 40 mm<br />
PIN-2050 2.0 x 50 mm<br />
<strong>Inion</strong> <strong>OTPS</strong> Pin instruments:<br />
INS-9230 (T)<br />
INS-9231 (T)<br />
INS-9232 (T)<br />
INS-9233 (T)<br />
INS-9234 (T)<br />
INS-9235 (T)<br />
INS-9236 (T)<br />
INS-9237 (T)<br />
INS-9238 (T)<br />
INS-9240 (T)<br />
ACC-9820 (T)<br />
ACC-9821 (T)<br />
Pin applicator 1.5 mm<br />
Pin applicator 2.0 mm<br />
Arthroscopic handle<br />
Arthroscopic tip 1.5 mm<br />
Arthroscopic tip 2.0 mm<br />
Arthroscopic piston 1.5 mm<br />
Arthroscopic piston 2.0 mm<br />
K-wire (Trocar tip drill) 1.5 mm<br />
K-wire (Trocar tip drill) 2.0 mm<br />
Wrench<br />
Sterilisation tray<br />
Sterilisation tray complete<br />
Kirjapaino Öhrling 5471 30000110 4/2005<br />
Pin applicator<br />
Arthroscopic<br />
Pin applicator<br />
Sterilisation tray<br />
Colour coded instruments for easier identification<br />
1.5 mm green 2.0 mm blue<br />
<strong>Inion</strong> Ltd • Lääkärinkatu 2<br />
FIN-33520 Tampere, FINLAND<br />
tel +358-3-2306 600 • fax +358-3-2306 601<br />
email: info@inion.com • internet: www.inion.com<br />
<strong>Inion</strong> Inc.<br />
Americas Corporate Office<br />
755 Research Parkway, Suite 150<br />
Oklahoma City, OK 73104<br />
Toll-free telephone (866-<strong>Inion</strong>-US)<br />
Toll-free fax (866-<strong>Inion</strong>-BIO)<br />
tel (405) 236-0017 • fax (405) 236-0634


