Previous SLVD User Manual
Previous SLVD User Manual
Previous SLVD User Manual

Create successful ePaper yourself
Turn your PDF publications into a flip-book with our unique Google optimized e-Paper software.
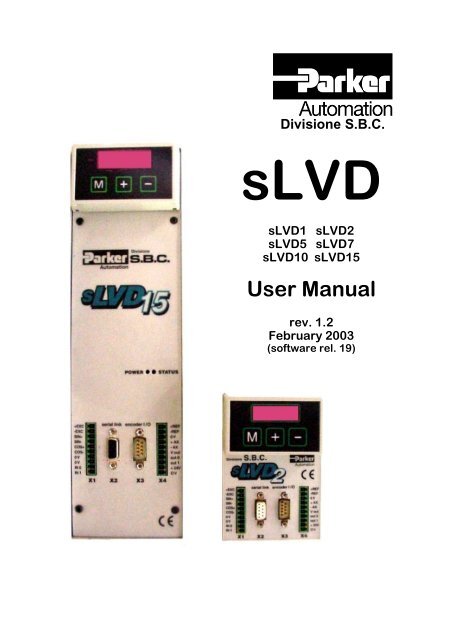
Divisione S.B.C.<br />
sLVD<br />
sLVD1 sLVD2<br />
sLVD5 sLVD7<br />
sLVD10 sLVD15<br />
<strong>User</strong> <strong>Manual</strong><br />
rev. 1.2<br />
February 2003<br />
(software rel. 19)
Parker Hannifin S.p.A Divisione S.B.C.<br />
sLVD <strong>User</strong>’s <strong>Manual</strong><br />
DANGER<br />
HIGH VOLTAGE!<br />
Some internal circuits of the <strong>SLVD</strong> converter are subject to voltages that can create<br />
serious danger for individuals and they can even cause death.<br />
The converter must not be accessed when it is powered-on.<br />
Whenever it is necessary to access it, be sure it has been powered off for fifteen<br />
minutes to allow the condensers to discharge. The user must make sure that the<br />
device has been installed in accordance with the workplace safety regulations<br />
currently in force.<br />
In this regard, note that the converter is to be considered a component, not a<br />
machine.<br />
Any unauthorized repair or tampering with the device invalidates the warranty<br />
immediately. The device is under warranty for one year.<br />
This user manual is for the standard version of the converter.<br />
Parker Hannifin S.p.A. Divisione S.B.C. declines any responsibility for any type of<br />
damage that may be caused by the inappropriate use of the converter.<br />
Only qualified and trained personnel who have a basic knowledge<br />
of electronics may install and carry out maintenance operations<br />
on the converter and the devices connected to it.<br />
Only qualified and trained personnel with a good knowledge of<br />
electronics and converter technology is allowed to<br />
commissioning.<br />
Upon request, Parker Hannifin S.p.A. Divisione S.B.C.offers training courses.<br />
The performance of <strong>SLVD</strong> converter is guaranteed only with<br />
synchronous motors with permanent magnets<br />
MB and SMB Series that have been manufactured by us.<br />
ISBN 0302261527<br />
2
Parker Hannifin S.p.A Divisione S.B.C.<br />
sLVD <strong>User</strong>’s <strong>Manual</strong><br />
TABLE OF CONTENTS<br />
1 INTRODUCTION.....................................................................................................................5<br />
1.1 General information ......................................................................................................5<br />
1.2 Product description........................................................................................................5<br />
1.3 Identification .................................................................................................................6<br />
1.4 Main hardware features.................................................................................................7<br />
1.5 Main software features ..................................................................................................8<br />
1.6 Conformity to EMC standards ......................................................................................8<br />
1.7 Safety.............................................................................................................................8<br />
2 INSTALLATION ......................................................................................................................9<br />
2.1 Safety instructions .........................................................................................................9<br />
2.2 How to suppress interference ......................................................................................10<br />
2.2.1 Grounding................................................................................................................10<br />
2.2.2 Mains and motor side filters....................................................................................12<br />
2.3 Signal connectors layout .............................................................................................13<br />
2.4 Power connectors layout .............................................................................................15<br />
2.5 Power connections.......................................................................................................17<br />
2.6 Line connection diagrams ...........................................................................................18<br />
2.7 Power connection diagrams.........................................................................................21<br />
2.8 Signal connection diagrams.........................................................................................21<br />
2.9 Signal cables connection .............................................................................................22<br />
2.10 Signal cables connection diagram ...............................................................................22<br />
2.11 Frequecy input/output connection ...............................................................................22<br />
2.12 Serial line connection..................................................................................................24<br />
2.13 Cable connections .......................................................................................................25<br />
2.14 Backup.........................................................................................................................27<br />
2.15 Status LED ..................................................................................................................28<br />
2.16 External braking resistance .........................................................................................28<br />
3 PARAMETERS AND PROGRAMMING .............................................................................29<br />
3.1 Using the keyboard (optional).....................................................................................32<br />
3.2 Power-on the <strong>SLVD</strong> for the first time.........................................................................33<br />
3.3 First commissioning of the <strong>SLVD</strong>...............................................................................34<br />
3.4 Main parameters..........................................................................................................36<br />
3.5 Basic commands..........................................................................................................42<br />
3.6 Speed control adjustment ............................................................................................43<br />
3.7 Operating modes .........................................................................................................49<br />
3.8 Torque control (operating mode 1) .............................................................................51<br />
3.9 Digital Lock + Positioner (operating mode 13)...........................................................52<br />
3.10 Electronic cam (operating mode 14) ...........................................................................54<br />
3.11 Position control through the CanBus (operating mode 15).........................................58<br />
3.12 Additional useful functions .........................................................................................60<br />
3.12.1 Value comparators...............................................................................................60<br />
3.12.2 Value capture.......................................................................................................60<br />
3.12.3 Virtual encoder....................................................................................................60<br />
3.12.4 Output cam programmer .....................................................................................60<br />
3.12.5 Homing function .................................................................................................61<br />
3
Parker Hannifin S.p.A Divisione S.B.C.<br />
sLVD <strong>User</strong>’s <strong>Manual</strong><br />
4 PROGRAMMING DIGITAL INPUTS AND OUTPUTS......................................................62<br />
4.1 The pico-PLC ..............................................................................................................62<br />
5 SERIAL INTERFACE ............................................................................................................67<br />
5.1 Communication protocol.............................................................................................67<br />
6 CANBUS.................................................................................................................................72<br />
6.1 Description of the fields in real time mode .................................................................73<br />
6.2 Description of the fields in communication mode ......................................................80<br />
6.3 Description of the fields Extended message set # 2 ..............................................82<br />
7 Appendix A: Mechanical dimensions of the <strong>SLVD</strong>................................................................84<br />
8 Appendix B: Series MB and SMB motor connectors ..........................................................85<br />
9 Appendix C: Hardware features..............................................................................................87<br />
10 Appendix D: Conventions.......................................................................................................88<br />
11 Appendix E: Software timing..................................................................................................89<br />
12 Appendix F: Default program for the pico-PLC .....................................................................90<br />
13 Appendix G: Flash information...............................................................................................91<br />
14 Appendix H: Motor parameters..............................................................................................92<br />
15 Appendix I: Alarms.................................................................................................................93<br />
16 Revision history of the <strong>User</strong> <strong>Manual</strong>.......................................................................................94<br />
17 Parker Hannifin Automation Group in the world....................................................................95<br />
4
Parker Hannifin S.p.A Divisione S.B.C.<br />
sLVD <strong>User</strong>’s <strong>Manual</strong><br />
1 INTRODUCTION<br />
1.1 General information<br />
This manual describes the installation and commissioning of the frequency converter<br />
<strong>SLVD</strong> for brushless motors.<br />
Read carefully all the sections and the history of the revision of the manual on the final<br />
page before using it.<br />
1.2 Product description<br />
The <strong>SLVD</strong> is a digital frequency converter for brushless motors. The operator interface<br />
based on parameters makes it easy to configure the converter. Configurations of different<br />
kinds make suitable it for many applications.<br />
The power of the 16-bit micro-controller is used to control the speed as required for a servo<br />
controller and it also offers a series of additional functions that can reduce the control<br />
electronics in the application with obvious cost savings.<br />
The <strong>SLVD</strong> provides functions as a positioner with a trapezoidal profile, electrical shaft,<br />
electronic cams, spindle orientation, simulator of a step motor and torque control, and it also<br />
contains a PLC. It uses widely diffused industrial programming standards and guarantees a<br />
high degree of freedom in selecting inputs and outputs. The <strong>SLVD</strong> also offers the possibility<br />
to develop additional functions that are not included in the basic functionality of the converter<br />
such as gain correction for loops based on speed or space, monitoring the used torque for tool<br />
life control, etc.<br />
The <strong>SLVD</strong> is equipped with a RS-422/RS-485 serial interface which is used to configure,<br />
monitor, and send commands to up to 32 <strong>SLVD</strong>s at the same time. Standard operator panels<br />
can be connected to support the SBC protocol.<br />
A CanBus interface is also available which can be used in communication mode and also in<br />
real time mode. The CanBus can be used to set up a wide-band digital link, thereby<br />
simplifying the cabling of the system.<br />
5
Parker Hannifin S.p.A Divisione S.B.C.<br />
sLVD <strong>User</strong>’s <strong>Manual</strong><br />
1.3 Identification<br />
The converters of the <strong>SLVD</strong> series are available in six models: <strong>SLVD</strong>1, <strong>SLVD</strong>2, <strong>SLVD</strong>5,<br />
<strong>SLVD</strong>7, <strong>SLVD</strong>10 and <strong>SLVD</strong>15. The number that follows the <strong>SLVD</strong> abbreviation corresponds<br />
to the rated current of the converter in amperes.<br />
A label is attached on the right side of the <strong>SLVD</strong> converter that contains all the essential<br />
informations to correctly identify the unit.<br />
It is important to refer to this label before requesting any kind of technical<br />
information from Parker Hunnifin S.p.A Divisione S.B.C.<br />
An example of this label is given below.<br />
Parker Hannifin S.p.A. Divisione S.B.C.<br />
Via Gounod 1 – 20092 Cinisello B.<br />
(Milano) – Italy<br />
sLVD 5 S/N 00020365<br />
POWER INPUT<br />
POWER OUTPUT<br />
3XA230V 4.6A<br />
50..60 Hz<br />
READINSTALLATION<br />
INSTRUCTION MANUAL<br />
BEFORE INSTALLING<br />
3XAC230 5A<br />
0..600 Hz<br />
USE COPPER WIRE RATED<br />
60/75°C<br />
6
Parker Hannifin S.p.A Divisione S.B.C.<br />
sLVD <strong>User</strong>’s <strong>Manual</strong><br />
1.4 Main hardware features<br />
Item<br />
Unit of<br />
Value<br />
meas<br />
urem<br />
ent<br />
Power Supply V~ 230 ± 10%<br />
Control Voltage V= 24 ± 10%, 1 A<br />
Models<br />
sLVD1 <strong>SLVD</strong>2 <strong>SLVD</strong>5 <strong>SLVD</strong>7 sLVD10 sLVD15<br />
Rated Output Current A 1,25 2,5 5 7 10 15<br />
Peak Output Current (4 s) A 2,5 5 10 14 20 30<br />
Shaft Power kW 0,345 0,7 1,5 2,2 3 4,5<br />
Control Electronics Dissipation W 18<br />
Power Stage Dissipation W 18 28 45 65 87 120<br />
Ambient Temperature<br />
o C 45<br />
Braking Resistor internal/external (PR option, standard on 7,10 e 15)<br />
Internal Braking Resistor<br />
Dissipation<br />
W 60<br />
Feedback resolver (speed 1)<br />
Power Stage Switching Frequency kHz 8<br />
Maximum Output Fundamental Hz 450<br />
Frequency<br />
Protection IP 20<br />
24 V Digital Inputs N o 2+2<br />
24 V / 100Ma / PNP Digital Outputs N o 2<br />
Encoder Simulation RS-422 steps/rev 4…2500<br />
Frequency / sign or Encoder Input kHz 800 / 200<br />
Analogue Reference V ±10 differential<br />
Auxiliary Analogue Input V ±10 differential<br />
Auxiliary Analogue Output V ± 4,5<br />
Serial link<br />
RS-422 / RS-485<br />
Field bus<br />
CanBus ISO/DIS11898<br />
7
Parker Hannifin S.p.A Divisione S.B.C.<br />
sLVD <strong>User</strong>’s <strong>Manual</strong><br />
1.5 Main software features<br />
The following functions have been implemented in the basic software of the <strong>SLVD</strong>:<br />
• Speed controller<br />
• Advanced manager of torque limits<br />
• Management of speed windows<br />
• Carries out positioning with a trapezoidal speed profile<br />
• Provides the functions of an electrical shaft with variable ratio and phase correction<br />
• Provides the functions of an electronic cam<br />
• Simulates a stepper motor<br />
• Controls the motor torque with the addition of speed control<br />
• The internal PLC can be programmed to manage inputs and outputs<br />
1.6 Conformity to EMC standards<br />
Immunity:<br />
EN50082-1* / EN50082-2<br />
IEC1000-4-2 (ex IEC 801-2)<br />
IEC1000-4-3 (ex IEC 801-3)<br />
IEC1000-4-4 (ex IEC 801-4)<br />
Compatibility:<br />
EN50081-1* / EN50081-2<br />
EN55011 group 1, class A<br />
EN55011 group 1, class B*<br />
Basic immunity specifications<br />
level 3 Immunity for electrostatic charge<br />
level 3 Immunity for electromagnetic field<br />
level 4 Immunity for fast transmission burst<br />
Basic specifications for radio interference<br />
Limits of measurement for radio interference<br />
Limits of measurement for radio interference<br />
1.7 Safety<br />
Safety regulation<br />
Low voltage regulation<br />
Applied regulation<br />
EN60065, EN50178<br />
73/23/CEE modified by 93/68/CEE<br />
EN60204-1<br />
• Conformity to the residential or industrial environment depends on the installation.<br />
8
Parker Hannifin S.p.A Divisione S.B.C.<br />
sLVD <strong>User</strong>’s <strong>Manual</strong><br />
2 INSTALLATION<br />
• The <strong>SLVD</strong> converter must be mounted vertically with the power block above using an<br />
omega guide.<br />
• A space of at least 100 mm. Must be left free above and beneath the converter.<br />
2.1 Safety instructions<br />
• Make sure that the converter is sized properly for the motor it will be used with. Compare<br />
the rated voltages and currents.<br />
• Connect the cabinet/converter/motor in accordance with the instructions that are given in<br />
this section, with the regulations for electromagnetic compatibility and with the safety<br />
regulations that are in force.<br />
• The user is responsible for the protection fuses in the AC power supply of the converter.<br />
• The power cables and the control cables must be separated by at least 20 cm. If they must<br />
be crossed, they must be crossed at a right angle. The motor cables and the power cables<br />
can never be parallel.<br />
• All power cables must have a sufficient section (see the table given in paragraph 2.7) and<br />
must conform to the IEC227-2 regulation.<br />
• The cables connected to the converter at the terminal cannot be consolidated with tin-lead<br />
welding (EN60065, Art.15.3.5).<br />
• Make sure that the converter and the motor are correctly grounded.<br />
• Make sure the maximum power at terminals L1, L2, and L3 does not exceed by more than<br />
10% the rated voltage even in the worst case (see EN60204-1, section 4.3.1). Excessive<br />
supply voltage can damage the converter.<br />
• Do not ever remove the electrical connections from a live converter.<br />
• Follow carefully the instructions given in this manual step by step during the installation. If<br />
you have questions or problems, contact our customer assistance service.<br />
• After power supply has been disconnected and the converter has been off for 60 seconds,<br />
dangerous voltage levels may persist. Do not touch any power cable during this time.<br />
• Do not ever open the converter. This is dangerous and invalidates the warranty.<br />
The installation and cabling operations must be done when there is<br />
absolutely no voltage in the entire electric cabinet. Make sure that the<br />
power switch on the converter is cut off from the emergency circuit.<br />
The first time the cabinet is powered up, qualified technical personnel<br />
must be present.<br />
9
Parker Hannifin S.p.A Divisione S.B.C.<br />
sLVD <strong>User</strong>’s <strong>Manual</strong><br />
2.2 How to suppress interference<br />
For the drive to meet the product requirements regarding electromagnetic compatibility, the<br />
installation must be carried out according to the following instructions.<br />
Because of strong PWM voltage fronts, undesirable currents of significant force can<br />
sometimes circulate through capacitive couplings and grounding systems (conducted<br />
interference). Besides, also high frequency interferes in the form of radiation, especially<br />
through the motor cable, in free space are generated (radiated interference).<br />
The reduction/suppression of both conducted and radiated interference can be obtained<br />
through grounding, shielding and filtering. In particular filters reduce the interference<br />
conducted in the cables and the return of interference conducted at the source (the frequency<br />
converter) by using paths with the lowest possible impedance. In this way other systems<br />
connected to the same electrical line can be protected effectively and the frequency converter<br />
will also be protected from the interference of other systems.<br />
Basically, the criteria are essentially based on grounding, filtering and shielding.<br />
2.2.1 Grounding<br />
In the electric panels where the drives are usually installed there are two ground systems:<br />
- EMC ground, or HF reference (high frequency), represented by the wall made of nonpainted<br />
metal, onto which drives and filters are fixed.<br />
- The safety ground, or PE (protective earth), according to the EN60204-1 standard<br />
Fix drive and mains filters, the 24Vdc power supply etc. on the metal wall, making sure<br />
that there is a proper electric contact (HF connection).<br />
Carry the safety ground using cables having a minimum section of 10mm²<br />
Cable connections and shielding<br />
With the exception of mains cables to the filter, all power and control cables must be shielded<br />
and, wherever possible, kept segregated (minimum distance 20 cm). If control and power cables<br />
must cross, the intersection must be at a right angle.<br />
The shielded cables must be unbroken and grounded to a copper bar using the cable clamps<br />
connections as shown in the drawing (at 360º) in order to obtain a good conductivity.<br />
10
Parker Hannifin S.p.A Divisione S.B.C.<br />
sLVD <strong>User</strong>’s <strong>Manual</strong><br />
360° shield connection<br />
In general the shield should be connected at each extremity. In certain circumstances,<br />
however, control cable shields may be connected only at one end to eliminate mains hum that<br />
could interfere with the control signal. Decide case by case as numerous factors must be<br />
considered. Adopt the following general approach: if the screen is solely for shielding, connect<br />
at both ends. If current flowing in the shield interferes with the shielded signals, connect at one<br />
end only.<br />
The incoming cable must be connected to an earth terminal by means of a screw to ensure<br />
proper contact between screen and earth.<br />
As far as possible keep the power side (drive) and control side (PLC or NC) physically<br />
separated by separating the metal mounting plates. Inside the electrical cabinet, the two plates<br />
must be connected through a copper strap.<br />
General suggestions on cable connections<br />
Avoid routing noise emitting cables in parallel with "clean" cables<br />
Avoid parallel cables, especially in the vicinity of the filter (ensure physical separation)<br />
Avoid cable loops (keep cables as short as possible and close to the common potential).<br />
In particular, keep the main cables separate from motor cables.<br />
If the motor is of the embedded brake type, keep the 24Vdc brake cables separate from the<br />
other cables (resolver and motor).<br />
11
Parker Hannifin S.p.A Divisione S.B.C.<br />
sLVD <strong>User</strong>’s <strong>Manual</strong><br />
PE connection<br />
mounting<br />
plate<br />
Filter<br />
mains<br />
cable<br />
control<br />
cable<br />
30 cm<br />
max<br />
* PE bar<br />
motor<br />
cable<br />
(power)<br />
motor<br />
cable<br />
(signal)<br />
Drive<br />
POWER<br />
** HF bar<br />
Connection<br />
copper strap<br />
CONTROL<br />
* The PE bar (for power grounding) must be mounted directly in contact; insulated columns are<br />
not to be used.<br />
** The signal cable shields can be connected to a bar (HF) different from the PE bar or<br />
connected directly the metallic cable clamps to electrical cabinet back-plate.<br />
2.2.2 Mains and motor side filters<br />
It is usually necessary to use external filters in addition to internal filters the drive is provided<br />
with, on the mains input and sometimes on the motor output.<br />
The mains filter must be mounted as close as possible to the drive and on the same drive panel,<br />
and must have a large area of contact with the power panel or the mounting plate.<br />
If distance exceeds 30cm, the effect decreases and a screened cable must be used between<br />
filter and converter.<br />
The filter earth terminal must be connected to the earth bar along the shortest possible route.<br />
Ferrite toroids are generally used for the motor output, with multiple turns obtained by<br />
winding the 3 motor cables contemporarily.<br />
12
Parker Hannifin S.p.A Divisione S.B.C.<br />
sLVD <strong>User</strong>’s <strong>Manual</strong><br />
2.3 Signal connectors layout<br />
sLVD1 sLVD2 sLVD5 sLVD7<br />
sLVD10 sLVD15<br />
13
Parker Hannifin S.p.A Divisione S.B.C.<br />
sLVD <strong>User</strong>’s <strong>Manual</strong><br />
10 pole terminal (left)<br />
X1<br />
1 + ECC 1 TX<br />
2 - ECC 2 RX<br />
3 SIN + 3 /TX<br />
4 SIN - 4 /RX<br />
5 COS + 5 CANH<br />
6 COS - 6 +BR180<br />
7 0 V 7 - BR180<br />
8 0 V 8 CANL<br />
9 IN 0 9 0V<br />
10 IN 1<br />
DB9 female poles<br />
X2 links<br />
DB9 male poles<br />
X3 encoder in/out<br />
10 pole terminal (right)<br />
X4<br />
1 PHA 1 ANALOGUE REFERENCE +<br />
2 /PHA 2 ANALOGUE REFERENCE -<br />
3 PHB 3 0 V<br />
4 /PHB 4 AUXILIARY ANALOGUE<br />
INPUT +<br />
5 PHC 5 AUXILIARY ANALOGUE<br />
INPUT -<br />
6 /PHC 6 V OUT<br />
7 0V 7 OUT 0 / IN 2<br />
8 8 OUT 1 / IN 3<br />
9 9 + 24 V<br />
10 0 V<br />
DB9 female poles<br />
X5 keyboard<br />
1<br />
2 Connector for<br />
3<br />
4 the programming keyboard<br />
5<br />
6<br />
7<br />
8<br />
9<br />
14
Parker Hannifin S.p.A Divisione S.B.C.<br />
sLVD <strong>User</strong>’s <strong>Manual</strong><br />
2.4 Power connectors layout<br />
sLVD1 sLVD2 sLVD5 sLVD7<br />
sLVD10 sLVD15<br />
X6<br />
U V W L1L2 L3<br />
15
Parker Hannifin S.p.A Divisione S.B.C.<br />
sLVD <strong>User</strong>’s <strong>Manual</strong><br />
7 pole terminal (top)<br />
X6 “power”<br />
(sLVD1, sLVD2, sLVD5, sLVD7)<br />
7 pole terminal (top)<br />
X7 “power”<br />
(sLVD10, sLVD15)<br />
1 MOTOR PHASE U 1 LIVE 1<br />
2 MOTOR PHASE V 2 LIVE 2<br />
3 MOTOR PHASE W 3 LIVE 3<br />
4 LIVE 1 4 PE<br />
5 LIVE 2 5 MOTOR PHASE U<br />
6 LIVE 3 6 MOTOR PHASE V<br />
7 PE 7 MOTOR PHASE W<br />
8 +BUS<br />
9 INT-RES<br />
10 COM-BRK<br />
16
Parker Hannifin S.p.A Divisione S.B.C.<br />
sLVD <strong>User</strong>’s <strong>Manual</strong><br />
2.5 Power connections<br />
Motor cable<br />
A choice shall be made between a cable for flexible or static installation.<br />
The cable must be shielded and sized properly in terms of insulation and sections. It should<br />
be made of reticular polypropylene. Once the length is decided upon (maximum length is 35<br />
m), the conductor-conductor capacity cannot exceed 8 Nf. The minimum cross section of the<br />
conductors must be 1.5 mm 2 .<br />
Power supply cable<br />
The cables cannot be shielded. The minimum section of the conductors must be 1.5 mm 2 .<br />
The fuses at the input must have the following values:<br />
MODEL Slow-blow fuses<br />
(A)<br />
sLVD1sLVD2 6<br />
sLVD5 10<br />
sLVD7 14<br />
sLVD10 16<br />
sLVD15 20<br />
A thermo-magnetic switch properly chosen depending on the power cables used can be<br />
used instead of fuses.<br />
Resolver cable<br />
The cable must consist of three individually shielded and insulated twisted pairs protected<br />
by a shield. The conductor-conductor capacity for the length used cannot exceed 10 Nf and the<br />
section cannot be less than 0.22 mm 2 . The maximum length is 35 m.<br />
The 24V Power supply<br />
It must deliver at least 1A for each drive connected with 1Vpp max ripple voltage.<br />
It must be reserved to the drive supply only. In fact, the use of just one 24V power supplier for<br />
e.g. brakes, relays etc. may generate electrical noises and or malfunctions.<br />
Connect of an EMI filter, if any<br />
If the unit is connected directly to the 230 V mains, the length of the cable between the<br />
<strong>SLVD</strong> and the filter cannot exceed 50 cm. In order to obtain the maximum effectiveness. If an<br />
auto-transformer is used, the filter can be installed either upstream or downstream from the<br />
auto-transformer. In this case the cable used for the connection between the transformer and<br />
the <strong>SLVD</strong> must be shielded.<br />
Ground connections<br />
It is necessary to minimize the length of the individual cables to be grounded. For this<br />
reason we recommend that a grounding bar be placed as close as possible to the frequency<br />
converters.<br />
17
Parker Hannifin S.p.A Divisione S.B.C.<br />
sLVD <strong>User</strong>’s <strong>Manual</strong><br />
The grounding bar must be made of low inductance copper<br />
and must be mounted on electrical cabinet back-plate (pls.<br />
ensure good electrical contact by removing paint, if any).<br />
The table shows the minimum dimensions vs. length.<br />
Length<br />
(m)<br />
Width<br />
(mm)<br />
0.5 20 6<br />
1 40 6<br />
1.5 50 6<br />
Thickness<br />
(mm)<br />
2.6 Line connection diagrams<br />
The <strong>SLVD</strong> converter can be connected to the power supply in various ways.<br />
If a transformer with an electrostatic shield between the primary and the secondary is used,<br />
EMC filters will not have to be installed. If an auto-transformer, a transformer without<br />
electrostatic shield or a direct connection to the power network is used, EMC filters must be<br />
used.<br />
Use of a transformer connected in a triangle configuration with a primary and<br />
secondary electrostatic shield<br />
MAINS L1<br />
L2<br />
L3<br />
PE<br />
Protective earth bar PE<br />
(power) on the galvanized<br />
back-plate of the electrical cabinet<br />
X6<br />
7<br />
6<br />
5<br />
4<br />
3<br />
2<br />
1<br />
X7<br />
4<br />
3<br />
2<br />
1<br />
7<br />
6<br />
5<br />
Use of a transformer connected in a star configuration with a primary and<br />
secondary electrostatic shield<br />
MAINS<br />
L1<br />
L2<br />
L3<br />
PE<br />
Protective earth bar PE<br />
(power) on the galvanized<br />
back-plate of the electrical cabinet<br />
X6<br />
7<br />
6<br />
5<br />
4<br />
3<br />
2<br />
1<br />
X7<br />
4<br />
3<br />
2<br />
1<br />
7<br />
6<br />
5<br />
18
Parker Hannifin S.p.A Divisione S.B.C.<br />
sLVD <strong>User</strong>’s <strong>Manual</strong><br />
Use of the auto-transformer<br />
X6<br />
X7<br />
MAINS L1<br />
L2<br />
L3<br />
PE<br />
emc<br />
filter<br />
7<br />
6<br />
5<br />
4<br />
4<br />
3<br />
2<br />
1<br />
3<br />
7<br />
2<br />
6<br />
Protective earth bar PE<br />
(power) on the galvanized<br />
back-plate of the electrical cabinet<br />
1<br />
5<br />
Note: The EMC filter can be connected upstream or downstream from the autotransformer.<br />
If it is connected upstream, it may be necessary to use a shielded cable<br />
between the auto-transformer and the <strong>SLVD</strong>. If it is connected downstream, the cable<br />
between the filter and the <strong>SLVD</strong> must be as short as possible and it cannot exceed 50 cm.<br />
Use the following formula to dimension the transformer:<br />
( Paz 17 . 80)<br />
Pt = ⋅ + ⋅<br />
173 .<br />
n + 2<br />
where Pt is the power in VA of the transformer, Paz is the sum of the rated powers of the<br />
motors in W and n is the number of powered drive units.<br />
19
Parker Hannifin S.p.A Divisione S.B.C.<br />
sLVD <strong>User</strong>’s <strong>Manual</strong><br />
Direct connection to 230V ~ power<br />
X6<br />
X7<br />
7<br />
4<br />
MAINS L1<br />
L2<br />
L3<br />
PE<br />
emc<br />
filter<br />
6<br />
5<br />
4<br />
3<br />
3<br />
2<br />
1<br />
7<br />
2<br />
6<br />
1<br />
5<br />
Protective earth bar PE<br />
(power) on the galvanized<br />
back-plate of the electrical cabinet<br />
Note: The cable connecting the filter and the <strong>SLVD</strong> must be as short as possible and in<br />
no case can it exceed 50 cm.<br />
If a mono-phase connection is used, a derating of the power supplied by the <strong>SLVD</strong><br />
converter is obtained. The maximum power supplied by the <strong>SLVD</strong> with mono-phase power is<br />
given by the formula:<br />
Pmax = 27 10-3 Vsupply2 [watt].<br />
If the unit is connected directly to the mains, currents on the order of 100A may be required<br />
when it is powered on for less than 3 ms. Therefore, protection fuses should be used. If many<br />
units are installed in parallel, a sequential power supply procedure is recommended.<br />
20
Parker Hannifin S.p.A Divisione S.B.C.<br />
sLVD <strong>User</strong>’s <strong>Manual</strong><br />
2.7 Power connection diagrams<br />
C<br />
B<br />
M<br />
MOTOR<br />
A<br />
D<br />
E<br />
Protective earth bar PE<br />
(power) on the galvanized<br />
back-plate of the electrical cabinet<br />
X6<br />
7<br />
6<br />
5<br />
4<br />
3<br />
2<br />
1<br />
X7<br />
4<br />
3<br />
2<br />
1<br />
7<br />
6<br />
5<br />
2.8 Signal connection diagrams<br />
MOTOR<br />
g<br />
c<br />
e d<br />
f<br />
b<br />
a<br />
resolver<br />
connector<br />
X1<br />
7<br />
6<br />
5<br />
4<br />
3<br />
2<br />
1<br />
Power supply<br />
24 V = 1A<br />
High frequency bar HF<br />
(signal) or on the galvanized<br />
back-plate of the electrical cabinet<br />
3.15A<br />
*<br />
X4<br />
9<br />
10<br />
*<br />
Use only if the power supply<br />
Is not protected<br />
21
Parker Hannifin S.p.A Divisione S.B.C.<br />
sLVD <strong>User</strong>’s <strong>Manual</strong><br />
2.9 Signal cables connection<br />
The cable used for the analogue reference must be a shielded twisted pair. The cable used<br />
to connect the signals of the simulated encoder must consist of three twisted pairs with a<br />
general shield. Shielded cables are also recommended for digital inputs and outputs.<br />
All cables must have a minimum section of 0.22 mm 2<br />
2.10 Signal cables connection diagram<br />
AXIS<br />
CONTROL<br />
Reference<br />
REF+<br />
REF -<br />
1<br />
2<br />
3<br />
sLVD<br />
X4 - Reference in<br />
Encoder in<br />
A<br />
/A<br />
B<br />
/B<br />
C<br />
/ C<br />
0V<br />
1<br />
2<br />
3<br />
4<br />
5<br />
6<br />
7<br />
X3 - Encoder out<br />
24Vcc<br />
High frequency bar HF<br />
(signal) or on the galvanized<br />
back-plate of the electrical cabinet<br />
Output<br />
( enable )<br />
9<br />
X1 - Inputs<br />
Input<br />
(drive ok)<br />
)<br />
TO THE EARTH BAR<br />
HF<br />
7<br />
X4 - Outputs<br />
2.11 Frequecy input/output connection<br />
The frequency input/output connector X3 (RS-422) can be configured by the software in<br />
different functional modes by using the binary parameters b42.0, b42.1 and b42.5 as given<br />
in the table below.<br />
22
Parker Hannifin S.p.A Divisione S.B.C.<br />
sLVD <strong>User</strong>’s <strong>Manual</strong><br />
B 42.0 b 42.1 b 42.5<br />
Description of the modes<br />
0 0 1 Incremental encoder simulation. X3 can be programmed in<br />
output. The number of pulses/rev. must be programmed in Pr<br />
44.<br />
0 1 1 X3 is programmed as quadrature input (phases A and B). This<br />
configuration must be used with operating modes 13 and 14.<br />
0 1 0 X3 is programmed as frequency/sign input. The mode must be<br />
set when you want to simulate a stepper motor or the pulses<br />
train function.<br />
1 0 1 X3 is programmed as output and the virtual axis function is<br />
turned on. (see the section Additional useful functions)<br />
N.B. Configurations not given in this table must be avoided.<br />
After the programming, the configuration must be saved and the unit must be powered off<br />
and on again.<br />
ATTENTION must be paid when X3 programmed as an input (b42.1=1) is used. Since there<br />
is a differential RS-422 connection, it is suitable to connect a closed line resistor of 180 ohm<br />
between A/A and B/B. If several input ports are connected in parallel, this operation must be<br />
carried out only on the last unit in the chain.<br />
Connecting the <strong>SLVD</strong> to the digital-lock<br />
180<br />
ohm<br />
X3 (sLVD)<br />
master<br />
X3 (sLVD)<br />
X3 (sLVD)<br />
1<br />
2<br />
3<br />
4<br />
7<br />
A<br />
A<br />
B<br />
B<br />
GND<br />
1<br />
2<br />
3<br />
4<br />
7<br />
see text for burden<br />
resistors<br />
In the example given above, the connection of two <strong>SLVD</strong>s to the Digital-Lock with a<br />
master is shown, but the diagram could be extended to several converters respecting the series<br />
connection. The line charge resistors must be connected to the last converter. The master can<br />
be an encoder powered externally or an encoder simulator of another converter.<br />
The signal of the master encoder must in any case be of differential type 5V RS-422.<br />
Therefore, it is possible to connect a maximum of ten slave <strong>SLVD</strong>s.<br />
If the master is a <strong>SLVD</strong> type converter, you can connect up to 32 converters to the<br />
electrical shaft by using the same signal of the simulated encoder (standard RS-422).<br />
To program the <strong>SLVD</strong>, see the section, Electrical shaft + positioner, in this manual.<br />
23
Parker Hannifin S.p.A Divisione S.B.C.<br />
sLVD <strong>User</strong>’s <strong>Manual</strong><br />
2.12 Serial line connection<br />
The serial line of the <strong>SLVD</strong> can be configured as either RS-422 or as RS-485 depending on<br />
how the connection is made. In both cases you must use termination resistors (150 Ω). If there<br />
are several converters connected to the same line, the last node must be terminated as shown<br />
in the diagram below. The two configurations are shown in the diagram below.<br />
MASTER<br />
RS - 485<br />
GND<br />
TX<br />
RX<br />
/TX<br />
/RX<br />
9<br />
+BR<br />
-BR<br />
NODE 1 NODE " n" LAST NODE<br />
RS - 422<br />
MASTER<br />
GND<br />
TX<br />
RX<br />
/TX<br />
/RX<br />
9<br />
+BR<br />
- BR<br />
NODE 1 NODE "n" LAST NODE<br />
24
Parker Hannifin S.p.A Divisione S.B.C.<br />
sLVD <strong>User</strong>’s <strong>Manual</strong><br />
2.13 Cable connections<br />
The following pictures show how to realize the cable connections, in particular how to<br />
connect the cable shields to the ground bars.<br />
Fig. 1 – connections overview<br />
25
Parker Hannifin S.p.A Divisione S.B.C.<br />
sLVD <strong>User</strong>’s <strong>Manual</strong><br />
The electrical cabinet back-plate has to be electrically conductive, for example galvanized.<br />
Remove optional painting from the back-plate in order to obtain the electrical contact.<br />
The ground bar has to be on electrical cabinet back-plate or a complete electrical<br />
connection has to be ensured; the ground bar cannot be isolated.<br />
Divide the routing of the power cables from that of the signal cable. Also the 24DC supply<br />
voltage cable has to be shielded.<br />
Fig. 2 – top view, power connections<br />
26
Parker Hannifin S.p.A Divisione S.B.C.<br />
sLVD <strong>User</strong>’s <strong>Manual</strong><br />
Fig. 3 – bottom view, signal connections<br />
2.14 Backup<br />
If it is necessary to keep the control electronics of the converter powered up even when<br />
there is no current, for example, to keep the encoder simulation operating, it is sufficient to<br />
keep power on terminals 9 and 10 of the X4.<br />
If the b99.8 bit is set to 1, when power supply is restored, the undervoltage alarm will be<br />
automatically reset.<br />
27
Parker Hannifin S.p.A Divisione S.B.C.<br />
sLVD <strong>User</strong>’s <strong>Manual</strong><br />
2.15 Status LED<br />
When the programming keyboard is not inserted, two LEDs are lit. The power LED, if on,<br />
indicates whether there is power for the electronic part. The status LED gives a series of<br />
information about the status of the converter:<br />
- If it is off, the converter is shut off without active alarms.<br />
- If it is on, the converter is on.<br />
- If it blinks quickly (10 Hz), the converter is powered on. The alarms are not active<br />
but the I 2 t control is active.<br />
- If it blinks with a pause after two series of blinks, the converter is shut off and an<br />
alarm is active. The active alarm can be identified by counting the number of blinks<br />
between the two pauses.<br />
2.16 External braking resistance<br />
The drive has an internal braking resistance. When a higher braking power is needed, it is<br />
possible to connect an external braking resistance to the drive.<br />
The possibility to connect an external braking resistance to the drive is optional for<br />
sLVD1,2 e 5 (ordering code PR placed at the end of the drive ordering code), while it is<br />
standard for sLVD7,10 e 15.<br />
The external braking resistance value must be 40 Ohm and it is necessary to place a<br />
magneto-thermal switch (or a fuse) between the external braking resistance and the drive.<br />
The minimum cross section of the conductors depends on the drive size and it is equal to<br />
the minimum cross section of the conductors between motor and drive (see paragraph “Power<br />
connections”). It is necessary to minimize the connection cable length. In any case the cable<br />
length must be less than 3 m.<br />
The connection of the external braking resistance is shown in the following pictures. The<br />
bride between IR and CB terminals (see pictures) enables the internal braking resistance;<br />
when the external braking resistance is connected, the IR-CB bridge must be removed.<br />
sLVD10 sLVD15<br />
sLVD1 sLVD2 sLVD5 sLVD7<br />
mains<br />
motor<br />
External braking<br />
resistance<br />
(optional)<br />
28
Parker Hannifin S.p.A Divisione S.B.C.<br />
sLVD <strong>User</strong>’s <strong>Manual</strong><br />
3 PARAMETERS AND PROGRAMMING<br />
The torque, speed, acceleration and position control functions are carried out by special<br />
digital electronics.<br />
In this section we explain how parameters are set and the meaning of each parameter. We<br />
also provide the functional block diagram and the description of advanced functions. The<br />
system is easy to use and flexible.<br />
In the diagram below the general block diagram of the part of the converter that is<br />
controlled by parameters is presented.<br />
analogue<br />
digital<br />
internal<br />
REFERENCE<br />
MANAGEMENT<br />
b40.2<br />
LIMIT SWITCH<br />
&<br />
STOP<br />
SPEED<br />
REGULATOR<br />
TORQUE<br />
DEMAND<br />
OPERATING<br />
MODE<br />
TORQUE<br />
LIMIT<br />
MANAGEMENT<br />
SPEED<br />
WINDOW<br />
Pr31<br />
ALARMS<br />
MANAGEMENT<br />
TORQUE<br />
CONTROL<br />
DIGITAL<br />
LOCK<br />
and<br />
POSITIONER<br />
ELECTR.<br />
CAM<br />
REAL TIME<br />
CAN<br />
29
Parker Hannifin S.p.A Divisione S.B.C.<br />
sLVD <strong>User</strong>’s <strong>Manual</strong><br />
The main block diagram and the diagrams for special functions (operating modes) are<br />
described later in more detail.<br />
How to associate inputs/outputs to the parameters of the converter is described in the chapter,<br />
The pico-PLC.<br />
The parameters are divided on the basis of their function in the following way.<br />
From Pr0 to Pr49<br />
From Pr50 to Pr70<br />
From Pr71 to Pr99<br />
From Pr100 to Pr150<br />
From Pr151 to Pr163<br />
From In0 to In127<br />
Main parameters<br />
Position loop<br />
pico-PLC parameters<br />
Operating mode parameters<br />
pico-PLC parameters<br />
pico-PLC instructions<br />
The units of measurement and the main resolutions of the parameters are:<br />
Parameter<br />
Unit<br />
Resolution<br />
type<br />
Speed Revolutions/minute 1<br />
Acceleration Seconds/1000 revolutions/minute. 0.001<br />
Position 4096 steps/revolution 1/4096 of a<br />
revolution<br />
Current % of the peak current of the converter 0.1<br />
Below we describe how to interpret the symbols used in the block diagrams. The main<br />
block diagram describes graphically how the converter works. Each rectangular block<br />
represents one or more read-write parameters. The rhomboid blocks represent read-only<br />
parameters. You can find other functional blocks in the diagram such as: GREATER THAN,<br />
EQUAL TO, LESS THAN, logical AND/OR. For all these functional blocks, standard<br />
symbols are used. Binary parameters are represented as switches and the position in the<br />
diagram corresponds to the default value.<br />
30
Parker Hannifin S.p.A Divisione S.B.C.<br />
sLVD <strong>User</strong>’s <strong>Manual</strong><br />
A<br />
A<br />
Pr X<br />
Pr X<br />
Pr X<br />
bx.y<br />
A<br />
B<br />
• Read/write of the PrX parameter<br />
A = value of the PrX parameter<br />
• Read/write of the PrX parameter<br />
B = value that depends on the values of A and PrX<br />
• Read-only parameter<br />
PrX indicates the value of A which can also be binary<br />
• Read/write of binary parameter<br />
The position of the switch indicates bx.y=0<br />
bx.y<br />
• The value of the binary parameter bx.y positions the switch.<br />
A<br />
B<br />
• If A is less than B, C =1 (true). Otherwise, C = 0 (false).<br />
C<br />
A<br />
B<br />
C<br />
D<br />
E<br />
F<br />
G<br />
• The value of G is the lowest value of A B C D E F.<br />
A<br />
B<br />
C<br />
• Only if A = 1, B = 1 and C = 1. Otherwise, C = 0.<br />
A<br />
B<br />
C<br />
• If A or B is equal to 1, C = 1. Otherwise, C = 0.<br />
A<br />
+<br />
-<br />
C<br />
• C = A – B.<br />
B<br />
• values coming from the hardware<br />
• values sent to the hardware<br />
A<br />
A<br />
B<br />
• the value of A is converted to B. For example, if in the triangle<br />
symbol you see A/D, this means that the analogue value of A was<br />
converted into the digital value B.<br />
• The maximum value of A will be PrX.<br />
Pr X<br />
31
Parker Hannifin S.p.A Divisione S.B.C.<br />
sLVD <strong>User</strong>’s <strong>Manual</strong><br />
3.1 Using the keyboard (optional)<br />
The keyboard-display module is easy to use. It is used to program the functional data,<br />
control the status of the converter and send commands. It consists of only three keys located<br />
directly beneath the display. The keys are marked: [M], [+], [-]. The [M] key is use to modify<br />
the display and consequently the function of the [+] e [-] keys.<br />
There are two types of display: parameter mode and parameter value mode.<br />
When the converter is powered on, if there is no alarm, the user sees ‘IDLE’ or ‘RUN’ on<br />
the screen, depending on whether the converter is on or off. This is also the position of the Pr0<br />
parameter.<br />
To view all the parameters, press the [+] o [-] keys. If you want to verify the value, press<br />
the [M] key. When the value is displayed, it can be modified by using the [+] e [-] keys. To<br />
return to parameter mode, press the [M] key again.<br />
The type of display depends on the type of parameter displayed.<br />
If you need to increment or decrement quickly the value of a parameter, you can do this by<br />
pressing the [M] key while the increment [+] key or decrement [-] key is held down.<br />
IDLE<br />
+ -<br />
M<br />
M<br />
XXXXX<br />
sLVD keypad<br />
Pr. 01<br />
+ -<br />
M<br />
M<br />
XXXXX<br />
+<br />
-<br />
+ 1 M + 9<br />
- 1 M - 9<br />
+ -<br />
Pr. 02<br />
Pb. 40<br />
Pb. 99<br />
+ -<br />
M<br />
M<br />
M<br />
M<br />
M<br />
M<br />
XXXXX<br />
+<br />
b40.XX<br />
-<br />
+<br />
b99.XX<br />
-<br />
+<br />
+<br />
-<br />
M<br />
M<br />
+ 1 M + 9<br />
- 1 M - 9<br />
XX<br />
XX<br />
+<br />
+<br />
-<br />
1<br />
0<br />
+ done<br />
+<br />
+<br />
In. 00<br />
M PLC inst. M<br />
1st oper.<br />
M<br />
2nd oper.<br />
M<br />
3rd oper.<br />
M<br />
-<br />
-<br />
-<br />
-<br />
In. XX<br />
32
Parker Hannifin S.p.A Divisione S.B.C.<br />
sLVD <strong>User</strong>’s <strong>Manual</strong><br />
The following messages may be displayed on the screen, in addition to the value of the<br />
parameters and the instructions of the pico-PLC:<br />
r. xx When the converter is powered on, this message indicates which version of the<br />
software is installed.<br />
IdLE When the converter is powered on and corresponding to Pr0, this message indicates<br />
that there is no alarm and that the converter is off.<br />
Run When the converter is powered on and corresponding to Pr0, this message indicates<br />
that there is no alarm and that the converter is on. The motor shaft may be rotating.<br />
Er. Xx Corresponding to Pr0, this message indicates that the converter has registered an<br />
alarm (xx indicates the alarm code) and has shut off. When it registers an alarm, the<br />
converter is brought to Pr0, displaying the alarm code.<br />
Pr. Xx Indicates the parameter xx whose value can be displayed by pressing the [M] key.<br />
Pb. Xx Indicates the parameter at bit xx.<br />
Bxx.yy Indicates the bit yy of parameter xx. By pressing the [M] key, the status of the bit is<br />
displayed.<br />
Hxx.yy Indicates bit yy of parameter 1xx. By pressing the [M] key, the status of the bit is<br />
displayed.<br />
In. xx Indicates instruction xx of the PLC program.<br />
donE Is displayed for about 1 second whenever a command is sent.<br />
rESet Is displayed for about 1 second whenever an alarm reset command is sent (b99.10).<br />
dEF Indicates that the drive is set to default status and must be programmed with the<br />
basic parameters of the motor.<br />
triP.x Indicates that the converter has malfunctioned.<br />
3.2 Power-on the <strong>SLVD</strong> for the first time<br />
When the <strong>SLVD</strong> is powered-on for the first time, or after the ‘load default parameters’<br />
command is sent, the message Def is displayed to indicate the status of the converter.<br />
At this point the <strong>SLVD</strong> is waiting for the basic parameters to be set for the motor that is<br />
connected. The basic parameters are:<br />
Pr29 Number of motor poles N<br />
Pr32 Rated speed of the motor rpm<br />
Pr33 Rated current of the motor A<br />
Pr34 Number of resolver poles N<br />
Pr46 Phase-phase motor resistance ohm<br />
Pr47 Phase-phase motor inductance mH<br />
The correct values to be set for the most commonly used motors are given in Appendix H.<br />
If the motor to be used is not included in the table, you must call S.B.C. or your local<br />
distributor.<br />
After setting the parameters that fit the motor, the operator must give the save data<br />
command, b99.15. The drive will calculate the correct values of Pr2, Pr3, Pr16, Pr17, Pr18,<br />
and Pr19 and save the parameters. At this point the basic parameters cannot be modified. If<br />
you want to modify one of them, you must enter b94.3=1. The Def alarm will be displayed<br />
again and after updating the value of the parameter, it must be saved by entering b99.15 again.<br />
33
Parker Hannifin S.p.A Divisione S.B.C.<br />
sLVD <strong>User</strong>’s <strong>Manual</strong><br />
3.3 First commissioning of the <strong>SLVD</strong><br />
The steps to be followed carefully the first time the converter is used are given below.<br />
1) Connect the motor to the converter by following carefully the diagrams in the manual.<br />
2) Make sure that the converter is shut off (pin 9 of the X1 connector open).<br />
3) Power the converter on.<br />
4) The “IdLE” message will appear on the screen.<br />
5) Set the analogue reference to 0 V (pin 1,2 of the X4 connector) and power the<br />
converter on (24 V at pin 9 of the X1 connector).<br />
6) At this point the motor shaft should be stopped. Any change in the voltage of the<br />
analogue reference should produce a proportional change in the speed of the motor. If<br />
this does not happen, control the cabling.<br />
The converter comes with default values pre-defined that satisfy most applications. In the<br />
default status the pico-PLC in the converter runs the program (described in Appendix F) and<br />
the following functions will be set at the input/output connectors:<br />
X1 / inputs<br />
9 Converter on ( 24V – on )<br />
10 Stop / Start ( 24V – Stop )<br />
X4 / outputs<br />
7 Drive OK ( 24V – ok )<br />
8 Motor Overloaded (I 2 t)<br />
34
Parker Hannifin S.p.A Divisione S.B.C.<br />
sLVD <strong>User</strong>’s <strong>Manual</strong><br />
Reduced and extended menu<br />
When the <strong>SLVD</strong> is in the default status, only a limited number of parameters is displayed.<br />
These parameters are the only parameters necessary for those applications where the <strong>SLVD</strong> is<br />
used as a simple converter and where the advanced functions of the converter, for example, if<br />
the <strong>SLVD</strong> is used with a numeric control or with an intelligent axis board, are not used. To<br />
switch between the limited menu and the extended menu, enter b99.6: limited menu if equal<br />
to 0, extended menu is 1.<br />
The parameters in the limited menu are:<br />
Pr0 Actual speed of the motor shaft in rpm (revolutions per minute).<br />
Pr1 Offset for the main analogue reference.<br />
Pr2 Full scale of the analogue reference: this is the rpm value that corresponds to a<br />
reference voltage of 10 V.<br />
Pr8 Value of the acceleration/deceleration ramps in seconds per 1000 rpm, with a<br />
resolution of 1 millisecond. If the acceleration/deceleration ramps must be set<br />
differently, you must go to the extended menu in order to access the Pr9, Pr10 e Pr11<br />
parameters.<br />
Pr16 Integral gain of the speed regulator.<br />
Pr17 Speed regulator damping.<br />
Pr19 Peak current supplied by the converter, expressed as a percentage of the peak drive<br />
rating.<br />
Pr29 Number of poles of the motor.<br />
Pr32 Rated speed (rpm).<br />
Pr33 Rated current supplied by the converter (which can be maintained indefinitely)<br />
expressed as rated current of the motor (A).<br />
Pr35 Instantaneous current required by the motor expressed as a percentage of the peak<br />
drive rating.<br />
Pb99 Bit parameter for the basic commands.<br />
The extended menu offers access to all the parameters and instructions of the pico-PLC, in<br />
addition to those specified above.<br />
Setting the default parameters<br />
If you want to set the default values of the converter as it was supplied by the manufacturer,<br />
do the following:<br />
− power off the converter using the hardware (pin 9 of X1 open)<br />
− power the converter on<br />
− the IdLE message appears on the screen<br />
− set b99.7 and b99.13 to 0<br />
− issue the command b99.12<br />
− save the set up using commands b99.14 and b99.15.<br />
35
Parker Hannifin S.p.A Divisione S.B.C.<br />
sLVD <strong>User</strong>’s <strong>Manual</strong><br />
3.4 Main parameters<br />
The extended menu is used to set all the following parameters. This menu is invoked by<br />
setting b99.6 to 1 and b99.7 must be set to 0.<br />
DECIMAL PARAMETERS<br />
Pr0<br />
Pr1<br />
Pr2<br />
Pr3<br />
Pr4<br />
Pr5<br />
Pr6<br />
Pr7<br />
Pr8<br />
Pr9<br />
Pr10<br />
Pr11<br />
Motor speed: a read-only parameter expressed in rpm; the Pr0 message is not ever<br />
displayed on the screen. Instead, the message indicating the status of the converter is<br />
displayed.<br />
Analogue reference offset. Expressed as a count of the input converter. The limits<br />
are –8000 and +8000.<br />
First full scale of analogue reference: Unit = rpm, range=±10000, default=3000. If<br />
b40.0=0 and b40.12=0, the value of Pr7 will be equal to:<br />
Vin ⋅ Pr2 / 9.76 where Vin is the voltage at the analogue input.<br />
Second full scale of the analogue reference: Unit = rpm, range=±10000,<br />
default=3000. If b40.0=0 and b40.12=0, the value of Pr7 will be equal to:<br />
Vin ⋅ Pr2 / 9.76 where Vin is the voltage at the analogue input.<br />
If b42.0=1, b42.1=0, and b42.5=1, Pr3 is the speed of the virtual axis.<br />
Full scale of frequency reference: (connector X3). Unit = rpm, range=±32767,<br />
default=3000. If b40.12=1 and b40.13=1, the value of Pr7 will be the following:<br />
If b42.5=0, Pr7 = Fin ⋅ Pr4 / 2000000 (frequency/sign signals)<br />
If b42.5=1, Pr7 = Fin ⋅ Pr4 / 500000 (quadrature signals)<br />
where Fin is the frequency present at the encoder input.<br />
Internal reference: Unit = rpm, range=±9000, default=0. If b40.12=1 and b40.13=0,<br />
Pr7 will be equal to Pr5.<br />
Reserved speed reference (read-only): Unit = rpm, range=±9000. If b40.2=1, this<br />
value is used as a reference for the speed regulator. The active operating mode will<br />
write its speed request in parameter Pr6.<br />
Main reference (read-only): Unit = rpm, range=±9000. If b40.2=0 is used, Pr7 is<br />
the reference for the speed regulator. In some operating modes Pr7 can be used as a<br />
reference for other values (torque/acceleration) and in these cases Pr7 will be<br />
expressed in the most suitable unit of measurement.<br />
Acceleration ramp for positive speed: Unit = s/krpm, range=0.002...65.535,<br />
resolution=0.001 s, default=0.002 s. Positive speed acceleration required by the<br />
motor via the speed reference is internally limited so that to achieve an acceleration<br />
of 1000 rpm, Pr8 seconds are necessary.<br />
Deceleration ramp for positive speed: Unit = s/krpm, range=0.002...65.535,<br />
resolution=0.001 s, default=0.002 s. Positive speed deceleration required by the<br />
motor via the speed reference is internally limited so that to achieve an acceleration<br />
of 1000 rpm, Pr8 seconds are necessary.<br />
Acceleration ramp for negative speed: Unit = s/krpm, range=0.002...65.535,<br />
resolution=0.001 s, default=0.002 s. Negative speed acceleration required by the<br />
motor via the speed reference is internally limited so that to achieve an acceleration<br />
of 1000 rpm, Pr10 seconds are necessary.<br />
Deceleration ramp for negative speed: Unit = s/krpm, range=0.002...65.535,<br />
resolution=0.001 s, default=0.002 s. Positive speed deceleration required by the<br />
36
Parker Hannifin S.p.A Divisione S.B.C.<br />
sLVD <strong>User</strong>’s <strong>Manual</strong><br />
Pr12<br />
Pr13<br />
Pr14<br />
Pr15<br />
Pr16<br />
Pr17<br />
Pr18<br />
Pr19<br />
Pr20<br />
Pr21<br />
Pr22<br />
Pr23<br />
Pr24<br />
motor via the speed reference is internally limited so that to achieve an acceleration<br />
of 1000 rpm, Pr11 seconds are necessary.<br />
Deceleration ramp for limit switch and stop functions: Unit = s/krpm,<br />
range=0.002...65.535, resolution=0.001 s, default=0.002 s. Deceleration required by<br />
the motor for limit switch and stop functions is internally limited so that to achieve<br />
an acceleration of 1000 rpm, Pr12 seconds are necessary.<br />
Overspeed limit: Unit = rpm, range=0..+13000, default=3500. If the absolute value<br />
of the motor speed exceeds the value set in Pr13, b41.0 will be =1, Otherwise, it will<br />
be = 0.<br />
High speed limit: Unit = rpm, range = ±13000, default=20. If b40.7=0 and if the<br />
difference of the speed of the motor and the reference is less than Pr14 and greater<br />
than Pr15, b41.1 will be = 1. Otherwise, it will be 0. If b40.7 = 1 and if the motor<br />
speed is less than Pr14 and greater than Pr15, b41.1 will be =1. Otherwise, it will be<br />
=0.<br />
Low speed limit: Unit = rpm, range = ±13000, default=-20. If b40.7=0 and if the<br />
difference of the speed of the motor and the reference is less than Pr14 and greater<br />
than Pr15, b41.1 will be =1. Otherwise, it will be =0. If b40.7=1 and if the motor<br />
speed is less than Pr14 and greater than Pr15, b41.1 will be =1. Otherwise, it will be<br />
=0.<br />
Integral gain of the speed regulator: Range=0...32767, default = N.A.<br />
Damping of the speed regulator: Range =0...32767, default = N.A. If Pr16=0, Pr17<br />
is the proportional gain of the speed regulator.<br />
Band width limiter: Unit =128µs, range=1..1000, default = N.A. Pr18 is used to set<br />
the time constant of a first order filter placed on the digital signal of the torque<br />
request. The frequency of the filter cut will be: 1240/Pr18 Hertz.<br />
Peak current: Unit =%, range=0...100.0%, resolution=0.1%, default = N.A. This is<br />
the maximum current that the converter can supply to the motor. It is expressed as a<br />
percentage of the peak current of the converter. In general, it should never exceed<br />
three times the rated current of the motor.<br />
DC bus voltage: Unit =volt, read-only parameter. Displays the value of the voltage<br />
present on the DC bus.<br />
Torque limiter (read-only): Unit = %. Can be used by the operating modes to limit<br />
the torque to the motor.<br />
Auxiliary analogue reference: Unit = %. The value displayed will be<br />
Pr22=Vin⋅100/9.76. The resolution is of 0.2%.<br />
Alarm code: This is the code for the alarm that is present. Code 0 represents the<br />
absence of alarms. Consult the table of alarm codes for more details.<br />
Latest alarm: This parameter contains the latest alarm. Pr24 will be set to 0 during<br />
the execution of the alarm reset command (b99.10).<br />
Alarm code Alarm Alarm code Alarm<br />
0 No alarm 6 Converter over-heating<br />
1 Overvoltage 10 PLC check sum<br />
2 Undervoltage 11 Parameter check sum<br />
3 Overcurrent 14 braking overloaded<br />
4 Resolver alarm 15 default parameters<br />
7 External alarm 16 Adjustment error<br />
8 Auxiliary alarm<br />
37
Parker Hannifin S.p.A Divisione S.B.C.<br />
sLVD <strong>User</strong>’s <strong>Manual</strong><br />
Pr25 Software version code (read-only): Indicates the version of the software that has<br />
been installed.<br />
Pr26 Serial line speed code: Default=5. This is the code for programming the<br />
transmission speed. For more information, consult the section on the serial interface.<br />
Pr27 Serial line address code: Default=0, range =0..31. For more information, consult the<br />
relevant section.<br />
Pr28 Motor shaft position (read-only): Unit = steps, range=0...4095. Indicates the<br />
absolute position of the resolver.<br />
Pr29 Number of motor poles: Range =2..64, default = N.A.<br />
Pr30 Offset of the resolver position: Default=0. Used to correct electronically the<br />
mechanical position of the resolver.<br />
Pr31 Operating mode: Default=0. Used to select the active operating mode. The value 0<br />
means that no operating mode has been selected.<br />
Pr32 Rated speed: Unit = rpm, range=0...9000, default = N.A. This is the rated speed of<br />
the motor. The speed that has been set is used to limit the speed request. Therefore, it<br />
should be set to about 10% greater than the maximum operational speed.<br />
Pr33 Rated current of the motor: Unit=range=0.5...5.0A, resolution =0.1A, default =<br />
N.A. The rated current of the motor must be set.<br />
Pr34 Number of poles on the resolver: range = 2, 4, 8; default = N.A.<br />
Pr35 Torque monitor: Unit = % of the torque at peak current, resolution 0.1%. Indicates<br />
the percentage of the torque or of the current that the motor is supplying.<br />
Pr36 Thermal image winding (read-only): Unit = % of the rated temperature. Indicates<br />
the estimate of the heat in the innermost coils of the motor. If this reaches the value<br />
of 100.0 % equal to the nominal value, b41.11 will become 1 and therefore the<br />
current will be limited to the nominal value.<br />
Pr37 Thermal image of the braking resistor (read-only): Unit = % of the rated<br />
temperature. Indicates the estimate of the heat of the braking resistor. If the value<br />
reaches 120.0 %, the converter issues an alarm.<br />
Pr38 Auxiliary analogue output: Unit =% of 4.5V, default=0, range =±100.0%,<br />
resolution 8 bit. If b40.11 = 1, the auxiliary analogue output will be equal to<br />
450⋅Pr38/100 volts.<br />
Pr43 Zero encoder offset. Range 0...4095, default=0. This parameter is used to modify the<br />
position of the output zero trace for the zero resolver (Pr28).<br />
Pr44 Number of pulses per revolution: Range 4...2500, default=1024. This is the number<br />
of pulses per revolution that is used by the simulation encoder. The maximum<br />
frequency is 120 kHz.<br />
Pr45 Main analogue input: Unit=8000esimi of 9.76V, range =±8192. Represents the<br />
value of the main analogue input.<br />
Pr46 Motor resistance: Unit ohm. The phase-phase resistance of the motor.<br />
Pr47 Motor inductance: Unit Mh. The phase-phase inductance of the motor.<br />
Pr48 Can bus speed code: Default=0, see the section CANBUS.<br />
38
Parker Hannifin S.p.A Divisione S.B.C.<br />
sLVD <strong>User</strong>’s <strong>Manual</strong><br />
BINARY PARAMETERS<br />
The binary parameter Pb40 can be read and set and then stored. The binary parameter Pb41<br />
provides indications about the status of the system. The parameters Pb42 and Pb99 be read<br />
and set and then stored.<br />
B40.0 Selection of the first or second full scale of the speed reference: Default value=0.<br />
If = 0, Pr2 will be used to rate the analogue reference. If = 1, parameter Pr3 will be<br />
used.<br />
B40.1 Activation of the algorithm to suppress vibration at 0 speed: Default=0. If = 1,<br />
the algorithm is turned on.<br />
B40.2 Selection of the reserved/user reference: If = 1, the reserved reference of the<br />
operating mode in use is used. If = 0, the reference selected by b40.0, b40.12 and<br />
b40.13 is used. Default = 0.<br />
B40.3 Reference hold: Default=0. If = 1, the reference will not be updated and the motor<br />
will not follow the variations of the input reference. If = 0, the reference will follow<br />
the variation of the input reference.<br />
B40.4 Left limit switch: Default=0. If = 1 and the reference selected requires negative<br />
speed, the reference is set to 0 following the ramp set in Pr12. If = 0, no control is<br />
made.<br />
B40.5 Right limit switch: Default=0. If = 1 and the reference selected requires negative<br />
speed, the reference is set to 0 following the ramp set in Pr12. If = 0, no control is<br />
made<br />
b40.6 Stop function: Default=0. If = 1, the motor is set to zero speed following the ramp<br />
set in Pr12.<br />
B40.7 Selection of the absolute/relative speed window: Default=0. If = 0, the speed<br />
window Pr14 Pr15 b41.1 will function in relative mode. Otherwise, if = 1, it will<br />
function in absolute mode.<br />
B40.8 Analogue torque limit: Default=0. If = 1, Pr22 will be used and also the auxiliary<br />
analogue input in order to limit the torque to the motor.<br />
B40.9 Software enable:. Default=1. If = 0, the converter cannot be enabled.<br />
B40.11 Selector for auxiliary analogue output: Default=0. If = 0, a signal proportional to<br />
the torque (b42.4=1) or to the speed (b42.4=0) supplied by the motor will be present<br />
at the auxiliary analogue output. If = 1, a value proportional to Pr38 will be present.<br />
B40.12 Selection of the digital/analogue reference: Default=0. If = 0, the analogue input<br />
will be selected as the main reference. If = 1, the reference will be digital and b40.13<br />
can be used to select parameter Pr4 or parameter Pr5.<br />
B40.13 Selector of internal reference Pr5 or frequency reference Pr4: Default=0. If<br />
b40.12 = 1, b40.13 can be used to make the selection. If = 0, the internal reference<br />
can be used. If = 1, the frequency input (encoder-in) which can be configured as<br />
frequency/direction or as a quadrature signal by using b42.5.<br />
b40.15 Reserved.<br />
B41.0 Overspeed: When the absolute value of the motor speed exceeds the value set in<br />
Pr13, b41.0 = 1. Otherwise, b41.0 = 0.<br />
B41.1 In speed: If b40.7 = 0 and if the difference in speed between the motor and the<br />
reference is less than Pr14 and greater than Pr15, b41.1 = 1. Otherwise, = 0. If<br />
b40.7=1 and if the motor speed is less than Pr14 and greater than Pr15, b41.1 =1.<br />
Otherwise, = 0.<br />
B41.2 Zero speed: If the motor speed (Pr0) = 0, b41.2=1. Otherwise, b41.2 = 0.<br />
B41.3 Forward:. If the motor speed (Pr0) is positive, b41.3 = 1. Otherwise, b41.3 = 0.<br />
B41.4 Converter O.K.: If = 1, there is no alarm. Otherwise, = 0.<br />
39
Parker Hannifin S.p.A Divisione S.B.C.<br />
sLVD <strong>User</strong>’s <strong>Manual</strong><br />
B41.5 Status of hardware enable: When hardware enable is present, = 1.<br />
B41.7 External alarm: An alarm that can be used by the user.<br />
B41.8 Auxiliary alarm. A second alarm that can be used by the user.<br />
B41.9 CanBus watchdog: This bit is set to 1 at every block sync reception via SBCCAN.<br />
B41.10 Saturation of the speed regulator: b41.10=1 when the speed regulator is supplying<br />
the maximum current.<br />
B41.11 I 2 T active:. Indicates that Pr36 has reached the 100.0 % value and therefore the<br />
converter is limiting the current to the nominal value.<br />
B41.12 Converter enabled.<br />
B41.13 Bus warning: Indicates a momentary communication error on the SBCCAN.<br />
B41.14 Bus off error: Indicates a permanent communication error on the SBCCAN.<br />
B41.15 CanBus watchdog: This bit is set to 1 at every sync (0 or 1) reception via SBCCAN.<br />
B42.0 Virtual encoder enabled: Default=0; 1= function enabled. See the section, Other<br />
useful functions.<br />
B42.1 Encoder port direction (X3 connector). Default=0; 0=output, 1=input.<br />
B42.2 Torque control: Default=0. If set to 1, the main analogue reference is assumed as<br />
the reference for the torque control (torque servocontrolled mode).<br />
B42.4 Selector to configure analogue output: Default=0. If set to 0, the analogue output<br />
represents the instantaneous speed of the motor, 4.27V at Pr32 speed. If set to 1, it<br />
represents the instantaneous torque, 4.5V at the peek current of the drive. The<br />
selector is valid only if b40.11 = 0.<br />
B42.5 Frequency input (X3 connector): If set to 1, the frequency input is programmed to<br />
receive two quadrature phases and this is the default value. If set to 0, a<br />
frequency/direction type of input can be received.<br />
B94.3 Basic parameters keylock. If set to 1, it is possible to modify the basic parameters<br />
(see the section Power-on the <strong>SLVD</strong> for the first time).<br />
B99.6 Extended menu enable: Default=0. If set to 1, the extended menu is enabled.<br />
B99.7 Safety: Default=0. If set to 1, parameters cannot be modified.<br />
B99.8 UV auto reset: Default=0. If set to 1, the under-voltage alarm will automatically be<br />
set to 0 when power returns.<br />
B99.13 Status of the pico-PLC: Default = 1. If set to 1, the PLC program is executed. If set<br />
to 0, the pico-PLC is in stop and the PLC instructions can be modified.<br />
40
Parker Hannifin S.p.A Divisione S.B.C.<br />
sLVD <strong>User</strong>’s <strong>Manual</strong><br />
A/D<br />
F/D<br />
-<br />
+<br />
offset<br />
Pr 1<br />
internal reference<br />
Pr 5<br />
reserved reference<br />
Parameter<br />
Pr 25<br />
Pr 26<br />
Pr 27<br />
Pr 28<br />
Pr 29<br />
Pr 30<br />
Pr 6<br />
full scale<br />
ref. 1<br />
Pr 2<br />
Pr 3<br />
full scale<br />
ref. 2<br />
max fq ref.<br />
Pr 4<br />
Description<br />
SOFTWARE ISSUE<br />
BAUD RATE<br />
SERIAL LINK ADDRESS<br />
SHAFT POSITION<br />
MOTOR POLES<br />
RES. PHASE SHIFT<br />
b40.0<br />
b40.12<br />
b40.13<br />
R/W<br />
Pr 31 OPERATING MODE Y<br />
Pr 32 RATED SPEED Y<br />
Pr 36 I2T ACCUMULATOR N<br />
Pr 37 BRAKE RESISTOR USE N<br />
Pr 20 DC BUS VOLTAGE N<br />
B40.1 VIBRATION STOP. Y<br />
B42.0<br />
A / D<br />
VIRTUAL ENCODER<br />
Pr 45<br />
B42.1 ENCODER IN/OUT Y<br />
B42.5 QUADRATURE / FD Y<br />
N<br />
Y<br />
Y<br />
N<br />
Y<br />
Y<br />
Y<br />
main ref.<br />
Pr 7<br />
left-sw<br />
right-sw<br />
S/H<br />
stop<br />
b40.2 b40.3<br />
-<br />
+<br />
b40.7<br />
b40.4<br />
b40.5<br />
b40.6<br />
ramps values<br />
Pr 8<br />
Pr 9<br />
Pr 10<br />
Pr 11<br />
over<br />
Pr 13<br />
high<br />
Pr 14<br />
low<br />
Pr 15<br />
Pr 12<br />
ramp<br />
value<br />
zero speed<br />
b 41.2<br />
forward<br />
b 41.3<br />
over speed<br />
b 41.0<br />
at speed<br />
b 41.1<br />
+<br />
-<br />
Pr 0<br />
motor speed<br />
b 41.7<br />
b 41.8<br />
Pr 33<br />
rated current<br />
max<br />
sLVD<br />
MAIN BLOCK DIAGRAM<br />
speed control<br />
Pr 16<br />
Pr 17<br />
user current limit<br />
Pr 19<br />
thermal image limit<br />
reserved current limit<br />
Pr 21<br />
Pr 22<br />
aux reference<br />
over voltage<br />
under voltage<br />
over current<br />
resolver break<br />
power stage over temp<br />
external trip<br />
aux. trip<br />
default<br />
b41.11<br />
PLC check-sum<br />
PAR. check-sum<br />
calibra error<br />
brake overload<br />
b40.8<br />
present<br />
Pr 23<br />
trip code<br />
band-width<br />
limitator<br />
Pr 18<br />
last<br />
Pr 24<br />
drive ok<br />
b41.4<br />
hardware<br />
enable<br />
b41.5<br />
software<br />
enable<br />
b40.9<br />
torque demand<br />
Pr 35<br />
Pr 38<br />
b40.11<br />
Vout aux<br />
torque<br />
demand<br />
analog out<br />
drive enabled<br />
b41.12<br />
41
Parker Hannifin S.p.A Divisione S.B.C.<br />
sLVD <strong>User</strong>’s <strong>Manual</strong><br />
3.5 Basic commands<br />
In order to send the following commands, b99.7 must be set to 0. To send the b42.3 and<br />
b94.1 commands, b99.6 must also be set to 0.<br />
B42.3 Reinitializing the serial line and the SBCCAN. Command to initialise serial<br />
communication whenever the speed value of the serial line (Pr26) has been modified.<br />
Command to initialise the SBCCAN whenever the address or the function mode has<br />
been modified. The serial line and the SBCCAN are in any case initialise when the<br />
converter is powered on.<br />
B94.1 Command to set the main reference offset to 0. This command is used to<br />
automatically set the Pr1 parameter in order to automatically set the voltage offset on<br />
the main analogue reference to 0. This operation can be done only if the absolute<br />
value of the offset is less than 200 Mv.<br />
B94.8 Value comparator. See the section, Other useful functions.<br />
B94.9 Value comparator. See the section, Other useful functions.<br />
B94.10 Value comparator. See the section, Other useful functions.<br />
B94.11 Value comparator. See the section, Other useful functions.<br />
B99.10 Command to reset alarms. This command sets Pr23 and Pr24 to 0. If the alarm<br />
continues, it is displayed on the screen. This command cannot be used if there is a<br />
check-sum error (Pr23 = 10, 11). In this case, it is necessary to set the default<br />
parameters (b99.12) and then reset the alarm.<br />
B99.11 Default values of the parameters in operating mode. This command sets the<br />
operating mode parameters to the default values. The command is executed only if<br />
b40.2 = 0.<br />
B99.12 Default values. This command sets all parameters to the default values and sets<br />
those used by the operating mode to 0. Furthermore, it sets the pico-PLC program as<br />
described in Appendix F. There is a check-sum alarm, Pr23 and Pr24 will be set to 0,<br />
thereby permitting the alarm to be reset. The command is executed only if b99.13 =<br />
0.<br />
B99.14 Storing of the pico-PLC instructions. This command saves the pico-PLC program.<br />
It cannot be used if a check-sum alarm has been indicated. In this case, it is necessary<br />
to set the default parameters, reset the alarm and then store the new parameters.<br />
B99.15 Storing of parameters. This command stores all parameters. It cannot be used if a<br />
check-sum alarm has been indicated. In this case, it is necessary to set the default<br />
parameters, reset the alarm and then store the new parameters.<br />
42
Parker Hannifin S.p.A Divisione S.B.C.<br />
sLVD <strong>User</strong>’s <strong>Manual</strong><br />
3.6 Speed control adjustment<br />
SOME IMPORTANT CONCEPTS<br />
SPEED LOOP: The main task of a converter is to control motor speed so that it follows as<br />
faithfully as possible the speed request that is generally known as the REFERENCE.<br />
Faithfully following the reference means that the motor speed should equal the reference in<br />
static conditions and also that the motor speed is as equal as possible to the speed requested<br />
during dynamic conditions. To carry out this task, the converter must know some of the<br />
features of the motor used and the mechanical part attached to it. This information is<br />
communicated to the converter by using the so-called ADJUSTMENT PARAMETERS.<br />
ERROR: The error is the difference between the reference speed and the motor speed. The<br />
size of the error is used by the speed loop in order to evaluate how much current must be<br />
supplied to the motor, based on the adjustment parameters.<br />
TORQUE: The current that circulates in the windings of the motor is transformed in<br />
torque, thereby allowing the motor to accelerate or decelerate.<br />
GAIN: Given the typical applications of the <strong>SLVD</strong> converter, when we speak of gain in<br />
this document we refer to the rigidity of the axis, better known as the STIFFNESS.<br />
To better illustrate what stiffness means, we can imagine a motor controlled by a converter<br />
with a requested speed of 0. The motor shaft will appear immobile, but if we apply a torque to<br />
the shaft, it will demonstrate an angle that is proportional to the torque applied. Suppose we<br />
apply the rated torque of the motor and measure the stiffness in degrees. The measured<br />
degrees will be the index of the regulator tuning quality. Clearly, it is not the only quality<br />
index.<br />
WHAT IS NEEDED<br />
To adjust a <strong>SLVD</strong> converter correctly, an oscilloscope with memory must be used. A<br />
technician who can use it to carry out the operation will also be needed. If it is not possible to<br />
use an oscilloscope, a more approximate but applicable adjustment method will be illustrated<br />
at the end of this section.<br />
43
Parker Hannifin S.p.A Divisione S.B.C.<br />
sLVD <strong>User</strong>’s <strong>Manual</strong><br />
BEFORE BEGINNING<br />
Study the diagram below carefully (Fig. 1):<br />
Fig. 1<br />
This diagram shows the response of the system to a square wave speed reference. Channel<br />
1 (Ch1) represents the speed and channel 2 (Ch2) the current of the motor. In practice, the<br />
probe has been connected to terminal 6 of the X4 (Vout). The two traces cannot be seen at the<br />
same time, but the trace to be displayed can be programmed using the binary parameter<br />
Pb42.4. The V/div scale and the time basis will not be discussed here since they can vary<br />
greatly.<br />
ESTIMATING THE Pr16<br />
Before turning the converter on, the user should estimate the value of Pr16. The value of Pr16<br />
is what defines the gain of the system. To convert the value of Pr16 into grades per rated<br />
Pr 33*<br />
100<br />
torque, the formula to be used is the following: α = ⋅28<br />
where α represents the<br />
Pr 16*<br />
Ipd<br />
stiffness and Ipd is the peak current of the drive. Before using the formula, Pr33 must be set<br />
with the correct value of the rated current of the motor. To evaluate the correct value of α,<br />
let’s consider that, if the mechanical part to be moved is rigid (non-elastic) and if there is no<br />
transmission play, the optimal stiffness would be about 4 degrees. If the mechanical part is not<br />
rigid enough, it could be necessary to reduce the gain. If the torque of the motor has been<br />
sized in order to obtain strong acceleration, but during the operation, the disturbing torques<br />
are very low, it is possible to choose stiffness angles of 20, 30 or 40 degrees, thereby<br />
maintaining acceptable performance. If it is difficult to choose the proper stiffness angle, the<br />
user can begin with 10 degrees that is the default adjustment if a motor with the same rated<br />
current as the converter’s is used.<br />
At this point, let us set the Pr16 to the estimate and turn on the axis with a square wave<br />
reference. The user must be careful to choose reference ranges and frequencies in order to<br />
avoid problems if the axis has a limited course. By observing the oscilloscope we will note<br />
44
Parker Hannifin S.p.A Divisione S.B.C.<br />
sLVD <strong>User</strong>’s <strong>Manual</strong><br />
that as Pr17 varies, the response will change. For decreasing values of Pr17, the response of<br />
the system will be as shown in figure 2 below:<br />
Fig.2<br />
For increasing values of Pr17, the response of the system will be similar to what is shown in<br />
figure 3 below:<br />
Fig.3<br />
The optimal value of Pr17 will be attained with a response of the system as shown in figure 4<br />
below:<br />
45
Parker Hannifin S.p.A Divisione S.B.C.<br />
sLVD <strong>User</strong>’s <strong>Manual</strong><br />
Fig. 4<br />
An overshoot of about 10% must be obtained. It is important that after the overshoot, an<br />
undershoot does not occur.<br />
Once the optimal value of Pr17 has been established, we must analyze the movement of the<br />
axis. If it moves without vibrations and acoustic noise, the adjustment of the system is<br />
complete. Otherwise, we must repeat the preceding procedures with lower values of Pr16.<br />
In some applications it is possible to reduce acoustic noise by using a higher value of Pr18.<br />
Figure 5 shows that once the optimal adjustment has been achieved, there is also an oscillation<br />
of the current that can produce acoustic noise and mechanical vibration. By raising the value<br />
of Pr18 to 3, the situation is much improved (fig. 6).<br />
Fig. 5<br />
46
Parker Hannifin S.p.A Divisione S.B.C.<br />
sLVD <strong>User</strong>’s <strong>Manual</strong><br />
Fig. 6<br />
If mechanical parts are used which very easily tend to enter into oscillation, we recommend<br />
you use very low values of Pr16. In this configuration the <strong>SLVD</strong> typically dampens the torque<br />
request of the motor in order to avoid triggering mechanical oscillations. This configuration is<br />
shown in figure 7.<br />
Fig. 7<br />
47
Parker Hannifin S.p.A Divisione S.B.C.<br />
sLVD <strong>User</strong>’s <strong>Manual</strong><br />
ADJUSTMENT WITHOUT USING INSTRUMENTATION<br />
If you do not have an oscilloscope, you must:<br />
A) Determine the value of Pr16 as described above.<br />
B) Determine the Pr17 parameter by using the following formula:<br />
Pr17 = 1488⋅<br />
15341 . ⋅ Pr16⋅ J<br />
Nm<br />
picco<br />
tot<br />
where: J tot is the total inertia (motor + load) expressed in kgm 2 .<br />
Nm picco is the available torque with the peak current of the converter.<br />
C) Turn on the converter and use the external control to move the axis. Move Pr17 to find<br />
the value where the axis seems to move best.<br />
D) Estimate the value of Pr18 by using the following formula:<br />
Pr17<br />
Pr 18 = 0.<br />
68 ⋅<br />
Pr16<br />
If the result is less than 1, Pr18 must be set to 1.<br />
If the adjustment is not satisfactory, repeat the procedure with lower values of Pr16.<br />
48
Parker Hannifin S.p.A Divisione S.B.C.<br />
sLVD <strong>User</strong>’s <strong>Manual</strong><br />
3.7 Operating modes<br />
Parameter Pr31 (default = 0) is used to select the operating mode. Every operating mode<br />
controls speed using parameter Pr6 and can use parameter PR21 to limit the torque at the<br />
motor (see the block diagram). Speed control will use as reference Pr7 or Pr6, depending on<br />
the value of b40.2. Before changing Pr31, b40.2 must be set to 0 in order to avoid unwanted<br />
movements of the motor. Therefore, it is possible to set Pr31 to the value that corresponds to<br />
the selected operating mode. The parameter b99.11 is used to load the default parameters for<br />
the selected operating mode. By setting b40.2 to 1, the operating mode will be turned on. All<br />
operating modes need to control the motor in position (13, 14, 15) by using the position loop<br />
described in the diagram in the figure.<br />
b70.4<br />
Pr 55<br />
servo window 1<br />
b70.5<br />
Pr 56<br />
servo vindow 2<br />
abs()<br />
d<br />
dt<br />
abilitazione feed-forward<br />
b 70.6<br />
caugth position<br />
Pr69:68<br />
b70.15<br />
target position<br />
Pr61:60<br />
Pr 65:64<br />
position offset<br />
+<br />
+<br />
+<br />
-<br />
Pr 57<br />
Kp<br />
+<br />
+<br />
Pr 50<br />
speed limit<br />
Pr 6<br />
speed demand<br />
din1<br />
motor position<br />
b70.1<br />
master speed<br />
Pr63:62<br />
X3<br />
d<br />
dt<br />
Pr 52<br />
Pr 53<br />
Pr 54<br />
encoder in<br />
Pr67:66<br />
Pr50 Maximum speed. Unit = rpm, default = 3000, range = 0...9000. This parameter<br />
limits the maximum speed of the motor. It can be useful to limit the speed during a<br />
sudden link or during a quick change of speed.<br />
Pr51 Position error. Range = -32768...+32767.<br />
Pr52 Reference multiplier. Default = 1, range = -32000...+32000. Using this parameter<br />
and Pr53, the user can set the ratio desired for the input reference frequency.<br />
Pr53 Reference divider. Default = 1, range = -32000...+32000. Using this parameter and<br />
Pr52, the user can set the ratio desired for the input reference frequency.<br />
Pr54 Encoder-in rotation speed (read-only). Unit = rpm. Indicates the input reference<br />
frequency translated into rpm (based on 4096 imp/revolution).<br />
Pr55 Window for servo-error 1. Unit = steps, default = 1000. If the position error as an<br />
absolute value exceeds the value set in Pr55, b70.4 is set to 1. Otherwise, b 70.4 = 0.<br />
49
Parker Hannifin S.p.A Divisione S.B.C.<br />
sLVD <strong>User</strong>’s <strong>Manual</strong><br />
Pr56 Window for servo-error 2. Unit = steps, default = 1000. If the position error as an<br />
absolute value exceeds the value set in Pr56, b70.5 is set to 1. Otherwise, b 70.5 = 0.<br />
Pr57 Proportional gain for the position regulator. Default = 100, range 0..32000.<br />
Pr58:59 Encoder in captured. Unit = steps. The value encoder master is captured on the<br />
positive edge of the selected input (see b70.0).<br />
Pr60:61 Regulator position reference. Unit = steps.<br />
Pr62:63 Motor position (resolver). Unit = steps. If incremented by 4096 steps per revolution.<br />
Pr64:65 Position offset. Unit = steps.<br />
Pr66:67 Encoder-in counter. Unit = steps.<br />
Pr68:69 Value captured. Value of the position of the motor captured on the positive end of<br />
the input (X1-10). Unit = steps.<br />
B70.0 Encoder in capture. Default = 0. If = 0, the capture of the value encoder master is<br />
made from input 0 (X1-9). Otherwise, it is made by the input of the zero trace<br />
encoder (X3) (see operating mode 14).<br />
B70.1 Feedback. Default = 0. If = 0, feedback is done by the resolver. If = 1, feedback is<br />
done by the encoder (X3). In this last case, the parameters Pr52 and Pr53 serve to rate<br />
the pulses per revolution at 4096.<br />
B70.2 Feedback direction. Default = 0. If = 1, the rotation of the motor is inverted. Only<br />
with feedback done by the resolver.<br />
B70.4 Servo error. B70.4 will be set to 1 if the position error as an absolute value exceeds<br />
the value set in Pr55.<br />
B70.5 Servo error. B70.5 will be set to 1 if the position error as an absolute value exceeds<br />
the value set in Pr56.<br />
B70.6 Feed-forward enable. If set to 1, the feed-forward on the position regulator is<br />
enabled.<br />
B70.13 Monitor error. If set to 1, Pr38 = Pr51 / 2 Pr89 .<br />
B70.14 Value master captured. If set to 1, this means that the value master has been<br />
captured. The user must set the bit to 1 (see operating mode 14).<br />
B70.15 Value motor captured. If set to 1, this means that the value motor has been<br />
captured. The user must set the bit to 1.<br />
50
Parker Hannifin S.p.A Divisione S.B.C.<br />
sLVD <strong>User</strong>’s <strong>Manual</strong><br />
3.8 Torque control (operating mode 1)<br />
This operating mode does not control the torque in the classic way since the speed control<br />
continues to work to control the speed limit. The torque reference will be the Pr7 main<br />
reference. To set up the torque control, you must first adjust the speed control in order to<br />
establish a stable system and then set Pr31 = 1 in order to program the operating mode by<br />
setting the default values with the command b99.11. Set Pr2 = 1000 (10 V = 100.0 % of the<br />
torque), b40.0 = 0, b40.12 = 0, b40.2 = 1 to enable the reserved reference and Pr100 to limit<br />
the maximum speed of the motor.<br />
OPERATING MODE 1 PARAMETERS<br />
Pr100<br />
Maximum speed. Unit = rpm, default = 3000, range = 0..9000. This parameter is<br />
used to limit the absolute maximum speed of the motor during the torque function.<br />
opm 1 for sLVD drive<br />
Pr 100<br />
max speed<br />
1<br />
-1<br />
Pr 6<br />
reserved reference<br />
Pr 7<br />
main ref<br />
1<br />
-1<br />
Pr 21<br />
reserved<br />
current limit<br />
51
Parker Hannifin S.p.A Divisione S.B.C.<br />
sLVD <strong>User</strong>’s <strong>Manual</strong><br />
3.9 Digital Lock + Positioner (operating mode 13)<br />
Operating mode 13 includes the Digital Lock, dynamic positioner and flow speed functions<br />
in order to use them at the same time. The tracking function refers to the input frequency<br />
signal (X3 connector) set as an input encoder signal by setting b42.0 = 0, b42.1 =1, and b42.5<br />
= 1. This encoder signal is counted at every end of the communication of A and B signals. The<br />
counter of the motor position is incremented at the rate of 4096 steps per revolution. The user<br />
can program the ratio between the master and the slave by using parameters Pr52 and Pr53. It<br />
is possible to choose the ramp to use during the engaging or release phase (Pr103). The main<br />
ramps and the internal PLC can be used to program different engaging and release modes with<br />
or without phase recovery. See the connection diagrams in the section, Input frequency<br />
connection. If you use a digital input for the engaging command, the digital input 0 in FAST-<br />
IN mode must be used in order to minimize phase errors.<br />
The positioner function follows a trapezoidal profile in which the acceleration and<br />
deceleration ramps are defined by Pr109, the full speed by Pr108 and the final position by<br />
Pr118:119 (one revolution of the motor equals 4096 steps). The parameters can be modified at<br />
any time. The current position of the positioner is given by the parameter Pr116:117.<br />
You can add a speed by using Pr104.<br />
OPERATING MODE 13 PARAMETERS<br />
Pr103 Acceleration and deceleration ramp (el. Axis). Unit = s/krpm, default = 500,<br />
range = 0..30000, resolution =one thousandth of a second. The acceleration and<br />
deceleration required for the motor can be limited in order to achieve a jump of<br />
1000 rpm that takes Pr103 thousandths of a second. This can be useful when<br />
the axis is suddenly attached.<br />
Pr104 Addition speed. Default=0, range 0..±6000.<br />
Pr108<br />
Full speed (positioner). Unit = rpm, default=1000, range = 0..+9000. This is<br />
the full speed that will be used during the generation of the position profile.<br />
Pr109 Acceleration time (positioner). Unit = s/krpm, range = 0.002..30.000,<br />
resolution =0.001s, default=0.500 s. This is the acceleration ramp that will be<br />
used during the positioning profile.<br />
Pr114:115<br />
Pr116:117<br />
Pr118:119<br />
Actual position (electrical shaft). Unit = steps; read-only parameter. Indicates<br />
the actual position with reference to the electrical shaft.<br />
Actual position (positioner). Unit = steps; read-only parameter. Indicates the<br />
actual position with reference to the trapezoidal profile.<br />
Final position (positioner). Unit = steps; used to set the final position that is<br />
desired for the generator of the trapezoidal profile, based on 4096 steps per<br />
revolution.<br />
B150.0 Active positioner. During the positioning (Pr118:119 ≠ Pr116:117) this bit is<br />
high.<br />
B150.2 Engaged electrical shaft. During the engaging phase when the ramp (Pr103) is<br />
not 0, this bit indicates the end of the transitory phase.<br />
B150.3 Encoder in selection. If 0, the encoder input, conditioned by Pr52 and Pr53, is<br />
used as the master for the electrical axis function. If 1, it updates directly<br />
Pr118:119 to execute the step like function or pulses train.<br />
52
Parker Hannifin S.p.A Divisione S.B.C.<br />
sLVD <strong>User</strong>’s <strong>Manual</strong><br />
B150.4 Profile direction. Read-only flag. Indicates the direction of the motion of the<br />
positioner.<br />
B150.6 Profile feed-forward. Default=0. If 1 the profile feed-forward is disabled.<br />
B150.8 El. Axis engaging/release. This bit it used to engage (= 1) and release (= 0) the<br />
axis from the input encoder reference.<br />
B150.10 Type 1 reset. Command to set all the motor position and reference to 0.<br />
B150.11 Type 2 reset. Command that sets the position of the motor shaft (Pr62:63) to<br />
the main reference (Pr60:61) and of the positioner (Pr116:117) by setting that<br />
of the electrical shaft to 0.<br />
B150.13 Final position evaluation enable/disable (Pr118:119). Default = 1. If 0,<br />
eventual modifications to Pr118:119 will not be considered.<br />
opm 13 for sLVD drive<br />
profile generator<br />
V<br />
in progress<br />
b150.0<br />
reset 1<br />
b150.10 target position = motor position = 0<br />
b150.11 target position = motor position<br />
reset 2<br />
A<br />
IQ<br />
Pr61:60<br />
Pr 109<br />
ramps<br />
Pr 108<br />
steady time<br />
speed<br />
target position<br />
to the position loop<br />
reverse/forward<br />
b150.4<br />
Pr116:117<br />
+<br />
+<br />
Pr114:115<br />
actual position<br />
actual position<br />
b150.13<br />
Pr118:119<br />
profile position<br />
master speed<br />
slip speed<br />
encoder<br />
master<br />
ratio<br />
Pr 52<br />
Pr 53<br />
b150.3<br />
d<br />
dt<br />
Pr 54<br />
b150.8<br />
Pr 103<br />
ramp<br />
+<br />
Pr 104<br />
+<br />
53
Parker Hannifin S.p.A Divisione S.B.C.<br />
sLVD <strong>User</strong>’s <strong>Manual</strong><br />
3.10 Electronic cam (operating mode 14)<br />
Operating mode 14 was expressly designed to meet the needs of packaging machines that<br />
require electronic cams. The table of the cam function is described with a vector composed of<br />
257 elements, each of which indicates the position that must be assumed by the controlled<br />
axis when the master axis is in the position (element_number * master_module) / 256. The<br />
value of the elements of the vector falls within the range 0 – 9999, where 10000 corresponds<br />
to the number of counts set in the slave module parameter. The 257 th element defines the cam<br />
as closed if it = 0, or as open if it = 10000.<br />
The mode selector can be used to select the source for the position loop. The possible<br />
sources are: no source, positioning, electronic cam and speed.<br />
POSITIONING. The parameters that regulate movement are: target_pos, acc, speed.<br />
Target_pos indicates the absolute position that is to be achieved; if it is included in the<br />
movement direction module, it is given by the sign of the difference between target_pos and<br />
Pr60:61. Acc is the maximum acceleration allowed during the movement and speed is the<br />
maximum speed. The path generator will begin its work when the mode selector is set to 1.<br />
When the position has been achieved, the mode selector automatically returns to 0.<br />
Alternatively, the positioner module can be used to sum a phase on the master axis by setting<br />
target_pos based on the actual offset phase position Pr116:117. At the start the calculation of<br />
the path will be such as to guarantee continuity with the actual speed of the motor.<br />
MASTER REPHASING. By setting the function (b150.8) the user can define the position<br />
of the master (Pr122:123) on the positive side of digital input 0 or of the zero trace encoder<br />
input (selector b70.0); b70.14 indicates that the initialise has been achieved. The user must set<br />
this flag to 0. For this function b42.0 must be 0 and b42.1 must be (see section Frequency<br />
input/output connection).<br />
CAM ENGAGING. A master phase can be defined to which the selector will automatically<br />
be set to position 2 by enabling the cam module. A similar procedure can be used for release.<br />
In this case, when the release phase has been programmed, the positioner will be enabled to<br />
reach the desired position. The functioning of operating mode 14 is described in detail in the<br />
block diagram. It is also possible to engage cam phase with a linear ramp by mean of<br />
command 150.11. Using this command it is necessary that the master is running positive way,<br />
that is to say the master position counter is increasing. It is also necessary to set in Pr 132:133<br />
the master position at which the slave axis starts moving , the distance to be covered by the<br />
slave during the acceleration ramp in Pr 136:137 , the position of the master at which the cam<br />
is engaged in Pr 126:127. Of course in this case the position reached by the slave axis at the<br />
end of the ramp (slave starting position + pr136:137) should be the same of the position set in<br />
the cam table corresponding to master position Pr126:127 that is to say starting position of<br />
slave axis must be less than engage cam phase position of the distance set in Pr136:137. The<br />
position of slave axis corresponding to present phase of master axis can be read dynamically<br />
in Pr134:135. The 150.11 command is reset when the slave axis starts moving and in the<br />
meantime 150.12 is set. It is up to the user to ensure that the speed of the slave axis is<br />
continuous at the engage phase.<br />
Three functions are pre-defined that can be used to set the cam profile. By setting Pr102 =<br />
5, the function is y = x, Pr102=6 the function is y = x-sinx, Pr102=7 the function is y = sinx<br />
where y is rated to 10000 on the 256 points of the cam. The compilation of the cam table is<br />
54
Parker Hannifin S.p.A Divisione S.B.C.<br />
sLVD <strong>User</strong>’s <strong>Manual</strong><br />
done in the background and at the conclusion Pr102 is set to 0. Make sure that if b40.2=0,<br />
the parameter Pr102 is nevertheless forced to 0.<br />
Pr100 Speed in speed mode. Default = 0, range 0..±6000.<br />
Pr101 Ramp time for Pr100. Unit = s/krpm, range = 0.002..30.000, resolution =<br />
0.001s, default=0.500 s. This is the acceleration ramp that will be used by the<br />
speed mode.<br />
Pr102 Function selector. Default=0, range 0..3. Enables the functioning as: a halted<br />
motor, positioning, electronic cam and speed.<br />
Pr103 Pointer to the cam table. Default=257, range 0..257. Pr103 is used to access<br />
the cam table. Pr104 will contain the value of the Pr103th element in the table.<br />
Pr104 Table element value. Default=0, range 0..10000. Pr104 is the value of the<br />
Pr103th element in the table.<br />
Pr108 Full speed (positioner). Unit = rpm, default=1000, range =0..+9000. This is<br />
the full speed that will be used during the generation of the position profile.<br />
Pr109 Acceleration time (positioner). Unit=s/krpm, range =0.002..30.000, resolution<br />
=0.001s, default=0.500 s. This is the acceleration ramp that will be used during<br />
the positioning profile.<br />
Pr110:111 Master axis module. Unit = steps; range 0..2 18 Default=10000. This is the<br />
value of the master axis module.<br />
Pr112:113 Master axis position. Unit = steps; this is the present position of the master<br />
axis.<br />
Pr114:115 Slave axis module. Unit = steps; range 0..2 18 Default=10000. This is the value<br />
of the slave axis module.<br />
Pr116:117<br />
Pr118:119<br />
Pr122:123<br />
Pr124:125<br />
Pr126:127<br />
Pr128:129<br />
Pr132:133<br />
Pr134:135<br />
Pr136:137<br />
Master position offset. Unit=steps; range 0..2 23 , default=0.<br />
Final position (positioner). Unit = steps; the parameter used to set the final<br />
position desired for the generator of the trapezoidal profile, based on 4096<br />
steps per revolution.<br />
Master axis phase. Unit = steps; range 0..2 23 Default=0. If b150.8 = 1 at the<br />
first positive front of digital input 0 or of the zero encoder input (see the block<br />
diagram), the position of the master axis become Pr122:123.<br />
Master axis phase captured. Unit = steps; range 0..2 23 Default=0. At each<br />
positive front of digital input 0 or of the zero encoder input (see the block<br />
diagram), the position of the master axis is copied into in Pr124:125.<br />
Master axis phase for engaging. Unit = steps; range 0..2 23 Default=0. If<br />
b150.12 = 1, when the position of the master Pr112:113 exceeds Pr126:127,<br />
Pr102 is brought to position 2 and b150.12 returns to 0 to indicate that<br />
engaging has been achieved.<br />
Master axis phase for release. Unit = steps; range 0..2 23 Default=0. If<br />
b150.13=1, when the position of the master Pr112:113 exceeds Pr128:129,<br />
Pr102 is brought to position 1 and b150.13 returns to 0 to indicate that the<br />
positioner has been enabled and will control the release phase.<br />
Engage cam with ramp. Unit=steps; range 0..2 23 , default=0. This is the<br />
position on which the engage ramp related to the master starts.<br />
Slave cam position. Unit=steps; range 0..2 23 . Read only parameter that shows<br />
the position at the output of the cam.<br />
Engage cam ramp. Unit=steps; range 0..2 15 , default=0. This is the step value<br />
performed by the slave during the engage ramp; the value must be less then an<br />
half of the slave axis module.<br />
55
Parker Hannifin S.p.A Divisione S.B.C.<br />
sLVD <strong>User</strong>’s <strong>Manual</strong><br />
B150.2 Position loop. Default=0. If = 1 the position loop works on absolute positions,<br />
otherwise on slave axis module.<br />
B150.3 Master phase-shift command. Default=0. If = 1, the positioner module is used<br />
to change the phase between the master and the slave or as the generator of the<br />
virtual axis. When the final position Pr118:119 equals Pr116:117, this bit is<br />
automatically set to 0. Do not use this command together with Pr102=1.<br />
B150.6 Encoder input enable (X3). Default=1. If = 1, the reading of the encoder<br />
master is enabled.<br />
B150.8 Phase master axis enable. Default=0. If = 1, the copying of parameter<br />
Pr122:123 to Pr112:113 to the first front of the rise of input 0 or the zero<br />
encoder is enabled.<br />
B150.10 Type 1 reset. Command to set all the motor positions and references to 0.<br />
B150.11 Cam engaging in phase with ramp. Command to engage the cam movement<br />
when the master reaches the level of Pr126:127 with a ramp defined by the<br />
parameters Pr132:133 and Pr136:137.<br />
B150.12 Electronic cam engaging in phase. Command to engage the cam movement<br />
when the master reaches the level of Pr126:127. This bit is automatically set to<br />
0 when the command has been enabled.<br />
B150.13 Electronic cam release in phase. Command to release the cam movement<br />
when the master reaches the level of Pr128:129. This bit is automatically set to<br />
0 when the command has been enabled.<br />
B150.14 Immediate electronic cam engaging. Command to engage the cam<br />
movement. This bit is automatically set to 0 when the command has been<br />
enabled.<br />
B150.15 Immediate electronic cam release. Command to release the cam movement<br />
This bit is automatically set to 0 when the command has been enabled.<br />
56
Parker Hannifin S.p.A Divisione S.B.C.<br />
sLVD <strong>User</strong>’s <strong>Manual</strong><br />
opm 14 for sLVD drive<br />
target pos.<br />
Pr118:119<br />
acc<br />
slave<br />
Pr134:135<br />
from encoder-in<br />
block<br />
b150.6<br />
Pr 109<br />
speed<br />
Pr 108<br />
master position<br />
Pr120:121<br />
+<br />
+<br />
Pr116:117<br />
b 150.3<br />
mod master master<br />
%<br />
Pr112:113<br />
Pr110:111<br />
normalized at<br />
10000<br />
256 points<br />
cam table<br />
mod slave<br />
0<br />
1<br />
2<br />
3<br />
%<br />
mode<br />
selector<br />
Pr 102<br />
to the position loop<br />
mod slave<br />
%<br />
Pr114:115<br />
Din 0<br />
b150.12<br />
set to 2<br />
b150.14<br />
zero encoder<br />
b70.0<br />
hw phase<br />
b150.8<br />
b70.14<br />
positive<br />
edge detector<br />
master<br />
Pr122:123<br />
phase<br />
Pr126:127 sw engage<br />
engaging cam phase<br />
b150.13<br />
set to 1<br />
positive<br />
edge detector<br />
Pr124:125<br />
b150.15<br />
Pr128:129 sw release<br />
release cam phase<br />
ramp<br />
Pr 101<br />
Din 1<br />
b70.15<br />
positive<br />
edge detector<br />
slave<br />
Pr68:69<br />
Pr 100<br />
speed<br />
57
Parker Hannifin S.p.A Divisione S.B.C.<br />
sLVD <strong>User</strong>’s <strong>Manual</strong><br />
3.11 Position control through the CanBus<br />
(operating mode 15)<br />
If operating mode 15 is enabled, the <strong>SLVD</strong> will execute a position loop of a proportional<br />
type with feed-forward. In this case the generator of profiles is considered external and must<br />
send the information about the position and speed reference via CanBus in accordance with<br />
the SBCCAN protocol (see the section on the CanBus). If b70.1 = 0, feedback is provided by<br />
the resolver. If b70.1 = 1, the feedback is provided by the encoder (X3).<br />
OPERATING MODE 15 PARAMETERS<br />
Pr102<br />
Pr103<br />
Pr104<br />
Pr105<br />
CanBus commands (see the section on the CanBus).<br />
CanBus status (see the section on the CanBus).<br />
Feed-forward speed. Unit = rpm, default=0, range =0..±9000. The value of this<br />
parameter is summed at the output of the position loop in order to obtain the<br />
speed request Pr6.<br />
Feed-forward speed via CanBus. This is the feed-forward value received via<br />
the CanBus. When the SYNC (Pb150.8=1) is received, Pr105 will be copied to<br />
Pr104 and will become active.<br />
Pr114:115 Position reference via CanBus. This is the position reference received via the<br />
CanBus. When the SYNC (Pb150.8=1) is received, Pr114:115 will be copied to<br />
Pr60:61 and will become active.<br />
Pr116:117 Motor position via the CanBus. When the SYNC (Pb150.8=1) is received,<br />
Pr62:63 will be copied to Pr116:117 and, if feedback transmission has been<br />
enabled (b150.2=1), it will automatically be transmitted via the CanBus.<br />
B150.2 Feedback transmission enable. Default=0. If = 1, when the type 0 SYNC is<br />
received, Pr116:117 will be transmitted via the CanBus.<br />
B150.3 Reply status. Default=0. If 0, the cyclic reply uses 16 bit status (Pr103); if 1, the<br />
cyclic reply status is a byte equal to the first 8 bit of Pr103.<br />
B150.4 Low speed mode. Default=0. In the case of Pr48=0: if b150.4=1, the speed of<br />
the functioning mode of the CanBus in real time will be set to 500kbps,<br />
otherwise, the same mode will have the speed of 1Mbps.<br />
B150.6 Feedback transmission enable. Default=0. If = 1, when the type 1 SYNC is<br />
received, Pr116:117 will be transmitted via the CanBus.<br />
B150.8 Sync. The command via the CanBus of synchronism sets b150.8 to 1, thereby<br />
allowing the torque of Pr105 on Pr104, Pr115:114 on Pr61:60 and Pr63:62 on<br />
Pr117:116. The references of the position control are updated and after this<br />
procedure b150.8 is automatically set to 0.<br />
B150.10 Type 1 reset. Command to set the motor positions and reference to 0.<br />
B150.11 Type 2 reset. Command that sets the motor position and the reference to the<br />
position of the motor shaft Pr28 and Pr64:65 to 0.<br />
B150.12 Type 3 reset. Command that copies the motor position to the reference and sets<br />
Pr64:65 to 0.<br />
58
Parker Hannifin S.p.A Divisione S.B.C.<br />
sLVD <strong>User</strong>’s <strong>Manual</strong><br />
op mode 15 for sLVD<br />
drive<br />
Pr105<br />
Pr104<br />
feedforward speed<br />
from CanBus<br />
feedforward speed<br />
b150.10<br />
reset 1<br />
target position = motor<br />
position = 0<br />
Pb150.2<br />
enable auto-answer sync 0<br />
Pr 115:114<br />
Pr 61:Pr60<br />
Pb150.4<br />
realtime mode low speed<br />
position reference<br />
from CanBus<br />
position reference<br />
Pb150.6<br />
enable auto-answer sync 1<br />
Pr 117:Pr116<br />
Pr 63:Pr62<br />
motor position<br />
to CanBus<br />
motor position<br />
Pb150.8<br />
sync<br />
59
Parker Hannifin S.p.A Divisione S.B.C.<br />
sLVD <strong>User</strong>’s <strong>Manual</strong><br />
3.12 Additional useful functions<br />
3.12.1 Value comparators<br />
These functions are enabled ONLY with operating mode 13 and 14. The Pr96:95 and<br />
Pr98:97 parameters have the alternative function of value comparators.<br />
With b94.10 = 0, then b94.8 = 1 if Pr96:95 > Pr63:62 (or Pr66:67 if feedback encoder)<br />
With b94.10 = 1, then b94.8 = 1 if Pr96:95 > Pr61:60<br />
With b94.11 = 0, then b94.9 = 1 if Pr98:97 > Pr63:62 (or Pr66:67 if feedback encoder)<br />
With b94.11 = 1, then b94.9 = 1 if Pr98:97 > Pr61:60<br />
This function is run every 6.144 ms.<br />
If the value comparators functions are not used, the Pr95, Pr96, Pr97, Pr98, b94.10 and<br />
b94.11 parameters by the PLC program as general purpose registers.<br />
3.12.2 Value capture<br />
At every positive front of digital input 0, the value of Pr63:62 (or Pr66:67) is captured and<br />
stored in Pr68:69 and b70.15 is set to 1 to signal the event. B70.15 is not reset automatically<br />
but must be executed by the pico-PLC or the serial line.<br />
3.12.3 Virtual encoder<br />
The virtual encoder function is enabled by setting b42.0 = 1, 42.1 = 0 and 42.5 = 1. A<br />
virtual encoder will be available at the X3 connector and its speed will be as set in Pr3. The<br />
set speed has a resolution equal to 1 rpm and a value in the range –3500 and +3500 rpm. The<br />
output signals (phase A, phase B) will simulate an encoder of Pr44 steps/revolution, without<br />
phase C of 0.<br />
After the programming, the configuration must be saved and the unit must be powered off<br />
and on again.<br />
3.12.4 Output cam programmer<br />
This function gives a digital output (pin 8 X4) according to the present position of the<br />
motor in a module. The user has to set the value corresponding to the module in Pr144:145.<br />
Inside the module can be defined 2 further values (Pr146:147 and Pr148:149) indicating the<br />
position at which the digital output is toggled. The user has to initialise the value of the motor<br />
position at Pr142:143 and the output status at b91.1; the function is enabled by b70.3=1 and in<br />
this case Pr142:143 shows the motor position inside the module. An offset for this position<br />
may be set at Pr140. The refresh time of the digital output is 512 µs. The limits for the<br />
parameter values are:<br />
Pr140 : range –2 15 … 2 15<br />
Pr142 :143 : range 0…2 31<br />
60
Parker Hannifin S.p.A Divisione S.B.C.<br />
sLVD <strong>User</strong>’s <strong>Manual</strong><br />
Pr144 :145 : range 0…2 31<br />
Pr146 :147 : range 0…2 31<br />
Pr148 :149 : range 0…2 31<br />
0 =< Pr146 :147 =< Pr148 :149 =< Pr144 :145.<br />
3.12.5 Homing function<br />
The homing function, which is available exclusively with operating modes 13, 14 and 15,<br />
provides a typical axis reset procedure. Before using the homing function perform the<br />
following settings:<br />
- connect the homing sensor to digital input 3<br />
- set the homing speed in parameter Pr4 (pay attention to the direction of rotation)<br />
- set Pr5 = 0, b40.12=1, b40.13=0, b40.2=0.<br />
To activate the homing procedure set b94.12=1 for a type 1 reset, or b94.13=1 for a type 2<br />
reset. When the homing procedure is concluded the respective activation bit will be reset. If<br />
you wish to abort the procedure, reset the command bit, stop the motor (e.g. by resetting Pr5)<br />
and, if necessary, read b40.2 which will remain on zero.<br />
RESET TYPE 1 - DESCRIPTION<br />
When the procedure is activated (b94.12=1) the axis is brought to the speed programmed in<br />
Pr4 (Pr5=Pr4); the axis is then brought to zero speed (Pr5=0) on the positive front of the<br />
homing sensor signal; after 150ms with the motor stopped parameters Pr61:60 and Pr63:62<br />
are reset, the position loop is enabled by setting b40.2=1, and command b94.12 is reset. The<br />
homing sensor signal must be maintained active in high status for the entire duration of the<br />
motor stopping phase.<br />
If the homing sensor is already engaged when the procedure is activated, the axis moves at<br />
the speed programmed in Pr4 but in the opposite direction until the homing sensor is freed; At<br />
this point the procedure continues as described above.<br />
RESET TYPE 2 - DESCRIPTION<br />
When the procedure is activated (b94.13=1) the axis is brought to the speed programmed in<br />
Pr4 (Pr5=Pr4); the axis is then brought to zero speed (Pr5=0) on the positive front of the<br />
homing sensor signal; after 150ms with the motor stopped parameters Pr61:60 and Pr63:62<br />
are programmed with the value of parameter Pr28, the position loop is enabled by setting<br />
b40.2=1, and command b94.13 is reset. The homing sensor signal must be maintained active<br />
in high status for the entire duration of the motor stopping phase.<br />
If the homing sensor is already engaged when the procedure is activated, the axis moves at<br />
the speed programmed in Pr4 but in the opposite direction until the homing sensor is freed; At<br />
this point the procedure continues as described above.<br />
61
Parker Hannifin S.p.A Divisione S.B.C.<br />
sLVD <strong>User</strong>’s <strong>Manual</strong><br />
4 PROGRAMMING DIGITAL INPUTS AND<br />
OUTPUTS<br />
4.1 The pico-PLC<br />
The internal pico-PLC is used to connect the external world (inputs/outputs) with the world of the<br />
parameters of the <strong>SLVD</strong>. The PLC can be used to copy digital input to a binary parameter, to copy a<br />
binary parameter to a digital output and to execute mathematical and Boolean operations. The PLC<br />
program must be inserted as a list of instructions by using the keyboard or by the serial line using a<br />
PC and an interface program. A PLC program (see Appendix F) written to meet the needs of a large<br />
number of applications corresponds to the default parameters (b99.12). In most cases it is not<br />
necessary to program the PLC itself. The main features of the pico-PLC are:<br />
program steps 128<br />
scanning time<br />
6.144 ms<br />
number of timers 2<br />
number of instructions 15<br />
stack depth 1<br />
mathematical operations 16 / 32 bits<br />
fast inputs<br />
2 – (512 ms)<br />
PLC PARAMETERS<br />
Pr71 Constant value = -1. Double word.<br />
Pr72 Constant value = 0. Double word.<br />
Pr73 Constant value = 1. Double word.<br />
Pr74 Constant value = 2. Double word.<br />
Pr75 Constant value = 10. Double word.<br />
Pr76 Constant value = 100. Double word.<br />
Pr77 Constant value = 1000. Double word.<br />
Pr78 Constant value = 1024. Double word.<br />
Pr79 Constant value = 4096. Double word.<br />
Pr80 Free parameter. A parameter that can be stored by the user (word).<br />
Pr81 Free parameter. A parameter that can be stored by the user (word).<br />
Pr82 Free parameter. A parameter that can be stored by the user (word).<br />
Pr83 Free parameter. A parameter that can be stored by the user (word).<br />
Pr84 Free parameter. A parameter that can be stored by the user (word).<br />
Pr85 Free parameter. A parameter that can be stored by the user (word).<br />
Pr86 Free parameter. A parameter that can be stored by the user (word).<br />
Pr87 Free parameter. A parameter that can be stored by the user (word).<br />
Pr88 Free parameter. A parameter that can be stored by the user (word).<br />
Pr89 Free parameter. A parameter that can be stored by the user (word).<br />
B90.X Status of digital input X. If X is greater than 3, this is a bit that can be stored by the user<br />
(b90.0 = converter enabled).<br />
B91.Y Status of digital output Y. If Y is greater than 1 this is a bit that can be stored by the user.<br />
Parameter Pb91 is not saved and is set to 0 when the unit is powered on. The two digital<br />
outputs available can be used as input (b90.2, b90.3): in this case the corresponding output<br />
is set to 0 (b91.0, b91.1).<br />
Pr92 First timer of the PLC. Every 6.144 ms, if Pr92 is not 0, it is decremented. If it is equal to<br />
0, b99.0 is set to 1.<br />
62
Parker Hannifin S.p.A Divisione S.B.C.<br />
sLVD <strong>User</strong>’s <strong>Manual</strong><br />
Pr93 Second time of the PLC. Every 6.144 ms, if Pr93 is not 0, it is decremented. If it is equal to<br />
0, b99.1 is set to 1.<br />
B94.0 Force a double word formatted operation. When the unit is powered on, this is 0. If it is<br />
set to 1, the first mathematical operation executed by the pico-PLC is done by using three<br />
double word type operands. After the execution of the operation b94.0 is automatically set<br />
to 0. If Pr60..Pr68 Pr110...Pr148 are used, the double word formatting is implicit.<br />
B94.5 First fast input disable (b94.5=1). When the unit is powered on, this is 0.<br />
B94.6 Second fast input disable (b94.6=1). When the unit is powered on, this is 0.<br />
B99.0 Status of the first timer. Equal to 1 if Pr92 = 0.<br />
B99.1 Status of the second timer. Equal to 1 if Pr93 = 0.<br />
B99.2 Equal to 1 if the result of the last PLC operation is negative.<br />
B99.3 Equal to 1 if the result of the last PLC operation is 0.<br />
B99.13 PLC status. Default=1. If set to 1, the PLC program is executed. If 0, the program is not<br />
executed, but the PLC instructions can be modified.<br />
63
Parker Hannifin S.p.A Divisione S.B.C.<br />
sLVD <strong>User</strong>’s <strong>Manual</strong><br />
PLC INSTRUCTIONS<br />
Pa.y<br />
Pa.y<br />
Pa.y<br />
Pa.y<br />
Pa.y<br />
SET<br />
Pa.y<br />
RST<br />
Pa.y<br />
Pa.y<br />
Pa.y<br />
Pa.y<br />
Pa Pb Pc<br />
ADD<br />
Pa Pb Pc<br />
SUB<br />
Pa Pb Pc<br />
MUL<br />
Pa Pb Pc<br />
DIV<br />
END<br />
Pa.y<br />
FIN<br />
LD Pa.y loads the y bit of the Pa parameter on the stack<br />
LDN Pa,y loads the negated y bit of the Pa parameter on the stack<br />
OUT Pa,y sets the y bit of the Pa parameter to the value loaded on the<br />
stack<br />
OUTN Pa,y<br />
places the y bit of the Pa parameter to the value of stack<br />
negating it<br />
SET Pa,y if the stack = 1, the y bit of the Pa parameter is set to 1<br />
RES Pa,y if the stack = 1, the y bit of the Pa parameter is set to 0<br />
AND Pa,y if the bit loaded on the stack contains the result of the logical<br />
AND operation between itself and the y bit of the Pa parameter<br />
ANDN Pa,y the bit of the stack contains the result of the logical AND<br />
operation between itself and the y bit of the negated Pa<br />
parameter<br />
OR Pa,y the bit loaded on the stack contains the result of the logical OR<br />
operation between itself and the y bit of the Pa parameter<br />
ORN Pa,y the bit on the stack contains the result of the logical OR<br />
operation between itself and the y bit of the negated Pa<br />
parameter<br />
ADD Pa, Pb, Pc if the bit on the stack = 1, the addition operation is executed on<br />
the parameters in which: Pc = Pa + Pb<br />
SUB Pa, Pb, Pc if the bit on the stack = 1, the subtraction operation is executed<br />
on the parameters in which: Pc = Pa – Pb<br />
MUL Pa, Pb, Pc if the bit on the stack = 1, the multiplication operation is<br />
executed on the parameters in which: Pc = Pa ⋅ Pb<br />
DIV Pa, Pb, Pc if the bit on the stack = 1, the division operation is executed on<br />
the parameters in which: Pc = Pa / Pb<br />
END<br />
end of program<br />
FIN y, 0/1 input with fast scanning<br />
64
Parker Hannifin S.p.A Divisione S.B.C.<br />
sLVD <strong>User</strong>’s <strong>Manual</strong><br />
FUNCTIONAL DESCRIPTION<br />
The pico-PLC program is scanned every 6.144 milliseconds. With this sampling, the input<br />
is first read, the two timers (Pr92 Pr93 b99.0 and b99.1) are updated, the user program is<br />
scanned and the output is updated. For this reason reading the input and setting the output can<br />
vary by 6.144 ms with respect to the physical event. If the microprocessor is overloaded with<br />
work (the operating mode is active, there are frequent serial requests and the PLC program is<br />
long), it may take more than 6.144 milliseconds to scan the entire PLC program.<br />
All the instructions of the pico-PLC with the exception of the arithmetic instructions are<br />
single bit instructions. The available stack has a depth of only one bit.<br />
The LD (LDN) instruction loads the bit defined as the operant on the stack with all the<br />
other logical instructions work on the stack itself. The arithmetic instructions are executed<br />
only if the stack bit is set to 1.<br />
The truth table for the logical operations is given below for the convenience of the user.<br />
AND logical operation<br />
bit A bit B result<br />
0 0 0<br />
0 1 0<br />
1 0 0<br />
1 1 1<br />
OR logical operation<br />
bit A bit B result<br />
0 0 0<br />
0 1 1<br />
1 0 1<br />
1 1 1<br />
The respective negative operations ANDN and ORN follow the same logic except that the<br />
negated value of the bit specified will be used.<br />
12 bits from b90.4 to b90.15 are reserved on the PLC and can be stored. 14 additional bits<br />
from b91.2 to b91.15 are available on the PLC but cannot be stored. They are always set to 0<br />
when the converter is powered on.<br />
10 word parameters are also reserved. These are from Pr80 to Pr89. They can be stored and<br />
used as 5 double word parameters just as the 13 parameters from Pr151 to Pr163. The pico-<br />
PLC includes 9 constants for arithmetic operations. These are from Pr71 to Pr79 and can be<br />
the constants most used by normal applications.<br />
When the arithmetic operations (ADD, SUB, MUL, DIV) are used, the operators are<br />
assumed to be words and are signed. If a double word operation is required, set b94.0 = 1<br />
before the operation itself. After the operation the PLC will automatically set this bit to 0. The<br />
parameters Pr58...Pr69 and Pr110...Pr149 are treated as double words so that in an operation<br />
such as [ADD 71 72 64] the result –1 will be written in the double word Pr64:65 without<br />
having to set b94.0=1 before the operation. If Pr80=-1 and Pr81=0 the operation [ADD 80 72<br />
64] will give the result Pr64:65=-1, while the same operation executed with b94.0=1 will<br />
assume Pr81 as the high word of the double word Pr80:81 and the result will be<br />
Pr64:65=65535. In the first case, operators other than Pr58...Pr69, Pr110...Pr149 are treated as<br />
words, while in the second case they are treated as double words.<br />
In the mathematical operations on double words, the operands and the result are defined as<br />
follows: the parameter of the operand defines the least significant part while the most<br />
significant part is represented by the next word.<br />
After every arithmetic operation, b99.2=0 if the result is positive and b99.2=1 if it is<br />
negative. In the same way b99.3=0 if the result is 0 and b99.3=1 if it is not 0. These settings<br />
remain active until the next arithmetic operation is executed (the operation is executed only if<br />
the stack bit is equal to 1). A mathematical operation can be executed by placing the result in<br />
one of the constant parameters (Pr71...Pr79) in order to set bit b99.2 and b99.3.<br />
If the DIV operation is executed on a double word, the most significant part of the result<br />
contains the remainder of the division, that is, if b94.0=1 and the operation [DIV 79 77 80] is<br />
executed, the result will be Pr80=4 and Pr81=96.<br />
65
Parker Hannifin S.p.A Divisione S.B.C.<br />
sLVD <strong>User</strong>’s <strong>Manual</strong><br />
The FIN instruction. Two instructions are available for the fast acquisition of inputs: in<br />
this case the scanning occurs at the rate of 512µs (normal scanning is at the rate of 6.144ms).<br />
If this is used, they must be the first instructions of the PLC. The first instruction FIN copies<br />
digital input 0 to the y bit of the Pb40 parameter (the second operand =0) or Pb150 (the<br />
second operand=1). The second FIN copies digital input 1 to the y bit of the pPb40 parameter<br />
(second operand=0) or Pb150 (second operand=1). If the value 2 is added to the second<br />
operand, the input must be negated before being copied. If an FIN instruction is inserted in a<br />
different position, it will not have any effect. The FIN instructions can be enabled/disabled<br />
using a bit for each FIN: the first FIN is enabled if b94.5=0; the second FIN is enabled if<br />
b94.6=0. The FIN instruction inserted in the PLC program after the first two instructions and<br />
in any case if it follows any instruction that is not a FIN instruction is ignored.<br />
The user can make use of two timers, Pr92 and Pr93. To use the first timer load the time as<br />
a number of sampling (6.144 ms) into PR92. For example, Pr92=100 is equal to 614<br />
milliseconds. Pr92 will automatically be decremented as time goes by and the b99.0 bit will<br />
remain set to 0 until the timer has expired. When Pr92=0, then b99.0=1. The second timer<br />
works the same way using the PR93 parameter and the b99.1 bit. Pr92, Pr93, b99.0 and b99.1<br />
are updated only before the pico-PLC program is scanned.<br />
The maximum number of instructions is 128. The arithmetic operations occupy the space<br />
of two logical operations. If they are used, the maximum number of instructions accepted is<br />
reduced.<br />
The PLC program must always end with the END instruction.<br />
The pico-PLC program can be edited via serial link or directly using the keyboard. In this<br />
last case, in order to facilitate the modification of the program, if you want to delete an<br />
instruction, go to the instruction to be deleted and hit the [M] key. The type of instruction is<br />
then displayed. By holding down the [M] key and pressing the [-] key, the instruction will be<br />
deleted when both keys are released. If you want to add an instruction after the In06, go to the<br />
next instruction In07 and hit the [M] key. The type of instruction is then displayed. By holding<br />
down the [M] key and pressing the [+] key, the FIN instruction will be inserted when both<br />
keys are released. In this last case make sure that the program does not exceed the maximum<br />
limit of the instructions, otherwise the last instructions will be lost. The pico-PLC program<br />
can be edited or modified only when the PLC is in stop (b99.13=0).<br />
66
Parker Hannifin S.p.A Divisione S.B.C.<br />
sLVD <strong>User</strong>’s <strong>Manual</strong><br />
5 SERIAL INTERFACE<br />
The serial communication of the converter is half-duplex, master-slave, using an<br />
asynchronous RS-485/RS-422 line. The converters take control of the line only if interrogated<br />
by the master.<br />
The same serial line can be connected to up to 32 converters by setting a different serial<br />
address in each to the Pr27 parameter. It is also possible to set the transmission speed by using<br />
the Pr26 parameter as specified in the table below:<br />
Pr26 (decimal base) b/s time-out (ms)<br />
0 600 512<br />
1 1200 256<br />
2 2400 128<br />
3 4800 64<br />
4 9600 (*) 32<br />
5 9600 32<br />
6 19200 16<br />
7 38400 12<br />
8 57600 8<br />
(*) The version with code Pr26=4 differs from Pr26=5 for the delay of the response of 25 ms.<br />
This version has been developed to interface with the PLCs that require such a feature.<br />
For the connection diagrams, see the section, Connecting the serial line.<br />
5.1 Communication protocol<br />
The column on the right in the table above shows the time-out value expressed in<br />
milliseconds for each communication speed. This is the time within which the message must<br />
be sent, beginning from the start of each message (STX). If a message is interrupted after this<br />
time, the converter ignores what has been received and waits for the beginning of a new<br />
message.<br />
The message consists of several consecutive bits. The format of the bits is the following:<br />
1 start bit<br />
8 bit of data defined by a following byte enclosed within brackets<br />
1 parity bit (even)<br />
1 stop bit<br />
The structure of the message is the following:<br />
[STX] [CMD+ADDR] [BK+LUN] [PAR] [D0]... [Dn] [CHK]<br />
where:<br />
[STX] = $7E indicator of transmission start. If a field in the message different from STX<br />
assumes the value $7E, this field is followed by a 0 ($00) so that it will not be interpreted as<br />
an [STX].<br />
[CMD+ADDR] = command and address of the peripheral device. This is never 0. This data is<br />
composed in the following way: the first 5 bits (bits 0-4) define the address of the converter<br />
(from 0 to 31); the remaining 3 bits (bits 5-7) define the type of message sent, as described in<br />
the following table:<br />
67
Parker Hannifin S.p.A Divisione S.B.C.<br />
sLVD <strong>User</strong>’s <strong>Manual</strong><br />
CMD bit 7 bit 6 bit 5 type of message<br />
1 0 0 1 converter response<br />
2 0 1 0 reading a pico-PLC instruction<br />
3 0 1 1 writing a pico-PLC instruction<br />
4 1 0 0 reading a parameter<br />
5 1 0 1 writing a parameter<br />
6 1 1 0 bit modification<br />
7 1 1 1 writing a parameter to all the slaves<br />
[BK+LUN] = the LUN field (first 3 bits) indicates the number of bytes of the data transmitted<br />
(a parameter or a PLC instruction); the values can range from 1 to 4. This value does not<br />
include eventual 0 characters ($00) which are inserted after the values that coincide with the<br />
character of transmission start ($7E). The length of each parameter is two bytes.<br />
The BK field is represented by the 5 most significant bits and represents the 5 most significant<br />
bits of the parameter address.<br />
[PAR] = write/read address of the parameter or PLC instruction.<br />
The parameter address is the number of the parameter * 2 with 13 bit field: PAR represents<br />
the least significant eight bits of the address, the 5 most significant bits must be written in the<br />
BK field. The table used by electronic cam starts at the address 4096. The PLC instructions<br />
have the address from 0 up to 255.<br />
[D0]... [Dn] = data transmitted.<br />
[CHK] = 256 module sum of all the fields excluding the [STX] (checksum).<br />
Message types<br />
[CMD1] = is the response message of the converter to a data request. The response message<br />
has the following format:<br />
[STX] [001+ADDR] [BK+LUN] [PAR] [D0]... [Dn] [CHK]<br />
or it can be the confirmation message to a data write or data modify. In this case, the format is<br />
the following:<br />
[STX] [001+ADDR]<br />
where ADDR always identifies which converter is answering.<br />
[CMD2] = is the read message of an instruction in the PLC area. The message has the<br />
following format:<br />
[STX] [010+ADDR] [BK+LUN] [PAR] [CHK]<br />
[CMD3] = is the write message to an instruction in the PLC area. The message has the<br />
following format:<br />
[STX] [011+ADDR] [BK+LUN] [PAR] [D0]... [Dn] [CHK]<br />
[CMD4] = is the read message of a parameter. The message has the following format:<br />
[STX] [100+ADDR] [BK+LUN] [PAR] [CHK]<br />
68
Parker Hannifin S.p.A Divisione S.B.C.<br />
sLVD <strong>User</strong>’s <strong>Manual</strong><br />
[CMD5] = is the write message of a parameter. The message has the following format:<br />
[STX] [101+ADDR] [BK+LUN] [PAR] [D0]... [Dn] [CHK]<br />
[CMD6] = is the change bit message of a byte parameter. The message has the following<br />
format:<br />
[STX] [110+ADDR] [BK+LUN] [PAR] [D0] [D1] [CHK]<br />
In this case LUN=2 or else two bytes are sent for the data. The first byte is the mask<br />
containing the 0s in the positions of the bits to be changed and 1s in the other positions, while<br />
the second byte contains 1s in the positions of the bits that are to be set to 1 and 0s in the other<br />
positions. The PAR address is that of the parameter (byte) where one or more bits are to be<br />
modified. If the parameter is a word and the bit to be modified is one of the first 8 (b0...b7):<br />
PAR = the parameter address; otherwise, if the bit to be modified is one of the upper 8<br />
(b8...b15): PAR = the address parameter + 1.<br />
[CMD7] = is the write message of a parameter to all converters connected to the serial line.<br />
The message has the following format:<br />
[STX] [11100000] [BK+LUN] [PAR] [D0]... [Dn] [CHK]<br />
The address of the peripheral device (ADDR) must be 0.<br />
Notes:<br />
- The parameters that are represented on the screen with decimals must be treated as<br />
complete values. For example, a value of 978.5 is read and written as 9785.<br />
- All values that are receded by the $ symbol are to be understood as hex numbers.<br />
- The value included inside the brackets identifies the base unit (byte) of the message.<br />
- All messages must be terminated with a time-out which is a function of the speed, well<br />
defined to be considered valid and must have the exact parity and checksum.<br />
- The converter responds to a request or to a data send only if the message has been received<br />
correctly. In the case of an error in the message, no response is transmitted. The only<br />
exception is message type 7 that is used to send data with a single message to all the<br />
converters connected to the serial line.<br />
Initializing and managing the serial line<br />
The converter is delivered with a 0 address (Pr27=0) and a speed of 9600 bps (Pr26=5).<br />
To modify the configuration, first set the speed in Pr26, then the serial address in Pr27 and<br />
finally initialise it by issuing the command b42.3. Use the b99.15 command to store the<br />
configuration.<br />
Each pico-PLC instruction occupies 2 or 4 bytes whose format is the following:<br />
Since the maximum length of each instruction in 2 bytes and the total area available in the<br />
PLC is 256 bytes, the PLC program can have at the most 128 instructions.<br />
69
Parker Hannifin S.p.A Divisione S.B.C.<br />
sLVD <strong>User</strong>’s <strong>Manual</strong><br />
Instruction Code Length<br />
(in bytes)<br />
LD Pa.y 0 2<br />
LDN Pa.y 1 2<br />
OUT Pa.y 2 2<br />
OUTN Pa.y 3 2<br />
AND Pa.y 4 2<br />
ANDN Pa.y 5 2<br />
OR Pa.y 6 2<br />
ORN Pa.y 7 2<br />
ADD Pa, Pb, Pc 8 4<br />
SUB Pa, Pb, Pc 9 4<br />
MUL Pa, Pb, Pc 10 4<br />
DIV Pa, Pb, Pc 11 4<br />
SET Pa.y 12 2<br />
RES Pa.y 13 2<br />
FIN Pb40.y/Pb150.y 14 2<br />
END 15 2<br />
The first 4 bits (b0..b3) of the first byte in each instruction contain the instruction code.<br />
In the first 8 instructions in the table (LD… ORN) and the SET and RES instructions, the<br />
remaining 4 bit of the first byte (b4..b7) contain the value y, while the second byte contains<br />
the value Pa.<br />
In the ADD, SUB, MUL e DIV instructions, the second byte contains the value Pa, the<br />
third byte the value Pb, and the fourth byte the value Pc.<br />
In the END instruction, the second byte is not used.<br />
In the FIN instruction, the fifth bit (b4) of the first byte selects the parameter: b4=0 if it<br />
refers to Pb40, b4=1 if it refers to Pb150; the sixth bit (b5) of the first byte is used for logical<br />
negation: b5=0 the bit is copied, b5=1 the bit is negated before being copied. The second byte<br />
of the FIN instruction contains the value of y.<br />
If the FIN instructions are used, they must be the first instructions of the program and<br />
cannot be more than 2. They occupy the addressed from 0h to 3h. If a FIN instruction is<br />
inserted beginning at the 4h address or after any other instruction, the FIN instruction does not<br />
function and is ignored (NOP).<br />
The instructions must follow each other beginning at address 0h and no byte can be left<br />
empty.<br />
There is only one program and it is terminated with the END instruction.<br />
Examples of using the serial line<br />
In order to better understand how to implement the communication protocol on the serial<br />
line, some examples of each type of message are given below.<br />
The values indicated are only indicative as examples.<br />
First example: reading a 1 byte parameter<br />
Suppose we want to read the value of the parameter Pr25 (release software) and that its value<br />
is 43. Suppose also that the converter has the serial address 0. The message to be sent is the<br />
following.<br />
[$7E][$80][$01][$32][$B3]<br />
70
Parker Hannifin S.p.A Divisione S.B.C.<br />
sLVD <strong>User</strong>’s <strong>Manual</strong><br />
The converter responds with the message:<br />
[$7E][$20][$01][$32][$2B][$7E][$00]<br />
Second example: reading a 2 byte parameter<br />
Suppose we want to read the reference speed (Pr7) and that its value is 2000. Suppose also<br />
that the converter has the serial address 1. The message to be sent is the following:<br />
[$7E][$81][$02][$0E][$91]<br />
The converter responds with the message:<br />
[$7E][$21][$02][$0E][$D0][$07][$08]<br />
Third example: writing a 1 byte parameter<br />
Suppose we want to select operating mode 1 (Pr31). Suppose also that the converter has the<br />
serial address 3. The message to be sent is the following:<br />
[$7E][$A3][$01][$3E][$01][$E3]<br />
The converter responds with the message:<br />
[$7E][$23]<br />
Fourth example: writing a 2 byte parameter<br />
Suppose we want to set the rated current to 2.5 A (Pr33). Suppose also that the converter has<br />
the serial address 3. The message to be sent is the following:<br />
[$7E][$A3][$02][$42][$19][$00][$00]<br />
The converter responds with the message:<br />
[$7E][$23]<br />
Fifth example: setting a bit to 1<br />
Suppose we want to send the command to save the PLC program (b99.14=1). Suppose also<br />
that the converter has the serial address 0. The message to be sent is the following:<br />
[$7E][$C0][$02][$C7][$BF][$40][$88]<br />
The converter responds with the message:<br />
[$7E][$20]<br />
Sixth example: setting a bit to 0<br />
Suppose we want to disable the converter via software (b40.9=0). Suppose also that the<br />
converter has the serial address 0. The message to be sent is the following:<br />
[$7E][$C0][$02][$51][$FD][$00][$10]<br />
The converter responds with the message:<br />
[$7E][$20]<br />
Seventh example: writing a PLC instruction<br />
Suppose we want to set the first instruction of the PLC as: LD 90.4. Suppose also that the<br />
converter has the serial address 0. The message to be sent is the following:<br />
[$7E][$60][$02][$00][$40][$5A][$FC]<br />
The converter responds with the message:<br />
[$7E][$20]<br />
71
Parker Hannifin S.p.A Divisione S.B.C.<br />
sLVD <strong>User</strong>’s <strong>Manual</strong><br />
6 CANBUS<br />
A CanBus interface based on the physical layer ISO/DIS11898 is included on the <strong>SLVD</strong><br />
converter. The Data link layer is the full CAN version 2.0 part A (ID 11 bit) and a subset of<br />
the application layer SBCCAN is used.<br />
Master<br />
Can - bus<br />
Can Connector<br />
CANL<br />
120<br />
CANH<br />
CAN_GND<br />
8<br />
5<br />
8<br />
5<br />
8<br />
5<br />
120<br />
9 9 9<br />
NODE 1<br />
NODE "n"<br />
LAST NODE<br />
The CanBus on the <strong>SLVD</strong> has two functional modes.<br />
The first functional mode is real time mode. This is to establish a real time digital link<br />
between 15 <strong>SLVD</strong>s and a control that executes the calculation of the trajectories and sends the<br />
position reference, the speed reference or both to the <strong>SLVD</strong>s which can change the actual<br />
position of the motors (b150.2=1). Real time mode is active when Pr31=15.<br />
The second functional mode is communication mode. This is used to write or read every<br />
parameter of each <strong>SLVD</strong> connected to the bus (maximum of 15). This function is very useful<br />
when you want to sue the motion functions that have already been realized in the base<br />
software of the <strong>SLVD</strong>. Communication mode is automatically set when Pr31≠15.<br />
The CanBus node must be set through Pr27 with values from 0 to 14 (*).<br />
Transmission speed depends on Pr31, Pr48 e b150.4 as the following table:<br />
Pr48 Pr31≠15 Pr31=15 b150.4 Max. length<br />
0 125 kbps 1 Mbps 0<br />
0 125 kbps 500 kbps 1<br />
1 1 Mbps 40 m<br />
2 500 kbps 100 m<br />
3 250 kbps 250 m<br />
4 125 kbps 500 m<br />
5 50 kbps 1000 m<br />
6 20 kbps 2500 m<br />
7 10 kbps 5000 m<br />
For bus length greater then about 1000 m bridge or repeater devices may be needed.<br />
All changes in speed, address or function mode are activated using the b42.3 command or<br />
when the converter is powered on again.<br />
(*) In the messages via CanBus, the node number is identified through Pr27+1, i.e. with<br />
values from 1 to 15<br />
72
Parker Hannifin S.p.A Divisione S.B.C.<br />
sLVD <strong>User</strong>’s <strong>Manual</strong><br />
6.1 Description of the fields in real time mode<br />
Cyclic message from the master to the <strong>SLVD</strong><br />
Cyclic data<br />
Data length<br />
8/6/4 bytes<br />
Field Name Position Reference Speed Reference Command<br />
Contents Pr114:115 (32 bit) Pr105 (16 bit) Pr102 (16 bit)<br />
Identifier<br />
ID2 ID1 ID0 - - - - - ID10 ID9 ID8 ID7 ID6 ID5 ID4 ID3<br />
A2 A1 A0 X X X X X 0 0 0 0 0 1 1 A3<br />
A0:A3 <strong>SLVD</strong> slave address (Pr27+1), valid values 1..15.<br />
Pr102 is used as a command and must be managed by the pico-PLC.<br />
The data type depends on the message length as follows:<br />
Data length Contents Contents Contents<br />
8 Position reference (4 byte) Speed reference (2 byte) Pr102 (2 byte)<br />
6 Position reference (4 byte) Pr102 (2 byte)<br />
4 Speed reference (2 byte) Pr102 (2 byte)<br />
Synchronism message from the master to the <strong>SLVD</strong><br />
Data length<br />
Field Name<br />
Contents<br />
Synchronism message<br />
1 byte<br />
Sync<br />
Sync type (8 bit)<br />
Identifier<br />
ID2 ID1 ID0 - - - - - ID10 ID9 ID8 ID7 ID6 ID5 ID4 ID3<br />
0 0 0 X X X X X 0 0 0 0 0 0 0 0<br />
Type 0 synchronism (Sync = 0): every <strong>SLVD</strong> activates the speed references and the position<br />
references and stores the actual position of the motor; if b150.2=1 the drive answers with a “cyclic<br />
reply”.<br />
Type 1 synchronism (Sync = 1): stores the actual position of the motor; if b150.6=1 the drive<br />
answer with a “cyclic reply”.<br />
73
Parker Hannifin S.p.A Divisione S.B.C.<br />
sLVD <strong>User</strong>’s <strong>Manual</strong><br />
Cyclic message from the <strong>SLVD</strong> to the master<br />
Cyclic reply<br />
Data length<br />
6/7 byte<br />
Field Name Address Motor Position Status<br />
Data Pr27+1 (8bit) Pr116:117 (32 bit) Pr103<br />
Identifier<br />
ID2 ID1 ID0 - - - - - ID10 ID9 ID8 ID7 ID6 ID5 ID4 ID3<br />
A2 A1 A0 X X X X X 0 0 0 1 0 1 0 A3<br />
A0:A3 <strong>SLVD</strong> slave address (Pr27+1), valid values 1..15.<br />
The Pr103 parameter is used as the status, if b150.3=0 all the 16 bits are sent, if b150.3=1 only the<br />
first 8 bits are sent.<br />
If b150.0=1 the message is understood as torque monitor.<br />
If b150.0=0 the message structure is the one shown above.<br />
MultiCyclic message from master to the <strong>SLVD</strong><br />
MultiCyclic data<br />
Data length<br />
2,4,6,8 byte<br />
Field Name Speed Reference0 Speed Reference 1 Speed Reference 2 Speed Reference 3<br />
Contents Pr105 (16 bit) Pr105 (16 bit) Pr105 (16 bit) Pr105 (16 bit)<br />
Identifier<br />
ID2 ID1 ID0 - - - - - ID10 ID9 ID8 ID7 ID6 ID5 ID4 ID3<br />
0 A1 A0 X X X X X 0 0 0 0 1 1 1 0<br />
A0:A1<br />
Group address<br />
This message contains several data which are sent to several slave drives. One data (speed<br />
reference) is addressed for one drive, based on an addressing logic. The following table shows<br />
which information (speed reference, Pr105) is sent to which drive, based on the<br />
A0:A1(=group address) value.<br />
A0:A1 Speed reference 0 Speed reference 1 Speed reference 2 Speed reference 3<br />
0 Drive 1 Drive 2 Drive 3 Drive 4<br />
1 Drive 5 Drive 6 Drive 7 Drive 8<br />
2 Drive 9 Drive 10 Drive 11 Drive 12<br />
3 Drive 13 Drive 14 Drive 15<br />
74
Parker Hannifin S.p.A Divisione S.B.C.<br />
sLVD <strong>User</strong>’s <strong>Manual</strong><br />
MultiSynchronism message from the master to the <strong>SLVD</strong><br />
MultiSynchronism message<br />
Data length<br />
1,2,3,4 byte<br />
Field Name Command 0 Command 1 Command 2 Command 3<br />
Contents Pr102 (8bit) Pr102 (8bit) Pr102 (8bit) Pr102 (8bit)<br />
Identifier<br />
ID2 ID1 ID0 - - - - - ID10 ID9 ID8 ID7 ID6 ID5 ID4 ID3<br />
0 0 0 X X X X X 0 0 0 0 0 1 0 0<br />
Each drive receives and executes the speed reference and saves the actual motor position; if<br />
b150.2=1 the drive answers with a “cyclic reply”.<br />
This message is for several drives. The following table shows to which drive the “Command”<br />
(Pr102 – first 8 bit) is sent to.<br />
Drive Command0 Command 1 Command 2 Command 3<br />
Drive1 YES<br />
Drive2 YES<br />
Drive3<br />
YES<br />
Drive4<br />
YES<br />
Drive5<br />
YES<br />
Drive6<br />
YES<br />
Drive7<br />
YES<br />
Drive8<br />
YES<br />
Drive9 YES<br />
Drive10 YES<br />
Drive11<br />
YES<br />
Drive12<br />
YES<br />
Drive13<br />
YES<br />
Drive14<br />
YES<br />
Drive15<br />
YES<br />
Each command is made up of 8 bit (Pr102) and it is sent to several drives. Each command<br />
value is set by the user through the pico-PLC of each drive.<br />
75
Parker Hannifin S.p.A Divisione S.B.C.<br />
sLVD <strong>User</strong>’s <strong>Manual</strong><br />
Acyclic data write message or parameter request from the master to the <strong>SLVD</strong><br />
Acyclic data write or request<br />
Data length<br />
7 byte<br />
Field Name Cmd & Len Data Address Data<br />
Contents 5 bit command and 3 bit length 16 bit data address 32 bit data<br />
Identifier<br />
ID2 ID1 ID0 - - - - - ID10 ID9 ID8 ID7 ID6 ID5 ID4 ID3<br />
A2 A1 A0 X X X X X 0 0 0 0 1 0 0 A3<br />
A0:A3 <strong>SLVD</strong> slave address (Pr27+1), valid values 1..15.<br />
Cmd & Len Sub-field Value Meaning<br />
Cmd [0..4] 0 Read request<br />
1 Write<br />
2 SET bit Pr = Pr .OR. Data<br />
3 RESET bit Pr = Pr .AND. (.NOT.Data)<br />
4 TOGGLE bit Pr = Pr .XOR. Data<br />
5 – 31 Not use<br />
Len [5..7] 0- 4 Number of significant bytes in the data field<br />
Data Address<br />
This is the address of the parameter interested in the operation (parameter number * 2).<br />
The PLC instructions have the address from 8192 up to 8447.<br />
The electronic cam table have the address from 4096 to 4610.<br />
Data<br />
If the parameter is written, it contains the value of the parameter.<br />
If one or more bits are modified, it contains the mask of the bits to be modified.<br />
If the parameter is to be read, the field has no meaning.<br />
If plc programme is written, it contains the instruction code (see the section Serial interface).<br />
Acyclic response message to a parameter request from the <strong>SLVD</strong> to the master<br />
Data reply<br />
Data length<br />
5 bytes<br />
Field Name Addr & Spare Data<br />
Contents Pr27+1 32 bit reply data<br />
Identifier<br />
ID2 ID1 ID0 - - - - - ID10 ID9 ID8 ID7 ID6 ID5 ID4 ID3<br />
A2 A1 A0 X X X X X 0 0 0 1 1 0 0 A3<br />
A0:A3 <strong>SLVD</strong> slave address (Pr27+1), valid values 1..15.<br />
76
Parker Hannifin S.p.A Divisione S.B.C.<br />
sLVD <strong>User</strong>’s <strong>Manual</strong><br />
Broadcast write parameter message from the master to the <strong>SLVD</strong><br />
Broadcast data write<br />
Data length<br />
7 bytes<br />
Field Name Cmd & Len Data Address Data<br />
Contents 5 bit command and 3 bit length 16 bit data address 32 bit data<br />
Identifier<br />
ID2 ID1 ID0 - - - - - ID10 ID9 ID8 ID7 ID6 ID5 ID4 ID3<br />
1 1 1 X X X X X 0 0 1 0 0 0 1 1<br />
Cmd & Len Sub-field Value Meaning<br />
Cmd [0..4] 0 Not used<br />
1 Write<br />
2 SET bit Pr = Pr .OR. Data<br />
3 RESET bit Pr = Pr .AND. (.NOT.Data)<br />
4 TOGGLE bit Pr = Pr .XOR. Data<br />
5 – 31 Not used<br />
Len [5..7] 0- 4 Number of significant bytes in the data field<br />
Data Address<br />
This is the address of the parameter interested in the operation (parameter number * 2 ). The<br />
PLC instructions have the address from 8192 up to 8447.<br />
Data<br />
If the parameter is to be written, it contains the value of the parameter.<br />
If one or more bits are modified, it contains the mask of the bits to be modified.<br />
If plc programme is written, it contains the instruction code (see the section Serial interface).<br />
Alarm message from the <strong>SLVD</strong> to the master<br />
Error<br />
Data length<br />
3 bytes<br />
Field Name Addr Error<br />
Contents Pr27+1 Pr23<br />
Identifier<br />
ID2 ID1 ID0 - - - - - ID10 ID9 ID8 ID7 ID6 ID5 ID4 ID3<br />
A2 A1 A0 X X X X X 0 0 0 1 0 0 0 A3<br />
A0:A3 <strong>SLVD</strong> slave address (Pr27+1), valid values 1..15.<br />
If the converter is in the alarm status, it will send this message on the bus (alarm 0 = no<br />
alarm).<br />
77
Parker Hannifin S.p.A Divisione S.B.C.<br />
sLVD <strong>User</strong>’s <strong>Manual</strong><br />
To evaluate the minimum sampling time, use the following formula:<br />
Tc min<br />
= ( Nr + Nt + 5 ) * 0.12<br />
where: Tc min is the minimum sampling time in milliseconds<br />
Nr is the number of <strong>SLVD</strong>s that receive the reference<br />
Nt is the number of <strong>SLVD</strong>s that transmit the feedback<br />
The constant 0.12 is valid for 1 Mbps bus speed<br />
Note 1: bit 41.15 can be used in “real time mode”; bit 41.15 is set to 1 every synchronism and<br />
multisynchronism message receiving via SBCCAN.<br />
Therefore, it is possible to check the communication status between Master and Slave via<br />
CanBus through a simple pico-PLC program.<br />
The pico-PLC code on the drive be as follows:<br />
…<br />
Ld 41.15<br />
Out 41.5<br />
Rst 41.15<br />
…<br />
If the check of the communication status between Master and Slave via CanBus is<br />
implemented into the drive pico-PLC, the test is executed every 6.144 [ms] (i.e. minimum<br />
execution time of pico-PLC program) or multiples.<br />
Attention: both Pr103 (Status) and Pr102 (Command) must be set through a specific pico-PLC<br />
program into each drive.<br />
Note 2: the Master can send the new reference data only if at least 400 [µs] passed from the<br />
last synchronism message, or if the response message has already been received.<br />
The typical timing of the SBCCAN in real time mode is shown in the diagram on the next<br />
page:<br />
78
Parker Hannifin S.p.A Divisione S.B.C.<br />
sLVD <strong>User</strong>’s <strong>Manual</strong><br />
SBCCAN<br />
feedback from sLVD 1 feedback from sLVD 2 feedback from sLVD 3 feedback from sLVD 4<br />
TX reference Sync RX feedback<br />
Change Pr of sLVD X<br />
TX reference<br />
cyclic msg to sLVD 1 cyclic msg to sLVD 2 cyclic msg to sLVD 3 cyclic msg to sLVD 4<br />
TC<br />
TX reference Sync RX feedback<br />
Require Pr of LVD X<br />
LVD X reply<br />
TX reference<br />
TC<br />
79
Parker Hannifin S.p.A Divisione S.B.C.<br />
sLVD <strong>User</strong>’s <strong>Manual</strong><br />
6.2 Description of the fields in communication<br />
mode<br />
Write or parameter request message from the master to the <strong>SLVD</strong><br />
data write or request<br />
Data length<br />
7 bytes<br />
Field Name Cmd & Len Data Address Data<br />
Contents 5 bit command and 3 bit length 16 bit data address 32 bit data<br />
Identifier<br />
ID2 ID1 ID0 - - - - - ID10 ID9 ID8 ID7 ID6 ID5 ID4 ID3<br />
A2 A1 A0 X X X X X 0 0 0 0 1 0 0 A3<br />
A0:A3 <strong>SLVD</strong> slave address (Pr27+1), valid values 1..15.<br />
Cmd & Len Sub-field Value Meaning<br />
Cmd [0..4] 0 Read request<br />
1 Write<br />
2 SET bit Pr = Pr .OR. Data<br />
3 RESET bit Pr = Pr .AND. (.NOT.Data)<br />
4 TOGGLE bit Pr = Pr .XOR. Data<br />
5 – 31 Not used<br />
Len [5..7] 0- 4 Number of significant bytes in the data field<br />
Data Address<br />
This is the address of the parameter interested in the operation (parameter number * 2).<br />
The PLC instructions have the address from 8192 up to 8447.<br />
The electronic cam table have the address from 4096 to 4610.<br />
Data<br />
If the parameter is written, it contains the value of the parameter.<br />
If one or more bits are modified, it contains the mask of the bits to be modified.<br />
If the parameter is to be read, the field has no meaning.<br />
If plc programme is written, it contains the instruction code (see the section Serial interface).<br />
80
Parker Hannifin S.p.A Divisione S.B.C.<br />
sLVD <strong>User</strong>’s <strong>Manual</strong><br />
Response to a parameter request message from the <strong>SLVD</strong> to the master<br />
Data reply<br />
Data length<br />
5 byte<br />
Field Name Addr & Spare Data<br />
Contents Pr27+1 (8bit) 32 bit reply data<br />
Identifier<br />
ID2 ID1 ID0 - - - - - ID10 ID9 ID8 ID7 ID6 ID5 ID4 ID3<br />
A2 A1 A0 X X X X X 0 0 0 1 1 0 0 A3<br />
A0:A3 <strong>SLVD</strong> slave address (Pr27+1), valid values 1..15.<br />
Broadcast write parameter message from the master to the <strong>SLVD</strong><br />
Broadcast data write<br />
Data length<br />
7 bytes<br />
Field Name Cmd & Len Data Address Data<br />
Contents 5 bit command and 3 bit length 16 bit data address 32 bit data<br />
Identifier<br />
ID2 ID1 ID0 - - - - - ID10 ID9 ID8 ID7 ID6 ID5 ID4 ID3<br />
1 1 1 X X X X X 0 0 1 0 0 0 1 1<br />
Cmd & Len Sub-field Value Meaning<br />
Cmd [0..4] 0 Not used<br />
1 Write<br />
2 SET bit Pr = Pr .OR. Data<br />
3 RESET bit Pr = Pr .AND. (.NOT.Data)<br />
4 TOGGLE bit Pr = Pr .XOR. Data<br />
5 – 31 Not used<br />
Len [5..7] 0- 4 Number of significant bytes in the data field<br />
Data Address<br />
This is the address of the parameter interested in the operation (parameter number * 2). The<br />
PLC instructions have the address from 8192 up to 8447.<br />
Data<br />
When the parameter is written, it contains the value of the parameter.<br />
If one or more bits are modified, it contains the mask of the bits to be modified.<br />
If plc programme is written, it contains the instruction code (see the section Serial interface).<br />
81
Parker Hannifin S.p.A Divisione S.B.C.<br />
sLVD <strong>User</strong>’s <strong>Manual</strong><br />
6.3 Description of the fields Extended message<br />
set # 2<br />
The extended message set 2 permits a memory area exchange between the master and the<br />
<strong>SLVD</strong> with both communication and realtime mode. The data exchange is synchronous: the<br />
data, transmitted from the master to the <strong>SLVD</strong>, are stored in a temporary buffer; when the<br />
master sends the synchronous message to all the drives, each <strong>SLVD</strong> copies the temporary<br />
buffer onto the writing block area and sends back the reading block area.<br />
Block send message from the master to the <strong>SLVD</strong><br />
Data length<br />
Field Name<br />
Contents<br />
Block send<br />
8 bytes<br />
Data<br />
64 bit of data<br />
Identifier<br />
ID2 ID1 ID0 - - - - - ID10 ID9 ID8 ID7 ID6 ID5 ID4 ID3<br />
A2 A1 A0 X X X X X 1 0 0 0 0 0 1 A3<br />
A0:A3 <strong>SLVD</strong> slave address (Pr27+1), valid values 1..15.<br />
Synchronism message from the master to the <strong>SLVD</strong><br />
Block sync<br />
Data length<br />
0 bytes<br />
Field Name<br />
Contents<br />
No data<br />
Identifier<br />
ID2 ID1 ID0 - - - - - ID10 ID9 ID8 ID7 ID6 ID5 ID4 ID3<br />
0 0 0 X X X X X 1 0 0 0 0 0 0 0<br />
Data received are stored from Pr80 to Pr83, and <strong>SLVD</strong> sends parameters from Pr84 to Pr87 by<br />
the following message:<br />
82
Parker Hannifin S.p.A Divisione S.B.C.<br />
sLVD <strong>User</strong>’s <strong>Manual</strong><br />
Block reply message from <strong>SLVD</strong> to the master<br />
Data length<br />
Field Name<br />
Contents<br />
Block reply<br />
8 bytes<br />
Data<br />
64 bit of data<br />
Identifier<br />
ID2 ID1 ID0 - - - - - ID10 ID9 ID8 ID7 ID6 ID5 ID4 ID3<br />
A2 A1 A0 X X X X X 1 0 0 0 0 1 0 A3<br />
A0:A3 <strong>SLVD</strong> slave address (Pr27+1), valid values 1..15.<br />
Note 1: as for the “real time mode”, bit 41.9 is set to 1 every synchronism message receiving<br />
via SBCCAN.<br />
Therefore, it is possible to check the communication status between Master and Slave via<br />
CanBus through a simple pico-PLC program.<br />
The pico-PLC code on the drive be as follows:<br />
…<br />
Ld 41.9<br />
Out 41.5<br />
Rst 41.9<br />
…<br />
If the check of the communication status between Master and Slave via CanBus is<br />
implemented into the drive pico-PLC, the test is executed every 6.144 [ms] (i.e. minimum<br />
execution time of pico-PLC program) or multiples.<br />
83
Parker Hannifin S.p.A Divisione S.B.C.<br />
sLVD <strong>User</strong>’s <strong>Manual</strong><br />
7 Appendix A: Mechanical dimensions of the<br />
<strong>SLVD</strong><br />
(*) weight 1,1Kg<br />
(*) weight 4,5Kg<br />
84
Parker Hannifin S.p.A Divisione S.B.C.<br />
sLVD <strong>User</strong>’s <strong>Manual</strong><br />
8 Appendix B: Series MB and SMB motor<br />
connectors<br />
COLLEGAMENTI PER MOTORI BRUSHLESS "MBmax"<br />
resolver<br />
motore<br />
A = bianco-rosso = EXCT +<br />
B = bianco-giallo = EXCT -<br />
C = blu = COS -<br />
D = giallo = COS +<br />
E = nero = SIN -<br />
F = rosso = SIN +<br />
G = Terra (schermo del cavo)<br />
H = Terra (schermo del cavo)<br />
K = PTC<br />
J = PTC<br />
A=<br />
B=<br />
C=<br />
}<br />
MOTORE<br />
D= Terra<br />
E= Terra<br />
F= Freno<br />
G= Freno<br />
CONNETTORE MOTORE<br />
VENTILATORE PER MBmax 105<br />
}<br />
24V= ±10%<br />
CONNETTORE MOTORE VENTILATORE<br />
PER MBmax 145 E 205<br />
F - G = FRENO<br />
C-B-A = MOTORE<br />
85
Parker Hannifin S.p.A Divisione S.B.C.<br />
sLVD <strong>User</strong>’s <strong>Manual</strong><br />
CONNECTION BOX SMB100 E SMB82<br />
CONNECTION BOX SMB60<br />
86
Parker Hannifin S.p.A Divisione S.B.C.<br />
sLVD <strong>User</strong>’s <strong>Manual</strong><br />
9 Appendix C: Hardware features<br />
Digital inputs<br />
Input impedance 7K ohm<br />
VH 15..30 V=<br />
VL 0..3 V=<br />
Digital outputs<br />
Type<br />
PNP open collector<br />
VH 20..26 20..26<br />
Io for a single output 100 100<br />
Maximum total current 500 500<br />
Analogue reference<br />
Type<br />
differential<br />
Impedance 20K ohm<br />
Range ± 10 V=<br />
CMMR > 60 dB<br />
Resolution 15 bit<br />
Auxiliary analogue inputs<br />
Type<br />
differential<br />
Impedance 250K ohm<br />
Escursione ± 10 V=<br />
CMMR > 40 dB<br />
Resolution 10 bit<br />
Analogue outputs<br />
Type<br />
single ended<br />
Maximum i/o 1.5 1.5<br />
Range ± 4.5 ± 4.5<br />
Resolution 10 10<br />
87
Parker Hannifin S.p.A Divisione S.B.C.<br />
sLVD <strong>User</strong>’s <strong>Manual</strong><br />
10 Appendix D: Conventions<br />
Reference<br />
Positive<br />
Motor shaft movement<br />
(motor shaft view)<br />
Torque<br />
Positive<br />
Resolver counter<br />
Increments<br />
Encoder output<br />
A<br />
B<br />
Tachometer signal<br />
Positive<br />
Iu couple • sin( ϑ)<br />
Iv<br />
Positive auxiliary input<br />
Pr38 positive<br />
Encoder In. A<br />
B<br />
⎛ 2<br />
couple • sin⎜ϑ<br />
+<br />
⎝<br />
• π ⎞<br />
⎟<br />
3 ⎠<br />
Pr22 positive<br />
Positive auxiliary analogue output<br />
Increment counter<br />
88
Parker Hannifin S.p.A Divisione S.B.C.<br />
sLVD <strong>User</strong>’s <strong>Manual</strong><br />
11 Appendix E: Software timing<br />
Period<br />
Task<br />
128 µs Current control<br />
512 µs speed control<br />
Fast operating modes<br />
management<br />
Torque limits management<br />
Speed reference management<br />
Braking resistor management<br />
FIN management<br />
2.048 ms Slow operating modes<br />
management<br />
6.144 ms Thermal motor image<br />
digital inputs<br />
program scanning pico-PLC<br />
digital outputs<br />
49.152 ms Speed windows management<br />
89
Parker Hannifin S.p.A Divisione S.B.C.<br />
sLVD <strong>User</strong>’s <strong>Manual</strong><br />
12 Appendix F: Default program for the pico-PLC<br />
90.0<br />
41.5<br />
LD 90.0<br />
OUT 41.5<br />
digital input 0 used to power the<br />
drive<br />
90.1<br />
40.6<br />
LD 90.1<br />
OUT 40.6<br />
digital input 1 used for the stop<br />
function<br />
41.4<br />
91.0<br />
LD 41.4<br />
OUT 91.0<br />
digital output 0 indicates that<br />
the converter is OK<br />
41.11<br />
END<br />
91.1<br />
LD 41.11<br />
OUT 91.1<br />
END<br />
digital output 1 indicates that<br />
the thermal motor image is<br />
active<br />
end of the program<br />
90
Parker Hannifin S.p.A Divisione S.B.C.<br />
sLVD <strong>User</strong>’s <strong>Manual</strong><br />
13 Appendix G: Flash information<br />
• TO SAVE USA IL b99.15 PARAMETERS<br />
• TO SAVE THE PLC USA IL b99.14 PROGRAM<br />
• TO CHANGE THE INSTRUCTIONS, PLC b99.13 MUST BE 0<br />
• WHEN THE OPERATING MODE IS CHANGED, YOU MUST USE b99.11 TO LOAD<br />
THE DEFAULT PARAMETERS (b40.2 MUST BE 0)<br />
• BEOFRE CHANGING Pr31, BE SURE THAT b40.2=0<br />
• THE SPEED REFERENCE WILL BE LIMITED TO THE VALUE OF Pr32<br />
• USING THE TORQUE CONTROL, Pr2 AND Pr3 MUST BE SET TO 1000<br />
• TO USE THE ACTIVE OPERATING MODE, b40.2 MUST BE 1<br />
• IF YOU CANNOT MODIFY THE READ-WRITE PARAMETERS USING THE<br />
KEYPAD, BE SURE THAT E b99.7 IS 0. IF IT WAS 0, PROBABLY THE SAME<br />
PARAMETERS WERE MODIFIED BY THE PLC PROGRAM.<br />
91
Parker Hannifin S.p.A Divisione S.B.C.<br />
sLVD <strong>User</strong>’s <strong>Manual</strong><br />
14 Appendix H: Motor parameters<br />
Main parameters for the motors that are<br />
most commonly used with the <strong>SLVD</strong><br />
Type of motor<br />
(230 V)<br />
Poles of<br />
motor<br />
Pr29<br />
Poles of<br />
resolver<br />
Pr34<br />
Velocity<br />
(rpm)<br />
Pr32<br />
I<br />
(A)<br />
Pr33<br />
R<br />
(ohm)<br />
Pr46<br />
L<br />
(mH)<br />
Pr47<br />
MB 56 100 0,2 4 2 9200 0.8 17.9 33.3<br />
MB 56 100 0,4 4 2 9200 1.5 7.1 20.7<br />
MB 56 100 0,6 4 2 9200 2.2 4.2 11.4<br />
MB 70 38 0,5 4 2 4000 0.7 37.8 58.8<br />
MB 70 38 01 4 2 4000 1.4 13.2 30.7<br />
MB 70 38 1,5 4 2 4000 2.2 7 20.6<br />
MB 70 38 02 4 2 4000 2.8 5.2 16.4<br />
MB 70 75 0,5 4 2 8000 1.3 10.3 16.9<br />
MB 70 75 01 4 2 8000 2.6 3.6 9.0<br />
MB 70 75 1,5 4 2 8000 4.0 2.1 6.1<br />
MB 70 75 02 4 2 8000 5.0 1.4 4.5<br />
MB 105 30 02 8 2 3300 2.8 5.0 12.4<br />
MB 105 30 04 8 2 3300 5.0 1.8 6.6<br />
MB 105 30 06 8 2 3300 7,7 1,1 4,56<br />
MB 105 30 08 8 2 3300 9,8 0,8 3,53<br />
MB 105 50 02 8 2 5500 4.3 2.2 5.5<br />
MB 105 50 04 8 2 5500 7,5 0,87 3,04<br />
MB 105 50 06 8 2 5500 11,2 0,48 2,03<br />
MB 105 50 08 8 2 5500 14,3 0,36 1,67<br />
MB 145 11 08 8 2 1210 3,7 4,04 41,6<br />
MB 145 11 15 8 2 1210 6,2 1,64 14,4<br />
MB 145 11 22 8 2 1210 8,9 0,98 8,2<br />
MB 145 11 28 8 2 1210 11,3 0,68 5,5<br />
MB 145 16 08 8 2 1760 5.0 1.9 19.4<br />
MB 145 16 15 8 2 1760 9,1 0,77 6,8<br />
MB 145 16 22 8 2 1760 13,1 0,46 3,8<br />
MB 145 5,5 15 8 2 605 3.3 5.7 52.2<br />
MB 145 5,5 22 8 2 605 4.7 3.5 29.4<br />
MB 145 25 08 8 2 2750 10,6 0,51 5,24<br />
MB 145 40 08 8 2 4400 12,3 0,4 3,84<br />
MB 205 5,5 28 8 2 605 6,9 3,31 36,70<br />
MB 205 5,5 50 8 2 605 12,4 1,18 18,83<br />
MB 205 11,5 28 8 2 1265 13 0,93 8,87<br />
SMB 60 60 1,4 8 2 6500 2.4 3.1 7.02<br />
SMB 82 30 03 8 2 3300 3.3 4.2 18.1<br />
SMB 82 60 03 8 2 6500 5.0 1.1 4.7<br />
SMB 100 30 06 8 2 3300 5.0 1.3 7.3<br />
92
Parker Hannifin S.p.A Divisione S.B.C.<br />
sLVD <strong>User</strong>’s <strong>Manual</strong><br />
15 Appendix I: Alarms<br />
Alarm code<br />
Alarm<br />
0 no alarm<br />
1 Overvoltage<br />
2 Undervoltage<br />
3 Overcurrent<br />
4 Resolver error<br />
6 Drive Over-Heating<br />
7 External Alarm<br />
8 Auxiliary Alarm<br />
10 PLC checksum<br />
11 parameter checksum<br />
14 Braking overload<br />
15 Default parameters<br />
16 Adjustment error<br />
“….” (all decimal points on) Current limitation (I 2 T)<br />
93
Parker Hannifin S.p.A Divisione S.B.C.<br />
sLVD <strong>User</strong>’s <strong>Manual</strong><br />
16 Revision history of the <strong>User</strong> <strong>Manual</strong><br />
Rev. 0.0 August 1999. Preliminary version.<br />
Rev. 0.1 January 2000.<br />
Rev. 0.2 January 2000.<br />
Output cam programmer (Additional useful functions).<br />
Rev. 0.3 April 2000.<br />
Operating mode 13: b150.6.<br />
CAN Bus: Pr48 for bus speed, Extended message set #2.<br />
Rev. 0.4 August 2000.<br />
Position loop: new parameters Pr51, Pr58:59.<br />
Operating mode 14: new value limits for Pr110:111, Pr112:113.<br />
Operating mode 14: new b150.2.<br />
Rev. 0.5 September 2000.<br />
Max value Pr44 = 2500.<br />
Rev. 0.6 February 2001<br />
New resolver cable requirement : insulated and twisted pairs.<br />
Rev. 0.7 September 2001<br />
Value comparators. These functions are enabled ONLY with operating mode<br />
13 and 14<br />
Rev 0.8 November 2001<br />
Chapter 2.5 Add characteristics of 24V power supply<br />
Set and complete the layout structure of the document<br />
Rev 0.9 March 2002<br />
Grounding bar instructions revised.<br />
Rev 1.0 September 2002<br />
<strong>User</strong> manual version as Italian version rev. 1.0 September 2002 SW rel. 19.<br />
Rev 1.1 January 2003<br />
EMC and cable connections modifications<br />
<strong>Manual</strong> version as Italian version rev. 1.1 January 2003 SW rel. 19.<br />
Rev 1.2 February 2003<br />
Updated the “Main Hardware Features” table.<br />
Added address list.<br />
94
Parker Hannifin S.p.A Divisione S.B.C.<br />
sLVD <strong>User</strong>’s <strong>Manual</strong><br />
17 Parker Hannifin Automation Group in the world<br />
Parker Hannifin EMD Europe:<br />
ITALY<br />
GERMANY<br />
Parker Hannifin S.p.A. Divisione S.B.C.<br />
Via Gounod, 1<br />
20092 Cinisello Balsamo (Milano)<br />
Tel: +39 02 660 12478<br />
Fax +39 02 660 12808<br />
e-mail: sales.sbc@parker.com<br />
Parker Hannifin GmbH, EMD Hauser<br />
Robert Bosch Str. 22<br />
D77656 Offenburg<br />
Tel: +49 (0) 781 509 0<br />
Fax +49 (0) 781 509 176<br />
e-mail: sales.hauser@parker.com<br />
U.K.<br />
Parker Hannifin Plc, EMD Digiplan<br />
Balena Close - Poole, Dorset<br />
England BH17 7DX<br />
Tel: +44 (0) 1202 506200<br />
Fax +44 (0) 1202 600820<br />
e-mail: sales.digiplan@parker.com<br />
Parker Hannifin North America:<br />
Parker Hannifin Corporation - Compumotor Division<br />
5500 Business Park Drive<br />
Rohnert Park, CA, 94928<br />
Tel: (707) 584-2417<br />
Fax: (707) 584-3715<br />
http://www.compumotor.com<br />
More about our products and<br />
International Contacts Informations at<br />
http://www.parker-emd.com<br />
95