
You also want an ePaper? Increase the reach of your titles
YUMPU automatically turns print PDFs into web optimized ePapers that Google loves.
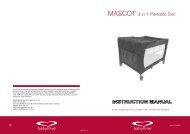
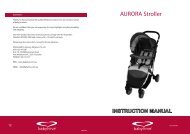
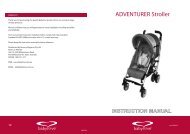
INSTRUCTION BOOK<br />
INFANT CARRIER<br />
Series No. BL620A/2010<br />
IMPORTANT:<br />
KEEP THIS BOOKLET IN THE PLACE PROVIDED<br />
ON THE CHILD RESTRAINT<br />
INFORMATION FOR BUYERS:<br />
FOR BABIES UP TO APPROXIMATELY 6 MONTHS<br />
THIS INFANT RESTRAINT MUST BE INSTALLED SO<br />
THAT THE BABY IS REARWARD FACING AT ALL<br />
TIMES.
INDEX<br />
INTRODUCTION<br />
PAGE<br />
3 INTRODUCTION<br />
4 WARNINGS<br />
6 SHOULDER HEIGHT MARKERS & A GROWING CHILD<br />
8 THE NEXT STEP<br />
9 FEATURES: CARRIER PARTS<br />
11 FEATURES: BASE PARTS<br />
13 SUITABLE FOR USE<br />
15 HOW TO SET-UP<br />
22 HOW TO INSTALL<br />
25 HOW TO USE<br />
36 CARE AND MAINTENANCE<br />
41 TRAVELLING TIPS<br />
43 ACCESSORIES<br />
44 TRAVEL SYSTEM -USE WITH STROLLER<br />
47 INSTALLATION OF CAR ANCHOR FITTING<br />
52 INSTALLATION ACCESSORIES<br />
53 IN CASE OF ACCIDENT<br />
To be used only in a rearward-facing position for an infant until their shoulders<br />
reach the shoulder height marker (approximately 6 months of age).<br />
Continue to use this infant restraint until the child reaches this limit.<br />
Infants are at risk of serious injury if they face forward too early.<br />
TO BE USED WITH A LAP-SASH OR LAP-ONLY SEATBELT IN THE BACK OF MOST<br />
CARS WITH FORWARD FACING SEATS.<br />
THIS RESTRAINT IS NOT SUITABLE FOR USE WHERE THE ANCHORAGE STRAP<br />
MAY FALL INTO A SPLIT IN THE SEAT BACK. (E.G. HATCHBACK OR WAGON).<br />
CAREFULLY READ ALL THE INSTRUCTIONS FOR INSTALLATION. IN THE EVENT OF<br />
DOUBT ABOUT THE METHOD OF INSTALLATION, CONSULT NURSERY ELEGANCE<br />
PTY LTD OR AGENT OR A CHILD RESTRAINT FITTING STATION AUTHORISED BY A<br />
RELEVANT TRANSPORT AUTHORITY OR, IN NEW ZEALAND, THE AGENT FOR THE<br />
CAR.<br />
No child restraint can guarantee absolute protection from injury in every crash.<br />
However, to ensure that your child gets all the protection designed into the restraint,<br />
PLEASE READ AND FOLLOW THESE INSTRUCTIONS EXACTLY and use only parts<br />
and accessories recommended by Nursery Elegance Pty Ltd.<br />
THIS RESTRAINT MUST BE ATTACHED TO A CHILD RESTRAINT ANCHORAGE<br />
POINT IN THE CAR. REFER TO CAR OWNER’S HANDBOOK FOR LOCATION OF<br />
ANCHORAGE POINTS. REFER TO A CHILD RESTRAINT FITTING STATION IF NO<br />
ANCHORAGE POINTS ARE IN THE MOTOR CAR.<br />
This instruction book can be stored at the back of the Carrier for future reference.<br />
2 3
• Use the restraint exactly as shown in the instructions.<br />
• Fit the restraint firmly to the car seat.<br />
• Fit the harness firmly to the child.<br />
• A loose restraint or harness is dangerous.<br />
• DO NOT LEAVE CHILDREN UNATTENDED IN THE CAR.<br />
• Supervision of children is needed because they may be able to undo buckles.<br />
• DO NOT USE A REAR-FACING CHILD RESTRAINT WHERE AN AIRBAG IS<br />
FITTED IN FRONT OF THE SEATING POSITION. For other airbags, refer to the<br />
car owner’s handbook for warnings and instructions.<br />
• To ensure baby’s back is evenly supported do not put more than one nappy<br />
on the baby and make sure the nappy is not thickly folded at the back.<br />
• Do not alter or modify this restraint.<br />
• Repairs must only be done by the manufacturer or agent.<br />
• Do not allow the restraint to come into contact with polishes, oils, bleach and<br />
other chemicals.<br />
• Destroy the restraint if it has been in a severe crash, even if no damage is<br />
visible.<br />
• DO NOT USE THIS RESTRAINT WITHOUT THE COVER.<br />
• Make sure the handle is latched properly every time you pick up the Infant<br />
Carrier.<br />
• The restraint is not intended to be a substitute baby cot or bed. It is only<br />
designed to enable safe transportation of children in motor vehicles. Do not<br />
leave a baby in the restraint for long periods of time.<br />
• Straps may be damaged by unsecured cargo in a collision. Secure or remove<br />
hazardous cargo before using this strap. Hatch-back or wagon: Do not use<br />
the child restraint where this strap may fall into a split in the seat back.<br />
• Regularly check the restraint components, straps and other fitments for<br />
correct function & condition. Seek prompt repair.<br />
• Protect all webbing from abrasion and cutting by sharp corners and edges.<br />
• Upper Anchorage Straps and extension straps may be damaged by unsecured<br />
cargo in a collision. Secure or remove hazardous cargo before using this<br />
restraint.<br />
• The restraint should not be purchased or sold as a second hand item. It is<br />
recommended not to use child restraints older that 10 years as the protection<br />
in an accident may be reduced.<br />
• Do not store in areas that may get hot, like in car boots, roof space, beside<br />
shed walls which get hot in summer. Do not place heavy items on top of the<br />
seat as this may distort the plastic.<br />
:<br />
DO NOT LEAVE CHILDREN UNATTENDED IN THE CAR.<br />
4 5
SHOULDER HEIGHT MARKERS & A GROWING CHILD<br />
SHOULDER HEIGHT MARKERS & A GROWING CHILD<br />
NEW BORN<br />
Maximum Shoulder<br />
Height marker<br />
Maximum shoulder<br />
height marker<br />
OLDER BABY<br />
IMPORTANT: Follow this advice.<br />
MAXIMUM SHOULDER HEIGHT MARKER<br />
DO NOT MOVE TO THE NEXT RESTRAINT UNTIL SHOULDERS REACH THE<br />
SHOULDER HEIGHT MARKER.<br />
When the child’s shoulders reach this marker, the child is now too big for the child<br />
restraint. It is now time to move too the next child restraint.<br />
Front of Vehicle<br />
The Carrier is not suitable for your child when their shoulders are above the<br />
shoulder height marker.<br />
If the babies neck muscles are unable to support their head then the child should<br />
remain Rearward-facing, choose a child seat that will take larger babies in<br />
Rearward-facing.<br />
DO NOT MOVE TO THE NEXT RESTRAINT UNTIL SHOULDER REACHES THE<br />
SHOULDER MARKER.<br />
6 7
THE NEXT STEP<br />
FEATURES: CARRIER PARTS<br />
CHOOSE FROM:<br />
• Convertible Child Seat, If the<br />
convertible seat is suitable for<br />
approximately 12 months then continue<br />
to keep your child Rearward-facing until<br />
the shoulders reach the lowest marker.<br />
Then turn to forward facing until the child<br />
reaches the top marker - approximately 4<br />
years of age.<br />
OR<br />
• Dedicated forward facing seat with<br />
in-built harness- for children who<br />
have outgrown their baby carrier up to<br />
approximately 4 years of age.<br />
Convertible<br />
Child Seat<br />
Forward-Facing<br />
Seat<br />
1. Carry Handle<br />
2. Shoulder Straps<br />
3. Front Stabilising Bar<br />
4. Adjuster and Harness Adjuster cover<br />
5. Harness Adjuster strap<br />
6. Harness Buckle and Tongues<br />
7. Handle Release Button<br />
8. Shoulder Pads<br />
9. Padded Insert<br />
10 11<br />
10. Shoulder Height Marker<br />
11. Buckle Tongue Holder<br />
1<br />
OR<br />
• Convertible Booster seat with in-built<br />
harness that faces forward- for children<br />
who have out grown their Rearwardfacing<br />
seat. This can be used up to<br />
approximately 4 years of age which can<br />
then be converted to a booster seat up to<br />
approximately 6 to 8 years of age.<br />
Convertible<br />
Booster Seat<br />
9<br />
8<br />
7<br />
2<br />
3<br />
4<br />
465<br />
8 9
FEATURES: CARRIER PARTS<br />
FEATURES: BASE PARTS<br />
12. Instruction Book Storage Pocket<br />
13. Release Lever For Stroller and Base<br />
14. Upper Anchorage Strap Guides<br />
15. Metal Strap Connector<br />
16. Base Latch<br />
17. Stroller Latch<br />
18. Canopy Attachment Points<br />
12<br />
19. Attachment Clip<br />
20. Upper Anchorage Strap Adjuster<br />
21. Upper Anchorage Strap<br />
22. Retaining Strap connected to base<br />
23. Adjustable Recline Foot (3 positions)<br />
24. Recline Foot retaining catch (behind flap)<br />
25. Recline Foot Adjustment<br />
26. Car’s Anchor Fitting<br />
21<br />
19<br />
20<br />
13<br />
18<br />
14<br />
26<br />
22<br />
17<br />
16<br />
15<br />
25<br />
24<br />
23<br />
10<br />
11
FEATURES: BASE PARTS<br />
SUITABLE FOR USE<br />
27. Seat belt Clip<br />
28. Carrier Latching Points<br />
29. Rearward-Facing Belt Path Label (shown in blue)<br />
30. Vehicle Seat Belt Path<br />
31. Seat Belt Routing Tabs<br />
TO BE USED WITH A LAP-SASH OR LAP ONLY SEAT BELT IN THE BACK OF MOST<br />
CARS WITH FORWARD-FACING SEATS.<br />
To be used in a rearward-facing position until the infant’s shoulder’s reach the<br />
shoulder height marker (approximately 6 months of age).<br />
Continue to use this infant restraint until child reaches this limit.<br />
Infants are at risk of serious injury if they face forward too early.<br />
If the baby’s neck muscles are unable to support their head, then the child should<br />
remain rear-facing in a restraint that is larger, possibly a Convertible child restraint.<br />
31<br />
440mm<br />
30<br />
29<br />
28<br />
27<br />
28<br />
660mm<br />
Seat Width 430mm<br />
To ensure that the space is sufficient, the purchaser should check the<br />
measurements between the vehicle’s rear and front seats in which the child restraint<br />
is intended to be used.<br />
12<br />
13
SUITABLE FOR USE<br />
HOW TO SET-UP<br />
REMOVING CARRIER FROM BASE<br />
THE UPPER ANCHORAGE STRAP MUST ALWAYS BE FITTED WHEN THE CHILD<br />
RESTRAINT IS USED IN A VEHICLE.<br />
Do not use the restraint without the Upper Anchorage Strap correctly attached.<br />
The upper anchorage strap must be attached to an anchorage point using an<br />
extension strap if necessary.<br />
The Carrier can just touch the front seat, but must not in such a way that the<br />
installation angle is affected. Do not recline the seat excessively, it must be installed<br />
at the correct angle (see page 23).<br />
A. Press the handle button (on both sides) and<br />
rotate the handle to upright “carry” position.<br />
Ensure the handle is locked, and it is safe to<br />
lift the Carrier.<br />
Press<br />
Do not allow the front seat to alter the<br />
installed position of the restraint, It is<br />
permissible to allow the restraint to<br />
touch the seat on front of it.<br />
B. Grasp the carry handle and pull the release<br />
lever at the back of the Carrier, and then lift<br />
the Carrier from the Base.<br />
Pull release catch<br />
Regional Road Rules may restrict the use of child restraints like this Carrier in the<br />
front seat of the car. Check your local Road Rules.<br />
Do not use on any car seat which faces sideways or rearwards.<br />
DO NOT USE A REAR-FACING CHILD RESTRAINT IN A SEATING POSITION WHERE<br />
AN AIRBAG IS FITTED. For other airbags, refer to the car owner’s handbook for<br />
warnings and instructions.<br />
Seat belt extenders should not be used if the seat belt is not long enough to fit<br />
around the child restraint base.<br />
14<br />
15
HOW TO SET-UP<br />
HOW TO SET-UP<br />
ADJUSTMENT OF HANDLE POSITION<br />
A. The Carrier features a sturdy carry handle.<br />
At the side of the handle there is a handle<br />
release buttons on each side which control<br />
the three positions of the handle. The<br />
“carry” position is upright and suitable<br />
to carry the baby. Ensure the handle is<br />
locked, and it is safe to lift the Carrier.<br />
B. To convert from “carry” to “access”<br />
position, press the handle release button<br />
on each side and rotate the handle towards<br />
the back of the Carrier. Rotate until the<br />
handle locks into the next position.<br />
This position ensures the handle does not<br />
interfere with the attachment of the upper<br />
anchorage strap or removal of the baby.<br />
C. To convert to a “non-rocking” position<br />
press both handle release buttons and<br />
rotate the handle to the next position.<br />
Ensure the handle is locked in position<br />
securely.<br />
D. Press the handle release buttons to<br />
reposition the handle to suit your needs.<br />
The handle can also be in any position<br />
when the carrier is installed in the car.<br />
16<br />
“Carry” position<br />
“Access” Position<br />
“Non rocking” position<br />
IMPORTANT:<br />
Make sure the handle is engaged properly every time you pick up the Carrier.<br />
TO REMOVE/FIT CANOPY<br />
A. To connect, feed the canopy stay into the<br />
mounting on the side of the Carrier.<br />
B. Connect two press studs on the back of<br />
canopy to the cover.<br />
C. The Canopy can be rotated to cover the<br />
baby or opened by rotating to the desired<br />
position. When fully open the canopy locks<br />
in position.<br />
D. To remove the canopy press the tab on<br />
the canopy stay on each side of the carrier.<br />
When removing take care not to bend the<br />
mounting.<br />
SETTING UP THE HARNESS<br />
A. Sit the Carrier on a flat ground or the floor<br />
with the handle rotated fully back to prevent<br />
rocking.<br />
B. Release the buckle and lengthen the Harness<br />
Straps by pressing Harness Adjuster (under<br />
the flap) while grasping both Shoulder<br />
Harness Straps and pulling out fully.<br />
Lift the Harness Adjuster<br />
up and pull the Harness<br />
Straps to slacken.<br />
Press<br />
studs<br />
Press to<br />
release<br />
17
HOW TO SET-UP<br />
HOW TO SET-UP<br />
C. Move the two harness tongues to<br />
the outer extents of the Carrier and<br />
connect to the Harness Tongue<br />
holders. Move the harness buckle<br />
towards the Harness Adjuster.<br />
E. The Carrier is fitted with three shoulder strap positions. As the baby grows, the<br />
shoulder straps must be moved to higher slots.<br />
The shoulder straps must be in<br />
the slots which are nearest to the<br />
child’s shoulders, but not lower<br />
than the child’s shoulders.<br />
Buckle Tongue Holder on both<br />
sides of the Carrier. Push<br />
tongue inwards to engage.<br />
D. Place baby into Carrier lying on its back so<br />
that the buckle is between the baby’s legs.<br />
1. Upper shoulder strap slots<br />
2. Medium shoulder strap slots<br />
3. Lower shoulder strap slots<br />
4. Shoulder harness strap<br />
5. Harness tongues & buckle<br />
6. Lap strap slot<br />
7. Crotch strap slot<br />
8. Maximum Shoulder Height Marker<br />
9. Harness Adjuster (under cover flap)<br />
10. Adjuster Strap<br />
8 1<br />
2<br />
3<br />
9<br />
4<br />
4<br />
5<br />
6 6<br />
7<br />
Correct fitment of the harness is very important as it restrains the baby in the<br />
Carrier. The harness must fit firmly around upper torso of the baby and be<br />
positioned so as to leave the baby’s arms and legs free.<br />
This Carrier needs to be used until the baby reaches the shoulder height marker. It is<br />
acceptable for the legs to be bent to fit.<br />
18<br />
If the baby is new born you will need to use either slot 2 or 3. With the baby in the<br />
carrier, check that the slot is just above the baby’s shoulder. If the strap is not in that<br />
slot then change the slot as described on the next page. If the slot is just above the<br />
shoulders then go to page 21.<br />
10<br />
19
HOW TO SET-UP<br />
HOW TO SET-UP<br />
F. At the rear of the Carrier, remove one of the<br />
harness shoulder straps from Metal Strap<br />
Connector by slipping strap through open<br />
slot. The Metal Strap Connector is shown in<br />
diagram right.<br />
I. Ensure there are no twists in the straps.<br />
J. Thread the shoulder strap over the bar and<br />
connect it to the Metal Strap Connector at rear<br />
of Carrier.<br />
FOR SMALL BABY<br />
Metal Strap Connector<br />
K. Repeat for the other shoulder strap. It is better to<br />
change one strap at a time so that the other strap<br />
will be a guide for re-assembly.<br />
FOR GROWING BABY<br />
G. Pull the shoulder strap through slot.<br />
H. Insert the shoulder strap through the Carrier<br />
slot which will position the shoulder strap<br />
level with or above the baby’s shoulder (see<br />
page 19). Ensure that the shoulder strap<br />
passes through matching slots in the cover<br />
and seat shell.<br />
If a Padded Insert is used then that will need<br />
to be re-positioned and the strap re-inserted<br />
when changing the slot position.<br />
FOR LARGER BABY<br />
IMPORTANT:<br />
Do not use the carrier with the harness shoulder straps set at different heights or<br />
fed through mismatching slots. Ensure the harness straps are not twisted and that<br />
all straps are secured by pulling each harness strap.<br />
20<br />
21
HOW TO INSTALL<br />
HOW TO INSTALL<br />
Consult the car owner’s handbook for location of anchor fittings or anchorage<br />
points. Some vehicle manufacturers recently have an anchor fitting fitted in the car.<br />
If there is no child restraint anchor fitting or child restraint anchor point refer to page<br />
48 for the installation of the anchor fitting as well as the use of extension straps.<br />
An anchor fitting is required to attach the upper anchorage strap to fully install the<br />
Carrier to the car. The upper anchorage strap must be used with this carrier when<br />
used in the car.<br />
For installing the Base to the car, select a seating position with a child restraint<br />
anchor fitting directly behind the seating position.<br />
INSTALLING THE BASE TO THE CAR<br />
B. If your car’s seat is contoured then you<br />
may need to adjust the angle of the base<br />
so your baby is not too upright.<br />
The recline angle may be altered using<br />
the four position adjustment foot located<br />
at the stabilising bar end of the base.<br />
To adjust, pull out on angle adjustment<br />
foot adjuster and lower or raise the angle<br />
adjustment foot to the desired position.<br />
Place back in the seating position and<br />
recheck the Level Indicator Line.<br />
Pull flap outward<br />
Then, adjust recline foot<br />
A. Place the base and Carrier on vehicle seat<br />
in a seating position where a child restraint<br />
anchor fitting is installed. The Level<br />
Indicator Line needs to be level with the<br />
road, (i.e. parallel with the road surface).<br />
Check and adjust the recline angle of the<br />
base if necessary as follows.<br />
Level Indicator Line on<br />
both sides of base<br />
Maximum<br />
compensation<br />
Minimum<br />
compensation<br />
Road<br />
Road<br />
22 23
HOW TO INSTALL<br />
HOW TO USE<br />
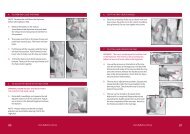
C. For car’s with flat seats, some<br />
packing (such as firmly rolled up<br />
nappy or towel) may be required<br />
to get a better angle and to have<br />
the stabilising bar contact the car’s<br />
seat back or close to the seat back.<br />
G. then feed the sash belt under the tabs and<br />
through the Seatbelt Clip<br />
Check that the Base is securely held. If it is<br />
not secure, readjust, or move to another<br />
seating position in the vehicle.<br />
Pull seatbelt<br />
tight<br />
Press down<br />
firmly on base<br />
D. Place the base into the car in the<br />
selected seating position.<br />
Packing<br />
H. Recheck the installation angle, and adjust<br />
if necessary.<br />
I. Check that the Base is securely held.<br />
If the Base moves easily to either side,<br />
retighten the seat belt or try another<br />
position in the vehicle. Some sideways<br />
movement is common and acceptable.<br />
E. Thread the vehicle lap belt under the<br />
tabs and through the seat belt clip,<br />
Pull the sash belt to remove slack.<br />
Blue<br />
REARWARD-<br />
FACING BELT<br />
PATH label<br />
Note: If using a lap only seatbelt thread<br />
through the tabs and seatbelt clip. The free<br />
end of the lap belt does not need to be<br />
threaded through the seat belt clip.<br />
F. Engage the seat belt buckle and pull<br />
the sash belt to achieve a tight fit<br />
whilst pressing on the base.<br />
When the Base is secured with a<br />
Lap/Sash Belt both the Lap and Sash<br />
belts need to pass through the Seat<br />
belt Clip.<br />
Seat belt Clip<br />
Lap Belt<br />
Tab<br />
Blue<br />
REARWARD-<br />
FACING BELT<br />
PATH label<br />
24 25
HOW TO USE<br />
HOW TO USE<br />
J. Some car seats do not provide enough<br />
support to hold the base up at the<br />
required angle to enable the Carrier to be<br />
connected to the Base. Use the adjustable<br />
foot to achieve the level. See page 23.<br />
If extra support is required to achieve the<br />
desired level then a tightly rolled towel can<br />
be used.<br />
Rolled towel or similar.<br />
IMPORTANT:<br />
Always anchor the base with a vehicle belt, even when the restraint is not installed<br />
on it. An unanchored base can injure passengers in a sudden stop or accident.<br />
INSTALLING UPPER ANCHORAGE STRAP<br />
A. Locate the child restraint anchor fitting<br />
in the car that is directly behind the<br />
seat location in the rear seat you<br />
have chosen. Refer to the car owner’s<br />
manual for the location (If there is no<br />
anchorage fitting then refer to page 48 for<br />
instructions in adding an anchor fitting.)<br />
Connect the Upper Anchorage Strap<br />
Attachment Clip to the Anchor Fitting.<br />
Lengthen the strap by pressing the<br />
adjuster button (1) and pull the strap (2)<br />
so that the strap is ready to attach to<br />
the Carrier.<br />
THIS UPPER ANCHORAGE STRAP<br />
MUST ALWAYS BE FITTED WHEN THE<br />
CARRIER IS USED IN THE CAR.<br />
Attachment Clip<br />
Car's Anchor Fitting<br />
Fully press Adjuster Button (1)<br />
while pulling Upper Anchorage<br />
Strap (2) to lengthen.<br />
1<br />
2<br />
3<br />
B. While the Carrier is out of the car, store the upper anchorage strap between the<br />
stabilising bar and the car seat back so that it will be ready for use when the<br />
Carrier is put back in the car.<br />
Always attach hook and remove slack.<br />
26<br />
27
HOW TO USE<br />
HOW TO USE<br />
PLACING BABY IN CARRIER<br />
When positioning baby into Carrier make sure baby’s back is fully supported<br />
onto the flat section and the baby’s nappy area (bottom) is resting in the bottom<br />
curvature as shown. It is recommended that bulky nappies are not used when baby<br />
is travelling in the Carrier as they can cause incorrect positioning of the baby’s back<br />
in the Carrier.<br />
Bottom curvature of Carrier<br />
B. Move the two harness tongues to the<br />
outer extents of the Carrier and engage<br />
into the Buckle Tongue holders.<br />
Move the harness buckle towards the<br />
Harness Adjuster.<br />
A. Loosen Harness Straps by pressing<br />
the Harness Adjuster while grasping<br />
both the Shoulder Harness Straps<br />
and pulling out the desired amount<br />
of slack.<br />
Press the Harness<br />
Adjuster and pull Harness<br />
Straps to loosen.<br />
Flat section of<br />
Carrier<br />
C. Place baby into Carrier lying on their<br />
back so that the buckle is between the<br />
baby’s legs. Make sure baby is dressed<br />
to allow the Harness Buckle to be pulled<br />
up between baby’s legs e.g. a jump suit.<br />
Never wrap the baby in a blanket before<br />
placing in the Carrier. Ensure that baby’s<br />
arms and legs are free.<br />
Buckle Tongue Holder on both<br />
sides of the Carrier. Push<br />
tongue inwards to engage.<br />
NOTE: If the blanket is required for warmth<br />
place it over the baby when harnessing is<br />
complete.<br />
NOTE: Discontinue using the Padded Insert if it causes over heating, discomfort or<br />
you need more room for the child to grow.<br />
28 29
HOW TO USE<br />
HOW TO USE<br />
D. Place each arm through each shoulder<br />
strap of the harness. Position the buckle of<br />
the crotch strap as shown right.<br />
E. Fit either harness tongue into the Harness<br />
buckle followed by the other tongue until a<br />
click is heard. If the second tongue does not<br />
engage - press the red button and re-insert the<br />
tongues. Check secure engagement by pulling<br />
harness straps.<br />
F. Ensure slack is removed from the lap straps by<br />
pulling the shoulder harness straps through the<br />
buckle tongues, then pull the Harness Adjustment<br />
Strap to take up the slack in the harness,<br />
adjusting to a firm but comfortable fit. Make sure<br />
that the baby’s arms and legs are free and the<br />
crotch strap is between the legs. Check that the<br />
slack in straps is minimal.<br />
Do not use the restraint if straps do not tighten<br />
and contact your local authorised service agent<br />
for repair.<br />
Pull Harness Straps<br />
through the buckle in<br />
direction of arrows<br />
Tongue<br />
Buckle<br />
Click<br />
Attach the press stud at the<br />
end of the strap to the cover to<br />
prevent tripping over the strap.<br />
Pull Harness Adjustment<br />
Strap to remove slack.<br />
CAUTION:<br />
The end of the harness adjustment strap is<br />
connected to the cover to avoid tripping over<br />
the end. Ensure the harness adjustment strap<br />
hook is attached when carrying the carrier<br />
(see page 31).<br />
IMPORTANT:<br />
Do not place the Baby Carrier on a table, bed or a work-top, where it could fall off or<br />
be knocked on to the floor.<br />
CAUTION: A LOOSE HARNESS IS DANGEROUS<br />
The end of the harness is connected to the cover to avoid tripping on the end.<br />
Ensure the Harness adjustment strap hook is attached when carrying the carrier<br />
(see above).<br />
30 31
HOW TO USE<br />
HOW TO USE<br />
PLACING BABY & CARRIER IN BASE<br />
A. Position the Carrier over the top of<br />
the base. Make sure the Harness<br />
Adjustment Strap is not caught<br />
between Carrier and Base then<br />
lower the Carrier into position.<br />
B. Push down on the Carrier until<br />
an audible click is heard. Pull on<br />
the Carrier to ensure it is correctly<br />
locked into position.<br />
IMPORTANT:<br />
Lift again to check engagement.<br />
C. The handle may be rotated into other positions if needed.<br />
OK<br />
CLICK<br />
D. Engage the upper anchorage strap attachment<br />
clip to the car’s anchor fitting, if not already<br />
connected.<br />
E. Feed the Upper Anchorage strap on the<br />
inside of the handle and through the<br />
locating slots in the front of the Carrier.<br />
F. Adjust the Upper Anchorage Strap by<br />
pulling as shown below to remove any<br />
slack in the straps. Do not over tighten.<br />
Press button<br />
to lengthen<br />
Pull to<br />
remove slack<br />
Upper Anchorage<br />
strap ready to be fitted<br />
to Carrier.<br />
Adjuster<br />
Upper Anchorage<br />
Strap guides<br />
IMPORTANT:<br />
The Upper anchorage strap must be fitted at all times when the baby is in the car.<br />
32 33
HOW TO USE<br />
HOW TO USE<br />
REMOVING BABY & CARRIER FROM BASE<br />
A. Loosen the upper anchorage strap by fully pressing the adjuster button while<br />
pulling the upper anchorage strap. Ensure that the adjuster does not fall on the<br />
baby.<br />
B. Remove the upper anchorage strap from the locating slots in the Carrier. Store<br />
the upper anchorage strap behind the stabilising bar.<br />
C. Rotate the Carry Handle to the “carry” position and ensure it is locked correctly<br />
before lifting.<br />
D. Grasp the handle with one hand, then release the Carrier release catch with the<br />
other hand. With the catch released, raise the Carrier away from the base, you<br />
may need two hands to lift the carrier out of the car. Place feet apart and use<br />
bent legs to lift the carrier to avoid back injury.<br />
REMOVAL OF BABY FROM CARRIER<br />
A. Rotate the carry handle to either the “access” or “non-rocking” position and<br />
ensure the Canopy is fully open.<br />
B. Press the Harness Adjuster while pulling shoulder straps to loosen the harness.<br />
C. Press the red button on Harness Buckle then both Harness Tongues will be<br />
released.<br />
D. Feed the baby’s arms through each side of the Harness and place the straps on<br />
each side of the carrier clear of the baby. Lift the baby out of the Carrier.<br />
NOTE: Once the baby gets heavier you may wish to leave the carrier in the car. In<br />
this case you will need to disconnect or loosen the upper anchorage strap before<br />
removing the baby.<br />
Stabilising bar<br />
CAUTION:<br />
Do not lift or carry the Carrier by the front stabilising bar.<br />
E. When the Carrier is clear of the base, carefully remove it from the car.<br />
F. Always keep baby secure in the integral harness when carrying.<br />
Ensure the adjustment strap press stud is connected to the cover, see page 31.<br />
34 35
CARE AND MAINTENANCE<br />
CARE AND MAINTENANCE<br />
REGULAR CARE OF THIS RESTRAINT:<br />
Please check the following items regularly to ensure the safety of your child:<br />
A. Check the webbing for fraying.<br />
B. Ensure the inside of the buckle is free of foreign matter, food or feeding liquids.<br />
Check that the buckle clicks and is not sluggish or sticky in operation. If sluggish,<br />
wash the buckle as shown on page 40.<br />
C. Ensure there are no cracks in moulding or the plastic moulding.<br />
D. Check the harness adjuster is operating and is clamping the webbing.<br />
E. If any part of the Carrier is cracked or broken, seek repair immediately or replace<br />
the Carrier.<br />
F. Check that the Carrier catch retains the Carrier to the base. Check screws and<br />
rivets are firmly in place. If not seek repair.<br />
COVER<br />
For baby’s comfort and health the Carrier cover is removable for cleaning. Washing<br />
instructions are on the care label attached to the liner. Washing the cover prior to<br />
use will remove excess fluff and dye’s.<br />
TO REMOVE THE COVER<br />
A. With the Carrier on the ground or the floor,<br />
remove the Shoulder Pads<br />
B. Disconnect the shoulder harness straps<br />
from the Metal Strap Connector, Refer to<br />
page 19. Then pull the shoulder straps out<br />
of the shoulder slots in the carrier, cover<br />
and Padded Insert.<br />
Note which shoulder strap slots you were<br />
using.<br />
CLEANING<br />
Use only mild soap and water with a damp cloth to clean all straps, metal and<br />
plastic parts of the restraint. Do not use chemicals or cleaning agents.<br />
C. Remove the Padded Insert<br />
D. Lift the cover around the rim of the Carrier<br />
at the harness adjuster end, feed the crotch<br />
buckle through the slot in cover and pull the<br />
harness adjuster strap out of the slots.<br />
Lap<br />
strap<br />
E. Feed the shoulder harness straps and<br />
tongues through lap strap slots in the<br />
Cover only. There is no need to completely<br />
remove the harness straps from the Carrier.<br />
Pull cover off from corners<br />
F. Remove the cover completely for cleaning.<br />
36 37
CARE AND MAINTENANCE<br />
CARE AND MAINTENANCE<br />
TO REPLACE THE COVER<br />
A. Place the cover over the Carrier.<br />
B. Feed the shoulder harness straps through<br />
lap strap slots in cover. Ensure that there<br />
are no twists in all straps at the back of the<br />
Carrier.<br />
C. Feed the crotch buckle as well as the<br />
harness adjuster strap through the slots in<br />
the cover.<br />
D. Fully fit the cover ensuring all slots in the<br />
cover line up with the slots in the carrier. Fit<br />
the Padded Insert if required.<br />
E. Feed the shoulder harness straps through<br />
the shoulder strap slots in cover and then<br />
in through the Carrier. If you forget which<br />
shoulder strap slots were used refer to page<br />
19 for correct shoulder harness position<br />
for your baby. Feed shoulder straps through<br />
the Padded Insert if required. Attach the<br />
shoulder harness straps to the Metal Strap<br />
Connector.<br />
F. Engage shoulder harness tongues and<br />
crotch buckle to ensure there are not twists<br />
in the harness straps. Pull to check harness<br />
is attached.<br />
Pull elastic cover over Carrier<br />
Shoulder<br />
strap slots<br />
Lap strap<br />
slots<br />
Press Studs<br />
COVER (style may vary)<br />
The cover has been designed to protect your child when seated in the Carrier. Care<br />
should be taken if children either eat or drink while in the Carrier as some products<br />
may cause damage or marking to the cover.<br />
IMPORTANT:<br />
Do not pull sticky items from covers as the cover may be damaged - soak in water<br />
and gently remove.<br />
The seat cover and accessories must not be replaced with any other than the one<br />
recommended by Nursery Elegance Pty Ltd, because the cover is an integral part<br />
of the child Carrier and how it performs. The child Carrier must not be used without<br />
the cover and the padding provided.<br />
G. Insert the cover wings on the edge of the<br />
carrier and connect the press studs next to<br />
the stabilising bar on the trim.<br />
Cover wings<br />
38 39
CARE AND MAINTENANCE<br />
TRAVELLING TIPS<br />
TO CLEAN HARNESS BUCKLE:<br />
If sticky liquids such as baby formula, fruit juice, etc. get inside your Harness<br />
Buckle, it may become sluggish. An indication of a sluggish Harness Buckle is<br />
that you cannot hear a click when engaging the Harness Tongues. To restore the<br />
Harness Buckle to good working order it needs to be cleaned as follows:<br />
A. Remove the Harness Buckle from the<br />
Carrier by disengaging the 3-bar slide.<br />
Cover<br />
B. Place the Harness Buckle under warm<br />
(approx. 40° Celsius) running water as<br />
shown below. Let the water run through<br />
the mouth of the buckle for five minutes.<br />
C. Engage and disengage the Harness<br />
Tongues and Buckles several times until a<br />
strong audible click is heard.<br />
D. Refit the harness buckle to the Carrier with<br />
the red button facing out and clip the 3-bar<br />
slide into the moulded housing.<br />
E. If you still cannot hear a strong audible<br />
click after engaging the Harness Tongues &<br />
Buckle, then repeat cleaning several times.<br />
If the Harness Buckle cannot be returned to<br />
its original working condition then contact<br />
Nursery Elegance Pty Ltd.<br />
Click<br />
Body<br />
3- bar<br />
slide<br />
SAFETY<br />
Never hold a baby in arms when riding in a motor vehicle. In this position the baby<br />
could be thrown against the dashboard, windscreen or other occupant and suffer<br />
serious injury or death.<br />
When riding in a motor vehicle never nurse a baby and use the same seat belt for<br />
both of you. In this position the baby or child could be crushed.<br />
Children must be secured in appropriate restraints at all times when the car is in<br />
motion. Children travelling unrestrained and standing up in the car are in danger of<br />
serious injury or death. Traffic regulations in all states require children to be secured<br />
in child restraints or adult seat belts where available.<br />
Plan your trip with frequent comfort stops to reduce stress on babies, young<br />
children and driver. Keep the car well ventilated to reduce heat stress. Two car<br />
windows should be kept open to maintain a good flow of fresh air if air conditioning<br />
is not used.<br />
Never leave babies or toddlers in a stationary car in the sun because of the risk of<br />
heat exhaustion.<br />
Ensure babies and toddlers are adequately shaded from direct sunlight through side<br />
or rear windows.<br />
Be on guard against carbon monoxide poisoning which can occur through only a<br />
slight leak in the exhaust system while travelling in a closed car.<br />
Securely stow all heavy objects, feeding bottles, etc. that could become missiles<br />
during an accident and cause injury to any occupant.<br />
40 41
TRAVELLING TIPS<br />
ACCESSORIES<br />
CLOTHING/BATHING<br />
Take several changes of clothing and bibs for possible car sickness. Disposable<br />
nappies and liners are very handy while travelling. Since it is often warmer in the<br />
car, dress the baby in light clothing. When cooler, it is easier to place a blanket over<br />
the baby than it is to remove the baby from the restraint and change clothes.<br />
Take a pack containing baby soap, oil, powder, cotton wool, small towel and wet<br />
washer in a plastic bag.<br />
FEEDING<br />
Never breast feed a baby while car is in motion. Babies will require extra feeding<br />
if travelling in the heat. For bottle fed babies, make up the bottles and refrigerate<br />
before leaving home for a day trip. Place in a cool bag and reheat as needed with<br />
hot water from a thermos.<br />
Alternatively, bring boiled water in a thermos and pre-measured amounts of baby<br />
formula in small containers. Use the water from the thermos to mix with the formula<br />
when required. Regardless which method is used, it is always a good plan to carry<br />
some boiled water in a sterile container or bottle.<br />
Do not attempt to carry warm milk because germs multiply rapidly in warm milk.<br />
PADDED INSERT (style may differ)<br />
Some models have a separate Padded Insert<br />
inside the Carrier for additional comfort.<br />
CAUTION:<br />
Shoulder straps must pass through slots in<br />
the insert.<br />
Failure to do this might result in the shoulder<br />
straps not holding the child securely.<br />
Shoulder Pads<br />
SHOULDER PADS (Where fitted)<br />
A. The shoulder pads may require release by<br />
press studs. If fully fitted to the shoulder<br />
strap then you will need to disconnect the<br />
shoulder strap as described on page 19.<br />
Padded Insert<br />
OTHER ACCESSORIES<br />
Only use accessories designed for this product and recommended by Nursery<br />
Elegance Pty Ltd.<br />
42 43
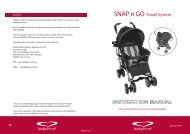
TRAVEL SYSTEM-USE WITH STROLLER<br />
TRAVEL SYSTEM-USE WITH STROLLER<br />
This Carrier is designed to be connected to compatible <strong>Babylove</strong> strollers. The<br />
following pages provide a general instructions about using the Carrier with a<br />
stroller which may differ slightly for some strollers. Preferably use the attachment<br />
instructions provided with your stroller. Use the stroller in accordance with the<br />
instructions supplied with the stroller.<br />
DO NOT LEAVE THE CHILD IN THE CARRIER FOR EXTENDED PERIODS.<br />
THE CARRIER IS DESIGNED TO PROVIDE MOBILITY OUTSIDE OF THE CAR BUT IT<br />
SHOULD NOT BE USED IN PLACE OF AN APPROPRIATE COT. DO NOT LEAVE THE<br />
BAY IN THE CARRIER FOR EXTENDED PERIODS.<br />
THE CARRIER MUST ONLY BE USED WITH A BABYLOVE STROLLER WITH<br />
COMPATIBLE ATTACHMENTS. DO NOT USE WITH ANY OTHER STROLLER.<br />
IF IN DOUBT ABOUT THE METHOD OF INSTALLATION OR SUITABLE COMPATIBLE<br />
STROLLERS, CONTACT NURSERY ELEGANCE CUSTOMER SERVICE ON<br />
1300 131 477.<br />
Always ensure the baby is secured in the Carrier with the harness at all times.<br />
FITTING THE CARRIER TO THE STROLLER<br />
NOTE - Ensure that the child is harnessed in the<br />
Carrier according to these instructions. See<br />
pages 28 to 31.<br />
A. Engage the brakes and place the stroller<br />
backrest into the fully reclined position.<br />
B. Locate and uncover the mounting slots on the<br />
stroller armrest.<br />
C. Hold the Carrier by the carry handle, and also<br />
if you prefer, by the front rebound bar. Face<br />
the feet end of the Carrier towards the stroller<br />
backrest.<br />
D. Lower the Carrier into the exposed mounting<br />
slots. Press down firmly on both sides until you<br />
hear it click and it locks into place.<br />
IMPORTANT:<br />
Ensure that the Carrier is locked into place by<br />
pulling up on both sides. Do not use the Carrier<br />
if it is not correctly installed.<br />
E. Rotate the Carrier handle down if you prefer.<br />
Press both buttons and hold them in. Then rotate<br />
the handle slightly backwards and then release.<br />
Continue to rotate the handle back over the<br />
canopy. Push down until it locks.<br />
Use the harness at all times.<br />
44 45
TRAVEL SYSTEM-USE WITH STROLLER<br />
INSTALLATION OF CAR ANCHOR FITTING<br />
REMOVING THE CARRIER FROM THE STROLLER<br />
A. Engage the brakes.<br />
B. Press both buttons on the side of the<br />
handle. Then continue to rotate the handle<br />
slightly forwards and then release. Rotate<br />
the handle up over the canopy. Check the<br />
handle is locked in the upright position.<br />
C. To release the Carrier from the stroller,<br />
locate the release lever on the back (head<br />
end) of the Carrier. Squeeze up and hold<br />
in to release the retaining locks. Lift the<br />
Carrier up by the handle and remove from<br />
the stroller.<br />
Consult the vehicle owner’s handbook for location of anchorage fittings or<br />
anchorage points and the possible use of spacers. Some vehicles may have an<br />
anchor fitting fitted by the vehicle manufacturer. If anchorage points cannot be found<br />
refer to car manufacturer or local child restraint fitting station or traffic authority for<br />
optimum position of anchorage point and the use of spacers.<br />
UPPER ANCHORAGE STRAP<br />
IMPORTANT:<br />
THE ATTACHMENT CLIP COVER MUST ALWAYS BE USED AS IT PREVENTS THE<br />
RISK OF INCORRECT FITMENT OF THE ATTACHMENT CLIP TO THE ANCHOR<br />
FITTING. ALWAYS ENSURE THAT THE ATTACHMENT CLIP IS CORRECTLY<br />
ENGAGED TO THE ANCHOR FITTING AND NOT HOOKED OR FITTED TO ANY<br />
OTHER OBJECT BEFORE EACH USE OF THE RESTRAINT. THIS IS ESPECIALLY<br />
IMPORTANT IN VEHICLES SUCH AS STATION WAGONS, VANS, HATCH BACKS<br />
OR VEHICLES WITHOUT A FIXED PARCEL SHELF, SINCE THE ANCHOR POINT IS<br />
USUALLY NOT VISIBLE.<br />
IMPORTANT INSTALLATION NOTE:<br />
In some vehicles the anchor fitting in the rear vertical panel can only be installed in<br />
one way. Please refer to vehicle owner’s handbook or a child restraint fitting station<br />
for correct method.<br />
46 47
INSTALLATION OF CAR ANCHOR FITTING<br />
INSTALLATION OF CAR ANCHOR FITTING<br />
Extension Strap distance to be measured.<br />
Length 300mm (Use <strong>Babylove</strong> part K304 or equivalent)<br />
Length 600mm (Use <strong>Babylove</strong> part K305 or equivalent)<br />
Available from all major child restraint retailers.<br />
DISTANCE TO MEASURE<br />
TO THE ANCHOR POINT<br />
IF THE CAR IS FITTED WITH CHILD<br />
RESTRAINT ANCHORAGE POINT<br />
Locate the anchorage point behind the<br />
rear seating position. (consult the car<br />
owners handbook for the location of the<br />
anchorage point). The anchorage point<br />
should be directly behind and central to<br />
the restraint. Remove thread plug from<br />
the parcel shelf/floor/roof, etc. and install<br />
anchor bolt and fitting as shown in Fig.1.<br />
CAUTION: DO NOT OVERTIGHTEN<br />
ANCHOR BOLT. OVERTIGHTENING MAY<br />
FRACTURE OR BREAK BOLT. MAXIMUM<br />
TORQUE IS 20 Nm (14.75 ft.lb.)<br />
Note: Minimum of five full turns of anchor<br />
bolt is required before tightening force is<br />
applied.<br />
UPPER ANCHORAGE FITTING<br />
Fig.1.<br />
Attachment Bolt<br />
Lock washer<br />
Vehicle trim<br />
Anchor fitting<br />
Spacer(s) if<br />
required<br />
Vehicle metal<br />
structure<br />
Front of Vehicle<br />
Adjustable upper<br />
Anchorage strap.<br />
FRONT OF VEHICLE<br />
The shaded areas of this diagram illustrate the possible locations of the anchor<br />
fitting. Within each shaded area is an anchor fitting showing the correct way to<br />
install the fitting. Ensure the anchor fitting is aligned as illustrated unless stated<br />
otherwise in the vehicle owner’s handbook.<br />
48 49
INSTALLATION OF CAR ANCHOR FITTING<br />
INSTALLATION OF CAR ANCHOR FITTING<br />
IF THE CAR IS NOT FITTED WITH<br />
CHILD RESTRAINT ANCHORAGE<br />
POINTS<br />
For Sedans only - Drill 9mm diameter<br />
hole in the parcel shelf on the centre<br />
line of the seating position as shown in<br />
Fig.3. Before drilling the hole, check the<br />
underside for accessibility. Install the<br />
anchor bolt as shown in Fig.2.<br />
For vehicles other than Sedans - In<br />
Australia, consult your nearest child<br />
restraint fitting station or traffic authority<br />
for vehicle inspection to find the best,<br />
correct position for the placement of<br />
the anchorage point, and for the correct<br />
attachment bolt length and use of<br />
spacers. In New Zealand, consult the<br />
agent for the vehicle.<br />
UPPER ANCHORAGE<br />
FITTINGS FOR SEDANS ONLY<br />
Fig.2.<br />
Attachment Bolt<br />
Vehicle trim<br />
Anchor fitting<br />
Spacer(s) if<br />
required<br />
Vehicle metal<br />
structure<br />
Reinforcing<br />
washer (cone<br />
downwards)<br />
Lock washer<br />
Secure nut<br />
Front of Vehicle<br />
Note to Queensland purchasers: The installation of anchorage points must be<br />
approved by authorised officers appointed by Queensland Transport. Authorised<br />
officers can be sourced from all Queensland Transport Customer Service and<br />
Queensland Ambulance Service Centres.<br />
ONLY USE A 5/16 UNC GRADE 5 BOLT. IF THE<br />
BOLT IS NOT THE CORRECT LENGTH THE<br />
CAR MANUFACTURER’S HAND BOOK CAN<br />
PROVIDE ADVICE ON THE CORRECT LENGTH<br />
BOLT.<br />
CHILD RESTRAINTS MUST NOT BE<br />
ATTACHED TO UNSOUND METAL OR TO<br />
WOOD, OR SYNTHETIC STRUCTURES.<br />
WHEN DRILLING 9 MM HOLE DO NOT<br />
DRILL THROUGH FUEL LINES, FUEL<br />
TANKS, ELECTRICAL WIRING, OR RADIO<br />
SPEAKERS.<br />
WEBBING STRAPS MUST BE<br />
PROTECTED FROM SHARP CORNERS<br />
AND EDGES. THE ANCHOR FITTING<br />
MUST BE USED ONLY AS DESCRIBED<br />
ABOVE. IT MUST NOT BE HOOKED ONTO<br />
ANY OTHER OBJECT.<br />
Note: Marking on<br />
the top of a Grade 5<br />
Bolt.<br />
Front of Vehicle<br />
200mm<br />
min.<br />
Fig.3.<br />
Centre line of<br />
seating position<br />
50 51
INSTALLATION ACCESSORIES<br />
IN CASE OF ACCIDENT<br />
CAR INSTALLATION ACCESSORIES<br />
(Available from retailers of <strong>Babylove</strong> products)<br />
EXTRA ANCHOR KITS: Are available if using the restraint in additional vehicles.<br />
Re-order number: K402<br />
EXTENSION STRAPS: May be required for vehicles without a fixed parcel shelf.<br />
Re-order number: K304 (length 300mm)<br />
or K305 (length 600mm).<br />
IN CASE OF ACCIDENT<br />
If your restraint has been involved in a severe crash, you should destroy the<br />
restraint even if no damage is obvious. Some insurance companies offer vehicle<br />
insurance which covers or partially covers the replacement of your child restraint.<br />
Contact your insurance company for further details.<br />
Your insurance company may require you to keep the child restraint for assessment,<br />
but do not use the child restraint after a severe crash.<br />
EXTRA BASE<br />
There are <strong>Babylove</strong> Series BL620A/2010 Extra Bases available as a separate<br />
purchase for a second car. These bases can mean that the Carrier can be easily<br />
and quickly switched between cars. The Extra Base has the same installation<br />
requirements as the Base in these instructions.<br />
52 53
NOTES<br />
NOTES<br />
54 55
We reserve the right to alter this product without notice in our constant endeavour<br />
for improvement.<br />
© 2007 - 2011 Nursery Elegance Pty. Ltd.<br />
Trademarks of <strong>Babylove</strong> and devices are owned by Nursery Elegance Pty. Ltd.<br />
This product is covered by Australian patent application.<br />
P/No. 2200878/A