
Create successful ePaper yourself
Turn your PDF publications into a flip-book with our unique Google optimized e-Paper software.
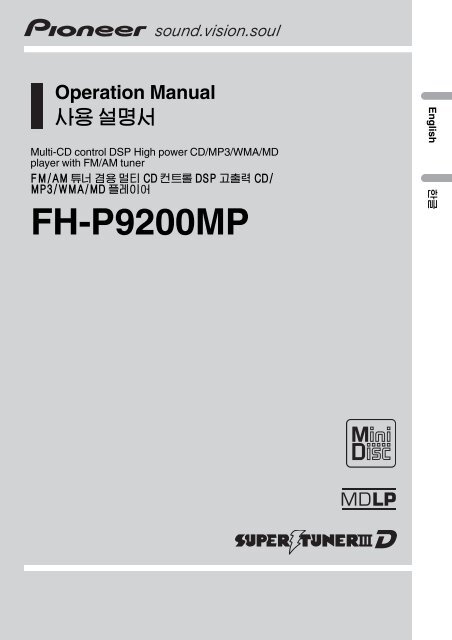
Operation Manual<br />
¬© $…<br />
Multi-CD control DSP High power CD/MP3/WMA/MD<br />
player with FM/AM tuner<br />
FM/AM œ ¸© @ð CD è¸d DSP àœ% CD/<br />
MP3/WMA/MD t´<br />
FH-P9200MP<br />
English \
Contents<br />
Thank you for buying this <strong>Pioneer</strong> product.<br />
Please read through these operating instructions so you will know how to operate<br />
your model properly. After you have finished reading the instructions, put them away<br />
in a safe place for future reference.<br />
Before You Start<br />
About this manual 5<br />
Precautions 5<br />
Features 5<br />
About WMA 6<br />
Switching the DSP setting mode 6<br />
Resetting the microprocessor 6<br />
About the demo mode 7<br />
Reverse mode 7<br />
Feature demo 7<br />
About basic displays 7<br />
SOFTKEY operation 8<br />
Switching the function of the multifunction<br />
buttons 8<br />
Example of multi-function button<br />
operation 8<br />
The difference between the BAND<br />
button and the BACK button 9<br />
Key guidance indicator 10<br />
Setting the display angle 10<br />
Use and care of the remote control 11<br />
Installing the battery 11<br />
Replacing the battery 11<br />
Using the remote control 11<br />
FUNCTION button and AUDIO<br />
button 12<br />
Whats What<br />
Head unit 13<br />
Remote control 14<br />
Power ON/OFF<br />
Turning the unit on 15<br />
Selecting a source 15<br />
Turning the unit off 15<br />
Tuner<br />
Listening to the radio 16<br />
Introduction of advanced tuner<br />
operation 16<br />
Storing and recalling broadcast<br />
frequencies 17<br />
Tuning in strong signals 17<br />
Storing the strongest broadcast<br />
frequencies 17<br />
Selecting stations from the preset channel<br />
list 18<br />
Built-in CD Player<br />
Playing a CD 19<br />
Introduction of advanced built-in CD player<br />
operation 20<br />
Repeating play 20<br />
Playing tracks in a random order 20<br />
Scanning tracks of a CD 20<br />
Selecting tracks from the track title list 21<br />
Pausing CD playback 21<br />
Selecting the search method 21<br />
Searching every 10 track in the current<br />
disc 21<br />
Entering disc titles 22<br />
Using disc title functions 22<br />
MP3/WMA Player<br />
Playing a MP3/WMA 23<br />
Introduction of advanced built-in CD player<br />
(MP3/WMA) operation 24<br />
Repeating play 24<br />
Playing tracks in a random order 25<br />
Scanning folders and tracks 25<br />
Pausing MP3/WMA playback 25<br />
Selecting folders from the folder title list 26<br />
Selecting the search method 26<br />
Searching every 10 track in the current<br />
folder 26<br />
Switching the tag display 27<br />
Using disc title functions 27<br />
Built-in MD Player<br />
Playing an MD 28<br />
2<br />
En
Contents<br />
English<br />
Introduction of advanced built-in MD player<br />
operation 29<br />
Repeating play 29<br />
Non group-recorded MD 29<br />
Group-recorded MD 29<br />
Playing tracks in a random order 29<br />
Scanning tracks of a MD 30<br />
Selecting tracks from the track title list 30<br />
Selecting groups from the group title list 30<br />
Pausing MD playback 31<br />
Using disc title functions 31<br />
Multi-CD Player<br />
Playing a CD 32<br />
50-disc multi-CD player 32<br />
Selecting a disc directly 32<br />
Introduction of advanced multi-CD player<br />
operation 33<br />
Repeating play 33<br />
Playing tracks in a random order 33<br />
Scanning CDs and tracks 34<br />
Selecting tracks from the track title list 34<br />
Selecting discs from the disc title list 34<br />
Pausing CD playback 35<br />
Using ITS playlists 35<br />
Creating a playlist with ITS<br />
programming 35<br />
Playback from your ITS playlist 36<br />
Erasing a track from your ITS<br />
playlist 36<br />
Erasing a CD from your ITS<br />
playlist 36<br />
Entering disc titles 36<br />
Using disc title functions 37<br />
Using compression and bass emphasis 38<br />
TV tuner<br />
Using the TV tuner 39<br />
Introduction of advanced TV tuner<br />
operation 39<br />
Storing and recalling broadcast stations 39<br />
Selecting channels from the preset channel<br />
list 40<br />
DVD Player<br />
Playing a disc 41<br />
Introduction of advanced DVD player<br />
operation 41<br />
Repeating play 42<br />
Playing tracks in a random order 42<br />
Scanning tracks of a CD 42<br />
Pausing disc playback 42<br />
Using ITS playlist, disc title input and disc<br />
title list functions 42<br />
Audio Adjustments<br />
Operation modes 43<br />
Operation mode marks 43<br />
3-way network mode 43<br />
Standard mode 43<br />
Adjusting the audio easily 43<br />
Adjusting the audio finely 43<br />
Extra functions 44<br />
Introduction of audio adjustments 44<br />
Using the position selector 44<br />
Using balance adjustment 45<br />
Using balance adjustment 45<br />
Using the time alignment 45<br />
Adjusting the time alignment 46<br />
About the network function 47<br />
Adjustable parameters 47<br />
Points concerning network<br />
adjustments 47<br />
Muting the speaker unit (filter) 48<br />
Adjusting network 48<br />
Using subwoofer output 49<br />
Adjusting subwoofer settings 49<br />
Using the high pass filter 50<br />
Setting the high pass filter for front<br />
speakers 50<br />
Setting the high pass filter for rear<br />
speakers 50<br />
En 3
Contents<br />
Using the auto-equalizer 50<br />
Recalling equalizer curves 50<br />
Adjusting equalizer curves 51<br />
Adjusting 13-band graphic equalizer 51<br />
Using BBE sound 52<br />
Adjusting BBE sound level 52<br />
Adjusting loudness 52<br />
Using sound field control and BBE sound<br />
52<br />
Recalling sound field programs 53<br />
Adjusting BBE sound level 53<br />
Using automatic sound levelizer 53<br />
Adjusting source levels 53<br />
Auto TA and EQ (auto-time alignment and<br />
auto-equalizing) 54<br />
Before operating the auto TA and EQ<br />
function 54<br />
Carrying out auto TA and EQ 55<br />
Initial Settings<br />
Adjusting initial settings 57<br />
Using reverse mode 57<br />
Using the feature demo 57<br />
Switching the auxiliary setting 57<br />
Selecting the digital attenuator 58<br />
Switching the telephone muting/<br />
attenuation 58<br />
Setting the FM tuning step 58<br />
Setting the AM tuning step 58<br />
Other Functions<br />
Attenuating volume 60<br />
Displaying and setting the clock 60<br />
Turning the off clock display on or<br />
off 60<br />
Setting the date 60<br />
Setting the clock 60<br />
Matching the time to a time<br />
signal 60<br />
Setting the time signal display 61<br />
Changing the display form 61<br />
Adjusting the brightness 61<br />
Switching the dimmer setting 61<br />
Setting the flash light screen 61<br />
Selecting the wall paper pattern 62<br />
Switching the font 62<br />
Using different entertainment displays 62<br />
Setting the movie screen 62<br />
Setting the level indicator display 62<br />
Setting the ASL display 63<br />
Setting the background visual 63<br />
Setting the background still<br />
picture 63<br />
Canceling the entertainment<br />
display 63<br />
Using the AUX source 63<br />
Selecting AUX as the source 63<br />
Setting the AUX title 64<br />
Additional Information<br />
Understanding built-in CD player error<br />
messages 65<br />
Understanding built-in MD player error<br />
messages 65<br />
Understanding auto TA and EQ error<br />
messages 65<br />
CD player and care 66<br />
CD-R/CD-RW discs 67<br />
MP3 and WMA files 67<br />
MP3 additional information 68<br />
WMA additional information 68<br />
About folders and MP3/WMA files 68<br />
MD player and care 69<br />
DSP adjustment value record sheet 70<br />
3-way network mode 70<br />
Standard mode 70<br />
Equalizer curves 70<br />
Terms 71<br />
Specifications 72<br />
4<br />
En
Before You Start<br />
Section<br />
01<br />
About this manual<br />
This unit features a number of sophisticated<br />
functions ensuring superior reception and operation.<br />
All the functions have been designed<br />
for the easiest possible use, but many are not<br />
self-explanatory. This operation manual will<br />
help you benefit fully from this productspotential<br />
and to maximize your listening enjoyment.<br />
We recommend that you familiarize yourself<br />
with the functions and their operation by reading<br />
through the manual before you begin<br />
using this unit. It is especially important that<br />
you read and observe precautions on this<br />
page and in other sections.<br />
Precautions<br />
CAUTION:<br />
USE OF CONTROL OR ADJUSTMENT OR<br />
PERFORMANCE OF PROCEDURES<br />
OTHERTHAN THOSE SPECIFIED HEREIN<br />
MAY RESULT IN HAZARDOUS RADIATION<br />
EXPOSURE.<br />
CAUTION:<br />
THE USE OF OPTICAL INSTRUMENTS<br />
WITH THIS PRODUCT WILL INCREASE<br />
EYE HAZARD.<br />
! Keep this manual handy as a reference for<br />
operating procedures and precautions.<br />
! Always keep the volume low enough so you<br />
can hear sounds outside of the car.<br />
! Protect this product from moisture.<br />
! If the battery is disconnected or discharged,<br />
the preset memory will be erased<br />
and must be reprogrammed.<br />
! If this unit does not operate properly, contact<br />
your dealer or nearest authorized <strong>Pioneer</strong><br />
Service Station.<br />
Features<br />
CD playback<br />
Music CD/CD-R/CD-RW playback is possible.<br />
MP3 file playback<br />
It is possible to play back MP3 files recorded<br />
on CD-ROM/CD-R/CD-RW (ISO9660 Level 1/<br />
Level 2 standard recordings).<br />
! Supply of this product only conveys a license<br />
for private, non-commercial use and<br />
does not convey a license nor imply any<br />
right to use this product in any commercial<br />
(i.e. revenue-generating) real time broadcasting<br />
(terrestrial, satellite, cable and/or<br />
any other media), broadcasting/streaming<br />
via internet, intranets and/or other networks<br />
or in other electronic content distribution<br />
systems, such as pay-audio or<br />
audio-on-demand applications. An independent<br />
license for such use is required.<br />
For details, please visit<br />
http://www.mp3licensing.com.<br />
WMA file playback<br />
It is possible to play back WMA files recorded<br />
on CD-ROM/CD-R/CD-RW (ISO9660 Level 1/<br />
Level 2 standard recordings).<br />
Playback of MDs featuring long<br />
recordings<br />
This unit is MDLP compatible, so you can playback<br />
MDs featuring long recordings.<br />
! MDLP is a data compression system that<br />
lets you record on regular MDs for 2 or 4<br />
times the length of time previously possible.<br />
Group-recorded MD playback<br />
Using a group-recorded MD, it is possible to<br />
play back tracks by the desired group (albums,<br />
artists, favorites, etc.).<br />
English<br />
En 5
Section<br />
01<br />
Before You Start<br />
About WMA<br />
The Windows Media" logo printed on the box<br />
indicates that this unit can playback the WMA<br />
data.<br />
WMA is short for Windows Media Audio and<br />
refers to an audio compression technology<br />
that is developed by Microsoft Corporation.<br />
WMA data can be encoded by using Windows<br />
Media Player version 7, 7.1 or Windows Media<br />
Player for Windows XP.<br />
Microsoft, Windows Media, and the Windows<br />
logo are trademarks, or registered trademarks<br />
of Microsoft Corporation in the United States<br />
and/or other countries.<br />
Notes<br />
! With some applications used to encode WMA<br />
files, this unit may not operate correctly.<br />
! With some applications used to encode WMA<br />
files, album names and other text information<br />
may not be correctly displayed.<br />
Switching the DSP setting<br />
mode<br />
This unit features two operation modes: the 3-<br />
way network mode (NW) and the standard<br />
mode (STD). You can switch between modes<br />
as desired. Initially, the DSP setting is set to<br />
the standard mode (STD).<br />
! After switching, reset the microprocessor.<br />
WARNING<br />
Do not use the unit in standard mode when a<br />
speaker system for 3-way network mode is connected<br />
to this unit. This may cause damage to<br />
the speakers.<br />
% Use a thin standard tip screwdriver to<br />
switch the DSP switch on the side of this<br />
unit.<br />
Resetting the microprocessor<br />
The microprocessor must be reset under the<br />
following conditions:<br />
! Prior to using this unit for the first time<br />
after installation<br />
! If the unit fails to operate properly<br />
! When strange or incorrect messages appear<br />
on the display<br />
% Press RESET on the head unit with a<br />
pen tip or other pointed instrument.<br />
RESET button<br />
6<br />
En
Before You Start<br />
Section<br />
01<br />
About the demo mode<br />
This unit features two demonstration modes.<br />
One is the reverse mode, the other is the feature<br />
demo mode.<br />
! When the source is off, you can check the<br />
location of 5 and 6 by turning on the feature<br />
demo.<br />
About basic displays<br />
This unit is equipped with three forms of basic<br />
display. You can select the desired display.<br />
English<br />
FORM1<br />
Important<br />
The red lead (ACC) of this unit should be connected<br />
to a terminal coupled with ignition switch<br />
on/off operations. If this is not done, the vehicle<br />
battery may be drained.<br />
FORM2<br />
Reverse mode<br />
If you do not perform an operation within<br />
about 30 seconds, screen indications start to<br />
reverse, and then continue reversing every 10<br />
seconds. Pressing 5 numbered button when<br />
power to this unit is turned off while the ignition<br />
switch is set to ACC or ON cancels the reverse<br />
mode. Pressing 5 numbered button<br />
again to start the reverse mode.<br />
FORM3<br />
Note<br />
For details, refer to Changing the display form on<br />
page 61.<br />
Feature demo<br />
The feature demo automatically starts when<br />
power to this unit is turned off while the ignition<br />
switch is set to ACC or ON. Pressing 6<br />
numbered button during feature demo operation<br />
cancels the feature demo mode. Pressing<br />
6 numbered button again to start the feature<br />
mode. Remember that if the feature demo<br />
continues operating when the car engine is<br />
turned off, it may drain battery power.<br />
En 7
Section<br />
01<br />
Before You Start<br />
SOFT KEYoperation<br />
SOFTKEY operation means that the function<br />
of a button changes as indicated on the display.<br />
The multi-function buttons provide SOFT<br />
KEY operation; the functions performed by the<br />
buttons change according to the function or<br />
setting that has been selected.<br />
Notes<br />
! The number of functions or displays switched<br />
through will differ according to the source or<br />
menu selected.<br />
! When no function is indicated for a button,<br />
that button is not currently active.<br />
Function names<br />
<br />
Example of multi-function<br />
button operation<br />
Here the random play function of the built-in<br />
CD player is used as an example to illustrate<br />
operation of the multi-function buttons.<br />
Multi-function buttons<br />
The explanations given in this manual are<br />
based on FORM1 display. If you have selected<br />
FORM2 or FORM3, the functions of some of<br />
the multi-function buttons may be different<br />
from those indicated in the manual.<br />
Important<br />
In this manual, for operations using the multifunction<br />
buttons the function displayed is used<br />
as the name of the function button.<br />
1 Press NEXT to display FUNC.<br />
Press NEXT until FUNC appears.<br />
2Press FUNC to enter the function menu.<br />
With the switch to the function menu, the<br />
functions of the multi-function buttons also<br />
change simultaneously.<br />
3 Press RDM to select the random mode.<br />
Switching the function of the<br />
multi-function buttons<br />
The d indicator shows that the multi-function<br />
buttons have functions other than those currently<br />
displayed. When this indicator is visible,<br />
press NEXT to switch through the functions of<br />
the multi-function buttons.<br />
% Press NEXT to display the desired functions<br />
(e.g., built-in CD player).<br />
Press NEXT repeatedly to switch between the<br />
following functions:<br />
4 Press RDM to turn random play on.<br />
The light illuminates.<br />
# Press RDM again to turn random play off. The<br />
light goes off.<br />
8<br />
En
Before You Start<br />
Section<br />
01<br />
5 Press BACK to exit the function menu.<br />
When the function menu is exited, the functions<br />
of the multi-function buttons also<br />
change simultaneously.<br />
English<br />
Notes<br />
! You can also turn random play on or off by<br />
pressing a or b in the random mode.<br />
! If you do not operate the function within about<br />
30 seconds, the display is automatically returned.<br />
The difference between the BAND<br />
button and the BACK button<br />
BAND button<br />
Pressing the BAND button immediately cancels<br />
the current menu or mode, and returns to<br />
the basic displays.<br />
! When the source is the tuner or television<br />
and no menu or mode is selected, pressing<br />
the BAND button has the effect of switching<br />
bands.<br />
BACK button<br />
Pressing the BACK button cancels the current<br />
menu or mode and returns to the previously<br />
selected menu or mode.<br />
En 9
Section<br />
01<br />
Before You Start<br />
Display example (e.g., built-in CD player)<br />
The number shows the current menu level.<br />
Key guidance indicator<br />
This units display features key guidance indicators.<br />
These light to indicate which of the a/<br />
b/c/d buttons you can use. When youre in<br />
the function menu, audio menu or the other<br />
menus, they also make it easy to see which a/<br />
b/c/d buttons you can use to switch functions<br />
on or off, switch repeat selections and<br />
perform other operations.<br />
Note<br />
In this manual, operation for each mode is given<br />
mainly in terms of the multi-function buttons.<br />
However, in each mode, when the key guidance<br />
indicators are lit it is also possible to use a/b/c/<br />
d to operate the mode.<br />
Setting the display angle<br />
You can adjust front panel angle for easier operation.<br />
Key guidance indicators<br />
WARNING<br />
! Do not use with the front panel left open. If<br />
you do leave it open, it may result in injury in<br />
the event of an accident.<br />
10<br />
En
Before You Start<br />
Section<br />
01<br />
! Be careful not to catch your finger in the front<br />
panel when it is opening or closing.<br />
% Press ANGLE to change the angle.<br />
Each press of ANGLE changes the angle.<br />
Replacing the battery<br />
Remove the battery.<br />
English<br />
Notes<br />
! While a disc is left partially inserted, you cannot<br />
operate the angle.<br />
! By pressing ANGLE and hold, you can open<br />
or close the front panel.<br />
Use and care of the remote<br />
control<br />
Installing the battery<br />
Remove the cover on the back of the steering<br />
remote control and insert the battery with the<br />
plus (+) and minus () poles pointing in the<br />
proper direction.<br />
WARNING<br />
Keep the battery out of the reach of children.<br />
Should the battery be swallowed, immediately<br />
consult a doctor.<br />
CAUTION<br />
! Use only one CR2032 (3 V) lithium battery.<br />
! Remove the battery if the remote control is not<br />
used for a month or longer.<br />
! Do not recharge, disassemble, heat or dispose<br />
of the battery in fire.<br />
! Do not handle the battery with metallic tools.<br />
! Do not store the battery with metallic materials.<br />
! In the event of battery leakage, wipe the remote<br />
control completely clean and install a<br />
new battery.<br />
! When disposing of used batteries, please<br />
comply with governmental regulations or environmental<br />
public institutions rules that<br />
apply in your country/area.<br />
Using the remote control<br />
Important<br />
! Do not operate this unit while manipulating<br />
the steering wheel as it might result in a traffic<br />
accident.<br />
En 11
Section<br />
01<br />
Before You Start<br />
! If you have to operate this unit unavoidably<br />
when driving, look ahead carefully to avoid the<br />
risk of being involved in a traffic accident.<br />
! If any of the following troubles occur, immediately<br />
stop using this unit and consult with the<br />
dealer from whom you purchased it:<br />
the unit is smoking.<br />
the unit is emitting abnormal odor.<br />
a foreign object has entered the unit.<br />
liquid has been spilled on or into the unit.<br />
If you continue to use this unit without finding<br />
a remedy, the unit may be damaged badly, resulting<br />
in a serious accident or fire.<br />
! Do not leave this unit free (unattached) inside<br />
the car. When the car stops or turns a curve,<br />
the unit might drop on the floor. If the unit<br />
rolls under the brake pedal, it might prevent<br />
the driver from braking well, causing serious<br />
trouble. Be sure to fix this unit to the steering<br />
wheel.<br />
! Do not disassemble or modify this unit. To do<br />
so may cause a fault.<br />
FUNCTION button and AUDIO button<br />
Operation of the FUNCTION button and the<br />
AUDIO button on the remote control differs<br />
from the operation of the FUNC button and<br />
the AUDIO button on the head unit. When operating<br />
the head unit, use the FUNC button<br />
and the AUDIO button to select the appropriate<br />
menu, then use the multi-function buttons<br />
to select the mode. When operating the remote<br />
control, however, switch through the<br />
modes as described below to select the mode.<br />
Note<br />
Refer to Introduction of advanced built-in CD<br />
player operation on page 20.<br />
AUDIO button operation<br />
% Press AUDIO to select the desired<br />
mode.<br />
Press AUDIO repeatedly to switch between<br />
the following modes:<br />
BALNWPOSIT.ALEQ 1EQ 2BBE<br />
LOUDASLSLA<br />
F/BLOUDSFCEQ 1EQ 2ASLPOSI<br />
T.ALA.EQSW1SW2HPF FHPF R<br />
SLA<br />
Note<br />
Refer to Introduction of audio adjustments on<br />
page 44.<br />
FUNCTION button operation<br />
% Press FUNCTION to select the desired<br />
mode (e.g., built-in CD player).<br />
Press FUNCTION repeatedly to switch between<br />
the following modes:<br />
RPTRDMSCANT.LISTPAUSETTLin<br />
R.SRCHT.READ<br />
12<br />
En
Whats What<br />
Section<br />
02<br />
2<br />
1<br />
3<br />
4<br />
5<br />
6<br />
English<br />
7 8 9 a b<br />
Head unit<br />
1 ANGLE button<br />
Press to change the display angle.<br />
2 Multi-function buttons<br />
Change according to the funtion or setting<br />
that has been selected.<br />
3 CD EJECT button<br />
Press to eject a CD from your built-in CD<br />
player.<br />
4 MD EJECT button<br />
Press to eject a MD from your built-in MD<br />
player.<br />
5 RESET button<br />
Press to reset the microprocessor.<br />
6 NEXT button<br />
Press to switch through the functions of<br />
multi-function buttons.<br />
8 SOURCE selector<br />
This unit is turned on by selecting a source.<br />
When you press SOURCE, it extends outward<br />
so that it becomes easier to turn. To retract<br />
SOURCE, press it again. Rotate to<br />
cycle through all of the available sources.<br />
9 a/b/c/d buttons<br />
Press to do manual seek tuning, fast forward,<br />
reverse and track search controls.<br />
Also used for controlling functions.<br />
a VOLUME<br />
When you press VOLUME, it extends outward<br />
so that it becomes easier to turn. To retract<br />
VOLUME, press it again. Rotate to<br />
increase or decrease the volume.<br />
b BAND button<br />
Press to select among three FM and one<br />
AM bands and cancel the control mode of<br />
functions.<br />
7 BACK button<br />
Press to return to the previously mode.<br />
En 13
Section<br />
02<br />
Whats What<br />
c<br />
b<br />
9<br />
e<br />
g<br />
f<br />
d<br />
Remote control<br />
Operation is the same as when using the button<br />
on the head unit.<br />
Note<br />
If you press FUNCTION on the remote control<br />
while pressing BAND on it, the remote control<br />
will not function properly. To cancel this setting,<br />
press AUDIO on the remote control while pressing<br />
BAND on it to return to the previous<br />
setting.<br />
c ATT button<br />
Press to quickly lower the volume level, by<br />
about 90%. Press once more to return to the<br />
original volume level.<br />
d VOLUME button<br />
Press to increase or decrease the volume.<br />
e FUNCTION button<br />
Press to select functions.<br />
f AUDIO button<br />
Press to select various sound quality controls.<br />
g SOURCE button<br />
This unit is turned on by selecting a source.<br />
Press to cycle through all of the available<br />
sources.<br />
14<br />
En
Power ON/OFF<br />
Section<br />
03<br />
Turning the unit on<br />
% Rotate SOURCE on the head unit to<br />
turn the unit on.<br />
When you select a source the unit is turned<br />
on.<br />
# When using the remote control, press<br />
SOURCE to turn the unit on.<br />
Selecting a source<br />
You can select a source you want to listen to.<br />
To switch to the built-in CD player, load a CD<br />
in this unit (refer to page 19). To switch to the<br />
built-in MD player, load an MD in this unit<br />
(refer to page 28).<br />
% Rotate SOURCE on the head unit to select<br />
a source.<br />
Rotate SOURCE repeatedly to switch between<br />
the following sources:<br />
TunerTelevisionDVD player/Multi-DVD<br />
playerBuilt-in CD playerMulti-CD<br />
playerBuilt-in MD playerExternal unit<br />
1External unit 2AUXSources off<br />
# When using the remote control, press<br />
SOURCE repeatedly.<br />
incompatible as a source, enables control of<br />
basic functions by this unit. Two external units<br />
can be controlled by this unit. When two external<br />
units are connected, the allocation of<br />
them to external unit 1 or external unit 2 is<br />
automatically set by this unit.<br />
! When this units blue lead is connected to the<br />
cars auto-antenna relay control terminal, the<br />
cars antenna extends when this units selected<br />
source is the tuner. To retract the antenna,<br />
switch to a source other than tuner.<br />
Turning the unit off<br />
% Rotate SOURCE on the head unit until<br />
the unit turns off.<br />
When using the remote control, press<br />
SOURCE and hold until the unit turns off.<br />
English<br />
Notes<br />
! In the following cases, the sound source will<br />
not change:<br />
When a unit corresponding to each source<br />
is not connected to this unit.<br />
When no disc is set in this unit.<br />
When no disc is set in the DVD player.<br />
When no magazine is set in the multi-CD<br />
player.<br />
When no magazine is set in the multi-DVD<br />
player.<br />
When the AUX (auxiliary input) is set to off<br />
(refer to page 57).<br />
! External unit refers to a <strong>Pioneer</strong> product (such<br />
as one available in the future) that, although<br />
En 15
Section<br />
04<br />
Tuner<br />
Listening to the radio<br />
1 2 3 4<br />
5<br />
FORM1<br />
These are the basic steps necessary to operate<br />
the radio. More advanced tuner operation is<br />
explained starting on this page.<br />
Important<br />
If you are using this unit in North, Central or<br />
South America, reset the AM tuning step (see<br />
Setting the AM tuning step on page 58).<br />
1 Band indicator<br />
Shows which band the radio is tuned to, AM<br />
or FM.<br />
2 LOC indicator<br />
Shows when local seek tuning is on.<br />
3 Preset number indicator<br />
Shows what preset has been selected.<br />
4 Stereo (5) indicator<br />
Shows that the frequency selected is being<br />
broadcast in stereo.<br />
5 Frequency indicator<br />
Shows to which frequency the tuner is<br />
tuned.<br />
2Use VOLUME to adjust the sound level.<br />
Rotate to increase or decrease the volume.<br />
3 Press BAND to select a band.<br />
Press BAND until the desired band is displayed,<br />
FM-1, FM-2, FM-3 for FM or AM.<br />
4 To perform manual tuning, press c or<br />
d with quick presses.<br />
The frequencies move up or down step by<br />
step.<br />
5 To perform seek tuning, press and hold<br />
c or d for about one second and release.<br />
The tuner will scan the frequencies until a<br />
broadcast strong enough for good reception is<br />
found.<br />
# You can cancel seek tuning by pressing either<br />
c or d with a quick press.<br />
# If you press and hold c or d you can skip<br />
broadcasting stations. Seek tuning starts as soon<br />
as you release the buttons.<br />
Introduction of advanced<br />
tuner operation<br />
The tuner function menu has the following<br />
functions:<br />
BSM (best stations memory)chLIST (channel<br />
list)LOC (local seek tuning)<br />
Note<br />
If you do not operate the function within about 30<br />
seconds, the display is automatically returned.<br />
1 Rotate SOURCE to select the tuner.<br />
Rotate SOURCE until you see Tuner displayed.<br />
16<br />
En
Tuner<br />
Section<br />
04<br />
Storing and recalling<br />
broadcast frequencies<br />
If you press any of the preset tuning buttons<br />
16 you can easily store up to six broadcast<br />
frequencies for later recall with the touch of a<br />
button.<br />
1 Press NEXT to display 16.<br />
Press NEXT until 16 appears in the display.<br />
2Press LOC to set the local seek sensitivity.<br />
Press LOC repeatedly to switch between the<br />
following settings:<br />
FM: Local OFFLevel 1Level 2Level 3<br />
Level 4<br />
AM: Local OFFLevel 1Level 2<br />
The Level 4 setting allows reception of only<br />
the strongest stations, while lower settings let<br />
you receive progressively weaker stations.<br />
English<br />
2When you find a frequency that you<br />
want to store in memory press a preset<br />
tuning button 16 and hold until the preset<br />
number stops flashing.<br />
The number you have pressed will flash in the<br />
preset number indicator and then remain lit.<br />
The selected radio station frequency has been<br />
stored in memory.<br />
The next time you press the same preset tuning<br />
button 16 the radio station frequency is<br />
recalled from memory.<br />
Notes<br />
! Up to 18 FM stations, 6 for each of the three<br />
FM bands, and 6 AM stations can be stored in<br />
memory.<br />
! You can also use a and b to recall radio station<br />
frequencies assigned to preset tuning<br />
buttons 16.<br />
Tuning in strong signals<br />
Local seek tuning lets you tune in only those<br />
radio stations with sufficiently strong signals<br />
for good reception.<br />
1 Press FUNC and then press LOC to select<br />
the local mode.<br />
Storing the strongest<br />
broadcast frequencies<br />
BSM (best stations memory) lets you automatically<br />
store the six strongest broadcast frequencies<br />
under preset tuning buttons 16 and<br />
once stored there you can tune in to those frequencies<br />
with the touch of a button.<br />
1 Press FUNC to select BSM mode.<br />
2Press BSM to turn BSM on.<br />
Searching appears. The six strongest broadcast<br />
frequencies will be stored under preset<br />
tuning buttons 16 in order of their signal<br />
strength.<br />
When finished, Searching disappears and the<br />
display switches to the preset channel list<br />
mode.<br />
# To cancel the storage process, press BSM<br />
again.<br />
Note<br />
Storing broadcast frequencies with BSM may replace<br />
broadcast frequencies you have saved<br />
using 16.<br />
En 17
Section<br />
04<br />
Tuner<br />
Selecting stations from the<br />
preset channel list<br />
The preset channel list lets you see the list of<br />
preset stations and select one of them to receive.<br />
1 Press FUNC and then press chLIST to select<br />
the preset channel list mode.<br />
2Press any of the buttons 16 to recall<br />
the desired station frequency.<br />
Note<br />
You can also use c, d and a to select and recall<br />
the desired station.<br />
18<br />
En
Built-in CD Player<br />
Section<br />
05<br />
Playing a CD<br />
1 2<br />
FORM1<br />
# You can eject a CD by pressing CD EJECT.<br />
3 Use VOLUME to adjust the sound level.<br />
Rotate to increase or decrease the volume.<br />
4 To perform fast forward or reverse,<br />
press and hold c or d.<br />
# If you select the search method to<br />
Rough search, pressing and holding c or d enables<br />
you to search every ten track in the current<br />
disc. (Refer to Selecting the search method on<br />
page 21.)<br />
English<br />
These are the basic steps necessary to play a<br />
CD with your built-in CD player. More advanced<br />
CD operation is explained starting on<br />
the next page.<br />
WARNING<br />
Do not use with the front panel left open, after<br />
ejecting a CD. If you do leave it open, it may result<br />
in injury in the event of an accident.<br />
1 Play time indicator<br />
Shows the elapsed playing time of the current<br />
track.<br />
2 Track number indicator<br />
Shows the track currently playing.<br />
1 Press CD EJECT.<br />
CD loading slot appears.<br />
# After a CD has been inserted, rotate SOURCE<br />
to select the built-in CD player.<br />
2Insert a CD into the CD loading slot.<br />
Front panel is closed automatically, and playback<br />
will start.<br />
CD loading slot<br />
5 To skip back or forward to another<br />
track, press c or d.<br />
Pressing d skips to the start of the next track.<br />
Pressing c once skips to the start of the current<br />
track. Pressing again will skip to the previous<br />
track.<br />
Notes<br />
! The built-in CD player plays one, standard, 12-<br />
cm or 8-cm (single) CD at a time. Do not use<br />
an adapter when playing 8-cm CDs.<br />
! Do not insert anything other than a CD into<br />
the CD loading slot.<br />
! A CD left partially inserted after ejection may<br />
incur damage or fall out.<br />
! If you cannot insert a disc completely or if<br />
after you insert a disc the disc does not play,<br />
check that the label side of the disc is up.<br />
Press CD EJECT to eject the disc, and check<br />
the disc for damage before inserting the disc<br />
again.<br />
! If the built-in CD player does not operate properly,<br />
an error message such as ERROR-11<br />
may be displayed. Refer to Understanding<br />
built-in CD player error messages on page 65.<br />
! When a CD TEXT disc is inserted, the disc and<br />
track titles begin to scroll to the left automatically.<br />
En 19
Section<br />
05<br />
Built-in CD Player<br />
Introduction of advanced<br />
built-in CD player operation<br />
The built-in CD player function menu has the<br />
following functions:<br />
RPT (repeat play)RDM (random play)<br />
SCAN (scan play)T.LIST (track title list)<br />
PAUSE (pause)TTLin (disc title input)<br />
R.SRCH (search method)T.READ (tag display)<br />
Notes<br />
! If you do not operate the function within about<br />
30 seconds, the display is automatically returned.<br />
(When you select the disc title input mode<br />
(TTLin), the display is not returned automatically.)<br />
! T.LIST is displayed only when playing a CD<br />
TEXT disc.<br />
Repeating play<br />
Repeat play lets you hear the same track over<br />
again.<br />
1 Press FUNC to select the repeat mode.<br />
2Press RPT to turn the repeat play on.<br />
The light illuminates. The track currently playing<br />
will play and then repeat.<br />
# To turn repeat play off, press RPT again.<br />
Notes<br />
! If you perform track search or fast forward/reverse,<br />
repeat play is automatically cancelled.<br />
! When the repeat mode is exited while repeat<br />
play is on, T.RPT appears on the basic display.<br />
Playing tracks in a random<br />
order<br />
Random play lets you play back tracks on the<br />
CD in a random order.<br />
1 Press FUNC and then press RDM to select<br />
the random mode.<br />
2Press RDM to turn random play on.<br />
The light illuminates. Tracks will play in a random<br />
order.<br />
# To turn random play off, press RDM again.<br />
Note<br />
When the random mode is exited while random<br />
play is on, RDM appears on the basic display.<br />
Scanning tracks of a CD<br />
Scan play lets you hear the first 10 seconds of<br />
each track on the CD.<br />
1 Press FUNC and then press SCAN to select<br />
the scan mode.<br />
2Press SCAN to turn scan play on.<br />
The light illuminates. The first 10 seconds of<br />
each track is played.<br />
3 When you find the desired track press<br />
SCAN to turn scan play off.<br />
The light goes off. The track will continue to<br />
play.<br />
# If the scan mode is automatically canceled,<br />
select the scan mode again.<br />
Notes<br />
! After scanning of a CD is finished, normal<br />
playback of the tracks will begin again.<br />
! When the scan mode is exited while scan play<br />
is on, SCAN appears on the basic display.<br />
20<br />
En
Built-in CD Player<br />
Section<br />
05<br />
Selecting tracks from the<br />
track title list<br />
The track title list lets you see the list of track<br />
titles on a CD TEXT disc and select one of<br />
them for playback.<br />
1 Press FUNC and then press T.LIST to select<br />
the track title list mode.<br />
2Press NEXT to display the desired track<br />
title.<br />
Press NEXT until the desired track title appears.<br />
3 Press the corresponding number button<br />
to select the desired track title.<br />
That selection will begin to play.<br />
Notes<br />
! You can also use c, d and a to select and<br />
play the desired track title.<br />
! Only when playing a CD TEXT disc, you can<br />
switch to this mode.<br />
Pausing CD playback<br />
Pause lets you temporarily stop playback of<br />
the CD.<br />
1 Press FUNC and then press PAUSE to select<br />
the pause mode.<br />
2Press PAUSE to turn pause on.<br />
The light illuminates. Play of the current track<br />
pauses.<br />
# To turn the pause off, press PAUSE again.<br />
Note<br />
You can also turn pause on or off by pressing<br />
PAUSE in the following display.<br />
Selecting the search method<br />
You can switch the search method between<br />
fast forward/reverse and searching every 10<br />
track.<br />
1 Press FUNC and NEXT and then press<br />
R.SRCH to select the search method mode.<br />
2Press R.SRCH to select the search method.<br />
Press R.SRCH until the desired search method<br />
appears in the display.<br />
! FF/REV Fast forward and reverse<br />
! Rough search Searching every 10<br />
track<br />
Searching every 10 track in<br />
the current disc<br />
If a disc contains over 10 tracks, you can<br />
search every 10 track. When a disc contains a<br />
lot of tracks, you can roughly search the track<br />
you want to play.<br />
1 Select the search method Rough search.<br />
Refer to Selecting the search method on this<br />
page.<br />
English<br />
En 21
Section<br />
05<br />
Built-in CD Player<br />
2Press and hold c or d to search every<br />
10 track in a disc.<br />
# If a disc contains less than 10 tracks, pressing<br />
and holding d recalls the last track of a disc.<br />
Also, if the remaining number of tracks after<br />
searching every 10 tracks are less than 10, pressing<br />
and holding d recalls the last track of a disc.<br />
# If a disc contains less than 10 tracks, pressing<br />
and holding c recalls the first track of a disc.<br />
Also, if the remaining number of tracks after<br />
searching every 10 tracks are less than 10, pressing<br />
and holding c recalls the first track of a<br />
disc.<br />
Entering disc titles<br />
Disc title input lets you input CD titles up to 10<br />
letters long and up to 48 disc titles into this<br />
unit.<br />
If you input a CD title, the entered title is displayed.<br />
For details of operation, refer to Entering<br />
disc titles on page 36 under Multi-CD<br />
Player.<br />
Notes<br />
! When playing a CD TEXT disc, if you switch to<br />
this mode, Cant input is displayed and you<br />
cannot input the title.<br />
! Titles remain in memory, even after the disc<br />
has been removed from this unit, and are recalled<br />
when the disc is reinserted.<br />
! After data for 48 discs has been stored in<br />
memory, data for a new disc will overwrite the<br />
oldest one.<br />
! If you connect a multi-CD player, you can<br />
input disc titles for up to 100 discs.<br />
Using disc title functions<br />
When playing a CD TEXT disc, you can switch<br />
text display such as artist name and track title.<br />
When the text is longer than 32 letters, you<br />
can scroll the text to the left so that the rest of<br />
the title can be seen.<br />
1 Press TITLE to switch the title mode.<br />
2Press the corresponding button to display<br />
the desired title.<br />
FORM1 and FORM3<br />
Button<br />
D.TTL<br />
D.ART<br />
T.TTL<br />
T.ART<br />
SCROLL<br />
FORM2<br />
Button<br />
TTL1<br />
TTL2<br />
TTL3<br />
SCROLL<br />
Operation<br />
Displays disc title.<br />
Displays disc artist name.<br />
Displays track title.<br />
Displays track artist name.<br />
Scrolls the displayed title.<br />
Operation<br />
Displays disc title and track title.<br />
Displays disc title and disc artist name.<br />
Displays track title and track artist name.<br />
Scrolls the displayed title.<br />
Notes<br />
! If you do not operate the function within about<br />
eight seconds, the display is automatically returned.<br />
! You cannot use c or d to select a track in title<br />
mode.<br />
! When you select the display FORM2, the titles<br />
are displayed up to 24 letters long.<br />
! A CD TEXT disc is a CD featuring recorded<br />
text information such as disc title, artist name<br />
and track title.<br />
! If specific information has not been recorded<br />
on a CD TEXT disc, No xxxx will be displayed<br />
(e.g., No artist name).<br />
! If no title has been entered for the currently<br />
playing disc, No title is displayed.<br />
22<br />
En
MP3/WMA Player<br />
Section<br />
06<br />
Playing a MP3/WMA<br />
1 2 3 4<br />
2Insert a CD-ROM into the CD loading<br />
slot.<br />
Front panel is closed automatically, and playback<br />
will start.<br />
CD loading slot<br />
English<br />
5<br />
FORM1<br />
# You can eject a CD-ROM by pressing<br />
CD EJECT.<br />
These are the basic steps necessary to play an<br />
MP3/WMA with your built-in CD player. More<br />
advanced MP3/WMA operation is explained<br />
starting on the next page.<br />
WARNING<br />
Do not use with the front panel left open, after<br />
ejecting a CD-ROM. If you do leave it open, it may<br />
result in injury in the event of an accident.<br />
1 MP3/WMA indicator<br />
Shows when the MP3/WMA file is playing.<br />
2 Folder number indicator<br />
Shows the folder number currently playing.<br />
3 Track number indicator<br />
Shows the track (file) currently playing.<br />
4 Bit rate indicator<br />
5 Play time indicator<br />
Shows the elapsed playing time of the current<br />
track (file).<br />
1 Press CD EJECT.<br />
CD loading slot appears.<br />
# After a CD-ROM has been inserted, rotate<br />
SOURCE to select the built-in CD player.<br />
3 Use VOLUME to adjust the sound level.<br />
Rotate to increase or decrease the volume.<br />
4 Press a or b to select a folder.<br />
# You cannot select a folder that does not have<br />
an MP3/WMA file recorded in it.<br />
# To return to folder 01 (ROOT), press and hold<br />
BAND. However, if folder 01 (ROOT) contains no<br />
files, playback commences with folder 02.<br />
5 To perform fast forward or reverse,<br />
press and hold c or d.<br />
# This is fast forward and reverse operation only<br />
for the file being played. This operation is canceled<br />
when the previous or next file is reached.<br />
# If you select the search method to<br />
Rough search, pressing and holding c or d enables<br />
you to search every ten track in the current<br />
folder. (Refer to Selecting the search method on<br />
page 26.)<br />
6 To skip back or forward to another<br />
track, press c or d.<br />
Pressing d skips to the start of the next track.<br />
Pressing c once skips to the start of the current<br />
track. Pressing again will skip to the previous<br />
track.<br />
En 23
Section<br />
06<br />
MP3/WMA Player<br />
Notes<br />
! When playing discs with MP3/WMA files and<br />
audio data (CD-DA) such as CD-EXTRA and<br />
MIXED-MODE CDs, both types can be played<br />
only by switching mode between MP3/WMA<br />
and CD-DA with BAND.<br />
! If you have switched between playback of<br />
MP3/WMA files and audio data (CD-DA), playback<br />
starts at the first track on the disc.<br />
! The built-in CD player can play back an MP3/<br />
WMA file recorded on CD-ROM. (Refer to<br />
page 67 for files that can be played back.)<br />
! Do not insert anything other than a CD into<br />
the CD loading slot.<br />
! A CD left partially inserted after ejection may<br />
incur damage or fall out.<br />
! There is sometimes a delay between starting<br />
up playback and the sound being issued. This<br />
is particularly the case when playing back<br />
multi-session and many folders. When being<br />
read in, Format read is displayed.<br />
! If you cannot insert a disc completely or if<br />
after you insert a disc the disc does not play,<br />
check that the label side of the disc is up.<br />
Press CD EJECT to eject the disc, and check<br />
the disc for damage before inserting the disc<br />
again.<br />
! Playback is carried out in order of file number.<br />
Folders are skipped if they contain no files. (If<br />
folder 01 (ROOT) contains no files, playback<br />
commences with folder 02.)<br />
! When playing back files recorded as VBR<br />
(variable bit rate) files, the play time will not be<br />
correctly displayed if fast forward or reverse<br />
operations are used.<br />
! If inserted disc contains no files that can be<br />
played back, No Audio is displayed.<br />
! There is no sound on fast forward or reverse.<br />
! If the built-in CD player does not operate properly,<br />
an error message such as ERROR-11<br />
may be displayed. Refer to Understanding<br />
built-in CD player error messages on page 65.<br />
! When an MP3/WMA disc is inserted, folder<br />
name and file name begin to scroll to the left<br />
automatically.<br />
Introduction of advanced<br />
built-in CD player (MP3/<br />
WMA) operation<br />
The MP3/WMA function menu has the following<br />
functions:<br />
RPT (repeat play)RDM (random play)<br />
SCAN (scan play)F.LIST (folder title list)<br />
PAUSE (pause)TTLin (disc title input)<br />
R.SRCH (search method)T.READ (tag display)<br />
Notes<br />
! If you do not operate the function within about<br />
30 seconds, the display is automatically returned.<br />
(When you select the disc title input mode<br />
(TTLin), the display is not returned automatically.)<br />
! When playing a CD-ROM disc, if you switch to<br />
the disc title input mode (TTLin), Cant input<br />
is displayed and you cannot input the title.<br />
Repeating play<br />
For MP3/WMA playback, there are three repeat<br />
play ranges: Folder repeat (folder repeat),<br />
Track repeat (one-track repeat) and<br />
Disc repeat (repeat all tracks).<br />
1 Press FUNC to select the repeat mode.<br />
24<br />
En
MP3/WMA Player<br />
Section<br />
06<br />
2Press RPT to select the repeat range.<br />
Press RPT until the desired repeat range appears<br />
in the display.<br />
! Folder repeat Repeat the current folder<br />
! Track repeat Repeat just the current<br />
track<br />
! Disc repeat Repeat all tracks<br />
Notes<br />
! If you select other folder during repeat play,<br />
the repeat play range changes to Disc repeat.<br />
! If you perform track search or fast forward/reverse<br />
during Track repeat, the repeat play<br />
range changes to Folder repeat.<br />
! When Folder repeat is selected, it is not possible<br />
to play back a subfolder of that folder.<br />
! When the repeat mode is exited, either T.RPT<br />
(one-track repeat) or FOLDER PRT (folder repeat)<br />
may appear on the basic display.<br />
Note<br />
When the random mode is exited while random<br />
play is on, RDM appears on the basic display.<br />
Scanning folders and tracks<br />
While you are using Folder repeat, the beginning<br />
of each track in the selected folder plays<br />
for about 10 seconds. When you are using<br />
Disc repeat, the beginning of the first track of<br />
each folder is played for about 10 seconds.<br />
1 Select the repeat range.<br />
Refer to Repeating play on the previous page.<br />
2Press FUNC and then press SCAN to select<br />
the scan mode.<br />
English<br />
Playing tracks in a random<br />
order<br />
Random play lets you play back tracks in a<br />
random order within the repeat range,<br />
Folder repeat and Disc repeat.<br />
1 Select the repeat range.<br />
Refer to Repeating play on the previous page.<br />
2Press FUNC and then press RDM to select<br />
the random mode.<br />
3 Press RDM to turn random play on.<br />
The light illuminates. Tracks will play in a random<br />
order within the previously selected<br />
Folder repeat or Disc repeat ranges.<br />
# To turn random play off, press RDM again.<br />
3 Press SCAN to turn scan play on.<br />
The light illuminates. The first 10 seconds of<br />
each track of the current folder (or the first<br />
track of each folder) is played.<br />
4 When you find the desired track (or<br />
folder) press SCAN to turn scan play off.<br />
The light goes off. The track (or folder) will continue<br />
to play.<br />
# If the scan mode is automatically canceled,<br />
select the scan mode again.<br />
Notes<br />
! After track or folder scanning is finished, normal<br />
playback of the tracks will begin again.<br />
! When the scan mode is exited while scan play<br />
is on, SCAN appears on the basic display.<br />
Pausing MP3/WMA playback<br />
Pause lets you temporarily stop playback of<br />
the MP3/WMA.<br />
En 25
Section<br />
06<br />
MP3/WMA Player<br />
1 Press FUNC and then press PAUSE to select<br />
the pause mode.<br />
2Press PAUSE to turn pause on.<br />
The light illuminates. Play of the current track<br />
pauses.<br />
# To turn the pause off, press PAUSE again.<br />
Note<br />
You can also turn pause on or off by pressing<br />
PAUSE in the following display.<br />
Note<br />
You can also use c, d and a to select and play<br />
the desired folder title.<br />
Selecting the search method<br />
You can switch the search method between<br />
fast forward/reverse and searching every 10<br />
track.<br />
1 Press FUNC and NEXT and then press<br />
R.SRCH to select the search method mode.<br />
Selecting folders from the<br />
folder title list<br />
Folder title list lets you see the list of folder titles<br />
and select one of them to playback.<br />
1 Press FUNC and then press F.LIST to select<br />
folder title list mode.<br />
2Press NEXT to display the desired folder<br />
title.<br />
Press NEXT until the desired folder title appears.<br />
2Press R.SRCH to select the search method.<br />
Press R.SRCH until the desired search method<br />
appears in the display.<br />
! FF/REV Fast forward and reverse<br />
! Rough search Searching every 10<br />
track<br />
Searching every 10 track in<br />
the current folder<br />
If the current folder contains over 10 tracks,<br />
you can search every 10 track. When the one<br />
folder contains a lot of tracks, you can roughly<br />
search the track you want to play.<br />
1 Select the search method Rough search.<br />
Refer to Selecting the search method on this<br />
page.<br />
This indication shows the number of files in the selected<br />
folder. If selected folder contains no files, nothing<br />
will be displayed.<br />
3 Press the corresponding number button<br />
to select the desired folder title.<br />
That selection will begin to play.<br />
2Press and hold c or d to search every<br />
10 track in the current folder.<br />
# If the current folder contains less than 10<br />
tracks, pressing and holding d recalls the last<br />
track of the folder. Also, if the remaining number<br />
of tracks after searching every 10 tracks are less<br />
26<br />
En
MP3/WMA Player<br />
Section<br />
06<br />
than 10, pressing and holding d recalls the last<br />
track of the folder.<br />
# If the current folder contains less than 10<br />
tracks, pressing and holding c recalls the first<br />
track of the folder. Also, if the remaining number<br />
of tracks after searching every 10 tracks are less<br />
than 10, pressing and holding c recalls the first<br />
track of the folder.<br />
Switching the tag display<br />
It is possible to turn the tag display on or off, if<br />
MP3/WMA disc contains the text information<br />
such as track title and artist name.<br />
! If you turn the tag display off, time to playback<br />
will be shorter than when this function<br />
is turned on.<br />
1 Press FUNC and NEXT and then press<br />
T.READ to select the tag display mode.<br />
2Press T.READ to turn tag display on.<br />
# To turn the tag display off, press T.READ<br />
again.<br />
Note<br />
When you turn the tag display on, this unit returns<br />
to the beginning of the current track in<br />
order to read the text information.<br />
Using disc title functions<br />
You can switch text display such as artist<br />
name and track title. When the text is longer<br />
than 32 letters, you can scroll the text to the<br />
left so that the rest of the title can be seen.<br />
1 Press TITLE to switch the title mode.<br />
2Press the corresponding button to display<br />
the desired title.<br />
FORM1 and FORM3<br />
Button<br />
FOLDER<br />
FILE<br />
ALBUM<br />
T.TTL<br />
ARTIST<br />
SCROLL<br />
FORM2<br />
Button<br />
F+FIL<br />
FIL+T<br />
ALB+T<br />
TR+ART<br />
SCROLL<br />
Operation<br />
Displays folder name.<br />
Displays file name.<br />
Displays album title.<br />
Displays track title.<br />
Displays track artist name.<br />
Scrolls the displayed title.<br />
Operation<br />
Displays folder name and file name<br />
Displays file name and track title.<br />
Displays album title and track title.<br />
Displays track title and track artist name.<br />
Scrolls the displayed title.<br />
Notes<br />
! If you do not operate the function within about<br />
eight seconds, the display is automatically returned.<br />
! You cannot use a/b/c/d to select a folder or<br />
track in title mode.<br />
! When you select the display FORM2, the titles<br />
are displayed up to 24 letters long.<br />
! If specific information has not been recorded<br />
on a MP3/WMA disc, No xxxx will be displayed<br />
(e.g., No album tilte).<br />
! With some applications used to encode WMA<br />
files, album names and other text information<br />
may not be correctly displayed.<br />
English<br />
En 27
Section<br />
07<br />
Built-in MD Player<br />
Playing an MD<br />
1 2 3 4<br />
2Insert an MD into the MD loading slot.<br />
Front panel is closed automatically, and playback<br />
will start.<br />
MD loading slot<br />
5<br />
FORM1<br />
These are the basic steps necessary to play an<br />
MD with your built-in MD player. More advanced<br />
MD operation is explained starting on<br />
the next page.<br />
WARNING<br />
Do not use with the front panel left open, after<br />
ejecting an MD. If you do leave it open, it may result<br />
in injury in the event of an accident.<br />
1 MDLP indicator (×2or ×4)<br />
Shows when an MD featuring long recording<br />
is playing.<br />
2 Group number indicator<br />
Shows the group currently playing.<br />
3 Track number indicator<br />
Shows the track currently playing.<br />
4 GRP indicator<br />
Shows when a group-recorded MD is playing.<br />
5 Play time indicator<br />
Shows the elapsed playing time of the current<br />
track.<br />
1 Press MD EJECT.<br />
MD loading slot appears.<br />
# After an MD has been inserted, rotate<br />
SOURCE to select the built-in MD player.<br />
# You can eject an MD by pressing MD EJECT.<br />
3 Use VOLUME to adjust the sound level.<br />
Rotate to increase or decrease the volume.<br />
4 When playing a group-recorded MD,<br />
press a or b to select a group.<br />
5 To perform fast forward or reverse,<br />
press and hold c or d.<br />
6 To skip back or forward to another<br />
track, press c or d.<br />
Pressing d skips to the start of the next track.<br />
Pressing c once skips to the start of the current<br />
track. Pressing again will skip to the previous<br />
track.<br />
Notes<br />
! Do not insert anything other than an MD into<br />
the MD loading slot.<br />
! An MD left partially inserted after ejection<br />
may incur damage or fall out.<br />
! Load an MD after confirming the MD shutter<br />
(refer to MD player and care on page 69) is<br />
closed.<br />
! When you load a disc, this unit reads information<br />
recorded on the disc such as the number<br />
of tracks. While the disc is being read,<br />
TOC read is indicated in the display.<br />
! If the built-in MD player does not operate<br />
properly, an error message such as ERROR-11<br />
may be displayed. Refer to Understanding<br />
built-in MD player error messages on page 65.<br />
28<br />
En
Built-in MD Player<br />
Section<br />
07<br />
! When you play MDs featuring long recordings,<br />
×2 or ×4 indicator is displayed.<br />
! When an MD is inserted, the disc (or group)<br />
and track titles begin to scroll to the left automatically.<br />
Introduction of advanced<br />
built-in MD player operation<br />
The built-in MD player function menu has the<br />
following functions:<br />
RPT (repeat play)RDM (random play)<br />
SCAN (scan play)T.LIST (track title list)<br />
G.LIST (group title list)PAUSE (pause)<br />
Notes<br />
! If you do not operate the function within about<br />
30 seconds, the display is automatically returned.<br />
! G.LIST is displayed only when playing a<br />
group-recorded MD.<br />
Repeating play<br />
Non group-recorded MD<br />
Repeat play lets you hear the same track over<br />
again.<br />
1 Press FUNC to select the repeat mode.<br />
2Press RPT to turn the repeat play on.<br />
The light illuminates. The track currently playing<br />
will play and then repeat.<br />
# To turn repeat play off, press RPT again.<br />
Notes<br />
! If you perform track search or fast forward/reverse,<br />
repeat play is automatically cancelled.<br />
! When the repeat mode is exited while repeat<br />
play is on, T.RPT appears on the basic display.<br />
Group-recorded MD<br />
For group-recorded MD playback, there are<br />
three repeat play ranges: Group repeat<br />
(group repeat), Track repeat (one-track repeat)<br />
and Disc repeat (repeat all tracks).<br />
1 Press FUNC to select the repeat mode.<br />
2Press RPT to select the repeat range.<br />
Press RPT until the desired repeat range appears<br />
in the display.<br />
! Group repeat Repeat the current group<br />
! Track repeat Repeat just the current<br />
track<br />
! Disc repeat Repeat all tracks<br />
Notes<br />
! If you select other group during repeat play,<br />
the repeat play range changes to Disc repeat.<br />
! If you perform track search or fast forward/reverse<br />
during Track repeat, the repeat play<br />
range changes to Group repeat.<br />
! When the repeat mode is exited, either T.RPT<br />
(one-track repeat) or GRP RPT (group repeat)<br />
may appear on the basic display.<br />
Playing tracks in a random<br />
order<br />
Random play lets you play back tracks on the<br />
MD in a random order.<br />
! When playing a group-recorded MD, random<br />
play lets you play back tracks in a random<br />
order within the repeat range,<br />
Group repeat and Disc repeat.<br />
1 Press FUNC and then press RDM to select<br />
the random mode.<br />
2Press RDM to turn random play on.<br />
The light illuminates. Tracks will play in a random<br />
order.<br />
# To turn random play off, press RDM again.<br />
English<br />
En 29
Section<br />
07<br />
Built-in MD Player<br />
Note<br />
When the random mode is exited while random<br />
play is on, RDM appears on the basic display.<br />
Scanning tracks of a MD<br />
Scan play lets you hear the first 10 seconds of<br />
each track on the MD.<br />
! When playing a group-recorded MD, while<br />
you are using Group repeat, the beginning<br />
of each track in the selected group plays<br />
for about 10 seconds. When you are using<br />
Disc repeat, the beginning of the first track<br />
of each group is played for about 10 seconds.<br />
Selecting tracks from the<br />
track title list<br />
The track title list lets you see the list of track<br />
titles on an MD and select one of them for<br />
playback.<br />
1 Press FUNC and then press T.LIST to select<br />
the track title list mode.<br />
2Press NEXT to display the desired track<br />
title.<br />
Press NEXT until the desired track title appears.<br />
1 Press FUNC and then press SCAN to select<br />
the scan mode.<br />
2Press SCAN to turn scan play on.<br />
The light illuminates. The first 10 seconds of<br />
each track is played.<br />
# When playing a group-recorded MD, the first<br />
10 seconds of each track of the current group (or<br />
the first track of each group) is played.<br />
3 When you find the desired track (or<br />
group) press SCAN to turn scan play off.<br />
The light goes off. The track (or group) will continue<br />
to play.<br />
# If the scan mode is automatically canceled,<br />
select the scan mode again.<br />
Notes<br />
! After scanning of an MD is finished, normal<br />
playback of the tracks will begin again.<br />
! When the scan mode is exited while scan play<br />
is on, SCAN appears on the basic display.<br />
3 Press the corresponding number button<br />
to select the desired track title.<br />
That selection will begin to play.<br />
Note<br />
You can also use c, d and a to select and play<br />
the desired track title.<br />
Selecting groups from the<br />
group title list<br />
Group title list lets you see the list of group titles<br />
and select one of them to playback.<br />
1 Press FUNC and then press G.LIST to select<br />
group title list mode.<br />
2Press NEXT to display the desired group<br />
title.<br />
Press NEXT until the desired group title appears.<br />
30<br />
En
Built-in MD Player<br />
Section<br />
07<br />
This indication shows the number of tracks in the selected<br />
group.<br />
3 Press the corresponding number button<br />
to select the desired group title.<br />
That selection will begin to play.<br />
Note<br />
You can also use c, d and a to select and play<br />
the desired group title.<br />
Pausing MD playback<br />
Pause lets you temporarily stop playback of<br />
the MD.<br />
1 Press FUNC and then press PAUSE to select<br />
the pause mode.<br />
2Press PAUSE to turn pause on.<br />
The light illuminates. Play of the current track<br />
pauses.<br />
# To turn the pause off, press PAUSE again.<br />
Note<br />
You can also turn pause on or off by pressing<br />
PAUSE in the following display.<br />
1 Press TITLE to switch the title mode.<br />
2Press the corresponding button to display<br />
the desired title.<br />
FORM1 and FORM3<br />
Button<br />
D.TTL<br />
G.TTL<br />
T.TTL<br />
SCROLL<br />
FORM2<br />
Button<br />
TTL1<br />
TTL2<br />
SCROLL<br />
Operation<br />
Displays disc title.<br />
Displays group title.<br />
Displays track title.<br />
Scrolls the displayed title.<br />
Operation<br />
Displays group title and track title.<br />
Displays disc title and track title.<br />
Scrolls the displayed title.<br />
Notes<br />
! If you do not operate the function within about<br />
eight seconds, the display is automatically returned.<br />
! You cannot use a/b/c/d to select a group or<br />
track in title mode.<br />
! When you select the display FORM2, the titles<br />
are displayed up to 24 letters long.<br />
! If no title has been entered for the currently<br />
playing disc, No title is displayed.<br />
! G.TTL, TTL1 and TTL2 are displayed only<br />
when playing a group-recorded MD.<br />
English<br />
Using disc title functions<br />
When playing an MD, you can switch text display<br />
such as disc title and track title. When<br />
the text is longer than 32 letters, you can scroll<br />
the text to the left so that the rest of the title<br />
can be seen.<br />
En 31
Section<br />
08<br />
Multi-CD Player<br />
Playing a CD<br />
4 To perform fast forward or reverse,<br />
press and hold c or d.<br />
1 2<br />
3<br />
FORM1<br />
You can use this unit to control a multi-CD<br />
player, which is sold separately.<br />
These are the basic steps necessary to play a<br />
CD with your multi-CD player. More advanced<br />
CD operation is explained starting on the next<br />
page.<br />
1 Disc number indicator<br />
Shows the disc currently playing.<br />
2 Track number indicator<br />
Shows the track currently playing.<br />
3 Play time indicator<br />
Shows the elapsed playing time of the current<br />
track.<br />
1 Rotate SOURCE to select the multi-CD<br />
player.<br />
Rotate SOURCE until you see Multi-CD displayed.<br />
2Use VOLUME to adjust the sound level.<br />
Rotate to increase or decrease the volume.<br />
3 Press a or b to select a disc.<br />
A disc number for which there is no disc will<br />
be skipped.<br />
# You can use the buttons 16 (or 712) to select<br />
a disc directly.<br />
5 To skip back or forward to another<br />
track, press c or d.<br />
Pressing d skips to the start of the next track.<br />
Pressing c once skips to the start of the current<br />
track. Pressing again will skip to the previous<br />
track.<br />
Notes<br />
! When the multi-CD player performs the preparatory<br />
operations, Ready is displayed.<br />
! If the multi-CD player does not operate properly,<br />
an error message such as ERROR-11<br />
may be displayed. Refer to the multi-CD player<br />
owners manual.<br />
! If there are no discs in the multi-CD player magazine,<br />
No disc is displayed.<br />
! When you select a CD TEXT disc on a CD TEXT<br />
compatible multi-CD player, the disc and track<br />
titles begin to scroll to the left automatically.<br />
50-disc multi-CD player<br />
Only those functions described in this manual<br />
are supported for 50-disc multi-CD players.<br />
Selecting a disc directly<br />
You can use the buttons 16 (or 712) to select<br />
a disc directly.<br />
1 Press NEXT to display 16 (or 712).<br />
Press NEXT until 16 (or 712) appears.<br />
2Press any of the buttons 16 (or 712)<br />
to select a disc located at 1 to 6 (or 7 to 12).<br />
32<br />
En
Multi-CD Player<br />
Section<br />
08<br />
Note<br />
You cannot display 712 when a 6-disc multi-CD<br />
player is connected.<br />
Introduction of advanced<br />
multi-CD player operation<br />
The multi-CD player function menu has the<br />
following functions:<br />
RPT (repeat play)RDM (random play)<br />
SCAN (scan play)T.LIST (track title list)<br />
D.LIST (disc title list)PAUSE (pause)<br />
TTLin (disc title input)COMP (compression<br />
and DBE)ITS.P (ITS play)ITS.M (ITS<br />
programming)<br />
2Press RPT to select the repeat range.<br />
Press RPT until the desired repeat range appears<br />
in the display.<br />
! Magazine repeat Repeat all discs in the<br />
multi-CD player<br />
! Track repeat Repeat just the current<br />
track<br />
! Disc repeat Repeat the current disc<br />
Notes<br />
! If you select other discs during repeat play,<br />
the repeat play range changes to<br />
Magazine repeat.<br />
! If you perform track search or fast forward/reverse<br />
during Track repeat, the repeat play<br />
range changes to Disc repeat.<br />
! When the repeat mode is exited, either T.RPT<br />
(one-track repeat) or D.RPT (disc repeat) may<br />
appear on the basic display.<br />
English<br />
Notes<br />
! If you do not operate the function within about<br />
30 seconds, the display is automatically returned.<br />
(When you select the disc title input mode<br />
(TTLin) or ITS programming mode (ITS.M),<br />
the display is not returned automatically.)<br />
! T.LIST is displayed only when playing a CD<br />
TEXT disc on a CD TEXT compatible multi-CD<br />
player.<br />
Repeating play<br />
There are three repeat play ranges for the<br />
multi-CD player: Magazine repeat (multi-CD<br />
player repeat), Track repeat (one-track repeat)<br />
and Disc repeat (disc repeat).<br />
1 Press FUNC to select the repeat mode.<br />
Playing tracks in a random<br />
order<br />
Random play lets you play back tracks in a<br />
random order within the repeat range,<br />
Magazine repeat and Disc repeat.<br />
1 Select the repeat range.<br />
Refer to Repeating play on this page.<br />
2Press FUNC and then press RDM to select<br />
the random mode.<br />
3 Press RDM to turn random play on.<br />
The light illuminates. Tracks will play in a random<br />
order within the previously selected<br />
Magazine repeat or Disc repeat ranges.<br />
# To turn random play off, press RDM again.<br />
En 33
Section<br />
08<br />
Multi-CD Player<br />
Note<br />
When the random mode is exited while random<br />
play is on, RDM appears on the basic display.<br />
Scanning CDs and tracks<br />
While you are using Disc repeat, the beginning<br />
of each track on the selected disc plays<br />
for about 10 seconds. When you are using<br />
Magazine repeat, the beginning of the first<br />
track of each disc is played for about 10 seconds.<br />
Selecting tracks from the<br />
track title list<br />
The track title list lets you see the list of track<br />
titles on a CD TEXT disc and select one of<br />
them for playback.<br />
1 Press FUNC and then press T.LIST to select<br />
the track title list mode.<br />
2Press NEXT to display the desired track<br />
title.<br />
Press NEXT until the desired track title appears.<br />
1 Select the repeat range.<br />
Refer to Repeating play on the previous page.<br />
2Press FUNC and then press SCAN to select<br />
the scan mode.<br />
3 Press SCAN to turn scan play on.<br />
The light illuminates. The first 10 seconds of<br />
each track of the current disc (or the first track<br />
of each disc) is played.<br />
4 When you find the desired track (or<br />
disc) press SCAN to turn scan play off.<br />
The light goes off. The track (or disc) will continue<br />
to play.<br />
# If the scan mode is automatically canceled,<br />
select the scan mode again.<br />
3 Press the corresponding number button<br />
to select the desired track title.<br />
That selection will begin to play.<br />
Notes<br />
! You can also use c, d and a to select and<br />
play the desired track title.<br />
! Only when playing a CD TEXT disc on a CD<br />
TEXT compatible multi-CD player, you can<br />
switch to this mode.<br />
Notes<br />
! After track or disc scanning is finished, normal<br />
playback of the tracks will begin again.<br />
! When the scan mode is exited while scan play<br />
is on, SCAN appears on the basic display.<br />
Selecting discs from the<br />
disc title list<br />
Disc title list lets you see the list of disc titles<br />
that have been entered into the multi-CD<br />
player and select one of them to playback.<br />
1 Press FUNC and then press D.LIST to select<br />
the disc title list mode.<br />
34<br />
En
Multi-CD Player<br />
Section<br />
08<br />
2Press NEXT to switch between 16 and<br />
712.<br />
Using ITS playlists<br />
ITS (instant track selection) lets you make a<br />
playlist of favorite tracks from those in the<br />
multi-CD player magazine. After you have<br />
added your favorite tracks to the playlist you<br />
can turn on ITS play and play just those selections.<br />
English<br />
3 Press any of the buttons 16 (or 712)<br />
to select the desired disc title.<br />
That selection will begin to play.<br />
Notes<br />
! You can also use c, d and a to select and<br />
play the desired disc title.<br />
! If no title has been entered for a disc,<br />
No D.Title will be displayed.<br />
! No disc is displayed next to the disc number<br />
when no disc is set in the magazine.<br />
! You cannot display 712 when a 6-disc multi-<br />
CD player is connected.<br />
Creating a playlist with ITS<br />
programming<br />
You can use ITS to enter and playback up to 99<br />
tracks per disc, up to 100 discs (with the disc<br />
title). (With multi-CD players sold before the<br />
CDX-P1250 and CDX-P650, up to 24 tracks can<br />
be stored in the playlist.)<br />
1 Play a CD that you want to program.<br />
Press a or b to select a CD.<br />
2Press FUNC and NEXT and then press<br />
ITS.M to select the ITS programming mode.<br />
Pausing CD playback<br />
Pause lets you temporarily stop playback of<br />
the CD.<br />
1 Press FUNC and then press PAUSE to select<br />
the pause mode.<br />
2Press PAUSE to turn pause on.<br />
The light illuminates. Play of the current track<br />
pauses.<br />
# To turn the pause off, press PAUSE again.<br />
Note<br />
You can also turn pause on or off by pressing<br />
PAUSE in the following display.<br />
3 Select a desired track by pressing c or<br />
d.<br />
4 Press MEMO to store the currently playing<br />
track in the playlist.<br />
Memory complete is displayed briefly and<br />
the currently playing selection is added to your<br />
playlist.<br />
# You can also use a to store the currently playing<br />
track in the playlist.<br />
5 Press BAND to return to the playback<br />
display.<br />
Note<br />
After data for 100 discs has been stored in memory,<br />
data for a new disc will overwrite the oldest<br />
one.<br />
En 35
Section<br />
08<br />
Multi-CD Player<br />
Playback from your ITS playlist<br />
ITS play lets you listen to the tracks that you<br />
have entered into your ITS playlist. When you<br />
turn on ITS play, tracks from your ITS playlist<br />
in the multi-CD player will begin to play.<br />
1 Select the repeat range.<br />
Refer to Repeating play on page 33.<br />
2Press FUNC and NEXT and then press<br />
ITS.P to select the ITS play mode.<br />
3 Press ITS.P to turn ITS play on.<br />
The light illuminates. Playback begins of those<br />
tracks from your playlist within the previously<br />
selected Magazine repeat or Disc repeat<br />
ranges.<br />
# To turn ITS play off, press ITS.P again.<br />
# If no tracks in the current range are programmed<br />
for ITS play then ITS empty is displayed.<br />
Erasing a track from your ITS<br />
playlist<br />
When you want to delete a track from your ITS<br />
playlist, you can if ITS play is on.<br />
If ITS play is already on, skip to step 2. If ITS<br />
play is not already on, press FUNC.<br />
1 Play a CD you want to delete a track<br />
from your ITS playlist, and turn ITS play on.<br />
Refer to Playback from your ITS playlist on this<br />
page.<br />
2Press FUNC and NEXT and then press<br />
ITS.M to select the ITS programming mode.<br />
3 Select a desired track by pressing c or<br />
d.<br />
4 Press CLEAR to erase a track from your<br />
ITS playlist.<br />
The currently playing selection is erased from<br />
your ITS playlist and playback of the next track<br />
from your ITS playlist begins.<br />
# If there are no tracks from your playlist in the<br />
current range, ITS empty is displayed and normal<br />
play resumes.<br />
# You can also use b to erase the currently playing<br />
track from ITS playlist.<br />
5 Press BAND to return to the playback<br />
display.<br />
Erasing a CD from your ITS playlist<br />
When you want to delete all tracks of a CD<br />
from your ITS playlist, you can if ITS play is off.<br />
1 Play a CD that you want to delete.<br />
Press a or b to select a CD.<br />
2Press FUNC and NEXT and then press<br />
ITS.M to select the ITS programming mode.<br />
3 Press CLEAR to erase all tracks on the<br />
currently playing CD from your ITS playlist.<br />
All tracks on the currently playing CD are<br />
erased from your playlist and<br />
Memory deleted is displayed.<br />
# You can also use b to erase all tracks on the<br />
currently playing CD from ITS playlist.<br />
4 Press BAND to return to the playback<br />
display.<br />
Entering disc titles<br />
Disc title input lets you input CD titles up to 10<br />
letters long and up to 100 disc titles (with ITS<br />
playlist) into the multi-CD player.<br />
If you input a CD title, the entered title is displayed.<br />
36<br />
En
Multi-CD Player<br />
Section<br />
08<br />
1 Play a CD that you want to enter the<br />
title.<br />
Press a or b to select a CD.<br />
2Press FUNC and NEXT and then press<br />
TTLin to select the disc title input mode.<br />
3 Press ABC to select the desired character<br />
type.<br />
Press ABC repeatedly to switch between the<br />
following character type:<br />
Alphabet (upper case), numbers and symbols<br />
Alphabet (lower case)<br />
# You can select to input numbers and symbols<br />
by pressing 012.<br />
4 Press a or b to select a letter of the alphabet.<br />
Each press of a will display a letter of the alphabet<br />
in A B C ... X Y Z, numbers and symbols<br />
in 1 23 ... @ # < order. Each press of b<br />
will display a letter in the reverse order, such<br />
as Z Y X ... C B A order.<br />
5 Press d to move the cursor to the next<br />
character position.<br />
When the letter you want is displayed, press d<br />
to move the cursor to the next position and<br />
then select the next letter. Press c to move<br />
backwards in the display.<br />
6 Move the cursor to the last position by<br />
pressing d after entering the title.<br />
When you press d one more time, the entered<br />
title is stored in memory.<br />
7 Press BAND to return to the playback<br />
display.<br />
Notes<br />
! When playing a CD TEXT disc on a CD TEXT<br />
compatible multi-CD player, if you switch to<br />
this mode, Cant input is displayed and you<br />
cannot input the title.<br />
! Titles remain in memory, even after the disc<br />
has been removed from the magazine, and<br />
are recalled when the disc is reinserted.<br />
! After data for 100 discs has been stored in<br />
memory, data for a new disc will overwrite the<br />
oldest one.<br />
Using disc title functions<br />
When playing a CD TEXT disc on a CD TEXT<br />
compatible multi-CD player, you can switch<br />
text display such as artist name and track title.<br />
When the text is longer than 32 letters, you<br />
can scroll the text to the left so that the rest of<br />
the title can be seen.<br />
1 Press TITLE to switch the title mode.<br />
2Press the corresponding button to display<br />
the desired title.<br />
FORM1 and FORM3<br />
Button<br />
D.TTL<br />
D.ART<br />
T.TTL<br />
T.ART<br />
SCROLL<br />
FORM2<br />
Button<br />
TTL1<br />
TTL2<br />
Operation<br />
Displays disc title.<br />
Displays disc artist name.<br />
Displays track title.<br />
Displays track artist name.<br />
Scrolls the displayed title.<br />
Operation<br />
Displays disc title and track title.<br />
Displays disc title and disc artist name.<br />
English<br />
En 37
Section<br />
08<br />
Multi-CD Player<br />
Button<br />
TTL3<br />
SCROLL<br />
Operation<br />
Displays track title and track artist name.<br />
Scrolls the displayed title.<br />
1 Press FUNC and NEXT and then press<br />
COMP to select the COMP/DBE mode.<br />
# If the multi-CD player does not support<br />
COMP/DBE, No COMP is displayed when you attempt<br />
to select it.<br />
Notes<br />
! If you do not operate the function within about<br />
eight seconds, the display is automatically returned.<br />
! You cannot use a/b/c/d to select a disc or<br />
track in title mode.<br />
! When you select the display FORM2, the titles<br />
are displayed up to 24 letters long.<br />
! A CD TEXT disc is a CD featuring recorded<br />
text information such as disc title, artist name<br />
and track title.<br />
! If specific information has not been recorded<br />
on a CD TEXT disc, No xxxx will be displayed<br />
(e.g., No artist name).<br />
! If no title has been entered for the currently<br />
playing disc, No title is displayed.<br />
2Press COMP to select your favorite setting.<br />
Press COMP repeatedly to switch between the<br />
following settings:<br />
COMP OFFCOMP 1COMP 2<br />
COMP OFFDBE 1DBE 2<br />
Using compression and<br />
bass emphasis<br />
You can use these functions only with a multi-<br />
CD player that supports them.<br />
Using COMP (compression) and DBE (dynamic<br />
bass emphasis) functions let you adjust<br />
the sound playback quality of the multi-CD<br />
player. Each of the functions have a two-step<br />
adjustment. The COMP function balances the<br />
output of louder and softer sounds at higher<br />
volumes. DBE boosts bass levels to give playback<br />
a fuller sound. Listen to each of the effects<br />
as you select through them and use the<br />
one that best enhances the playback of the<br />
track or CD that you are listening to.<br />
38<br />
En
TV tuner<br />
Section<br />
09<br />
Using the TV tuner<br />
1 2<br />
5 To perform seek tuning, press and hold<br />
c or d for about one second and release.<br />
# You can cancel seek tuning by pressing either<br />
c or d with a quick press.<br />
English<br />
3<br />
FORM1<br />
You can use this unit to control a TV tuner,<br />
which is sold separately.<br />
For details concerning operation, refer to the<br />
TV tuners operation manuals. This section<br />
provides information on TV operations with<br />
this unit which differs from that described in<br />
the TV tuners operation manual.<br />
1 Band indicator<br />
Shows which band the TV tuner is tuned to.<br />
2 Preset number indicator<br />
Shows what preset has been selected.<br />
3 Channel indicator<br />
Shows which channel the TV tuner is tuned.<br />
1 Rotate SOURCE to select the television.<br />
Rotate SOURCE until you see Television displayed.<br />
2Use VOLUME to adjust the sound level.<br />
Rotate to increase or decrease the volume.<br />
3 Press BAND to select a band.<br />
Press BAND until the desired band is displayed,<br />
TV-1 or TV-2.<br />
4 To perform manual tuning, press c or<br />
d with quick presses.<br />
The channels move up or down step by step.<br />
Introduction of advanced<br />
TV tuner operation<br />
The tuner function menu has the following<br />
functions:<br />
BSSM (best stations sequential memory)<br />
chLIST (preset channel list)<br />
1 BSSM (best stations sequential memory)<br />
Press BSSM repeatedly to turn BSSM on or<br />
off.<br />
When finished, the display switches to the<br />
preset channel list mode.<br />
2 chLIST (preset channel list)<br />
For operation of the preset channel list, refer<br />
to Selecting channels from the preset channel<br />
list on the next page.<br />
Note<br />
If you do not operate the function within about 30<br />
seconds, the display is automatically returned.<br />
Storing and recalling<br />
broadcast stations<br />
If you press any of the preset tuning buttons<br />
16 (or 712) you can easily store up to 12<br />
broadcast stations for later recall with the<br />
touch of a button.<br />
En 39
Section<br />
09<br />
TV tuner<br />
1 Press NEXT to display 16 (or 712).<br />
Press NEXT until 16 (or 712) appears.<br />
2When you find a station that you want<br />
to store in memory press a preset tuning<br />
button 16 (or 712) and hold until the preset<br />
number stops flashing.<br />
The number you have pressed will flash in the<br />
preset number indicator and then remain lit.<br />
The selected station has been stored in memory.<br />
The next time you press the same preset tuning<br />
button 16 (or 712) the station is recalled<br />
from memory.<br />
Notes<br />
! Up to 12 stations, 6 for each of two TV bands<br />
can be stored in memory.<br />
! You can also use a and b to recall broadcast<br />
stations assigned to preset tuning buttons<br />
16 and 712.<br />
Selecting channels from<br />
the preset channel list<br />
The preset channel list lets you see the list of<br />
preset channels and select one of them to receive.<br />
1 Press FUNC and then press chLIST to select<br />
the preset channel list mode.<br />
2Press NEXT to switch between 16 and<br />
712.<br />
3 Press any of the buttons 16 (or 712)<br />
to recall the desired channel.<br />
Note<br />
You can also use c, d and a to select and recall<br />
the desired channel.<br />
40<br />
En
DVD Player<br />
Section<br />
10<br />
Playing a disc<br />
1 2 3<br />
3 Press a or b to select a disc.<br />
A disc number for which there is no disc will<br />
be skipped.<br />
# You can use the buttons 16 to select a disc<br />
directly.<br />
English<br />
4 To perform fast forward or reverse,<br />
press and hold c or d.<br />
4<br />
FORM1<br />
You can use this unit to control a DVD player or<br />
multi-DVD player, which is sold separately.<br />
For details concerning operation, refer to the<br />
DVD players or multi-DVD players operation<br />
manuals. This section provides information on<br />
DVD operations with this unit which differs<br />
from that described in the DVD playersor<br />
multi-DVD players operation manual.<br />
1 Disc number indicator<br />
Shows the disc currently playing when<br />
using a multi-DVD player.<br />
2 Title number indicator<br />
Shows the title currently playing during<br />
DVD video playback.<br />
3 Chapter/track number indicator<br />
Shows the chapter/track currently playing.<br />
4 Play time indicator<br />
Shows the elapsed playing time of the current<br />
chapter/track.<br />
1 Rotate SOURCE to select the DVD<br />
player.<br />
Rotate SOURCE until you see DVD displayed.<br />
2Use VOLUME to adjust the sound level.<br />
Rotate to increase or decrease the volume.<br />
5 To skip back or forward to another<br />
chapter (or track), press c or d.<br />
Pressing d skips to the start of the next chapter<br />
(or track). Pressing c once skips to the<br />
start of the current chapter (or track). Pressing<br />
again will skip to the previous chapter (or<br />
track).<br />
Introduction of advanced<br />
DVD player operation<br />
The DVD player function menu has the following<br />
functions:<br />
During DVD video or Video CD playback<br />
RPT (repeat play)D.LIST (disc title list)<br />
PAUSE (pause)TTLin (disc title input)<br />
During CD playback<br />
RPT (repeat play)RDM (random play)<br />
SCAN (scan play)D.LIST (disc title list)<br />
PAUSE (pause)TTLin (disc title input)<br />
ITS.P (ITS play)ITS.M (ITS programming)<br />
Notes<br />
! If you do not operate the function within about<br />
30 seconds, the display is automatically returned.<br />
En 41
Section<br />
10<br />
DVD Player<br />
(When you select the disc title input mode<br />
(TTLin) or ITS programming mode (ITS.M),<br />
the display is not returned automatically.)<br />
! D.LIST, TTLin, ITS.P and ITS.M are displayed<br />
only when using a multi-DVD player.<br />
Repeating play<br />
1 Press FUNC to select the repeat mode.<br />
2Press RPT to select the repeat range.<br />
During DVD video playback<br />
! Title repeat Repeat just the current title<br />
! Chapter repeat Repeat just the current<br />
chapter<br />
! Disc repeat Repeat the current disc<br />
During Video CD or CD playback<br />
Each press of RPT turns the repeat play on or<br />
off.<br />
Playing tracks in a random<br />
order<br />
1 Press FUNC and then press RDM to select<br />
the random mode.<br />
2Press RDM to turn random play on.<br />
The light illuminates. Tracks will play in a random<br />
order.<br />
# To turn random play off, press RDM again.<br />
2Press SCAN to turn scan play on.<br />
The light illuminates. The first 10 seconds of<br />
each track is played.<br />
3 When you find the desired track press<br />
SCAN to turn scan play off.<br />
The light goes off. The track will continue to<br />
play.<br />
# If the scan mode is automatically canceled,<br />
select the scan mode again.<br />
Notes<br />
! After scanning of a CD is finished, normal<br />
playback of the tracks will begin again.<br />
! When the scan mode is exited while scan play<br />
is on, SCAN appears on the basic display.<br />
Pausing disc playback<br />
1 Press FUNC and then press PAUSE to select<br />
the pause mode.<br />
2Press PAUSE to turn pause on.<br />
The light illuminates. Play of the current track<br />
pauses.<br />
# To turn the pause off, press PAUSE again.<br />
Note<br />
You can also turn pause on or off by pressing<br />
PAUSE in the following display.<br />
Note<br />
When the random mode is exited while random<br />
play is on, RDM appears on the basic display.<br />
Scanning tracks of a CD<br />
1 Press FUNC and then press SCAN to select<br />
the scan mode.<br />
Using ITS playlist, disc title<br />
input and disc title list<br />
functions<br />
During CD playback when using this unit with<br />
multi-DVD player, you can use these functions.<br />
Operation is same as multi-CD player. Please<br />
refer to multi-CD player section.<br />
42<br />
En
Audio Adjustments<br />
Section<br />
11<br />
Operation modes<br />
This unit features two operation modes: the 3-<br />
way network mode (NW) and the standard<br />
mode (STD). You can switch between modes<br />
as desired. Initially, the DSP setting is set to<br />
the standard mode (STD). (Refer to Switching<br />
the DSP setting mode on page 6.)<br />
! The 3-way network mode (NW) lets you create<br />
of a 3-way multi-amp, multi-speaker system<br />
with separate speakers for<br />
reproduction of high, middle and low frequencies<br />
(bands), each driven by a dedicated<br />
power amp. The 3-way network mode<br />
provides network and time alignment functions,<br />
two functions essential for a multiamp,<br />
multi-speaker system, to enable precise<br />
control over settings for each frequency<br />
range.<br />
! The standard mode (STD) lets you create a<br />
4-speaker system with front and rear speakers,<br />
or a 6-speaker system with front and<br />
rear speakers and subwoofers. The standard<br />
mode provides a sound field control<br />
function offering an easy way to recreate<br />
realistic sound fields in your car.<br />
Important<br />
! When no power is supplied to this unit because<br />
of an exchange of the car battery or similar,<br />
the microcomputer of this unit is<br />
returned to its initial condition. If this happens,<br />
all memorized adjusted audio settings<br />
are erased. When you have completed audio<br />
setting adjustment, be sure to record the settings<br />
on page 70.<br />
Operation mode marks<br />
This manual uses the following marks to make<br />
the description clear.<br />
: This mark indicates a function only in<br />
NW mode or an operation in NW mode.<br />
: This mark indicates a function available<br />
only in STD mode or an operation in STD<br />
mode.<br />
! The functions and operations which do not<br />
carry either mark are commonly used in<br />
the NW and STD modes.<br />
3-way network mode<br />
By carrying out the following settings/adjustments<br />
in order, you can create a finely-tuned<br />
sound field effortlessly.<br />
! Using the position selector (POSI)<br />
! Using balance adjustment (BAL)<br />
! Using the time alignment (T.AL)<br />
! Adjusting network (NW)<br />
! Recalling equalizer curves (EEQ)<br />
! Adjusting equalizer curves (EQ 1)<br />
! Adjusting 13-band graphic equalizer<br />
(EQ 2)<br />
Standard mode<br />
Adjusting the audio easily<br />
The following functions let you easily adjust<br />
your audio system to match the car interior<br />
acoustic characteristics which vary depending<br />
on the type of car.<br />
! Recalling equalizer curves (EEQ)<br />
! Using the position selector (POSI)<br />
! Adjusting equalizer curves (EQ 1)<br />
Adjusting the audio finely<br />
By carrying out the following settings/adjustments<br />
in order, you can create a finely-tuned<br />
sound field effortlessly.<br />
! Using the position selector (POSI)<br />
! Using balance adjustment (F/B)<br />
! Using subwoofer output (SW1)<br />
English<br />
En 43
Section<br />
11<br />
Audio Adjustments<br />
! Adjusting subwoofer settings (SW2)<br />
! Setting the high pass filter for front speakers<br />
(HPF F)<br />
! Setting the high pass filter for rear speakers<br />
(HPF R)<br />
! Auto TA and EQ (auto-time alignment and<br />
auto-equalizing)<br />
! Recalling equalizer curves (EEQ)<br />
! Adjusting equalizer curves (EQ 1)<br />
! Adjusting 13-band graphic equalizer<br />
(EQ 2)<br />
Extra functions<br />
These functions are helpful in adjusting the<br />
sound to suit your system or your personal<br />
preferences.<br />
! Using BBE sound (BBE)<br />
! Adjusting loudness (LOUD)<br />
! Using sound field control and BBE sound<br />
(SFC)<br />
! Using automatic sound levelizer (ASL)<br />
! Adjusting source levels (SLA)<br />
F/BLOUDSFCEQ 1EQ 2ASLPOSI<br />
T.ALA.EQSW1SW2HPF FHPF R<br />
SLA<br />
Notes<br />
! If you do not operate the function within about<br />
30 seconds, the display is automatically returned.<br />
(When you select the 13-band graphic equalizer<br />
mode (EQ 2), the time alignment adjustment<br />
mode (T.AL) or the network adjustment<br />
mode (NW), the display is not returned automatically.)<br />
! SW2 is displayed only when the subwoofer<br />
output is on in the subwoofer output mode<br />
(SW1).<br />
! SLA is not displayed when you select FM<br />
tuner as the source.<br />
Introduction of audio<br />
adjustments<br />
The audio menu has the following functions:<br />
BALNWPOSIT.ALEQ 1EQ 2BBE<br />
LOUDASLSLA<br />
Using the position selector<br />
One way to assure a more natural sound is to<br />
clearly position the stereo image, putting you<br />
right in the center of the sound field. The position<br />
selector function lets you automatically<br />
adjust the speakers output levels and inserts<br />
a delay time to match the number and position<br />
of occupied seats.<br />
1 Press AUDIO and then press NEXT to<br />
display POSI.<br />
Press NEXT until POSI appears in the display.<br />
2Press POSI to select the position selector<br />
mode.<br />
44<br />
En
Audio Adjustments<br />
Section<br />
11<br />
3 Press the corresponding button to select<br />
a listening position.<br />
Button Indicator Position<br />
FL<br />
FR<br />
Front seat left<br />
Front seat right<br />
2Press c or d to adjust left/right speaker<br />
balance.<br />
Each press of c or d moves the left/right<br />
speaker balance towards the left or the right.<br />
Balance L25 Balance R25 is displayed as<br />
the left/right speaker balance moves from left<br />
to right.<br />
English<br />
FRONT<br />
ALL<br />
Front seats<br />
All seats<br />
# To cancel the selected listening position,<br />
press the same button again.<br />
# You cannot select ALL when NW mode has<br />
been selected.<br />
Using balance adjustment<br />
You can select a fader/balance setting that<br />
provides an ideal listening environment in all<br />
occupied seats.<br />
1 Press AUDIO to select the fader/balance<br />
mode.<br />
Note<br />
You can also use a, b, c or d to select the listening<br />
position.<br />
Button Indicator Position<br />
c<br />
d<br />
Front seat left<br />
Front seat right<br />
2Press a or b to adjust front/rear speaker<br />
balance.<br />
Each press of a or b moves the front/rear<br />
speaker balance towards the front or the rear.<br />
Fader F25 Fader R25 is displayed as the<br />
front/rear speaker balance moves from front to<br />
rear.<br />
# Fader FR 00 is the proper setting when only<br />
two speakers are used.<br />
a<br />
b<br />
Front seats<br />
All seats<br />
3 Press c or d to adjust left/right speaker<br />
balance.<br />
Each press of c or d moves the left/right<br />
speaker balance towards the left or the right.<br />
Balance L25 Balance R25 is displayed as<br />
the left/right speaker balance moves from left<br />
to right.<br />
Using balance adjustment<br />
You can select a balance setting that provides<br />
an ideal listening environment in all occupied<br />
seats.<br />
1 Press AUDIO to select the balance<br />
mode.<br />
Using the time alignment<br />
The time alignment lets you adjust the distance<br />
between each speaker and the listening<br />
position.<br />
En 45
Section<br />
11<br />
Audio Adjustments<br />
1 Press AUDIO and then press NEXT to<br />
display T.AL.<br />
Press NEXT until T.AL appears in the display.<br />
2Press T.AL to select the time alignment<br />
mode.<br />
# T.AL is inactive when neither FL nor FR is selected<br />
in the position selector mode (POSI).<br />
3 Press the corresponding button to select<br />
the time alignment.<br />
Button<br />
INTL<br />
A.TA<br />
CUSTM<br />
Time alignment<br />
Initial<br />
Auto-time alignment<br />
Custom<br />
# To turn time alignment off, press the same<br />
button again.<br />
# You cannot select A.TA when NW mode has<br />
been selected.<br />
# A.TA is inactive if auto TA and EQ has not<br />
been carried out.<br />
4 Press BAND to cancel the time alignment<br />
mode.<br />
Notes<br />
! INTL is the factory supplied time alignment.<br />
! A.TA is the time alignment created by auto TA<br />
and EQ. (Refer to Auto TA and EQ (auto-time<br />
alignment and auto-equalizing) on page<br />
54.)<br />
! CUSTM is an adjusted time alignment that<br />
you can create for yourself.<br />
Adjusting the time alignment<br />
You can adjust the distance between each<br />
speaker and the selected position.<br />
! An adjusted time alignment is memorized<br />
in CUSTM.<br />
1 Press AUDIO and then press NEXT to<br />
display T.AL.<br />
Press NEXT until T.AL appears in the display.<br />
2Press T.AL to select the time alignment<br />
mode.<br />
# T.AL is inactive when neither FL nor FR is selected<br />
in the position selector mode (POSI).<br />
3 Press c or d to select the speaker to be<br />
adjusted.<br />
Each press of c or d selects the speaker in<br />
the following order:<br />
High Left (high-range left)High Right<br />
(high-range right)Mid Right (middle-range<br />
right)Mid Left (middle-range left)<br />
Low Left (low-range left)Low Right (lowrange<br />
right)<br />
Front Left (front left)Front Right (front<br />
right)Rear Right (rear right)Rear Left<br />
(rear left)Sub. W (subwoofer)<br />
# You cannot select Sub. W when the subwoofer<br />
output is off.<br />
4 Press a or b to adjust the distance between<br />
the selected speaker and the listening<br />
position.<br />
Each press of a or b increases or decreases<br />
the distance.<br />
400.0cm 0.0cm is displayed as the distance<br />
is increased or decreased.<br />
# You can adjust the distance for the other<br />
speakers in the same way.<br />
5 Press BAND to cancel the time alignment<br />
mode.<br />
46<br />
En
Audio Adjustments<br />
Section<br />
11<br />
About the network<br />
function<br />
The network function lets you divide the audio<br />
signal into different frequency bands, and<br />
then reproduce each of them through separate<br />
speaker units.<br />
You can then make precise adjustments to the<br />
reproduced frequency band (with a low-pass<br />
filter or high-pass filter), level, phase and other<br />
parameters to match the characteristics of<br />
each speaker unit.<br />
Adjustable parameters<br />
The network function enables adjustment of<br />
the following parameters. Make adjustments<br />
in line with the reproduced frequency band<br />
and characteristics of each connected speaker<br />
unit.<br />
Level<br />
(dB)<br />
Reproduced frequency band<br />
! The LPF cuts frequencies (high) above the<br />
set frequency, letting low frequencies<br />
through.<br />
Level<br />
The difference in reproduced levels between<br />
speaker units can be corrected.<br />
Slope<br />
Adjusting the HPF/LPF slope (filter attenuation<br />
slope) lets you adjust the continuity of sound<br />
between speaker units.<br />
! The slope indicates the number of decibels<br />
(dB) the signal is attenuated when the frequency<br />
is one octave higher (lower) (Unit:<br />
dB/oct.). The steeper the slope, the more<br />
the signal is attenuated.<br />
Phase<br />
You can switch phase (normal, reverse) for<br />
each speaker units input signal. When the<br />
continuity of sound between speakers is imprecise,<br />
try switching phase. This may improve<br />
the continuity of sound between speakers.<br />
English<br />
Level<br />
Cut-off frequency<br />
of HPF<br />
Pass<br />
Slope (dB/oct.)<br />
Frequency<br />
(Hz)<br />
Cut-off frequency<br />
of LPF<br />
Reproduced frequency band<br />
Adjusting the HPF (high-pass filter) or LPF<br />
(low-pass filter) cut-off frequency lets you set<br />
the reproduced frequency band for each<br />
speaker unit.<br />
! The HPF cuts frequencies (low) below the<br />
set frequency, letting high frequencies<br />
through.<br />
Points concerning network<br />
adjustments<br />
Cut-off frequency adjustment<br />
! With the low-range speaker installed in the<br />
rear tray, if you set the L LPF cut-off frequency<br />
high, bass sound is separated so<br />
that it appears to come from the rear. You<br />
are recommended to set the L LPF cut-off<br />
frequency to 100 Hz or lower.<br />
! The maximum input power setting for middle-<br />
and high-range speakers is usually<br />
lower than that for low-range speakers. Remember<br />
that if the M HPF or H HPF cut-off<br />
frequency is set lower than required, strong<br />
bass signal input may damage the speaker.<br />
En 47
Section<br />
11<br />
Audio Adjustments<br />
Level adjustment<br />
The basic frequencies of many musical instruments<br />
are in the middle range. First perform<br />
middle-range level adjustment, followed by<br />
high-range and then low-range level adjustment<br />
in that order.<br />
Slope adjustment<br />
! If you set a small absolute value for the<br />
slope (for a gentle slope), interference between<br />
adjacent speaker units can easily result<br />
in degraded frequency response.<br />
! If you set a large absolute value for the<br />
slope (for a steep slope), continuity of<br />
sound between speaker units is degraded,<br />
and sounds appear to be separated.<br />
! If you set the slope to 0 dB/oct. (Pass), the<br />
audio signal bypasses the filter, so the filter<br />
does not have an effect.<br />
Phase adjustment<br />
When the cross-over point value for filters on<br />
both sides is set to 12 dB/oct., the phase is<br />
reversed 180 degrees at the filter cut-off frequency.<br />
In this case, reversing the phase assures<br />
improved sound continuity.<br />
Normal phase<br />
Reverse phase<br />
Crossover point<br />
! Even if any speaker unit (filter) is muted,<br />
you can adjust the parameters for other<br />
speaker units (filters).<br />
1 Press AUDIO and then press NW to select<br />
the network adjustment mode.<br />
2Press the corresponding button to select<br />
the speaker unit (filter) to be adjusted.<br />
Button<br />
L LPF<br />
M HPF<br />
M LPF<br />
H HPF<br />
Speaker unit (filter)<br />
Low-range speaker LPF<br />
Middle-range speaker HPF<br />
Middle-range speaker LPF<br />
High-range speaker HPF<br />
3 Press MUTE to mute the selected speaker<br />
unit (filter).<br />
MUTE blinks in the display.<br />
# To cancel the muting, press MUTE again.<br />
Adjusting network<br />
1 Press AUDIO and then press NW to select<br />
the network adjustment mode.<br />
2Press the corresponding button to select<br />
the speaker unit (filter) to be adjusted.<br />
Button<br />
Speaker unit (filter)<br />
L LPF<br />
Low-range speaker LPF<br />
Muting the speaker unit (filter)<br />
You can mute each speaker unit (filter). When<br />
a speaker unit (filter) is muted, no sound is<br />
output from that speaker.<br />
! If you mute the selected speaker unit (filter),<br />
MUTE blinks and no adjustments are<br />
possible.<br />
M HPF<br />
M LPF<br />
H HPF<br />
Middle-range speaker HPF<br />
Middle-range speaker LPF<br />
High-range speaker HPF<br />
3 Press c or d to select the cut-off frequency<br />
(crossover frequency) of the selected<br />
speaker unit (filter).<br />
L LPF: 31.540506380100125<br />
160200 (Hz)<br />
48<br />
En
Audio Adjustments<br />
Section<br />
11<br />
M HPF: 31.540506380100125<br />
160200 (Hz)<br />
M LPF: 1.622.53.15456.38<br />
1012.516 (kHz)<br />
H HPF: 1.622.53.15456.38<br />
1012.516 (kHz)<br />
4 Press a or b to adjust the level of the<br />
selected speaker unit (filter).<br />
Each press of a or b increases or decreases<br />
the level of the selected speaker unit (filter).<br />
0dB 24dB is displayed as the levelis increased<br />
or decreased.<br />
+6dB 24dB is displayed as the levelis increased<br />
or decreased, only if you haveselected<br />
L LPF.<br />
5 Press SLOPE to select the slope of the<br />
selected speaker unit (filter).<br />
L LPF: 12 18 6 (dB/oct.)<br />
M HPF: 12 18Pass (0) 6 (dB/oct.)<br />
M LPF: 12Pass (0) 6 (dB/oct.)<br />
H HPF: 12 6 (dB/oct.)<br />
6 Press PHASE to switch the phase of the<br />
selected speaker unit (filter).<br />
Each press of PHASE switches the phase between<br />
normal and reverse .<br />
# You can adjust the parameters for other<br />
speaker units (filters) in the same way.<br />
7 Press BAND to cancel the network adjustment<br />
mode.<br />
Using subwoofer output<br />
This unit is equipped with a subwoofer output<br />
which can be switched on or off. When a subwoofer<br />
is connected to this unit, turn the subwoofer<br />
output on.<br />
The subwoofer output phase can be switched<br />
between normal and reverse.<br />
1 Press AUDIO and NEXT and then press<br />
SW1 to select the subwoofer output mode.<br />
# SW2 is displayed only when the subwoofer<br />
output is on in the subwoofer output mode<br />
(SW1).<br />
2Press SW1 to turn subwoofer output<br />
on.<br />
SUB.W ON appears in the display. Subwoofer<br />
output is now on.<br />
# To turn subwoofer output off, press SW1<br />
again.<br />
3 Press c or d to select the phase of subwoofer<br />
output.<br />
Press c to select reverse phase. Press d to select<br />
normal phase.<br />
Adjusting subwoofer settings<br />
When the subwoofer output is on, you can adjust<br />
the cut-off frequency and the output level<br />
of the subwoofer.<br />
1 Press AUDIO and NEXT and then press<br />
SW2to select the subwoofer setting mode.<br />
2Press c or d to select cut-off frequency.<br />
Each press of c or d selects cut-off frequencies<br />
in the following order:<br />
506380100125 (Hz)<br />
Only frequencies lower than those in the selected<br />
range are output from the subwoofer.<br />
3 Press a or b to adjust the output level<br />
of the subwoofer.<br />
Each press of a or b increases or decreases<br />
the level of the subwoofer. +6 24 is displayed<br />
as the level is increased or<br />
decreased.<br />
English<br />
En 49
Section<br />
11<br />
Audio Adjustments<br />
Using the high pass filter<br />
When you do not want low sounds from the<br />
subwoofer output frequency range to play<br />
from the front or rear speakers, turn the HPF<br />
(high pass filter) on. Only frequencies higher<br />
than those in the selected range are output<br />
from the front or rear speakers.<br />
4 Press c or d to select cut-off frequency.<br />
Each press of c or d selects cut-off frequencies<br />
in the following order:<br />
506380100125 (Hz)<br />
Only frequencies higher than those in the selected<br />
range are output from the front or rear<br />
speakers.<br />
Setting the high pass filter for<br />
front speakers<br />
1 Press AUDIO and NEXT and then press<br />
HPF F to select the high pass filter mode.<br />
2Press HPF F to turn high pass filter on.<br />
HPF ON appears in the display. High pass filter<br />
is now on.<br />
# To turn high pass filter off, press HPF F again.<br />
3 Press c or d to select cut-off frequency.<br />
Each press of c or d selects cut-off frequencies<br />
in the following order:<br />
506380100125 (Hz)<br />
Only frequencies higher than those in the selected<br />
range are output from the front or rear<br />
speakers.<br />
Setting the high pass filter for<br />
rear speakers<br />
1 Press AUDIO and then press NEXT<br />
twice.<br />
2Press HPF R to select the high pass filter<br />
mode.<br />
3 Press HPF R to turn high pass filter on.<br />
HPF ON appears in the display. High pass filter<br />
is now on.<br />
# To turn high pass filter off, press HPF R again.<br />
Using the auto-equalizer<br />
The auto-equalizer is the equalizer curve created<br />
by auto TA and EQ (Refer to Auto TA and<br />
EQ (auto-time alignment and auto-equalizing)<br />
on page 54).<br />
You can turn the auto-equalizer on or off.<br />
1 Press AUDIO and NEXT and then press<br />
A.EQ to select the auto-equalizer on/off<br />
mode.<br />
# A.EQ is inactive if auto TA and EQ has not<br />
been carried out.<br />
2Press A.EQ to turn the auto-equalizer<br />
on.<br />
Auto EQ ON appears in the display.<br />
# To turn auto-equalizer off, press A.EQ<br />
again.<br />
Recalling equalizer curves<br />
The equalizer lets you adjust the equalization<br />
to match car interior acoustic characteristics<br />
as desired.<br />
There are seven stored equalizer curves which<br />
you can easily recall at any time.<br />
1 Press EEQ to switch to the easy equalizer<br />
mode.<br />
2Press NEXT to switch between CSTM2<br />
and the other selections (curves).<br />
50<br />
En
Audio Adjustments<br />
Section<br />
11<br />
3 Press the corresponding button to select<br />
the desired equalizer curve.<br />
Button<br />
Equalizer curve<br />
CLRTY<br />
Clarity<br />
RHYTM<br />
Rhythm<br />
SENS<br />
Sensitive<br />
NRRW<br />
Narrow<br />
FLAT<br />
Flat<br />
CSTM1 Custom 1<br />
CSTM2 Custom 2<br />
! CUSTOM1 and CUSTOM2 are adjusted<br />
equalizer curves that you create. Adjustments<br />
can be made with a 13-band graphic<br />
equalizer.<br />
! When FLAT is selected no supplement or<br />
correction is made to the sound. This is<br />
useful to check the effect of the equalizer<br />
curves by switching alternatively between<br />
FLAT and a set equalizer curve.<br />
Notes<br />
! You can also sequentially select an equalizer<br />
curve by pressing c or d.<br />
! If you do not operate the function within about<br />
eight seconds, the display is automatically returned.<br />
Adjusting equalizer curves<br />
The factory supplied equalizer curves, with the<br />
exception of FLAT, can be adjusted to a fine<br />
degree (nuance control).<br />
1 Press AUDIO and then press EQ 1 to select<br />
the graphic equalizer mode.<br />
2Press c or d to select an equalizer<br />
curve.<br />
3 Press a or b to adjust the equalizer<br />
curve.<br />
Each press of a or b increases or decreases<br />
the equalizer curve respectively.<br />
+6 5 (or 6) is displayed as the equalizer<br />
curve is increased or decreased.<br />
# The actual range of the adjustments are different<br />
depending on which equalizer curve is selected.<br />
# The equalizer curve with all frequencies set to<br />
0 cannot be adjusted.<br />
Adjusting 13-band graphic<br />
equalizer<br />
For CUSTOM1 and CUSTOM2 equalizer<br />
curves, you can adjust the level of each band.<br />
! A separate CUSTOM1 curve can be created<br />
for each source. (The built-in CD<br />
player and the multi-CD player are set to<br />
the same equalizer adjustment setting<br />
automatically.) If you make adjustments<br />
when a curve other than CUSTOM2 is selected,<br />
the equalizer curve settings will be<br />
memorized in CUSTOM1.<br />
! A CUSTOM2 curve can be created common<br />
to all sources. If you make adjustments<br />
when the CUSTOM2 curve is<br />
selected, the CUSTOM2 curve will be updated.<br />
1 Recall the equalizer curve you want to<br />
adjust.<br />
See Recalling equalizer curves on the previous<br />
page.<br />
2Press AUDIO and then press EQ 2to select<br />
the 13-band graphic equalizer mode.<br />
3 Press c or d to select the equalizer<br />
band to adjust.<br />
Each press of c or d selects equalizer bands<br />
in the following order:<br />
English<br />
En 51
Section<br />
11<br />
Audio Adjustments<br />
50801252003155008001.25k<br />
2k3.15k5k8k12.5k (Hz)<br />
4 Press a or b to adjust the level of the<br />
equalizer band.<br />
Each press of a or b increases or decreases<br />
the level of the equalization band.<br />
+6 6 is displayed as the level is increased<br />
or decreased.<br />
# You can then select another band and adjust<br />
the level.<br />
5 Press BAND to cancel the 13-band graphice<br />
qualizer mode.<br />
Using BBE sound<br />
With BBE, playback very close to the original<br />
sound can be obtained by correction with a<br />
combination of phase compensation and<br />
high-range boost for the delay of the high-frequency<br />
components and the amplitude deviation<br />
occurring during playback. This function<br />
makes it possible to reproduce the dynamic<br />
sound field as if you are listening to a live performance.<br />
Note<br />
Manufactured under license from BBE Sound,<br />
Inc. The mark BBE is a trademark of BBE Sound,<br />
Inc.<br />
Adjusting BBE sound level<br />
With BBE sound processing technology, you<br />
can adjust the level of BBE.<br />
1 Press AUDIO and NEXT and then press<br />
BBE to select BBE.<br />
2Press BBE to turn BBE on.<br />
# To cancel the BBE, press BBE again.<br />
3 Press a or b to adjust the level of BBE.<br />
Each press of a or b increases or decreases<br />
the level of BBE.<br />
+4 4 is displayed as the level is increased<br />
or decreased.<br />
Adjusting loudness<br />
Loudness compensates for deficiencies in the<br />
low- and high-sound ranges at low volume.<br />
1 Press AUDIO and then press NEXT to<br />
display LOUD.<br />
Press NEXT until LOUD appears.<br />
2Press LOUD to select the loudness<br />
mode.<br />
3 Press LOUD to turn loudness on.<br />
Loudness ON appears in the display.<br />
# To turn loudness off, press LOUD again.<br />
Using sound field control<br />
and BBE sound<br />
SFC (sound field control) incorporate four programs<br />
for reproducing typical sound fields of<br />
a studio, club, concert hall or dome. This function<br />
makes it possible to reproduce the realistic<br />
sound fields of the four programs in your<br />
car.<br />
With BBE, playback very close to the original<br />
sound can be obtained by correction with a<br />
combination of phase compensation and<br />
high-range boost for the delay of the high-frequency<br />
components and the amplitude deviation<br />
occurring during playback. This function<br />
makes it possible to reproduce the dynamic<br />
sound field as if you are listening to a live performance.<br />
52<br />
En
Audio Adjustments<br />
Section<br />
11<br />
Note<br />
Manufactured under license from BBE Sound,<br />
Inc. The mark BBE is a trademark of BBE Sound,<br />
Inc.<br />
Recalling sound field programs<br />
1 Press AUDIO and then press SFC to select<br />
the sound field control mode.<br />
2Press the corresponding button to select<br />
the desired sound field program.<br />
Button<br />
STUDIO<br />
CLUB<br />
HALL<br />
DOME<br />
BBE<br />
Effect<br />
Studio<br />
Club<br />
Concert hall<br />
Dome<br />
BBE<br />
# To cancel the selected sound field program,<br />
press the same button again.<br />
# You can also sequentially select a sound field<br />
program by pressing c or d.<br />
Adjusting BBE sound level<br />
With BBE sound processing technology, you<br />
can adjust the level of BBE.<br />
1 Press AUDIO and SFC and then press<br />
BBE to select BBE.<br />
2Press BBE to turn BBE on.<br />
# To cancel the BBE, press BBE again.<br />
3 Press a or b to adjust the level of BBE.<br />
Each press of a or b increases or decreases<br />
the level of BBE.<br />
+4 4 is displayed as the level is increased<br />
or decreased.<br />
Using automatic sound<br />
levelizer<br />
During driving, noise in the car changes according<br />
to the driving speed and road conditions.<br />
The automatic sound levelizer (ASL)<br />
monitors such varying noise and automatically<br />
increases the volume level, if this noise<br />
becomes greater. The sensitivity (variation of<br />
volume level to noise level) of ASL can be set<br />
to one of five levels.<br />
1 Press AUDIO and then press NEXT to<br />
display ASL.<br />
Press NEXT until ASL appears.<br />
2Press ASL to select the automatic sound<br />
levelizer mode.<br />
3 Press ASL to select the desired ASL<br />
level.<br />
Each press of ASL selects ASL level in the following<br />
order:<br />
OFF (off)Low (low)Mid-Low (mid-low)<br />
Mid (mid)Mid-High (mid-high)High<br />
(high)<br />
Note<br />
When the ASL mode is exited except for OFF is<br />
selected, ASL appears on the basic display.<br />
Adjusting source levels<br />
SLA (source level adjustment) lets you adjust<br />
the volume level of each source to prevent radical<br />
changes in volume when switching between<br />
sources.<br />
! Settings are based on the volume level of<br />
the FM tuner, which remains unchanged.<br />
English<br />
En 53
Section<br />
11<br />
Audio Adjustments<br />
1 Compare the FM tuner volume level<br />
with the level of the source you wish to adjust.<br />
2Press AUDIO and then press NEXT to<br />
display SLA.<br />
Press NEXT until SLA appears.<br />
# SLA is not displayed when you select FM<br />
tuner as the source.<br />
3 Press SLA to select the SLA mode.<br />
4 Press a or b to adjust the source volume.<br />
Each press of a or b increases or decreases<br />
the source volume.<br />
+4 4 is displayed as the source volume is<br />
increased or decreased.<br />
Notes<br />
! Since the FM tuner volume is the control, it is<br />
not possible to apply source level adjustments<br />
to the FM tuner.<br />
! The AM tuner volume level can also be adjusted<br />
with source level adjustments.<br />
! The built-in CD player and the multi-CD player<br />
are set to the same source level adjustment<br />
volume automatically.<br />
! External unit 1 and external unit 2 are set to<br />
the same source level adjustment volume<br />
automatically.<br />
Auto TA and EQ (auto-time<br />
alignment and autoequalizing)<br />
The auto-time alignment automatically adjusted<br />
the distance between each speaker and<br />
the listening position.<br />
The auto-equalizer automatically measures<br />
the car interior acoustic characteristics, and<br />
then creates the auto-equalizer curve based<br />
on that information.<br />
WARNING<br />
To prevent accidents, never carry out auto TA and<br />
EQ while driving. When this function measures<br />
the car interior acoustic characteristics to create<br />
an auto-equalizer curve, a loud measurement<br />
tone (noise) may be output from the speakers.<br />
CAUTION<br />
! Carrying out auto TA and EQ under the following<br />
conditions may damage the speakers. Be<br />
sure to check the conditions thoroughly before<br />
carrying out auto TA and EQ.<br />
When speakers are incorrectly connected.<br />
(e.g., When a rear speaker is connected to<br />
a subwoofer output.)<br />
When a speaker is connected to a power<br />
amp delivering output higher than the<br />
speakers maximum input power capability.<br />
! If the microphone is placed in an unsuitable<br />
position the measurement tone may become<br />
loud and measurement may take a long time,<br />
resulting in a drain on battery power. Be sure<br />
to place the microphone in the specified location.<br />
Before operating the auto TA<br />
and EQ function<br />
! Carry out auto TA and EQ in as quiet a<br />
place as possible, with the car engine and<br />
air conditioning switched off. Also cut<br />
power to car phones or portable telephones<br />
in the car, or remove them from the car before<br />
carrying out auto TA and EQ. Sounds<br />
other than the measurement tone (surrounding<br />
sounds, engine sound, telephones<br />
ringing etc.) may prevent correct<br />
54<br />
En
Audio Adjustments<br />
Section<br />
11<br />
measurement of the car interior acoustic<br />
characteristics.<br />
! Be sure to carry out auto TA and EQ using<br />
the supplied microphone. Using another<br />
microphone may prevent measurement, or<br />
result in incorrect measurement of the car<br />
interior acoustic characteristics.<br />
! When front speaker is not connected, auto<br />
TA and EQ cannot be carried out.<br />
! When this unit is connected to a power<br />
amp with input level control, auto TA and<br />
EQ may not be possible if you lower power<br />
amp input level. Set the power amps input<br />
level to the standard position.<br />
! When this unit is connected to a power<br />
amp with LPF, be sure to turn LPF off and<br />
then carry out auto TA and EQ. LPF may<br />
prevent correct measurement.<br />
! Auto TA and EQ changes the audio settings<br />
as below:<br />
The fader/balance settings return to the<br />
center position. (Refer to page 45.)<br />
The graphic equalizer curve switches to<br />
FLAT. (Refer to page 50.)<br />
When a subwoofer is connected to this<br />
unit, it will be adjusted automatically to<br />
either subwoofer output and high pass<br />
filter setting for rear speaker.<br />
! If you carry out auto TA and EQ when a previous<br />
setting of this already exists, the setting<br />
will be replaced.<br />
Carrying out auto TA and EQ<br />
1 Stop the car in a place that is as quiet<br />
as possible, close all doors, windows and<br />
the sun roof, and then turn the engine off.<br />
If the engine is left running, engine noise may<br />
prevent correct auto TA and EQ.<br />
2Fix the supplied microphone in the center<br />
of the headrest of the drivers seat, facing<br />
forward, using the belt (sold<br />
separately).<br />
The auto TA and EQ may differ depending on<br />
where you place the microphone. If desired,<br />
place the microphone on the front passenger<br />
seat to carry out auto TA and EQ.<br />
3 Turn the ignition switch to ON or ACC.<br />
If the cars air conditioner or heater is turned<br />
on, turn it off. Noise from the fan in the air<br />
conditioner or heater may prevent correct auto<br />
TA and EQ.<br />
# Rotate SOURCE to turn the source on if this<br />
unit is turned off.<br />
4 Select the position for the seat on<br />
which the microphone is placed.<br />
Refer to Using the position selector on page<br />
44.<br />
# If no position is selected before you start auto<br />
TA and EQ, FR is selected automatically.<br />
5 Rotate SOURCE until the unit turns off.<br />
6 Press and hold to enter the auto<br />
TA and EQ measurement mode.<br />
The front panel opens automatically.<br />
# When the source is off, you can check the location<br />
of by turning on the feature demo.<br />
English<br />
En 55
Section<br />
11<br />
Audio Adjustments<br />
11 Press EXIT or BAND to cancel the auto<br />
TA and EQ mode.<br />
7 Plug the microphone into the microphone<br />
input jack on this unit.<br />
12Store the microphone carefully in the<br />
glove compartment.<br />
Store the microphone carefully in the glove<br />
compartment or any other safe place. If the<br />
microphone is subjected to direct sunlight for<br />
an extended period, high temperatures may<br />
cause distortion, color change or malfunction.<br />
8 Press START to start the auto TA and<br />
EQ.<br />
9 Get out of the car and close the door<br />
within 10 seconds when the 10-second<br />
count-down starts.<br />
The measurement tone (noise) is output from<br />
the speakers, and auto TA and EQ begins.<br />
# When all speakers are connected, auto TA<br />
and EQ is completed in about six minutes.<br />
# To stop auto TA and EQ, press STOP.<br />
# To cancel auto TA and EQ part way through,<br />
press EXIT or BAND.<br />
10 When auto TA and EQ is completed,<br />
Complete is displayed.<br />
When correct measurement of car interior<br />
acoustic characteristics is not possible, an<br />
error message is displayed. (Refer to Understanding<br />
auto TA and EQ error messages on<br />
page 65.)<br />
56<br />
En
Initial Settings<br />
Section<br />
12<br />
Adjusting initial settings<br />
Initial settings lets you perform initial set up of<br />
different settings for this unit.<br />
The initial settings menu has the following<br />
functions:<br />
REV (reverse mode)F.DEMO (feature demo)<br />
AUX (auxiliary input)D.ATT (digital attenuator)MUTE.S<br />
(telephone muting/attenuation)FMstep<br />
(FM tuning step)<br />
AMstep (AM tuning step)<br />
1 Rotate SOURCE until the unit turns off.<br />
2Press and hold to enter the initialsettings<br />
menu.<br />
When the source is off, you can check the location<br />
of by turning on the feature demo.<br />
Using the feature demo<br />
The feature demo automatically starts when<br />
power to this unit is turned off while the ignition<br />
switch is set to ACC or ON.<br />
You can turn the feature demo on or off.<br />
Important<br />
The red lead (ACC) of this unit should be connected<br />
to a terminal coupled with ignition switch<br />
on/off operations. If this is not done, the vehicle<br />
battery may be drained.<br />
1 With the source turned off, press<br />
and hold.<br />
2Press F.DEMO to select the feature<br />
demo mode.<br />
3 Press F.DEMO to turn the feature demo<br />
on.<br />
ON appears in the display.<br />
# To turn the feature demo off, press F.DEMO<br />
again.<br />
English<br />
# To cancel initial settings, press BAND.<br />
Using reverse mode<br />
If you do not perform an operation within<br />
about 30 seconds, screen indications start to<br />
reverse, and then continue reversing every 10<br />
seconds.<br />
You can turn the reverse mode on or off.<br />
1 With the source turned off, press<br />
and hold to select the reverse mode.<br />
2Press REV to turn the reverse mode on.<br />
ON appears in the display.<br />
# To turn the reverse mode off, press REV<br />
again.<br />
Switching the auxiliary setting<br />
It is possible to use auxiliary equipment with<br />
this unit. Activate the auxiliary setting when<br />
using auxiliary equipment connected to this<br />
unit.<br />
1 With the source turned off, press<br />
and hold.<br />
2Press AUX to select the AUX mode.<br />
3 Press AUX to turn AUX on.<br />
ON appears in the display.<br />
# To turn AUX off, press AUX again.<br />
En 57
Section<br />
12<br />
Initial Settings<br />
Selecting the digital<br />
attenuator<br />
When listening to a CD or other source on<br />
which the recording level is high, setting the<br />
equalizer curve level to high may result in distortion.<br />
You can switch the digital attenuator<br />
to low to reduce distortion.<br />
! Sound quality is better at the high setting<br />
so this setting is usually used.<br />
1 With the source turned off, press<br />
and hold.<br />
2Press D.ATT to select the digital attenuator<br />
mode.<br />
3 Press the corresponding button to select<br />
the digital attenuator level.<br />
Button<br />
LOW<br />
HIGH<br />
Level<br />
Low<br />
High<br />
Switching the telephone<br />
muting/attenuation<br />
Sound from this system is muted or attenuated<br />
automatically when a call is made or received<br />
using a cellular telephone connected to<br />
this unit.<br />
! The sound turns off, MUTE or ATT is displayed<br />
and no audio adjustments, except<br />
volume control, are possible.<br />
! Operation returns to normal when the<br />
phone call is ended.<br />
1 With the source turned off, press<br />
and hold.<br />
2Press MUTE.S to select the telephone<br />
muting/attenuation mode.<br />
3 Press MUTE.S to select the desired setting.<br />
Each press of MUTE.S selects settings in the<br />
following order:<br />
TEL mute (muting) 10dB ATT (attenuation)<br />
20dB ATT (attenuation)<br />
20dB ATT has a stronger effect than<br />
10dB ATT.<br />
Setting the FM tuning step<br />
The FM tuning step employed by seek tuning<br />
can be switched between 100 kHz, the preset<br />
step, and 50 kHz.<br />
1 With the source turned off, press<br />
and hold.<br />
2Press NEXT and then press FMstep to<br />
select the FM tuning step mode.<br />
3 Press the corresponding button to select<br />
the desired tuning step.<br />
Button<br />
50K<br />
100K<br />
Tuning step<br />
50 kHz<br />
100 kHz<br />
Note<br />
If seek tuning is performed in 50 kHz steps, stations<br />
may be tuned in imprecisely. Tune in the stations<br />
with manual tuning or use seek tuning<br />
again.<br />
Setting the AM tuning step<br />
The AM tuning step can be switched between<br />
9 kHz, the preset step, and 10 kHz. When<br />
using the tuner in North, Central or South<br />
America, reset the tuning step from 9 kHz (531<br />
58<br />
En
Initial Settings<br />
Section<br />
12<br />
1,602 kHz allowable) to 10 kHz (530 1,640<br />
kHz allowable).<br />
1 With the source turned off, press<br />
and hold.<br />
English<br />
2Press NEXT and then press AMstep to<br />
select the AM tuning step mode.<br />
3 Press the corresponding button to select<br />
the desired tuning step.<br />
Button<br />
9K<br />
10K<br />
Tuning step<br />
9 kHz<br />
10 kHz<br />
En 59
Section<br />
13<br />
Other Functions<br />
Attenuating volume<br />
The attenuator lets you lower the volume level<br />
quickly (by about 90%).<br />
% Press ATT to turn the attenuator on.<br />
ATT appears in the display.<br />
# Press ATT again to turn the attenuator off and<br />
return to the original volume level.<br />
Displaying and setting the<br />
clock<br />
You can turn the clock display on or off and<br />
set the clock.<br />
Turning the off clock display on<br />
or off<br />
If the off clock display is turned on, when the<br />
sources and the feature demo are off, the<br />
clock display appears on the display.<br />
1 Press NEXT to display CLK.<br />
Press NEXT until CLK appears.<br />
2Press CLK and then press OFF CLK to select<br />
the off clock display mode.<br />
3 Press OFF CLK to turn the off clock display<br />
on.<br />
ON appears in the display.<br />
# To turn the off clock display off, press OFF CLK<br />
again.<br />
1 Press NEXT to display CLK.<br />
Press NEXT until CLK appears.<br />
2Press CLK and then press DATE to set<br />
the date.<br />
3 Press c or d to select the segment of<br />
the calendar display you wish to set.<br />
Pressing c or d will select one segment of the<br />
calendar display:<br />
DayMonthYear<br />
4 Press a or b to set the date.<br />
Pressing a will increase the selected day,<br />
month or year. Pressing b will decrease the<br />
selected day, month or year.<br />
Setting the clock<br />
1 Press NEXT to display CLK.<br />
Press NEXT until CLK appears.<br />
2Press CLK and then press TIME to set<br />
the clock.<br />
3 Press c or d to select the segment of<br />
the clock display you wish to set.<br />
Pressing c or d will select one segment of the<br />
clock display:<br />
HourMinute<br />
4 Press a or b to set the clock.<br />
Pressing a will increase the selected hour or<br />
minute. Pressing b will decrease the selected<br />
hour or minute.<br />
Setting the date<br />
The calender display adjusted in this mode appears<br />
only when sources and the feature<br />
demo are off.<br />
Matching the time to a time signal<br />
1 Press NEXT to display CLK.<br />
Press NEXT until CLK appears.<br />
2Press CLK and then press TIME to set<br />
the clock.<br />
60<br />
En
Other Functions<br />
Section<br />
13<br />
3 Press JUST to match the time to a time<br />
signal.<br />
If the minute is 00 29, the minutes are<br />
rounded down. (e.g., 10:18 becomes 10:00.)<br />
If the minute is 30 59, the minutes are<br />
rounded up. (e.g., 10:36 becomes 11:00.)<br />
Note<br />
During date adjustment, JUST is not displayed.<br />
Setting the time signal display<br />
You can display the time signal display, which<br />
announces every full hour with a sound and<br />
ananimation.<br />
1 Press NEXT to display CLK.<br />
Press NEXT until CLK appears.<br />
2Press CLK and then press T.SGNL to select<br />
the time signal display.<br />
Changing the display form<br />
This unit is equipped with two basic displays.<br />
You can select the desired display.<br />
1 Press NEXT to display C.MENU.<br />
Press NEXT until C.MENU appears.<br />
2Press C.MENU and then press D.FORM<br />
to select the display form mode.<br />
3 Press FORM1, FORM2or FORM3 to select<br />
the desired display form.<br />
Adjusting the brightness<br />
Display brightness adjustment lets you adjust<br />
the display for easier viewing when lighting<br />
conditions change.<br />
1 Press NEXT to display C.MENU.<br />
Press NEXT until C.MENU appears.<br />
2Press C.MENU and then press BRGHT to<br />
select the brightness mode.<br />
3 Press c or d to adjust the brightness<br />
level.<br />
Each press of c or d increases or decreases<br />
the brightness level. 00 28 is displayed as<br />
the level is increased or decreased.<br />
Switching the dimmer setting<br />
To prevent the display from being too bright at<br />
night, the display is automatically dimmed<br />
when the cars headlights are turned on. You<br />
can switch dimmer on or off.<br />
1 Press NEXT to display C.MENU.<br />
Press NEXT until C.MENU appears.<br />
2Press C.MENU and then press DMMER<br />
to select the dimmer mode.<br />
3 Press DMMER to turn the dimmer on.<br />
ON appears in the display.<br />
# To turn the dimmer off, press DMMER<br />
again.<br />
English<br />
Setting the flash light screen<br />
There are four stored flash light screen to select<br />
from.<br />
En 61
Section<br />
13<br />
Other Functions<br />
1 Press NEXT to display C.MENU.<br />
Press NEXT until C.MENU appears.<br />
2Press C.MENU and then press FLASH to<br />
select the flash light select mode.<br />
3 Press any of the buttons TYPE1 TYPE4<br />
or ALL to select the desired type.<br />
When you press ALL, you can display all types<br />
sequentially.<br />
# To turn the flash light off, press OFF.<br />
Selecting the wall paper<br />
pattern<br />
When you select display form 2 (FORM2),<br />
there are three patterns to select from.<br />
1 Press NEXT to display C.MENU.<br />
Press NEXT until C.MENU appears.<br />
2Press C.MENU and then press PTRN to<br />
select the wall paper pattern mode.<br />
3 Press A, B or C to select the desired<br />
pattern.<br />
Switching the font<br />
When you select display form 3 (FORM3),<br />
there are three kinds of fonts to select from.<br />
1 Press NEXT to display C.MENU.<br />
Press NEXT until C.MENU appears.<br />
2Press C.MENU and then press FONT to<br />
select the font select mode.<br />
3 Press A, B or C to select the desired<br />
font.<br />
Using different<br />
entertainment displays<br />
You can enjoy entertainment displays while listening<br />
to each sound source.<br />
Setting the movie screen<br />
There are three stored movie screens to select<br />
from.<br />
1 Press ENT and then press MOVIE to select<br />
the movie mode.<br />
2Press any of the buttons MOVIE1 <br />
MOVIE3 or ALL to select the desired movie.<br />
When you press ALL, you can display movies<br />
1 to 3 sequentially.<br />
Note<br />
The movie screen will disappear temporarily<br />
when you perform other operations, but will be<br />
displayed again after three seconds.<br />
Setting the level indicator display<br />
There are three stored level indicator displays<br />
to select from.<br />
1 Press ENT and then press S/A to select<br />
the level indicator mode.<br />
2Press any of the buttons S/A1 S/A3 to<br />
select the desired level indicator.<br />
Note<br />
The level indicator display will disappear temporarily<br />
when you perform other operations, but will<br />
be displayed again after three seconds.<br />
62<br />
En
Other Functions<br />
Section<br />
13<br />
Setting the ASL display<br />
You can display the ASL effect level. (Refer to<br />
page 53.)<br />
% Press ENT and then press ASL to select<br />
the ASL display.<br />
Note<br />
The ASL display will disappear temporarily when<br />
you perform other operations, but will be displayed<br />
again after three seconds<br />
Setting the background visual<br />
When you select display form 1 (FORM1),<br />
there are five stored background visuals to select<br />
from.<br />
! When you select FORM2, BG is not displayed<br />
and this mode is inactive.<br />
! When you select FORM3, the background<br />
visual cannot be changed.<br />
FORM1<br />
1 Press ENT and BG and then press BGV<br />
to select the background visual mode.<br />
2Press any of the buttons BGV1 BGV5<br />
to select the desired visual.<br />
1 Press ENT and BG and then press BGP<br />
to select the background still picture mode.<br />
2Press NEXT to switch between BGP1 <br />
BGP6 and BGP7 BGP12.<br />
3 Press any of the buttons BGP1 BGP6<br />
(or BGP7 BGP12) to select the desired picture.<br />
Canceling the entertainment<br />
display<br />
You can cancel the entertainment display (the<br />
movie screens, the level indicator displays,<br />
etc.).<br />
% Press ENT and then press OFF to cancel<br />
the entertainment display.<br />
Using the AUX source<br />
An IP-BUS-RCA Interconnector such as the<br />
CD-RB20/CD-RB10 (sold separately) lets you<br />
connect this unit to auxiliary equipment featuring<br />
RCA output. For more details, refer to<br />
the IP-BUS-RCA Interconnector owners manual.<br />
English<br />
FORM3<br />
% Press ENT and BGV to select the background<br />
visual.<br />
Setting the background still<br />
picture<br />
The background still pictures are only for the<br />
display form 1 (FORM1). There are 12 stored<br />
background still pictures to select from.<br />
! When you select FORM2 or FORM3, BG is<br />
not displayed and this mode is inactive.<br />
Selecting AUX as the source<br />
% Rotate SOURCE to select AUX as the<br />
source.<br />
Rotate SOURCE until AUX appears in the display.<br />
# If the auxiliary setting is not turned on, AUX<br />
cannot be selected. For more details, see Switching<br />
the auxiliary setting on page 57.<br />
En 63
Section<br />
13<br />
Other Functions<br />
Setting the AUX title<br />
The title displayed for the AUX source can be<br />
changed.<br />
1 Rotate SOURCE to select AUX as the<br />
source.<br />
Rotate SOURCE until AUX appears in the display.<br />
2Press FUNC and then press TTLin to select<br />
the AUX title input mode.<br />
Refer to Entering disc titles on page 36, and<br />
perform procedures 3 to 7 in the same way.<br />
Note<br />
Even if you do not press TTLin you can enter the<br />
title, but you will not be able to change the character<br />
types.<br />
64<br />
En
Additional Information<br />
Appendix<br />
Understanding built-in CD<br />
player error messages<br />
When problems occur during CD play an error<br />
message may appear on the display. If an<br />
error message appears on the display refer to<br />
the table below to see what the problem is and<br />
the suggested method of correcting the problem.<br />
If the error cannot be corrected, contact<br />
your dealer or your nearest <strong>Pioneer</strong> Service<br />
Center.<br />
Message Cause Action<br />
ERROR-11, 12, Dirty disc Clean disc.<br />
17, 30<br />
ERROR-11, 12,<br />
17, 30<br />
Scratched disc Replace disc.<br />
ERROR-10, 11,<br />
12, 17, 30, A0<br />
ERROR-22, 23<br />
ERROR-44<br />
Electrical or mechanical<br />
The CD format<br />
cannot be played<br />
back<br />
All tracks are<br />
skip tracks<br />
Turn the ignition<br />
ON and OFF, or<br />
switch to a different<br />
source, then<br />
back to the CD<br />
player.<br />
Replace disc.<br />
Replace disc.<br />
Message Cause Action<br />
Blank MD Blank disc is inserted.<br />
Replace disc.<br />
TEMP The temperature<br />
of this unit is outside<br />
of the normal<br />
operating<br />
range<br />
Wait until the<br />
units temperature<br />
returns to within<br />
normal operating<br />
limits.<br />
ERROR-11, 12, Dirty disc Clean disc.<br />
17, 30<br />
ERROR-11, 12,<br />
17, 30<br />
Scratched disc Replace disc.<br />
ERROR-01, 11,<br />
12, 17, 30, A0,<br />
A1<br />
ERROR-20, 21<br />
ERROR-20, 21,<br />
24<br />
ERROR-23<br />
ERROR-A1<br />
ERROR-<br />
Electrical or mechanical<br />
Track information<br />
cannot be read.<br />
There is something<br />
wrong with<br />
the MD.<br />
The MD contains<br />
recorded information<br />
other<br />
than music.<br />
Electrical or mechanical<br />
MD play not possible.<br />
Turn the ignition<br />
ON and OFF, or<br />
switch to a different<br />
source, then<br />
back to the MD<br />
player.<br />
Reload the MD.<br />
Replace disc.<br />
Replace disc.<br />
Press RESET.<br />
Replace disc, or<br />
press RESET.<br />
English<br />
Understanding built-in MD<br />
player error messages<br />
When problems occur during MD play an<br />
error message may appear on the display. If<br />
an error message appears on the display refer<br />
to the table below to see what the problem is<br />
and the suggested method of correcting the<br />
problem. If the error cannot be corrected, contact<br />
your dealer or your nearest <strong>Pioneer</strong> Service<br />
Center.<br />
Understanding auto TA and<br />
EQ error messages<br />
When correct measurement of car interior<br />
acoustic characteristics is not possible using<br />
the auto TA and EQ, an error message may appear<br />
on the display. If an error message appears<br />
on the display refer to the table below to<br />
see what the problem is and the suggested<br />
method of correcting the problem. After<br />
checking, try again.<br />
En 65
Appendix<br />
Additional Information<br />
Message Cause Action<br />
Error check<br />
MIC<br />
Error check<br />
front SP, Error<br />
check FL SP,<br />
Error check FR<br />
SP, Error check<br />
RL SP, Error<br />
check RR SP,<br />
Error check<br />
SW<br />
Error check<br />
noise<br />
A.TA&EQ unavailable<br />
Microphone is<br />
not connected.<br />
The microphone<br />
cannot pick up<br />
the measuring<br />
tone of any<br />
speaker.<br />
The surrounding<br />
noise level is too<br />
high.<br />
The operation<br />
mode set to NW<br />
mode.<br />
Plug the supplied<br />
microphone securely<br />
into the<br />
jack.<br />
! Confirm that the<br />
speakers are connected<br />
correctly.<br />
! Correct the input<br />
level setting of the<br />
power amp connected<br />
to the<br />
speakers.<br />
! Set the microphone<br />
correctly.<br />
! Stop your car in<br />
a place that is as<br />
quite as possible,<br />
and switch off the<br />
engine, air conditioner<br />
or heater.<br />
! Set the microphone<br />
correctly.<br />
The auto TA and<br />
EQ function does<br />
not work in NW<br />
mode.<br />
! Use only normal, round CDs. If you insert irregular,<br />
non-round, shaped CDs they may<br />
jam in the CD player or not play properly.<br />
! Check all CDs for cracks, scratches or<br />
warped discs before playing. CDs that have<br />
cracks, scratches or are warped may not<br />
play properly. Do not use such discs.<br />
! Avoid touching the recorded (non-printed<br />
side) surface when handling the disc.<br />
! Store discs in their cases when not in use.<br />
! Keep discs out of direct sunlight and do<br />
not expose the discs to high temperatures.<br />
! Do not attach labels, write on or apply chemicals<br />
to the surface of the discs.<br />
! To clean dirt from a CD, wipe the disc with<br />
a soft cloth outward from the center of the<br />
disc.<br />
CD player and care<br />
! Use only CDs that have either of the two<br />
Compact Disc Digital Audio marks as<br />
shown below.<br />
! If the heater is used in cold weather, moisture<br />
may form on components inside the<br />
CD player. Condensation may cause the CD<br />
player to not operate properly. If you think<br />
that condensation is a problem turn off the<br />
CD player for an hour or so to allow the CD<br />
player to dry out and wipe any damp discs<br />
with a soft cloth to remove the moisture.<br />
! Road shocks may interrupt CD playback.<br />
66<br />
En
Additional Information<br />
Appendix<br />
CD-R/CD-RW discs<br />
! When CD-R/CD-RW discs are used, playback<br />
is possible only for discs which have<br />
been finalized.<br />
! It may not be possible to play back CD-R/<br />
CD-RW discs recorded on a music CD recorder<br />
or a personal computer because of<br />
disc characteristics, scratches or dirt on<br />
the disc, or dirt, condensation, etc. on the<br />
lens of this unit.<br />
! Playback of discs recorded on a personal<br />
computer may not be possible depending<br />
on the application settings and the environment.<br />
Please record with the correct format.<br />
(For details, contact the manufacturer<br />
of the application.)<br />
! Playback of CD-R/CD-RW discs may become<br />
impossible in case of direct exposure<br />
to sunlight, high temperatures, or the storage<br />
conditions in the car.<br />
! Titles and other text information recorded<br />
on a CD-R/CD-RW disc may not be displayed<br />
by this unit (in the case of audio<br />
data (CD-DA)).<br />
! This unit conforms to the track skip function<br />
of the CD-R/CD-RW disc. The tracks<br />
containing the track skip information are<br />
skipped automatically (in case of audio<br />
data (CD-DA)).<br />
! If you insert a CD-RW disc into this unit,<br />
time to playback will be longer than when<br />
you insert a conventional CD or CD-R disc.<br />
! Read the precautions with CD-R/CD-RW<br />
discs before using them.<br />
MP3 and WMA files<br />
! MP3 is short for MPEG Audio Layer 3 and<br />
refers to an audio compression technology<br />
standard.<br />
! WMA is short for Windows Media" Audio<br />
and refers to an audio compression technology<br />
that is developed by Microsoft Corporation.<br />
WMA data can be encoded by<br />
using Windows Media Player version 7, 7.1<br />
or Windows Media Player for Windows XP.<br />
! With some applications used to encode<br />
WMA files, this unit may not operate correctly.<br />
! With some applications used to encode<br />
WMA files, album names and other text information<br />
may not be correctly displayed.<br />
! This unit allows playback of MP3/WMA<br />
files on CD-ROM, CD-R and CD-RW discs.<br />
Disc recordings compatible with level 1<br />
and level 2 of ISO9660 and with the Romeo<br />
and Joliet file system can be played back.<br />
! It is possible to play back multi-session<br />
compatible recorded discs.<br />
! MP3/WMA files are not compatible with<br />
packet write data transfer.<br />
! The max. number of characters which can<br />
be displayed for a file name, including the<br />
extension (.mp3 or .wma), is 32 characters<br />
from the first character.<br />
! The max. number of characters which can<br />
be displayed for a folder name is 32 characters.<br />
! In case of files recorded according to the<br />
Romeo and Joliet file system, only the first<br />
32 characters can be displayed.<br />
! When playing discs with MP3/WMA files<br />
and audio data (CD-DA) such as CD-EXTRA<br />
and MIXED-MODE CDs, both types can be<br />
played only by switching mode between<br />
MP3/WMA and CD-DA.<br />
! The folder selection sequence for playback<br />
and other operations becomes the writing<br />
sequence used by the writing software. For<br />
this reason, the expected sequence at the<br />
time of playback may not coincide with the<br />
actual playback sequence. However, there<br />
also is some writing software which permits<br />
setting of the playback order.<br />
English<br />
En 67
Appendix<br />
Additional Information<br />
Important<br />
! When naming an MP3 or a WMA file, add the<br />
corresponding filename extension (.mp3 or<br />
.wma).<br />
! This unit plays back files with the filename extension<br />
(.mp3 or .wma) as an MP3 or a WMA<br />
file. To prevent noise and malfunctions, do not<br />
use these extensions for files other than MP3<br />
or WMA files.<br />
About folders and MP3/<br />
WMA files<br />
! An outline of a CD-ROM with MP3/WMA<br />
files on it is shown below. Subfolders are<br />
shown as folders in the folder currently selected.<br />
MP3 additional information<br />
! Files are compatible with the ID3 Tag Ver.<br />
1.0 and Ver. 1.1 formats for display of<br />
album (disc title), track (track title) and artist<br />
(track artist).<br />
! Only when MP3 files of 32, 44.1 and 48 kHz<br />
frequencies are played back, the emphasis<br />
function is valid. (16, 22.05, 24, 32, 44.1, 48<br />
kHz sampling frequencies can be played<br />
back.)<br />
! There is no m3u playlist compatibility.<br />
! There is no compatibility with the MP3i<br />
(MP3 interactive) or mp3 PRO format.<br />
! The sound quality of MP3 files generally becomes<br />
better with increasing bit rate. This<br />
unit can play recordings with bit rates from<br />
8 kbps to 320 kbps, but in order to be able<br />
to enjoy a certain sound quality, it is recommended<br />
to use only discs recorded with a<br />
bit rate of at least 128 kbps.<br />
1 2<br />
1 First level<br />
3<br />
WMA additional information<br />
! Only when WMA files of 32, 44.1 and 48<br />
kHz frequencies are played back.<br />
! The sound quality of WMA files generally<br />
becomes better with increasing bit rate.<br />
This unit can play recordings with bit rates<br />
from 48 kbps to 192 kbps, but in order to be<br />
able to enjoy a certain sound quality, it is<br />
recommended to use discs recorded with a<br />
higher bit rate.<br />
2 Second level<br />
3 Third level<br />
Notes<br />
! This unit assigns folder numbers. The user<br />
can not assign folder numbers.<br />
! It is not possible to check folders that do not<br />
include MP3/WMA files. (These folders will be<br />
skipped without displaying the folder number.)<br />
68<br />
En
Additional Information<br />
Appendix<br />
! MP3/WMA files in up to 8 tiers of folders can<br />
be played back. However, there is a delay in<br />
the start of playback on discs with numerous<br />
tiers. For this reason we recommend creating<br />
discs with no more than 2 tiers.<br />
! It is possible to play back up to 253 items from<br />
folder on one disc.<br />
! Do not use MDs with labels that are not affixed<br />
correctly. Labels like this may catch<br />
on something, preventing removal of the<br />
MD. Before using an MD, remove the label<br />
if it is not correctly affixed, and replace it<br />
with a new label.<br />
English<br />
MD player and care<br />
! Use MDs bearing this mark. Using a disc<br />
other than a music MD may result in damage<br />
to this unit.<br />
! Do not open the MD shutter by hand. Forcing<br />
it open may result in damage.<br />
Shutter<br />
! Keep MDs out of direct sunlight and high<br />
temperatures.<br />
! If the surface of an MD cartridge is dirty,<br />
wipe it gently with a clean, soft cloth.<br />
! Do not apply benzene, thinner or other volatile<br />
liquids to MDs.<br />
! When using an MD cleaning disc, be sure<br />
to read the discs instructions carefully.<br />
Cleaning discs may result in damage to<br />
this unit.<br />
! When its cold, if you start playing an MD<br />
immediately after switching the heater in a<br />
room on, condensation on the optical lens<br />
inside the player or on the MD may prevent<br />
normal play. If this happens, turn off the<br />
player for about an hour to allow the condensation<br />
to evaporate, and wipe damp<br />
MD cartridge surfaces with a soft cloth.<br />
! Be sure to stick labels supplied with MDs<br />
in the specified location. Failing to do this,<br />
or sticking one label on top of another may<br />
make it impossible for the MD to be removed.<br />
En 69
Appendix<br />
Additional Information<br />
DSP adjustment value record sheet<br />
3-way network mode<br />
Network setting<br />
Filter L LPF M HPF M LPF H HPF<br />
Cutoff frequency<br />
Level<br />
Slope<br />
Phase<br />
Time alignment setting<br />
Speaker unit High Left High Right Mid Left Mid Right Low Left Low Right<br />
Distance<br />
Standard mode<br />
Network setting<br />
Filter SW1 (SW2) HPF F HPF R<br />
Cutoff frequency<br />
Level <br />
Phase <br />
Time alignment setting<br />
Speaker unit Front Left Front Right Rear Left Rear Right Sub. W<br />
Distance<br />
Equalizer curves<br />
CUSTOM2 curve<br />
Frequency 50 80 125 200 315 500 800 1.25k 2k 3.15k 5k 8k 12.5k<br />
Level<br />
70<br />
En
Additional Information<br />
Appendix<br />
Terms<br />
Bit rate<br />
This expresses data volume per second, or bps<br />
units (bits per second). The higher the rate,<br />
the more information is available to reproduce<br />
the sound. Using the same encoding method<br />
(such as MP3), the higher the rate, the better<br />
the sound.<br />
ID3 tag<br />
This is a method of embedding track-related<br />
information in a MP3 file. This embedded information<br />
can include the track title, the artists<br />
name, the album title, the music genre,<br />
the year of production, comments and other<br />
data. The contents can be freely edited using<br />
software with ID3 Tag editing functions.<br />
Although the tags are restricted to the number<br />
of characters, the information can be viewed<br />
when the track is played back.<br />
ISO9660 format<br />
This is the international standard for the format<br />
logic of CD-ROM folders and files. For the<br />
ISO9660 format, there are regulations for the<br />
following two levels.<br />
Level 1:<br />
The file name is in 8.3 format (the name consists<br />
of up to 8 characters, half-byte English<br />
capital letters and half-byte numerals and the<br />
_ sign, with a file-extension of three characters.)<br />
Level 2:<br />
The file name can have up to 31 characters (including<br />
the separation mark . and a file extension).<br />
Each folder contains less than 8<br />
hierarchies.<br />
Extended formats<br />
Joliet:<br />
File names can have up to 64 characters.<br />
Romeo:<br />
File names can have up to 128 characters.<br />
m3u<br />
Playlists created using the WINAMP software<br />
have a playlist file extension (.m3u).<br />
MP3<br />
MP3 is short for MPEG Audio Layer 3. It is an<br />
audio compression standard set by a working<br />
group (MPEG) of the ISO (International Standards<br />
Organization). MP3 is able to compress<br />
audio data to about 1/10th the level of a conventional<br />
disc.<br />
Multi-session<br />
Multi-session is a recording method that allows<br />
additional data to be recorded later.<br />
When recording data on a CD-ROM, CD-R or<br />
CD-RW, etc., all data from beginning to end is<br />
treated as a single unit or session. Multi-session<br />
is a method of recording more than 2 sessions<br />
in one disc.<br />
Packet write<br />
This is a general term for a method of writing<br />
on CD-R, etc. at the time required for a file,<br />
just as is done with files on floppy or hard<br />
discs.<br />
VBR<br />
VBR is short for variable bit rate. Generally<br />
speaking CBR (constant bit rate) is more<br />
widely used. But to flexibly adjust the bit rate<br />
according to the needs of audio compression,<br />
it is possible to achieve compression priorities<br />
sound quality.<br />
WMA<br />
WMA is short for Windows Media" Audio and<br />
refers to an audio compression technology<br />
that is developed by Microsoft Corporation.<br />
WMA data can be encoded by using Windows<br />
Media Player version 7, 7.1 or Windows Media<br />
Player for Windows XP.<br />
Microsoft, Windows Media, and the Windows<br />
logo are trademarks, or registered trademarks<br />
of Microsoft Corporation in the United States<br />
and/or other countries.<br />
English<br />
En 71
Appendix<br />
Additional Information<br />
Specifications<br />
General<br />
Rated power source ............... 14.4 V DC<br />
(allowable voltage range:<br />
12.0 14.4 V DC)<br />
Grounding system ................... Negative type<br />
Max. current consumption<br />
..................................................... 10.0 A<br />
Dimensions (W × H × D):<br />
Chassis ............................... 178 × 100 × 160 mm<br />
Nose ..................................... 169 × 94 × 17 mm<br />
Weight .......................................... 2.5 kg<br />
Audio/DSP<br />
Continuous power output is 22 W per channel minimum<br />
into 4 ohms, both channels driven 50 to 15,000 Hz with<br />
no more than 5% THD.<br />
Maximum power output ....... 50 W × 4<br />
Load impedance ...................... 4 W (4 8 W allowable)<br />
Preout max output level/output impedance<br />
..................................................... 1.8 V/1 kW<br />
Loudness contour ................... +10 dB (100 Hz), +6.5 dB<br />
(10 kHz) (volume: 30 dB)<br />
Equalizer (13-Band Graphic Equalizer):<br />
Frequency .......................... 50/80/125/200/315/500/800<br />
Hz<br />
1.25/2/3.15/5/8/12.5 kHz<br />
Equalization range ........ ±12 dB<br />
Auto equalizer (just for standard mode):<br />
Frequency .......................... 50/80/125/200/315/500/800<br />
Hz<br />
1.25/2/3.15/5/8/12.5 kHz<br />
Equalization range ........ +6 12 dB<br />
Network (standard mode):<br />
HPF (Front/rear):<br />
Frequency ................ 50/63/80/100/125 Hz<br />
Slope .......................... 12 dB/oct<br />
Subwoofer:<br />
Frequency ................ 50/63/80/100/125 Hz<br />
Slope .......................... 18 dB/oct<br />
Gain ............................ +6 24 dB<br />
Phase ........................ Normal/Reverse<br />
Network (3-way network mode):<br />
High HPF:<br />
Frequency ................ 1.6/2/2.5/3.15/4/5/6.3/8/10/<br />
12.5/16 kHz<br />
Slope .......................... 6/12 dB/oct<br />
Gain ............................ 0 24 dB/Mute<br />
Phase ........................ Normal/Reverse<br />
Mid HPF/LPF:<br />
Frequency (LPF) ... 1.6/2/2.5/3.15/4/5/6.3/8/10/<br />
12.5/16 kHz<br />
Frequency (HPF)<br />
................................. 31.5/40/50/63/80/100/125/<br />
160/200 Hz<br />
Slope (LPF) ............. 0 (Pass)/6/12 dB/oct<br />
Slope (HPF) ............ 0 (Pass)/6/12/18 dB/oct<br />
Gain ............................ 0 24 dB/Mute<br />
Phase ........................ Normal/Reverse<br />
Low LPF:<br />
Frequency ................ 31.5/40/50/63/80/100/125/<br />
160/200 Hz<br />
Slope .......................... 6/12/18 dB/oct<br />
Gain ............................ +6 24 dB/Mute<br />
Phase ........................ Normal/Reverse<br />
CD player<br />
System .......................................... Compact disc audio system<br />
Usable discs .............................. Compact disc<br />
Signal format:<br />
Sampling frequency ..... 44.1 kHz<br />
Number of quantization bits<br />
........................................... 16; linear<br />
Frequency characteristics ... 5 20,000 Hz (±1 dB)<br />
Signal-to-noise ratio ............... 94 dB (1 kHz) (IEC-A network)<br />
Dynamic range ......................... 92 dB (1 kHz)<br />
Number of channels .............. 2 (stereo)<br />
MP3 decoding format ........... MPEG-1 & 2 Audio Layer 3<br />
WMA decoding format ......... Ver. 7 & 8<br />
MD player<br />
System .......................................... Mini disc digital audio system<br />
Usable discs .............................. Mini disc<br />
Signal format:<br />
Sampling frequency ..... 44.1 kHz<br />
Number of quantization bits<br />
........................................... 16; linear<br />
Frequency characteristics ... 20 20,000 Hz (±1 dB)<br />
Signal-to-noise ratio ............... 90 dB (1 kHz) (IEC-A network)<br />
Dynamic range ......................... 90 dB (1 kHz)<br />
Number of channels .............. 2 (stereo)<br />
FM tuner<br />
Frequency range ...................... 87.5 108.0 MHz<br />
Usable sensitivity ..................... 8 dBf (0.7 µV/75 W, mono,<br />
S/N: 30 dB)<br />
50 dB quieting sensitivity ..... 10 dBf (0.9 µV/75 W, mono)<br />
72<br />
En
Additional Information<br />
Appendix<br />
Signal-to-noise ratio ............... 75 dB (IEC-A network)<br />
Distortion ..................................... 0.3 % (at 65 dBf, 1 kHz,<br />
stereo)<br />
0.1 % (at 65 dBf, 1 kHz,<br />
mono)<br />
Frequency response ............... 30 15,000 Hz (±3 dB)<br />
Stereo separation .................... 45 dB (at 65 dBf, 1 kHz)<br />
English<br />
AM tuner<br />
Frequency range ...................... 531 1,602 kHz (9 kHz)<br />
530 1,640 kHz (10 kHz)<br />
Usable sensitivity ..................... 18 µV (S/N: 20 dB)<br />
Signal-to-noise ratio ............... 65 dB (IEC-A network)<br />
Infrared remote control<br />
Wavelength ................................. 940 nm ±50 nm<br />
Output ........................................... typ; 12 mw/sr per Infrared<br />
LED<br />
Notes<br />
! US and foreign patents licensed from Dolby<br />
Laboratories.<br />
! Specifications and the design are subject to<br />
possible modifications without notice due to<br />
improvements.<br />
En 73
©(<br />
t$ÈD ˆD l…t üT ¬Ü½Èä.<br />
t ˆX ,x ¬©D t t ¬© $…| 8XŒ }´ üíÜ$. ¬© $<br />
…| ä }@ ÄÐÄ tÄX 8p| t H\ ¥ŒÐ ô XíÜ$.<br />
¬©X0 Ð<br />
t ¬© $…Ð Xì 77<br />
üX ¬m 77<br />
0¥ 77<br />
WMAÐ Xì 78<br />
DSP $ ¨Ü\ XX0 78<br />
Ètl\\8 ¬KX0 78<br />
p¨ ¨ÜÐ Xì 79<br />
í)¥ ¨Ü 79<br />
0¥ p¨ 79<br />
0ø ¤tÐ Xì 79<br />
Œ¸ ¤ ‘Ù 80<br />
ä 0¥ „¼X 0¥ XX0 80<br />
ä 0¥ „¼ ‘ÙX 80<br />
BAND „¼ü BACK „¼X (t<br />
81<br />
¤ H´ \Ü 82<br />
¤t Ä $ 82<br />
¬¨è ¬© ¬ 83<br />
00¬ ½…X0 83<br />
00¬ P´X0 83<br />
¬¨è ¬©X0 84<br />
FUNCTION „¼ AUDIO „<br />
¼ 84<br />
8€ …m<br />
äÜ Û 85<br />
¬¨è 86<br />
Ð 0/D0<br />
00 Ð 0 87<br />
LÐ ÝX0 87<br />
00 Ð D0 87<br />
œ<br />
|$ èX0 88<br />
œ à ¬© )• Œ 88<br />
)¡ ü ¥ ÝX0 89<br />
\ à8Ð \ ü œÝ 89<br />
¥ \ | ¡œX” )¡m ü<br />
¥X0 89<br />
¬ $ D ©]Ð )¡m ÝX<br />
0 90<br />
´¥ CD t´<br />
CD ¬ÝX0 91<br />
à ´¥ CD t´ ‘Ù )• Œ 92<br />
¬Ý õX0 92<br />
4‘ \ ¸ ¬ÝX0 92<br />
CDX ¸ ¤”X0 92<br />
¸ ©©]Ð ¸ Ý 93<br />
CD ¬Ý |Ü ÀX0 93<br />
€É )• ÝX0 93<br />
¬ ¤lÐ ä 10X ¸Èä €ÉX<br />
0 94<br />
¤l © …%X0 94<br />
¤l © 0¥ ¬©X0 94<br />
MP3/WMA t´<br />
MP3/WMA ¬ÝX0 96<br />
à ´¥ CD t´(MP3/WMA) ‘Ù<br />
)• Œ 97<br />
¬Ý õX0 97<br />
4‘ \ ¸ ¬ÝX0 98<br />
ôT@ ¸ ¤” 98<br />
MP3/WMA ¬Ý |Ü ÀX0 99<br />
ôT ©©]Ð ôT ÝX0 99<br />
€É )• ÝX0 99<br />
¬ ôTÐ ä 10X ¸Èä €ÉX<br />
0 100<br />
Üø ¤t XX0 100<br />
¤l © 0¥ ¬©X0 100<br />
´¥ MD t´<br />
MD ¬ÝX0 102<br />
à ´¥ MD t´ ‘Ù )• Œ<br />
103<br />
¬Ý õX0 103<br />
øù T)À J@ MD 103<br />
øù T) MD 103<br />
4‘ \ ¸ ¬ÝX0 103<br />
MDX ¸ ¤”X0 104<br />
¸ ©©]Ð ¸ Ý 104<br />
74<br />
Ko
©(<br />
øù ©©]Ð ¤l ÝX0 104<br />
MD ¬Ý |Ü ÀX0 105<br />
¤l © 0¥ ¬©X0 105<br />
@ð CD t´<br />
CD ¬ÝX0 106<br />
¤l 50 ¥ ©ÉX @ð CD t´ 106<br />
¤l Á ÝX0 106<br />
à @ð CD t´ ‘Ù )• Œ 107<br />
¬Ý õX0 107<br />
4‘ \ ¸ ¬ÝX0 107<br />
CD@ ¸ ¤” 108<br />
¸ ©©]Ð ¸ Ý 108<br />
¤l ©©]Ð ¤l ÝX0 109<br />
CD ¬Ý |Ü ÀX0 109<br />
ITS ¬Ý ©] ¬©X0 109<br />
ITS \ø˜
©(<br />
Ù TA EQ( Ù Ü , Ù t<br />
|t ) 128<br />
Ù TA EQ 0¥D ‰X0 <br />
Ð 128<br />
Ù TA EQ ‰X0 129<br />
0 $<br />
0 $pX0 131<br />
í)¥ ¨Ü ¬©X0 131<br />
0¥ p¨ ¬©X0 131<br />
ôp $X 131<br />
À8 Ä 0¥ ÝX0 132<br />
T LŒp/Ä XX0 132<br />
FM œÝ © $X0 132<br />
AM œÝ © $X0 133<br />
0À 0¥<br />
üh Ä 134<br />
ÜÄ ¤t $X0 134<br />
ÜÄ ¤t ‘ÙXp˜ èX<br />
0 134<br />
Ü $X0 134<br />
ÜÄ $X0 134<br />
ÜD Ü à8Ð Qܤ0 134<br />
Ü à8 ¤t $X0 135<br />
¤t Ý À½X0 135<br />
Ä pX0 135<br />
0 p $ XX0 135<br />
˜Ü |t¸ Tt $X0 136<br />
0½ (4 Ý 136<br />
4 XX0 136<br />
ä‘\ Ô0Lx
¬©X0 Ð<br />
¥<br />
01<br />
t ¬© $…Ð<br />
Xì<br />
t 00” ð´œ à ¥%ü 1¥D õX<br />
” Î@ 0¥äD ø ¹Õ
¥<br />
01<br />
¬©X0 Ð<br />
WMAÐ<br />
Xì<br />
½à<br />
t 00Ð 3èt $¸Ìl ¨Ü© ¤
¬©X0 Ð<br />
¥<br />
01<br />
p¨ ¨ÜÐ<br />
Xì<br />
t 00” P À p¨¨Ü| õiÈä.<br />
X˜” í)¥ ¨Ütp äx X˜” 0¥ p<br />
¨¨Ü…Èä.<br />
! LÐt ¼8 ˆät 0¥ ¨Ü| ‘ÙÜ´<br />
¥<br />
01<br />
¬©X0 Ð<br />
Œ¸ ¤ ‘Ù<br />
Œ¸ ¤ ‘Ù@ \ „¼X 0¥t TtÐ <br />
¤t” \ ì|À” ƒD XøiÈ<br />
ä. ä 0¥ „¼ä@ Œ¸ ¤ ‘ÙD <br />
õiÈä. ‰, t „¼äÐ Xt ‰” 0<br />
¥ä@ Ý tù 0¥ ” $Ð 0| ì<br />
|ÀŒ )Èä.<br />
0¥ t„<br />
ä 0¥ „¼<br />
t ¬© $…Ð Ü $…@ FORM1 <br />
¤tÐ 0iÈä. FORM2 ”<br />
FORM3D ݈ät ä 0¥ „¼ |€<br />
¬© $…Ð \Ü ƒü” ä| Ä ˆ<br />
µÈä.<br />
”<br />
t ¬© $…Дä 0¥ „¼D ¬©X<br />
” ‘ÙÐ t ¤t” 0¥@ 0¥<br />
„¼X t„
¬©X0 Ð<br />
¥<br />
01<br />
4 4‘ ¬ÝD ‘ÙX$t RDMD ì<br />
üíÜ$.<br />
\Üñt ÑÈä.<br />
# 4‘ ¬ÝD èX$t RDMD äÜ ì<br />
üíÜ$. \Üñt ¼ÑÈä.<br />
\<br />
5 0¥ TtÐ ˜ $t BACKD ì ü<br />
íÜ$.<br />
t 0¥ TtÐ ˜$t ä 0¥ „¼X 0<br />
¥Ä ÙÜÐ À½)Èä.<br />
8à<br />
! 4‘ ¨ÜÐ a ” b| ì 4‘<br />
¬ÝD ‘Ù ” è` ˆµÈä.<br />
! 30 tÁ tù 0¥D ¬©XÀ J
¥<br />
01<br />
¬©X0 Ð<br />
¤t (. ´¥ CD t´)<br />
+ ” ¬X Tt ¨D \ÜiÈä.<br />
¤ H´ \Ü<br />
t 00X ¤tД ¤ H´ \Ü <br />
õ)Èä. tƒ@ ¬© a/b/c/d „¼<br />
´ \ ƒD ¬©` ˆ”À \ÜiÈä.<br />
\ 0¥ Tt, $$ Tt ” 0À Tt<br />
Ð 0¥D ‘Ùܤp˜ èܤà õ<br />
ÝD XXp äx ‘ÙD ‰X0 t<br />
a/b/c/d „¼ ´¤ ƒD ¬©` ˆ”<br />
À }Œ L ˆÄ] t Èä.<br />
8à<br />
t ¬© $…Д ¨ÜÐ \ ‘Ù@ ü<br />
\ ä 0¥ „¼D µt $…)Èä. øì˜ <br />
¨ÜÐ ¤ H´ \ÜÐ ˆt ä´ TDL ¨Ü<br />
| ‘Ùܤ0 t a/b/c/d| ¬©` Ä<br />
ˆµÈä.<br />
¤t Ä $<br />
T }Œ ¬©X0 t t ( Ä| p<br />
` ˆµÈä.<br />
¤ H´ \Ü<br />
82<br />
Ko
¬©X0 Ð<br />
¥<br />
01<br />
½à<br />
! t (D ô´ T D ¬©XÀ ÈíÜ$.<br />
t (D ô´ Pt ¬à ݈D L €<br />
ÁD …D ˆµÈä.<br />
! t (D ôp˜ ëD L t (Ð<br />
}t |À JÄ] üXXíÜ$.<br />
¬¨è ¬© ¬<br />
00¬ ½…X0<br />
´ ¬¨è ·tX ä„| ôà ‘ù(+)ü<br />
Lù(-)Ð Þ° U\ )¥
¥<br />
01<br />
¬©X0 Ð<br />
!
8€ …m<br />
¥<br />
02<br />
2<br />
1<br />
3<br />
4<br />
5<br />
6<br />
\<br />
7 8 9 a b<br />
äÜ<br />
Û<br />
1 ANGLE „¼<br />
¤t Ä| À½` L ì üíÜ<br />
$.<br />
2 ä 0¥ „¼<br />
Ý 0¥t˜ $Ð 0| ì| ÑÈä.<br />
3 CD EJECT „¼<br />
´¥ CD t´Ð CD| ¼¼ L ì<br />
üíÜ$.<br />
4 MD EJECT „¼<br />
´¥ MD t´Ð MD| ¼¼ L ì<br />
üíÜ$.<br />
5 RESET „¼<br />
Ètl\\8| ¬K` L ì üíÜ<br />
$.<br />
6 NEXT „¼<br />
ä 0¥ „¼X 0¥äD XX0 t<br />
ì üíÜ$.<br />
8 SOURCE @ 0<br />
t 00” LÐD ÝXt ÑÈä.<br />
SOURCE| tt e ½
¥<br />
02<br />
8€ …m<br />
c<br />
b<br />
9<br />
e<br />
g<br />
f<br />
d<br />
¬¨è<br />
¬¨è ‘Ù@ tˆX „¼D ¬©` L@<br />
Ù|iÈä.<br />
c ATT „¼<br />
} 90%\ üh ¨D à XŒ ®œ L <br />
ì üíÜ$. \ ˆ T tt И üh <br />
¨\ ÌDÈä.<br />
d VOLUME „¼<br />
ühD ’tp˜®œ L ì üíÜ$.<br />
e FUNCTION „¼<br />
ìì À 0¥D Ý` L ì üíÜ$.<br />
f AUDIO „¼<br />
ä‘\ ¬´Ü ˆÈ ´| Ý` L ¬©<br />
iÈä.<br />
g SOURCE „¼<br />
t 00” LÐD ÝXt ÑÈä. ¬©<br />
¥\ ¨à LÐäD (@\ ©X0 <br />
t ì üíÜ$.<br />
8à<br />
BAND| x ÁÜÐ ¬¨èX FUNCTIOND<br />
ÙÜÐ tt ¬¨èt \ ‘ÙXÀ JD<br />
ˆµÈä. t $D èŒX$t BAND| <br />
x ÁÜÐ ¬¨èX AUDIO| ÙÜÐ tt<br />
t $
Ð 0/D0<br />
¥<br />
03<br />
00 Ð 0<br />
% 00| 0 t äÜ ÛX SOURCE|<br />
ŒÜ üíÜ$.<br />
LÐD ÝXt 00X Ðt ÑÈä.<br />
# ¬¨èD ¬©` L” 00X ÐD 0 <br />
t SOURCE| ì üíÜ$.<br />
LÐ<br />
ÝX0<br />
è` LÐD Ý` ˆµÈä. ´¥ CD<br />
t´\ XX$t t 00Ð CD| ½…<br />
iÈä (91 ˜tÀ| 8pt üíÜ$). ´¥<br />
MD t´\ XX$t t 00Ð MD|<br />
½…iÈä (102 ˜tÀ| 8pt üíÜ$).<br />
% LÐD ÝX0 t äÜ ÛX<br />
SOURCE| ŒÜ üíÜ$.<br />
SOURCE| õt tt äLLÐät <br />
\ X)Èä:<br />
œTDDVD t´/ä DVD<br />
t´´¥ CD t´@ð CD <br />
t´´¥ MD t´x€ 00 1x€<br />
00 2AUXLÐ D0<br />
# ¬¨è ¬© Ü SOURCE| õt ì ü<br />
íÜ$.<br />
DXøiÈä. t 00\ P À x€ 00<br />
| ´` ˆµÈä. P À x€00<br />
ð° ½°, t 00Ð Ù
¥<br />
04<br />
œ<br />
|$ èX0<br />
1 2 3 4<br />
1 œ| ÝX$t SOURCE| ŒÜ<br />
üíÜ$.<br />
Tuner ¤t LLÀ SOURCE| Œ<br />
Ü üíÜ$.<br />
2 ¬´Ü ¨D pX$t VOLUMED ¬<br />
©iÈä.<br />
ühD ’tp˜®œ L ŒÜ üíÜ$.<br />
5<br />
FORM1<br />
äL ü@ |$| ‘ÙX0 \ 0ø<br />
x èÄä…Èä. t ˜tÀÐ œ ‘Ù )•<br />
t ôä 8XŒ $…´ ˆµÈä.<br />
”<br />
t 00| ø Àí, ø Àí, ¨ø ÀíÐ<br />
¬©` ½° AM œÝ èÄ| äÜ $t| i<br />
Èä (133 ˜tÀX AM œÝ © $X0|<br />
8pt üíÜ$).<br />
1 4Ü \Ü<br />
|$ AM ” FM ´ 4ÜÐ Þ°<br />
8 ˆ”À \ÜiÈä.<br />
2 LOC \Ü<br />
Àí )¡m €É œÝt äÜ<br />
Èä.<br />
L \Ü)<br />
3 ¬ $ ˆ8 \Ü<br />
Ý\ ¬ $ ´©t \Ü)Èä.<br />
4 ¤L$(5) \Ü<br />
Ý\ üX ¤L$ )¡ ì€| \<br />
ÜiÈä.<br />
5 ü \Ü<br />
œÐ $ ü| \ÜiÈä.<br />
3 4Ü| ÝX$t BAND| ì üíÜ<br />
$.<br />
ÐX” 4Ü ¤t LLÀ BAND|<br />
ì üíÜ$.FMX ½° FM-1, FM-2,<br />
FM-3 (@\ ¤tp,AMX ½°<br />
” AMt ¤t)Èä.<br />
4 Ù œÝD ä‰X$t c ” d| à<br />
XŒ ì üíÜ$.<br />
ü èÄD LLÀ œÐ<br />
ü| €ÉiÈä.<br />
# €É œÝD èŒX$t c ” d| à X<br />
Œ ì üíÜ$.<br />
# c ” d| Ä tt )¡ x )¡mD<br />
tø ˆµÈä. „¼D “
œ<br />
¥<br />
04<br />
)¡ ü ¥ ÝX0<br />
¬ $ œÝ „¼ 16D tt )¡mD 6<br />
LÀ }Œ 0µÜ¬ ˆà, ˜Ð tù<br />
„¼D ì )¡mD Ý` ˆµÈä.<br />
1 16D ¤t X0 t NEXT| ì<br />
üíÜ$.<br />
16t ¤tÐ ˜À LLÀ NEXT|<br />
ì üíÜ$.<br />
2 0µ ¥XÐ ¥` ü| >
¥<br />
04<br />
œ<br />
¬ $ D ©]Ð )¡m<br />
ÝX0<br />
¬ $ D ©]@ ¬ $ )¡m ©]<br />
D ôì üp t X˜| Ýt à` <br />
ˆÄ] iÈä.<br />
1 ¬ $ D ©] ¨Ü| ÝX$t<br />
FUNCD x ÄÐ chLIST| ì üíÜ$.<br />
2 ÐX” )¡m ü| ÝX$t 16<br />
„¼ X˜| ì üíÜ$.<br />
8à<br />
ÐX” )¡mD ÝX0 t c, d a| ¬<br />
©` Ä ˆµÈä.<br />
90<br />
Ko
´¥ CD t´<br />
¥<br />
05<br />
CD ¬ÝX0<br />
CD \) ¬o<br />
1 2<br />
FORM1<br />
äL@ ´¥ CD t´\ CD| ¬ÝX0<br />
t D”\ 0øx èÄä…Èä. ¤ ˜t<br />
ÀÐ CD ‘Ù )•D ôä 8XŒ $…i<br />
Èä.<br />
½à<br />
CD| ¼¸ Ä t (D ô´ T D\ ¬©X<br />
À ÈíÜ$. t (D ô´ Pt ¬à Ý<br />
ˆD L €ÁD …D ˆµÈä.<br />
1 ¬Ý Ü \Ü<br />
¬ ¬Ý x ¸X ¬Ý ½ü Üt \<br />
Ü)Èä.<br />
2 ¸ ˆ8 \Ü<br />
¬ ¬Ý x ¸t \Ü)Èä.<br />
1 CD EJECT| ì üíÜ$.<br />
CD \) ¬ot ˜À©Èä.<br />
# CD ½… Ä ´¥ CD t´| ÝX<br />
$t SOURCE| ŒÜ üíÜ$.<br />
2 CD| CD \) ¬oÐ #µÈä.<br />
t (t Ù
¥<br />
05<br />
´¥ CD t´<br />
! ´¥ CD t´ \ ‘ÙXÀ JD ½<br />
° ERROR-11 ñü @ Ðì TÜÀ ˜À<br />
ˆµÈä. 139 ˜tÀX ´¥ CD <br />
t´ Ðì TÜÀ| 8pt üíÜ$.<br />
! CD TEXT ¤l| ½…Xt ¤l/¸<br />
©t Ù
´¥ CD t´<br />
¥<br />
05<br />
2 ¤” ¬ÝD ‘ÙX$t SCAND ì ü<br />
íÜ$.<br />
\Üñt ÑÈä. ¸X ˜L 10 ¬<br />
Ý)Èä.<br />
3 ÐX” ¸| >@ Ä, ¤” ¬ÝD è<br />
X$t SCAND ì üíÜ$.<br />
\Üñt ¼ÑÈä. ¸t Ä ¬Ý)Èä.<br />
# ¤” ¨Ü Ù
¥<br />
05<br />
´¥ CD t´<br />
! FF/REV h¬ 0 0<br />
! Rough search ä 10 ¸Èä €ÉX<br />
0<br />
CD t´X 111 ˜tÀX ¤l © …<br />
%X0| 8pXíÜ$.<br />
8à<br />
¬ ¤lÐ ä 10X ¸<br />
Èä €ÉX0<br />
¤lÐ 10 tÁX ¸t ìh´ ˆ<<br />
t ä 10X ¸Èä €ÉD ‰` ˆµ<br />
Èä. ¤lÐ ¸t Ît ìh´ ˆät<br />
¬ÝD X$” ¸D µ
´¥ CD t´<br />
¥<br />
05<br />
FORM2<br />
„¼ ‘Ù<br />
TTL1<br />
TTL2<br />
TTL3<br />
SCROLL<br />
¤l ©ü ¸ ©D ¤ti<br />
Èä.<br />
¤l ©ü ¤l D𤸠t„D <br />
¤tiÈä.<br />
¸ ©ü ¸ D𤸠t„D ¤<br />
tiÈä.<br />
¤t ©D ¤ldiÈä.<br />
\<br />
8à<br />
! 8 tÁ tù 0¥D ¬©XÀ J
¥<br />
06<br />
MP3/WMA t´<br />
MP3/WMA ¬ÝX0<br />
1 2 3 4<br />
2 CD| CD-ROMÐ #µÈä.<br />
t (t Ù
MP3/WMA t´<br />
¥<br />
06<br />
8à<br />
! MP3/WMA |ü CD-EXTRA <br />
MIXED-MODE CD@ @ $$ pt0<br />
(CD-DA) © ¤l| ¬Ý` ½° P<br />
À ¨P ä MP3/WMA@ BAND ©<br />
CD-DA ¬t| Xh
¥<br />
06<br />
MP3/WMA t´<br />
1 õ ¨Ü| ÝX$t FUNCD ì ü<br />
íÜ$.<br />
2 õ ”| ÝX$t RPT| ì üí<br />
Ü$.<br />
ÐX” õ ” ¤tÐ ˜À L<br />
LÀ RPT| ì üíÜ$.<br />
! Folder repeat ¬ ôT õ<br />
! Track repeat À ¬ ¸Ì õ<br />
! Disc repeat ¨à ¸ õ<br />
8à<br />
! õ ¬Ý Ð äx ôT| ÝXt õ ¬<br />
Ý ” Disc repeat\ À½)Èä.<br />
! Track repeat Ð ¸ €É ” h¬ 0/<br />
0| ä‰Xt õ ”<br />
Folder repeat\ À½)Èä.<br />
! Folder repeat ÝÈD ½° tùX X<br />
ôT| ¬Ý` ƵÈä.<br />
! õ ¨Ü …Ì ½° 0ø ¤tÐ<br />
T.RPT(\ ¸ õ) ” FOLDER PRT(ôT<br />
õ) ˜À Ä ˆµÈä.<br />
4‘ \ ¸ ¬ÝX0<br />
4‘ ¬ÝD µt ¸D Folder repeat@<br />
Disc repeat P À õ ” ´Ð 4‘<br />
\ ¬Ý` ˆµÈä.<br />
1 õ ”| ÝiÈä.<br />
^ ˜tÀX ¬Ý õX0| 8pt üíÜ<br />
$.<br />
2 4‘ ¨Ü| ÝX$t FUNCD x<br />
ÄÐ RDMD ì üíÜ$.<br />
3 4‘ ¬ÝD ‘ÙX$t RDMD ì<br />
üíÜ$.<br />
\Üñt ÑÈä. ¸@ ^Ð Ý\<br />
Folder repeat ” Disc repeat ” ´Ð<br />
4‘ \ ¬Ý)Èä.<br />
# 4‘ ¬ÝD èX$t RDMD äÜ ì<br />
üíÜ$.<br />
8à<br />
4‘ ¬Ýt 8 ˆD L 4‘ ¨Ü …Ì<br />
t 0ø ¤tÐ RDMt ˜À©Èä.<br />
ôT@ ¸ ¤”<br />
Folder repeat| ¬©X” Ð Ý\ ôT<br />
X ¸X Ü‘ €„t } 10 ÙH ¬Ý)<br />
Èä. Disc repeat| ¬©X” Ð ôTX<br />
«ˆø ¸X Ü‘ €„t } 10 ÙH ¬Ý<br />
)Èä.<br />
1 õ ”| ÝiÈä.<br />
^ ˜tÀX ¬Ý õX0| 8pt üíÜ<br />
$.<br />
2 ¤” ¨Ü| ÝX$t FUNCD x Ä<br />
Ð SCAND ì üíÜ$.<br />
3 ¤” ¬ÝD ‘ÙX$t SCAND ì ü<br />
íÜ$.<br />
\Üñt ÑÈä. ¬ ôT ´ ¸X<br />
˜L 10 (” ôTX «ˆø ¸) „É<br />
t¬Ý)Èä.<br />
4 ÐX” ¸(” ôT)D >XD L ¤”<br />
D èX$t SCAND ì üíÜ$.<br />
\Üñt ¼ÑÈä. ¸(” ôT)t Ä<br />
¬Ý)Èä.<br />
# ¤” ¨Ü Ù
MP3/WMA t´<br />
¥<br />
06<br />
MP3/WMA ¬Ý |Ü ÀX0<br />
|Ü À 0¥
¥<br />
06<br />
MP3/WMA t´<br />
¬ ôTÐ ä 10X ¸È<br />
ä €ÉX0<br />
¬ ôTÐ 10 tÁX ¸t ìh´ ˆ<br />
MP3/WMA t´<br />
¥<br />
06<br />
„¼ ‘Ù<br />
ALB+T<br />
TR+ART<br />
SCROLL<br />
h” ©ü ¸ ©D ¤tiÈ<br />
ä.<br />
¸ ©ü ¸ D𤸠t„D ¤<br />
tiÈä.<br />
¤t ©D ¤ldiÈä.<br />
8à<br />
! 8 tÁ tù 0¥D ¬©XÀ J
¥<br />
07<br />
´¥ MD t´<br />
MD ¬ÝX0<br />
1 2 3 4<br />
2 MD| MD \) ¬oÐ #µÈä.<br />
t (t Ù
´¥ MD t´<br />
¥<br />
07<br />
! ¥Ü T) 0¥t © MD| ¬Ý`<br />
½° ×2 ” ×4 \Ü ¤t)Èä.<br />
! MD| ½…Xt ¤l(” øù) Ù<br />
¥<br />
07<br />
´¥ MD t´<br />
2 4‘ ¬ÝD ‘ÙX$t RDMD ì<br />
üíÜ$.<br />
\Üñt ÑÈä. ¸t 4‘ \ ¬<br />
Ý)Èä.<br />
# 4‘ ¬ÝD èX$t RDMD äÜ ì<br />
üíÜ$.<br />
8à<br />
4‘ ¬Ýt 8 ˆD L 4‘ ¨Ü …Ì<br />
t 0ø ¤tÐ RDMt ˜À©Èä.<br />
MDX ¸ ¤”X0<br />
¤” ¬Ý@ MDÐ ˆ” ¨à ¸Ð ˜L<br />
X 10 „ÉÌ ¬ÝiÈä.<br />
! øù T) MD| ¬Ý` L<br />
Group repeat| ¬©X” ÙHÐ Ý\<br />
øùX ¸X Ü‘ €„t } 10 Ù<br />
H ¬Ý)Èä. Disc repeat| ¬©X” <br />
Ð øùX «ø ¸X Ü‘ €„t }<br />
10 ÙH ¬Ý)Èä.<br />
1 ¤” ¨Ü| ÝX$t FUNCD x Ä<br />
Ð SCAND ì üíÜ$.<br />
2 ¤” ¬ÝD ‘ÙX$t SCAND ì ü<br />
íÜ$.<br />
\Üñt ÑÈä. ¸X ˜L 10 ¬<br />
Ý)Èä.<br />
# øù T) MD| ¬Ý` L ¬ øù(<br />
” øùX « ˆø ¸)X ¸Ð ^ €<br />
„t 10 ÙH ¬Ý)Èä.<br />
3 ÐX” ¸(” øù)D >XD L ¤”<br />
D èX$t SCAND ì üíÜ$.<br />
\Üñt ¼ÑÈä. ¸(” øù)t Ä<br />
¬Ý)Èä.<br />
# ¤” ¨Ü Ù
´¥ MD t´<br />
¥<br />
07<br />
2 ÐX” øù ©D ¤tX0 t<br />
NEXT| ì üíÜ$.<br />
ÐX” øù ©t ˜À LLÀ NEXT| <br />
ì üíÜ$.<br />
t \Ü”<br />
Ý øù HX ¸ | ˜ÀÅÈä.<br />
3 ÐX” øù ©D ÝX0 t tù<br />
+ „¼D ì üíÜ$.<br />
Ý\ €„t ¬Ý)Èä.<br />
8à<br />
ÐX” øù ©D Ý ¬ÝX0 t c, d<br />
a| ¬©` Ä ˆµÈä.<br />
MD ¬Ý |Ü ÀX0<br />
|Ü À 0¥
¥<br />
08<br />
@ð CD t´<br />
CD ¬ÝX0<br />
4 h¬ 0˜ 0| ä‰X$t c ”<br />
d| Ä ì üíÜ$.<br />
1 2<br />
3<br />
FORM1<br />
t 00| ¬©Xì Ää” @ð CD t<br />
´| ´` ˆµÈä.<br />
@ð CD t´\ CD| ¬ÝX” p D”<br />
\ 0ø …Èä. ¤ ˜tÀÐ CD ‘Ù<br />
)•D ôä 8XŒ $…iÈä.<br />
1 ¤l ˆ8 \Ü<br />
¬ ¬Ý x ¤l \Ü)Èä.<br />
2 ¸ ˆ8 \Ü<br />
¬ ¬Ý x ¸t \Ü)Èä.<br />
3 ¬Ý Ü \Ü<br />
¬ ¬Ý x ¸X ¬Ý ½ü Üt \<br />
Ü)Èä.<br />
1 @ð CD t´| ÝX$t<br />
SOURCE| ŒÜ üíÜ$.<br />
Multi-CD ¤t LLÀ SOURCE|<br />
ŒÜ üíÜ$.<br />
2 ¬´Ü ¨D pX$t VOLUMED ¬<br />
©iÈä.<br />
ühD ’tp˜®œ L ŒÜ üíÜ$.<br />
3 ¤l| ÝX$t a ” b| ì ü<br />
íÜ$.<br />
¤l Æ” ¤l ˆ8” tðŒ )È<br />
ä.<br />
# ¤l| Á ÝX0 t 16 (”<br />
712)„¼D ¬©` Ä ˆµÈä.<br />
5 ^
@ð CD t´<br />
¥<br />
08<br />
2 1Ð 6(” 7Ð 12)LÀ X\ ¤<br />
l| ÝX0 t 16 (” 712) „¼ <br />
X˜| ì üíÜ$.<br />
8à<br />
6 ¤l ä CD t´ ð°ÈD ½°<br />
712| ¤t` ƵÈä.<br />
à @ð CD t´ ‘Ù )<br />
• Œ<br />
@ð CD t´ 0¥ Tt” äL 0¥D<br />
Àà ˆµÈä:<br />
RPT (õ ¬Ý)RDM (4‘ ¬Ý)<br />
SCAN (¤” ¬Ý)T.LIST (¸ © ©<br />
])D.LIST (¤l © ©])PAUSE (|<br />
Ü À)TTLin (¤l © …%)COMP<br />
(U• DBE)ITS.P (ITS ¬Ý)ITS.M<br />
(ITS \ø˜)<br />
CD t´ õ), Track repeat (\ ¸<br />
õ) ü Disc repeat (¤l õ).<br />
1 õ ¨Ü| ÝX$t FUNCD ì ü<br />
íÜ$.<br />
2 õ ”| ÝX$t RPT| ì üí<br />
Ü$.<br />
ÐX” õ ” ¤tÐ ˜À L<br />
LÀ RPT| ì üíÜ$.<br />
! Magazine repeat @ð CD t´Ð<br />
ˆ” ¨à ¤l õ ¬Ý<br />
! Track repeat À ¬ ¸Ì õ<br />
! Disc repeat ¬ ¤l õ<br />
8à<br />
! õ ¬Ý Ð äx ¤l| ÝXt õ<br />
” Magazine repeat\ À½)Èä.<br />
! Track repeat Ð ¸ €É ” h¬ 0/<br />
0| ä‰Xt õ ”<br />
Disc repeat\ À½)Èä.<br />
! õ ¨Ü …Ì ½° 0ø ¤tÐ<br />
T.RPT(\ ¸ õ) ” D.RPT(¤l <br />
õ) ˜À Ä ˆµÈä.<br />
\<br />
8à<br />
! 30 tÁ tù 0¥D ¬©XÀ J
¥<br />
08<br />
@ð CD t´<br />
3 4‘ ¬ÝD ‘ÙX$t RDMD ì<br />
üíÜ$.<br />
\Üñt ÑÈä. ¸@ ^Ð Ý\<br />
Magazine repeat ” Disc repeat ” ´Ð<br />
4‘ \ ¬Ý)Èä.<br />
# 4‘ ¬ÝD èX$t RDMD äÜ ì<br />
üíÜ$.<br />
8à<br />
! ¸ ” ¤lX ¤”t ]˜t ¸t <br />
ÁXD L<br />
¤”D èX$t SCAND ì üíÜ$.<br />
\Üñt ¼ÑÈä. ¸ (” ¤l)t Ä<br />
¬Ý)Èä.<br />
# ¤” ¨Ü Ù
@ð CD t´<br />
¥<br />
08<br />
¤l ©©]Ð ¤l<br />
ÝX0<br />
¤l © ©] 0¥D µt @ð CD <br />
t´Ð …% ¤l © ©]D ´´ôà<br />
ø Ð ¬Ý` ¤l| Ý` ˆµÈ<br />
ä.<br />
1 ¤l © ©] ¨Ü| ÝX$t<br />
FUNCD x ÄÐ D.LIST| ì üíÜ$.<br />
2 16 ü 712 ¬t| XX$t NEXT|<br />
ì üíÜ$.<br />
2 |Ü À| ‘ÙX$t PAUSE| ì ü<br />
íÜ$.<br />
\Üñt ÑÈä. ¬ ¸X ¬Ýt |Ü<br />
À)Èä.<br />
# |Ü À| èX$t PAUSE| äÜ ì<br />
üíÜ$.<br />
8à<br />
äL ¤tÐ PAUSE| ì |Ü À<br />
| ‘Ù ” è` Ä ˆµÈä.<br />
\<br />
3 ÐX” ¤l ©D ÝX0 t<br />
16 (” 712) „¼ X˜| ì üíÜ<br />
$.<br />
Ý\ €„t ¬Ý)Èä.<br />
8à<br />
! ÐX” ¤l ©D Ý ¬ÝX0 t<br />
c, d a| ¬©` Ä ˆµÈä.<br />
! tù ¤lX ©t…%´ ˆÀ J
¥<br />
08<br />
@ð CD t´<br />
4 MEMO| ì ¬ ¬Ý x ¸D ¬<br />
Ý ©]Ð ¥iÈä.<br />
Memory complete P ˜À¬ä ¬<br />
¬Ý x ¸t ¬Ý ©]Ð ” )Èä.<br />
# ¬ ¬Ý x ¸D¬Ý ©]Ð ¥X<br />
0 t a| ¬©` Ä ˆµÈä.<br />
5 ¬Ý ¤t\ ÌD $t BAND|<br />
ì üíÜ$.<br />
8à<br />
100 ¥X ¤lÐ \ pt0 T¨¬Ð ¨P<br />
…% Ä äÜ È\´ ¤l pt0 …%<br />
t ¥ $˜ ¤l pt0 Ð ¹Ð 0]<br />
)Èä.<br />
ITS ¬Ý ©] ¬Ý<br />
ITS ¬Ý 0¥D µt ITS ¬Ý ©]Ð …%<br />
¸D è` ˆµÈä. ITS ¬Ý 0¥<br />
D ÝXt @ð CD t´X ITS ¬Ý ©<br />
]Ð ˆ” ¸t ¬Ý)Èä.<br />
1 õ ”| ÝiÈä.<br />
107 ˜tÀX ¬Ý õX0| 8pt üíÜ<br />
$.<br />
2 ITS ¬Ý ¨Ü| ÝX$t FUNC <br />
NEXT| x ÄÐ ITS.P| ì üíÜ$.<br />
3 ITS ¬ÝD ‘ÙX$t ITS.P| ì üí<br />
Ü$.<br />
\Üñt ÑÈä. tÐ Ý\<br />
Magazine repeat ” Disc repeat ” ´X<br />
¬Ý ©]Ð ˆ” ¸t¬Ý)Èä.<br />
# ITS ¬ÝD èX$t ITS.P| äÜ ì ü<br />
íÜ$.<br />
# ITS ¬ÝDt ¬ ” ´Ð ¥ ¸<br />
t Æ
@ð CD t´<br />
¥<br />
08<br />
3 ITS ¬Ý ©]Ð ¬ ¬Ý x CDX ¨<br />
à ¸D X$t CLEAR| ì üíÜ<br />
$.<br />
¬ ¬Ý x CDX ¨à ¸t ¬Ý ©]<br />
Ð à Memory deleted \Ü)È<br />
ä.<br />
# ¬ ¬Ý x CD| ITS ¬Ý ©]Ð X<br />
0 t b| ¬©` Ä ˆµÈä.<br />
4 ¬Ý ¤t\ ÌD $t BAND|<br />
ì üíÜ$.<br />
¤l © …%X0<br />
¤l © …% 0¥D ¬©Xt \ 10 <br />
X 8 \ (ITS ¬Ý ©]ü hØ) \ 100<br />
X ¤l ©LÀ CD ©D @ð CD <br />
t´Ð …%` ˆµÈä.<br />
CD ©D…%Xt …% ©t ¤<br />
t)Èä.<br />
1 ©D …%` CD| ¬ÝiÈä.<br />
CD| ÝX$t a ” b| ì üíÜ<br />
$.<br />
2 ¤l © …% ¨Ü| ÝX$t<br />
FUNCü NEXT| x ÄÐ TTLinD ì üí<br />
Ü$.<br />
3 ÐX” 8 D ÝX$t ABC| <br />
ì üíÜ$.<br />
ABC| õt tt äL 8 t <br />
\ X)Èä:<br />
L³ 8 ( 8 ), + @ 08L³<br />
8 (Œ8 )<br />
# 012| ì + @ 08| Ýt …%`<br />
ˆµÈä.<br />
4 L³ 8 | ÝX$t a ” b| <br />
ì üíÜ$.<br />
a| äˆ | LÈä L³ 8 ” A B C ...<br />
XYZ, + @ 08” 1 23 ... @ # < <br />
\ ¤t)Èä. b| | LÈä ZY<br />
X ... C B A @ t 8 í
¥<br />
08<br />
@ð CD t´<br />
¤l © 0¥ ¬©X0<br />
CD TEXT 8X @ð CD t´Ð CD<br />
TEXT ¤l| ¬Ý` ½° D𤸠t„<br />
ü ¸ ©ü@ M¤¸ ¤t| <br />
X` ˆµÈä. M¤¸ 32X 8 ôä<br />
8t M¤¸X ˜8À €„D ü ˆÄ] M<br />
¤¸| |½
TV œ<br />
¥<br />
09<br />
TV œ ¬©X0<br />
1 2<br />
3 4Ü| ÝX$t BAND| ì üíÜ<br />
$.<br />
TV-1 ” TV-2 ÐX” 4Ü ¤t<br />
LLÀ BAND| ì üíÜ$.<br />
3<br />
FORM1<br />
t 00| ¬©Xì Ää” TV œ| ´<br />
` ˆµÈä.<br />
( ‘ÙÐ \ 8\ ´©@ TV œX<br />
¬© $…| 8pt üíÜ$. t €„Ð<br />
” TV œX ¬© $…Ð $… ´©ü<br />
” ÄÄ\ t 00| t©t TV ‘ÙD <br />
‰` ½°Ð \ ô| õiÈä.<br />
1 4Ü \Ü<br />
TV œ ´¤ 4ÜÐ œÝÈ”À \Ü<br />
)Èä.<br />
2 ¬ $ ˆ8 \Ü<br />
Ý\ ¬ $ ´©t \Ü)Èä.<br />
3 D \Ü<br />
TV œ ´¤ DÐ œÝÈ”À \Ü<br />
)Èä.<br />
1 TDD ÝX$t SOURCE| Œ<br />
Ü üíÜ$.<br />
Televisiont ¤t LLÀ<br />
SOURCE| ŒÜ üíÜ$.<br />
2 ¬´Ü ¨D pX$t VOLUMED ¬<br />
©iÈä.<br />
ühD ’tp˜®œ L ŒÜ üíÜ$.<br />
4 Ù œÝD ä‰X$t c ” d| à<br />
XŒ ì üíÜ$.<br />
Dt èÄ
¥<br />
09<br />
TV œ<br />
)¡m ¥ ÝX0<br />
¬ $ œÝ „¼ 16 (” 712)D t<br />
t )¡mD 12LÀ }Œ 0µÜ tÄ<br />
Ð „¼D \ ˆÌ ìÄ )¡mD Ý` <br />
ˆµÈä.<br />
1 16 (” 712)D ¤t X$t<br />
NEXT| ì üíÜ$.<br />
16 (” 712)t ˜À LLÀ NEXT| <br />
ì üíÜ$.<br />
2 16 ü 712 ¬t| XX$t NEXT|<br />
ì üíÜ$.<br />
3 ÐX” DD ÝX0 t 16 (”<br />
712) „¼ X˜| ì üíÜ$.<br />
8à<br />
ÐX” DD ÝX0 t c, d a| t©<br />
` Ä ˆµÈä.<br />
2 0µ ¥XÐ ¥` )¡mD >
DVD t´<br />
¥<br />
10<br />
¤l ¬ÝX0<br />
1 2 3<br />
4<br />
FORM1<br />
t 00| ¬©Xì Ää” DVD t´<br />
” @ð DVD t´| ´` ˆµÈ<br />
ä.<br />
‘ÙÐ \ 8\ ´©@ tù DVD t<br />
´ ” @ð DVD t´X ¬© $…|<br />
8pt üíÜ$. t €„Д DVD <br />
t´ ” @ð DVD t´X ¬© $…<br />
Ð $… ´©ü” ÄÄ\ t 00| t©<br />
t DVD ‘ÙD ‰` ½°Ð \ ô|<br />
õiÈä.<br />
1 ¤l ˆ8 \Ü<br />
@ð DVD t´| ¬©Xà ˆD ½°<br />
¬ ¬Ý x ¤l| \ÜiÈä.<br />
2 © ˆ8 \Ü<br />
DVD D$ ¬Ý Ð ¬ ¬Ý x <br />
©D ôì Èä.<br />
3 U0/¸ ˆ8 \Ü<br />
¬ ¬Ý x U0/¸t \Ü)Èä.<br />
4 ¬Ý Ü \Ü<br />
¬ ¬Ý x U0/¸X¬Ý ½ü Ü<br />
t \Ü)Èä.<br />
1 @ð DVD t´| ÝX$t<br />
SOURCE| ŒÜ üíÜ$.<br />
DVD ¤t LLÀ SOURCE| Œ<br />
Ü üíÜ$.<br />
2 ¬´Ü ¨D pX$t VOLUMED ¬<br />
©iÈä.<br />
ühD ’tp˜®œ L ŒÜ üíÜ$.<br />
3 ¤l| ÝX$t a ” b| ì ü<br />
íÜ$.<br />
¤l Æ” ¤l ˆ8” tðŒ )È<br />
ä.<br />
# ¤l| Á ÝX0 t 16 „¼D ¬<br />
©` Ä ˆµÈä.<br />
4 h¬ 0˜ 0| ä‰X$t c ”<br />
d| Ä ì üíÜ$.<br />
5 äx U0(” ¸)\ ^
¥<br />
10<br />
DVD t´<br />
(¤l © …% ¨Ü(TTLin)˜ ITS \ø<br />
˜ ¨Ü(ITS.M)| ݈D L, ¤<br />
t” Ù
$$ p<br />
¥<br />
11<br />
‘Ù ¨Ü<br />
t 00” P À Ù‘ ¨Ü| õiÈä:3<br />
èt $¸Ìl ¨Ü(NW) \ ¨Ü<br />
(STD). ÐX” \ ¨Ü ¬t| X` <br />
ˆµÈä. 0Ð DSP $@ \ ¨Ü<br />
(STD)\ À´ ˆµÈä.(78˜tÀX<br />
DSP $ ¨Ü\ XX0| 8pt üíÜ<br />
$.)<br />
! 3 èt $¸Ìl ¨Ü(NW)” 3 èt @ð<br />
p@ àü, ü, ü(4Ü)<br />
| ¬ÝX0 \ Ž ¤
¥<br />
11<br />
$$ p<br />
! ) ¤
$$ p<br />
¥<br />
11<br />
3 è X| ÝX$t tù „¼D ì<br />
üíÜ$.<br />
„¼ \Ü X<br />
FL ^ Œ |½<br />
FR<br />
^ Œ $x½<br />
2 Œ/° ¤
¥<br />
11<br />
$$ p<br />
1 T.AL| ¤t X0 t AUDIO| <br />
x ÄÐ NEXT| ì üíÜ$.<br />
T.ALt ¤tÐ ˜À LLÀ NEXT|<br />
ì üíÜ$.<br />
2 Ü , ¨Ü| ÝX$t T.ALD ì<br />
üíÜ$.<br />
# X Ý ¨Ü(POSI)Ð FL˜ FRD ÝX<br />
À JXD ½°Ð” T.ALt D\1T)Èä.<br />
3 Ü , 0¥D ÝX$t tù „¼D<br />
ì üíÜ$.<br />
„¼ Ü ,<br />
INTL<br />
0<br />
A.TA Ù Ü ,<br />
CUSTM<br />
Þ¤<br />
# Ü , 0¥D D0 t” Ù|\ „¼<br />
D äÜ ì üíÜ$.<br />
# NW ¨Ü Ý ½° A.TA| Ý` Æ<br />
µÈä.<br />
# Ì| Ù TA@ EQ ‰À J
$$ p<br />
¥<br />
11<br />
$¸Ìl 0¥Ð<br />
Xì<br />
$¸Ìl 0¥@ $$ à8| ä‘\ ü<br />
4ÜÐ „°Ü¨ Ä ÄÄX ¤
¥<br />
11<br />
$$ p<br />
0¸0 p<br />
! 0¸0Ð t ‘@ D $(DÌ\<br />
0¸0)\ät üÀ ¤
$$ p<br />
¥<br />
11<br />
4 Ý\ ¤
¥<br />
11<br />
$$ p<br />
) ¤
$$ p<br />
¥<br />
11<br />
„¼ t|t á<br />
CSTM1 © $ 1<br />
CSTM2 © $ 2<br />
! CUSTOM1ü CUSTOM2” ¬© p<br />
X” t|t á …Èä. 134Ü ø˜<br />
= t|t | ¬©Xì p ‘ÅD <br />
‰` ˆµÈä.<br />
! FLAT Ýt ¬´ÜÐ \ ôDt˜<br />
@ ˆ ¥iÈä. t 0¥@ FLAT@<br />
t|t á äX Ñiä ¬tÐ L<br />
Þ@ ¨ü| õX” t|t á D<br />
´´ ô0 t ä° ©iÈä.<br />
8à<br />
! c ” d| ì t|t á D (<br />
¥<br />
11<br />
$$ p<br />
BBE ¬´Ü ¬©X0<br />
BBE| t©h
$$ p<br />
¥<br />
11<br />
„¼ ¨ü<br />
DOME<br />
Ô<br />
BBE<br />
BBE<br />
# Ý\ L¥ \ø¨D èŒX$t Ù|\<br />
„¼D äÜ ì üíÜ$.<br />
# c ” d| ì L¥ \ø¨D (<<br />
\ Ý` Ä ˆµÈä.<br />
BBE ¬´Ü ¨ pX0<br />
BBE ¬´Ü \8ñ 0 D µt BBEX <br />
¨D p` ˆµÈä.<br />
1 BBE| ÝX$t AUDIO@ SFC| x<br />
ÄÐ BBE| ì üíÜ$.<br />
2 BBED ‘ÙX$t BBE| ì üíÜ$.<br />
# BBE| èŒX$t BBE| äÜ ì üíÜ<br />
$.<br />
3 BBE ¨D pX$t a ” b| ì<br />
üíÜ$.<br />
a ” b| | LÈä BBEX ¨t<br />
Xp˜ ŒiÈä.<br />
¨t Xp˜ ŒhÐ 0| +4 -4t<br />
¤t)Èä.<br />
Ù ¬´Ü ¨ p 0¥ ¬<br />
©X0<br />
´ Ù( ´X ŒL@ ´ Ä@ Ä\<br />
ìtÐ 0| ì|ÑÈä. Ù ¬´Ü ¨ p<br />
0¥ (ASL) @ ä‘XŒ ÀX” ŒLD <br />
ÜXì ŒLt äÀt üh ¨D Ù<<br />
\ ܵÈä. ASLX Ä (ŒL ¨Ð<br />
\ üh ¨X ÀÙ)” äL \ À <br />
¨\ $` ˆµÈä.<br />
1 ASLD ¤t X0 t AUDIO| <br />
x ÄÐ NEXT| ì üíÜ$.<br />
ASLt ˜À LLÀ NEXT| ì üíÜ$.<br />
2 Ù ¬´Ü ¨ p ¨Ü| ÝX0<br />
t ASLD ì üíÜ$.<br />
3 ÐX” ASL ¨D ÝX$t ASLD <br />
ì üíÜ$.<br />
ASLD | LÈä ASL ¨t äLü @<br />
\ Ý)Èä.<br />
OFF (¼Ð)Low ( )Mid-Low ( )<br />
Mid ()Mid-High (à)High (à)<br />
8à<br />
OFF Ý ½°| xXà ASL ¨Ü …Ì<br />
t ASLt 0ø ¤tÐ ˜À©Èä.<br />
LÐ ¨ pX0<br />
SLA (LÐ ¨ p) | µt LÐD X`<br />
½° Ý` Ä ˆ” ühX ©\ ÀT|<br />
)ÀX0 t LÐX üh ¨D p`<br />
ˆµÈä.<br />
! LÐ $@ À½À J” FM œX ü<br />
h ¨D 0
¥<br />
11<br />
$$ p<br />
8à<br />
! FM œ üht p ¥XÀ\ FM œÐ<br />
LÐ ¨ pD ` ” ƵÈä.<br />
! LÐ ¨ p
$$ p<br />
¥<br />
11<br />
! t $t tø t¬` ½°Ð Ù TA<br />
EQ| ‰Xt t $t ÀÌÑÈ<br />
ä.<br />
Ù TA EQ ‰X0<br />
1 ¥\ \p©\ ¥ŒÐ Ù(| ü(<br />
Ü¤à ¨à 8ü =8, è| ëà ˜<br />
ÔÄD ¼ üíÜ$.<br />
ÔÄt Ä Ùt ÔÄ ¡L
¥<br />
11<br />
$$ p<br />
# Ù TA EQ| ÀX$t STOPD ì<br />
üíÜ$.<br />
# Ù TA EQ| Ð èŒX$t EXIT <br />
” BAND| tíÜ$.<br />
10 Ù TA EQ 0¥t DÌt<br />
Complete ¤t)Èä.<br />
Ù( ´€ L¥ ¹1t ,tŒ ‰À<br />
»\ ½° Ðì TÜÀ ¤t)Èä.<br />
(139 ˜tÀX Ù TA EQ Ðì TÜÀ t<br />
tX0| 8pt üíÜ$.)<br />
11 Ù TA EQ ¨Ü| èŒX$t EXIT <br />
” BAND| ì üíÜ$.<br />
12 Ètl| p ^ \ ô¸
0 $<br />
¥<br />
12<br />
0 $pX0<br />
t 0¥@t00X 0 $ D p` <br />
ˆ” 0¥…Èä.<br />
0 $ Tt” äLü@ 0¥äD À<br />
à ˆµÈä:<br />
REV (í)¥ ¨Ü)F.DEMO (0¥ p¨)<br />
AUX (ôp …%)D.ATT (À8 Ä0)<br />
MUTE.S (T LŒp/Ä)FMstep<br />
(FM œÝ èÄ)AMstep (AM œÝèÄ)<br />
1 00 ¼È LLÀ SOURCE| ŒÜ<br />
üíÜ$.<br />
2 0 $ Tt\ ä´ $t | x<br />
Ä x ÁÜ| Àt üíÜ$.<br />
LÐt ¼8 ˆät 0¥ p¨¨Ü| ‘ÙÜ<br />
´
¥<br />
12<br />
0 $<br />
2 AUX ¨Ü| ÝX$t AUX| ì üí<br />
Ü$.<br />
3 AUX| ‘ÙX$t AUX| ì üíÜ$.<br />
ONt ¤tÐ ˜À©Èä.<br />
# AUX| èX$t AUX| äÜ ì üíÜ<br />
$.<br />
À8 Ä 0¥<br />
ÝX0<br />
T) ¨t ’@ CD ” äx LÐD <br />
è` L t|t á ¨D ’@ ¨<<br />
\ $Xt \át Ý` ˆµÈä. À<br />
8 Ä 0¥D ®@ ¨
0 $<br />
¥<br />
12<br />
8à<br />
50 Khz ©
¥<br />
13<br />
0À 0¥<br />
üh Ä<br />
Ä0” üh ¨D à XŒ ®œ ˆÄ<br />
] iÈä(} 90%
0À 0¥<br />
¥<br />
13<br />
3 ÜD Ü à8Ð Qܤ0 t”<br />
JUST| ì üíÜ$.<br />
„ \Ü 00 29X ”| ½° „@ „¼<br />
t )Èä.(. 10:18@ 10:00t )Èä.)<br />
„ \Ü 30 59X ”| ½° „@ ,¼<br />
t )Èä.(. 10:36@ 11:00t )Èä.)<br />
8à<br />
Ü pD X” ÙHÐ JUST” ¤t<br />
À JµÈä.<br />
Ü à8 ¤t $X0<br />
ä Ü Èä ¬´Ü@ `ÈTtXD õX<br />
” Ü à8 ¤t| \Ü` ˆµÈ<br />
ä.<br />
1 CLK| ¤t X0 t NEXT| <br />
ì üíÜ$.<br />
CLK ˜À LLÀ NEXT| ì üíÜ$.<br />
2 Ü à8 ¤t| ÝX$t<br />
CLK| x ÄÐ T.SGNLD ì üíÜ$.<br />
¤t Ý À½X0<br />
t 00Д P À 0ø ¤t ¥)<br />
´ ˆµÈä. ¬© ” ÐX” ¤t<br />
| Ý` ˆµÈä.<br />
1 C.MENU| ¤t X0 t NEXT|<br />
ì üíÜ$.<br />
C.MENU ˜À LLÀ NEXT| ì üí<br />
Ü$.<br />
2 ¤t Ý ¨Ü| ÝX$t<br />
C.MENU| x ÄÐ D.FORM| ì üíÜ<br />
$.<br />
3 ÐX” ¤t Ý ¨Ü| FORM1,<br />
FORM2 ” FORM3D ì üíÜ$.<br />
Ä pX0<br />
¤t Ä pD µt ü p…t <br />
´Ä ¤t ˜ ôtÄ] p` <br />
ˆµÈä.<br />
1 C.MENU| ¤t X0 t NEXT|<br />
ì üíÜ$.<br />
C.MENU ˜À LLÀ NEXT| ì üí<br />
Ü$.<br />
2 Ä ¨Ü| ÝX$t C.MENU| x<br />
ÄÐ BRGHT| ì üíÜ$.<br />
3 Ä ¨D pX$t c ” d| ì<br />
üíÜ$.<br />
c ” d| | LÈä Ä ¨t X<br />
p˜ ŒiÈä. t ¨t Xp˜ Œ<br />
hÐ 0| 00 28 \Ü)Èä.<br />
0 p $ XX0<br />
|Ð À˜XŒ Œ \ÜÀ JÄ] X0<br />
t Ù(X äÜ|t¸ Àt ¤<br />
tX 0 Ù
¥<br />
13<br />
0À 0¥<br />
˜Ü |t¸ Tt $X0<br />
¥´ ˆ” ˜Ü |t¸ Tt X˜|<br />
Ý` ˆµÈä.<br />
1 C.MENU| ¤t X0 t NEXT|<br />
ì üíÜ$.<br />
C.MENU ˜À LLÀ NEXT| ì üí<br />
Ü$.<br />
2 ˜Ü |t¸ Ý ¨Ü| ÝX$t<br />
C.MENU| x ÄÐ FLASH| ì üíÜ<br />
$.<br />
3 ÐX” D ÝX0 t TYPE1 <br />
TYPE4 ” ALL „¼ X˜| ì üíÜ<br />
$.<br />
ALLD D L ¨à D \ ¤<br />
t` ˆµÈä.<br />
# ˜Ü |t¸| D$t OFF| ì üíÜ<br />
$.<br />
0½ (4<br />
Ý<br />
¤t Ý 2(FORM2)D ÝXt 3<br />
X (4 Ð X˜| Ý` ˆµÈä.<br />
1 C.MENU| ¤t X0 t NEXT|<br />
ì üíÜ$.<br />
C.MENU ˜À LLÀ NEXT| ì üí<br />
Ü$.<br />
2 0½ (4 ¨Ü| ÝX$t C.MENU|<br />
x äL PTRND ì üíÜ$.<br />
3 ÐX” (4D ÝX$t A, B ” C|<br />
ì üíÜ$.<br />
4 XX0<br />
¤t Ý 3(FORM3)D ݈D ½°<br />
¥ 4 3 X˜| Ý` ˆµÈ<br />
ä.<br />
1 C.MENU| ¤t X0 t NEXT|<br />
ì üíÜ$.<br />
C.MENU ˜À LLÀ NEXT| ì üí<br />
Ü$.<br />
2 4 Ý ¨Ü| ÝX$t C.MENU|<br />
x ÄÐ FONT| ì üíÜ$.<br />
3 ÐX” 4D ÝX$t A, B ” C|<br />
ì üíÜ$.<br />
ä‘\ Ô0Lx
0À 0¥<br />
¥<br />
13<br />
¨ \Ü ¤t $X0<br />
¥´ ˆ” 8 À ¨ \Ü ¤t<br />
X˜| Ý` ˆµÈä.<br />
1 ¨ \Ü ¨Ü| ÝX$t ENT| x<br />
ÄÐ S/A| ì üíÜ$.<br />
2 ÐX” ¨ \Ü| ÝX0 t<br />
S/A1 S/A3 „¼ X˜| ì üíÜ$.<br />
8à<br />
äx ‘ÙD ‰ˆD ½° ¨ \Ü ¤<br />
t” |Ü
¥<br />
13<br />
0À 0¥<br />
AUX LÐ ¬©X0<br />
CD-RB20/CD-RB10 (ÄÄ ä) @ @ IP-<br />
BUS-RCA x0ä%0| ¬©Xt t 00|<br />
RCA œ%D ÀÐX” ôp 00@ ð°` <br />
ˆµÈä. 8\ ´©@ IP-BUS-RCA x0<br />
ä%0 ¬© $…| 8pt üíÜ$.<br />
AUX LÐ<br />
ÝX0<br />
% AUX| LÐ
” ô<br />
€]<br />
´¥ CD t´ Ðì TÜÀ<br />
CD ¬Ý Ð 8 ÝXt Ðì TÜÀ<br />
¤tÐ ˜À©Èä. Ðì TÜÀ <br />
¤tÐ ˜À˜t D˜ \| 8pXì´<br />
¤ 8xÀ ø¬à Ü\ 8 t° )•D<br />
UxiÈä. Ðì| t°` Æ
€]<br />
” ô<br />
TÜÀ Ðx pX<br />
Error check<br />
MIC<br />
Error check<br />
front SP,<br />
Error check FL<br />
SP, Error<br />
check FR SP,<br />
Error check RL<br />
SP, Error<br />
check RR SP,<br />
Error check<br />
SW<br />
Error check<br />
noise<br />
A.TA&EQ<br />
unavailable<br />
Ètl ð°<br />
À JXL.<br />
Ètl ¤
” ô<br />
€]<br />
CD-R/CD-RW ¤l<br />
! CD-R/CD-RW ¤l ¬© Ü, 8X ð0<br />
DÌ ¤lÌ ¬Ýt ¥iÈä.<br />
! ¤l ¹1, ¤lX ˜ ” $ü <<br />
È, 00 ´ ˆX $ü, µ0 ñ
€]<br />
” ô<br />
! t 00” | t„ U¥ (.mp3 ”<br />
.wma)| Ä MP3 ” WMA |D ¬Ý<br />
iÈä. ¡L à¥D )ÀX0 t MP3<br />
˜ WMA | txX |Ð t U¥ | ¬<br />
©XÀ ÈíÜ$.<br />
ôT” ¬ Ý ôT ´X ôT\ \Ü<br />
)Èä.<br />
MP3 ”<br />
ô<br />
! |@ ID3 Üø „ 1.0 „ 1.1 ì÷<br />
ü h” ¤t(¤l ©), ¸<br />
(¸ ©), Dð¤¸(¸ Dð¤¸)Ð<br />
t 8X1D ÑÈä.<br />
! 32, 44.1 48 kHz ü| À” MP3<br />
|t ¬Ý ½°ÐÌ p 0¥D ©<br />
` ˆµÈä. (16, 22.05, 24, 32,<br />
44.1, 48 kHz ØÁ ü ¬Ý ¥.)<br />
! m3u ¬Ý ©] 8X1@ õÀ JµÈ<br />
ä.<br />
! MP3i (MP3 x0 ð) ” mp3 PRO<br />
ì÷ü” 8XÀ JµÈä.<br />
! MP3 |X ¬´Ü ˆÈ@ D¸ t¸<br />
’D ] ¥Á)Èä. t 00” 8 kbps<br />
Ð 320 kbpsLÀX D¸ t¸\ ¬Ý<br />
` ˆÀÌ Uä\ ¬´Ü ˆÈD 00<br />
t” \Œ 128kbps tÁ
” ô<br />
€]<br />
t ôT lp| ‘1XÀ J” ƒt ŒÁ<br />
iÈä.<br />
! X˜X ¤l ´Ð ˆ” ôTÐ 253LÀ<br />
X Dt\ ¬Ýt ¥iÈä.<br />
! ,tŒ tt €)À J@ MD”<br />
¬©XÀ ÈíÜ$. ,tŒ €)À J<br />
@ t@ äx óÐ ´ MD| |¼<br />
ÆÄ] iÈä.MD| ¬©X0 Ð ,<br />
tŒ €)À J@ t@ pt<br />
È t\ ì üíÜ$.<br />
MD t´@ ¬<br />
! t Èl \Ü´ ˆ” MD| ¬©Xí<br />
Ü$. LE MD txX ¤l| t©Xt<br />
00 Á Ä ˆµÈä.<br />
\<br />
!
€]<br />
” ô<br />
DSP p TÜ Ü¸<br />
3 èt $¸Ìl ¨Ü<br />
$¸Ìl $<br />
D0 L LPF M HPF M LPF H HPF<br />
(è ü<br />
¨<br />
0¸0<br />
Á<br />
Ü , $X0<br />
¤
” ô<br />
€]<br />
©´<br />
@ð 8X<br />
@ð 8X@ tÄÐ ” \ pt0| T)<br />
` ˆÄ] X” )•…Èä. CD-ROM,<br />
CD-R ” CD-RWÐ pt0| T)` L<br />
¨à pt0” ˜L€0 ]LÀ X˜X è,<br />
‰, 8X
€]<br />
” ô<br />
ˆ ¬‘<br />
|x ´©<br />
Ü© Ð .....................................14.4 V DC<br />
(È© U ”: 12.0 <br />
14.4 V DC)<br />
À ܤ\ ................................$pð À…<br />
\ X ŒD .........................10.0 A<br />
X (W × H × D):<br />
Ü ......................................178 × 100 × 160 mm<br />
Ìœ€ .................................169× 94 × 17 mm<br />
É ................................................2.5 Kg<br />
$$/DSP<br />
ð Ì œ% D ù 22 W - \Œ …% „
” ô<br />
€]<br />
50 dB H Ä .......................10 dBf (0.9 ¼V/75 W, ¨<br />
x)<br />
à8 ¡L D( ...................75 dB (IEC-A $¸Ìl)<br />
\á ................................................0.3 % (at 65 dBf, 1 kHz,<br />
¤L$)<br />
0.1 % (65 dBfÐ, 1 kHz,<br />
¨x)<br />
ü Qõ ................................30 15,000 Hz (±3 dB)<br />
¤L$ „¬ ...........................45 dB (65 dBf, 1 kHz)<br />
AM œ<br />
ü ” ................................531 1,602 kHz (9kHz)<br />
530 1,640 kHz (10 kHz)<br />
¬© ¥ Ä ...........................18¼V (S/N: 20 dB)<br />
à8 ¡L D( ...................65 dB (IEC-A $¸Ìl)<br />
\<br />
8à<br />
! øm 0À m X ¹È” Dolby<br />
Laboratories X Œ …Èä.<br />
! ˆ ¬‘ü x@ ˆ
PIONEER CORPORATION<br />
4-1, MEGURO 1-CHOME, MEGURO-KU, TOKYO 153-8654, JAPAN<br />
PIONEERELECTRONICS (USA) INC.<br />
P.O. Box 1540, Long Beach, California 90801-1540, U.S.A.<br />
TEL: (800) 421-1404<br />
PIONEEREUROPE NV<br />
Haven 1087, Keetberglaan 1, B-9120 Melsele, Belgium<br />
TEL: (0) 3/570.05.11<br />
PIONEER ELECTRONICS ASIACENTRE PTE. LTD.<br />
253 Alexandra Road, #04-01, Singapore 159936<br />
TEL: 65-6472-1111<br />
PIONEER ELECTRONICS AUSTRALIA PTY. LTD.<br />
178-184 Boundary Road, Braeside, Victoria 3195, Australia<br />
TEL: (03) 9586-6300<br />
PIONEERELECTRONICS OF CANADA, INC.<br />
300 Allstate Parkway, Markham, Ontario L3R OP2, Canada<br />
TEL: (905) 479-4411<br />
PIONEERELECTRONICS DE MEXICO, S.A. de C.V.<br />
Blvd.Manuel Avila Camacho 138 10 piso<br />
Col.Lomas de Chapultepec, Mexico, D.F. 11000<br />
TEL: 55-9178-4270<br />
HÒ¡ý Plø<br />
=lø : ð-q44_13<br />
ûq : (02) 2521-3588<br />
HÒûP- Plø<br />
/¦‹U : /…|cJëSS280_L¿-Ã<br />
17 1704-06¤<br />
ûq : (0852) 2848-6488<br />
<br />
Published by <strong>Pioneer</strong> Corporation.<br />
Copyright © 2003 by <strong>Pioneer</strong> Corporation.<br />
All rights reserved.<br />
t$ÈD T|tX œ ‘Œ Ò<br />
2003 t$ÈD T|tX. ¨à Œ¬<br />
ô h.<br />
Printed in Japan<br />
|ø xÄ<br />
ES