Operating Instructions Manual de instrucciones - Pioneer
Operating Instructions Manual de instrucciones - Pioneer
Operating Instructions Manual de instrucciones - Pioneer

Create successful ePaper yourself
Turn your PDF publications into a flip-book with our unique Google optimized e-Paper software.
MULTI COMPACT DISC<br />
PLAYER<br />
REPRODUCTOR DE MULTIDISCOS COMPACTOS<br />
<br />
PD-M407<br />
PD-M427<br />
<strong>Operating</strong> <strong>Instructions</strong><br />
<strong>Manual</strong> <strong>de</strong> <strong>instrucciones</strong><br />
<br />
'
Thank you for buying this <strong>Pioneer</strong> product.<br />
Please read through these operating instructions so you will know<br />
how to operate your mo<strong>de</strong>l properly. After you have finished<br />
reading the instructions, put them away in a safe place for future<br />
reference.<br />
In some countries or regions, the shape of the power plug and<br />
power outlet may sometimes differ from that shown in the<br />
explanatory drawings. However, the method of connecting and<br />
operating the unit is the same.<br />
WARNING: TO PREVENT FIRE OR SHOCK HAZARD, DO<br />
NOT EXPOSE THIS APPLIANCE TO RAIN OR MOISTURE.<br />
CAUTION: This product satisfies FCC regulations when<br />
shiel<strong>de</strong>d cables and connectors are used to connect the<br />
unit to other equipment. To prevent electromagnetic<br />
interference with electric appliances such as radios and<br />
televisions, use shiel<strong>de</strong>d cables and connectors for<br />
connections.<br />
THE STANDBY/ON SWITCH IS SECONDARY CONNECTED AND<br />
THEREFORE DOES NOT SEPARATE THE UNIT FROM MAINS<br />
POWER IN STANDBY POSITION.<br />
LINE VOLTAGE SELECTOR SWITCH<br />
Mains voltages in Saudi Arabia are 127V and 220V<br />
only.<br />
The line voltage selector switch is located on the rear panel of<br />
this player. Check that it is set properly before plugging the<br />
power cord into the outlet. If the voltage is not properly set or if<br />
you move to an area where the voltage requirements differ,<br />
adjust the selector switch as follows:<br />
÷ Be sure to disconnect the power cord from its outlet before<br />
making this adjustment.<br />
÷ Use a medium-sized (flat bla<strong>de</strong>) screwdriver. Insert the<br />
tip of the screwdriver into the groove of the selector<br />
switch and turn it so that the power voltage making<br />
of your area points to the arrow.<br />
This player is for consumer use. If the player is used in a<br />
business (for example, used for a period at a restaurant),<br />
the player will not be covered un<strong>de</strong>r warranty.<br />
CD Vi<strong>de</strong>o, VIDEO CD, CD graphics and CD-ROM discs<br />
cannot be played with this player.<br />
220-240V 110-127V<br />
IMPORTANT<br />
The lightning flash with arrowhead symbol, within an<br />
equilateral triangle, is inten<strong>de</strong>d to alert the user to the<br />
presence of uninsulated "dangerous voltage" within the<br />
product's enclosure that may be of sufficient magnitu<strong>de</strong><br />
to constitute a risk of electric shock to persons.<br />
CAUTION<br />
RISK OF ELECTRIC SHOCK<br />
DO NOT OPEN<br />
CAUTION:<br />
TO PREVENT THE RISK OF ELECTRIC SHOCK, DO NOT<br />
REMOVE COVER (OR BACK). NO USER-SERVICEABLE<br />
PARTS INSIDE. REFER SERVICING TO QUALIFIED<br />
SERVICE PERSONNEL.<br />
The exclamation point within an equilateral triangle is<br />
inten<strong>de</strong>d to alert the user to the presence of important<br />
operating and maintenance (servicing) instructions in the<br />
literature accompanying the appliance.<br />
This equipment has been tested and found to comply with the limits for a Class B digital <strong>de</strong>vice, pursuant to Part 15 of the FCC Rules.<br />
These limits are <strong>de</strong>signed to provi<strong>de</strong> reasonable protection against harmful interference in a resi<strong>de</strong>ntial installation. This equipment<br />
generates, uses, and can radiate radio frequency energy and, if not installed and used in accordance with the instructions, may cause<br />
harmful interference to radio communications. However, there is no guarantee that interference will not occur in a particular<br />
installation. If this equipment does cause harmful interference to radio or television reception, which can be <strong>de</strong>termined by turning<br />
the equipment off and on, the user is encouraged to try to correct the interference by one or more of the following measures:<br />
– Reorient or relocate the receiving antenna.<br />
– Increase the separation between the equipment and receiver.<br />
– Connect the equipment into an outlet on a circuit different from that to which the receiver is connected.<br />
– Consult the <strong>de</strong>aler or an experienced radio/TV technician for help.<br />
Information to User<br />
Alteration or modifications carried out without appropriate authorization may invalidate the user's right to operate the equipment.<br />
2<br />
En<br />
CAUTION<br />
÷ Use of controls or adjustments or performance of procedures other than those specified herein may result in hazardous<br />
radiation exposure.<br />
÷ The use of optical instruments with this product will increase eye hazard.
CONTENTS<br />
PUT BATTERIES INTO THE REMOTE<br />
CONTROL UNIT (PD-M427 only)<br />
CONFIRM SUPPLIED ACCESSORIES ............................... 3<br />
PUT BATTERIES INTO THE REMOTE CONTROL UNIT .... 3<br />
REMOTE CONTROL OPERATIONS................................... 3<br />
CAUTIONS REGARDING HANDLING ................................ 4<br />
BEFORE OPERATING THE PLAYER .................................. 5<br />
CONNECTIONS.................................................................. 6<br />
NAMES AND FUNCTIONS OF PARTS............................... 7<br />
BASIC OPERATION ........................................................... 8<br />
VARIOUS OPERATIONS .................................................... 9<br />
TO PLAY ONLY DESIRED TRACKS/DISCS ...................... 11<br />
TROUBLESHOOTING ...................................................... 14<br />
SPECIFICATIONS ............................................................. 14<br />
1<br />
2<br />
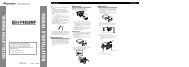
Open the lid of the battery compartment on the rear of the<br />
remote control unit, and insert the batteries ( size "AAA" (IEC<br />
R03)), taking care to align the ª and · polarities correctly.<br />
3<br />
English<br />
CONFIRM SUPPLIED ACCESSORIES<br />
1<br />
4 5<br />
NOTES:<br />
÷ In or<strong>de</strong>r to prevent battery leakage, remove the batteries<br />
when not using the remote control unit for an exten<strong>de</strong>d<br />
period (one month or more). If leakage occurs, carefully<br />
wipe away any battery fluid insi<strong>de</strong> the compartment, and<br />
replace the batteries with new ones.<br />
÷ Do not allow books or other objects to rest on top of the<br />
remote control unit, since the buttons may be <strong>de</strong>pressed,<br />
causing faster exhaustion of the batteries.<br />
2<br />
3<br />
Î<br />
'<br />
Incorrect use of batteries may cause leakage or rupture.<br />
Always be sure to follow these gui<strong>de</strong>lines:<br />
A. Always insert batteries into the battery compartment<br />
correctly matching the positive ª and negative<br />
·polarities, as shown by the display insi<strong>de</strong> the<br />
compartment.<br />
B. Never mix new and used batteries.<br />
C. Batteries of the same size may have different voltages,<br />
<strong>de</strong>pending on brand. Do not mix different brands of<br />
batteries.<br />
1 6-Compact Disc Magazine x 1<br />
(Called 6-disc magazine in the explanatory text.)<br />
NOTE:<br />
The supplied 6-disc magazine is for 12 cm ( 5-inch) disc<br />
only.<br />
2 Output cable x 1<br />
3 Control cable x 1<br />
4 Remote control unit x 1 (PD-M427 only)<br />
5 AAA/R03 dry cell batteries x 2 (PD-M427 only)<br />
REMOTE CONTROL OPERATIONS<br />
(PD-M427 only)<br />
When operating the remote control unit, point the unit’s<br />
infrared signal transmitter at the remote control receiver<br />
(REMOTE SENSOR) on the front panel of the player. The<br />
remote control unit can be used within a range of about 7<br />
meters (23 feet) from the remote sensor, and within angles<br />
of up to about 30 <strong>de</strong>grees.<br />
POWER-CORD CAUTION<br />
Handle the power cord by the plug. Do not pull out the plug by tugging<br />
the cord and never touch the power cord when your hands are wet<br />
as this could cause a short circuit or electric shock. Do not place the<br />
unit, a piece of furniture, etc., on the power cord, or pinch the cord.<br />
Never make a knot in the cord or tie it with other cords. The power<br />
cords should be routed such that they are not likely to be stepped on.<br />
A damaged power cord can cause a fire or give you an electrical shock.<br />
Check the power cord once in a while. When you find it damaged, ask<br />
your nearest PIONEER authorized service center or your <strong>de</strong>aler for a<br />
replacement.<br />
7 m<br />
30˚<br />
30˚<br />
NOTE:<br />
If the remote control sensor window is in a position where it<br />
receives strong light such as sunlight or fluorescent light,<br />
control may not be possible.<br />
NOTE for PD-M407:<br />
Operate the PD-M407 using the remote control unit which<br />
accompanies the amplifier. (See page 6.)<br />
3<br />
En
CAUTIONS REGARDING HANDLING<br />
LOCATION<br />
Install the player in a well-ventilated location where it will not be<br />
exposed to high temperatures or humidity.<br />
Do not install the player in a location which is exposed to direct rays<br />
of the sun, or near stoves or radiators. Excessive heat can adversely<br />
affect the cabinet and internal components. Installation of the player<br />
in a damp or dusty environment may also result in a malfunction or an<br />
acci<strong>de</strong>nt. (Avoid installation near cookers etc., where the player may<br />
be exposed to oily smoke, steam or heat.)<br />
Do not install the player on a tottered stand nor in an unstable or<br />
inclined place.<br />
CONDENSATION<br />
When this unit is brought into a warm room from previously cold<br />
surroundings or when the room temperature rises sharply,<br />
con<strong>de</strong>nsation may form insi<strong>de</strong>, and the unit may not be able to attain<br />
its full performance. If this occurs, allow the unit to stand for about an<br />
hour or raise the room temperature gradually.<br />
CLEANING AND HANDLING COMPACT DISCS<br />
4<br />
PRECAUTIONS REGARDING INSTALLATION<br />
÷ Placing and using the compact disc player for long periods on heatgenerating<br />
sources such as amplifiers will affect performance. Avoid<br />
placing the player on heat-generating sources.<br />
÷ Install this compact disc player as far as possible from tuners and<br />
TV sets. A compact disc player installed in close proximity to such<br />
equipment may cause noise or <strong>de</strong>gradation of the picture.<br />
÷ Such noise may be particularly noticeable when an indoor antenna<br />
is used. In such cases, make use of an outdoor antenna, or turn off<br />
power to the compact disc player.<br />
÷ Please place this unit on a level surface.<br />
CLEANING THE PLAYER AND THE MAGAZINE<br />
To clean the PLAYER and the MAGAZINE, wipe with a soft, dry cloth.<br />
For stubborn dirt, wet a soft cloth with a mild <strong>de</strong>tergent solution ma<strong>de</strong><br />
by diluting one part <strong>de</strong>tergent to 5 or 6 parts water, wring well, then<br />
wipe off the dirt. Also use a dry cloth to wipe the surface dry. Do not<br />
use volatile liquids such as benzene and thinner which are harmful to<br />
the unit.<br />
STORING DISCS<br />
÷ Discs are ma<strong>de</strong> of the same kinds of plastic used for conventional<br />
analog audio records. Be careful not to allow discs to warp; always<br />
store discs in their cases vertically, avoiding locations with high heat<br />
or humidity, or extremely low temperatures. Avoid leaving discs in<br />
cars, since the seat of a car in direct sunlight can become unbelievably<br />
hot.<br />
÷ Always read and abi<strong>de</strong> by the precautionary notes listed on disc<br />
labels.<br />
CD LENS CLEANER<br />
The player's pickup lens should not become dirty in normal use, but<br />
if for some reason it should malfunction due to soiling, consult your<br />
nearest PIONEER authorized service center. Lens cleaners for CD<br />
players are commercially available, but special care should be exercised<br />
in their use since some may cause damage to the lens.<br />
÷ Always keep your discs clean by wiping them gently with a soft<br />
cloth from the inner edge toward the outer periphery.<br />
÷ If a disc becomes very dirty, dip a soft cloth in water, and after<br />
wringing it out well, wipe the dirt away gently, and then remove<br />
any water drops with another soft, dry cloth.<br />
÷ Do not use record cleaning sprays or anti-static agents on discs.<br />
Also, never clean discs with benzene, thinner, or other volatile<br />
solvents, since damage to the disc surface may result.<br />
With this unit, use a Compact Disc carrying the mark shown<br />
below. Do not use other disc, for this may result in<br />
malfunction or damage.<br />
÷ When holding discs, do not touch their signal surfaces (the si<strong>de</strong><br />
reflecting a "rainbow" pattern, opposite the label si<strong>de</strong>). Hold by the<br />
edges, or by one edge and the center hole.<br />
÷ Do not affix gummed labels or tape to the label surfaces. Also, do<br />
not scratch or damage the label.<br />
÷ Discs rotate at high speed insi<strong>de</strong> the player. Do not use damaged<br />
(cracked or warped) discs.<br />
CAUTION RE: USE OF SHAPED CD's<br />
This product is <strong>de</strong>signed for use with conventional, fully circular CD's<br />
only. Use of shaped CD's is not recommen<strong>de</strong>d for this product.<br />
<strong>Pioneer</strong> disclaims all liability arising in connection with the use of<br />
shaped CD's.<br />
'<br />
NOTES:<br />
÷ In or<strong>de</strong>r to play an 8-cm (3-inch) CD you will need a special<br />
Multi CD Magazine (JD-M108, JD-M308) which is sold separately.<br />
Be sure to thoroughly read the <strong>Operating</strong> <strong>Instructions</strong> before using<br />
it.<br />
÷ 8-cm (3-inch) CD Adapters<br />
It is possible that even an adapter which meets recommen<strong>de</strong>d<br />
standard CD specifications will not be usable with the CD player.<br />
It is recommen<strong>de</strong>d that the special Multi CD Magazine (JD-M108,<br />
JD-M308) be used.<br />
÷ Never load an 8-cm (3-inch) CD or its adapter into a standard 12-<br />
cm (5-inch) magazine. This may seriously damage the CD player.<br />
÷ Do not insert only an 8-cm (3-inch) disc and adapter into the<br />
supplied magazine.<br />
En
BEFORE OPERATING THE PLAYER<br />
INSERT DISCS INTO THE 6-DISC MAGAZINE<br />
Insert any discs which you may have into the supplied<br />
magazine. Up to six discs may be inserted. The numbering of<br />
the discs begins with 1 at the topmost tray, and then increases<br />
in or<strong>de</strong>r downwards to 6 for the lowest tray. The magazine has<br />
a window through which the pulled-out disc tray can be<br />
checked. Even during playback, the number of the disc being<br />
played back can be checked through this window.<br />
1. Pull out only one disc tray.<br />
AFFIXING LABELS TO THE MAGAZINE<br />
÷ Always attach the labels provi<strong>de</strong>d in the <strong>de</strong>signated locations.<br />
Correct operation may not be possible if labels or tape are<br />
attached in other locations.<br />
÷ The following are convenient ways of using labels:<br />
A: For titles<br />
B: For disc names<br />
C: For classification<br />
÷ Do not attach labels on top of other labels.<br />
English<br />
C<br />
A<br />
B<br />
A<br />
C<br />
B<br />
B<br />
2. Position discs with the label si<strong>de</strong> downward.<br />
Label si<strong>de</strong><br />
downward<br />
Additional magazines i<strong>de</strong>ntical to the one supplied are<br />
available as options (*JD-M100, JD-M200, JD-M300, JD-<br />
M108, JD-M308). Please use them to make your own disc<br />
library, with separate magazines for each artist or genre.<br />
3. Put the disc tray back as it was originally.<br />
* JD-M100/JD-M200/JD-M300<br />
..................................... Magazine for 12-cm (5-inch) discs<br />
JD-M108/JD-M308......... Magazine for 8-cm (3-inch) discs<br />
NOTE:<br />
Do not load 8-cm (3-inch) discs into the magazine for 12-cm (5-<br />
inch) discs.<br />
4. Insert other discs by repeating steps 1 to 3.<br />
CAUTIONS:<br />
÷ Please make sure to only pull out one disc tray at a time.<br />
(When a disc tray has been pulled out, do not pull out other<br />
disc trays.)<br />
÷ If discs are inserted label si<strong>de</strong> upward, it will not be possible<br />
for them to be played. Please make sure to insert them with<br />
the label si<strong>de</strong> downward.<br />
÷ Objects other than discs (song cards, explanations of disc<br />
contents, etc.), must never be inserted into the disc trays.<br />
÷ Do not touch the playing surface of discs (iri<strong>de</strong>scent si<strong>de</strong>)<br />
with hands or fingers.<br />
5<br />
En
CONNECTIONS<br />
L<br />
R<br />
CD<br />
White<br />
L<br />
R<br />
Red<br />
Output cable<br />
CD player<br />
÷ Before making or changing the connections, switch<br />
off the STANDBY/ON switch and disconnect the power<br />
cord from the AC outlet.<br />
CONTROL<br />
OUT<br />
White<br />
Stereo amplifier<br />
Red<br />
Control cable<br />
L<br />
R<br />
L<br />
R<br />
LINE OUT<br />
CONTROL<br />
IN<br />
OUT<br />
To AC<br />
Wall outlet<br />
Power cord<br />
Making connections<br />
1. Connect the LINE OUT jacks of this unit to the<br />
input jacks (CD or AUX) of the amplifier. Make<br />
sure that the white plugs are connected to the<br />
left (L) jacks and the red plugs to the right (R)<br />
jacks.<br />
÷ Be sure not to connect this unit to the amplifier’s<br />
PHONO jacks, as sound will be distorted and normal<br />
playback will not be possible.<br />
2. Connect the power cord to a household AC wall<br />
outlet or an AC outlet on your amplifier.<br />
÷ Make sure plugs are inserted fully into the jacks and wall<br />
outlet.<br />
System remote control with a <strong>Pioneer</strong> stereo<br />
amplifier that has the Î mark<br />
When a <strong>Pioneer</strong> stereo amplifier bearing the Î mark is used,<br />
connect the CONTROL IN jack on the rear panel of the CD<br />
player to the CONTROL OUT jack of the amplifier. This will<br />
enable the CD player to be controlled using the remote control<br />
unit supplied with the stereo amplifier. If you do not plan to<br />
use this feature, it is not necessary to connect CONTROL IN/<br />
OUT jacks.<br />
÷ Be sure to use the supplied control cable.<br />
÷ The remote control unit supplied with the amplifier can be<br />
used to control Play, Stop, Pause, Track/Disc Search and<br />
Disc Change operations.<br />
÷ For instructions regarding connections and operation, refer<br />
to the operating instruction manual provi<strong>de</strong>d with your<br />
stereo amplifier.<br />
NOTES:<br />
÷ When a control cord is connected to the player’s CONTROL<br />
IN jack, direct control of the player with the remote control<br />
unit is not possible. Operate the player with the remote<br />
control unit by aiming it at the amplifier.<br />
÷ Be sure to connect both of the control cord’s plugs securely<br />
to the CONTROL IN and CONTROL OUT terminals. Do not<br />
connect only one end of the cable.<br />
÷ Be sure to turn off the power of the amplifier before<br />
connecting the power cord and output cord.<br />
Connecting the power cord<br />
Connect the power cord to a household AC wall outlet or an<br />
AC outlet on your amplifier.<br />
÷ Make sure plugs are inserted fully into the jacks and wall<br />
outlet.<br />
AC POWER CORD CONNECTION AND<br />
FUNCTIONS<br />
Some functions cannot be carried out <strong>de</strong>pending on the<br />
connection of AC power cord.<br />
Function<br />
Timer playback<br />
Program<br />
memory<br />
Delete program<br />
memory<br />
When the AC power<br />
cord is connected to the<br />
switched outlet of an<br />
amplifier or audio timer<br />
Yes<br />
No<br />
No<br />
When the AC power<br />
cord is connected to<br />
the unswitched<br />
outlet of an amplifier<br />
or wall outlet<br />
No<br />
Yes<br />
Yes<br />
For <strong>de</strong>tails, refer to the <strong>de</strong>scription of each function in these<br />
<strong>Operating</strong> <strong>Instructions</strong>.<br />
6<br />
En
NAMES AND FUNCTIONS OF PARTS<br />
FRONT PANEL<br />
STANDBY/ON<br />
MAGAZINE<br />
insertion slot<br />
Display window<br />
Remote sensor window (PD-M427 only)<br />
Receive the signal from the remote control unit.<br />
RANDOM<br />
English<br />
HI-LITE<br />
MULTI COMPACT DISC PLAYER<br />
PD–M427<br />
DISC TRACK MIN SEC<br />
'<br />
Î<br />
RANDOM<br />
HI–LITE<br />
STANDBY/ON<br />
6<br />
-DISC<br />
MULTI CD<br />
EJECT REPEAT PROGRAM DISC TRACK/MANUAL<br />
0 41 ¡ ¢<br />
STOP PLAY/PAUSE<br />
7 6<br />
1-BIT•DLC DIRECT LINEAR CONVERSION<br />
RANDOM<br />
DELETE<br />
DELETE<br />
RANDOM<br />
PROGRAM<br />
REPEAT–1<br />
Play<br />
Pause<br />
DISC number<br />
TRACK number<br />
DISC TRACK<br />
MIN SEC<br />
1 2 3 4 5 6<br />
DISC<br />
SCAN<br />
EJECT<br />
REPEAT<br />
PROGRAM<br />
DISC<br />
TRACK/MANUAL<br />
PLAY/PAUSE<br />
STOP<br />
REPEAT<br />
PROGRAM<br />
DISC<br />
Minutes<br />
DISC SCAN<br />
Seconds<br />
REMOTE CONTROL UNIT (PD-M427 only)<br />
Remote control buttons with the same names or marks as<br />
buttons on the front panel of the player control the same<br />
operations as the corresponding front panel buttons.<br />
1<br />
2<br />
3<br />
4<br />
5<br />
6<br />
7<br />
STANDBY/ON<br />
DISC 1 DISC 2 DISC 3<br />
DISC 4 DISC 5 DISC 6<br />
Î<br />
7 8 3<br />
RANDOM<br />
HI–LITE<br />
1 ¡<br />
4 ¢<br />
PROGRAM<br />
CHECK<br />
DELETE<br />
CLEAR<br />
'<br />
MULTI<br />
COMPACT DISC PLAYER<br />
REMOTE CONTROL UNIT<br />
8<br />
9<br />
10<br />
11<br />
12<br />
13<br />
1 STANDBY/ON button<br />
2 DISC NUMBER buttons (DISC 1-DISC 6)<br />
3 STOP button (7)<br />
4 RANDOM button<br />
5 Hl-LlTE button<br />
6 PROGRAM button<br />
7 CHECK button<br />
8 PAUSE button<br />
9 PLAY button ( 3)<br />
10 MANUAL search buttons (1 , ¡)<br />
11 TRACK search buttons (4 , ¢)<br />
12 DELETE button<br />
13 CLEAR button<br />
7<br />
En
STANDBY/ON<br />
MULTI COMPACT DISC PLAYER<br />
-DISC<br />
MULTI CD<br />
DISC TRACK MIN SEC<br />
EJECT REPEAT PROGRAM DISC TRACK/MANUAL<br />
RANDOM<br />
HI–LITE<br />
STOP PLAY/PAUSE<br />
1-BIT•DLC DIRECT LINEAR CONVERSION<br />
BASIC OPERATION<br />
TO PLAY A COMPACT DISC<br />
1<br />
2<br />
6<br />
'<br />
1 2 3<br />
STANDBY/ON<br />
0 41 ¡ ¢<br />
7 6<br />
1. Press the STANDBY/ON switch to turn the<br />
poweron.<br />
2. Insert a magazine, pushing it in until a click sound<br />
is heard.<br />
÷ Insert the discs to be played into the magazine beforehand.<br />
(Refer to “BEFORE OPERATING THE PLAYER” on page 5.)<br />
÷ When the power is turned off (in standby mo<strong>de</strong>), inserting a<br />
magazine automatically turns on the power (Automatic Power<br />
On function).<br />
3. Press the 6 button to start playback.<br />
To pause playback temporarily:<br />
Press the 6 button during playback. The 8 indicator lights<br />
and playback is paused at that point. Pressing the 6 button<br />
again or 3 button resumes playback from the position where<br />
pause mo<strong>de</strong> was entered.<br />
To stop playback:<br />
Press the 7 button. The player returns to the beginning of the<br />
first track on the disc at which playback was stopped. If the 7<br />
button is pressed twice, the player returns to the beginning<br />
of the first track on the first disc and enters stop mo<strong>de</strong>.<br />
NOTE:<br />
When the power is turned off while a magazine is in the player,<br />
the player memorizes which disc was played just before the<br />
power was turned off. Thus, when the power is next turned<br />
on, pressing the 6 button starts playback from the first<br />
track on the memorized disc.<br />
3<br />
PLAY/PAUSE<br />
6<br />
DISC TRACK<br />
MIN SEC<br />
1 2 3 4 5 6<br />
To stop playback and take out the magazine:<br />
Press the EJECT button (0), remove the magazine, and then<br />
press the STANDBY/ON switch to turn off the power.<br />
Even when the power is turned off (in standby mo<strong>de</strong>), the<br />
magazine will be ejected by pressing the EJECT button.<br />
(PD-M427 only)<br />
3<br />
PLAY/PAUSE<br />
8 PAUSE 6<br />
STOP<br />
7 STOP<br />
7<br />
(PD-M427 only)<br />
8<br />
(PD-M427 only)<br />
7<br />
Cautions regarding handling of magazines:<br />
÷ When inserting a magazine into the player, make sure that<br />
the direction of insertion is correct.<br />
÷ After use, store in the case provi<strong>de</strong>d. Do not place in<br />
locations subject to high temperatures or exposed to direct<br />
sunlight.<br />
÷ Do not take magazines apart.<br />
÷ Be careful not to drop, or hit magazines against things. Also<br />
do not apply strong force to trays which have been withdrawn.<br />
÷ Application of benzene, thinner, insectici<strong>de</strong> or other volatile<br />
liquids to a magazine may damage the surface, so keep<br />
magazines away from such substances.<br />
Operations indicated the [ ] mark are performed with the<br />
remote control unit.(PD-M427 only)<br />
8<br />
En
VARIOUS OPERATIONS<br />
DISC SEARCH - TO SEARCH FOR A<br />
PARTICULAR DISC<br />
During playback or stop mo<strong>de</strong><br />
DISC<br />
(PD-M427 only)<br />
DISC 1 DISC 2 DISC 3<br />
DISC 4 DISC 5<br />
DISC 6<br />
MANUAL SEARCH - TO SEARCH FOR A<br />
PARTICULAR PASSAGE<br />
During playback or pause mo<strong>de</strong><br />
TRACK/MANUAL<br />
41 ¡¢<br />
(PD-M427 only)<br />
1 ¡<br />
English<br />
Use the DISC button to select the <strong>de</strong>sired disc number, then<br />
press the 6 button, or one of the DISC NUMBER (DISC 1-<br />
DISC 6) buttons; the player will then search for the selected<br />
disc and begin playback from the beginning of the disc.<br />
NOTES:<br />
÷ If “no DISC” appears on the display, you have pressed the<br />
disc number of a tray which does not contain a disc.<br />
÷ During program playback, Disc Search cannot be carried<br />
out.<br />
TRACK SEARCH - TO SEARCH FOR A<br />
PARTICULAR TRACK<br />
During playback, pause or stop mo<strong>de</strong><br />
TRACK/MANUAL<br />
41 ¡¢<br />
(PD-M427 only)<br />
4 ¢<br />
While the ¡ ¢ button is kept pressed, playback rapidly<br />
advances toward the end of the disc. When playback reaches<br />
the end of the disc, the player enters pause mo<strong>de</strong> and “END”<br />
is displayed. While the 4 1 button is kept pressed,<br />
playback rapidly reverses toward the beginning of the disc.<br />
When the <strong>de</strong>sired passage is reached, release the ¡ ¢<br />
button or 4 1 button. The player enters original mo<strong>de</strong><br />
(playback or pause) where ¡ ¢ button or 4 1 button<br />
is released.<br />
NOTES:<br />
÷ During normal playback, <strong>Manual</strong> Search can be carried out<br />
on one disc only.<br />
÷ During program playback, <strong>Manual</strong> Search can be carried<br />
out in one program step only.<br />
TO REPEAT PLAYBACK (REPEAT PLAY)<br />
REPEAT<br />
When the ¡ ¢ button is pressed once or a number of<br />
times, playback advances to the beginning of a track located<br />
after the track being played. The position of the located track<br />
corresponds to the number of times the button is pressed.<br />
When the 4 1 button is pressed once, playback returns<br />
to the beginning of the track being played. When this button<br />
is pressed more than once, playback is returned to a track<br />
located before the track being played.<br />
÷ When the ¡ ¢ button or 4 1 button is operated<br />
in pause mo<strong>de</strong> or stop mo<strong>de</strong>, press the 6 button to start<br />
playback.<br />
NOTES:<br />
÷ During program playback, the ¡¢ (or ¢) button or<br />
41 (or 4) button can be used to select the<br />
programmed track.<br />
÷ During normal playback, Track Search can be carried out on<br />
one disc only. In stop mo<strong>de</strong>, this operation can be carried<br />
out from 1st track through 99th track.<br />
To repeatedly play the displayed track, press the REPEAT<br />
button once. The REPEAT-1 indicator lights. The REPEAT<br />
button can be pressed in any playback mo<strong>de</strong>.<br />
To repeatedly play all tracks on all of the discs in normal<br />
playback mo<strong>de</strong> or in the specified playback mo<strong>de</strong> (Program<br />
playback, Delete program playback or Random playback),<br />
press the REPEAT button twice. The REPEAT indicator<br />
lights.<br />
÷ To exit repeat mo<strong>de</strong>, press the REPEAT button so that the<br />
REPEAT-1 or REPEAT indicator goes off.<br />
9<br />
En
VARIOUS OPERATIONS<br />
RANDOM PLAYBACK - TO PLAY ALL TRACKS<br />
IN RANDOM ORDER<br />
RANDOM<br />
Press the RANDOM button. All tracks on all discs are played<br />
in a random or<strong>de</strong>r. To play tracks other than the <strong>de</strong>leted tracks<br />
in a random or<strong>de</strong>r, press the RANDOM button after carrying<br />
out the Delete Program procedure. See “Delete Program<br />
Playback” on page 13.<br />
MAGAZINE HI-LITE SCAN<br />
During stop mo<strong>de</strong><br />
HI-LITE<br />
(PD-M427 only)<br />
RANDOM<br />
(PD-M427 only)<br />
HI-LITE<br />
Timer playback:<br />
By using a commercially available audio timer, it is possible<br />
to initiate playback at any time automatically.<br />
1. Insert a magazine into the magazine slot.<br />
2. Set the time at which you wish playback to begin.<br />
The timer will supply power to both the amplifier and the<br />
player at the preset time, turning all the components on<br />
and initiating the playback mo<strong>de</strong>. Playback starts from the<br />
first track on the first disc.<br />
Cautions:<br />
÷ Do not unplug the power cord or do not turn off the<br />
power with an audio timer during playback, as this<br />
could result in damage to the disc.<br />
÷ If a power failure occurs while the power is turned off<br />
(standby mo<strong>de</strong>), the power is automatically turned on<br />
with the timer playback function when the power is<br />
restored.<br />
THEREFORE, DISCONNECT THE AC POWER CORD WHEN<br />
THE PLAYER IS NOT USED FOR A LONG PERIOD OF TIME.<br />
When the Hl-LlTE button is pressed once during stop mo<strong>de</strong>,<br />
playback starts from a point 1 minute after the beginning of<br />
the first track, and the first track of each disc is played for<br />
about 10 seconds. The DISC SCAN indicator blinks during<br />
Disc Scan mo<strong>de</strong>. After the first tracks of all discs are scanned,<br />
the player enters stop mo<strong>de</strong>.<br />
When the Hl-LlTE button is pressed twice during stop mo<strong>de</strong>,<br />
playback starts from a point 1 minute after the beginning of<br />
the track, and each track is played for about 10 seconds. The<br />
SCAN indicator blinks during Track Scan mo<strong>de</strong>. After all tracks<br />
of all discs are scanned, the player enters stop mo<strong>de</strong>.<br />
To exit Magazine Hi-Lite Scan mo<strong>de</strong>:<br />
Press the 7, 6 or DISC NUMBER (DISC 1-DISC 6) button.<br />
When the 6 button is pressed, normal playback starts from<br />
the current point. When the DISC NUMBER (DISC 1-DISC 6)<br />
button is pressed, the selected disc is played from the<br />
beginning.<br />
NOTES:<br />
÷ Hi-Lite Scan can be carried out from the <strong>de</strong>sired elapsed<br />
time of the track. During playback, press the HI-LITE<br />
button at the point you want to start Hi-Lite Scan playback.<br />
The player memorizes the minute and second of the point<br />
and Track Scan playback is carried out from the memorized<br />
point on each track.<br />
÷ Each time the HI-LITE button is pressed, the mo<strong>de</strong> switches<br />
between Disc Scan and Track Scan.<br />
÷ Programming of only <strong>de</strong>sired tracks is possible during Track<br />
Scan playback. See “Direct program” on page 12.<br />
÷ During Track Scan playback, you can skip to the <strong>de</strong>sired<br />
track with the 4 1 button or ¡ ¢ button.<br />
÷ When the REPEAT button is pressed, Hi-Lite Scan playback<br />
will be repeated.<br />
÷ When playback time of a track is less than one minute or is<br />
shorter than the memorized time, Hi-Lite Scan playback is<br />
carried out from the beginning of the track for about 10<br />
seconds. When playback time of a track is less than 10<br />
seconds, the track is played from the beginning to the end.<br />
10<br />
En
STANDBY/ON<br />
MULTI COMPACT DISC PLAYER<br />
-DISC<br />
MULTI CD<br />
DISC TRACK MIN SEC<br />
EJECT REPEAT PROGRAM DISC TRACK/MANUAL<br />
RANDOM<br />
HI–LITE<br />
STOP PLAY/PAUSE<br />
1-BIT•DLC DIRECT LINEAR CONVERSION<br />
TO PLAY ONLY DESIRED TRACKS/DISCS<br />
1<br />
2<br />
PROGRAM<br />
DISC<br />
6<br />
'<br />
0 41 ¡ ¢<br />
1,4<br />
2 3 6<br />
(PD-M427 only)<br />
PROGRAM<br />
(PD-M427 only)<br />
7 6<br />
DISC 1 DISC 2 DISC 3<br />
DISC 4 DISC 5<br />
DISC 6<br />
PROGRAM PLAYBACK - TO PROGRAM<br />
TRACKS/DISCS IN DESIRED ORDER<br />
1. With the player stopped, press the PROGRAM<br />
button, so that the PROGRAM indicator lights.<br />
2. Use the DISC button or one of the DISC NUMBER<br />
(DISC 1-DISC 6) buttons to select the <strong>de</strong>sired disc<br />
number.<br />
The selected disc number will be displayed.<br />
3. Then, press the 4 1 or ¡¢ button to<br />
select the <strong>de</strong>sired track.<br />
The selected track number will be displayed.<br />
4. Finally press the PROGRAM button, or wait for<br />
about two seconds; the program will be stored in<br />
memory.<br />
If the PROGRAM button is pressed after selecting only<br />
the disc number, the "AL" indicator will appear, indicating<br />
selection of the "Disc All Program" mo<strong>de</strong> (the entire<br />
contents of the disc is entered into the program as a single<br />
step).<br />
While the "AL" indicator is displayed, however, if the 4<br />
1 or ¡¢ button is used to <strong>de</strong>signate a track number<br />
and the PROGRAM button is then pressed (or after two<br />
seconds elapses), the selected track will be stored as that<br />
program step.<br />
5. Repeat steps 2, 3 and 4 to program other tracks.<br />
6. Press the 6 button.<br />
The tracks are played in the programmed or<strong>de</strong>r. When all<br />
programmed tracks have been played, the player enters<br />
stop mo<strong>de</strong>.<br />
English<br />
3<br />
TRACK/MANUAL<br />
41 ¡¢<br />
(PD-M427 only)<br />
4 ¢<br />
NOTE:<br />
When a track is selected with the 4 1 or ¡ ¢ button<br />
in step 3, the displayed track number is automatically<br />
programmed if the 4 1 or ¡ ¢ button is not pressed<br />
within 2 seconds. Therefore, be sure to press the 4 1 or<br />
¡ ¢ button sequentially until the <strong>de</strong>sired track number<br />
appears on the display.<br />
To stop Program playback, press the 7 button.<br />
4<br />
PROGRAM<br />
PROGRAM<br />
To exit program mo<strong>de</strong>:<br />
During program playback, select a DISC number with the<br />
DISC NUMBER button and then press the 6 button. The<br />
player enters normal playback mo<strong>de</strong> and playback starts from<br />
the beginning of the selected disc.<br />
6<br />
PLAY/PAUSE<br />
6<br />
(PD-M427 only)<br />
3<br />
÷ Programs containing up to 32 steps can be created.<br />
÷ To go to the previous or next step in a program, press the<br />
4 1 or ¡ ¢ button.<br />
÷ If the magazine is in the player, the program contents will<br />
not be erased even if the power is turned off.<br />
NOTE:<br />
During Delete programming the PROGRAM button cannot<br />
be operated.<br />
11<br />
En
TO PLAY ONLY DESIRED TRACKS/DISCS<br />
Direct Program:<br />
During normal playback or Magazine Hi-Lite Scan playback,<br />
the track being played can be programmed.<br />
1. Press the PROGRAM button to enter the program<br />
mo<strong>de</strong>.<br />
2. To search for a <strong>de</strong>sired track during normal play<br />
back, it is possible to skip to succeeding tracks by<br />
pressing the 4 1 or ¡ ¢ button.<br />
Also, Magazine Hi-Lite Scan function can be used to move<br />
from track to track through the disc.<br />
3. If you wish to program the track currently playing,<br />
press the PROGRAM button while the track is<br />
playing.<br />
÷ Direct programming is not possible during program<br />
playback.<br />
To check the program contents (PD-M427 only) :<br />
During program mo<strong>de</strong>, set the player to stop mo<strong>de</strong> and press<br />
the CHECK button on the remote control unit. The program<br />
contents will be displayed in the programmed or<strong>de</strong>r.<br />
÷ After confirming the last program step, the display will<br />
show “0-00”.<br />
PROGRAMMING A PAUSE (PD-M427 only)<br />
Inserting a pause in your program can be very useful when<br />
carrying out recording. Press the 8 button on the remote<br />
control unit instead of entering a track number. “PA” appears<br />
on the display panel.<br />
÷ For example, when recording on both si<strong>de</strong>s of a cassette<br />
tape, if you program a pause after the last track to be<br />
recor<strong>de</strong>d on the first si<strong>de</strong>, program playback will pause at<br />
that point to allow you to switch tape si<strong>de</strong>s. To resume<br />
program playback after the player enters pause mo<strong>de</strong>,<br />
press the 8 button on the remote control unit or 6<br />
button on the front panel.<br />
To erase a program (PD-M427 only) :<br />
During program mo<strong>de</strong>, press the CLEAR button on the<br />
remote control unit.<br />
The last program step is erased and the contents of the<br />
previous program step are displayed.<br />
NOTE:<br />
Contents of a program can be erased during playback as well.<br />
However tracks preceding the currently playing track cannot<br />
be erased in this way.<br />
To clear all of the program contents:<br />
A. During stop mo<strong>de</strong>, press the 7 button.<br />
B. When the magazine is ejected, the program contents will<br />
be cleared.<br />
To modify the program contents (PD-M427 only) :<br />
1. During program mo<strong>de</strong>, set the player to stop<br />
mo<strong>de</strong> and press the CHECK button on the remote<br />
control unit so that the program step to be<br />
corrected appears on the display.<br />
2. Enter the new disc number with the DISC<br />
NUMBER (DISC 1-DISC 6) buttons and then press<br />
the 4 1 or ¡ ¢ button so that the new<br />
track number appears on the display.<br />
3. Press the PROGRAM button.<br />
÷ Repeat steps 1 through 3 to change other tracks as<br />
<strong>de</strong>sired.<br />
÷ If the 4 1 or ¡ ¢ button is not pressed within<br />
2 seconds when correcting the track number, the<br />
displayed track number is automatically memorized.<br />
NOTES:<br />
÷ A pause can be programmed only when the program<br />
procedure is performed un<strong>de</strong>r stop mo<strong>de</strong>.<br />
÷ A pause cannot be programmed at the beginning of a<br />
program (P–01), nor can two pauses be programmed one<br />
after the other<br />
÷ A pause inserted in a program is counted as one step.<br />
÷ If a pause is programmed as the last step of a program, the<br />
player will not enter the pause mo<strong>de</strong>.<br />
12<br />
En
TO PLAY ONLY DESIRED TRACKS/DISCS<br />
1<br />
2<br />
DISC<br />
STANDBY/ON<br />
DISC 1 DISC 2 DISC 3<br />
DISC 4 DISC 5 DISC 6<br />
Î<br />
7 8 3<br />
RANDOM<br />
HI–LITE<br />
1 ¡<br />
4 ¢<br />
PROGRAM<br />
CHECK<br />
DELETE<br />
CLEAR<br />
'<br />
MULTI<br />
COMPACT DISC PLAYER<br />
REMOTE CONTROL UNIT<br />
(PD-M427 only)<br />
(PD-M427 only)<br />
2<br />
6<br />
3<br />
1,4<br />
DELETE<br />
DISC 1 DISC 2 DISC 3<br />
DISC 4 DISC 5<br />
DISC 6<br />
DELETE PROGRAM PLAYBACK - TO DELETE<br />
UNDESIRED TRACKS/DISCS (PD-M427 only)<br />
1. With the player stopped, press the DELETE button,<br />
so that the DELETE indicator lights.<br />
2. Use the DISC button or one of the DISC NUMBER<br />
(DISC 1 - DISC 6) buttons to select the disc<br />
number.<br />
The selected disc number will be displayed.<br />
3. Then, press the 4 1 or ¡¢ button to<br />
select the track number.<br />
The selected track number will be displayed.<br />
4. Press the DELETE button, or wait two seconds;<br />
the track to be <strong>de</strong>leted will be input.<br />
If the DELETE button is pressed after selecting the disc<br />
number only, the "AL" indicator will appear, indicating<br />
selection of the "Disc All Delete" mo<strong>de</strong> (the entire disc<br />
contents will be <strong>de</strong>leted from the program memory). While<br />
the "AL" indicator is displayed, however, if the 41 or<br />
¡¢ button is used to <strong>de</strong>signate a track number and<br />
the DELETE button is then pressed (or after two seconds<br />
elapses), the selected track will be <strong>de</strong>leted as that program<br />
step.<br />
5. Repeat steps 2, 3 and 4 to <strong>de</strong>lete other tracks.<br />
6. Press the 6 button.<br />
All tracks other than <strong>de</strong>leted tracks/discs are played in the<br />
or<strong>de</strong>r of the discs and track numbers. When tracks have<br />
been played, the player enters stop mo<strong>de</strong>.<br />
English<br />
3<br />
TRACK/MANUAL<br />
41 ¡¢<br />
(PD-M427 only)<br />
4 ¢<br />
NOTE:<br />
When a track is selected with the 4 1 or ¡ ¢ button<br />
in step 3, the displayed track number is automatically<br />
programmed if the 4 1 or ¡ ¢ button is not pressed<br />
within 2 seconds. Therefore, be sure to press the 4 1 or<br />
¡ ¢ button sequentially until the <strong>de</strong>sired track number<br />
appears on the display.<br />
To stop Delete program playback, Press the 7<br />
button.<br />
4<br />
DELETE<br />
÷ Track number 33 or above cannot be <strong>de</strong>leted.<br />
÷ To go to the previous or next disc/track other than the<br />
<strong>de</strong>leted disc/track, press the 4 1 or ¡ ¢ button.<br />
÷ If the magazine is in the player, the <strong>de</strong>lete program contents<br />
will not be erased even if the power is turned off.<br />
6<br />
PLAY/PAUSE<br />
6<br />
(PD-M427 only)<br />
3<br />
NOTE:<br />
After programming for Program playback or during Program<br />
playback mo<strong>de</strong>, Delete programming can not be carried out.<br />
To clear all of the Delete program contents:<br />
A During stop mo<strong>de</strong>, press the 7 button.<br />
B When the magazine is ejected, the program contents will<br />
be cleared.<br />
C Press the CLEAR button on the remote control unit during<br />
stop mo<strong>de</strong> or play mo<strong>de</strong>. When the CLEAR button is<br />
pressed during Delete program playback mo<strong>de</strong>, the player<br />
enters normal playback mo<strong>de</strong>.<br />
13<br />
En
TROUBLESHOOTING<br />
Incorrect operations are often mistaken for trouble and malfunctions. If you think that there is something wrong with this component, check the<br />
points below. Sometimes the trouble may lie in another component. Investigate the other components and electrical appliances being used.<br />
If the trouble cannot be rectified even after exercising the checks listed below, ask your nearest PIONEER authorized service center or your <strong>de</strong>aler<br />
to carry out repair work.<br />
Symptom<br />
Magazine is not expelled when the EJECT<br />
button is pressed.<br />
When playback is started, it stops<br />
immediately.<br />
Pauses or stops during playback.<br />
No sound<br />
Sound is distorted, noise is output.<br />
The picture of the TV screen is fluctuating<br />
or FM broadcast has noise interference.<br />
Remote control will not function.<br />
(PD-M427 only)<br />
Cause<br />
÷ Power plug is disconnected from outlet.<br />
÷ Disc is loa<strong>de</strong>d upsi<strong>de</strong> down.<br />
÷ Smudges, etc., on the disc.<br />
÷ Output cords are connected incorrectly or<br />
loosely.<br />
÷ Incorrect operation of stereo amplifier.<br />
÷ Pin plugs and/or amplifier terminals are dirty.<br />
÷ Player is in pause mo<strong>de</strong>.<br />
÷ Incorrect connections.<br />
÷ Pin plugs and/or amplifier terminals are dirty.<br />
÷ Interference is being picked up from a TV set.<br />
÷ Interference is being picked up from the CD<br />
player.<br />
÷ Dead batteries.<br />
÷ Too far from player or wrong angle.<br />
÷ Obstruction between player and remote control<br />
unit.<br />
Remedy<br />
÷ Connect plug to amplifier or wall outlet.<br />
÷ Load the disc correctly with the label si<strong>de</strong><br />
DOWN.<br />
÷ Clean the smudges from the disc and then<br />
play it again.<br />
÷ Connect properly.<br />
÷ Check the settings of amplifier switches<br />
and sound volume controls.<br />
÷ Clean away dirt.<br />
÷ Press the 6 (3 or 8) button.<br />
÷ Connect to amplifier’s AUX or CD terminals.<br />
Do not connect to PHONO terminals.<br />
÷ Clean away dirt.<br />
÷ Switch OFF TV set, or move player away<br />
from TV set.<br />
÷ Unplug the AC power cord, or move the<br />
player away from TV or tuner.<br />
÷ Replace batteries.<br />
÷ The distance between remote control unit<br />
and player should be no more than about 7<br />
meters (23 feet).<br />
The operational angle against the front<br />
panel is within 30° from right or left end of<br />
player.<br />
÷ Relocate remote control unit or remove<br />
obstruction.<br />
Abnormal functioning of this unit may be caused by static electricity, or other external interference. To restore operation, turn the<br />
power off and then on again, or unplug the AC power cord and then plug it in again.<br />
SPECIFICATIONS<br />
General<br />
Type ............................... Compact disc digital audio system<br />
Power requirements ........................ AC 110-127/220-240 V<br />
(switchable), 50/60Hz<br />
Power consumption ..................................................... 12 W<br />
<strong>Operating</strong> temperature...................................... +5°C-+35°C<br />
(+41°F– +95°F)<br />
Weight (without package) ......................... 3.7 kg (8 lb, 3 oz)<br />
External dimensions ............420(W) x 294 (D) x 105 (H) mm<br />
16-9/16 (W) x 11-9/16 (D) x 4-1/8 (H) in<br />
Audio section<br />
Frequency response ...................................... 2 Hz – 20 kHz<br />
Output voltage ............................................................. 2.0 V<br />
Wow and flutter ................................ Limit of measurement<br />
(0.001% W.PEAK) or less (EIAJ)<br />
Channels .................................................. 2-channel (stereo)<br />
14<br />
Output terminal<br />
Audio line output<br />
Control input/output jacks<br />
Accessories<br />
÷ Remote control unit (PD-M427 only) .............................. 1<br />
÷ Size AAA/R03 dry batteries (PD-M427 only) ................... 2<br />
÷ Six-compact-disc magazine............................................. 1<br />
÷ Control cable ................................................................... 1<br />
÷ Output cable ................................................................... 1<br />
÷ <strong>Operating</strong> instructions .................................................... 1<br />
NOTE:<br />
Specifications and <strong>de</strong>sign subject to possible modification<br />
without notice, due to improvements.<br />
The Magazine Type Multi CD Players with mark and<br />
the Magazines with the same mark are compatible for 5 inch<br />
(12 cm) discs.<br />
Published by <strong>Pioneer</strong> Electronic Corporation.<br />
Copyright © 1999 <strong>Pioneer</strong> Electronic Corporation.<br />
All rights reserved.<br />
En
ÍNDICE<br />
Gracias por la adquisición <strong>de</strong> este producto <strong>Pioneer</strong>.<br />
Para saber cómo utilizar correctamente su mo<strong>de</strong>lo, lea<br />
cuidadosamente este manual <strong>de</strong> <strong>instrucciones</strong>. Después <strong>de</strong><br />
haber finalizado su lectura, guár<strong>de</strong>lo en un lugar seguro para<br />
futuras referencias.<br />
En algunos países o regiones, la forma <strong>de</strong> la clavija <strong>de</strong><br />
alimentación y <strong>de</strong> la toma <strong>de</strong> corriente pue<strong>de</strong>n ser diferentes<br />
a la indicada en las ilustraciones explicatorias, sin embargo el<br />
método <strong>de</strong> conexión y operación <strong>de</strong> la unidad es idéntico.<br />
ADVERTENCIA: PARA EVITAR INCENDIOS Y<br />
DESCARGAS ELÉCTRICAS, NO EXPONGA ESTE APARATO<br />
A LA LLUVIA NI A LA HUMEDAD.<br />
SELECTOR DE TENSIÓN DE LÍNEA<br />
Las tensiones <strong>de</strong> la red eléctrica en Arabia Saudí son <strong>de</strong><br />
127 V y 220 V solamente.<br />
El selector <strong>de</strong> tensión está situado en el panel posterior <strong>de</strong><br />
este reproductor. Antes <strong>de</strong> que el reproductor salga <strong>de</strong><br />
fábrica, el selector se ajusta al valor <strong>de</strong> la tensión <strong>de</strong>l país<br />
<strong>de</strong> <strong>de</strong>stino.<br />
Compruebe que esté correctamente ajustado antes <strong>de</strong><br />
enchufar el cable <strong>de</strong> alimentación a la toma <strong>de</strong> alimentación.<br />
Si la tensión no está correctamente ajustada, ajuste el<br />
selector <strong>de</strong>l modo siguiente:<br />
÷ Asegúrese <strong>de</strong> haber <strong>de</strong>senchufado el cable <strong>de</strong><br />
alimentación <strong>de</strong> la toma <strong>de</strong> alimentación antes <strong>de</strong> realizar<br />
este ajuste.<br />
÷ Utilice un <strong>de</strong>stornillador <strong>de</strong> tamaño medio (cabeza plana).<br />
Inserte la punta <strong>de</strong>l <strong>de</strong>stornillador en la ranura <strong>de</strong>l<br />
selector y gírelo <strong>de</strong> modo que la marca <strong>de</strong> la tensión <strong>de</strong><br />
su zona señale a la flecha.<br />
CONFIRMACIÓN DE LOS ACCESORIOS ........................ 15<br />
INSTALACIÓN DE LAS PILAS EN LA UNIDAD DE<br />
CONTROL REMOTO ................................................... 16<br />
OPERACIÓN A CONTROL REMOTO .............................. 16<br />
PRECAUCIONES REFERENTES AL MANEJO ................. 17<br />
ANTES DE UTILIZAR EL REPRODUCTOR....................... 18<br />
CONEXIONES .................................................................. 19<br />
NOMBRES Y FUNCIONES DE LOS CONTROLES .......... 20<br />
FUNCIONAMIENTO BÁSICO........................................... 21<br />
DIVERSAS OPERACIONES .............................................. 22<br />
PARA REPRODUCIR SOLAMENTE LAS CANCIONES/<br />
DISCOS DESEADOS ................................................... 24<br />
SOLUCIÓN DE PROBLEMAS .......................................... 27<br />
ESPECIFICACIONES ........................................................ 27<br />
CONFIRMACIÓN DE LOS<br />
ACCESORIOS<br />
1<br />
2<br />
3<br />
4<br />
Î<br />
'<br />
5<br />
Español<br />
220-240V 110-127V<br />
1 1 cartucho <strong>de</strong> 6 discos compactos<br />
(Llamado cartucho <strong>de</strong> 6 discos en las explicaciones.)<br />
NOTA:<br />
El cartucho <strong>de</strong> 6 discos compactos es sólo para discos <strong>de</strong><br />
12 cm.<br />
2 1 cable <strong>de</strong> salida<br />
3 1 cable <strong>de</strong> control<br />
4 1 unidad <strong>de</strong> control remoto (sólo en el PD-M427)<br />
5 2 pilas secas (AAA/R03) (sólo en el PD-M427)<br />
15<br />
Sp
INSTALACIÓN DE LAS PILAS EN LA UNIDAD<br />
DE CONTROL REMOTO (sólo en el PD-M427)<br />
OPERACIÓN A CONTROL<br />
REMOTO (sólo en el PD-M427)<br />
1<br />
2<br />
3<br />
Para usar la unidad <strong>de</strong> control remoto, apunte el transmisor <strong>de</strong><br />
señales infrarrojas <strong>de</strong> la unidad hacia el sensor <strong>de</strong> control<br />
remoto (REMOTE SENSOR) <strong>de</strong>l panel <strong>de</strong>lantero <strong>de</strong>l<br />
reproductor. La unidad <strong>de</strong> control remoto pue<strong>de</strong> emplearse a<br />
una distancia <strong>de</strong> aproximadamente 7 metros <strong>de</strong>l sensor <strong>de</strong><br />
control remoto, y en un ángulo <strong>de</strong> hasta 30 grados.<br />
Abra la tapa <strong>de</strong>l compartimiento <strong>de</strong> las pilas, situado en la<br />
parte posterior <strong>de</strong> la unidad <strong>de</strong> control remoto, e inserte las<br />
pilas (tamaño “AAA” (IEC R03)), asegurándose <strong>de</strong> alinear<br />
correctamente las polarida<strong>de</strong>s ª y ·.<br />
Aproximadamente<br />
7m<br />
7 m<br />
30˚<br />
30˚<br />
NOTAS:<br />
÷ Para evitar que las pilas sufran pérdidas, extráigalas cuando<br />
no vaya a usar la unidad <strong>de</strong> control remoto por un período<br />
prolongado <strong>de</strong> tiempo (un mes o más). Si las pilas sufren<br />
pérdidas, limpie cuidadosamente el interior <strong>de</strong>l<br />
compartimiento hasta eliminar todo residuo <strong>de</strong> electrólito<br />
<strong>de</strong> pila, y reemplace las pilas por pilas nuevas.<br />
÷ No permita que libros u otros objetos que<strong>de</strong>n encima <strong>de</strong> la<br />
unidad <strong>de</strong> control remoto, ya que los botones podrían<br />
presionarse, haciendo que las pilas se <strong>de</strong>sgasten más<br />
rápido.<br />
NOTA:<br />
Si la ventanilla <strong>de</strong>l sensor <strong>de</strong> control remoto queda expuesta<br />
a luz intensa, como ser la luz <strong>de</strong>l sol o luz fluorescente, el<br />
control podrá verse imposibilitado.<br />
NOTA para el PD-M407:<br />
Opere el PD-M407 usando la uniddad <strong>de</strong> control remoto<br />
proporcionada viene con el amplificador. (Consulte la página<br />
19).<br />
El uso incorrecto <strong>de</strong> las pilas pue<strong>de</strong> causar pérdidas o<br />
ruptura. Consi<strong>de</strong>re siempre las siguientes<br />
recomendaciones:<br />
A. Inserte las pilas en el compartimiento en la dirección<br />
correcta, observando la polaridad positiva ª y<br />
negativa ·, como se indica en el interior <strong>de</strong>l<br />
compartimiento.<br />
B. Nunca mezcle pilas nuevas con pilas usadas.<br />
C. Dependiendo <strong>de</strong> la marca, las pilas <strong>de</strong> un mismo<br />
tamaño pue<strong>de</strong>n tener distinta tensión. No mezcle<br />
pilas <strong>de</strong> distintas marcas.<br />
16<br />
Sp
PRECAUCIONES REFERENTES AL MANEJO<br />
UBICACIÓN<br />
Instale el reproductor en un lugar bien ventilado, don<strong>de</strong> no<br />
que<strong>de</strong> expuesto a gran temperatura ni humedad.<br />
No instale el reproductor en un lugar expuesto a los rayos directos <strong>de</strong>l<br />
sol, ni cerca <strong>de</strong> estufas o radiadores. El calor excesivo pue<strong>de</strong> dañar la<br />
caja y los componentes internos.<br />
A<strong>de</strong>más, la instalación en un ambiente húmedo o polvoriento pue<strong>de</strong><br />
resultar en mal funcionamiento o acci<strong>de</strong>ntes. (A<strong>de</strong>más, evite la<br />
instalación cerca <strong>de</strong> cocinas, etc., don<strong>de</strong> el reproductor pueda quedar<br />
expuesto al humo <strong>de</strong> aceite, vapor o calor.)<br />
No instale el reproductor sobre una superficie inestable o inclinada.<br />
PRECAUCIONES REFERENTES A LA<br />
INSTALACIÓN<br />
÷ Si se instala y emplea el reproductor <strong>de</strong> discos compactos durante<br />
períodos prolongados sobre fuentes que generan calor, tales<br />
como amplificadores, el rendimiento se verá afectado. No ponga<br />
el reproductor sobre fuentes generadoras <strong>de</strong> calor.<br />
÷ Instale este reproductor <strong>de</strong> discos compactos lo más alejado<br />
posible <strong>de</strong> sintonizadores y aparatos <strong>de</strong> TV. Un reproductor <strong>de</strong><br />
discos compactos instalado cerca <strong>de</strong> tales equipos pue<strong>de</strong> causar<br />
ruidos o la <strong>de</strong>gradación <strong>de</strong> la imagen.<br />
÷ Tal ruido pue<strong>de</strong> ser especialmente notable cuando se emplee una<br />
antena interior. En tal caso, utilice una antena exterior, o <strong>de</strong>sconecte<br />
la alimentación <strong>de</strong>l reproductor <strong>de</strong> discos compactos.<br />
÷ Coloque este aparato sobre una superficie plana.<br />
LIMPIEZA DEL REPRODUCTOR Y DEL<br />
CARTUCHO<br />
Para limpiar el REPRODUCTOR y el CARTUCHO, frótelos con un<br />
paño suave y seco. Para partes muy sucias, hume<strong>de</strong>zca un paño<br />
suave en una solución <strong>de</strong> <strong>de</strong>tergente con concentración <strong>de</strong> 5 ó 6<br />
partes <strong>de</strong> agua, escurra bien el paño, y frote la suciedad. Emplee un<br />
paño seco para frotar la superficie y secarla. No emplee líquidos<br />
volátiles como puedan ser benica o disolvente, porque podrían dañar<br />
el aparato.<br />
ALMACENAJE DE LOS DISCOS<br />
÷ Los discos compactos están hechos <strong>de</strong>l mismo tipo <strong>de</strong> plástico<br />
que el empleado para los discos analógicos convencionales.<br />
Tenga cuidado <strong>de</strong> que no se alabeen; guár<strong>de</strong>los siempre<br />
verticalmente en sus cajas, evitando lugares muy cálidos o <strong>de</strong> gran<br />
humedad, o <strong>de</strong> temperatura extremadamente baja. Evite <strong>de</strong>jar los<br />
discos en automóviles, ya que el asiento <strong>de</strong> un automóvil a la luz<br />
solar directa pue<strong>de</strong> calentarse mucho, lo cual es perjudicial.<br />
÷ Lea y realice siempre lo indicado en las precauciones <strong>de</strong> los discos.<br />
LIMPIADOR DE LENTES DE REPRODUCTORES<br />
DE DISCOS COMPACTOS<br />
Las lentes <strong>de</strong>l fonocaptor <strong>de</strong>l reproductor no <strong>de</strong>ben ensuciarse<br />
durante la reproducción normal, pero si por alguna que otra razón<br />
funciona mal <strong>de</strong>bido a suciedad, lea la sección sobre solución <strong>de</strong><br />
consulte al centro <strong>de</strong> servicio técnico PIONEER autorizado más<br />
cercano. Los limpiadores <strong>de</strong> lentes para reproductores <strong>de</strong> discos<br />
compactos están <strong>de</strong>sponibles en las tiendas <strong>de</strong>l ramo, pero <strong>de</strong>be<br />
tenerse mucho cuidado en su empleo porque algunos productos<br />
pue<strong>de</strong>n causar daños en las lentes.<br />
CONDENSACIÓN<br />
Cuando el reproductor se <strong>de</strong>splaza <strong>de</strong> un lugar frío a otro cálido, o<br />
cuando la temperatura <strong>de</strong> la sala aumenta repentinamente, pue<strong>de</strong><br />
con<strong>de</strong>nsarse humedad en el interior, y es posible que el reproductor<br />
no rinda al máximo. En tal caso, <strong>de</strong>je el reproductor en reposo durante<br />
una hora o aumente gradualmente la temperatura <strong>de</strong> la sala.<br />
LIMPIEZA DE DISCOS Y MANIPULACIÓN DE<br />
DISCOS COMPACTOS<br />
÷ Mantenga siempre los discos limpios frotándolos suavemente<br />
con un paño suave <strong>de</strong>s<strong>de</strong> el centro hacia la periferia.<br />
÷ Si un disco se ensucia <strong>de</strong>masiado, hume<strong>de</strong>zca un paño suave en<br />
agua y, <strong>de</strong>spués <strong>de</strong> escurrirlo bien, limpie suavemente la suciedad,<br />
y <strong>de</strong>spués seque bien las gotas <strong>de</strong> agua con otro paño suave y<br />
seco.<br />
÷ No emplee rociadores para limpieza <strong>de</strong> discos convencionales ni<br />
agentes antiestáticos. A<strong>de</strong>más, no limpie nunca los discos con<br />
bencina, diluidor <strong>de</strong> pintura, ni ningún otro disolvente volátil, ya<br />
que podría dañar la superficie <strong>de</strong> los discos.<br />
Nesta unida<strong>de</strong>, usar urn disco compacto que tenha a marca<br />
mostrada abaixo. Não usar outro disco, pois isso po<strong>de</strong> resultar<br />
em mau funcionamento ou danos.<br />
÷ Cuando manipule discos no toque las superficies <strong>de</strong> las<br />
señales (el lado con los colores <strong>de</strong>l arco iris, el lado<br />
opuesto al <strong>de</strong> la etiqueta).<br />
Sujételos por los bor<strong>de</strong>s, o por un bor<strong>de</strong> y su orificio<br />
central.<br />
÷ No pegue etiquetas ni cintas en la superficie <strong>de</strong> la etiqueta<br />
central. A<strong>de</strong>más, no raye ni dañe dicha etiqueta.<br />
÷ Los discos giran a gran velocidad <strong>de</strong>ntro <strong>de</strong>l reproductor.<br />
No emple discos dañados (rajados o alabeados).<br />
PRECAUCIÓN: EMPLEO DE DISCOS CD CON FORMAS<br />
ESPECIALES<br />
Este producto está diseñado para emplear solamente discos CD<br />
totalmente circulares convencionales. El empleo <strong>de</strong> discos CD con<br />
formas especiales no se recomienda para este producto. <strong>Pioneer</strong> no<br />
se hace responsable por los problemas que puedan surgir con<br />
relación al empleo <strong>de</strong> discos CD <strong>de</strong> formas especiales.<br />
'<br />
NOTAS:<br />
÷ Para po<strong>de</strong>r reproducir un disco compacto <strong>de</strong> 8 cm, necesitará un<br />
cartucho <strong>de</strong> multidiscos especial (JD-M108, JD-M308), que está<br />
a la venta por esparado. Lea su manual <strong>de</strong> <strong>instrucciones</strong> antes <strong>de</strong><br />
utilizarlo.<br />
÷ Adaptadores para discos <strong>de</strong> 8 cm<br />
Es posible que incluso un adaptador que satisfaga las<br />
especificaciones <strong>de</strong> CD estándar recomendadas no pueda utilizarse<br />
con el reproductor <strong>de</strong> discos compactos. Se recomienda el empleo<br />
<strong>de</strong> un cartucho <strong>de</strong> multidiscos especial (JD-M108, JD-M308).<br />
÷ No inserte nunca un disco compacto <strong>de</strong> 8 cm o su adaptador en un<br />
cartucho <strong>de</strong> disco estándar <strong>de</strong> 12 cm, porque podría dañarse<br />
seriamente el reproductor.<br />
÷ No inserte solamente un disco <strong>de</strong> 8 cm y el adaptador en el<br />
cartucho suministrado.<br />
17<br />
Sp<br />
Español
ANTES DE UTILIZAR EL REPRODUCTOR<br />
INSERCIÓN DE DISCOS EN EL<br />
CARTUCHO DE 6 DISCOS<br />
Inserte los discos que <strong>de</strong>see en el cartucho suministrado.<br />
Pue<strong>de</strong>n insertarse hasta 6 discos. La numeración <strong>de</strong> los<br />
discos empieza por el número 1 para el disco superior. El<br />
número va aumentando según va bajando la posición <strong>de</strong>l<br />
disco; hasta el número 6 que correspon<strong>de</strong> al disco inferior. El<br />
cartucho tiene una mirilla por la que pue<strong>de</strong> comprobarse la<br />
ban<strong>de</strong>ja <strong>de</strong>l disco seleccionado. Incluso durante la<br />
reproducción, a través <strong>de</strong> esta mirilla pue<strong>de</strong> comprobarse el<br />
número <strong>de</strong>l disco que se está reproduciendo.<br />
COLOCACIÓN DE ETIQUETAS EN EL<br />
CARTUCHO<br />
÷ Coloque siempre en los lugares asignados las etiquetas<br />
suministradas. El funcionamiento quizá no sea correcto si<br />
coloca las etiquetas en otros lugares.<br />
÷ Formas convenientes <strong>de</strong> utilizar las etiquetas:<br />
A: Para títulos<br />
B: Para nombres <strong>de</strong> discos<br />
C: Para clasificación<br />
÷ No ponga etiquetas sobre otras etiquetas.<br />
1. Extraiga una sola ban<strong>de</strong>ja <strong>de</strong> disco.<br />
C<br />
B<br />
B<br />
B<br />
A<br />
A<br />
C<br />
2. Coloque los discos con el lado <strong>de</strong> la etiqueta mirando<br />
hacia abajo.<br />
El lado <strong>de</strong> la<br />
etiqueta mirando<br />
hacia abajo.<br />
Hay disponibles a modo opcional cartuchos adicionales<br />
idénticos al suministrado (*JD-M100/JD-M200, JD-M300,<br />
JD-M108, JD-M308).<br />
Utilice estos cartuchos para preparar su propia discografía<br />
con cartuchos separados para cada músico o estilo.<br />
* JD-M100/JD-M200/JD-M300<br />
....................................... Cartucho para discos <strong>de</strong> 12 cm.<br />
JD-M108/JD-M308 .......... Cartucho para discos <strong>de</strong> 8 cm.<br />
NOTA:<br />
No ponga discos <strong>de</strong> 8 cm en el cartucho para discos <strong>de</strong> 12 cm.<br />
3. Introduzca la ban<strong>de</strong>ja <strong>de</strong> disco a su posición original.<br />
4. Inserte los otros discos repitiendo los pasos 1 al 3.<br />
PRECAUCIÓN:<br />
÷ Cerciórese <strong>de</strong> sacar sólo una ban<strong>de</strong>ja <strong>de</strong> disco cada vez.<br />
(Cuando se ha sacado una ban<strong>de</strong>ja <strong>de</strong> disco, no saque otras<br />
ban<strong>de</strong>jas.)<br />
÷ Si se insertan los discos con el lado <strong>de</strong> la etiqueta arriba, no<br />
podrán ser reproducidos. Cerciórese <strong>de</strong> que que<strong>de</strong>n<br />
insertados con el lado <strong>de</strong> la etiqueta abajo.<br />
÷ Nunca <strong>de</strong>ben insertarse objetos que no sean discos (tarjetas<br />
<strong>de</strong> canciones, explicaciones <strong>de</strong>l contenido <strong>de</strong> los discos,<br />
etc.) en las ban<strong>de</strong>jas <strong>de</strong> discos.<br />
÷ No toque la superficie <strong>de</strong> reproducción <strong>de</strong> los discos (el<br />
lado iri<strong>de</strong>scente) con las manos ni con los <strong>de</strong>dos.<br />
18<br />
PRECAUCIONES CONCERNIENTES A LA<br />
MANIPULACIÓN DEL CABLE DE ALIMENTACIÓN<br />
Tome el cable <strong>de</strong> alimentación por la clavija. No extraiga la<br />
clavija tirando <strong>de</strong>l cable. Nunca toque el cable <strong>de</strong> alimentación<br />
cuando sus manos estén mojadas, ya que esto podría causar<br />
cortocircuitos o <strong>de</strong>scargas eléctricas. No coloque la unidad,<br />
algún mueble, etc., sobre el cable <strong>de</strong> alimentación. Asegúrese<br />
<strong>de</strong> no hacer nudos en el cable ni <strong>de</strong> unirlo a otros cables. Los<br />
cables <strong>de</strong> alimentación <strong>de</strong>berán ser dispuestos <strong>de</strong> tal forma<br />
que la probabilidad <strong>de</strong> que sean pisados sea mínima. Un cable<br />
<strong>de</strong> alimentación dañado podrá causar incendios o <strong>de</strong>scargas<br />
eléctricas. Revise el cable <strong>de</strong> alimentación está dañado,<br />
solicite el reemplazo <strong>de</strong>l mismo al centro <strong>de</strong> servicio autorizado<br />
PIONEER más cercano, o a su distribuidor.<br />
Sp
CONEXIONES<br />
L<br />
R<br />
CD<br />
Blanco<br />
L<br />
R<br />
Rojo<br />
Cable <strong>de</strong> salida<br />
÷ Antes <strong>de</strong> hacer o cambiar las conexiones, ponga el<br />
interruptor STANDBY/ON en OFF y <strong>de</strong>sconecte el<br />
cable <strong>de</strong> alimentación <strong>de</strong>l tomacorriente <strong>de</strong> CA.<br />
Reproductor <strong>de</strong> discos compactos<br />
CONTROL<br />
OUT<br />
Amplificador estéreo<br />
Blanco<br />
Cable <strong>de</strong> control<br />
L<br />
R<br />
Rojo<br />
L<br />
R<br />
LINE OUT<br />
CONTROL<br />
IN<br />
OUT<br />
A la toma <strong>de</strong> corriente <strong>de</strong> CA.<br />
Español<br />
Cable <strong>de</strong> la alimentación<br />
Conexiones<br />
1. Conecte las tomas LINE OUT <strong>de</strong> este aparato a las<br />
tomas <strong>de</strong> entrada (CD o AUX) <strong>de</strong>l amplificador.<br />
Cerciórese <strong>de</strong> que los enchufes blancos estén<br />
conectados a las tomas izquierdas (L) y los enchufes<br />
rojos a las tomas <strong>de</strong>rechas (R).<br />
÷ Cerciórese <strong>de</strong> no conectar este aparato a las tomas PHONO<br />
<strong>de</strong>l amplificador porque el sonido se distorsionará y no<br />
podrá obtenerse una reproducción normal.<br />
2. Conecte el cable <strong>de</strong> alimentación a una toma <strong>de</strong><br />
corriente <strong>de</strong> CA <strong>de</strong>l hogar o una toma <strong>de</strong> CA <strong>de</strong> su<br />
amplificador.<br />
÷ Cerciórese <strong>de</strong> que los enchufes estén firmemente<br />
insertados en las tomas, incluida la <strong>de</strong> CA <strong>de</strong> la pared.<br />
Control remoto <strong>de</strong>l sistema con un amplificador estéreo<br />
<strong>Pioneer</strong> que tenga la marca Î<br />
Cuando se usa un amplificador estéreo <strong>Pioneer</strong> provisto <strong>de</strong> la<br />
marca Î, conecte la toma CONTROL IN <strong>de</strong>l panel posterior <strong>de</strong>l<br />
reproductor <strong>de</strong> discos compactos a la toma CONTROL OUT<br />
<strong>de</strong>l amplificador. De este modo podrá controlar el reproductor<br />
<strong>de</strong> discos compactos usando la unidad <strong>de</strong> control remoto<br />
suministrada con el amplificador estéreo. Si no tiene la intención<br />
<strong>de</strong> emplear esta función, no es necesario conectar las tomas<br />
CONTROL IN/OUT.<br />
÷ El cable <strong>de</strong> control se suministra con el reproductor <strong>de</strong><br />
discos compactos.<br />
÷ La unidad <strong>de</strong> control remoto suministrada con el amplificador<br />
pue<strong>de</strong> usarse para las operaciones <strong>de</strong> reproducción, parada,<br />
pausa, búsqueda <strong>de</strong> canciones/discos y <strong>de</strong> cambio <strong>de</strong><br />
disco.<br />
÷ Para las <strong>instrucciones</strong> relacionadas con las conexiones y la<br />
operación, consulte el manual <strong>de</strong> <strong>instrucciones</strong> provisto<br />
con el amplificador estéreo.<br />
NOTAS:<br />
÷ Cuando haya un cable <strong>de</strong> control conectado al conector <strong>de</strong><br />
entrada <strong>de</strong> control (CONTROL IN) <strong>de</strong>l reproductor, el<br />
control directo <strong>de</strong>l reproductor mediante la unidad <strong>de</strong><br />
control remoto no será posible. En este caso, para operar<br />
el reproductor con la unidad <strong>de</strong> control remoto, apúntela<br />
hacia el amplificador.<br />
÷ Asegúrese <strong>de</strong> conectar las clavijas <strong>de</strong>l cable <strong>de</strong> control con<br />
seguridad a los terminales CONTROL IN y CONTROL<br />
OUT. No conecte sólo un extremo <strong>de</strong>l cable.<br />
÷ Asegúrese <strong>de</strong> <strong>de</strong>sconectar la alimentación <strong>de</strong>l amplificador<br />
antes <strong>de</strong> conectar el cable <strong>de</strong> alimentación y el cable <strong>de</strong><br />
salida.<br />
Conexión <strong>de</strong>l cable <strong>de</strong> alimentación<br />
Conecte el cable <strong>de</strong> alimentación a una toma <strong>de</strong> corriente <strong>de</strong><br />
CA <strong>de</strong>l hogar o una toma <strong>de</strong> CA <strong>de</strong> su amplificador.<br />
÷ Asegúrese <strong>de</strong> que las clavijas estén insertadas por completo<br />
a las tomas y al tomacorriente.<br />
CONEXIÓN DEL CABLE DE<br />
ALIMENTACIÓN DE CA Y FUNCIONES<br />
Algunas funciones no pue<strong>de</strong>n llevarse a cabo <strong>de</strong>pendiendo <strong>de</strong><br />
la conexión <strong>de</strong>l cable <strong>de</strong> alimentación <strong>de</strong> CA.<br />
Función<br />
Reproducción<br />
con temporizador<br />
Memoria <strong>de</strong><br />
programa<br />
Cuando el cable <strong>de</strong><br />
alimentación <strong>de</strong> CA se<br />
conecta a la toma<br />
interconectada <strong>de</strong> un<br />
amplificador o a un<br />
temporizador <strong>de</strong> audio.<br />
Sí<br />
No<br />
Cuando el cable <strong>de</strong><br />
alimentación <strong>de</strong> CA se<br />
conecta a la toma<br />
in<strong>de</strong>pendiente <strong>de</strong> un<br />
amplificador o a un<br />
tomacorriente <strong>de</strong> la<br />
red eléctrica.<br />
Memoria <strong>de</strong> programa<br />
con<br />
No<br />
Sí<br />
borrado<br />
Para más <strong>de</strong>talles, consulte la <strong>de</strong>scripción <strong>de</strong> cada función <strong>de</strong><br />
este manual <strong>de</strong> <strong>instrucciones</strong>.<br />
No<br />
Sí<br />
19<br />
Sp
NOMBRES Y FUNCIONES DE LOS CONTROLES<br />
PANEL FRONTAL<br />
Interruptor <strong>de</strong> alimentación/<br />
reserva ( STANDBY/ON)<br />
Ranura <strong>de</strong><br />
inserción <strong>de</strong>l<br />
cartucho <strong>de</strong><br />
discos<br />
Ventanilla <strong>de</strong>l sensor <strong>de</strong> control remoto (sólo en el PD-M427)<br />
Recibe la señal <strong>de</strong>s<strong>de</strong> la unidad <strong>de</strong> control remoto.<br />
Visualizador<br />
Aleatoria (RANDOM)<br />
Exploración Hi-Lite<br />
(HI-LITE )<br />
MULTI COMPACT DISC PLAYER<br />
PD–M427<br />
DISC TRACK MIN SEC<br />
'<br />
Î<br />
RANDOM<br />
HI–LITE<br />
STANDBY/ON<br />
6<br />
-DISC<br />
MULTI CD<br />
EJECT REPEAT PROGRAM DISC TRACK/MANUAL<br />
0 41 ¡ ¢<br />
STOP PLAY/PAUSE<br />
7 6<br />
1-BIT•DLC DIRECT LINEAR CONVERSION<br />
Aleatoria (RANDOM)<br />
Borrado<br />
(DELETE)<br />
Reproducción<br />
DISC TRACK<br />
MIN SEC<br />
Expulsión<br />
(EJECT)<br />
Repetición<br />
(REPEAT)<br />
Programación<br />
Pausa<br />
(PROGRAM)<br />
Número <strong>de</strong> discos<br />
(DISC)<br />
Número <strong>de</strong> canción (TRACK)<br />
Disco (DISC)<br />
Parada (STOP)<br />
Canció n/manual<br />
(TRACK/MANUAL)<br />
Reproducción/pausa<br />
(PLAY/PAUSE)<br />
DELETE<br />
RANDOM<br />
PROGRAM<br />
REPEAT–1<br />
1 2 3 4 5 6<br />
DISC<br />
SCAN<br />
Repetición<br />
(REPEAT)<br />
Disco<br />
(DISC)<br />
Programación (PROGRAM)<br />
Minutos<br />
Exploración <strong>de</strong> discos<br />
(DISC SCAN)<br />
Segundos<br />
UNIDAD DE CONTROL REMOTO (sólo en el PD-<br />
M427)<br />
Los botones <strong>de</strong> la unidad <strong>de</strong> control remoto tienen las mimas<br />
funciones que los botones correspondientes (aquellos con el<br />
mismo nombre o símbolo) <strong>de</strong>l panel <strong>de</strong>lantero <strong>de</strong>l reproductor.<br />
1<br />
2<br />
3<br />
4<br />
5<br />
6<br />
7<br />
STANDBY/ON<br />
DISC 1 DISC 2 DISC 3<br />
DISC 4 DISC 5 DISC 6<br />
Î<br />
7 8 3<br />
RANDOM<br />
HI–LITE<br />
1 ¡<br />
4 ¢<br />
PROGRAM<br />
CHECK<br />
DELETE<br />
CLEAR<br />
'<br />
MULTI<br />
COMPACT DISC PLAYER<br />
REMOTE CONTROL UNIT<br />
8<br />
9<br />
10<br />
11<br />
12<br />
13<br />
1 Interruptor <strong>de</strong> alimentación ( STANDBY/ON)<br />
2 Botones selectores <strong>de</strong> número <strong>de</strong> disco (DISC<br />
NUMBER)(DISC 1 – DISC 6)<br />
3 Botón <strong>de</strong> parada (STOP) (7)<br />
4 Botón <strong>de</strong> aleatoria (RANDOM)<br />
5 Botón <strong>de</strong> exploración selectiva (HI-LITE)<br />
6 Botón <strong>de</strong> programa (PROGRAM)<br />
7 Botón <strong>de</strong> verificación (CHECK)<br />
8 Botón <strong>de</strong> pausa (PAUSE)<br />
9 Botón <strong>de</strong> reproducción (PLAY) (3)<br />
10 Botones <strong>de</strong> búsqueda manual (MANUAL) (1, ¡)<br />
11 Botones <strong>de</strong> búsqueda <strong>de</strong> pista (TRACK) (4, ¢)<br />
12 Botón <strong>de</strong> borrado (DELETE)<br />
13 Botón <strong>de</strong> borrado (CLEAR)<br />
20<br />
Sp
STANDBY/ON<br />
MULTI COMPACT DISC PLAYER<br />
-DISC<br />
MULTI CD<br />
DISC TRACK MIN SEC<br />
EJECT REPEAT PROGRAM DISC TRACK/MANUAL<br />
RANDOM<br />
HI–LITE<br />
STOP PLAY/PAUSE<br />
FUNCIONAMIENTO BÁSICO<br />
PARA REPRODUCIR UN DISCO COMPACTO<br />
1<br />
6<br />
'<br />
1 2 3<br />
STANDBY/ON<br />
0 41 ¡ ¢<br />
7 6<br />
1-BIT•DLC DIRECT LINEAR CONVERSION<br />
1. Pulse el interruptor STANDBY/ON para conectar la<br />
alimentación.<br />
2. Inserte un cartucho empujándolo hasta que se escuche<br />
un ruido seco.<br />
÷ Inserte <strong>de</strong> antemano en el cartucho el disco que va a<br />
reproducir. (Consulte “ANTES DE UTILIZAR EL<br />
REPRODUCTOR” en la página 18.)<br />
÷ Cuando se <strong>de</strong>sconecta la alimentación (en el modo <strong>de</strong><br />
reserva), al inserte un cartucho se conecta automáticamente<br />
la alimentación (función <strong>de</strong> conexión automática <strong>de</strong> la<br />
alimentación).<br />
3. Pulse el botón 6 para comenzar la reproducción.<br />
Para hacer temporalment una pausa en la<br />
reproducción:<br />
Presione el botón 6 durante la reproducción. El indicador 8<br />
se encen<strong>de</strong>rá y se pausará la reproducción en tal punto. Al<br />
presionar <strong>de</strong> nuevo el botón 6 o el botón 3, se reanudará<br />
la reproducción <strong>de</strong>s<strong>de</strong> la posición en que se estableció el<br />
modo <strong>de</strong> pausa.<br />
Español<br />
2<br />
Para parar la reproducción:<br />
Pulse el botón 7. El reproductor vuelve al principio <strong>de</strong> la<br />
primera melodía <strong>de</strong>l disco en el que paró la reproducción. Si se<br />
pulsa el botón 7 dos veces, el reproductor vuelve al comienzo<br />
<strong>de</strong> la primera melodía <strong>de</strong>l primer disco y luego se pone en el<br />
modo <strong>de</strong> parada.<br />
3<br />
PLAY/PAUSE<br />
6<br />
DISC TRACK<br />
MIN SEC<br />
NOTA:<br />
Si se <strong>de</strong>sconecta la alimentación habiendo un cartucho en el<br />
reproductor, el reproductor memoriza el disco que estaba<br />
reproduciéndose en el momento <strong>de</strong> <strong>de</strong>sconectar la<br />
alimentación. Por lo tanto, cuando conecte <strong>de</strong> nuevo la<br />
alimentación, al pulsar el botón 6, la reproducción comienza<br />
<strong>de</strong>s<strong>de</strong> la primera melodía <strong>de</strong>l disco memorizado.<br />
1 2 3 4 5 6<br />
(sólo en el PD-M427)<br />
3<br />
Para <strong>de</strong>tener la reproducción y sacar el cartucho:<br />
Presione el botón <strong>de</strong> expulsión (EJECT) (0), saque el cartucho,<br />
y luego presione el interruptor STANDBY/ON para<br />
<strong>de</strong>sconectar la alimentación.<br />
Incluso cuando la alimentación está <strong>de</strong>sconectada (en el<br />
modo <strong>de</strong> reserva), el cartucho se expulsará al presionar el<br />
botón <strong>de</strong> expulsión (EJECT).<br />
PLAY/PAUSE<br />
8 PAUSE 6<br />
STOP<br />
7 STOP<br />
7<br />
(sólo en el PD-M427)<br />
Las operaciones indicadas con el símbolo [ ] se efectúan<br />
mediante la unidad <strong>de</strong> control remoto.(sólo en el PD-M427)<br />
8<br />
(sólo en el PD-M427)<br />
7<br />
Precauciones relacionadas con la manipulación <strong>de</strong><br />
cartuchos:<br />
÷ Al insertar un cartucho en el reproductor, cerciórese <strong>de</strong> que<br />
la dirección <strong>de</strong> inserción sea la correcta.<br />
÷ Después <strong>de</strong> la utilización, guár<strong>de</strong>lo en la caja suministrada.<br />
No lo ponga en lugares sujetos a altas temperaturas o<br />
expuesto a los rayos directos <strong>de</strong>l sol.<br />
÷ No separe los cartuchos.<br />
÷ Tenga cuidado <strong>de</strong> que no se caigan ni golpeen los cartuchos.<br />
No aplique fuerza a las ban<strong>de</strong>jas que se han abierto.<br />
÷ La aplicación <strong>de</strong> bencina, diluidor <strong>de</strong> pintura, insecticida, u<br />
otros líquidos volátiles a un cartucho pue<strong>de</strong> ocasionar<br />
daños en la superficie, por lo que <strong>de</strong>berá guardar los<br />
cartuchos apartados <strong>de</strong> tales substancias.<br />
21<br />
Sp
DIVERSAS OPERACIONES<br />
BÚSQUEDA DE DISCO – PARA BUSCAR<br />
UN DISCO ESPECIFICADO<br />
Durante el modo <strong>de</strong> reproducción o parada<br />
BÚSQUEDA MANUAL – PARA BUSCAR<br />
UN PASAJE ESPECIFICADO<br />
Durante el modo <strong>de</strong> reproducción o pausa<br />
DISC<br />
(sólo en el PD-M427)<br />
DISC 1 DISC 2 DISC 3<br />
DISC 4 DISC 5 DISC 6<br />
TRACK/MANUAL<br />
41 ¡¢<br />
(sólo en el PD-M427)<br />
1 ¡<br />
Use el botón selector <strong>de</strong> disco (DISC) para seleccionar el<br />
número <strong>de</strong> disco <strong>de</strong>seado, y presione luego el botón 6, o<br />
uno <strong>de</strong> los botones selectores <strong>de</strong> número <strong>de</strong> disco (DISC<br />
NUMBER) (DISC 1 – DISC 6); el reproductor localizará el disco<br />
seleccionado e iniciará la reproducción <strong>de</strong>s<strong>de</strong> el principio <strong>de</strong>l<br />
mismo.<br />
NOTAS:<br />
÷ Si aparece “no DISC” en el visualizador, significa que<br />
usted ha presionado un número <strong>de</strong> disco <strong>de</strong> una ban<strong>de</strong>ja<br />
que no tiene ningún disco.<br />
÷ Durante la reproducción programada, no pue<strong>de</strong> efectuarse<br />
la búsqueda <strong>de</strong> discos.<br />
BÚSQUEDA DE CANCIONES – PARA<br />
BUSCAR UNA CANCIÓN ESPECIFICADA<br />
Durante el modo <strong>de</strong> reproducción, pausa, o parada<br />
TRACK/MANUAL<br />
41 ¡¢<br />
(sólo en el PD-M427)<br />
4 ¢<br />
Mientras se mantiene pulsado el botón ¡ ¢ , la<br />
reproducción avanza rápidamente hasta el final <strong>de</strong>l disco.<br />
Cuando la reproducción llegue al final <strong>de</strong>l disco, el reproductor<br />
entra en el modo <strong>de</strong> pausa y se visualiza la palabra “END”.<br />
Mientras se mantiene pulsado el botón 4 1 , la<br />
reproducción retroce<strong>de</strong> rápidamente hasta el comienzo <strong>de</strong>l<br />
disco.<br />
Al llegar al pasaje especificado, <strong>de</strong>je <strong>de</strong> pulsar el botón ¡<br />
¢ o 4 1. El reproductor entra en el modo original<br />
(reproducción o pausa) en el momento en que <strong>de</strong>ja <strong>de</strong> pulsar<br />
el botón ¡ ¢ o 4 1.<br />
NOTAS:<br />
÷ Durante la reproducción normal, la búsqueda manual pue<strong>de</strong><br />
realizarse en un solo disco.<br />
÷ Durante la reproducción <strong>de</strong> programas la búsqueda manual<br />
pue<strong>de</strong> realizarse en un paso <strong>de</strong> programa solamente.<br />
PARA REPETIR LA REPRODUCCIÓN<br />
(REPETICIÓN DE REPRODUCCIÓN)<br />
REPEAT<br />
Cuando se presiona el botón ¡¢ una vez o varias veces,<br />
la reproducción avanza al principio <strong>de</strong> la canción ubicada<br />
<strong>de</strong>spués <strong>de</strong> la canción que se está reproduciendo. La posición<br />
<strong>de</strong> la canción localizada correspon<strong>de</strong> al número <strong>de</strong> veces que<br />
se presiona el botón.<br />
Cuando el botón 41 se presiona un vez, la reproduccion<br />
retorna al principio <strong>de</strong> la canción que se esté reproduciendo.<br />
Cuando se presiona más <strong>de</strong> una vez, la reproducción retroce<strong>de</strong><br />
a la canción anterior <strong>de</strong> la que se está reproduciendo.<br />
÷ Cuando se opera el botón ¡¢ o botón 41 en el<br />
modo <strong>de</strong> pausa o modo <strong>de</strong> parada, presione el botón 6<br />
para iniciar la reproducción.<br />
Para repetir la reproducción <strong>de</strong> la canción visualizada, pulse<br />
una vez el botón REPEAT. El indicador REPEAT-1 se encien<strong>de</strong>.<br />
El botón REPEAT pue<strong>de</strong> pulsarse en cualquier modo <strong>de</strong><br />
reproducción.<br />
Pare reproducir repetidamente todas las canciones <strong>de</strong> todos<br />
los discos en el modo <strong>de</strong> reproducción normal o en el modo<br />
<strong>de</strong> reproducción especificado (reproducción <strong>de</strong> programas,<br />
reproducción <strong>de</strong> programas con supresión o reproducción<br />
aleatoria), pulse dos veces el botón REPEAT. El indicador<br />
REPEAT se encien<strong>de</strong>.<br />
÷ Para cancelar el modo <strong>de</strong> repetición, pulse el botón REPEAT<br />
<strong>de</strong> forma que se apague el indicador REPEAT-1 o REPEAT.<br />
NOTAS:<br />
÷ Durante la reproducción <strong>de</strong> programas, el botón ¡ ¢<br />
(o ¢) o 41 (o 4) pue<strong>de</strong> utilizarse para seleccionar<br />
la canción programada.<br />
÷ Durante la reproducción normal, la búsqueda <strong>de</strong> canciones<br />
pue<strong>de</strong> realizarse en un solo disco. En el modo <strong>de</strong> parada,<br />
esta operación pue<strong>de</strong> realizarse <strong>de</strong>s<strong>de</strong> la 1ª canción hasta<br />
la 99ª.<br />
22<br />
Sp
DIVERSAS OPERACIONES<br />
REPRODUCCIÓN ALEATORIA – PARA<br />
REPRODUCIR ALEATORIAMENTE<br />
TODAS LAS CANCIONES<br />
RANDOM<br />
(sólo en el PD-M427)<br />
RANDOM<br />
Para abandonar el modo <strong>de</strong> exploración Hi-Lite <strong>de</strong>l<br />
cartucho:<br />
Presione el botón 7, 6 o uno <strong>de</strong> los botones selectores <strong>de</strong><br />
número <strong>de</strong> disco (DISC NUMBER) (DISC 1 – DISC 6). Cuando<br />
el botón 6 sea presionado, la reproducción normal será<br />
reanudada <strong>de</strong>s<strong>de</strong> dicho punto. Cuando se presione un botón<br />
selector <strong>de</strong> número <strong>de</strong> disco (DISC NUMBER) (DISC 1 – DISC<br />
6), el disco seleccionado será reproducido <strong>de</strong>s<strong>de</strong> el principio.<br />
Presione el botón <strong>de</strong> aleatoria (RANDOM). Todas las pistas <strong>de</strong><br />
todos los discos serán reproducidas en or<strong>de</strong>n arbitrario. Para<br />
reproducir en or<strong>de</strong>n arbitrario las pistas que no han sido<br />
borradas, presione el botón <strong>de</strong> aleatoria (RANDOM) <strong>de</strong>spués<br />
<strong>de</strong> llevar a cabo el procedimiento <strong>de</strong> borrado <strong>de</strong> programa.<br />
Consulte la sección “Reproducción programada con borrado”<br />
en la página 26.<br />
EXPLORACIÓN HI-LITE DEL CARTUCHO<br />
Durante el modo <strong>de</strong> parada<br />
HI-LITE<br />
(sólo en el PD-M427)<br />
HI-LITE<br />
Cuando se presiona una vez el botón <strong>de</strong> exploración Hi-Lite<br />
(HI-LITE) durante el modo <strong>de</strong> parada, la reproducción se inicia<br />
<strong>de</strong>s<strong>de</strong> un punto <strong>de</strong> 1 minuto <strong>de</strong>spués <strong>de</strong>l principio <strong>de</strong> la<br />
primera canción, y se reproduce la primera canción <strong>de</strong> cada<br />
disco durante unos 10 segundos. El indicador DISC SCAN<br />
parpa<strong>de</strong>a durante el modo <strong>de</strong> exploración <strong>de</strong> discos. Después<br />
<strong>de</strong> haber explorado la primera canción <strong>de</strong> todos los discos, el<br />
reproductor se establece en el modo <strong>de</strong> parada.<br />
Cuando se presiona dos veces el botón <strong>de</strong> exploración Hi-Lite<br />
(HI-LITE) durante el modo <strong>de</strong> parada, la reproducción se inicia<br />
<strong>de</strong>s<strong>de</strong> un punto <strong>de</strong> 1 minuto <strong>de</strong>spués <strong>de</strong>l principio <strong>de</strong> la<br />
canción, y se reproduce cada canción durante unos 10<br />
segundos. El indicador SCAN parpa<strong>de</strong>a durante el modo <strong>de</strong><br />
exploración <strong>de</strong> canciones. Después <strong>de</strong> haber explorado todas<br />
las canciones <strong>de</strong> todos los discos, el reproductor se establece<br />
en el modo <strong>de</strong> parada.<br />
NOTAS:<br />
÷ La exploración Hi-Lite podrá realizarse <strong>de</strong>s<strong>de</strong> el tiempo<br />
transcurrido <strong>de</strong>seado <strong>de</strong> la canción. Durante la reproducción,<br />
presione el botón <strong>de</strong> exploración Hi-Lite (HI-LITE) en el<br />
punto en que <strong>de</strong>see iniciar la reproducción con exploración<br />
Hi-Lite. El reproductor memorizará el minuto y segundo <strong>de</strong>l<br />
punto y la reproducción con exploración <strong>de</strong> canciones se<br />
realizará <strong>de</strong>s<strong>de</strong> el tiempo memorizado en cada canción.<br />
÷ Cada vez que se presiona el botón <strong>de</strong> exploración Hi-Lite<br />
(HI-LITE\), el modo cambia entre exploración <strong>de</strong> discos y<br />
exploración <strong>de</strong> canciones.<br />
÷ La programación sólo <strong>de</strong> las canciones <strong>de</strong>seadas es posible<br />
durante la reproducción con exploración <strong>de</strong> canciones.<br />
Consulte “Programación directa” en la página 25.<br />
÷ Durante la reproducción con exploración <strong>de</strong> canciones,<br />
podrá saltar a la canción <strong>de</strong>seada con el botón 41 o<br />
botón ¡ ¢.<br />
÷ Cuando se presiona el botón REPEAT, se repetirá la<br />
reproducción con exploración Hi-Lite.<br />
÷ Cuando el tiempo <strong>de</strong> reproducción <strong>de</strong> una canción sea<br />
inferior a un minuto o inferior al tiempo memorizado, la<br />
reproducción con exploración HI-LITE se realiza <strong>de</strong>s<strong>de</strong> el<br />
comienzo <strong>de</strong> la canción durante unos 10 segundos. Cuando<br />
el tiempo <strong>de</strong> reproducción <strong>de</strong> la canción es inferior a 10<br />
segundos, la canción se reproduce <strong>de</strong> principio a final.<br />
Español<br />
Reproducción con temporizador:<br />
Utilizando un temporizador <strong>de</strong> audio <strong>de</strong> venta en el comercio<br />
<strong>de</strong>l ramo será posible iniciar automáticamente la<br />
reproducción en cualquier momento <strong>de</strong>seado.<br />
1. Inserte el cartucho en la ranura para el cartucho.<br />
2. Fije la hora a la que <strong>de</strong>sea que comience la<br />
reproducción.<br />
El temporizador suministrará alimentación eléctrica al<br />
amplificador y al reproductor <strong>de</strong> discos compactos a la hora<br />
prefijada, encendiendo todos los componentes e iniciando<br />
el modo <strong>de</strong> reproducción. La reproducción comienza por la<br />
primera melodía <strong>de</strong>l primer disco.<br />
Precaución:<br />
÷ No <strong>de</strong>senchufe el cable <strong>de</strong> la alimentación ni <strong>de</strong>sconecte<br />
la alimentación con un temporizador <strong>de</strong> audio durante la<br />
reproducción. De lo contrario, el disco podría estropearse.<br />
÷ Si se produce un fallo en la alimentación estando ésta<br />
<strong>de</strong>sconectada (modo <strong>de</strong> alimentación en reserva), la<br />
alimentación se conecta automáticamente con la función<br />
<strong>de</strong> reproducción con temporizador al reponerse la<br />
alimentación.<br />
POR LO TANTO, DESCONECTE EL CABLE DE ALIMENTACIÓN<br />
DE CA CUANDO NO PIENSE UTILIZAR EL REPRODUCTOR<br />
DURANTE UN LARGO PERÍODO DE TIEMPO.<br />
23<br />
Sp
STANDBY/ON<br />
MULTI COMPACT DISC PLAYER<br />
-DISC<br />
MULTI CD<br />
DISC TRACK MIN SEC<br />
EJECT REPEAT PROGRAM DISC TRACK/MANUAL<br />
RANDOM<br />
HI–LITE<br />
STOP PLAY/PAUSE<br />
1-BIT•DLC DIRECT LINEAR CONVERSION<br />
PARA REPRODUCIR SOLAMENTE LAS CANCIONES/DISCOS DESEADOS<br />
REPRODUCCIÓN DE PROGRAMA – PARA<br />
PROGRAMAR CANCIONES/DISCOS EN<br />
EL ORDEN DESEADO<br />
1<br />
2<br />
PROGRAM<br />
DISC<br />
6<br />
'<br />
0 41 ¡ ¢<br />
1,4<br />
3 2 6<br />
(sólo en el PD-M427)<br />
PROGRAM<br />
(sólo en el PD-M427)<br />
DISC 1 DISC 2 DISC 3<br />
DISC 4 DISC 5<br />
7 6<br />
DISC 6<br />
1. Con el reproductor parado, presione el botón PROGRAM<br />
<strong>de</strong> modo que se encienda el indicador PROGRAM.<br />
2. Use el botón selector <strong>de</strong> disco (DISC) o los botones<br />
selectores <strong>de</strong> número <strong>de</strong> disco (DISC NUMBER) para<br />
seleccionar el número <strong>de</strong> disco <strong>de</strong>seado.<br />
Se visualizará el número <strong>de</strong> disco seleccionado.<br />
3. Entonces, presione el botón 4 1 o ¡ ¢ para<br />
seleccionar la canción <strong>de</strong>seada.<br />
Se visualizará el número <strong>de</strong> la canción seleccionada.<br />
4. Finalmente, presione el botón PROGRAM o espere<br />
unos dos segundos; el programa se almacenará en la<br />
memoria.<br />
Si el botón PROGRAM se presiona <strong>de</strong>spués <strong>de</strong> haber<br />
seleccionado sólo el número <strong>de</strong> disco, el indicador “AL”<br />
aparecerá indicando la selección <strong>de</strong>l modo <strong>de</strong> “Disc All<br />
Program” (se introduce todo el contenido <strong>de</strong>l disco en el<br />
programa como un solo paso).<br />
Sin embargo, mientras se esté visualizando el indicador<br />
“AL”, si se utiliza el botón 41 o ¡¢ para <strong>de</strong>signar<br />
un número <strong>de</strong> canción y entonces se presiona el botón<br />
PROGRAM (o <strong>de</strong>spués <strong>de</strong> transcurrir dos segundos), la<br />
canción selecionada se almacenará como este paso <strong>de</strong><br />
programa.<br />
5. Repita los pasos 2, 3 y 4 para las <strong>de</strong>más canciones que<br />
va a programar.<br />
6. Pulse el botón 6.<br />
Las canciones se reproducen en el or<strong>de</strong>n programado. El<br />
reproductor entra en el modo <strong>de</strong> parada una vez<br />
reproducidas todas las canciones programadas.<br />
3<br />
TRACK/MANUAL<br />
41 ¡¢<br />
(sólo en el PD-M427)<br />
4 ¢<br />
NOTA:<br />
Cuando seleccione la canción con 4 1 o ¡ ¢ en el<br />
paso 3, el número <strong>de</strong> canción visualizado se programa<br />
automáticamente si no se pulsa el botón 41 o ¡¢<br />
antes <strong>de</strong> que pasen 2 segundos. Por lo tanto, no se olvi<strong>de</strong> <strong>de</strong><br />
pulsar 4 1 o ¡ ¢ <strong>de</strong> forma continua hasta que el<br />
número <strong>de</strong> la canción <strong>de</strong>seada aparezca en el visualizador.<br />
4<br />
PROGRAM<br />
PROGRAM<br />
Para parar la reproducción <strong>de</strong> programas,<br />
pulse el botón 7.<br />
6<br />
PLAY/PAUSE<br />
6<br />
(sólo en el PD-M427)<br />
3<br />
Para abandonar el modo <strong>de</strong> programa:<br />
Durante la reproducción <strong>de</strong> programas, seleccione un N.° <strong>de</strong><br />
disco con el botón DISC NUMBER y presione luego el botón<br />
6. El reproductor se establecerá en el modo <strong>de</strong> reproducción<br />
normal y la reproducción se iniciará <strong>de</strong>s<strong>de</strong> el principio <strong>de</strong> la<br />
canción seleccionada.<br />
÷ Pue<strong>de</strong>n crearse programas <strong>de</strong> hasta 32 pasos.<br />
÷ Para pasar al paso anterior o al siguiente en un programa,<br />
pulse el botón 4 1 o ¡ ¢.<br />
÷ Si el cartucho está en el reproductor <strong>de</strong> discos compactos,<br />
el contenido <strong>de</strong>l programa no se borrará, incluso cuando<br />
esté <strong>de</strong>sconectada la alimentación.<br />
24<br />
NOTA:<br />
Durante el borrado <strong>de</strong>l programa, el botón <strong>de</strong> programa<br />
(PROGRAM) no podrá ser accionado.<br />
Sp
PARA REPRODUCIR SOLAMENTE LAS CANCIONES/DISCOS DESEADOS<br />
Programación directa:<br />
Durante la reproducción normal o la reproducción con<br />
exploración Hi-Lite <strong>de</strong>l cartucho, la canción que está siendo<br />
reproducida pue<strong>de</strong> programarse.<br />
1. Pulse el botón PROGRAM para entrar en el modo <strong>de</strong><br />
programación.<br />
2. Para buscar una canción <strong>de</strong>seada durante la reproducción<br />
normal es posible avanzar o retroce<strong>de</strong>r pulsando el botón<br />
4 1 o ¡ ¢.<br />
A<strong>de</strong>más, la función <strong>de</strong> exploración Hi-Lite <strong>de</strong>l cartucho<br />
pue<strong>de</strong> utilizarse para pasar <strong>de</strong> canción a melodía <strong>de</strong>l disco.<br />
3. Si usted <strong>de</strong>sea programar la canción que está siendo<br />
reproducida, pulse el botón PROGRAM mientras se<br />
reproduce la canción.<br />
÷ La programación directa no pue<strong>de</strong> realizarse durante la<br />
reproducción <strong>de</strong> programa.<br />
Para verificar el contenido <strong>de</strong>l programa<br />
(sólo en el PD-M427) :<br />
Durante el modo <strong>de</strong> programa, ponga el reproductor en modo<br />
<strong>de</strong> <strong>de</strong>tención y presione el botón <strong>de</strong> verificación (CHECK) <strong>de</strong><br />
la unidad <strong>de</strong> control remoto. El contenido <strong>de</strong>l programa será<br />
exhibido en el or<strong>de</strong>n en que haya sido programado.<br />
÷ Después <strong>de</strong> confirmar el último paso <strong>de</strong> programa, el<br />
visualizador indicará “0-00”.<br />
PROGRAMACIÓN DE UNA PAUSA<br />
(sólo en el PD-M427)<br />
La inserción <strong>de</strong> una pausa en un programa pue<strong>de</strong> ser <strong>de</strong> gran<br />
utilidad al efectuar una grabación. Presione el botón <strong>de</strong> pausa<br />
(8) <strong>de</strong> la unidad <strong>de</strong> control remoto en lugar <strong>de</strong> ingresar un<br />
número <strong>de</strong> pista. La indicación “PA” aparecerá en el panel<br />
visualizador.<br />
÷ Por ejemplo, al grabar en ambos lados <strong>de</strong> un cassette, si<br />
usted programa una pausa <strong>de</strong>spués <strong>de</strong> la última pista a ser<br />
grabada en el primer lado <strong>de</strong> la cinta, la reproducción<br />
programada se interrumpirá momentáneamente en dicho<br />
punto, permitiéndole a usted dar vuelta el cassette. Para<br />
reanudar la reproducción una vez que el reproductor ha<br />
asumido el modo <strong>de</strong> pausa, presione el botón 8 <strong>de</strong> la<br />
unidad <strong>de</strong> control remoto o el botón 6 <strong>de</strong>l panel <strong>de</strong>lantero.<br />
Cómo borrar un programa (sólo en el PD-M427) :<br />
Estando el reproductor en modo <strong>de</strong> programa, presione el<br />
botón <strong>de</strong> borrado (CLEAR) <strong>de</strong> la unidad <strong>de</strong> control remoto.<br />
El último paso <strong>de</strong>l programa será borrado y el contenido <strong>de</strong>l<br />
paso <strong>de</strong> programa anterior será exhibido.<br />
NOTA:<br />
El contenido <strong>de</strong> un programa también pue<strong>de</strong> ser borrado<br />
durante la reproducción. Sin embargo, usted no podrá borrar<br />
<strong>de</strong> esta forma las pistas que precedan a la que esté siendo<br />
reproducida.<br />
Para borrar el contenido completo <strong>de</strong> un programa:<br />
A: Estando el reproductor en modo <strong>de</strong> <strong>de</strong>tención, presione el<br />
botón 7.<br />
B: Cuando el magazín sea expulsado, el contenido <strong>de</strong>l<br />
programa se borrará.<br />
Para modificar el contenido <strong>de</strong>l programa<br />
(sólo en el PD-M427) :<br />
1. Durante el modo <strong>de</strong> programa, ponga el reproductor<br />
en modo <strong>de</strong> <strong>de</strong>tención y presione el botón <strong>de</strong><br />
verificación (CHECK) <strong>de</strong> la unidad <strong>de</strong> control remoto<br />
para hacer que el paso <strong>de</strong> programa a ser corregido sea<br />
exhibido en el visualizador.<br />
2. Ingrese el nuevo número <strong>de</strong> disco con los botones <strong>de</strong><br />
núm. <strong>de</strong> disco (DISC NUMBER), y presione luego el<br />
botón 4 1 o ¡ ¢ para hacer que el nuevo<br />
número <strong>de</strong> pista aparezca en el visualizador.<br />
3. Presione el botón <strong>de</strong> programa (PROGRAM).<br />
÷ Repita los pasos 1 a 3 para cambiar otras pistas según<br />
lo <strong>de</strong>see.<br />
÷ Si el botón 4 1 o ¡ ¢ no es presionado en el<br />
transcurso <strong>de</strong> 2 segundos al corregir el núm. <strong>de</strong> pista,<br />
el número <strong>de</strong> pista exhibido será automáticamente<br />
memorizado.<br />
Español<br />
NOTAS:<br />
÷ Sólo es posible programar pausas cuando el procedimiento<br />
<strong>de</strong> programación es efectuado en modo <strong>de</strong> <strong>de</strong>tención.<br />
÷ No es posible programar una pausa al principio <strong>de</strong> un<br />
programa (P-01), ni tampoco dos pausas seguidas.<br />
÷ Una pausa insertada en un programa cuenta como un paso.<br />
÷ Si se programa una pausa como el último paso <strong>de</strong> un<br />
programa, el reproductor no asumirá el modo <strong>de</strong> pausa.<br />
25<br />
Sp
PARA REPRODUCIR SOLAMENTE LAS CANCIONES/DISCOS DESEADOS<br />
REPRODUCCIÓN PROGRAMADA CON<br />
BORRADO – BORRADO DE LAS PISTAS/<br />
DISCOS NO DESEADOS (sólo en el PD-M427)<br />
1<br />
2<br />
DISC<br />
STANDBY/ON<br />
DISC 1 DISC 2 DISC 3<br />
DISC 4 DISC 5 DISC 6<br />
Î<br />
7 8 3<br />
RANDOM<br />
HI–LITE<br />
1 ¡<br />
4 ¢<br />
PROGRAM<br />
CHECK<br />
DELETE<br />
CLEAR<br />
'<br />
MULTI<br />
COMPACT DISC PLAYER<br />
REMOTE CONTROL UNIT<br />
2<br />
6<br />
3<br />
1,4<br />
(sólo en el PD-M427)<br />
DELETE<br />
(sólo en el PD-M427)<br />
DISC 1 DISC 2 DISC 3<br />
DISC 4 DISC 5<br />
DISC 6<br />
1. Estando el reproductor <strong>de</strong>tenido, presione el botón <strong>de</strong><br />
borrado (DELETE); el indicador DELETE se iluminará.<br />
2. Use el botón selector <strong>de</strong> disco (DISC) o uno <strong>de</strong> los<br />
botones selectores <strong>de</strong> número <strong>de</strong> disco (DISC NUMBER)<br />
para seleccionar el número <strong>de</strong> disco <strong>de</strong>seado.<br />
El número <strong>de</strong> disco seleccionado será exhibido.<br />
3. Luego, presione el botón 4 1 o ¡ ¢ para<br />
seleccionar el número <strong>de</strong> pista.<br />
El número <strong>de</strong> pista seleccionado será exhibido.<br />
4. Presione el botón <strong>de</strong> borrado (DELETE), o espere dos<br />
segundos; la pista a ser borrada será ingresada.<br />
Si el botón <strong>de</strong> borrado (DELETE) es presionado <strong>de</strong>spués <strong>de</strong><br />
seleccionar el número <strong>de</strong> disco, el indicador “AL” será<br />
exhibido, indicando selección <strong>de</strong> la función <strong>de</strong> “borrado<br />
<strong>de</strong> todo el disco” (el contenido completo <strong>de</strong>l disco será<br />
borrado <strong>de</strong> la memoria <strong>de</strong> programa). Sin embargo, mientras<br />
el indicador “AL” esté siendo exhibido, si usted usa el<br />
botón 4 1 o ¡ ¢ para especificar un número <strong>de</strong><br />
pista y luego presiona el botón <strong>de</strong> borrado (DELETE) (o <strong>de</strong>ja<br />
transcurrir dos segundos), la pista seleccionada será borrada<br />
<strong>de</strong> dicho paso <strong>de</strong> programa.<br />
5. Repita los pasos 2, 3 y 4 para borrar otras pistas.<br />
6. Presione el botón 6.<br />
Todas las pistas/discos que no hayan sido borrados serán<br />
reproducidos en el or<strong>de</strong>n <strong>de</strong> los discos y números <strong>de</strong> pista.<br />
Una vez que todas las pistas hayan sido reproducidas, el<br />
reproductor asumirá el modo <strong>de</strong> <strong>de</strong>tención.<br />
3<br />
TRACK/MANUAL<br />
41 ¡¢<br />
(sólo en el PD-M427)<br />
4 ¢<br />
NOTA:<br />
Al seleccionar una pista con el botón 41 o ¡ ¢ en el paso<br />
3, el número <strong>de</strong> pista exhibido será automáticamente programado si<br />
no se vuelve a presionar el botón 41 o ¡¢ en el transcurso<br />
<strong>de</strong> 2 segundos. Por lo tanto, asegúrese <strong>de</strong> presionar secuencialmente<br />
el botón 41 o ¡¢ hasta que el número <strong>de</strong> pista <strong>de</strong>seado<br />
aparezca en el visualizador.<br />
Para cancelar la operación <strong>de</strong> reproducción programada<br />
con borrado, presione el botón 7.<br />
4<br />
DELETE<br />
÷ Los números <strong>de</strong> pista <strong>de</strong>s<strong>de</strong> el 33 en a<strong>de</strong>lante no pue<strong>de</strong>n ser<br />
borrados.<br />
÷ Para <strong>de</strong>splazarse al disco/pista siguiente o anterior que no sea el<br />
disco/pista que haya sido borrado, presione el botón 41 o ¡<br />
¢.<br />
÷ Si el magazín está en el reproductor, el contenido <strong>de</strong>l programa no<br />
se borrará si la alimentación es <strong>de</strong>sconectada.<br />
6<br />
26<br />
PLAY/PAUSE<br />
6<br />
(sólo en el PD-M427)<br />
3<br />
NOTA:<br />
Después <strong>de</strong> programar para reproducción programada, o durante el<br />
modo <strong>de</strong> reproducción programada, la programación con borrado no<br />
podrá ser efectuada.<br />
Para borrar el contenido completo <strong>de</strong>l programa <strong>de</strong><br />
borrado:<br />
A Estando el reproductor en modo <strong>de</strong> <strong>de</strong>tención, presione el botón<br />
7.<br />
B Cuando el magazín sea expulsado, el contenido <strong>de</strong>l programa se<br />
borrará.<br />
C Estando el reproductor en modo <strong>de</strong> <strong>de</strong>tención o reproducción,<br />
presione el botón CLEAR <strong>de</strong> la unidad <strong>de</strong> control remoto. Cuando<br />
el botón CLEAR sea presionado durante el modo <strong>de</strong> reproducción<br />
programada con borrado, el reproductor asumirá el modo normal<br />
<strong>de</strong> reproducción.<br />
Sp
SOLUCIÓN DE PROBLEMAS<br />
Frecuentemente se toman por averías problemas <strong>de</strong>bidos a operaciones incorrectas. Si usted cree que hay algo que no funciona<br />
con normalidad en este aparato, compruebe los puntos siguientes. A veces el problema resi<strong>de</strong> en otro componente. Investigue los<br />
<strong>de</strong>más componentes y aparatos eléctricos que esté utilizando.<br />
Si el problema no pue<strong>de</strong> solucionarse incluso <strong>de</strong>spués <strong>de</strong> haber realizado las comprobaciones <strong>de</strong> la lista <strong>de</strong> abajo, lleve el aparato<br />
a reparar al centro <strong>de</strong> servico técnico autorizado por PIONEER o al establecimiento don<strong>de</strong> lo compró.<br />
Síntoma<br />
Causa<br />
Remedio<br />
÷ Conecte la clavija al tomacorriente <strong>de</strong>l<br />
amplificador o a una toma <strong>de</strong> la red.<br />
÷ Colóquelo correctamente con la cara <strong>de</strong> la<br />
etiqueta hacia ABAJO.<br />
÷ Limpie el disco y vuélvalo a reproducir.<br />
El cartucho no sale cuando se presiona el<br />
botón EJECT.<br />
Al intentar iniciar la reproducción ésta se<br />
<strong>de</strong>tiene inmediatamente.<br />
Pausas o interrupciones durante la<br />
reproducción.<br />
÷ La clavija <strong>de</strong> alimentación está <strong>de</strong>senchufada <strong>de</strong><br />
la toma <strong>de</strong> la red.<br />
÷ El disco está al revés.<br />
No hay sonido.<br />
÷ El disco está sucio, etc.<br />
÷ Los cables <strong>de</strong> salida están incorrectamente<br />
conectados o flojos.<br />
÷ Operación incorrecta <strong>de</strong>l amplificador estéreo.<br />
÷ Las clavijas y/o terminales <strong>de</strong>l amplificador están<br />
sucios.<br />
÷ El reproductor está en el modo <strong>de</strong> pausa.<br />
÷ Conexiones incorrectas.<br />
÷ Conéctelos correctamente.<br />
÷ Compruebe el ajuste <strong>de</strong> los selectores y <strong>de</strong><br />
los controles <strong>de</strong> volumen <strong>de</strong>l amplificador.<br />
÷ Limpie la suciedad.<br />
÷ Presione el botón 6 (3 o 8).<br />
÷ Conecte a las tomas CD o AUX <strong>de</strong>l<br />
amplificador. No conecte a las tomas <strong>de</strong><br />
entrada PHONO.<br />
÷ Limpie la suciedad.<br />
Español<br />
El sonido está distorsionado, ruido en la<br />
salida.<br />
÷ Las clavijas y/o las tomas <strong>de</strong>l amplificador están<br />
sucias.<br />
÷ Interferencias causadas por un aparato <strong>de</strong> TV.<br />
La imagen <strong>de</strong>l televisor fluctúa o las<br />
radiodifusiones <strong>de</strong> FM tienen ruidos.<br />
÷ Las interferencias provienen <strong>de</strong>l reproductor <strong>de</strong><br />
discos compactos.<br />
La unidad <strong>de</strong> control remoto no funciona.<br />
(sólo en el PD-M427)<br />
÷ Las pilas están agotadas.<br />
÷ Demasiada distancia al reproductor, o ángulo<br />
incorrecto.<br />
÷ Hay un obstáculo entre el reproductor y la unidad<br />
<strong>de</strong> control remoto.<br />
÷ Desconecte la alimentación <strong>de</strong>l aparato <strong>de</strong><br />
TV, o aleje <strong>de</strong> éste el reproductor.<br />
÷ Desenchufe el cable <strong>de</strong> alimentación <strong>de</strong> CA<br />
o separe el reproductor <strong>de</strong>l televisor o <strong>de</strong>l<br />
sintonizador.<br />
÷ Reemplace las pilas.<br />
÷ La distancia entre la unidad <strong>de</strong> control remoto<br />
y el reproductor no <strong>de</strong>be ser superior a 7<br />
metros, aproximadamente.<br />
El ángulo <strong>de</strong> operación respecto <strong>de</strong>l panel<br />
<strong>de</strong>lantero es máximo 30° a la <strong>de</strong>recha o<br />
izquierda <strong>de</strong>l reproductor.<br />
÷ Relocalice la unidad <strong>de</strong> control remoto o<br />
quite el obstáculo.<br />
La electricidad estática, y otras interferencias externas, pordrán ser causa <strong>de</strong> un funcionamiento anormal <strong>de</strong> la unidad. Para reanudar la operación<br />
normal, <strong>de</strong>sactive el interruptor <strong>de</strong> alimentación y actívelo nuevamente, o <strong>de</strong>sconecte el cable <strong>de</strong> alimentación <strong>de</strong> CA y conéctelo luego nuevamente.<br />
ESPECIFICACIONES<br />
Generalida<strong>de</strong>s<br />
Tipo ......................... Sistema <strong>de</strong> audio digital <strong>de</strong> discos compactos<br />
Alimentación ...................................... 110–127 V CA/220–240 V CA<br />
.................................................................. (seleccionable) 50/60 Hz<br />
Consumo ..................................................................................12 W<br />
Temperatura <strong>de</strong> operación ....................................... +5° C – +35° C<br />
Peso (sin embalaje) ................................................................ 3,7 kg<br />
Dimensiones exteriores<br />
........................................ 420 (Ancho) x 294 (Prof) x 105 (Alto) mm<br />
Sección <strong>de</strong> audio<br />
Respuesta <strong>de</strong> frecuencia ........................................... 2 Hz – 20 kHz<br />
Voltaje <strong>de</strong> salida ....................................................................... 2,0 V<br />
Fluctuación y trémolo ......................................... Límite mensurable<br />
(±0,001 % W.PEAK) o menos (EIAJ)<br />
Canales .............................................................. 2 canales (estéreo)<br />
Terminal <strong>de</strong> salida<br />
Salida <strong>de</strong> línea <strong>de</strong> audio<br />
Tomas <strong>de</strong> entrada/salida <strong>de</strong> control<br />
Accesorios<br />
÷ Unidad <strong>de</strong> control remoto (sólo en el PD-M427) ....................... 1<br />
÷ Pilas secas (AAA/R03) (sólo en el PD-M427) ............................ 2<br />
÷ Cartucho para seis discos compactos ....................................... 1<br />
÷ Cable <strong>de</strong> control ........................................................................ 1<br />
÷ Cable <strong>de</strong> salida .......................................................................... 1<br />
÷ <strong>Manual</strong> <strong>de</strong> <strong>instrucciones</strong> ........................................................... 1<br />
Las especificaciones y el diseño están sujetos a cambios sin previo<br />
aviso con motivos <strong>de</strong> mejoras.<br />
Los reproductores <strong>de</strong> CD múltiples que llevan el símbolo<br />
y los cargadores múltiples con el mismo símblol, son<br />
compatibles con los discos <strong>de</strong> 12 cm.<br />
Publicado por <strong>Pioneer</strong> Electronic Corporation.<br />
Copyright C 1999 <strong>Pioneer</strong> Electronic Corporation.<br />
Todos los <strong>de</strong>rechos reservados.<br />
27<br />
Sp
÷ <br />
÷ <br />
<br />
220-240V 110-127V<br />
28<br />
ChH
1<br />
2 3<br />
<br />
ª·<br />
<br />
• <br />
<br />
<br />
• <br />
<br />
1<br />
2<br />
4<br />
5<br />
<br />
<br />
ª·<br />
<br />
<br />
<br />
<br />
<br />
Î<br />
'<br />
3<br />
<br />
<br />
1×<br />
<br />
<br />
<br />
2×<br />
3×<br />
4 ×<br />
5 × <br />
<br />
<br />
˚ <br />
7 m<br />
30˚<br />
30˚<br />
<br />
<br />
<br />
<br />
<br />
29<br />
ChH
÷ <br />
<br />
÷ <br />
<br />
÷ <br />
<br />
÷ <br />
<br />
<br />
<br />
<br />
<br />
<br />
÷ <br />
<br />
<br />
<br />
÷ <br />
÷ <br />
÷ <br />
<br />
÷ <br />
<br />
<br />
<br />
÷ <br />
<br />
÷ <br />
÷ <br />
<br />
<br />
<br />
<br />
'<br />
<br />
<br />
<br />
<br />
<br />
÷ <br />
<br />
<br />
÷ <br />
<br />
<br />
÷ <br />
<br />
÷ <br />
30<br />
ChH
• <br />
<br />
• <br />
<br />
<br />
<br />
• <br />
<br />
<br />
<br />
C<br />
A<br />
B<br />
B<br />
B<br />
A<br />
C<br />
<br />
<br />
<br />
<br />
<br />
<br />
<br />
<br />
<br />
<br />
<br />
<br />
• <br />
<br />
• <br />
<br />
• <br />
• <br />
<br />
<br />
<br />
<br />
<br />
<br />
<br />
31<br />
ChH
L<br />
CD<br />
<br />
L<br />
<br />
÷ <br />
<br />
R<br />
R<br />
<br />
<br />
<br />
<br />
L<br />
R<br />
<br />
L<br />
R<br />
LINE OUT<br />
CONTROL<br />
IN<br />
OUT<br />
CONTROL<br />
OUT<br />
<br />
<br />
<br />
<br />
<br />
<br />
• <br />
<br />
<br />
<br />
• <br />
Î <br />
Î <br />
<br />
<br />
<br />
• <br />
• <br />
<br />
• <br />
<br />
• <br />
<br />
• <br />
<br />
• <br />
<br />
<br />
<br />
• <br />
<br />
<br />
<br />
<br />
<br />
<br />
<br />
<br />
<br />
<br />
<br />
<br />
<br />
<br />
<br />
<br />
<br />
<br />
<br />
32<br />
ChH
MULTI COMPACT DISC PLAYER<br />
PD–M427<br />
DISC TRACK MIN SEC<br />
'<br />
Î<br />
RANDOM<br />
HI–LITE<br />
STANDBY/ON<br />
6<br />
-DISC<br />
MULTI CD<br />
EJECT REPEAT PROGRAM DISC TRACK/MANUAL<br />
0 41 ¡ ¢<br />
STOP PLAY/PAUSE<br />
7 6<br />
1-BIT•DLC DIRECT LINEAR CONVERSION<br />
<br />
<br />
<br />
<br />
<br />
<br />
<br />
DELETE<br />
RANDOM<br />
PROGRAM<br />
REPEAT–1<br />
DISC TRACK<br />
MIN SEC<br />
1 2 3 4 5 6<br />
DISC<br />
SCAN<br />
<br />
<br />
<br />
<br />
<br />
<br />
<br />
<br />
<br />
<br />
<br />
<br />
<br />
<br />
<br />
<br />
1<br />
2<br />
3<br />
4<br />
5<br />
6<br />
7<br />
STANDBY/ON<br />
DISC 1 DISC 2 DISC 3<br />
DISC 4 DISC 5 DISC 6<br />
Î<br />
7 8 3<br />
RANDOM<br />
HI–LITE<br />
1 ¡<br />
4 ¢<br />
PROGRAM<br />
CHECK<br />
DELETE<br />
CLEAR<br />
'<br />
MULTI<br />
COMPACT DISC PLAYER<br />
REMOTE CONTROL UNIT<br />
8<br />
9<br />
10<br />
11<br />
12<br />
13<br />
<br />
<br />
7 <br />
<br />
<br />
<br />
<br />
<br />
3 <br />
1 ¡<br />
4 ¢ <br />
<br />
<br />
33<br />
ChH
STANDBY/ON<br />
MULTI COMPACT DISC PLAYER<br />
-DISC<br />
MULTI CD<br />
DISC TRACK MIN SEC<br />
EJECT REPEAT PROGRAM DISC TRACK/MANUAL<br />
RANDOM<br />
HI–LITE<br />
STOP PLAY/PAUSE<br />
<br />
<br />
6<br />
'<br />
0 41 ¡ ¢<br />
7 6<br />
1-BIT•DLC DIRECT LINEAR CONVERSION<br />
<br />
<br />
• <br />
<br />
• <br />
<br />
6 <br />
1 2 3<br />
<br />
6 8 <br />
6 <br />
1<br />
STANDBY/ON<br />
<br />
7 <br />
7 <br />
<br />
2<br />
<br />
<br />
6 <br />
<br />
<br />
0 <br />
<br />
<br />
<br />
3<br />
PLAY/PAUSE<br />
6<br />
<br />
3<br />
DISC TRACK<br />
MIN SEC<br />
1 2 3 4 5 6<br />
<br />
• <br />
• <br />
<br />
• <br />
• <br />
<br />
• <br />
<br />
PLAY/PAUSE<br />
8 PAUSE 6<br />
<br />
8<br />
7 STOP<br />
STOP<br />
7<br />
<br />
7<br />
<br />
<br />
34<br />
ChH
DISC<br />
<br />
DISC 1 DISC 2 DISC 3<br />
DISC 4 DISC 5 DISC 6<br />
TRACK/MANUAL<br />
41 ¡¢<br />
<br />
1 ¡<br />
6 <br />
<br />
<br />
<br />
• <br />
<br />
• <br />
<br />
<br />
¡ ¢ <br />
<br />
4 1 <br />
¡ ¢ 4 1 <br />
¡ ¢ 4 1 <br />
<br />
<br />
• <br />
• <br />
<br />
<br />
TRACK/MANUAL <br />
41 ¡¢ 4 ¢<br />
REPEAT<br />
¡ ¢ <br />
<br />
4 1 <br />
<br />
<br />
• ¡ ¢ 4 1 <br />
6 <br />
<br />
<br />
<br />
<br />
<br />
• <br />
<br />
<br />
• ¡ ¢ ¢ 4 1 4 <br />
<br />
• <br />
<br />
35<br />
ChH
RANDOM<br />
<br />
<br />
<br />
<br />
<br />
RANDOM<br />
<br />
<br />
<br />
<br />
<br />
<br />
<br />
<br />
<br />
• <br />
<br />
• <br />
<br />
<br />
<br />
HI-LITE<br />
<br />
HI-LITE<br />
<br />
<br />
<br />
<br />
<br />
<br />
<br />
<br />
<br />
76 <br />
6 <br />
<br />
• <br />
<br />
<br />
<br />
• <br />
<br />
• <br />
<br />
• 4 1 ¡ ¢ <br />
<br />
• <br />
• <br />
<br />
<br />
36<br />
ChH
STANDBY/ON<br />
MULTI COMPACT DISC PLAYER<br />
-DISC<br />
MULTI CD<br />
DISC TRACK MIN SEC<br />
EJECT REPEAT PROGRAM DISC TRACK/MANUAL<br />
RANDOM<br />
HI–LITE<br />
STOP PLAY/PAUSE<br />
<br />
<br />
1<br />
6<br />
PROGRAM<br />
'<br />
0 41 ¡ ¢<br />
1,4<br />
2 3 6<br />
<br />
PROGRAM<br />
7 6<br />
1-BIT•DLC DIRECT LINEAR CONVERSION<br />
<br />
<br />
<br />
4 1 ¡ ¢ <br />
<br />
<br />
<br />
<br />
<br />
<br />
4 1 ¡ ¢ <br />
<br />
<br />
<br />
6 <br />
<br />
<br />
2<br />
DISC<br />
<br />
DISC 1 DISC 2 DISC 3<br />
<br />
4 1 ¡ ¢ <br />
4 1 ¡ ¢ <br />
4 1 ¡<br />
¢ <br />
<br />
DISC 4 DISC 5<br />
DISC 6<br />
7 <br />
3<br />
TRACK/MANUAL<br />
41 ¡¢<br />
<br />
4 ¢<br />
<br />
6<br />
<br />
<br />
• <br />
• 4 1 ¡<br />
¢ <br />
• <br />
<br />
4<br />
PROGRAM<br />
PROGRAM<br />
<br />
<br />
6<br />
PLAY/PAUSE<br />
<br />
3<br />
6<br />
37<br />
ChH
4 1 ¡ ¢ <br />
<br />
<br />
<br />
<br />
<br />
• <br />
<br />
<br />
<br />
• <br />
<br />
<br />
8 <br />
• <br />
<br />
<br />
8 6<br />
<br />
<br />
<br />
<br />
<br />
<br />
<br />
7 <br />
<br />
<br />
<br />
<br />
4 1 <br />
¡ ¢ <br />
<br />
• <br />
• 4 1 ¡ ¢<br />
<br />
<br />
• <br />
• <br />
<br />
• <br />
• <br />
<br />
38<br />
ChH
RANDOM<br />
HI–LITE<br />
PROGRAM<br />
CHECK<br />
DELETE<br />
CLEAR<br />
<br />
<br />
<br />
1<br />
STANDBY/ON<br />
DISC 1 DISC 2 DISC 3<br />
DISC 4 DISC 5 DISC 6<br />
7 8 3<br />
Î<br />
1 ¡<br />
4 ¢<br />
'<br />
MULTI<br />
COMPACT DISC PLAYER<br />
REMOTE CONTROL UNIT<br />
2<br />
6<br />
3<br />
1,4<br />
<br />
DELETE<br />
<br />
<br />
<br />
4 1 ¡ ¢ <br />
<br />
<br />
<br />
<br />
4¢<br />
<br />
<br />
<br />
6<br />
<br />
<br />
2<br />
DISC<br />
<br />
DISC 1 DISC 2 DISC 3<br />
<br />
4 1 ¡ ¢ <br />
4 1 ¡ ¢ <br />
4 1 ¡ ¢ <br />
<br />
7 <br />
<br />
DISC 4 DISC 5<br />
DISC 6<br />
• <br />
• <br />
4 1 ¡ ¢ <br />
• <br />
<br />
3<br />
4<br />
TRACK/MANUAL<br />
41 ¡¢<br />
<br />
4 ¢<br />
DELETE<br />
<br />
<br />
<br />
<br />
A 7 <br />
B <br />
C <br />
<br />
6<br />
PLAY/PAUSE<br />
6<br />
<br />
3<br />
39<br />
ChH
• <br />
• <br />
• <br />
• <br />
• <br />
• <br />
• <br />
• <br />
• <br />
• <br />
• <br />
• <br />
• <br />
• <br />
<br />
• <br />
• <br />
• <br />
• <br />
• <br />
• <br />
• 6 3 8<br />
• <br />
<br />
• <br />
• <br />
• <br />
<br />
• <br />
• <br />
˚ <br />
• <br />
<br />
<br />
<br />
<br />
<br />
<br />
<br />
<br />
<br />
<br />
<br />
<br />
<br />
<br />
<br />
<br />
• <br />
• <br />
• <br />
• <br />
• <br />
• <br />
<br />
<br />
<br />
<br />
<br />
<br />
<br />
© 1<br />
<br />
PIONEER ELECTRONIC CORPORATION 4-1, Meguro 1-Chome, Meguro-ku, Tokyo 153-8654, Japan<br />
PIONEER ELECTRONICS [USA] INC. P.O. BOX 1540, Long Beach, California 90801-1540<br />
PIONEER ELECTRONICS OF CANADA, INC. 300 Allstate Parkway, Markham, Ontario L3R OP2, Canada<br />
PIONEER ELECTRONIC [EUROPE] N.V. Haven 1087, Keetberglaan 1, 9120 Melsele, Belgium TEL: 03/570.05.11<br />
PIONEER ELECTRONICS AUSTRALIA PTY. LTD. 178-184 Boundary Road, Braesi<strong>de</strong>, Victoria 3195, Australia, TEL: [03] 9586-6300<br />
PIONEER ELECTRONICS DE MEXICO, S.A. DE C.V. San Lorenzo Num 1009 3er piso Desp. 302 Col. Del Valle, Mexico D.F. C.P. 03100 TEL: 5-688-52-90<br />
<br />
Printed in<br />