Powertrax no-slip installation guide - Pirate4x4.Com
Powertrax no-slip installation guide - Pirate4x4.Com
Powertrax no-slip installation guide - Pirate4x4.Com

Create successful ePaper yourself
Turn your PDF publications into a flip-book with our unique Google optimized e-Paper software.
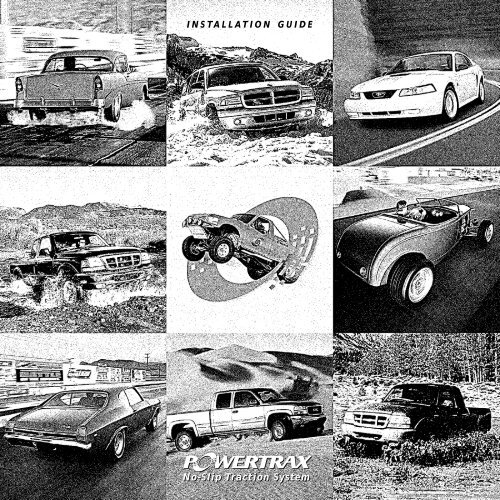
INSTALLATION<br />
GUIDE<br />
TM<br />
No-Slip Traction System
Installation Guide<br />
Contents<br />
Page<br />
Open Differential Part Identification & Termi<strong>no</strong>logy ......... 2<br />
<strong>Powertrax</strong> No-Slip Differential Exploded View .................. 3<br />
Vehicle Preparation for Installation (steps 1 to 5) ............. 4<br />
Removal of Open Differential Parts (steps 6 to 10) ........... 5<br />
Preparation of Parts to be Installed (steps 11 to 13) ......... 7<br />
Assembly (steps 14 to 39) .............................................. 8<br />
Verification of Proper Assembly Test (steps 40 to 44) ....... 17<br />
Finish Installation (steps 45 to 49) .................................. 18<br />
Thoroughly read User Manual.<br />
Traction output and resulting handling characteristics of your vehicle will be modified by <strong>installation</strong>.<br />
Drive carefully and use caution under all on-road and off-road conditions.
OPEN DIFFERENTIAL<br />
PART IDENTIFICATION/TERMINOLOGY<br />
Spider Gear Washer (2)<br />
Spider Gear (2)<br />
Ring Gear<br />
C-Clip (2)<br />
Axle Housing<br />
Thrust Washer (2)<br />
Axle Shaft (2)<br />
Bearing Cap (2)<br />
Yoke<br />
Side Gear (2)<br />
Pinion Shaft<br />
Pinion Gear<br />
Differential Case<br />
Pinion Shaft<br />
Retaining Bolt or Roll Pin<br />
2
EXPLODED VIEW<br />
Paddle Opening<br />
in Synchro<br />
Paddle<br />
Saddle Springs (8)<br />
Check Block<br />
Inner Springs (2)<br />
Pinion Shaft<br />
Synchro<br />
Ring<br />
Outer Springs (2)<br />
Active Spacer<br />
(Non-Slotted)<br />
Driver<br />
(Non-Slotted)<br />
Driver<br />
(Slotted)<br />
Paddle Opening in Driver<br />
(Missing Extended Tooth)<br />
3<br />
Active Spacer<br />
(Slotted)<br />
Coupler
1. Put transmission in gear (or park),<br />
and turn off engine.<br />
2. Set parking brake.<br />
3. Safeguard the vehicle from rolling.<br />
4. Safely raise vehicle and<br />
apply jack stands.<br />
5. Put transmission in neutral and release parking brake.<br />
4
6. Remove Differential cover and<br />
drain fluid. Clean the diff cover and<br />
housing sealing surface.<br />
7. Expose pinion shaft; remove<br />
retaining bolt/roll pin and shaft.<br />
8. Push both axles inward and<br />
remove both c-clips. Remove o-<br />
rings from c-clip grooves on axle<br />
shafts if present.<br />
Note: It may be necessary to<br />
remove wheels and disc brake<br />
calipers.<br />
5
9. Remove both spider gears and<br />
their thrust washers.<br />
10. Pull passenger side axle shaft<br />
out approximately 6”. Remove side<br />
gears and thrust washers.<br />
6
11. Verify gaps in coupler<br />
teeth are aligned with gaps in<br />
synchro ring. Place coupler in a<br />
vise and use an active spacer to<br />
align them if necessary.<br />
12. Apply wheel bearing grease to<br />
driver teeth and spacer.<br />
13. Apply wheel bearing grease to<br />
saddle springs and seat in holes.<br />
7
1 2<br />
14. Install couplers inside differential<br />
case, ring gear side first.<br />
15. Install c-clip on ring gear side<br />
axle shaft only.<br />
8
16. Make sure paddle opening<br />
(widest gap) in ring gear side synchro<br />
ring is facing out towards you.<br />
Paddle Opening<br />
17. Insert the <strong>no</strong>n-slotted spacer<br />
into the <strong>no</strong>n-slotted driver. Seat<br />
the spacer paddle at the paddle<br />
opening in driver (missing extended<br />
tooth).<br />
18. Insert driver/spacer as shown,<br />
making sure spacer paddle is facing<br />
out towards you.<br />
9
19. Verify spacer paddle is aligned<br />
with paddle opening in synchro<br />
ring and press driver/spacer down<br />
onto coupler. Driver teeth should<br />
be fully engaged all the way<br />
around.<br />
20. Insert the slotted spacer into<br />
the slotted driver. Seat the spacer<br />
paddle at the paddle opening in<br />
driver (missing extended tooth).<br />
21. Verify paddle opening (widest<br />
gap) in other synchro ring is facing<br />
the back of the differential, away<br />
from you.<br />
Paddle Opening<br />
10
22. Install slotted driver/spacer<br />
making sure that paddle is pointing<br />
away from you toward rear of differential.<br />
23. Verify spacer paddle is aligned<br />
with the paddle opening in synchro<br />
ring and press down on driver/spacer<br />
to seat on coupler; driver teeth<br />
should be fully engaged all the way<br />
around.<br />
24. Wedge both drivers in engagement<br />
with couplers. Rotate driver’s<br />
side wheel forward 1/4 turn to<br />
reveal spring slot.<br />
spring slot<br />
11
25. Place the two inner springs<br />
inside the two outer springs.<br />
26. Compress inner spring and<br />
install spring assembly into spring<br />
slot.<br />
27. Visually inspect <strong>no</strong>tches in<br />
spring slot to make sure inner<br />
spring is fully seated.<br />
check spring<br />
12
28. Keeping both drivers wedged<br />
in engagement with couplers,<br />
rotate driver’s side wheel forward<br />
1/2 turn to reveal spring slot on<br />
other side.<br />
29. Compress inner spring and<br />
install the second spring assembly<br />
into the second spring slot.<br />
30. Visually inspect <strong>no</strong>tches in<br />
spring slot to make sure inner<br />
spring is fully seated.<br />
check spring<br />
13
Go<br />
No Go<br />
31. Check the gap between<br />
drivers using check block. The<br />
narrow side of the block should<br />
fit between the drivers, but the<br />
wider side should <strong>no</strong>t fit.<br />
If driver gap is incorrect, STOP and<br />
call <strong>Powertrax</strong> Technical Support at<br />
800-578-1020. There may be a<br />
problem with your differential case.<br />
32. Push passenger side axle shaft<br />
inward through coupler as far as it<br />
will go.<br />
c-clip slot<br />
33. Making sure drivers stay<br />
engaged with couplers, carefully<br />
rotate wheels until c-clip slot is<br />
accessible. Verify c-clip groove on<br />
axle is accessible through c-clip<br />
slots on driver and spacer.<br />
14
34. Insert 2nd c-clip through c-clip<br />
slot in driver onto axle shaft; pull<br />
axle shaft out to seat c-clip.<br />
35. Making sure drivers stay<br />
engaged with couplers, carefully<br />
rotate both wheels backwards 1/4<br />
turn to expose pinion shaft opening.<br />
pinion shaft opening<br />
36. Feel through pinion shaft opening<br />
and verify both spacers and<br />
drivers are fully seated onto couplers.<br />
Verify all 8 saddle springs are<br />
fully seated in holes.<br />
saddle springs<br />
15 pinion shaft opening
37. Keeping couplers and drivers<br />
stationary, rotate case 1/4 turn forward<br />
to align pinion shaft opening<br />
with driver saddles.<br />
38. Using the retaining bolt/roll-pin<br />
as a handle, insert the shaft into the<br />
differential. Press hard while twisting<br />
to pass shaft by springs.<br />
39. Insert retaining bolt/roll-pin<br />
into case/shaft. Tighten retaining<br />
bolt firmly.<br />
16
40. Put transmission in gear (or park).<br />
41. Turn driver’s side<br />
wheel forward and hold<br />
against driveline for steps<br />
42 & 43.<br />
HOLD<br />
42. Passenger side wheel<br />
should <strong>no</strong>t be able to rotate<br />
in the same direction.<br />
HOLD<br />
43. Passenger side wheel<br />
should rotate freely in opposite<br />
direction.<br />
HOLD<br />
44. Repeat the test for both wheels in<br />
both directions.<br />
17
45. Install differential cover with gasket<br />
sealant.<br />
46. Add differential fluid.<br />
47. Set parking brake.<br />
48. Be sure transmission is in<br />
gear or park.<br />
49. Remove jack stands, lower vehicle, then remove<br />
blocks.<br />
18
822 1002 A<br />
Open Differential<br />
Integral Carrier<br />
C-Clip Version<br />
TM<br />
245 Fischer Ave, Bldg B4, Costa Mesa, California 92626 (800)578-1020 www.powertrax.com<br />
©1999 Vehicular Tech<strong>no</strong>logies and its licensors. All Rights Reserved.