AgfaPhoto sensor 530s User manual - plawa
AgfaPhoto sensor 530s User manual - plawa
AgfaPhoto sensor 530s User manual - plawa

Create successful ePaper yourself
Turn your PDF publications into a flip-book with our unique Google optimized e-Paper software.
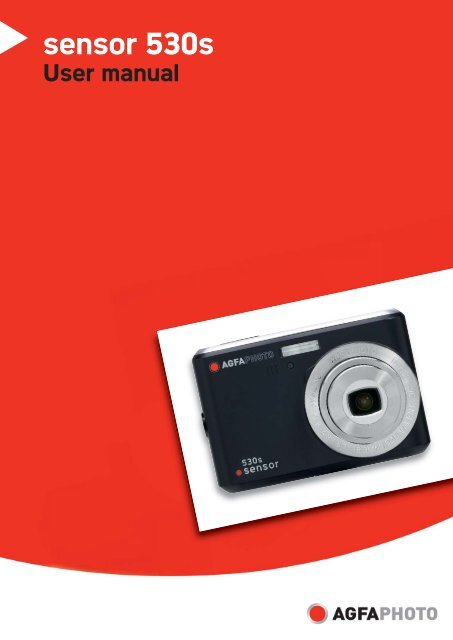
<strong>sensor</strong> <strong>530s</strong><br />
<strong>User</strong> <strong>manual</strong>
Thank you for purchasing this <strong>AgfaPhoto</strong> digital camera. Please read these operating<br />
instructions carefully in order to use the digital camera correctly. Keep the instructions in a<br />
safe place after reading so that you can refer to them later.<br />
Precautions<br />
• Do not aim the camera directly into the sun or other intense light sources which could<br />
damage your eyesight.<br />
• Do not try to open the casing of the camera or attempt to modify this camera in any way.<br />
High-voltage internal components create the risk of electric shock when exposed.<br />
Maintenance and repairs should be carried out only by authorized service providers.<br />
• Do not fire the flash too close to the eyes of animals or young children. Eye damage<br />
may result. Please remain at least one meter away from infants when using the flash.<br />
• Keep the camera away from water and other liquids. Do not use the camera with wet<br />
hands. Never use the camera in the rain or snow. Internal moisture is dangerous and<br />
may lead to electric shock.<br />
• Keep the camera and its accessories out of the reach of children and animals to prevent<br />
accidents or damage to the camera.<br />
• If you notice smoke or a strange odor coming from the camera, turn the power off<br />
immediately. Take the camera to the nearest authorized service center for repair. Never<br />
attempt to repair the camera yourself.<br />
• Use only the recommended power accessories. Use of power sources not expressly<br />
recommended for this equipment may lead to overheating, distortion of the equipment,<br />
fire, electrical shock or other hazards.<br />
Disclaimer<br />
We assume no responsibility over and above the provisions of the Product Liability Law for<br />
damages suffered by the user or third parties as a result of the inappropriate handling of the<br />
product or its accessories, or by their operational failure and by their use. We reserve the<br />
right to make changes to this product and its accessories without prior notice.<br />
Warning!<br />
Never open the camera or remove any parts of it. This will void all warranty claims.<br />
Using your batteries<br />
For best performance and prolonged battery life, we recommend the use of rechargeable Ni-<br />
MH batteries.<br />
Extending battery life<br />
Excessive use of the following functions use up a great deal of battery power and should<br />
therefore only be used occasionally:<br />
• Flash<br />
• Editing images on the camera display<br />
The battery life can be affected by soiling. Please clean the contacts with a clean, dry cloth<br />
before putting the batteries in the camera. Battery performance drops at temperatures below<br />
0° C. If you use the camera at low temperatures you should have replacement batteries to<br />
hand and ensure they do not get too cold.<br />
Please note: you should not dispose of cold and seemingly flat batteries because these<br />
batteries may work again at room temperature.<br />
1
1.0 Table of Contents<br />
Precautions ............................................ 1<br />
Disclaimer...................................................... 1<br />
Warning! ........................................................ 1<br />
Using your batteries ...................................... 1<br />
Extending battery life..................................... 1<br />
1.0 Table of Contents.......................... 2<br />
2.0 General Introduction..................... 3<br />
2.1 Package contents................................. 3<br />
2.2 External View ....................................... 3<br />
2.3 Display Information .............................. 5<br />
3.0 Getting Started .............................. 7<br />
3.1 Turning Power On & Off....................... 7<br />
3.2 Inserting / Removing the Batteries ....... 7<br />
3.3 Inserting / Removing a Memory Card .. 8<br />
3.4 Attaching the Wrist Strap ..................... 8<br />
4.0 Buttons & Functions..................... 9<br />
4.1 Power................................................... 9<br />
4.2 Shutter ................................................. 9<br />
4.3 Tele / Wide........................................... 9<br />
4.4 Playback ............................................ 10<br />
4.5 Mode .................................................. 10<br />
4.6 Basic Operations................................ 10<br />
4.6.1 EV ...................................................... 10<br />
4.6.2 ISO..................................................... 11<br />
4.6.3 WB ..................................................... 11<br />
4.7 Menu .................................................. 12<br />
4.7.1 Up / Play & Pause / Macro................. 12<br />
4.7.2 Right / Flash....................................... 12<br />
4.7.3 Down / Voice Memo........................... 12<br />
4.7.4 Left / Self-timer................................... 12<br />
5.0 Still Image Mode.......................... 14<br />
5.1 Capturing Images............................... 14<br />
5.2 Menu Mode ........................................ 14<br />
5.2.1 Size (Default: 5M) .............................. 14<br />
5.2.2 Quality (Default: Fine) ........................ 14<br />
5.2.3 Sharpness (Default: Normal).............. 15<br />
5.2.4 Saturation (Default: Normal) .............. 15<br />
5.2.5 Effect (Default: Normal)...................... 15<br />
5.2.6 Metering (Default: Multi)..................... 15<br />
5.2.7 Scene Mode (Default: Auto Mode)..... 15<br />
5.2.8 Shooting (Continuous)<br />
(Default: Single) ................................. 15<br />
6.0 Movie Clip Mode.......................... 16<br />
6.1 Movie Recording ................................ 16<br />
6.2 Movie Size ......................................... 16<br />
7.0 Voice Recording Mode ............... 17<br />
8.0 Playback Mode ............................ 18<br />
8.1 Playing a Still Image........................... 18<br />
8.2 Playing Movie Clips............................ 18<br />
8.3 Thumbnail Display (Small Images) .... 19<br />
8.4 Exploring an Image ............................ 19<br />
8.5 Slide ................................................... 19<br />
8.6 Protect................................................ 20<br />
8.7 Delete................................................. 21<br />
8.8 Copy To Card..................................... 21<br />
8.9 DPOF ................................................. 22<br />
9.0 SETUP Mode................................ 23<br />
9.1 Auto Off.............................................. 23<br />
9.2 Language .............................................. 24<br />
9.3 Format................................................ 24<br />
9.4 Date Input .......................................... 24<br />
9.5 Imprint ................................................ 25<br />
9.6 Beep................................................... 25<br />
9.7 Light Frequency ................................. 25<br />
9.8 Q. View .............................................. 25<br />
9.9 Sys. Reset.......................................... 26<br />
9.10 USB.................................................... 26<br />
9.10.1 PC Cam: ....................................... 26<br />
9.10.2 Disk Drive:..................................... 26<br />
9.10.3 Printer: .......................................... 26<br />
10.0 Specifications.............................. 27<br />
System Requirements ................................. 28<br />
11.0 Customer care............................. 29<br />
11.1 Customer care.................................... 29<br />
11.2 Disposal of Waste Equipment by<br />
<strong>User</strong>s in Private Households in the<br />
European Union .......................................... 30<br />
11.3 Compliance and Advisory .................. 30<br />
2
2.0 General Introduction<br />
2.1 Package contents<br />
<strong>AgfaPhoto</strong> Sensor<br />
<strong>530s</strong><br />
Camera Driver &<br />
Software CD<br />
Quick Guide<br />
USB Cable<br />
Wrist Strap Camera Pouch 2xAA Batteries<br />
2.2 External View<br />
Top<br />
Shutter Button<br />
Microphone<br />
Strap Eyelet<br />
Power Button<br />
3
Side<br />
USB Connector<br />
Battery/Memory<br />
Card/Compartment Cover<br />
Front<br />
LED<br />
Flash<br />
Lens<br />
Back<br />
Wide/Tele Button<br />
LCD Monitor<br />
Tripod Socket<br />
4
Playback Button<br />
Mode Button<br />
Delete/Exposure Button<br />
Play/Pause/Up Button<br />
Flash/Right Button<br />
Self-Timer/Left Button<br />
Voice Memo/Down Button<br />
Menu Button<br />
2.3 Display Information<br />
Battery Status<br />
( ) Batteries Full<br />
( ) Batteries Half Full<br />
( ) Batteries Empty<br />
Operation Mode<br />
( ) Image Shooting Mode<br />
( ) Playback Mode<br />
( ) Movie Clip Mode<br />
( ) Voice Recording Mode<br />
( ) Auto Mode<br />
( ) Sport Mode<br />
( ) Night Mode<br />
( ) Portrait Mode<br />
( ) Landscape<br />
( ) Backlight<br />
( ) WARNING:<br />
Hold Camera Stable<br />
Flash Mode<br />
( ) Auto Flash<br />
( ) Red-Eye<br />
( ) Fill-in Flash<br />
( ) Slow Sync<br />
( ) Flash Off<br />
5
Self-timer<br />
( ) 10 Seconds<br />
( ) 2 Seconds<br />
( ) Cloudy<br />
( ) Tungsten<br />
( ) Fluorescent<br />
( ) Voice Memo<br />
Focus Range<br />
( ) Macro<br />
Metering<br />
( ) Multi<br />
( ) Spot<br />
Shooting<br />
( ) Continuous<br />
Single<br />
ISO Value<br />
( ) 100<br />
( ) 200<br />
( ) 400<br />
( ) Exposure ± 2<br />
W. Balance<br />
( ) Auto<br />
( ) Daylight<br />
( ) Memory Card Inserted<br />
Sharpness<br />
( ) Soft<br />
( ) Normal<br />
( ) Vivid<br />
Quality<br />
( ) S. Fine<br />
( ) Fine<br />
( ) Normal<br />
Size<br />
(12M) (Via interpolation)<br />
(5M)<br />
(3M)<br />
(VGA)<br />
(100) Available Shots<br />
Zoom Status Indicator<br />
( )<br />
3.0X Optical Zoom<br />
8.0X Digital Zoom<br />
6
3.0 Getting Started<br />
3.1 Turning Power On & Off<br />
• Press the Power Button to turn the camera on.<br />
• Press the Power Button again to turn the camera off.<br />
3.2 Inserting / Removing the Batteries<br />
1. Power off the camera.<br />
2. Slide open the battery compartment cover.<br />
3. Remove the batteries or, respecting the polarity indications, insert them.<br />
4. Close the battery cover.<br />
Battery status indicator.<br />
( ): Batteries full.<br />
( ): Batteries half full.<br />
( ): Batteries empty. Replace with new batteries.<br />
• The batteries will discharge if kept inside the camera for a long time without use.<br />
Remove the batteries when the camera is not in use.<br />
• The batteries may not work normally under 0 o C or over 40 o C.<br />
7
3.3 Inserting / Removing a Memory Card<br />
1. Power off the camera.<br />
2. Open the battery compartment cover.<br />
3. Insert the memory card into the card slot and press it gently until you hear a click.<br />
4. To remove, gently press on the edge of the card and pull it out.<br />
5. Close the battery cover.<br />
3.4 Attaching the Wrist Strap<br />
8
4.0 Buttons & Functions<br />
4.1 Power<br />
• Press the Power Button to turn the camera on.<br />
• Press the Power Button again to turn the camera off.<br />
Power<br />
• If the camera is left idle for a certain period of time, the camera will power off<br />
automatically.<br />
4.2 Shutter<br />
Shutter<br />
• Press the Shutter Button half way to focus and then press it fully down to capture an<br />
image.<br />
4.3 Tele / Wide<br />
• Press the Tele Button. The Zoom Bar Indicator will appear in the top of the LCD display<br />
showing the current zoom status.<br />
• Press the Wide Button. The Zoom Bar Indicator will return to the Wide view.<br />
• The camera allows maximum 3.0x optical zoom and 8.0x digital zoom.<br />
Note: As shown in the Technical Specifications on the last page:<br />
Play mode: 1.0X ~ 8.0X (depending on image size)<br />
9
You can record images and voices in the Operation mode. Use the Playback Mode to play,<br />
delete or edit images on the LCD display.<br />
4.4 Playback<br />
• Select the Playback Mode by pressing the Playback Button ( ).<br />
• Playback Mode displays still images, movie clips and voice recordings.<br />
• Select an image by pressing the Left or Right Button.<br />
4.5 Mode<br />
Still Image Movie Clip Voice Recording<br />
4.6 Basic Operations<br />
• To adjust white balance, ISO & EV press the Delete / Exposure Button ( ) several<br />
times to toggle between EV, ISO and white balance.<br />
4.6.1 EV<br />
• To adjust the EV value from -2.0EV to +2.0EV press the Left / Right Button.<br />
• When you have selected the preferred value, press the Menu Button to confirm the<br />
setting.<br />
• The higher the EV value, the brighter the image will be.<br />
10
4.6.2 ISO<br />
• Press the Delete / Exposure Button several times to toggle between EV, ISO and white<br />
balance.<br />
• To adjust the ISO value, press the Left / Right Button to set the ISO value and press the<br />
Menu Button to confirm.<br />
4.6.3 WB<br />
• Press the Delete / Exposure Button several times to toggle between EV, ISO and white<br />
balance.<br />
• To adjust the WB value, press the Left / Right Button to set the white balance and select<br />
the Menu Button to confirm.<br />
Auto<br />
Daylight<br />
Cloudy<br />
Tungsten<br />
Fluorescent<br />
Adjusts the white balance automatically<br />
For bright light conditions<br />
For cloudy conditions<br />
For tungsten light<br />
For florescent light<br />
11
4.7 Menu<br />
• Press the Menu Button to open the menu.<br />
• When the menu appears on the LCD display, the Menu Button is used to move through<br />
the highlighted items in the submenu or to confirm data.<br />
4.7.1 Up / Play & Pause / Macro<br />
• Press the Up Button ( ) to move up the submenu.<br />
• When the menu is not displayed on the LCD display, the Up Button ( ) operates as<br />
the Macro function.<br />
• The Up Button also operates as the Play & Pause function to play movie clips in<br />
Playback Mode.<br />
4.7.2 Right / Flash<br />
• Press the Right Button ( ) to highlight items in the right tab.<br />
• The Right Button ( ) also operates as the Flash function.<br />
4.7.3 Down / Voice Memo<br />
• Press the Voice Button ( ) to highlight items in the down tab.<br />
• There are two ways you can add your voice to a stored still image.<br />
1. Shooting Mode<br />
2. Playback Mode<br />
4.7.4 Left / Self-timer<br />
• Press the Left Button to highlight items in the left tab.<br />
10 sec. Self-timer ( ): The image will be taken 10 after the shutter is released.<br />
2 sec. Self-timer ( ): The image will be taken 2 seconds after the shutter is released.<br />
12
Note:<br />
Night Scene Under Shooting Mode<br />
While in Shooting Mode, press Menu Button then go to Scene Mode and select "Night".<br />
Press the Left Button to exit the menu. Press the Down Button, and then press the Left /<br />
Right Button to adjust the Long Exposure Value which ranges through<br />
Auto,1/8,1/4,1/2,1,2,3,4.<br />
Press the Menu Button to confirm the value you select.<br />
13
5.0 Still Image Mode<br />
5.1 Capturing Images<br />
Taking a Picture<br />
1. Press the Power Button to power on the camera.<br />
2. Press the Shutter Button half way to focus.<br />
3. Press the Shutter Button fully to capture the image.<br />
• Using the Zoom<br />
Press T or W on the Zoom Button ( )<br />
It is recommended that you take photos with the camera mounted on a tripod or<br />
other device if the Shaking Hand (<br />
) icon appears.<br />
5.2 Menu Mode<br />
5.2.1 Size (Default: 5M)<br />
This feature allows you to select image resolution.<br />
(12M) 4032 x 3024 ( 3M ) 2048 x 1536<br />
( 5M ) 2560 x 1920 (VGA) 640 x 480<br />
5.2.2 Quality (Default: Fine)<br />
This feature allows you to select image quality.<br />
( ) S. Fine (Super Fine)<br />
( ) Fine<br />
( ) Normal<br />
14
5.2.3 Sharpness (Default: Normal)<br />
VIVID<br />
NORMAL<br />
SOFT<br />
This effect emphasizes the edges.<br />
The captured image looks sharper but may result in more<br />
image noise.<br />
This effect emphasizes the edges, making the captured<br />
image suitable for printing.<br />
This effect makes the edges of the captured image look<br />
smoother, making it suitable for image editing on PC.<br />
5.2.4 Saturation (Default: Normal)<br />
High<br />
Normal<br />
Low<br />
5.2.5 Effect (Default: Normal)<br />
NORMAL No special effect is added to the picture.<br />
NEGATIVE Gives the image a negative photo effect.<br />
SEPIA Gives the image a yellowish brown tone.<br />
B & W Turns the image black and white.<br />
5.2.6 Metering (Default: Multi)<br />
The Metering Setting allows you to obtain superior exposure conditions and to capture a<br />
brighter picture.<br />
( ) Multi Metering:<br />
Exposure will be evaluated according to the average of the available light sources in the<br />
image area. This is suitable for general use.<br />
( ) Spot Metering:<br />
If the subject is against the light source or has little contrast, you can use this function to<br />
have the subject made brighter.<br />
5.2.7 Scene Mode (Default: Auto Mode)<br />
Select the scene modes from the following options:<br />
( ) Auto Mode<br />
( ) Sport Mode<br />
( ) Night Mode<br />
( ) Portrait Mode<br />
( ) Landscape<br />
( ) Backlight<br />
5.2.8 Shooting (Continuous) (Default: Single)<br />
1. Single: Single Image capture.<br />
2. 3 pictures in sequence ( ): Press the Shutter Button to start the continuous shooting<br />
function. Three still images are taken automatically.<br />
Note: The Continuous Shooting function will not be cancelled until “ Single" is selected.<br />
15
6.0 Movie Clip Mode<br />
6.1 Movie Recording<br />
Recording<br />
1. Press the Power Button to power on the camera.<br />
2. Press the Mode Button to change to Movie Clip Mode.<br />
3. Press the Shutter Button to start movie recording.<br />
4. Press the Shutter Button again to stop recording.<br />
6.2 Movie Size<br />
The video size options provided are as follows:<br />
1. VGA : 640 x 480<br />
2. QVGA : 320 x 240<br />
16
7.0 Voice Recording Mode<br />
1. Press the Mode Button and select Voice Recording Mode ( ).<br />
2. Press the Shutter Button to start recording and press the Shutter Button again to stop the<br />
recording.<br />
3. Press the Play / Pause Button ( ) during recording to pause recording and press the<br />
Play / Pause Button again to continue recording.<br />
17
8.0 Playback Mode<br />
8.1 Playing a Still Image<br />
• Press the Playback Button to view images taken.<br />
• Press the Right or Left Button to go to the next or last image.<br />
Operation Steps<br />
1. Playback Button<br />
2. or <br />
Note: The icon (<br />
) appears when viewing a still image with a voice memo.<br />
8.2 Playing Movie Clips<br />
• Press the Playback Button to play the Movie Clips.<br />
• Press the Up Button to start or pause the Movie Clip.<br />
• You can choose a 2X, 4X and 8X fast forward speed by pressing the Menu Button when<br />
playing the Movie Clips.<br />
• When playing back the Movie Clips, press the Left / Self-Timer Button to play backwards<br />
and press the Menu Button to choose the 2X, 4X and 8X backward speed.<br />
Operation Steps<br />
1. Playback Button<br />
2. or <br />
Note: The icon (<br />
still image.<br />
) in the top left of the LCD display represents a Movie Clip, not a<br />
18
8.3 Thumbnail Display (Small Images)<br />
1. The Thumbnail Display is a convenient tool for finding an image.<br />
2. Press the WIDE Button to view the Thumbnail Display.<br />
8.4 Exploring an Image<br />
1. Press the TELE Button to see an enlargement of the image.<br />
2. Use the TELE/WIDE Button to zoom in or out.<br />
3. Use the UP/DOWN/LEFT/RIGHT Button to move the enlarged section you would like to<br />
view.<br />
4. Press the WIDE Button to return to the original Playback Mode.<br />
8.5 Slide<br />
1. This option allows you to view your photos in a slide show.<br />
2. There are 3 interval options available:<br />
1. 3 sec.<br />
2. 5 sec.<br />
3. 10 sec.<br />
Operation Steps<br />
1. MENU<br />
2. or <br />
3. MENU<br />
19
8.6 Protect<br />
Protecting Selected Image(s)<br />
1. Press the Menu Button. Select "PROTECT" and confirm with the Menu Button.<br />
2. Choose "SELECT" and press the Menu Button.<br />
3. Select your image(s) to protect and press the Menu Button.<br />
( ) will appear on the LCD display when a file is protected.<br />
4. To unprotect a file, press the Menu Button.<br />
Operation Steps<br />
1. MENU<br />
2. or <br />
3. <br />
4. or <br />
5. MENU<br />
Protecting All Images<br />
1. Press the Menu Button. Select "PROTECT" and confirm with the Menu Button.<br />
2. Choose "ALL" and press the Menu Button.<br />
3. Select "EXECUTE" and press the Menu Button to confirm. ( ) will appear on the<br />
LCD display when the files are protected.<br />
20
8.7 Delete<br />
Deleting Single Image<br />
1a. Select the image you want to delete and press the Delete / Exposure Button (+/-).<br />
Choose "Execute" and press the Menu Button to confirm or the Left Button to cancel<br />
the request.<br />
1b. Press the Menu Button. Select "Delete" and press the Menu Button. Select "Single"<br />
and press the Menu Button to proceed.<br />
Operation Steps<br />
1. MENU<br />
2. or <br />
3. or MENU<br />
Deleting All Image(s)<br />
1. Press the Menu Button and select "Delete" using the Menu Button.<br />
2. Select "ALL" and press the Menu Button to proceed.<br />
Deleting Selected Image<br />
1. Press the Menu Button and select "Delete" using the Menu Button.<br />
2. Choose "Select" and press the Menu Button.<br />
3. Select the image you want to delete and press the Menu Button.<br />
8.8 Copy To Card<br />
This function allows you to copy the images stored in the internal flash memory onto a<br />
memory card.<br />
Operation Steps<br />
1. MENU<br />
2. or <br />
3. or MENU<br />
21
8.9 DPOF<br />
• This function can only be used when a memory card is inserted.<br />
• This option allows you to store the number of copies to print (MAX.30 pcs) on your<br />
memory card.<br />
[SINGLE] - specifies the number of copies for a selected image.<br />
[ALL ] - specifies the number of copies for all pictures apart from movie clips and voice<br />
recording files.<br />
Note: The "PRINT" function will not appear on the LCD display if a memory card is<br />
not inserted.<br />
Operation Steps<br />
1. MENU<br />
2. or <br />
3. or MENU<br />
Operation Steps<br />
1.MENU<br />
2. or <br />
3. <br />
4. MENU<br />
Operation Steps<br />
1. or <br />
2. MENU<br />
Operation Steps<br />
1. or <br />
2. MENU<br />
22
9.0 SETUP Mode<br />
You can enter the SETUP Mode by pressing the Menu Button and selecting SETUP.<br />
Operation Steps Item:<br />
1. MENU<br />
1. Auto Off<br />
2. or <br />
2. Language<br />
3. <br />
3. Format<br />
4. or <br />
4. Date Input<br />
5.MENU<br />
5. Imprint<br />
6. Beep<br />
7. Light Freq.<br />
8. Q. View<br />
9. Sys. Reset<br />
10. USB<br />
9.1 Auto Off<br />
This function allows you to set the power saving time.<br />
1. Press the Menu Button and select "SETUP".<br />
2. Select "AUTO OFF".<br />
3. Select the time you prefer and press the Menu Button to confirm the setting.<br />
Select "OFF" to disable the power-saving function.<br />
Operation Steps<br />
1. MENU<br />
2. or <br />
3. MENU<br />
4. or <br />
5. MENU<br />
6. or <br />
7. MENU<br />
Note:<br />
If "OFF" is set, the camera will not turn off automatically.<br />
The batteries will discharge if the camera is powered on for a long time.<br />
23
9.2 Language<br />
There are 12 languages available to select:<br />
Operation Steps<br />
1. MENU<br />
2. or <br />
3. MENU<br />
4. or <br />
5. MENU<br />
1. English<br />
2. French<br />
3. German<br />
4. Italian<br />
5. Spanish<br />
6. Portuguese<br />
7. Traditional Chinese<br />
8. Simplified Chinese<br />
9. Japanese<br />
10. Thai<br />
11. Turkish<br />
12. Russian<br />
Operation Steps<br />
1. or <br />
2. MENU<br />
9.3 Format<br />
This function allows you to format the memory card or the built-in flash memory.<br />
Operation Steps<br />
1. MENU<br />
2. or <br />
3. MENU<br />
4. or <br />
5. MENU<br />
9.4 Date Input<br />
This function allows you to set up the type of date & time.<br />
Operation Steps<br />
1. MENU<br />
2. or <br />
3. MENU<br />
4. or <br />
5. MENU<br />
1. YYYY/MM/DD<br />
2. DD/MM/YYYY<br />
3. MM/DD/YYYY<br />
24
9.5 Imprint<br />
This function allows you to print the date or date & time on a captured image.<br />
Operation Steps<br />
1. MENU<br />
2. or <br />
3. MENU<br />
4. or <br />
5. MENU<br />
9.6 Beep<br />
This function allows you to switch the button sound on or off.<br />
Operation Steps<br />
1. MENU<br />
2. or <br />
3. MENU<br />
4. or <br />
5. MENU<br />
9.7 Light Frequency<br />
The Light Frequency setting is for Anti-flicker.<br />
50Hz: UK, Germany, Italy, Spain, France, Netherlands, China, Japan, Portugal.<br />
60Hz: U.S.A., Taiwan, Korea, Japan.<br />
Operation Steps<br />
1. MENU<br />
2. or <br />
3. MENU<br />
4. or <br />
5. MENU<br />
Note: A horizontal flicker will occur under artificial lighting conditions if the wrong frequency<br />
is selected.<br />
9.8 Q. View<br />
If you select Q. View “On", you can view the captured image on the LCD display.<br />
Q. View is possible only with still images.<br />
Operation Steps<br />
1. MENU<br />
2. or <br />
3. MENU<br />
4. or <br />
5. MENU<br />
25
9.9 Sys. Reset<br />
This function is to restore all default values apart from the Date, Time and Language.<br />
Operation Steps<br />
1. MENU<br />
2. or <br />
3. MENU<br />
4. or <br />
5. MENU<br />
9.10 USB<br />
You can select the operating mode when connecting the camera to an external device using<br />
a USB cable.<br />
Operation Steps<br />
1. MENU<br />
2. or <br />
3. MENU<br />
4. or <br />
5. MENU<br />
9.10.1 PC Cam:<br />
a. Install the PC Cam Driver on your computer.<br />
b. Select the USB setting as PC Cam.<br />
c. Connect the USB cable to your computer.<br />
d. You can start the PC Cam function after you have set up MSN messenger or AMCAP.<br />
9.10.2 Disk Drive:<br />
When Disk Drive is selected, the PC will automatically detect the camera as a Disk Drive.<br />
The LCD display will power off. A new removable disk will appear to download images to<br />
your computer.<br />
9.10.3 Printer:<br />
Connect the camera to a printer and select the Printer via PictBridge function. Select the<br />
detailed printer options.<br />
26
10.0 Specifications<br />
Image Sensor Type 1/2.5″ 5M CMOS Sensor<br />
Effective 5.0 Mega Pixels (2,592 × 1,944)<br />
Pixels<br />
Lens<br />
Lens Type Optical 3X Zoom (35mm Film Equivalent: 36~108<br />
mm)<br />
F No. F2.8~F4.8<br />
Digital Zoom Still Image mode: 1.0X ~ 8.0X<br />
Play mode: 1.0X ~ 8.0X (depends on image size)<br />
LCD Display<br />
2.4" Color LTPS LCD<br />
Focusing<br />
Type Auto Focus<br />
Range Normal: 110cm ~ infinity Macro: 5cm~200cm<br />
(Wide only)<br />
Shutter<br />
Type Mechanical and Electrical Shutter<br />
Speed Normal: 1/4000 sec. - 4 sec., Night Scene: 4 sec. -<br />
1/8 sec.<br />
Exposure<br />
Control Programmed AE, Metering: Multi, Spot<br />
ISO<br />
100, 200, 400<br />
Equivalent<br />
Flash Modes Auto, Red Eye, SlowSync, Fill-in Flash, Flash Off<br />
Effect<br />
Normal, Sepia, Negative, B&W<br />
White Balance<br />
Auto, Daylight, Cloudy, Fluorescent, Tungsten<br />
Voice Recording<br />
Voice Recording (depends on capacity)<br />
Voice Memo in Still Image (max. 10 sec.)<br />
Date Imprinting<br />
Date, Date & Time, Off (user selectable)<br />
Shooting Still Image Mode Single Image, Continuous Shooting<br />
Image Size [12M]: 4032 X 3024 pixels (by interpolation)<br />
[3M]: 2048 X 1536 pixels<br />
[5M]: 2560 X 1920 pixels<br />
[VGA]: 640 X 480 pixels<br />
Image Quality Super Fine, Fine, Normal<br />
Self-Timer<br />
10 sec. , 2 sec.<br />
Scene Mode<br />
Auto, Sport, Night, Potrait, Landscape, Backlight<br />
Movie Clip Movie Size QVGA (320x240), VGA (640x480)<br />
Frame Rate QVGA (30fps), VGA (28fps)<br />
Zoom Optical Zoom: up to 3.0X<br />
Storage Media<br />
Internal memory: 16M<br />
External memory: supporting SD card (up to 2G)<br />
File Format Still Image JPEG (DCF), EXIF 2.2, DPOF 1.1, PictBridge 1.0<br />
Movie Clip MJPEG, 320x240 (QVGA), 640x480(VGA), with<br />
audio on PC<br />
Audio Audio for Voice Recording and Memo: WAV<br />
PictBridge (Direct Printing)<br />
Yes<br />
Image Play Type Single Image, Thumbnails, Slide Show, Movie Clip<br />
Interface<br />
Digital output connector: USB 1.1 Full Speed<br />
Other interface: MIC-in, Buzzer Out (No Speaker)<br />
Power Source<br />
2 x AA alkaline, Ni-MH Battery<br />
Dimensions (WxHxD)<br />
91.7 x 30 x 61.5 mm<br />
Weight<br />
Approx.120g (without battery and card)<br />
27
Software<br />
Camera<br />
Driver<br />
Application<br />
System Requirements<br />
Windows 2000/ME/XP, Vista32/64<br />
Arcsoft MediaImpression<br />
For Windows • PC with processor higher than MMX Pentium 233MHz<br />
(XP: Pentium II 300MHz)<br />
• Windows 2000 Professional (SP4)/Windows ME/Windows XP<br />
(SP2)/Window Vista<br />
• Minimum 64MB RAM (XP: 128MB)<br />
• 140MB of available hard-disk space<br />
• USB port (1.1 or 2.0 standard interface)<br />
• CD-ROM drive<br />
• 800×600 pixels, 16-bit color display compatible monitor<br />
(24-bit color display recommended)<br />
For Macintosh • Power Mac G3 or later<br />
• Mac OS 10.0-10.4<br />
• Minimum 64MB RAM<br />
• 110MB of available hard-disk space<br />
• USB port<br />
• CD-ROM Drive<br />
• 800x600 pixels, 16-bit color display compatible monitor<br />
• QuickTime6.0 or Later for MPEG4 SP Movie Clip<br />
28
11.0 Customer care<br />
11.1 Customer care<br />
More information on the complete <strong>AgfaPhoto</strong> digital camera product range can be found<br />
under www.<strong>plawa</strong>.com / www.<strong>plawa</strong>usa.com<br />
Service & Repair (USA/ Canada):<br />
1-866 475 2605<br />
www.<strong>plawa</strong>usa.com<br />
Support Service (USA/ Canada)<br />
Support-apdc@<strong>plawa</strong>usa.com<br />
Service & Repair Hotline (EU):<br />
00800 752 921 00 (from a landline only)<br />
Service & Support Hotline (Germany):<br />
0900 1000 042 (1.49 Euro/ min. from a German landline only)<br />
Online Service / International contact (Not for USA/ Canada):<br />
support-apdc@<strong>plawa</strong>.com<br />
Manufactured by<br />
<strong>plawa</strong>-feinwerktechnik GmbH & Co. KG<br />
Bleichereistraße 18<br />
73066 Uhingen<br />
Germany<br />
<strong>AgfaPhoto</strong> is used under license of Agfa-Gevaert NV & Co. KG. Agfa-Gevaert NV & Co. KG.<br />
does not manufacture this product or provide any product warranty or support.<br />
For service, support and warranty information, contact the distributor or manufacturer.<br />
Contact: <strong>AgfaPhoto</strong> Holding GmbH, www.agfaphoto.com<br />
29
11.2 Disposal of Waste Equipment by <strong>User</strong>s in Private<br />
Households in the European Union<br />
This symbol on the product or on its packaging indicates that this product must not be<br />
disposed of with your other household waste. Instead, it is your responsibility to dispose of<br />
your waste equipment by handing it over to a designated collection point for the recycling of<br />
waste electrical and electronic equipment. The separate collection and recycling of your<br />
waste equipment at the time of disposal will help to conserve natural resources and ensure<br />
that it is recycled in a manner that protects human health and the environment. For more<br />
information about where you can drop off your waste equipment for recycling, please contact<br />
your local city office, your household waste disposal service or the shop where you<br />
purchased the product.<br />
11.3 Compliance and Advisory<br />
This device complies with Part 15 of the FCC Rules. Operation is subject to the following two<br />
conditions: 1.) this device may not cause harmful interference, and 2.) this device must<br />
accept any interference received, including interference that may cause unsatisfactory<br />
operation. This equipment has been tested and found to comply with the limits for a Class B<br />
peripheral, pursuant to Part 15 of the FCC Rules. These limits are designed to provide<br />
reasonable protection against harmful interference in a residential installation. This<br />
equipment generates, uses, and can radiate radio frequency energy and, if not installed and<br />
used in accordance with the instructions, may cause harmful interference to radio<br />
communication. However, there is no guarantee that interference will not occur in a particular<br />
installation. If this equipment does cause harmful interference to radio or television reception,<br />
which can be determined by turning the equipment off and on, the user is encouraged to try<br />
to correct the interference by one or more of the following measures.<br />
• Reorient or relocate the receiving antenna.<br />
• Increase the separation between the equipment and receiver.<br />
• Connect the equipment to an outlet on a circuit different from that to which the receiver is<br />
connected.<br />
• Consult the dealer or an experienced radio/TV technician for help.<br />
Any changes or modifications not expressly approved by the party responsible for<br />
compliance could void the user's authority to operate the equipment. When shielded interface<br />
cables have been provided with the product or when specified additional components or<br />
accessories have elsewhere been designated to be used with the installation of the product,<br />
they must be used in order to ensure compliance with FCC regulations.<br />
30