Extensa 5635/5635Z/5235 Service Guide - Acer Support
Extensa 5635/5635Z/5235 Service Guide - Acer Support
Extensa 5635/5635Z/5235 Service Guide - Acer Support

Create successful ePaper yourself
Turn your PDF publications into a flip-book with our unique Google optimized e-Paper software.
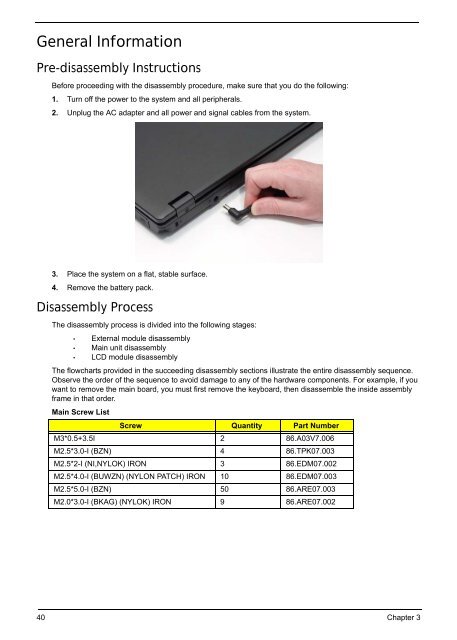
General Information<br />
Pre-disassembly Instructions<br />
Before proceeding with the disassembly procedure, make sure that you do the following:<br />
1. Turn off the power to the system and all peripherals.<br />
2. Unplug the AC adapter and all power and signal cables from the system.<br />
3. Place the system on a flat, stable surface.<br />
4. Remove the battery pack.<br />
Disassembly Process<br />
The disassembly process is divided into the following stages:<br />
• External module disassembly<br />
• Main unit disassembly<br />
• LCD module disassembly<br />
The flowcharts provided in the succeeding disassembly sections illustrate the entire disassembly sequence.<br />
Observe the order of the sequence to avoid damage to any of the hardware components. For example, if you<br />
want to remove the main board, you must first remove the keyboard, then disassemble the inside assembly<br />
frame in that order.<br />
Main Screw List<br />
Screw Quantity Part Number<br />
M3*0.5+3.5I 2 86.A03V7.006<br />
M2.5*3.0-I (BZN) 4 86.TPK07.003<br />
M2.5*2-I (NI,NYLOK) IRON 3 86.EDM07.002<br />
M2.5*4.0-I (BUWZN) (NYLON PATCH) IRON 10 86.EDM07.003<br />
M2.5*5.0-I (BZN) 50 86.ARE07.003<br />
M2.0*3.0-I (BKAG) (NYLOK) IRON 9 86.ARE07.002<br />
40 Chapter 3