gas pressure washer 039-8583-4 owner's manual - Simoniz
gas pressure washer 039-8583-4 owner's manual - Simoniz
gas pressure washer 039-8583-4 owner's manual - Simoniz
You also want an ePaper? Increase the reach of your titles
YUMPU automatically turns print PDFs into web optimized ePapers that Google loves.
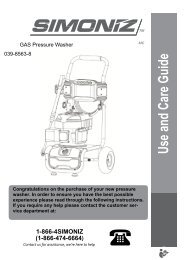
GAS PRESSURE WASHER<br />
<strong>039</strong>-<strong>8583</strong>-4<br />
OWNER’S MANUAL<br />
Questions?<br />
If you have a question or if there are missing parts,<br />
please call:<br />
1-866-4-SIMONIZ<br />
(1-866-474-6664)<br />
Monday-Saturday 7:00 am-8:00 pm EST<br />
Product #: <strong>039</strong>-<strong>8583</strong>-4<br />
Serial #: _____________________<br />
Purchase Date: ________________<br />
TO PREVENT DAMAGE AND BODILY HARM, ENSURE ENTIRE MANUAL HAS BEEN<br />
READ BEFORE OPERATING PRESSURE WASHER UNIT. ANY QUESTIONS OR CONCERNS<br />
REGARDING THIS MANUAL SHOULD BE DIRECTED TO THE SIMONIZ TOLL-FREE<br />
NUMBER.<br />
1 | P age
TABLE OF CONTENTS<br />
SPECIFICATIONS..............................................................................................................................................................2<br />
SAFETY INSTRUCTIONS.................................................................................................................................................3<br />
PRESSURE WASHER FEATURES....................................................................................................................................8<br />
ASSEMBLY AND PRE-START CHECK...........................................................................................................................9<br />
START-UP PROCEDURES & OPERATIONS.................................................................................................................13<br />
TROUBLESHOOTING.....................................................................................................................................................17<br />
MAINTENANCE..............................................................................................................................................................18<br />
DIAGRAM & PARTS LIST..............................................................................................................................................22<br />
LIMITED WARRANTY....................................................................................................................................................24<br />
SPECIFICATIONS<br />
Model<br />
S2900<br />
Product # <strong>039</strong>-<strong>8583</strong>-4<br />
Maximum Pressure<br />
2900 PSI<br />
Rated Water Pressure<br />
2200 PSI<br />
Maximum Water Volume<br />
2.3 US GPM<br />
Minimum Inlet Pressure<br />
30 PSI<br />
Maximum Inlet Pressure<br />
90 PSI<br />
Pump Type<br />
Heavy-duty maintenance-free axial cam<br />
Thermal Relief Valve<br />
Included<br />
Detergent Tank (Volume)<br />
Double,0.2 Gallon (US)<br />
Maximum Temperature of Pumped Fluid 60°C<br />
Engine Power (OHV)<br />
6.5 HP<br />
No Load Speed<br />
3,600 RPM<br />
High Pressure Hose Length 30’ (9 m)<br />
Inlet & Discharge Ports<br />
3/4” standard garden hose connector<br />
Displacement<br />
196 (cc)<br />
Wheels<br />
10” (25.4 cm) pneumatic wheels<br />
Net Weight<br />
77 lb 3 oz (35 kg)<br />
Oil Specification SAE 10W-30<br />
Oil Capacity (L)<br />
0.6 L<br />
Fuel<br />
Unleaded Gasoline<br />
Fuel Tank (L)<br />
3.6 L<br />
2 | P age
SAFETY INSTRUCTIONS<br />
WARNING<br />
To reduce the risk of serious injury, read all instructions and precautions before operating this<br />
machine.<br />
SYMBOL MEANINGS:<br />
TOXIC<br />
This symbol warns you of possible toxic <strong>gas</strong>es which can<br />
be harmful to your health or deadly if you are exposed to<br />
them.<br />
FLAMMABLE AND<br />
COMBUSTIBLE MATERIALS<br />
VERY POISONOUS<br />
HOT SURFACE<br />
GENERAL WARNING<br />
This symbol warns of materials/<strong>gas</strong>es which are present<br />
and extremely flammable. When you see this symbol, be<br />
very cautious not to ignite the materials/<strong>gas</strong>es.<br />
This symbol warns of materials, <strong>gas</strong>es, etc. which are very<br />
poisonous and would cause serious bodily harm or death.<br />
When you see this symbol, please take proper<br />
precautions.<br />
This symbol warns of a hot surface which could cause<br />
damage to material and/or damage to human skin if<br />
touched. Please take proper precautions when you see<br />
this symbol.<br />
This symbol indicates that serious bodily injury or death<br />
could occur if proper precautions are not taken. These are<br />
warning statements which do not fall into the above<br />
categories<br />
EXHAUST FUMES ARE DANGEROUS<br />
• Never operate unit in enclosed areas such as garages, basements, storage sheds, or in any<br />
location occupied by humans or animals. Never operate the engine in a closed area or it may cause<br />
unconsciousness and death within a short time. Operate <strong>pressure</strong> <strong>washer</strong> in a clean, dry, wellventilated<br />
area.<br />
• Keep children, pets and others away from area around the unit while it is operating. Breathing<br />
exhaust fumes will cause serious injury or death.<br />
WARNING: Gasoline engines produce toxic carbon monoxide exhaust fumes.<br />
3 | P age
INADEQUATE VENTILATION<br />
• Placing materials against or near the <strong>pressure</strong> <strong>washer</strong> or operating the unit in areas where the<br />
temperature exceeds 40°C ambient (such as storage rooms or garages) can interfere with its proper<br />
ventilation features causing overheating and possible ignition of the materials or buildings.<br />
• Operate <strong>pressure</strong> <strong>washer</strong> in a clean, dry, well-ventilated area a minimum of 4’ (1.2 m) from any<br />
building, object or wall. DO NOT OPERATE UNIT INDOORS OR IN ANY CONFINED AREA.<br />
FUEL IS HIGHLY FLAMMABLE AND POISONOUS<br />
• Always turn off the engine when refuelling.<br />
• Never refuel while smoking or in the vicinity of an open flame.<br />
• When operating or manoeuvring the <strong>pressure</strong> <strong>washer</strong>, be sure to keep it upright. If it tilts, fuel may<br />
leak from the carburettor or fuel tank.<br />
DO NOT ATTEMPT TO FILL GASOLINE TANK WHILE ENGINE IS RUNNING.<br />
• Gasoline and <strong>gas</strong>oline vapours can become ignited by coming into contact with hot components<br />
such as the muffler, engine exhaust <strong>gas</strong>es, or from an electrical spark.<br />
• Turn engine off and allow it to cool before adding fuel to the tank. Equip the area of operation with a<br />
fire extinguisher certified to handle <strong>gas</strong>oline or fuel fires.<br />
SPARKS, FIRE, HOT OBJECTS<br />
• Cigarettes, sparks, fires, or other hot objects can cause <strong>gas</strong>oline or <strong>gas</strong>oline vapours to ignite.<br />
ENGINE AND MUFFLER MAY BE HOT<br />
• Place the <strong>pressure</strong> <strong>washer</strong> in an appropriate location, away from children and pedestrians.<br />
• Avoid placing any flammable materials near the exhaust outlet during operation or shortly thereafter.<br />
• Keep a 4’ (1.2 m) clearance from buildings or other equipment around the <strong>pressure</strong> <strong>washer</strong> to<br />
prevent overheating.<br />
WARNING The engine muffler will be very hot during and after use, avoid touching the<br />
engine or muffler while they are still hot.<br />
4 | P age
HOT MUFFLER & HIGH PRESSURE HOSE<br />
• Muffler will become very hot during operation. DO NOT TOUCH MUFFLER WHILE IN USE OR<br />
SHORTLY THEREAFTER.<br />
• Keep hose away from the hot muffler or it may damage the hose. Do not use a damaged high<br />
<strong>pressure</strong> hose. Do not kink the high <strong>pressure</strong> hose.<br />
APPLICATION<br />
• This equipment is designed for specific residential applications. Do not modify or use for any<br />
purpose other than those for which it is designed. This equipment is not designed for industrial use..<br />
Please refer to icons above for suggested uses. For questions regarding other uses, please refer to<br />
our website at www.simoniz.ca or call us at 1-866-4SIMONIZ (1-866-474-6664).<br />
NEVER OPERATE UNDER THE FOLLOWING CONDITIONS<br />
• When a noticeable change in engine speed occurs.<br />
• Engine misfires.<br />
• Loss of water <strong>pressure</strong>.<br />
• Smoke or flames in the area.<br />
• Excessive vibration.<br />
WATER SPRAY<br />
• Never direct the water spray towards ANY person, animal, electrical wiring or the <strong>pressure</strong> <strong>washer</strong><br />
itself.<br />
• DO NOT spray too close to the surface being cleaned or damage could occur.<br />
• The vendor is not responsible for damage caused by improper use.<br />
PREVENT ACCIDENTAL WATER SPRAY<br />
• To prevent accidental water spray, the wand trigger should be in the locked position when not in<br />
use.<br />
KEEP HANDS AWAY<br />
• Keep hands and other body parts away from high <strong>pressure</strong> water stream as water <strong>pressure</strong> will<br />
cause severe bodily harm.<br />
5 | P age
SAFETY GLASSES<br />
• Always wear safety glasses while operating.<br />
DETERGENTS<br />
• Only use detergents recommended for <strong>pressure</strong> <strong>washer</strong>s. Using detergents not specifically<br />
recommended for use with <strong>pressure</strong> <strong>washer</strong>s can cause damage to pump and other <strong>pressure</strong><br />
<strong>washer</strong> components.<br />
• DAMAGE CAUSED TO PRESSURE WASHER UNIT BY USING NON-RECOMMENDED<br />
DETERGENTS IS NOT COVERED UNDER WARRANTY.<br />
COLD WEATHER STARTS<br />
• Do not operate this <strong>pressure</strong> <strong>washer</strong> in temperatures below 5°C. Operating <strong>pressure</strong> <strong>washer</strong> in<br />
temperatures below may cause damage to pump and other <strong>pressure</strong> <strong>washer</strong> parts.<br />
• DAMAGE TO PRESSURE WASHER UNIT BY USER MISUSE IS NOT COVERED UNDER<br />
WARRANTY.<br />
SAFETY FEATURES<br />
• Thermal Relief Valve<br />
Protects the pump from overheating in case nozzle becomes clogged. This system should not be<br />
abused. Make every effort to prevent the pump from overheating.<br />
• Low-Oil Auto Shut-Off<br />
This <strong>pressure</strong> <strong>washer</strong> is equipped with a low oil shut-off system. If the engine oil falls below<br />
the recommended level, the <strong>pressure</strong> <strong>washer</strong> will automatically shut-off. This protects your<br />
engine and prevents operating without proper lubrication.<br />
STORAGE<br />
• Store the <strong>pressure</strong> <strong>washer</strong> in a well-ventilated area with the fuel tank empty. Fuel should never be<br />
stored or placed near the <strong>pressure</strong> <strong>washer</strong>.<br />
• In winter, store the <strong>pressure</strong> <strong>washer</strong> indoors (at room temperature) in a dry location, away from any<br />
heat sources.<br />
• If unused <strong>gas</strong> will not be used for alternative purposes immediately, use fuel stabilizer to keep the<br />
<strong>gas</strong> from breaking down.<br />
• To protect and extend the life of your <strong>pressure</strong> <strong>washer</strong> when storing, use pump antifreeze, which<br />
can be found at your local Canadian Tire store.<br />
PREVENT PUMP DAMAGE<br />
• Do not run the <strong>pressure</strong> <strong>washer</strong> engine for more than 5 minutes without pressing the wand trigger<br />
or damage to the pump may result.<br />
• Never let the machine run unless connected to the water supply. Ensure water supply is running<br />
water through the <strong>pressure</strong> <strong>washer</strong> before attempting to start engine.<br />
• Never run caustic fluids or acid through this machine<br />
6 | P age
PRESSURE WASHER FEATURES<br />
A – Trigger Locking Latch –Will prevent from misoperating<br />
or spraying accidentally.<br />
B – Wand –Will extend your reach for easier cleaning.<br />
C – Spray Nozzles – 0°, 15°, 25°, 40°, soap tip; Use<br />
to apply the right <strong>pressure</strong> for each specific project<br />
D – Muffler – Ensure you avoid contact as this will be<br />
hot during and shortly after use. Avoid resting the<br />
<strong>pressure</strong> hose on muffler.<br />
E – Fuel Cap – Ensure cap is on tight during use.<br />
F – Fuel Tank – Has a 4 L capacity.<br />
G – Spark Plug –Should be checked every 100 hours<br />
of operation.<br />
H – Air Filter – Filter should be replaced annually to<br />
ensure optimal performance<br />
I – Throttle Lever – This will adjust the engine speed<br />
J – Choke Lever –Will control incoming air.<br />
K – Fuel Valve – Regulates the flow of fuel to the<br />
engine. Must be fully open before starting engine.<br />
L – Recoil Starter – This will start the engine<br />
M –O/I Switch – Ensure this is set to ‘I’<br />
before attempting to start engine.<br />
N – Oil Dipstick – Ensure the unit has the proper<br />
level of oil before starting engine. Use<br />
only SAE 10W-30 oil.<br />
O – Pump – Increases the water <strong>pressure</strong><br />
P – Pump Inlet – Using included quick-connect<br />
coupling, attach your garden hose here.<br />
Q – Pump outlet – Attach your <strong>pressure</strong> hose here.<br />
R –Thermal Relief Valve – This includes a drain<br />
pipe to be used if resting water inside pump<br />
becomes too hot. This will help prevent damage<br />
to pump.<br />
S – Detergent Tank Caps – Take these caps off to fill<br />
either detergent tank with <strong>pressure</strong> <strong>washer</strong><br />
approved detergent.<br />
T – Detergent Dial – Allows you to switch between<br />
different detergents without stopping.<br />
U – Pressure Hose – Attach to pump and gun.<br />
30’ (9 m).<br />
V – Garden Hose Quick-Connect – Use this to make<br />
it easier to connect and disconnect garden hose<br />
from pump inlet.<br />
W – Pump Breather- Will prevent <strong>pressure</strong> inside<br />
pump from going too high.<br />
7 | P age
ASSEMBLY & PRE-START CHECK<br />
Before assembling or starting <strong>pressure</strong><br />
<strong>washer</strong>, ensure entire <strong>manual</strong> has been read.<br />
Unpack <strong>pressure</strong> <strong>washer</strong><br />
Remove everything from carton except<br />
<strong>pressure</strong> <strong>washer</strong> and all parts.<br />
Ensure everything is ready for assembling. If<br />
anything are damaged or missing, call<br />
<strong>Simoniz</strong> toll-free number 1-866-4SIMONIZ (1-<br />
866-474-6664)<br />
You will need:<br />
Utility knife; Adjustable wrench; Unleaded<br />
fuel(87# or above); Engine oil(SAE10w-30);<br />
Standard Garden hose,50ft(15m) or less;<br />
Safety goggles(indirect vented type);<br />
Items included:<br />
1) Fill <strong>gas</strong>oline tank with unleaded <strong>gas</strong>oline. This<br />
is a 4-cycle engine with separate reservoirs for<br />
<strong>gas</strong> and oil. DO NOT use pre-mixed <strong>gas</strong>! DO<br />
NOT use old <strong>gas</strong>! Fuel must be purchased<br />
separately.<br />
2) Fill oil tank with SAE 10W-30 oil. Running<br />
<strong>pressure</strong> <strong>washer</strong> without oil will severely<br />
damage engine which is not covered by<br />
warranty! Oil must be purchased separately.<br />
3) Ensure both the <strong>pressure</strong> hose and garden<br />
hose have been correctly attached to the<br />
<strong>pressure</strong> <strong>washer</strong> pump. Ensure the water tap is<br />
on and water is running through the hose before<br />
attempting to start engine. Not doing this will<br />
damage the pump!<br />
Assemble Pressure Washer<br />
1<br />
WHEEL ASSEMBLY<br />
NOTE: Make sure that there is enough air in<br />
wheel before assembly, if not, please fill to 25psi.<br />
Attach the wheels (A) to the frame. First<br />
press the spring-loaded pin (a) on the axle, then<br />
insert the wheel shaft into the frame. Align the<br />
spring-loaded pin with hole in frame until the pin<br />
snaps in place. Repeat for the other wheel.<br />
Other Contents not shown:<br />
Telephone Card×1, Instruction<br />
Manual×1,Spray tip cleaner×1 ,Spark plug<br />
wrench×1 , Screw driver×1,Replacement O-<br />
ring ×3(2 for high <strong>pressure</strong> hose, 1 for tip<br />
quick connector)<br />
WARNING! Before attempting to start<br />
<strong>pressure</strong> <strong>washer</strong>, ensure you complete the<br />
following important steps.<br />
HANDLE ASSEMBLY<br />
2-1<br />
Attach panel(G) to handle(F) and secure<br />
with bolts, nut, <strong>washer</strong>sx4 sets(J). Tighten with<br />
wrench (included) and screw driver(included)<br />
2-2<br />
Attach the handle (F) to the frame of main<br />
unit (E) by sliding the top handle posts (b) into the<br />
frame posts (b).<br />
8 | P age
2-3<br />
Insert bolt x1(L) through handle and<br />
secure with nutx1 and <strong>washer</strong>x1(L).Tighten with<br />
wrench (included) and screw driver(included)<br />
5-3<br />
Re-attach quick-connect coupler to<br />
pump inlet (f).<br />
3<br />
HOSE SUPPORT ASSEMBLY<br />
Attach the hose support (I) to right side of the<br />
frame and secure with boltsx2, nutx2, <strong>washer</strong>sx4<br />
already attached. Tighten with wrench (included)<br />
and screw driver(included)<br />
WAND ASSEMBLY<br />
6-1<br />
Pull back the rubber shroud (g) to expose<br />
the threaded fitting on the wand (B).<br />
6-2<br />
Attach the wand (B) to the gun(C)<br />
4<br />
GUN SUPPORT ASSEMBLY<br />
Attach the gun support (H) to the left side of the<br />
frame and secure with boltsx2, nutx2, <strong>washer</strong>sx4<br />
already attached. Tighten with wrench (included)<br />
and screw driver(included)<br />
6-3<br />
Slide rubber shroud over connection point.<br />
GARDEN HOSE CONNECTION<br />
5-1<br />
Remove quick-connect coupler (d)<br />
from the pump inlet.<br />
6-4<br />
Pull back on quick-connect collar, insert<br />
your required nozzle (h)and<br />
release collar. Tug on nozzle to make sure<br />
it is securely in place<br />
5-2<br />
Screw female quick-connect coupler<br />
(d) to garden hose (e).<br />
PRESSURE HOSE CONNECTION<br />
7-1<br />
Unscrew air shield (i) on the pump outlet.<br />
9 | P a g e
To Check Oil Level;<br />
1) Turn the oil gauge dipstick(A)<br />
counter clockwise; remove it and clean it with a<br />
clean cloth. (There are two ports to fill oil.)<br />
2) Fully reinsert the oil gauge dipstick and pull it<br />
out to check the oil level.<br />
3) If the oil level is halfway up the dipstick or<br />
below, refill with SAE 10W-30 oil through the<br />
dipstick hole until the oil level reaches 3/4 up<br />
the dipstick or until it reaches the bottom lip of<br />
the dipstick hole as shown in illustration to the<br />
right.<br />
4) Re-position the oil gauge dipstick and tighten it<br />
by turning clockwise.<br />
PRE-START: CHECK FUEL LEVEL<br />
WARNING! Make sure there is enough fuel in the fuel tank before operating.<br />
1) If it is necessary to add fuel, first make sure<br />
the engine is OFF, and then remove the fuel<br />
cap(A) by turning it counter clockwise.<br />
2) When refuelling, make sure the fuel filter(B)<br />
is in place and keep in mind all safety<br />
precautions.<br />
3) Use clean unleaded <strong>gas</strong>oline with a minimum of<br />
87 octane. DO NOT use old <strong>gas</strong>. DO NOT mix<br />
oil with <strong>gas</strong>oline. Fuel tank capacity: 4.0 Litres.<br />
*** This is a 4-cycle engine and does not require a<br />
<strong>gas</strong>/oil mixture. There is a separate reservoir<br />
for <strong>gas</strong> and a separate reservoir for oil.<br />
11 | P age
PRE-START: CHECK AIR FILTER<br />
WARNING! The air filter should be checked after prolonged storage. The following steps<br />
should be followed when checking the air filter. It is recommended to replace the air filter every<br />
spring.<br />
1) Unscrew the bolt(A) and remove<br />
the air filter cover(B).<br />
2) Unscrew the other bolt(A) and remove the air<br />
filter(C), wash filter in kerosene,<br />
squeeze kerosene out, soak filter in engine oil<br />
and squeeze engine oil out.<br />
3) Replace filter and replace the air filter cover.<br />
START-UP PROCEDURES & OPERATION<br />
START-UP PROCEDURES<br />
Follow these instructions to safely start your <strong>pressure</strong> <strong>washer</strong>:<br />
1. Check engine oil level, fill to recommended<br />
level if necessary. Check <strong>gas</strong>oline level, fill if<br />
necessary. Fig A<br />
2. Connect garden hose to the water supply and<br />
TURN WATER ON. The water supply must<br />
provide a minimum of 4 GPM at 30 PSI or the<br />
pump may be damaged. Fig.B<br />
3. Squeeze gun trigger. This will allow air to<br />
escape from the hose in order to prime the<br />
pump. Squeeze trigger until there is a steady<br />
flow of water. Fig.C<br />
4. Turn engine switch to the “I” position. Fig.D<br />
5. Open fuel valve to the “On” position. Fig.E<br />
6. Close the Choke lever by moving the lever<br />
to the “CLOSE” position. Fig.F<br />
7. Also move the throttle lever to<br />
its maximum setting “Fast ” position. Fig.G<br />
H<br />
8. Locate recoil cord and pull slowly until<br />
resistance is felt. At this point, pull rapidly to<br />
12 | P age
start engine. Repeat if necessary. Fig.H<br />
Once engine starts, open choke lever by<br />
moving the lever to the “Open” position.<br />
9. If motor fails to start, repeat steps 3-9<br />
10. If you have problems starting the <strong>pressure</strong><br />
<strong>washer</strong>, call the <strong>Simoniz</strong> toll-free number and<br />
one of our customer service representatives<br />
will be glad to assist you.<br />
OPERATION: SPRAY NOZZLE USAGE<br />
• This <strong>pressure</strong> <strong>washer</strong> comes with a stainless<br />
steel wand. Its tip has a quick-connect coupler<br />
(A) to fit different nozzles.<br />
• The spray pattern is adjusted by installing the<br />
appropriate spray pattern nozzle to the quick<br />
connect coupler. Five nozzles are included, 0°,<br />
15°, 25°, 40° and a detergent nozzle.<br />
• To install a nozzle to the quick-connect<br />
coupler, pull the coupler ring (B) backwards<br />
and insert the desired nozzle. Release the<br />
coupler ring to lock it in place.<br />
NOZZLE USAGE:<br />
• 0° (red) - Thin and powerful stream of water for<br />
difficult stains and debris removal.<br />
• 15° (yellow) – Thin-angled spray for focused<br />
cleaning.<br />
• 25° (green) – Medium-angled spray for focused<br />
cleaning.<br />
• 40° (white) - Large fan pattern for wider<br />
cleaning applications.<br />
• Detergent (black) - This nozzle must be used<br />
in conjunction with a cleaning detergent at low<br />
<strong>pressure</strong>. Only use this nozzle when using a<br />
detergent or cleaning solution<br />
13 | P age
ADJUSTING WATER PRESSURE:<br />
• The water <strong>pressure</strong> is regulated by the throttle<br />
lever.(A)<br />
• Moving the throttle lever towards the left will<br />
increase the engine speed thus increasing the<br />
water <strong>pressure</strong>.<br />
• Moving the throttle lever towards the right will<br />
decrease the engine speed thus decreasing<br />
the water <strong>pressure</strong>.<br />
DETERGENT INJECTOR (LOW PRESSURE):<br />
• This <strong>pressure</strong> <strong>washer</strong> is intended for use with<br />
<strong>pressure</strong> <strong>washer</strong> detergents only.<br />
• Do not use powdered soaps which clog the<br />
injection system.<br />
• Follow the detergent manufacturer’s<br />
directions or call the <strong>Simoniz</strong> toll-free number<br />
if you have any questions or concerns.<br />
HOW TO USE DETERGENT WITH PRESSURE WASHER:<br />
1) Ensure detergent siphon tubes are set up<br />
correctly. You may want to refer to assembly<br />
instruction #9 on page 10 to verify that siphon<br />
tubes are set up properly.<br />
2) Pour the two kinds of detergents into the<br />
detergent tanks. It is recommend to have one<br />
detergent tank filled with All-Purpose detergent,<br />
and the other filled with a more specific cleaning<br />
detergent.<br />
3) The indicator on the detergent dial shows the<br />
amount and the consumption of detergent.Fig.A<br />
4) When using a detergent, the stainless steel<br />
wand must be fitted with the detergent nozzle<br />
(black). See ‘OPERATION SPRAY NOZZLE<br />
USAGE’ on page 14 for instructions on how to<br />
connect detergent nozzle to wand. Fig.B<br />
5) If the throttle lever is not in the fast position, the<br />
injection of the detergent may be decreased or<br />
stopped completely. If this happens, move the<br />
throttle lever towards the left to increase engine<br />
speed and <strong>pressure</strong>.<br />
Important Note: When you have finished using the detergent injector system, remove the<br />
injector filter from the detergent container and place it in a different larger container containing<br />
only clean water and let the <strong>pressure</strong> <strong>washer</strong> run until you no longer see detergent coming out<br />
14 | P age
of the wand. This will prevent detergent from gumming up the wand and reducing <strong>pressure</strong> for<br />
next use.<br />
USING THE PRESSURE WASHER TO CLEAN:<br />
• Some cleaning jobs can be completed by using<br />
only water, but for most, it is advantageous to use<br />
a detergent to penetrate and remove the dirt more<br />
effectively. When using <strong>pressure</strong> <strong>washer</strong> approved<br />
detergent, make sure the surface to clean is dry.<br />
Wetting the surface first is not recommended; it<br />
will dilute the detergent and will reduce the<br />
cleaning effectiveness.<br />
• Avoid hot surfaces or direct sunlight; this will<br />
minimize the chances of the detergent<br />
damaging the painted surface.<br />
• DO NOT let the detergent dry or it may damage<br />
the painted surface. Allow the detergent to remain<br />
on the surface for a short time before rinsing with<br />
clean water under high <strong>pressure</strong>.<br />
• Position the tip of the wand 6-8” (15-20 cm) away<br />
from the surface to clean at a 45°angle.<br />
TROUBLESHOOTING<br />
NOTE: If your unit still is not functioning properly once you have used this guide please call the<br />
SIMONIZ Tool-free service number at 1-866-4SIMONIZ(1-866-474-6664). Please do NOT bring the<br />
unit back to the store until you have called this number.<br />
Engine<br />
PROBLEM POSSIBLE CAUSE CORRECTION<br />
Engine doesn’t start<br />
or difficult to start<br />
The engine power switch<br />
is OFF<br />
Ensure the switch is in ON (I)<br />
position<br />
No fuel<br />
Fill the fuel tank with regular<br />
<strong>gas</strong>oline<br />
Low oil shut down sensor<br />
tripped to protect engine<br />
(not applicable to<br />
SKU#199-1010-8 2600psi<br />
<strong>pressure</strong> <strong>washer</strong>).<br />
Excess water <strong>pressure</strong> in<br />
pump or hose<br />
Choke lever not in right<br />
position.<br />
Clogged carburetor<br />
Carbon build-up on spark<br />
plug.<br />
Add oil until reaches minimum level<br />
on dip stick<br />
Release water <strong>pressure</strong> by<br />
squeezing trigger on gun<br />
1 When cold starting the engine,<br />
set the choke to “CLOSE” or<br />
“OFF”<br />
2 When warm starting, set the<br />
choke to “OPEN” or “ON” or<br />
try the middle position.<br />
Clean the carburetor. Refer to<br />
instruction <strong>manual</strong> for details.<br />
Clean the spark plug. Refer to the<br />
instruction <strong>manual</strong>.<br />
15 | P age
Engine stops after<br />
starting.<br />
Engine lacks of<br />
power.<br />
Engine stops while<br />
moving or being<br />
tiled.<br />
Incorrect starting method<br />
Low oil or no fuel<br />
The choke at “Close”<br />
position<br />
Clogged air filter.<br />
Clogged carburetor.<br />
Low oil shut down sensor<br />
tripped to protect engine<br />
(not applicable to<br />
SKU#199-1010-8 2600psi<br />
<strong>pressure</strong> <strong>washer</strong>).<br />
Use correct starting method, Refer<br />
to the instruction <strong>manual</strong>.<br />
Check oil level and fuel<br />
Move the Choke lever to “Open”<br />
position immediately after starting<br />
the engine<br />
Clean or replace the air filter. Refer<br />
to the instruction <strong>manual</strong>.<br />
Clean the carburetor. Refer to the<br />
instruction <strong>manual</strong>.<br />
Do not tilt the machine past 15⁰<br />
when operating<br />
Check oil Level and esnure it is<br />
above the minimum level on the dip<br />
stick<br />
Pump<br />
Carburetor leaks Carburetor is clogged Clean the carburetor. refer to IM<br />
Starter rope doesn't<br />
recoil<br />
Engine sounds<br />
abnormal or<br />
overloaded<br />
No <strong>pressure</strong>,low<br />
<strong>pressure</strong><br />
Recoil mechanism is<br />
broken<br />
RPM too low(not<br />
applicable to SKU#199-<br />
1010-8 2600psi <strong>pressure</strong><br />
<strong>washer</strong>).<br />
Clogged nozzle<br />
Pressure is too high<br />
Nozzle tip not attached<br />
Water supply faucet<br />
closed<br />
Water supply <strong>pressure</strong> is<br />
low<br />
Inlet water filter is clogged<br />
Water leaks at<br />
connections<br />
Air in pump<br />
The loaded RPM is not<br />
sent to MAX.(not<br />
applicable to SKU#199-<br />
1010-8 2600psi <strong>pressure</strong><br />
<strong>washer</strong>).<br />
Clogged check valve.<br />
CALL Customer Service Toll-Free<br />
1-866-4SIMONIZ<br />
Adjust Throttle lever to "Fast"<br />
position.<br />
Clean nozzle by tip cleaner<br />
CALL Customer Service Toll-Free<br />
Attach required tip nozzle<br />
Turn on faucet<br />
Ensure there are no kinks or<br />
blockage in hose<br />
Ensure faucet is on full<br />
Check to make sure water from<br />
supply line is a minimum 30psi,<br />
4GPM<br />
Clean the water filter. Refer to the<br />
instruction <strong>manual</strong>.<br />
Replace the worn o-ring at the<br />
connection point with ones supplied<br />
with unit or they can be purchased<br />
at CT store. SKU# <strong>039</strong>-8552-8.<br />
Squeeze trigger to release the air in<br />
pump when the machine is running<br />
Set RPM (Throttle lever)to MAX.<br />
CALL Customer Service Toll-Free<br />
Damaged pump.<br />
CALL Customer Service Toll-Free<br />
Pressure too high Clogged nozzle Clean nozzle with tip cleaner<br />
Water or oil leaks<br />
out of pump<br />
Damaged seal ring<br />
CALL Customer Service Toll-Free<br />
16 | P age
Cold water keeps<br />
draining out of<br />
thermal relieve<br />
valve<br />
No intake of<br />
detergent<br />
Defective thermal relieve<br />
valve.<br />
The detergent supply hose<br />
is not connected.<br />
Damaged detergent hose.<br />
Wrong nozzle<br />
Detergent adjustment<br />
knob set at wrong position.<br />
Clogged nozzle.<br />
Clogged pump detergent<br />
siphon.<br />
CALL Customer Service Toll-Free<br />
Connect detergent hose properly.<br />
Refer to IM.<br />
Replace the detergent hose.<br />
Use black nozzle when applying<br />
detergent. Refer To instruction<br />
<strong>manual</strong> for details<br />
Check adjustment knob. Refer to<br />
IM<br />
Clean nozzle.<br />
Detach the detergent hose and<br />
clean the hole with tip cleaner<br />
Accessories<br />
&<br />
Connections<br />
The trigger can’t be<br />
squeezed<br />
Detergent is too thick.<br />
Clogged detergent filter.<br />
Only applies to SKU#199-<br />
1010-8 2600psi <strong>pressure</strong><br />
<strong>washer</strong><br />
Safety lock is not open<br />
Use only detergent approved for<br />
use with <strong>pressure</strong> <strong>washer</strong>.<br />
Clean detergent filter<br />
Open the safety lock refer to IM<br />
There is water<br />
leakage at<br />
joints/connections<br />
on gun, hose<br />
and/or pump<br />
Damaged seal ring.<br />
Change with back-up o-ring or<br />
purchase accessory kit sku#.<strong>039</strong>-<br />
8552-8 at local Canadian Tire Store<br />
High Pressure<br />
Hose can’t be<br />
connected to pump<br />
or gun.<br />
The O rings are not<br />
lubricated<br />
Put lubricating oil or water on the O<br />
rings.<br />
17 | P age
MAINTENANCE<br />
WATER INLET FILTER:<br />
• This <strong>pressure</strong> <strong>washer</strong> is equipped with a<br />
water inlet filter(A).<br />
• This water filter must be kept clean at all<br />
times or else it will restrict the water flow to<br />
the <strong>pressure</strong> <strong>washer</strong> and may damage the<br />
pump.<br />
• Remove the quick connect coupling from the<br />
water inlet, then remove and clean water filter.<br />
• DO NOT operate this <strong>pressure</strong> <strong>washer</strong><br />
without the water inlet filter in place as<br />
deposits could build up internally and affect<br />
the functioning of the unit.<br />
A<br />
*** See in-store for replacement filters.<br />
ENGINE MAINTENACE:<br />
Engine Oil Replacement<br />
• Engine oil should be replaced after the first<br />
20 hours of operation or after the first month<br />
of use.<br />
• Thereafter, it should be replaced every 100<br />
hours or 6 months.<br />
• To replace engine oil: Loosen the oil gauge<br />
dipstick (A); Place an oil pan underneath drain<br />
hex bolt (B); Remove hex bolt and drain oil.<br />
Once all the oil has completely drained,<br />
retighten the hex bolt.<br />
A<br />
B<br />
Recommended Engine Oil<br />
• It is recommended to use SAE10W-30<br />
4-stroke <strong>gas</strong>oline engine oil.<br />
• Fill with clean engine oil through the oil gauge<br />
dipstick hole to recommended level.<br />
Inspecting, Replacing or Cleaning Spark Plug<br />
• The spark plug should be checked every 100<br />
hours of operation or every 6 months.<br />
To replace or clean spark plug:<br />
18 | P age
1) Dismantle the spark plug wire (A) by pulling it<br />
off the spark plug (B). Using the supplied spark<br />
plug wrench, undo the spark plug by turning<br />
counter clockwise.<br />
2) Check to see if there is carbon sediment<br />
build-up. If so, remove it. If the carbon sediment<br />
is excessive, replace the spark plug.<br />
3) Measure the electrode’s clearance using a<br />
feeler gauge. The spark plug electrode<br />
clearance should be between 0.7-0.8 mm. If the<br />
clearance exceeds 0.8 mm, replace the spark<br />
plug. The original spark plug supplied is an<br />
LG F7RTC, you can replace it with an NGK<br />
BP6ES spark plug or equivalent.<br />
4) Reinstall spark plug following instructions in 1)<br />
above in the reverse order.<br />
PRESSURE WASHER STORAGE:<br />
If you plan on storing your <strong>pressure</strong> <strong>washer</strong><br />
for an extended period of time, the following<br />
steps should be followed:<br />
1) Add fuel stabilizer to fuel tank to minimize the<br />
formation of fuel gum deposits during storage.<br />
2) Run engine at least 5 minutes after adding<br />
stabilizer to allow it to enter the fuel system.<br />
NOTE: If a fuel stabilizer is not used, all<br />
<strong>gas</strong>oline must be drained from the tank and<br />
carburetor to prevent gum deposits from<br />
forming on these parts and causing possible<br />
malfunction of the engine (see instructions on<br />
draining fuel below).<br />
3) Drain engine oil from engine as described in<br />
“Engine Oil Replacement.”<br />
4) Pour approximately one teaspoon of engine oil<br />
through the spark plug hole and pull the recoil<br />
starter slowly until you feel increased <strong>pressure</strong><br />
which indicates the piston is on its compression<br />
stroke and leave it in this position. This closes<br />
both the intake and exhaust valves to prevent<br />
the inside of the cylinder from rusting.<br />
5) Use <strong>pressure</strong> <strong>washer</strong> antifreeze to ensure that<br />
your pump will not freeze during the winter and<br />
to keep components lubricated for maximum<br />
efficiency. See instructions below on<br />
“Preventing Freezing Damage”.<br />
19 | P age
6) Cover the <strong>pressure</strong> <strong>washer</strong> and store it in a<br />
clean, well ventilated and dry place. Ensure<br />
storage area is at room temperature.<br />
*** See in-store to purchase fuel stabilizer or<br />
<strong>pressure</strong> <strong>washer</strong> antifreeze.<br />
If you wish to drain the fuel instead of adding<br />
fuel stabilizer, please follow these steps:<br />
1) Turn fuel shut-off valve to the “OFF” position.<br />
Remove drain hex bolt (A) from the carburettor<br />
(B).<br />
2) Now turn fuel shut-off valve to the “ON” position<br />
and drain the fuel from the tank, carburettor and<br />
hose.<br />
3) Replace the carburetor drain hex bolt once<br />
the fuel is completely drained.<br />
PREVENTING FREEZING DAMAGE:<br />
• If your <strong>pressure</strong> <strong>washer</strong> is subjected to<br />
freezing temperatures, damage could occur.<br />
This type of damage is not covered under<br />
warranty. To avoid possible damage, a small<br />
amount of antifreeze can be used.<br />
• Place the unit on its side with the water inlet<br />
facing upwards. Pour 1/4 cup of antifreeze<br />
into the water inlet.<br />
• Disconnect spark plug wire, and then pull<br />
recoil starter several times to circulate the<br />
antifreeze in the pump system. Reconnect<br />
spark plug wire.<br />
• It is also important to make sure the wand and<br />
all hoses are disconnected and drained of all<br />
water or they may burst.<br />
• When taking <strong>pressure</strong> <strong>washer</strong> out of storage,<br />
run water through the system until it runs<br />
clear.<br />
20 | P a g e
DIAGRAM AND PARTS LIST<br />
21 | P age
Ref No DESCRIPTION QTY Ref No DESCRIPTION QTY<br />
1 30’ high <strong>pressure</strong> hose 1 22 Engine rubber isolator 1<br />
2 Bolt M5*45 8 23 Bolt M6*45 4<br />
3 Washer 5 12 24 Baseboard 1<br />
4 Hose hook 1 25 Frame 1<br />
5 Handle 1 26 Locknut M6 4<br />
6 Locknut M5 8 27 10" (25.4 cm) wheel 2<br />
7 Detergent bottle cap 2 28 Washer 16 2<br />
8 Detergent bottle <strong>gas</strong>ket 2 29 Circlip 2<br />
9 Spring Lock 5 30 Wheel shaft 2<br />
10 Detergent bottle switch 1 31 Spring wire 2<br />
11 Detergent bottle switch nut 1 32 Clip 2<br />
12 Gun holder 1 33 Inner hex bolt M8*45 2<br />
13 Gun 1 34 Rubber foot 2<br />
14-1 0° nozzle (red) 1 35 Inner hex bolt M8*40 4<br />
14-2 15° nozzle (yellow) 1 36 Spring <strong>gas</strong>ket 8 4<br />
14-3 25° nozzle (green) 1 37 Inner hex bolt M8*25 4<br />
14-4 40° nozzle (white) 1 38 Drain pipe 1<br />
14-5 Detergent nozzle (black) 1 39 Inlet quick connector 1<br />
15 Nozzle grommet 5 40 High <strong>pressure</strong> pump 1<br />
16 Panel 1 41 Thermal relief cap 1<br />
17 Gasoline engine 1 42 Injection hose (short) 2<br />
18 Locknut M8 6 43 Injection hose (long) 1<br />
19 Washer 8 14 44 Bolt M5*16 2<br />
20 Washer 6 8 45 Detergent bottle 2<br />
21 Bolt M6*40 2 # Owner’s Manual 1<br />
“#” Indicates a non-illustrated part.<br />
22 | P age
LIMITED WARRANTY<br />
This <strong>Simoniz</strong>® product has a limited 30-day over-the-counter replacement warranty, a 2-year repair warranty on the main unit<br />
against defects in manufacturing workmanship and materials and a 90-day warranty on included accessories. All warranty<br />
claims must be accompanied by proof of purchase.<br />
Subject to the conditions and limitations described below, this product, if returned to us with proof of purchase within the stated<br />
warranty period and if covered under this warranty, will be repaired or replaced (with the same model, or one of equal value or<br />
specification), at our option. We will bear the cost of any repair or replacement and any costs of labour relating thereto.<br />
These warranties are subject to the following conditions and limitations:<br />
a) a bill of sale verifying the purchase and purchase date must be provided;<br />
b) this warranty will not apply to any product or part thereof which is worn or broken or which has become<br />
inoperative due to abuse, misuse, accidental damage, neglect or lack of proper installation, operation<br />
or maintenance (as outlined in the applicable owner’s <strong>manual</strong> or operating instructions) or which is being used<br />
for industrial, professional, commercial or rental purposes;<br />
c) this warranty will not apply to normal wear and tear or to expendable parts or accessories that may be supplied<br />
with the product that are expected to become inoperative or unusable after a reasonable period of use;<br />
d) this warranty will not apply to routine maintenance and consumable items such as, but not limited to, fuel,<br />
lubricants, vacuum bags, blades, belts, sandpaper, bits, fluids, tune-ups or adjustments;<br />
e) this warranty will not apply where damage is caused by repairs made or attempted by others (i.e. persons not<br />
authorized by the manufacturer);<br />
f) this warranty will not apply to any product that was sold to the original purchaser as a reconditioned or<br />
refurbished product (unless otherwise specified in writing);<br />
g) this warranty will not apply to any product or part thereof if any part from another manufacturer is installed therein<br />
or any repairs or alterations have been made or attempted by unauthorized persons;<br />
h) this warranty will not apply to normal deterioration of the exterior finish, such as, but not limited to, scratches,<br />
dents, paint chips, or to any corrosion or discolouring by heat, abrasive and chemical cleaners; and<br />
i) this warranty will not apply to component parts sold by and identified as the product of another company, which<br />
shall be covered under the product manufacturer’s warranty, if any.<br />
Additional Limitations<br />
This warranty applies only to the original purchaser and may not be transferred. Neither the retailer nor the manufacturer shall<br />
be liable for any other expense, loss or damage, including, without limitation, any indirect, incidental, consequential or<br />
exemplary damages arising in connection with the sale, use or inability to use this product.<br />
Notice to Consumer<br />
This warranty gives you specific legal rights, and you may have other rights, which may vary from province to province. The<br />
provisions contained in this warranty are not intended to limit, modify, take away from, disclaim or exclude any statutory<br />
warranties set forth in any applicable provincial or federal legislation.<br />
Imported by Trileaf Distribution Trifeuil Toronto, Canada M4S 2B8<br />
23 | Page


