TURBOTRONIK NT 151/361 - Pascal Technologies, Inc
TURBOTRONIK NT 151/361 - Pascal Technologies, Inc
TURBOTRONIK NT 151/361 - Pascal Technologies, Inc

You also want an ePaper? Increase the reach of your titles
YUMPU automatically turns print PDFs into web optimized ePapers that Google loves.
Vakuum-Lösungen<br />
Applikations-<br />
Unterstützung Service LEYBOLD VAKUUM<br />
GA 05.214/7<br />
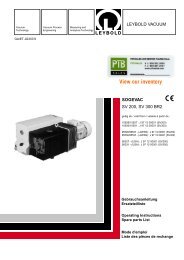
View our inventory<br />
<strong>TURBOTRONIK</strong><br />
<strong>NT</strong> <strong>151</strong>/<strong>361</strong><br />
Elektronischer<br />
Frequenzwandler<br />
Electronic Frequency<br />
Converter<br />
Kat.-Nr. / Cat. No.<br />
857 15/16/17/18/19<br />
Gebrauchsanleitung<br />
Operating Instructions
Inhalt<br />
Seite<br />
1 Beschreibung . . . . . . . . . . . . . . . . . . . . . . . 3<br />
1.1 Funktion und Aufbau . . . . . . . . . . . . . . . . . . . 3<br />
1.2 Lieferumfang . . . . . . . . . . . . . . . . . . . . . . . . . 3<br />
1.3 Technische Daten . . . . . . . . . . . . . . . . . . . . . 4<br />
1.4 Bestell-Daten . . . . . . . . . . . . . . . . . . . . . . . . . 4<br />
2 Anschluß . . . . . . . . . . . . . . . . . . . . . . . . . . . 5<br />
2.1 Netzspannung einstellen . . . . . . . . . . . . . . . . 5<br />
2.2 Fernsteuerung anschließen . . . . . . . . . . . . . 6<br />
2.3 TURBOVAC anschließen . . . . . . . . . . . . . . . . 6<br />
2.4 <strong>TURBOTRONIK</strong> einbauen<br />
und Netz anschließen . . . . . . . . . . . . . . . . . . 6<br />
3 Betrieb . . . . . . . . . . . . . . . . . . . . . . . . . . . . . 7<br />
3.1 Inbetriebnahme . . . . . . . . . . . . . . . . . . . . . . . 7<br />
3.2 TURBOVAC starten . . . . . . . . . . . . . . . . . . . . 7<br />
3.3 TURBOVAC abschalten . . . . . . . . . . . . . . . . . 7<br />
Abbildungen<br />
Abbildungs-Hinweise z. B. (2/5), geben mit der ersten<br />
Ziffer die Abbildungsnummer und mit der zweiten Ziffer<br />
die Position in dieser Abbildung an.<br />
Vorsicht<br />
Steht bei Arbeits- und Betriebsverfahren, die genau einzuhalten<br />
sind, um eine Gefährdung von Personen auszuschließen.<br />
Achtung<br />
Bezieht sich auf Arbeits- und Betriebsverfahren, die<br />
genau einzuhalten sind, um Beschädigungen oder Zerstörungen<br />
des Gerätes zu vermeiden.<br />
4 Fehlersuche . . . . . . . . . . . . . . . . . . . . . . . . . 8<br />
EG-Konformitätserklärung . . . . . . . . . . . . . . . 9<br />
The English Operating Instructions start on page 10<br />
Sicherheitshinweise<br />
Vorsicht<br />
Eingriffe in den Wandler dürfen nur von qualifiziertem Personal oder durch den Leybold-<br />
Service durchgeführt werden.<br />
Im Inneren des Wandlers liegen lebensgefährliche Spannungen an.<br />
Bei allen Arbeiten an dem geöffneten Wandler ist das Gerät vorher vom Netz zu trennen.<br />
Der Wandler enthält elektrostatisch gefährdete Bauelemente.<br />
Der Wandler ist grundsätzlich servicefrei, da er keine einstellbaren Bauelemente enthält.<br />
Je nach Einbau- und Umgebungsbedingungen kann der Wandler innen verschmutzen<br />
(Staub, Feuchtigkeit). Diese Verschmutzung kann zu Fehlfunktionen, Überhitzung oder<br />
Kurzschluß führen und muß nach Möglichkeit vermieden werden. Der LEYBOLD-Service<br />
kann den Wandler reinigen. Wir empfehlen Reinigungsintervalle von etwa 3 Jahren.<br />
Eigenmächtige Umbauten und Manipulationen der Wandler sind aus Sicherheitsgründen<br />
verboten.<br />
2 GA 05.214/7 - 11/97
Beschreibung<br />
Abb. 1<br />
Elektronischer Frequenzwandler <strong>TURBOTRONIK</strong> <strong>NT</strong> <strong>151</strong>/<strong>361</strong>, Frontseite<br />
1 Beschreibung<br />
1.1 Funktion und Aufbau<br />
Der elektronische Frequenzwandler <strong>TURBOTRONIK</strong> <strong>NT</strong><br />
<strong>151</strong>/<strong>361</strong> dient zum Antrieb der Turbo-Molekularpumpen<br />
TURBOVAC150, 360, 150 CSV, 360 CSV, 150 V, 360 V,<br />
<strong>151</strong>, <strong>361</strong>, <strong>151</strong> C, <strong>361</strong> C.<br />
Die <strong>TURBOTRONIK</strong> <strong>NT</strong> <strong>151</strong>/<strong>361</strong> formt die einphasige<br />
Netzspannung in eine dreiphasige Wechselspannung<br />
zur Steuerung des Asynchronmotors der TURBOVAC<br />
um.<br />
Die Betriebszustände werden über LEDs angezeigt:<br />
- Netzspannung liegt an (POWER, grün),<br />
- Hochlauf (ACCEL, gelb),<br />
- Normal (NORMAL, grün),<br />
- Störung (FAIL, rot).<br />
Das Signal NORMAL steht außerdem über einen Relais-<br />
Ausgang zur Verfügung.<br />
Nach dem Start läuft die Pumpe kontinuierlich mit maximalem<br />
Strom hoch. Zur Kennzeichnung leuchtet die LED<br />
ACCEL.<br />
Nach Erreichen von ca. 80 % der Nenn-Drehzahl leuchtet<br />
die LED NORMAL, die LED ACCEL geht aus.<br />
Der Motorstrom wird kontinuierlich überwacht und geregelt.<br />
Wenn durch äußere Einflüsse, z. B. größere Gaszufuhr,<br />
die Drehzahl auch bei maximal zulässigem Strom<br />
nicht gehalten werden kann, sinkt sie ab, die Pumpe<br />
arbeitet aber weiter.<br />
Bei Unterschreiten einer Drehfrequenz von ca. 150 Hz<br />
leuchtet am Frequenzwandler die LED FAIL auf.<br />
GA 05.214/7 - 11/97<br />
Die Ausgänge des Frequenzwandlers sind leerlauf- und<br />
kurzschlußfest.<br />
Der elektronische Frequenzwandler <strong>TURBOTRONIK</strong><br />
erkennt, welche Pumpe angeschlossen ist.<br />
Die Verbindungsleitung <strong>TURBOTRONIK</strong> - TURBOVAC<br />
darf bis zu 100 m lang sein.<br />
Die <strong>TURBOTRONIK</strong> hat ein Gehäuse und kann als<br />
Tischgerät oder zum Einbau in ein 19“-Rack verwendet<br />
werden. Zur Bedienung befinden sich auf der Frontplatte<br />
die Tasten START und STOP.<br />
1.2 Lieferumfang<br />
Kat.-Nr. Netzleitung, 2 m lang Sicherungen<br />
————————————————————————<br />
857 15 mit Schutzkontakt-Stecker 2 x T 2,5 A<br />
2 x F 5 A<br />
857 16 mit US-Netzstecker 2 x T 2,5 A<br />
2 x F 10 A<br />
857 17 mit US-Netzstecker 2 x T 2,5 A<br />
2 x F 10 A<br />
857 18 mit Spezial-Netzstecker 2 x T 2,5 A<br />
2 x F 10 A<br />
2 x F 5 A<br />
857 19 ohne Netzleitung 2 x T 2,5 A<br />
2 x F 5 A<br />
4 Schrauben und Unterlegscheiben für Rackmontage.<br />
3
Beschreibung<br />
(Frontplatte)<br />
(Gehäuse)<br />
Abb. 2 Maßzeichnung, Maße in mm<br />
4 5<br />
Erläuterungen zur Abb. 3<br />
1 Sicherungshalter<br />
2 Sicherung<br />
3 Klappe<br />
4 Stecker für Netz-Anschlußleitung<br />
5 Leiterplatte<br />
Abb. 3<br />
<strong>TURBOTRONIK</strong> auf die Netzspannung einstellen<br />
und Sicherung wechseln<br />
3 2 1<br />
1.3 Technische Daten<br />
Netzspannung, umschaltbar<br />
Netzfrequenz<br />
Leistungsaufnahme der TURBOVAC<br />
im Hochlauf (max. 30 min)<br />
kontinuierlich max.<br />
kurzzeitig (0,5 s)<br />
100/120/220/240 V,±10%<br />
50/60 Hz<br />
680 VA<br />
480 VA<br />
750 VA<br />
Ausgang für den Motor<br />
Nennspannung<br />
3x42 V eff<br />
Strom-Begrenzung (Zwischenkreisstrom) 5 A<br />
Nenn-Drehzahl der TURBOVAC<br />
150/<strong>151</strong> 50.000 min -1 =833 Hz<br />
360/<strong>361</strong> 45.000 min -1 =750 Hz<br />
Max. Belastung der Relais-Kontakte<br />
50 VAC/4 A, 30 VDC/1A<br />
Abmessungen<br />
Gewicht<br />
Betriebs-Temperatur; bei ausreichend<br />
freier Konvektion<br />
Lagerungs-Temperatur<br />
1/2 19“, 3HE<br />
8,5 kg<br />
0-40°C<br />
-25°C bis +70°C<br />
Elektrische Sicherheit gemäß<br />
IEC 1010 / EN 61010 / VDE 0411<br />
EMV-Störaussendung gemäß<br />
EN 50081-1 / VDE 0839 Teil 81-1, Grenzwert B<br />
EMV-Störfestigkeit gemäß<br />
EN 50082-2 / VDE 0839 Teil 82-2, Testlevel III<br />
1.4 Bestell-Daten<br />
Elektronischer Frequenzwandler<br />
<strong>TURBOTRONIK</strong> <strong>NT</strong> <strong>151</strong>/<strong>361</strong><br />
Kat.-Nr.<br />
230 V 857 15<br />
120 V 857 16<br />
100 V 857 17<br />
SH (100 V) 857 18<br />
230 V ohne Netzleitung 857 19<br />
Verbindungsleitung zur TURBOVAC<br />
3 m lang 857 60<br />
5 m lang 857 61<br />
10 m lang 857 62<br />
20 m lang 857 63<br />
Einbaurahmen 19“, 3HE 161 00<br />
4 GA 05.214/7 - 11/97
Anschluß<br />
Erläuterungen zur Abb. 4<br />
1 Stecker für die<br />
Verbindungsleitung zur<br />
TURBOVAC<br />
2 Erdungsanschluß<br />
3 Netzspannungs-Einstellung<br />
und Sicherung; siehe Abb. 3<br />
4 Anschlußklemmen für<br />
Fernbedienung; siehe Abb. 5<br />
5 Anschlußklemmen für Relais<br />
6 Sicherung<br />
7 Stecker für die<br />
Netz-Anschlußleitung<br />
TURBOVAC<br />
100<br />
120<br />
220<br />
240<br />
100/120V F10A<br />
220/240V F5A<br />
START STOP RELAIS<br />
7<br />
6<br />
1 2 3 4 5 6<br />
HV<br />
PE<br />
1 2 3 4 5<br />
Abb. 4 Rückseite<br />
2 Anschluß<br />
Der Anschluß darf nur von einem Fachmann entsprechend<br />
den VDE-Richtlinien durchgeführt werden.<br />
Vorsicht<br />
Im Innern der <strong>TURBOTRONIK</strong> liegen gefährliche<br />
Spannungen an.<br />
Die <strong>TURBOTRONIK</strong> nur öffnen, wenn sie<br />
vom Netz getrennt ist.<br />
Bei 230-V-Netzen mit starker Unterspannung (< 216 V)<br />
die 220-V-Einstellung wählen.<br />
Falls nötig, die Sicherung wechseln.<br />
Erforderliche Sicherung: 100-120 V 10 A<br />
220-240 V 5 A<br />
Die Klappe wieder schließen. Der eingestellte Netzspannungswert<br />
ist von außen erkennbar.<br />
2.1 Netzspannung einstellen<br />
(Option)<br />
Der Netzspannungs-Bereich der <strong>TURBOTRONIK</strong> kann<br />
geändert werden; siehe „Technische Daten“.<br />
Achtung<br />
Die <strong>TURBOTRONIK</strong> wird beschädigt, wenn<br />
sie mit falscher Netzspannungs-Einstellung<br />
mit dem Netz verbunden wird.<br />
Die Klappe (3/3) öffnen. Die Leiterplatte (3/5) herausziehen<br />
und so wieder einstecken, daß der zutreffende Netzspannungswert<br />
sichtbar ist.<br />
GA 05.214/7 - 11/97<br />
5
Anschluß<br />
2.2 Fernsteuerung<br />
anschließen (Option)<br />
Die <strong>TURBOTRONIK</strong> <strong>NT</strong> <strong>151</strong>/<strong>361</strong> ermöglicht 4 Betriebsarten.<br />
Diese sind wählbar durch unterschiedliches Verbinden<br />
der Pins 1 bis 3 der Anschlußklemmen auf der<br />
Rückseite der <strong>TURBOTRONIK</strong>; siehe Abb. 5.<br />
1. Betrieb über die Tasten START und STOP<br />
Brücke zwischen Pin 2 und 3 herstellen (Lieferzustand).<br />
2. Automatisches Starten durch Netz einschalten<br />
Alle 3 Pins (1, 2, 3) miteinander verbinden.<br />
Beim Anlegen von Netzspannung startet die TURBOVAC<br />
automatisch.<br />
3. Fernbedienung über einen externen Schalter<br />
Brücke zwischen Pin 1 und 3 herstellen.<br />
Wird der zweite Eingang STOP (Pin 2) an diesen<br />
gemeinsamen Punkt gelegt, startet die TURBOVAC.<br />
Wird die Verbindung wieder getrennt, stoppt die TUR-<br />
BOVAC.<br />
4. Fernbedienung über 2 externe Taster<br />
Brücke zwischen Pin 2 und 3 herstellen.<br />
Wird START (Pin 1) mindestens 200 ms mit dem<br />
Brückenpunkt verbunden, startet die TURBOVAC.<br />
Wird die Verbindung der beiden Eingänge STOP<br />
getrennt, stoppt die TURBOVAC.<br />
Relais-Kontakte anschließen (4/5)<br />
An den Pins 4, 5, 6 (Wechselkontakt, potentialfrei) kann<br />
der Betriebszustand NORMAL abgefragt werden.<br />
5-6 geschlossen NORMAL<br />
4-5 geschlossen nicht NORMAL;<br />
ACCEL oder Stillstand<br />
2.3 TURBOVAC anschließen<br />
Die <strong>TURBOTRONIK</strong> <strong>NT</strong> <strong>151</strong>/<strong>361</strong> dient zum Antrieb der<br />
Turbo-Molekularpumpen TURBOVAC150, 360, 150 CSV,<br />
360 CSV, 150 V, 360 V,<strong>151</strong>, <strong>361</strong>, <strong>151</strong> C, <strong>361</strong> C.<br />
TURBOVAC 150 H und 360 H können nicht angeschlossen<br />
werden.<br />
Die Verbindungsleitung zur TURBOVAC am Stecker (4/1)<br />
und am Motor der TURBOVAC einstecken.<br />
Die Verbindungsleitung darf bis zu 100 m lang sein.<br />
Die Erdungsleitung bei (4/2) anschließen.<br />
2.4 <strong>TURBOTRONIK</strong> einbauen<br />
und Netz anschließen<br />
Die <strong>TURBOTRONIK</strong> <strong>NT</strong> <strong>151</strong>/<strong>361</strong> wird in einem Gehäuse<br />
eingebaut als Tischgerät geliefert.<br />
Sie läßt sich in ein Rack einbauen. Hierbei auf ausreichende<br />
Belüftung achten.<br />
Die Umgebungs-Temperatur darf 40°C bei Betrieb nicht<br />
übersteigen.<br />
Zum Einbau in einen 19“-Einbaurahmen dienen die in<br />
der Frontplatte vorhandenen vier Bohrungen.<br />
Vorsicht<br />
Bei Rack-Montage ist der Gerätestecker<br />
nicht leicht erreichbar. Deshalb bei Rack-<br />
Montage eine Trennung der TURBOTRO-<br />
NIK vom Netz vorsehen.<br />
Die Netz-Anschlußleitung bei (4/7) einstecken.<br />
Vorsicht<br />
Die <strong>TURBOTRONIK</strong> darf mit der serienmäßigen<br />
Netzleitung nicht in chemisch<br />
aggressiver Umgebung betrieben werden.<br />
Bei Betrieb in chemisch aggressiver Umgebung<br />
die Netzleitung durch eine entsprechend<br />
resistente ersetzen.<br />
6<br />
GA 05.214/7 - 11/97
Betrieb<br />
3 Betrieb<br />
3.1 Inbetriebnahme<br />
Den Netzstecker einstecken. Alle 4 LEDs leuchten auf.<br />
Im Frequenzwandler laufen verschiedene Initialisierungen<br />
und Selbstprüfungen ab, der angeschlossenen<br />
Pumpentyp und die Länge der Verbindungsleitung zur<br />
<strong>TURBOTRONIK</strong> werden ermittelt.<br />
Nach einigen Sekunden erlöschen alle LEDs bis auf die<br />
LED POWER.<br />
Die <strong>TURBOTRONIK</strong> ist betriebsbereit.<br />
3.2 TURBOVAC starten<br />
Kühlung für die TURBOVAC einschalten; siehe<br />
Gebrauchsanleitung zur TURBOVAC.<br />
Die Taste START drücken oder die TURBOVAC über<br />
eine Fernbedienung starten, siehe Abschnitt 2.2.<br />
Die Pumpe läuft hoch.<br />
Die LED ACCEL (Hochlauf) leuchtet.<br />
Nach Erreichen von ca. 80% der Nenn-Drehzahl leuchtet<br />
die LED NORMAL, die LED ACCEL verlöscht.<br />
Gleichzeitig schaltet das Relais auf NORMAL.<br />
Die TURBOVAC kann auch wieder gestartet werden,<br />
wenn sie sich noch dreht.<br />
Achtung<br />
Die gesamte Hochlaufphase soll 30 Minuten<br />
nicht überschreiten; z.B. durch mehrmaliges<br />
Starten. Danach darf die TURBOTRO-<br />
NIK erst nach Ablauf von 25 Minuten erneut<br />
in die Hochlaufphase eintreten. Bei längeren<br />
Hochlaufphasen wird die TURBOTRO-<br />
NIK zu warm.<br />
1<br />
2<br />
3<br />
1<br />
2<br />
3<br />
1<br />
2<br />
3<br />
1<br />
2<br />
3<br />
START<br />
STOP<br />
Abb. 5 Bedienmöglichkeiten<br />
Notwendige Brücke bei Betrieb über die<br />
Tastatur (bei Auslieferung montiert)<br />
Automatischer Hochlauf beim Anlegen der<br />
Netzspannung.<br />
Fernbedienung mit einem Schalter:<br />
Schalter geschlossen START,<br />
Schalter geöffnet STOP.<br />
Fernbedienung mit 2 Tastern:<br />
Pins 2 und 3 verbunden: Start erfolgt,<br />
wenn die Taste START für<br />
mind. 200 ms geschlossen wird.<br />
Stop erfolgt, wenn die Taste STOP<br />
geöffnet wird.<br />
3.3 TURBOVAC abschalten<br />
Die Taste STOP drücken oder die TURBOVAC über eine<br />
Fernbedienung abschalten, siehe Abschnitt 2.2.<br />
Nur die LED POWER leuchtet.<br />
Das Relais schaltet auf nicht NORMAL.<br />
Kühlung für die TURBOVAC ausschalten und TURBO-<br />
VAC belüften; siehe Gebrauchsanleitung zur TURBO-<br />
VAC.<br />
Die <strong>TURBOTRONIK</strong> muß nicht elektrisch abgeschaltet<br />
werden.<br />
Nach Beheben einer Störung die Taste STOP drücken<br />
oder die TURBOVAC über eine Fernbedienung abschalten;<br />
dann erst wieder starten.<br />
GA 05.214/7 - 11/97<br />
7
Fehlersuche<br />
4 Fehlersuche<br />
Störung Mögliche Ursache Beseitigung<br />
1. Nach Einschalten der Netzspannung bleiben<br />
alle LEDs aus.<br />
Netzspannung fehlt.<br />
Sicherung defekt.<br />
Mögliche Ursachen für defekte Sicherung:<br />
-Leiterplatte zur Netzspannung-Einstellung<br />
falsch gesteckt,<br />
- Falsche Sicherung.<br />
- Kurzschluß im Gleichrichterteil des Frequenzwandlers,<br />
- Kurzschluß im Netztransformator.<br />
Netzstecker einstecken oder Spannung einschalten.<br />
Sicherung austauschen.<br />
-Leiterplatte korrekt stecken; siehe Abschnitt<br />
2.1.<br />
-Korrekte Sicherung einsetzen:<br />
5 A flink für 220, 240 V Netzspannung;<br />
10 A flink für 100, 120V.<br />
-Leybold-Service.<br />
-Leybold-Service.<br />
2. Nach Einschalten der Netzspannung und<br />
beendeter Initialisierungsphase leuchten alle<br />
LEDs außer POWER nacheinander zyklisch<br />
auf.<br />
3. Bei Betätigen der Taste START leuchtet die<br />
LED ACCEL, sie geht beim Loslassen der<br />
Taste START wieder aus.<br />
4. Nach Betätigen der Taste START leuchtet<br />
die LED ACCEL und die LED FAIL blinkt mit 2<br />
Hz.<br />
Die Verbindung TURBOVAC-<strong>TURBOTRONIK</strong><br />
ist unterbrochen.<br />
Selbsttest wurde nicht bestanden.<br />
Die Brücke an den Pins 2-3, an der Klemmleiste<br />
(4/4), auf der Geräterückseite fehlt.<br />
Bei externen Start/Stop-Tasten ist der Stromkreis<br />
über die Taste STOP unterbrochen.<br />
Der Thermoschalter der Pumpe hat geöffnet.<br />
Verbindungsleitung korrekt anschließen.<br />
Leybold-Service.<br />
Brücke anschließen.<br />
Taste STOP schließen, TURBOVAC starten.<br />
Kühlung prüfen, ggf. herstellen. Taste STOP<br />
drücken oder die TURBOVAC über die Fernbedienung<br />
abschalten, TURBOVAC abkühlen lassen,<br />
dann wieder starten.<br />
5. Die LED ACCEL leuchtet nach dem Starten<br />
zu lange, die LED NORMAL leuchtet nicht auf.<br />
Die Pumpendrehzahl ist zu niedrig; unter ca.<br />
80% der Nenndrehzahl. Ursache ist möglicherweise<br />
ein Fehler im Vakuumsystem.<br />
Vorvakuumdruck zu hoch (>10 -2 mbar).<br />
TURBOVAC dreht schwergängig.<br />
Fehler im Vakuumsystem beheben. Taste<br />
STOP drücken oder die TURBOVAC über die<br />
Fernbedienung abschalten, dann wieder starten.<br />
Größere Vorvakuumpumpe einsetzen.<br />
Leybold-Service.<br />
6. Die LED ACCEL leuchtet, die Pumpe läuft<br />
aber nicht hoch.<br />
Falscher Anschluß der Fernbedienung.<br />
Fernbedienung an den Anschlußklemmen richtig<br />
anschließen; siehe Abb. 5.<br />
7. Die LED FAIL leuchtet während des Hochlaufs<br />
oder Normalbetriebes auf und bleibt<br />
dann dauernd an.<br />
Die Kurzschluß-Überwachung der TUR-<br />
BOTRONIK hat angesprochen. Mögliche Ursachen:<br />
Kurzschluß innerhalb oder außerhalb der<br />
<strong>TURBOTRONIK</strong>, extremer elektromagnetischer<br />
Störimpuls.<br />
Netzstecker der <strong>TURBOTRONIK</strong> ziehen, alle<br />
Anschlüsse prüfen, <strong>TURBOTRONIK</strong> mindestens<br />
1 Minute vom Netz getrennt lassen,<br />
dann wieder anschließen und TURBOVAC neu<br />
starten.<br />
8. Die LED FAIL leuchtet während des Hochlaufs<br />
oder Normalbetriebes auf und blinkt dann<br />
mit 1 Hz.<br />
9. Die LED FAIL leuchtet während des Hochlaufs<br />
oder Normalbetriebes auf und blinkt dann<br />
mit 2 Hz.<br />
Die Pumpe ist überlastet, die Pumpen-Drehzahl<br />
ist zu niedrig (< 150 Hz). Ursache ist<br />
möglicherweise ein Fehler im Vakuumsystem.<br />
Der Thermoschalter in der TURBOVAC hat<br />
geöffnet. Ursache ist möglicherweise der Ausfall<br />
der Wasser- oder Luftkühlung.<br />
Fehler im Vakuumsystem beheben. Taste<br />
STOP drücken oder die TURBOVAC über die<br />
Fernbedienung abschalten, dann wieder starten.<br />
Kühlung wieder herstellen. Taste STOP<br />
drücken oder die TURBOVAC über die Fernbedienung<br />
abschalten, TURBOVAC abkühlen lassen,<br />
dann wieder starten.<br />
10. Die LED FAIL leuchtet während des Hochlaufs<br />
oder Normalbetriebes auf und blinkt dann<br />
mit 4 Hz.<br />
<strong>TURBOTRONIK</strong> defekt.<br />
Leybold-Service.<br />
8<br />
GA 05.214/7 - 11/97
EG-Konformitätserklärung<br />
Hiermit erklären wir, die Leybold AG, daß die nachfolgend<br />
bezeichneten Produkte aufgrund ihrer Konzipierung<br />
und Bauart sowie in der von uns in Verkehr gebrachten<br />
Ausführung den einschlägigen grundlegenden<br />
Sicherheits- und Gesundheitsanforderungen der EG-<br />
Richtlinien entsprechen.<br />
Bei einer nicht mit uns abgestimmten Änderung eines<br />
Produkts verliert diese Erklärung ihre Gültigkeit.<br />
Bezeichnung der Produkte:<br />
Elektronischer Frequenzwandler<br />
Die Produkte entsprechen folgenden Richtlinien:<br />
• EG-Niederspannungsrichtlinie (73/23/EWG)<br />
• EG-Richtlinie Elektromagnetische Verträglichkeit<br />
(89/336/EWG)<br />
Angewandte harmonisierte Normen<br />
• EN 61010-1: 1993<br />
• EN 50081-1: 1992<br />
• prEN 50082-2: 1994<br />
Typen:<br />
<strong>TURBOTRONIK</strong> <strong>NT</strong> <strong>151</strong>/<strong>361</strong><br />
Katalog-Nummern:<br />
857 15/16/17/18<br />
Angewandte nationale Normen und technische<br />
Spezifikationen:<br />
• VDE 0411 Teil 1/03.94<br />
• VDE 0839 Teil 81-1/03.93<br />
• EVDE 0839 Teil 82-2/11.94<br />
LK.GT.0048.01.11.95<br />
Köln, den 14.11.1995<br />
Köln, den 14.11.1995<br />
—————————————————————<br />
Beeck, Geschäftsbereichsleiter Instrumente<br />
—————————————————————<br />
Finke, Entwicklung Instrumente<br />
GA 05.214/7 - 11/97 9
Contents<br />
page<br />
1 Description . . . . . . . . . . . . . . . . . . . . . . . . . 11<br />
1.1 Design and function . . . . . . . . . . . . . . . . . . . 11<br />
1.2 Standard specification . . . . . . . . . . . . . . . . . 11<br />
1.3 Technical data . . . . . . . . . . . . . . . . . . . . . . . 12<br />
1.4 Ordering data . . . . . . . . . . . . . . . . . . . . . . . 12<br />
2 Connection . . . . . . . . . . . . . . . . . . . . . . . . . 13<br />
2.1 Selecting the mains voltage . . . . . . . . . . . . . 13<br />
2.2 Remote control connection . . . . . . . . . . . . . 14<br />
2.3 Connection of TURBOVAC . . . . . . . . . . . . . . 14<br />
2.4 Fitting the <strong>TURBOTRONIK</strong><br />
and connecting the mains . . . . . . . . . . . . . . 14<br />
Figures<br />
References to diagrams, e.g. (2/5) consist of the Fig. No.<br />
and the Item No. in that order.<br />
Warning<br />
Indicates procedures that must be strictly observed to<br />
prevent hazards to persons.<br />
Caution<br />
Indicates procedures that must be strictly observed to<br />
prevent damage to, or destruction of the appliance.<br />
3 Operation . . . . . . . . . . . . . . . . . . . . . . . . . . 15<br />
3.1 Start-up of the <strong>TURBOTRONIK</strong> . . . . . . . . . . 15<br />
3.2 Start-up of the TURBOVAC . . . . . . . . . . . . . 15<br />
3.3 Shut-down of the TURBOVAC . . . . . . . . . . . 15<br />
4 Troubleshooting . . . . . . . . . . . . . . . . . . . . . 16<br />
EEC Declaration of Conformity . . . . . . . . . . 17<br />
Die deutsche Gebrauchsanleitung<br />
beginnt auf Seite 2<br />
Safety Notes<br />
Warning<br />
Only qualified personnel or the Leybold Service Department may carry out work on the<br />
converter.<br />
Potentially fatal voltages are present inside the converter.<br />
The unit shall be disconnected from the power supply before commencing any work<br />
where the converter housing will be opened.<br />
The converter contains components which could be damaged by electrostatic discharges.<br />
The converter essentially requires no servicing since it contains no components which<br />
could be adjusted.<br />
Depending on the installation particulars and the ambient conditions, the converter may<br />
collect grime (dust, moisture) on the inside. Such contamination can lead to malfunctions,<br />
overheating or short circuits and will have to be avoided to the maximum extent<br />
possible. The LEYBOLD Service Department can clean the converter. We recommend<br />
adhering to a cleaning interval of about three years.<br />
In the interest of safety all unauthorized modifications and tampering with the converter<br />
are absolutely prohibited.<br />
10<br />
GA 05.214/7 - 11/97
Description<br />
Fig. 1<br />
Electronic frequency converter<br />
<strong>TURBOTRONIK</strong> <strong>NT</strong> <strong>151</strong>/<strong>361</strong>, front<br />
1 Description<br />
1.1 Design and function<br />
The electronic frequency converter <strong>TURBOTRONIK</strong> <strong>NT</strong><br />
<strong>151</strong>/<strong>361</strong> is used to drive the turbomolecular pumps TUR-<br />
BOVAC150, 360, 150 CSV, 360 CSV, 150 V, 360 V,<strong>151</strong>,<br />
<strong>361</strong>, <strong>151</strong> C, <strong>361</strong> C.<br />
The <strong>TURBOTRONIK</strong> <strong>NT</strong> <strong>151</strong>/<strong>361</strong> converts the single<br />
phase mains voltage into a three-phase AC voltage for<br />
driving the asynchronous motor of the connected turbomolecular<br />
pump.<br />
The following operational states are indicated by LEDs:<br />
- Mains voltage applied (POWER, green),<br />
- Acceleration (ACCEL, yellow),<br />
- Normal (NORMAL, green),<br />
- Failure (FAIL, red).<br />
A relay output is also available for the NORMAL signal.<br />
After starting the pump will run up at maximum current.<br />
This is indicated by the ACCEL LED.<br />
Having reached approx. 80% of the nominal speed the<br />
NORMAL LED comes on and the ACCEL LED goes off.<br />
The motor current is continuously monitored and controlled.<br />
If the speed cannot be maintained even at the<br />
maximum current due to external influences, for example<br />
because of a greater gas supply, the speed will drop but<br />
the pump will continue to operate.<br />
When the speed drops below 150 Hz approx. the LED<br />
FAIL on the converter lights up.<br />
The outputs are short-circuit proof and protected against<br />
no load conditions.<br />
The <strong>TURBOTRONIK</strong> recognizes which pump is connected.<br />
The connection line between <strong>TURBOTRONIK</strong> and TUR-<br />
BOVAC may be up to 100 m long.<br />
The <strong>TURBOTRONIK</strong> is contained within a housing, and<br />
can be used as a table top instrument or for installation<br />
in a 19“ rack. Operation is by means of the START and<br />
STOP buttons on the front plate.<br />
1.2 Standard specification<br />
Cat. No. Mains lead , 2 m long Fuses<br />
————————————————————————<br />
857 15 with earthed plug 2 x T 2,5 A<br />
2 x F 5 A<br />
857 16 with US mains plug 2 x T 2,5 A<br />
2 x F 10 A<br />
857 17 with US mains plug 2 x T 2,5 A<br />
2 x F 10 A<br />
857 18 with special mains plug 2 x T 2,5 A<br />
2 x F 10 A<br />
2 x F 5 A<br />
857 19 without mains lead 2 x T 2,5 A<br />
2 x F 5 A<br />
4 screws and washers for rack installation.<br />
GA 05.214/7 - 11/97<br />
11
Description<br />
(front panel)<br />
(housing)<br />
Fig. 2 Dimensional drawing,<br />
Dimensions in mm<br />
Key to fig. 3<br />
1 Fuse holder<br />
2 Fuse, 6.3 x 32 mm<br />
3 Hinged cover<br />
4 Plug for mains cable<br />
5 Printed circuit board<br />
4 5<br />
Fig. 3 Set <strong>TURBOTRONIK</strong> to the mains voltage and change fuse 3 2 1<br />
1.3 Technical data<br />
Mains voltage ranges, selectable<br />
100/120/220/240 V, ±10%<br />
Mains frequency<br />
50/60 Hz<br />
Power consumption of the TURBOVAC<br />
During acceleration (max. 30 min.)<br />
Continuously, max.<br />
Briefly (0.5 s)<br />
680 VA<br />
480 VA<br />
750 VA<br />
Output for the motor nominal voltage 3 x 42 V rms<br />
Current limiting (intermediate circuit current) 5 A<br />
Nominal speed of the TURBOVAC<br />
150/<strong>151</strong> 50,000 min -1 = 833 Hz<br />
360/<strong>361</strong> 45,000 min -1 = 750 Hz<br />
Max. loading of the relay contacts<br />
50 V AC/4 A, 30 V DC/1 A<br />
Dimensions<br />
Weight<br />
1/2 19“, 3 HU*<br />
8.5 kg<br />
Operating temperature, with sufficient convection<br />
0 - 40°C<br />
Storage temperature<br />
-25°C to +70°C<br />
Electrical safety as to<br />
IEC 1010 / EN 61010 / VDE 0411<br />
EMV interference emission as to<br />
EN 50081-1 / VDE 0839 Part 81-1, limit value B<br />
EMV resistance to interference<br />
EN 50082-2 / VDE 0839 Part 82-2, test level III<br />
1.4 Ordering data<br />
Electronic frequency converter<br />
<strong>TURBOTRONIK</strong> <strong>NT</strong> <strong>151</strong>/<strong>361</strong><br />
Cat. No.<br />
230 V 857 15<br />
120 V 857 16<br />
100 V 857 17<br />
SH (100 V) 857 18<br />
230 V without mains lead 857 19<br />
Connection lead to the TURBOVAC<br />
3 m long 857 60<br />
5 m long 857 61<br />
10 m long 857 62<br />
20 m long 857 63<br />
19“ rack, 3 HU* 161 00<br />
* HU = height units (modular spacings high)<br />
12<br />
GA 05.214/7 - 11/97
Connection<br />
Key to fig. 4<br />
1 Plug for the TURBOVAC<br />
connection line<br />
2 Earth connection<br />
3 Mains voltage settings and<br />
fuse; see fig. 3<br />
4 Terminals for remote<br />
control; see fig. 5<br />
5 Terminals for relays<br />
6 Fuse<br />
7 Plug for the mains cable<br />
TURBOVAC<br />
100<br />
120<br />
220<br />
240<br />
100/120V F10A<br />
220/240V F5A<br />
START STOP RELAIS<br />
1 2 3 4 5 6<br />
7<br />
6<br />
HV<br />
PE<br />
1 2 3 4 5<br />
Fig. 4 Rear of the unit<br />
2 Connection<br />
The unit may only be connected by a qualified electrician<br />
and in accordance with the local regulations.<br />
Open the hinged cover (3/3). Remove the printed circuit<br />
board (3/5) and plug it back in such that the appropriate<br />
mains voltage value is visible.<br />
Warning<br />
Inside the <strong>TURBOTRONIK</strong> there are hazardous<br />
voltages. Open the <strong>TURBOTRONIK</strong><br />
only after disconnecting the mains.<br />
If the voltage drops below 216 V in 230 V mains select<br />
the 220 V setting.<br />
If necessary change the fuse.<br />
Required fuse: 100-120 V 10 A<br />
220-240 V 5 A<br />
2.1 Selecting the mains voltage<br />
(optional)<br />
Close the hinged cover again. The set mains voltage is<br />
visible from the outside.<br />
The mains voltage setting of the <strong>TURBOTRONIK</strong> can be<br />
changed; see „Technical data“.<br />
Caution<br />
The <strong>TURBOTRONIK</strong> is damaged when<br />
connected to the mains with an incorrect<br />
mains voltage setting.<br />
GA 05.214/7 - 11/97<br />
13
Connection<br />
2.2 Remote control<br />
connection (optional)<br />
The <strong>TURBOTRONIK</strong> <strong>NT</strong> <strong>151</strong>/<strong>361</strong> may be run in any one<br />
of 4 operating modes. They are selectable via different<br />
connection of pins 1 to 3 of the terminals (4/4) on the<br />
back of the <strong>TURBOTRONIK</strong>; see Fig. 5.<br />
1. Operation via the START and STOP pushbuttons<br />
Provide a link between pin 2 and pin 3 (setting as supplied).<br />
2. Automatic start when the mains voltage is<br />
applied<br />
Connect all 3 pins (1, 2 and 3) to each other.<br />
When the mains voltage is applied the TURBOVAC will<br />
start up automatically.<br />
3. Remote control via one external switch<br />
Provide a link between pin 1 and pin 3.<br />
When the second STOP input (pin 2) is connected to the<br />
connected pins 1-3 the TURBOVAC starts.<br />
Removing this connection stops the TURBOVAC.<br />
4. Remote control via 2 external pushbuttons<br />
Provide a link between pin 2 and pin 3.<br />
When pin 1 START is linked for at least 200 ms with<br />
connected pins 2 and 3, the TURBOVAC will start.<br />
Removing the connection stops the TURBOVAC.<br />
2.3 Connection of<br />
TURBOVAC<br />
The <strong>TURBOTRONIK</strong> <strong>NT</strong> <strong>151</strong>/<strong>361</strong> is used to drive the turbomolecular<br />
pumps TURBOVAC 150, 360, 150 CSV, 360<br />
CSV, 150 V, 360 V, <strong>151</strong>, <strong>361</strong>, <strong>151</strong> C, <strong>361</strong> C.<br />
The TURBOVAC 150 H and 360 H may not be connected.<br />
Plug in the connection line to the TURBOVAC at the plug<br />
(4/1) and on the motor of the TURBOVAC.<br />
Connection lines up to 100 m long are permissible.<br />
An earth line can be connected to (4/2).<br />
2.4 Fitting the TURBOTRO-<br />
NIK and connecting the<br />
mains<br />
The <strong>TURBOTRONIK</strong> <strong>NT</strong> <strong>151</strong>/<strong>361</strong> is supplied in a table<br />
top housing.<br />
It may also be built into a rack. In this case sufficient ventilation<br />
must be ensured and the ambient temperature<br />
must not exceed 40°C during operation.<br />
The four holes in the front panel are used for installing<br />
the unit in a 19“ rack.<br />
Warning<br />
If the <strong>TURBOTRONIK</strong> is built into a rack the<br />
mains plug is not within easy reach. Therefore<br />
install a separation between the TUR-<br />
BOTRONIK and the mains when you build it<br />
into a rack.<br />
Connection of relay contacts (4/5)<br />
Via pins 4, 5 and 6 (potential-free changeover contact) it<br />
is possible to detect the operating mode NORMAL.<br />
5-6 closed NORMAL<br />
4-5 closed not NORMAL;<br />
ACCEL or standstill<br />
Plug in the mains cable at (4/7).<br />
Warning<br />
Do not operate the <strong>TURBOTRONIK</strong> with the<br />
standard mains lead in chemically aggressive<br />
surroundings. If you operate the TUR-<br />
BOTRONIK in chemically aggressive surroundings<br />
replace the mains lead by a resistant<br />
one.<br />
14<br />
GA 05.214/7 - 11/97
3 Operation<br />
3.1 Start-up of the<br />
<strong>TURBOTRONIK</strong><br />
Plug in the mains plug. All four LEDs light up.<br />
A number of initialisation functions and self-tests are performed<br />
within the frequency converter. The pump type<br />
connected and the length of the connection line to the<br />
<strong>TURBOTRONIK</strong> are determined.<br />
After a few seconds, all LEDs with the exception of<br />
POWER go out.<br />
The <strong>TURBOTRONIK</strong> is ready for operation.<br />
3.2 Start-up of the<br />
TURBOVAC<br />
Switch on the cooling for the TURBOVAC; refer to the<br />
Operating Instructions for the TURBOVAC.<br />
Press the START pushbutton or start the TURBOVAC via<br />
remote control, see Section 2.2.<br />
The pump will start to run up.<br />
LED ACCEL (acceleration) is on.<br />
After reaching approx. 80% of the nominal speed the<br />
NORMAL LED comes on and the ACCEL LED goes off.<br />
At the same time, the relay switches to NORMAL.<br />
The TURBOVAC can also be started whilst it is still turning.<br />
Caution<br />
The entire acceleration phase must not<br />
exceed 30 minutes, e.g. as a result of<br />
repeated starting. Once the phase has reached<br />
30 minutes, the acceleration phase of<br />
the <strong>TURBOTRONIK</strong> may be re-initiated only<br />
after a further 25 minutes have elapsed.<br />
Acceleration phases in excess of 30 minutes<br />
result in the <strong>TURBOTRONIK</strong> overheating.<br />
1<br />
2<br />
3<br />
1<br />
2<br />
3<br />
1<br />
2<br />
3<br />
1<br />
2<br />
3<br />
START<br />
STOP<br />
Fig. 5 Control options<br />
Link required for keyboard operation<br />
(fitted as supplied)<br />
Automatic acceleration with mains<br />
connected<br />
3.3 Shut-down of the<br />
TURBOVAC<br />
Operation<br />
Remote control by means of one switch:<br />
Switch closed: START.<br />
Switch open: STOP.<br />
Remote control with two pushbuttons<br />
Pins 2 and 3 connected: Start when the<br />
START pushbutton is closed for at least<br />
200 ms.<br />
Stop when the STOP button is<br />
opened.<br />
Press the STOP button or switch off the TURBOVAC via<br />
remote control; see Section 2.2.<br />
Only the POWER LED remains on. The relay (4/5) switches<br />
to not NORMAL.<br />
Switch off the TURBOVAC cooling and vent the TURBO-<br />
VAC; refer to the Operating Instructions for the TURBO-<br />
VAC.<br />
It is not required to switch off the <strong>TURBOTRONIK</strong> electrically.<br />
Having rectified a fault press STOP or switch off the<br />
TURBOVAC via remote control before starting the pump<br />
again.<br />
GA 05.214/7 - 11/97<br />
15
Troubleshooting<br />
4 Troubleshooting<br />
Symptom Probable cause Recommended Corrective Action<br />
1. When the mains voltage is switched on, all<br />
LEDs fail to come on.<br />
Mains voltage not present.<br />
Fuse malfunctioning.<br />
Probable causes of a malfunctioning fuse:<br />
-Printed circuit board for mains voltage setting<br />
plugged in incorrectly.<br />
- <strong>Inc</strong>orrect fuse value.<br />
-Short circuit in the rectifier section of the frequency<br />
converter.<br />
- Short circuit in the mains transformer.<br />
Insert the mains plug or switch on the power.<br />
Change the fuse.<br />
-Plug in the printed circuit board correctly: see<br />
Section 2.1.<br />
-Use the correct fuse:<br />
5 A fast-blow for 220/240V mains voltage;<br />
10 A fast-blow for 100/120 V.<br />
- Leybold Service.<br />
- Leybold Service.<br />
2. When the mains voltage is switched on and<br />
the initialization phase has been completed, all<br />
LEDs with the exception of POWER come on<br />
cyclically in sequence.<br />
Connection interrupted between TURBOVAC<br />
and <strong>TURBOTRONIK</strong>.<br />
Self-test not completed successfully.<br />
Connect the connection line correctly.<br />
Leybold Service.<br />
3. When the START pushbutton is pressed,<br />
the ACCEL LED comes on; it goes off again<br />
when the START pushbutton is released.<br />
4. When the START pushbutton is pressed,<br />
the ACCEL LED comes on and the FAIL LED<br />
flashes at 2 Hz.<br />
Link not fitted across pins 2 and 3 on the terminal<br />
block (4/4) on the rear of the unit.<br />
Circuit interrupted at the stop pushbutton<br />
(where external start/stop pushbuttons are fitted).<br />
The thermal switch for the pump has opened.<br />
Connect the link.<br />
Close the stop button and start the TURBO-<br />
VAC.<br />
Check the cooling system and repair if necessary.<br />
Press the STOP button or switch off the<br />
TURBOVAC using the remote control. Allow<br />
the TURBOVAC to cool down, then restart.<br />
5. The ACCEL LED remains on for too long<br />
after starting, and the NORMAL LED fails to<br />
come on.<br />
Pump speed too low, i.e. below approx. 80% of<br />
the nominal speed. Probable cause: fault in the<br />
vacuum system.<br />
Forevacuum pressure too high (>10 -2 mbar).<br />
TURBOVAC is running sluggish.<br />
Correct the fault in the vacuum system. Press<br />
the STOP button or switch off the TURBOVAC<br />
using the remote control, then restart.<br />
Use a larger backing pump.<br />
Leybold Service.<br />
6. The ACCEL LED comes on, but the pump<br />
fails to accelerate.<br />
7. The FAIL LED comes on during acceleration<br />
or normal operation, and then remains on<br />
continuously.<br />
Remote control not connected correctly.<br />
Short-circuit monitoring for the TURBOTRO-<br />
NIK has tripped. Probable cause: internal or<br />
external short-circuit on the <strong>TURBOTRONIK</strong>,<br />
extreme electromagnetic spurious pulse.<br />
Connect the remote control correctly to the terminals;<br />
see Fig. 5.<br />
Withdraw the mains plug from the TUR-<br />
BOTRONIK; check all connections; leave the<br />
<strong>TURBOTRONIK</strong> disconnected from the mains<br />
for at least 1 minute, then reconnect and<br />
restart the TURBOVAC.<br />
8. The FAIL LED comes on during acceleration<br />
or normal operation, and then flashes at 1<br />
Hz.<br />
Pump overloaded,, pump speed too low<br />
(
EEC Declaration of Conformity<br />
We - LEYBOLD AG - herewith declare that the products<br />
defined below meet the basic requirements regarding<br />
safety and health of the relevant EEC directives by<br />
design, type and the versions which are brought in to circulation<br />
by us.<br />
In case of any products changes made without our<br />
approval, this declaration will be void.<br />
Designation of the products:<br />
Electronic frequency converter<br />
Models:<br />
<strong>TURBOTRONIK</strong> <strong>NT</strong> <strong>151</strong>/<strong>361</strong><br />
Catalogue numbers:<br />
857 15/16/17/18<br />
The products comply with the following guidelines:<br />
• EC Low-Voltage Guidelines (73/23/EEC)<br />
• EEC Directive on Elektromagnetic Compatibility<br />
(89/336/EWG)<br />
Applicable, harmonized standards:<br />
• EN 61010-1: 1993<br />
• EN 50081-1: 1992<br />
• prEN 50082-2: 1994<br />
Applied national standards and technical<br />
specifications:<br />
• VDE 0411 Part 1/03.94<br />
• VDE 0839 Part 81-1/03.93<br />
• EVDE 0839 Part 82-2/11.94<br />
LK.GT.0048.02.11.95<br />
Cologne, November 14, 1995<br />
Cologne, November 14, 1995<br />
—————————————————————<br />
Beeck, Business Area Manager Instruments<br />
—————————————————————<br />
Finke, Developement Instruments<br />
GA 05.214/7 - 11/97 17
Eine Änderung der Konstruktion und der technischen<br />
Daten behalten wir uns vor. Die Abbildungen sind unverbindlich.<br />
We reserve the right to alter the design or any data given<br />
in these Operating Instructions. The illustrations are not<br />
binding.<br />
1.80.8.635.26 RSP 11.97 Printed in Germany on chlorine-free bleached paper Technical alterations reserved<br />
LEYBOLD VAKUUM GmbH<br />
Bonner Strasse 498 (Bayenthal)<br />
D-50968 Köln<br />
Tel.: (0221) 347-0<br />
Fax: (0221) 347-1250<br />
http://www.leyboldvac.de<br />
e-mail:documentation@leyboldvac.de<br />
GA 05.214/7 - 11/97