Customer PTC E-Newsletter - PTC.com
Customer PTC E-Newsletter - PTC.com
Customer PTC E-Newsletter - PTC.com

Create successful ePaper yourself
Turn your PDF publications into a flip-book with our unique Google optimized e-Paper software.
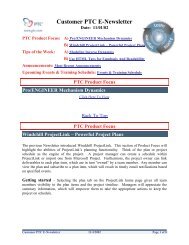
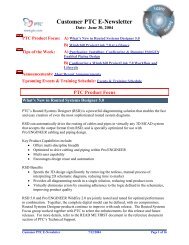
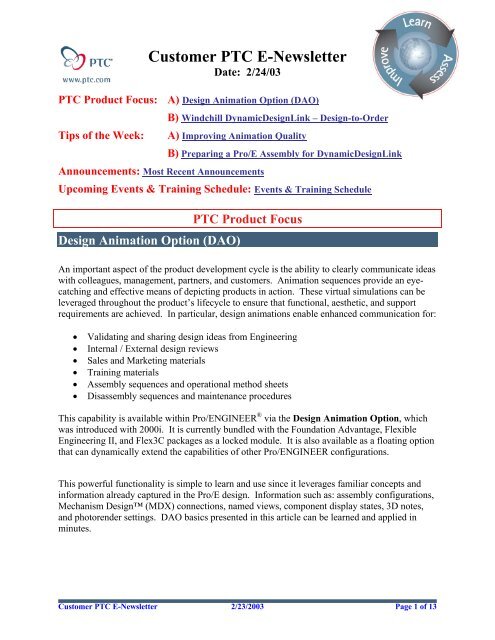
<strong>Customer</strong> <strong>PTC</strong> E-<strong>Newsletter</strong><br />
Date: 2/24/03<br />
<strong>PTC</strong> Product Focus: A) Design Animation Option (DAO)<br />
Tips of the Week:<br />
B) Windchill DynamicDesignLink – Design-to-Order<br />
A) Improving Animation Quality<br />
Announcements: Most Recent Announcements<br />
B) Preparing a Pro/E Assembly for DynamicDesignLink<br />
Up<strong>com</strong>ing Events & Training Schedule: Events & Training Schedule<br />
Design Animation Option (DAO)<br />
<strong>PTC</strong> Product Focus<br />
An important aspect of the product development cycle is the ability to clearly <strong>com</strong>municate ideas<br />
with colleagues, management, partners, and customers. Animation sequences provide an eyecatching<br />
and effective means of depicting products in action. These virtual simulations can be<br />
leveraged throughout the product’s lifecycle to ensure that functional, aesthetic, and support<br />
requirements are achieved. In particular, design animations enable enhanced <strong>com</strong>munication for:<br />
• Validating and sharing design ideas from Engineering<br />
• Internal / External design reviews<br />
• Sales and Marketing materials<br />
• Training materials<br />
• Assembly sequences and operational method sheets<br />
• Disassembly sequences and maintenance procedures<br />
This capability is available within Pro/ENGINEER ® via the Design Animation Option, which<br />
was introduced with 2000i. It is currently bundled with the Foundation Advantage, Flexible<br />
Engineering II, and Flex3C packages as a locked module. It is also available as a floating option<br />
that can dynamically extend the capabilities of other Pro/ENGINEER configurations.<br />
This powerful functionality is simple to learn and use since it leverages familiar concepts and<br />
information already captured in the Pro/E design. Information such as: assembly configurations,<br />
Mechanism Design (MDX) connections, named views, <strong>com</strong>ponent display states, 3D notes,<br />
and photorender settings. DAO basics presented in this article can be learned and applied in<br />
minutes.<br />
<strong>Customer</strong> <strong>PTC</strong> E-<strong>Newsletter</strong> 2/23/2003 Page 1 of 13
Accessing Design Animation<br />
The Design Animation functionality can be<br />
accessed during any assembly design session.<br />
1. If necessary, first acquire a license<br />
using Utilities > Floating Modules<br />
2. Select Applications > Animation<br />
Animation Command Structure<br />
The User Interface is very simple to navigate, with the most <strong>com</strong>monly used functions available<br />
on the customizable Toolbar. Right Mouse Button (RMB) shortcuts provide access to<br />
<strong>com</strong>mands in the context of the Timeline Sequencer. Additional <strong>com</strong>mands are available<br />
within the Pull-down Menus. Refer to the figure below for a sample User Interface layout.<br />
<strong>Customer</strong> <strong>PTC</strong> E-<strong>Newsletter</strong> 2/23/2003 Page 2 of 13
The default toolbar icons follow a natural flow, and map to the <strong>com</strong>mands indicated:<br />
Animation Workflow<br />
The process to develop an animation is iterative and centers upon intuitive toolbar <strong>com</strong>mands<br />
and the timeline sequencer. A series of simple steps are <strong>com</strong>bined to configure a <strong>com</strong>plex<br />
animation over time. This animation can depict any <strong>com</strong>bination of viewpoint positions, relative<br />
<strong>com</strong>ponent positions, as well as functional operation. Animations defined in sub-assemblies can<br />
be reused in higher-level assemblies.<br />
<strong>Customer</strong> <strong>PTC</strong> E-<strong>Newsletter</strong> 2/23/2003 Page 3 of 13
Typically, the development follows this basic flow:<br />
Setup<br />
The animation definition is named and stored associatively as part of the<br />
assembly. Each assembly may contain more than one animation<br />
sequence. The Animation dialog is used to name and manage these sets.<br />
The Utilities menu contains various animation specific environment settings:<br />
• Time Domain - control length of animation by specifying<br />
<strong>com</strong>bination of Start Time, End Time, Frame Count, or Rate<br />
(shortcut: double-click on timeline at bottom of sequencer)<br />
• Animation Interpolation – global setting to determine if translation<br />
and rotations are interpolated using linear or smooth algorithms<br />
• Animation Tolerance – options to control assembly and mechanism tolerances; useful<br />
option to increase performance by disabling graphical display during playback<br />
<strong>Customer</strong> <strong>PTC</strong> E-<strong>Newsletter</strong> 2/23/2003 Page 4 of 13
Objects that need to move together are defined through the<br />
concept of Bodies. This grouping can be <strong>com</strong>pletely independent<br />
from assembly structure and constraints. By default, all objects<br />
with conventional placement constraints are included in the<br />
Ground [reference] body. Since MDX uses the same body<br />
methodology, bodies defined from connections are inherited by<br />
DAO. The body definition dialog is used to regroup <strong>com</strong>ponents<br />
into named, user-defined body sets. Note that each part can only<br />
exist in a single body definition.<br />
• If a body is removed, all it members will revert to Ground<br />
• If a part is added to a body, it will be removed from Ground or other bodies<br />
• Default Bodies will revert back to initial state based upon assembly constraints<br />
• One Part per Body will create a body for every <strong>com</strong>ponent in the assembly<br />
– only use this for small and simple designs<br />
Key Frames<br />
It is time to get things moving! Snapshots are essentially exploded view states created using a<br />
drag & drop approach to position and orient bodies. These snapshots are referenced at specified<br />
times during the definition of Key Frame Sequences. Design Animation interpolates between<br />
these frames to produce a smooth animation. Nodes within the sequence can easily be redefined<br />
or re-sequenced. Notice that as with all new tools in Pro/E, Undo / Redo is implemented!<br />
<strong>Customer</strong> <strong>PTC</strong> E-<strong>Newsletter</strong> 2/23/2003 Page 5 of 13
Any Views or Component Display States that were previously defined can<br />
be leveraged within DAO. Additional ones may be defined as needed while<br />
Animation mode is active. If views or display states are redefined, the<br />
animation will update accordingly. These are referenced at specified times<br />
using the View @Time and Display @Time <strong>com</strong>mands. The transition can<br />
be linear, smooth, or none.<br />
In order to have a view position remain fixed over time, simply specify the<br />
same named view at different time locations.<br />
The Timeline Sequencer is a powerful tool to manage the animation and<br />
<strong>com</strong>bined effects of defined elements. Selected nodes can be repositioned using a drag & drop<br />
approach. Once an element is selected, the most <strong>com</strong>monly used operations are available on the<br />
RMB context menu.<br />
Shortcuts:<br />
Single select click node or instance with LMB<br />
Multiple select CTRL + click with LMB<br />
Edit Component Time double-click LMB; or drag & drop<br />
Edit vertical position MMB + drag<br />
Undo shift + LMB<br />
Redo shift + MMB<br />
Context menu RMB<br />
Edit Time Domain double-click timeline<br />
Expand sub-animation select circle node at start/end<br />
Optional Elements<br />
Events can be added as associative nodes at specific times. This <strong>com</strong>mand is not on the default<br />
toolbar, but can be added or accessed from Animation > Event. If an event is moved, any<br />
linked items will automatically be repositioned.<br />
Lock Bodies provides a method to temporarily cause bodies to a follow a leader. In the snapshot<br />
dialog form, there is a Bodies tab which allows the user to specify how a body should behave if<br />
conflicting motion is requested.<br />
Servo Motors can be added as drivers to define functional operation of bodies. The approach is<br />
identical to that used in MDX. Any Servo Motors defined in MDX will be inherited, thereby<br />
supporting design intent re-use. They may be selectively activated or de-activated at any stage in<br />
<strong>Customer</strong> <strong>PTC</strong> E-<strong>Newsletter</strong> 2/23/2003 Page 6 of 13
the animation sequence. The various driver profiles each have their own input requirements.<br />
Further description is beyond the scope of this article, but each is fully explained in the<br />
documentation.<br />
3D Notes attached to <strong>com</strong>ponents will appear during animation run in Pro/E, but are not<br />
displayed during playback or capture in Release 2001.<br />
Start Animation<br />
The Animation > Start <strong>com</strong>mand is used to validate the animation while<br />
generating each frame for the movie. The result set is stored in session for<br />
subsequent playback. While only one result set can be in session at a time, the<br />
playback dialog described below enables saving multiple sets. Re-run the Start<br />
<strong>com</strong>mand after making design modifications or refinements to the animation.<br />
Playback Results and Export<br />
Now, the moment you have been waiting for – deliverable generation! After the animation is<br />
run, use the Animation > Playback <strong>com</strong>mand to review, save, or export the result set<br />
information. The playback button on the toolbar is only a shortcut to the Animate dialog box.<br />
The Animate dialog is a VCR-like control to play the animation and export output.<br />
Output can be Photorendered to<br />
increase realism.<br />
Notice that a dynamic<br />
interference can also be<br />
performed during<br />
playback!<br />
Output quality is very sensitive to Image Size versus Pro/E graphics window size, as well as<br />
Photorender settings. The Tip section in this edition provides guidance to improve movie<br />
quality. The MPEG export generates a single file in an industry standard format that can be<br />
replayed by Windows Media Player, Real Player, QuickTime, etc. The JPEG export will<br />
generate a single file for each frame. Third party tools can then be used to retouch images,<br />
<strong>com</strong>bine frames into other movie formats, and/or dub audio.<br />
Conclusion<br />
Design Animation is a tightly coupled module that extends the range of problems that designers<br />
can address, while leveraging the fundamental benefits of Pro/E. It bypasses the typical process<br />
problems ac<strong>com</strong>panying data translation. This solution supports the business needs to increase<br />
innovation and quality, while reducing design cycle times and costs. Non-Pro/E users requiring<br />
a similar capability should consider ProductView with the Realizer option.<br />
<strong>Customer</strong> <strong>PTC</strong> E-<strong>Newsletter</strong> 2/23/2003 Page 7 of 13
Additional Information<br />
Full documentation is provided on the Pro/E Documentation CD, and can be accessed by<br />
browsing to “Using Additional Modules” under Contents tab. In addition, a PDF version<br />
(des_anim.pdf) is provided on the same CDROM under Topic Collections.<br />
• Online Datasheet - http://www.ptc.<strong>com</strong>/products/proe/dao/index.htm<br />
• Sample Animations -<br />
http://www.ptc.<strong>com</strong>/products/proe/dao/saw_anim.htm<br />
http://www.ptc.<strong>com</strong>/products/proe/dao/foot_anim.htm<br />
• Technical Support Tutorial - http://www.ptc.<strong>com</strong>/cs/cs_23/howto/pas3220/pas3220.htm<br />
Back To Top<br />
<strong>PTC</strong> Product Focus<br />
Windchill DynamicDesignLink – Design-to-Order<br />
Click Here To View<br />
Back To Top<br />
<strong>Customer</strong> <strong>PTC</strong> E-<strong>Newsletter</strong> 2/23/2003 Page 8 of 13
Improving Animation Quality<br />
Tips of the Week<br />
As indicated in this month’s Product Focus, the quality of the movies generated by DAO is very<br />
sensitive to the graphics window aspect ratio and optional photorender settings. This section is a<br />
collection of tips to assist with maximizing image and movie quality plus realism.<br />
Since the introduction of DAO with 2000i, an effort has been made to<br />
improve the default quality of captured movies. In order to make<br />
sure that the movie is not distorted, the size entered in the capture<br />
dialog box for Width x Height should match the size of the graphicsonly<br />
portion of the Pro/E window. Square regions like 500x500 with<br />
an aspect ratio of 1:1 work best. Unfortunately, there is no means<br />
within the application to set or determine the size of this window.<br />
These utilities can help in sizing the window:<br />
• SnagIt - http://www.techsmith.<strong>com</strong>/products/snagit/default.asp<br />
General purpose, <strong>com</strong>mercial screen capture utility with support for fixed regions. When<br />
setting the properties for capture, the region size is displayed as a crude means to measure<br />
window size.<br />
• Sizer - http://www.brianapps.net/sizer.html<br />
Freeware utility to resize windows to specific sizes. Open a temporary browser window<br />
and set to specific size, then overlay Pro/E graphics area to approximate size.<br />
Make sure that Display Properties > Settings have the color depth set to True Color (24 or 32<br />
bit) to prevent blurring as the result of dithering.<br />
It is not re<strong>com</strong>mended to use gradient<br />
backgrounds since they do not capture well.<br />
Another benefit of a fixed background color is a more <strong>com</strong>pressible and therefore<br />
smaller movie file. The background can be set to a fixed color using View ><br />
Display Settings > System Colors. Uncheck Blended Background. Next select<br />
the Background swatch to set color. Photorendered images will optionally use<br />
wall textures from Room Setup. These can be set to a solid color if desired.<br />
<strong>Customer</strong> <strong>PTC</strong> E-<strong>Newsletter</strong> 2/23/2003 Page 9 of 13
In order to prevent players from skipping frames, a frame rate of<br />
24 to 30 fps is re<strong>com</strong>mended. When setting up the Time<br />
Domain, use the Length and Rate, or Rate and Frame Count<br />
options.<br />
The Display Interval is the graduation that is used on the<br />
Timeline.<br />
During capture, do not try to interact with the Pro/E windows. It<br />
is also important that no other application windows are opened<br />
that will overlap with the Pro/E graphics window.<br />
Photorendering can significantl<br />
y increase the amount of time and resources required to generate<br />
a movie, but is the most effectiv e way to increase realism. Depending on the target audience and<br />
intended application, it may not be desired or required.<br />
Applying Pro/PHOTORENDER will dramatically increase the realism of the product<br />
animation and scene. While very simple to setup and use, it does require trial and error to stage<br />
the environment with realistic appearances, textures, and lighting. Once established, these can<br />
be re-used with future projects. The render settings will be used when capturing movies with the<br />
Photorender option enabled. Photorender functionality is available while in Animation mode<br />
and can be accessed from View > Model Setup > Photorender.<br />
The default toolbar is shown here, and cannot be docked or customized.<br />
If the photo rendered image appears washed out, the gamma needs to be adjusted. Many video<br />
adapters provide an option in the Display Properties control panel to set this. There is also a<br />
config.pro option available. Set window_gamma to a value between 0.5 and 2.0; larger numbers<br />
result in darker renderings.<br />
Appearances can be improved by turning up the color intensity and ambient values up to 100%.<br />
Washout can be eliminated by increasing basic color values to 100%. 100% black with a Mirror<br />
value of 80% will result in the elusive chrome finish.<br />
Lights are one of the most important influencers to a high quality scene. Toggle off the default<br />
ambient light. Next, add two lights - a point light and a spotlight with shadows enabled.<br />
There are two excellent tutorials for Pro/PHOTORENDER available here:<br />
1. http://ptc-mss.<strong>com</strong>/Tutorial/photo_tut.zip<br />
http://ptc-mss.<strong>com</strong>/Tutorial/PhotoRender.zip<br />
Back To Top<br />
<strong>Customer</strong> <strong>PTC</strong> E-<strong>Newsletter</strong> 2/23/2003 Page 10 of 13
Tips of the Week<br />
Preparing a Pro/ENGINEER Assembly for<br />
DynamicDesignLink<br />
Click Here To View<br />
Back To Top<br />
Announcements<br />
Special Hardware offers for customers updating to Pro/ENGINEER Wildfire<br />
http://www.ptc.<strong>com</strong>/partners/hardware/current/wildfire_tlo.htm<br />
h ttp://www.3dlabs.<strong>com</strong>/<strong>PTC</strong>/<br />
<strong>Customer</strong> <strong>PTC</strong> E-<strong>Newsletter</strong> Survey<br />
For the past 2 years I've been sending you our <strong>Customer</strong> <strong>PTC</strong> E-<strong>Newsletter</strong> such as this one.<br />
In an attempt to deliver the highest quality and create the most value we would like to use this<br />
survey to further our "Learning" Relationship with you, our <strong>Customer</strong>s. Even if you are a first<br />
time recipient of the newsletter, please feel free to share your <strong>com</strong>ments on this one you’re<br />
reading.<br />
It will not take longer than a few minutes to fill out this quick survey as your input is invaluable<br />
and we greatly appreciate your input. Please click on the following link to begin:<br />
To Enter Survey, Please Click<br />
Please note it may be impossible to "Customize" the newsletter to meet every individual request<br />
however we will attempt to integrate as many ideas as possible.<br />
Thank-you very much for your time and feedback as we try to improve this value-added service.<br />
<strong>PTC</strong> Sponsored Events<br />
Click below to see <strong>PTC</strong> sponsored events:<br />
http://www.ptc.<strong>com</strong>/<strong>com</strong>pany/news/events/ index.htm<br />
<strong>Customer</strong> <strong>PTC</strong> E-<strong>Newsletter</strong> 2/23/2003 Page 11 of 13
Click on the poster to gain access to the Product First Virtual Event resource center!! See the<br />
software and pick up a screen-saver or two.<br />
E -PROFILES IS HERE!!<br />
We have been eagerly anticipating the debut of the new electronic version of Profiles Magazine<br />
and now it is here! This new web site will supplement the print edition of the magazine and will<br />
provide new useful features not feasible with paper media. e-Profiles will provide you with<br />
24x7, worldwide access to key information previously available exclusively in the print version.<br />
"Tips & Tricks," a popular feature pioneered by Pro/USER, has also moved to the web and will<br />
be expanded as the site matures. Future plans include several foreign-language editions of<br />
Profiles for our many international readers. Currently, Profiles is printed in English and<br />
Japanese.<br />
Please take a few minutes to check out this new web site. We don't think you will be<br />
disappointed.<br />
h ttp://profilesmagazine.<strong>com</strong>/<br />
Back To Top<br />
<strong>Customer</strong> <strong>PTC</strong> E-<strong>Newsletter</strong> 2/23/2003 Page 12 of 13
Up<strong>com</strong>ing Events & Training Class Schedules<br />
Up<strong>com</strong>ing, 2003<br />
Up<strong>com</strong>ing, 2003<br />
Your local Pro/Engineer User Groups<br />
http://www.prouser.org/rugs/<br />
Pro/USER International Conference<br />
http://www.prouser.org/<br />
Please visit the <strong>PTC</strong> Education Services website for the latest training information<br />
including course descriptions, schedules, locations, and pricing.<br />
• Attend a course at any <strong>PTC</strong> Center and receive a free copy of Pro/E 2001 Student<br />
Edition!<br />
http://www.ptc.<strong>com</strong>/services/edserv/index.htm<br />
<strong>PTC</strong><br />
Note: This <strong>PTC</strong> E-<strong>Newsletter</strong> will continue to be used for the following:<br />
1) Inform you on events related to <strong>PTC</strong> products (user groups, conferences, training schedules, etc.)<br />
2) Educate you on products that are available at <strong>PTC</strong><br />
3) Tips & Techniques using <strong>PTC</strong> Products<br />
Note: These messages are <strong>com</strong>piled in the local <strong>PTC</strong> office and will be distributed via<br />
e-mail.<br />
Back To Top<br />
<strong>Customer</strong> <strong>PTC</strong> E-<strong>Newsletter</strong> 2/23/2003 Page 13 of 13