Media Sampling Guide - Purafil
Media Sampling Guide - Purafil
Media Sampling Guide - Purafil

You also want an ePaper? Increase the reach of your titles
YUMPU automatically turns print PDFs into web optimized ePapers that Google loves.
www.purafil.com<br />
FIRST<br />
IN CLEAN<br />
AIR<br />
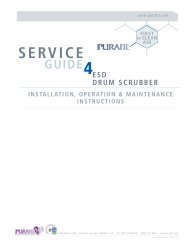
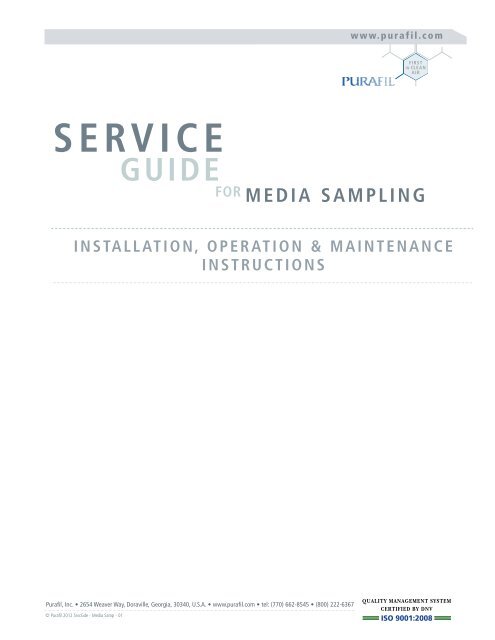
SERVICE<br />
GUIDE<br />
FOR MEDIA SAMPLING<br />
INSTALLATION, OPERATION & MAINTENANCE<br />
INSTRUCTIONS<br />
<strong>Purafil</strong>, Inc. • 2654 Weaver Way, Doraville, Georgia, 30340, U.S.A. • www.purafil.com • tel: (770) 662-8545 • (800) 222-6367<br />
© <strong>Purafil</strong> 2012 SrvcGde - <strong>Media</strong> Samp - 01<br />
ISO 9001:2008
Thank you for taking advantage of <strong>Media</strong> Life Analysis, a complimentary service<br />
available through <strong>Purafil</strong>, Inc.<br />
<strong>Purafil</strong> is committed to providing clean air solutions. Our technical services, including <strong>Media</strong> Life Analysis, allow for<br />
verification that <strong>Purafil</strong>’s air filtration system is performing optimally. By analyzing samples of media from the air<br />
filtration system, <strong>Purafil</strong> can project the life cycle of system media and make suggestions to improve system<br />
performance. Your <strong>Media</strong> Life Analysis Report is made available to your local <strong>Purafil</strong> representative via <strong>Purafil</strong>’s online<br />
portal.<br />
1.0 PRE-INSTALLATION INSTRUCTIONS<br />
1.1 SAFETY CONSIDERATIONS<br />
• Read this Service Manual carefully. Be thoroughly familiar with the controls and the proper use of the<br />
equipment.<br />
• This manual should be retained with the unit. It contains information necessary for proper maintenance.<br />
There is a pocket envelope provided for this purpose. Attach it permanently to the unit.<br />
1.2 STORAGE<br />
The unit should be protected from the elements during storage, especially when storage time is extensive.<br />
• Store PURAFIL ® media in a dry place with less than 95% relative humidity.<br />
1.3 CLEARANCES<br />
All units should be easily accessible for the required periodic maintenance. Do not block return and discharge<br />
grilles. Sufficient minimum clearances can be recommended by the local PURAFIL ® representative.<br />
2.0 MEDIA<br />
2.1 NEED FOR SAMPLING<br />
PURAFIL ® media has a finite life which is a function of the available active ingredient (expressed as a percentage)<br />
and the concentration of target contaminants present in the airstream. After start-up, your local <strong>Purafil</strong><br />
representative will work with the owner to periodically secure media samples. <strong>Purafil</strong>, Inc. will provide at no<br />
charge, regular laboratory analysis of such samples to establish life cycles.<br />
NOTE: There is no known method to chemically analyze PURAKOL ® media for optimum adsorptive capacity,<br />
given the wide spectrum of gases encountered in an industrial atmosphere (i.e. acid gases to various<br />
hydrocarbons.) If PURAKOL ® media is used in this equipment as a pre-sorber, the media’s life will be determined<br />
by the downstream PURAFIL ® media analysis.<br />
2.2 SAMPLING SCHEDULE<br />
Since every installation varies due to type and quantity of contaminant, each operator must develop a sample<br />
schedule best suited to their system. However, until a schedule can be established, we recommend that a sample<br />
be taken from each bank, beginning at start-up and sent for analysis within 90 days. According to the analysis, a<br />
replacement date can be projected with a recommended sampling schedule.
2.3 SAMPLING PROCEDURE<br />
To take a media sample, you will need the following items:<br />
• Safety gloves<br />
• Dust mask<br />
• <strong>Media</strong> sampling probe*<br />
• <strong>Media</strong> sampling laboratory bags*<br />
• Weatherproof envelope or packaging addressed to <strong>Purafil</strong>’s laboratory*<br />
Take proper safety precautions by wearing safety gloves and a dust mask.<br />
*These items are supplied free of charge by <strong>Purafil</strong>.
Modular Systems<br />
Follow these instructions.<br />
1. Disconnect the power supply, if applicable.<br />
2. Use one media sampling bag per pass of your system. Using a marker, provide the information requested on<br />
the outside of each bag, including the S.O. No, Serial No., and Bed #. Please note: Bed #1 is the first bed in<br />
the direction of airflow. The S.O. No. and Serial No. can be found on the blue metal plate affixed to the<br />
outside of the unit.<br />
3. Remove the middle module from Bed #1 from the system.<br />
4. Set the module up on its end so that the sampling port faces up and remove the plug from the sampling<br />
port.
5. Open the media sampling probe and insert the device into the module via the sampling port. Once media<br />
has filled the device’s lower portion, close the probe and remove it from the module.<br />
6. Pour the contents of the media sampling probe into the plastic sample bag marked with the appropriate Bed<br />
#. Fill the sample bag to within one inch from its top and seal tightly.<br />
7. Replace the sampling port plug and module.<br />
8. Repeat steps 3 through 7 for each bed of your system. Reconnect the power supply, if applicable.<br />
9. Complete the <strong>Purafil</strong> <strong>Sampling</strong> Transmittal Form and send it with your samples to Attn: <strong>Purafil</strong> Laboratory.<br />
For start-up installations, please use the form enclosed in your System Start-up Kit. Transmittal forms are<br />
also provided in your <strong>Media</strong> Life Analysis Kit, available from <strong>Purafil</strong>, Inc., or can be downloaded from<br />
<strong>Purafil</strong>’s portal. Please contact your local representative or <strong>Purafil</strong> for more information.
Drum Scrubber Systems(DS-300, DS-500, and DS-1000)<br />
Follow these instructions.<br />
NOTE: The instructions below do not apply to the DS-100 unit due to the usage of <strong>Media</strong>SAKs. <strong>Sampling</strong> the <strong>Media</strong><br />
Saks would affect the integrity and cause media to spill when replacing the <strong>Media</strong> Saks.<br />
1. Disconnect the power supply, if applicable.<br />
2. Use three media sampling bags. You will be taking samples from two sampling ports located on the side of<br />
the unit and from the top of the media column. Please note: Bed #1 is the first bed in the direction of<br />
airflow. In a draw-through unit, for example, Bed #1 is accessible from the bottom sampling port. Using a<br />
marker, provide the information requested on the outside of each bag, including the S.O. No, Serial No., and<br />
Bed #.<br />
3. To take a sample from the bottom media sampling port, first remove the cap. Open the media sampling<br />
probe and insert the device into the drum. Once media has filled the device’s lower portion, close the probe<br />
and remove it from the drum.<br />
4. Pour the contents of the media sampling probe into the plastic sample bag marked with the appropriate Bed<br />
#. Fill the sample bag to within one inch from its top and seal tightly.
5. Replace the sampling port cap.<br />
6. To take a sample from the top media sampling port, repeat steps 3 through 5 and pour the contents of<br />
probe into the appropriately marked bag.<br />
7. To take a sample from the top of the media column, unlatch the lid of the blower/motor assembly. Gently,<br />
slide the lid 3 inches to gain access to the top of the media column. Pull back the blue polyfilter media and<br />
insert the opened media sampling probe into the top of the media column. Once media has filled the<br />
device’s lower portion, close the probe and remove it from the drum.<br />
8. Pour the contents of the media sampling probe into the appropriately marked bag. Fill the sample bag to<br />
within one inch from its top and seal tightly.<br />
9. Replace the blue polyfilter media and re-latch the lid. Reconnect power supply.<br />
10. Complete the <strong>Purafil</strong> <strong>Sampling</strong> Transmittal Form and send it with your samples to Attn: <strong>Purafil</strong> Laboratory.<br />
For start-up installations, please use the form enclosed in your System Start-up Kit. Transmittal forms are<br />
also provided in your <strong>Media</strong> Life Analysis Kit, available from <strong>Purafil</strong>, Inc., or can be downloaded from<br />
<strong>Purafil</strong>’s portal. Please contact your local representative or <strong>Purafil</strong> for more information.
Tub Scrubber System<br />
Follow these instructions if your Tub Scrubber is equipped with media sampling ports on the side of the unit. If your<br />
unit does not have sampling ports, skip to Part B.<br />
Part A<br />
1. Disconnect the power supply.<br />
2. Use three media sampling bags, one per each sampling port. Using a marker, provide the information<br />
requested on the outside of each bag, including the S.O. No, Serial No., and Bed #. Please note: Bed #1 is<br />
the first bed in the direction of airflow. In a blow-through unit, for example, Bed #1 is accessible from the<br />
top sampling port. The S.O. No. and Serial No. can be found on the blue metal plate affixed to the outside of<br />
the unit.<br />
3. To take a sample from the top media sampling port, first remove the cap. Open the media sampling probe<br />
and insert the device into the unit. Once media has filled the device’s lower portion, close the probe and<br />
remove it from the unit.<br />
4. Pour the contents of the media sampling probe into the plastic sample bag marked with the appropriate Bed<br />
#. Fill the sample bag to within one inch from its top and seal tightly.
5. Replace the sampling port cap.<br />
6. Repeat steps 3 through 5 when taking samples from the middle and bottom sampling ports. Reconnect the<br />
power supply.<br />
7. Complete the <strong>Purafil</strong> <strong>Sampling</strong> Transmittal Form and send it with your samples to Attn: <strong>Purafil</strong> Laboratory.<br />
For start-up installations, please use the form enclosed in your System Start-up Kit. Transmittal forms are<br />
also provided in your <strong>Media</strong> Life Analysis Kit, available from <strong>Purafil</strong>, Inc., or can be downloaded from<br />
<strong>Purafil</strong>’s portal. Please contact your local representative or <strong>Purafil</strong> for more information.<br />
Part B<br />
1. Disconnect the power supply.<br />
2. Use three media sampling bags. Using a marker, provide the information requested on the outside of each<br />
bag, including the S.O. No, Serial No., and Bed #. Using your media probe, you will be taking samples from<br />
three locations within the Tub Scrubber — 6 inches, 18 inches, and 30 inches from the top of the unit. It<br />
may be helpful for you to mark these incremental measurements of your media probe prior to sampling.<br />
Please note: Bed #1 is the first bed in the direction of airflow. In a blow-through unit, for example, Bed #1<br />
is located 6 inches from the top of the unit. Samples should be taken from the middle of the media bed in all<br />
three locations. The S.O. No. and Serial No. can be found on the blue metal plate affixed to the outside of<br />
the unit.<br />
3. Unlatch the Tub Scrubber lid and set aside.<br />
4. To take a sample, first open your media sampling probe. Insert the probe into the unit until the open portion<br />
of the probe is approximately 6 inches from the top of the unit. Once media has filled the device’s lower<br />
portion, close the probe and remove it from the unit.
5. Pour the contents of the media sampling probe into the plastic sample bag marked with the appropriate Bed<br />
#. Fill the sample bag to within one inch from its top and seal tightly.<br />
6. Repeat steps 4 and 5 when taking samples from successive beds.<br />
7. Replace the lid and latch. Reconnect the power supply.<br />
8. Complete the <strong>Purafil</strong> <strong>Sampling</strong> Transmittal Form and send it with your samples to Attn: <strong>Purafil</strong> Laboratory.<br />
For start-up installations, please use the form enclosed in your System Start-up Kit. Transmittal forms are<br />
also provided in your <strong>Media</strong> Life Analysis Kit, available from <strong>Purafil</strong>, Inc., or can be downloaded from<br />
<strong>Purafil</strong>’s portal. Please contact your local representative or <strong>Purafil</strong> for more information.
Deep Bed Scrubber<br />
Follow these instructions.<br />
1. Disconnect the power supply.<br />
2. Use three media sampling bags per bed of your system. Using a marker, provide the information requested<br />
on the outside of each bag, including the S.O. No, Serial No., Bed # and the increment that you measured<br />
(e.g. 1”, 6” and 12”). Please note: Bed #1 is the first bed in the direction of airflow. The S.O. No. and Serial<br />
No. can be found on the blue metal plate affixed to the outside of the unit.<br />
3. To take a media sample from Bed #1, first remove the lid of the full-chute.<br />
4. Close your media sampling probe and insert the probe into the unit until the open portion of the probe<br />
reaches the middle of the media bed. Open the probe to obtain the media, then close the probe and remove<br />
it from the unit. Note: You will want to take samples of 1”, 6” and 12” increments from each bed.
5. Pour the contents of the media sampling probe into the plastic sample bag marked with the appropriate Bed<br />
#. Fill the sample bag to within one inch from its top and seal tightly.<br />
6. Replace the lid of the fill chute and latch.<br />
7. Repeat steps 3 through 6 for each incremental measure and successive media bed. PLEASE NOTE: It is<br />
important to be consistent in taking media samples from the same approximate location in each bed.<br />
8. Complete the <strong>Purafil</strong> <strong>Sampling</strong> Transmittal Form and send it with your samples to Attn: <strong>Purafil</strong> Laboratory.<br />
For start-up installations, please use the form enclosed in your System Start-up Kit. Transmittal forms are<br />
also provided in your <strong>Media</strong> Life Analysis Kit, available from <strong>Purafil</strong>, Inc., or can be downloaded from<br />
<strong>Purafil</strong>’s portal. Please contact your local representative or <strong>Purafil</strong> for more information.
Vessel Scrubber<br />
Follow these instructions if your vessel scrubber is equipped with media sampling ports on the side or top of the unit.<br />
If your unit does not have sampling ports, skip to Part B.<br />
Part A<br />
1. Disconnect the power supply.<br />
2. Use one sampling bag per each sampling port. Using a marker, provide the information requested on the<br />
outside of each bag, including the S.O. No, Serial No., Bed #. Please note: Bed #1 is the first bed in the<br />
direction of airflow. In a draw through unit, for example, Bed #1 is the top sample port nearest the incoming<br />
airflow. The S. O. No and Serial No. Can be found on the blue metal plate affixed to the outside of the unit.<br />
3. To take a sample from the top media sampling port, first remove the cap. Open the media sampling probe<br />
and insert the device into the unit. Once media has filled the device’s lower portion, close the probe and<br />
remove it from the unit.<br />
4. Pour the contents of the media sampling probe into the plastic sample bag marked with the appropriate bed<br />
#. Fill the sample bag to within one inch from its top and seal tightly.<br />
5. Replace the sampling port cap.<br />
6. Repeat steps 3 through 5 when taking samples from the middle and bottom sampling ports. Reconnect the<br />
power supply.
7. Complete the <strong>Purafil</strong> <strong>Sampling</strong> Transmittal Form and send it with your samples to Attn: <strong>Purafil</strong> Laboratory.<br />
For startup installations, please use the form enclosed in your System Start-up kit. Transmittal forms are also<br />
provided in your <strong>Media</strong> Life Analysis Kit, available from <strong>Purafil</strong>, Inc., or can be downloaded from <strong>Purafil</strong>’s<br />
portal. Please contact your local representative or <strong>Purafil</strong> for more information.<br />
Part B<br />
1. Disconnect the power supply.<br />
2. Use one sampling bag per each sampling port. Using a marker, provide the information requested on the<br />
outside of each bag, including the S.O. No, Serial No, and the Bed #. Using your media probe, you will be<br />
taking samples from at least three locations within the vessel- 6 inches, 18 inches, and 30 inches from the<br />
top of each bed. Please note: Bed #1 is the first bed in the direction of airflow. In a draw through unit, for<br />
example, Bed #1 will be considered to be 6” from the top of media bed. The S. O. No and Serial No. Can be<br />
found on the blue metal plate affixed to the outside of the unit.<br />
3. Remove the top sample ports (if available) or remove the access man-way and set aside. Insert the device<br />
into the unit approximately 6 inches from the top of the unit. Once media has filled the device’s lower<br />
portion, close the probe and remove it from the unit.
4. Pour the contents of the media sampling probe into the plastic sample bag marked with the appropriate bed<br />
#. Fill the sample bag to within one inch from its top and seal tightly.<br />
5. Replace the sampling port cap.<br />
6. Repeat steps 3 through 5 when taking samples from successive beds.<br />
7. Replace the vessel lid and reconnect the power supply.<br />
8. Complete the <strong>Purafil</strong> <strong>Sampling</strong> Transmittal Form and send it with your samples to Attn: <strong>Purafil</strong> Laboratory.<br />
For startup installations, please use the form enclosed in your System Start-up kit. Transmittal forms are also<br />
provided in your <strong>Media</strong> Life Analysis Kit, available from <strong>Purafil</strong>, Inc., or can be downloaded from <strong>Purafil</strong>’s<br />
portal. Please contact your local representative or <strong>Purafil</strong> for more information.
3.0 CERTIFICATE OF ANALYSIS<br />
After the PURAFIL ® laboratory has analyzed the sample, a Certificate of Analysis will be sent to you detailing the<br />
approximate percentage of total life consumed, and if installation and sampling dates will be given for each unit.<br />
An example of the Certificate of Analysis is shown.<br />
The projected replacement dates may be used in updating budget requirements, and as a guide in ordering<br />
replacement material; however, since contaminant load is rarely constant, avoid relying too heavily on projected<br />
replacement dates.<br />
By maintaining up-to-date records showing the life expenditures of each filter bank, media banks with the<br />
greatest percentage of life expended can be replaced before other banks which have less life expended. This<br />
allows a possible problem such as sudden contaminant breakthrough to be corrected quickly, while making the<br />
best possible use of the potential life of the remaining media.<br />
4.0 WARRANTY INFORMATION<br />
PURAFIL ® warrants hardware equipment manufactured by PURAFIL ® to be free from defects in<br />
material and workmanship under normal use and service for twelve (12) months from startup<br />
date or eighteen (18) months from shipment date. PURAFIL'S obligation under this warranty<br />
shall be limited to replacing any parts thereof which shall be demonstrated to have been<br />
defective. THIS WARRANTY IS EXPRESSLY IN LIEU OF ALL OTHER WARRANTIES, EXPRESS OR<br />
IMPLIED, INCLUDING THE WARRANTIES OF MERCHANTABILITY AND FITNESS.<br />
PURAFIL MAKES NO WARRANTIES AS TO MERCHANTABILITY OR AS TO THE FITNESS OF THE<br />
MERCHANDISE FOR ANY PARTICULAR USE AND SHALL NOT BE LIABLE FOR ANY LOSS OR<br />
DAMAGE, DIRECTLY OR INDIRECTLY, ARISING FROM THE USE OF SUCH MERCHANDISE OR FOR<br />
CONSEQUENTIAL DAMAGES. No person, firm or corporation is authorized to assume for<br />
PURAFIL ® any other liability in connection with the sale of these goods. Equipment, parts and<br />
material manufactured by others and incorporated in PURAFIL ® equipment are warranted by<br />
PURAFIL ® ONLY TO THE EXTENT OF THE ORIGINAL MANUFACTURERS LIABILITY TO PURAFIL.<br />
5.0 SPECIAL PRECAUTIONS<br />
Refer to the appropriate <strong>Purafil</strong> Material Safety Data Sheet for safety precautions regarding the <strong>Purafil</strong> media used in<br />
your system. For more information, contact <strong>Purafil</strong> directly at 770.662.8545 or email purafil@purafil.com.
<strong>Sampling</strong> Record/Schedule<br />
DATE SAMPLE<br />
TAKEN AND<br />
MAILED<br />
SAMPLED<br />
BANK/UNIT<br />
ESTIMATED<br />
EXPENDED LIFE<br />
NEXT SAMPLING<br />
DATE<br />
RECOMMENDED<br />
PROJECTED<br />
REPLACEMENT<br />
DATE<br />
START-UP<br />
DATE/OTHER<br />
Important Notice<br />
The information contained in this Bulletin reflects the results of various testing and analytical procedures believed by<br />
PURAFIL, INC. (a USA corporation) to be useful indicators of the relative performance of air filtration systems and<br />
media. It is intended for use by persons having apporpriate scientific and technical knowledge and experience, at their<br />
own risk. This Bulletin does not in any way constitute a representation, warranty, promise, or guarantee by PURAFIL,<br />
INC. of the installed performance of media manufactured by PURAFIL, INC.