VXR-9000 - The Repeater Builder's Technical Information Page
VXR-9000 - The Repeater Builder's Technical Information Page
VXR-9000 - The Repeater Builder's Technical Information Page

Create successful ePaper yourself
Turn your PDF publications into a flip-book with our unique Google optimized e-Paper software.
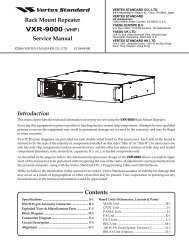
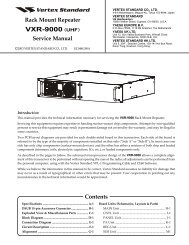
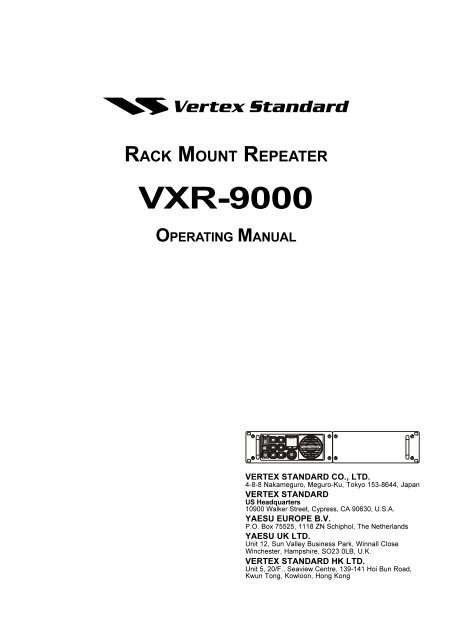
RACK MOUNT REPEATER<br />
<strong>VXR</strong>-<strong>9000</strong><br />
OPERATING MANUAL<br />
VERTEX STANDARD CO., LTD.<br />
4-8-8 Nakameguro, Meguro-Ku, Tokyo 153-8644, Japan<br />
VERTEX STANDARD<br />
US Headquarters<br />
10900 Walker Street, Cypress, CA 90630, U.S.A.<br />
YAESU EUROPE B.V.<br />
P.O. Box 75525, 1118 ZN Schiphol, <strong>The</strong> Netherlands<br />
YAESU UK LTD.<br />
Unit 12, Sun Valley Business Park, Winnall Close<br />
Winchester, Hampshire, SO23 0LB, U.K.<br />
VERTEX STANDARD HK LTD.<br />
Unit 5, 20/F., Seaview Centre, 139-141 Hoi Bun Road,<br />
Kwun Tong, Kowloon, Hong Kong<br />
<strong>VXR</strong>-<strong>9000</strong> FM REPEATER OPERATING MANUAL
INTRODUCTION<br />
<strong>The</strong> <strong>VXR</strong>-<strong>9000</strong> is commercial-grade 50-watt FM repeater designed to provide reliable two-way full-duplex communications<br />
over a wide range of environmental conditions.<br />
Designed to mount in a standard 19-inch rack, the <strong>VXR</strong>-<strong>9000</strong> is crafted using the latest computer-aided design and<br />
manufacturing processes, to ensure a high level of reliability to users. Important channel frequency data is stored in<br />
EEPROM, and is easily programmable by a Servicing Technician or Dealer using an IBM compatible personal computer<br />
and the VPL-1 Programming Cable and CE60 Software.<br />
Please take a few minutes to read this manual carefully. <strong>The</strong> information presented here will allow you to derive<br />
maximum performance from your <strong>VXR</strong>-<strong>9000</strong>. After reading it, keep this manual handy for quick reference, in case<br />
questions arise later on.<br />
Important Note: Internal service work, programming, and accessory installations should only be performed by your<br />
authorized Vertex Standard Dealer. Dangerous conditions and/or possibly illegal operation may result from improper<br />
setup, programming, or internal modifications.<br />
SAFETY/WARNING INFORMATION<br />
<strong>The</strong> antenna(s) used for this transmitter must be fixed-mounted on outdoor permanent structures with a<br />
separation distance of at least 74cm from all persons during normal operation and must not exceed an<br />
antenna gain of 0 dBd. This device must be restricted to work related operations in an Occupational/Controlled<br />
RF exposure Environment, not exceeding a maximum transmitting duty factor of 50%. <strong>The</strong> antenna(s)<br />
used with this device must satisfy the antenna co-location requirements of 47 C.F.R. 1.1307(b)(3).<br />
<br />
<br />
<br />
<br />
<br />
NOTICE!<br />
Do not modify this repeater for any reason.<br />
Refer service of this repeater to qualified technicians only.<br />
When the repeater become abnormal, such as the overheating, smoke smell of burning, etc., turn the main<br />
power switch off and disconnect the Main Power Source connector from the rear of the <strong>VXR</strong>-<strong>9000</strong> immediately.<br />
Also disconnect any backup power source you may have connected to the rear of the <strong>VXR</strong>-<strong>9000</strong>.<br />
Do not place any combustible material near the repeater.<br />
Do not spray any liquid over the repeater.<br />
Ensure that the power and antenna connections are securely made, using cables with excess capacity for<br />
the power being utilized.<br />
<strong>VXR</strong>-<strong>9000</strong> FM REPEATER OPERATING MANUAL<br />
1
FRONT PANEL CONTROLS & CONNECTORS<br />
<br />
<br />
<br />
<br />
<br />
<br />
POWER (O/I) Switch<br />
This is the main power switch for the repeater.<br />
Power Indicator (MAIN)<br />
This LED glows green when the main power source<br />
is used.<br />
Power Indicator (BACKUP)<br />
This LED glows red when the backup power source<br />
is used.<br />
MIC Jack<br />
Connect the microphone plug to this jack. This jack<br />
is also used for writing and reading channel frequency<br />
or other configurations via the COM Port of<br />
the PC on which the clone editor (CE60) is running.<br />
Programmable Function (PF) Key<br />
Six pushbuttons on the front panel are programmable<br />
function (PF) keys, each with an orange indicator<br />
inside. Each key can be programmed with<br />
two functions, one for a “long” press and one for a<br />
“momentary” press. <strong>The</strong> PF key functions may be<br />
customized, via programming by your VERTEX<br />
STANDARD dealer, to meet your communications<br />
network requirements. Note that some functions<br />
may require the purchase of optional internal accessories.<br />
<strong>The</strong> possible PF key features and functions<br />
are explained on the pages to follow.<br />
TX Indicator<br />
This LED glows red when the repeater is transmitting.<br />
Numeric Display<br />
This display consists of two 7-segment LEDs, indicating<br />
the channel number during normal operation.<br />
If an abnormal condition arises, an error code<br />
will be displayed:<br />
DISPLAY DESCRIPTION<br />
01 - 32 Channel Number<br />
PC<br />
Clone Active<br />
UL<br />
PLL Unlock<br />
HI<br />
High temperature in PA Unit<br />
SC<br />
Scan Active<br />
LC<br />
Front Panel Keys are Locked<br />
E1<br />
PTT key is Disabled<br />
E2<br />
Cooling Fan is Disabled<br />
E5<br />
Low Voltage in Backup Battery<br />
E7<br />
PA Unit Abnormality<br />
E3, E4, E6, E9 Contact your Dealer<br />
BUSY Indicator<br />
This LED glows green when the receiving channel<br />
is busy.<br />
Speaker<br />
<strong>The</strong> internal speaker is located here.<br />
VOL Knob<br />
This control knob adjusts the output level of the<br />
front speaker and external speaker jack on the back<br />
panel.<br />
2<br />
<strong>VXR</strong>-<strong>9000</strong> FM REPEATER OPERATING MANUAL
PROGRAMMABLE FUNCTION (PF) KEY DETAILS<br />
FUNCTION<br />
PF-1 KEY<br />
PRESS<br />
PRESS & HOLD<br />
PF-2 KEY<br />
PRESS<br />
PRESS & HOLD<br />
PF-3 KEY<br />
PRESS<br />
PRESS & HOLD<br />
PF-4 KEY<br />
PRESS<br />
PRESS & HOLD<br />
PF-5 KEY<br />
PRESS<br />
PRESS & HOLD<br />
PF-6 KEY<br />
PRESS<br />
PRESS & HOLD<br />
CH DOWN<br />
CH UP<br />
COMPANDER<br />
CTCSS/DCS ENC<br />
CTCSS/DCS DEC<br />
CW ID<br />
TWO TONE DEC<br />
CW ID SIGNAL<br />
CW MESSAGE 1<br />
CW MESSAGE 2<br />
CW MESSAGE 3<br />
CW MESSAGE 4<br />
CW MESSAGE 5<br />
CW MESSAGE 6<br />
CW MESSAGE 7<br />
CW MESSAGE 8<br />
DC POWER SAVE<br />
ENCRYPTION<br />
ENCRYPTION CODE<br />
KEY LOCK<br />
LOCAL PTT<br />
MONITOR<br />
MONITOR M<br />
MULTI TONE<br />
PANEL INDICATOR<br />
REMOTE<br />
REPEAT<br />
RESET<br />
SCAN<br />
SQUELCH<br />
TEST TONE<br />
TEST TONE M<br />
TOT<br />
TRANSMIT<br />
TX POWER MID<br />
TX POWER LOW<br />
CH DOWN<br />
Press (or Press and hold in for one second) the PF key<br />
assigned to “CH Down” to step to the next-lower operating<br />
channel.<br />
CH UP<br />
Press (or Press and hold in for one second) the PF key<br />
assigned to “CH Up” to step to the next-higher operating<br />
channel.<br />
COMPANDER<br />
Press (or Press and hold in for one second) the PF key<br />
assigned to “Compander” to turn the Compander circuit<br />
“On” or “Off” (toggle). This function is only activated<br />
on the “Narrow Channel Spread” of the “Base<br />
Transceiver” mode.<br />
<strong>The</strong> Compander IC contains two variable gain circuits<br />
configured for compressing and expanding the dynamic<br />
range of the repeater’s transmitted and received audio<br />
signal. When you enable this function, the signal-tonoise<br />
ratio can be improved by reducing the transmitted<br />
audio dynamic range.<br />
<strong>VXR</strong>-<strong>9000</strong> FM REPEATER OPERATING MANUAL<br />
CTCSS/DCS ENC<br />
Press (or Press and hold in for one second) the PF key<br />
assigned to “CTCSS/DCS Enc” to turn the CTCSS/DCS<br />
Encoder “On” or “Off” (toggle).<br />
CTCSS/DCS DEC<br />
Press (or Press and hold in for one second) the PF key<br />
assigned to “CTCSS/DCS Dec” to turn the CTCSS/DCS<br />
Decoder “On” or “Off” (toggle).<br />
CW ID<br />
Press (or Press and hold in for one second) the PF key<br />
assigned to “CW ID” to turn the CW Identifier feature<br />
“On” or “Off” (toggle).<br />
When the CW ID feature is set to “On,” your station’s<br />
callsign will be superimposed on the outbound signal,<br />
in Morse Code, at the beginning of every transmission.<br />
Programming of the callsign is performed by your VER-<br />
TEX STANDARD dealer.<br />
3
PROGRAMMABLE FUNCTION (PF) KEY DETAILS<br />
TWO TONE DEC<br />
Press (or Press and hold in for one second) the PF key<br />
assigned to “Two Tone Dec” to turn the 2-Tone Decoder<br />
“On” or “Off” (toggle).<br />
CW ID SINGLE<br />
Press (or Press and hold in for one second) the PF key<br />
assigned to “CW ID Single” to send the station callsign,<br />
via Morse Code, once. Programming of the callsign is<br />
performed by your VERTEX STANDARD dealer.<br />
CW MESSAGE 1 - CW MESSAGE 8<br />
Press (or press and hold in for one second) the PF key<br />
assigned to “CW Message 1 - 8” to send a pre-programmed<br />
Morse Code message on the transmitted signal.<br />
Programming of the message(s) is performed by<br />
your VERTEX STANDARD dealer.<br />
DC POWER SAVE<br />
Press (or Press and hold in for one second) the PF key<br />
assigned to “DC Power Save” to turn the DC Power<br />
Save feature “On” or “Off” (toggle).<br />
When DC Power Save feature is set to “ON,” activate<br />
the various power save feature (determined from your<br />
VERTEX STANDARD dealer) while the repeater operates<br />
from the Backup Power Source.<br />
ENCRYPTION<br />
Press (or Press and hold in for one second) the PF key<br />
assigned to “Encryption” to turn off the Optional Encryption<br />
Unit temporarily.<br />
ENCRYPTION CODE<br />
Press (or Press and hold in for one second) the PF key<br />
assigned to “Encryption Code” to select the Encryption<br />
Code (determined from your VERTEX STANDARD<br />
dealer; require the FVP-35 Rolling Code Encryption<br />
Unit).<br />
KEY LOCK<br />
Press (or Press and hold in for one second) the PF key<br />
assigned to “Key Lock” to lock the repeater’s front panel<br />
keys (except “Key Lock” key); this feature can be enabled<br />
to prevent repeater settings from being disturbed.<br />
LOCAL PTT<br />
Press (or Press and hold in for one second) the PF key<br />
assigned to “Local PTT” to enable (“On”) or disable<br />
(“Off”) operation using a PTT switch connected to the<br />
front panel’s Microphone Jack.<br />
MONITOR<br />
Press (or Press and hold in for one second) the PF key<br />
assigned to “Monitor” to cancel CTCSS and DCS squelch<br />
decoding, so as to enable reception of signals present on<br />
the channel that do not contain a matching CTCSS tone<br />
or DCS code.<br />
MONITOR M<br />
This function provides to “Monitor” to cancel CTCSS<br />
and DCS squelch decoding, so long as the PF key assigned<br />
to “Monitor M” is pressed and held in.<br />
MULTI TONE<br />
Press (or Press and hold in for one second) the PF key<br />
assigned to “Multi Tone” to switch the Tone Table between<br />
“Main” and “Sub.”<br />
PANEL INDICATOR<br />
Press (or Press and hold in for one second) the PF key<br />
assigned to “Panel Indicator” to turn the Front Panel’s<br />
Illumination “On” or “Off” (toggle).<br />
REMOTE<br />
Press (or Press and hold in for one second) the PF key<br />
assigned to “Remote” to toggle the operating mode between<br />
the “Remote” mode and “Local” mode.<br />
When the “Remote” mode is selected, the repeater operates<br />
according to the control instructions received<br />
from the external device (connected to the ACC jack on<br />
the rear panel). While in the “Local” mode, the repeater<br />
operates from the front panel’s PF keys.<br />
REPEAT<br />
Press (or Press and hold in for one second) the PF key<br />
assigned to “Repeat” to toggle the operating mode between<br />
the “<strong>Repeater</strong>” mode and “Base Transceiver”<br />
mode.<br />
For normal operation, set this key to the “Repeat” mode.<br />
When the “Base Transceiver” mode is selected, you can<br />
speak into the microphone to use this repeater as a transceiver.<br />
RESET<br />
Press (or Press and hold in for one second) the PF key<br />
assigned to “Reset” to reset (same function as the<br />
POWER switch “off” and “on”) the repeater.<br />
4<br />
<strong>VXR</strong>-<strong>9000</strong> FM REPEATER OPERATING MANUAL
PROGRAMMABLE FUNCTION (PF) KEY DETAILS<br />
SCAN<br />
Press (or Press and hold in for one second) the PF key<br />
assigned to “Scan” to start scanning. To stop scanning,<br />
press (or Press and hold in for one second) this key again.<br />
<strong>The</strong> scanning feature is used to monitor multiple channels<br />
programmed into the repeater.<br />
This function is only activated on the “Base Transceiver”<br />
mode.<br />
SQUELCH<br />
Press (or Press and hold in for one second) the PF key<br />
assigned to “Squelch” to override the Squelch action<br />
(CTCSS, DCS, and Noise Squelch), so as to hear any signal<br />
present on the operating channel.<br />
TEST TONE<br />
Press (or Press and hold in for one second) the PF key<br />
assigned to “Test Tone” to generate the Test Tone Signal,<br />
as programmed by your VERTEX STANDARD dealer.<br />
Press (or Press and hold in for one second) this key again<br />
to stop the generation of the Test Tone. This is a toggle<br />
function.<br />
Press (or Press and hold in for one second) this key while<br />
press and holding the PTT switch to transmit the Test<br />
Tone Signal, as programmed by your VERTEX STAN-<br />
DARD dealer.<br />
TEST TONE M<br />
This function provides momentary generation of the<br />
above-referenced Test Tone signal, so long as the PF key<br />
assigned to “Test Tone M” is pressed and held in.<br />
Press this key while press and holding the PTT switch<br />
to transmit the Test Tone Signal, as programmed by<br />
your VERTEX STANDARD dealer.<br />
TOT<br />
Press (or press and hold in one second) the PF key assigned<br />
to “TOT” to turn the Time-Out Timer feature<br />
“On” or “Off” (toggle).<br />
When the TOT feature is set to “On,” the repeater will<br />
return to the “Receive” mode automatically after a preset<br />
time of continuous transmission (determined via<br />
programming by your VERTEX STANDARD dealer).<br />
TRANSMIT<br />
Press (or Press and hold in for one second) the PF key<br />
assigned to “Transmit” to enable (“On”) or disable<br />
(“Off”) the transmission of the <strong>VXR</strong>-<strong>9000</strong>.<br />
TX POWER MID<br />
Press (or Press and hold in one second) the PF key assigned<br />
to “TX Power Mid”to set the transmitter power<br />
to the “Mid” level.<br />
Press (or press and hold in one second) this key again to<br />
return to the “Original” power level (determined via<br />
programming by your VERTEX STANDARD dealer).<br />
This function is ignored on the channel which is programmed<br />
to the transmitter power to the “Mid” or<br />
“Low” level by your VERTEX STANDARD dealer.<br />
TX POWER LOW<br />
Press (or Press and hold in one second) the PF key assigned<br />
to “TX Power Low”to set the transmitter power<br />
to the “Low” level.<br />
Press (or press and hold in one second) this key again to<br />
return to “Original” power level (determined via programming<br />
by your VERTEX STANDARD dealer).<br />
This function is ignored on the channel which is programmed<br />
to the transmitter power to the “Low” level<br />
by your VERTEX STANDARD dealer.<br />
<strong>VXR</strong>-<strong>9000</strong> FM REPEATER OPERATING MANUAL<br />
5
REAR PANEL CONNECTORS<br />
<br />
BACKUP BACKUP<br />
TX<br />
MAIN<br />
RX<br />
INPUT<br />
DC 13.6V<br />
EXT<br />
ACC<br />
GND<br />
<br />
<br />
<br />
Backup Power Source Terminals<br />
If available, a backup 13.6 Volt power source, such<br />
as a rechargeable battery, may be connected here.<br />
When the Battery Charge switch (located on the PA<br />
Unit) is set to “ON,” a “trickle” charge current is<br />
present here while the repeater is operating from<br />
the “Main Power Source.”<br />
Circuit Protection Fuse<br />
Two 15-Amp blade fuses, for the “Main” and<br />
“Backup” power sources, are installed here.<br />
RX Antenna Jack<br />
This BNC-type coaxial jack accepts the receiver input<br />
signal, for connection to the receiving antenna,<br />
or the “RX” jack on the duplexer. <strong>The</strong> input impedance<br />
requirement is 50 Ohms.<br />
TX Antenna Jack<br />
This N-type coaxial jack provides the transmitter<br />
output signal, for connection to the transmitting<br />
antenna, or the “TX” jack on the duplexer. <strong>The</strong> output<br />
impedance requirement is 50 Ohms.<br />
Main Power Source Connector<br />
<strong>The</strong> primary DC power source should be connected<br />
here. <strong>The</strong> power requirements are 13.6 V DC at 12<br />
Amps, continuous duty.<br />
External Speaker Jack<br />
This 3.5-mm, 2-pin jack provides variable audio<br />
output for an external speaker. <strong>The</strong> audio output<br />
impedance at this jack is 4 to 16 Ohms, and the level<br />
varies according to the setting of the front panel's<br />
VOL knob.<br />
DSUB 25-pin Accessory Connector<br />
This DB-25F connector allows the repeater to be remote-controlled<br />
by an external controller. Analog<br />
I/O signals, such as TX Audio In, Discriminator<br />
Output, RSSI, etc. are available. Moreover, the <strong>VXR</strong>-<br />
<strong>9000</strong> provides eight ports that can be programmed<br />
for various input or output signals, or for control<br />
functions. Each port may be programmed as to its<br />
function, its status (input or output), and its logic<br />
(for output ports only).<br />
6<br />
<strong>VXR</strong>-<strong>9000</strong> FM REPEATER OPERATING MANUAL
DB-25 CONNECTOR PORT<br />
<strong>The</strong> <strong>VXR</strong>-<strong>9000</strong> repeater is provided with a 25-pin DB-<br />
25F female connector for interconnections to<br />
accessories.Use a DB-25M 25-pin male connector to connect<br />
accessories to the repeater. <strong>The</strong> pins on the accessory<br />
connector are explained in detail as follows:<br />
Pin 1: GND<br />
Chassis ground for all logic levels and power supply<br />
return.<br />
Pin 2: +13.6 V<br />
[POWER SUPPLY]<br />
This pin provides 13.6 Volts, 2.0 A, DC from the repeater<br />
supply. <strong>The</strong>re is a internal 3 A fuse to prevent damage<br />
to the repeater.<br />
Pin 3: TX AF IN<br />
[ANALOG TRANSMITTER INPUT] (VOICE BAND: 300 ~ 3,000 HZ)<br />
This pin is audio input. Input impedance is 600 Ohms.<br />
This audio is injected before the splatter filter stage, so<br />
excess signal input levels are clipped.<br />
Use shielded cable to connect to this pin, and connect<br />
the shield to GND.<br />
Pin 4: TONE IN<br />
[TRANSMITTER INPUT] (SUB-AUDIBLE BAND: 5 ~ 250 HZ)<br />
This pin is sub-audiable tone input. <strong>The</strong> input impedance<br />
is 600 Ohms, and has a flat response characteristic<br />
(repeater deviation is constant for a given signal level<br />
over the frequency range of 5 ~ 250 Hz). Injecting too<br />
high a voltage here causes over-deviation of CTCSS or<br />
DCS, degrading performance.<br />
Use shielded cable to connect to this pin, connecting the<br />
shield to GND.<br />
Pin 5: TX ATT<br />
This output is intended for controlling an external coaxial<br />
switching relay. It is an open drain output which<br />
can sink approx. 1.5 A when active. <strong>The</strong> delay time<br />
which is between the repeater cause to transmit mode<br />
and this port switches to ground can be programmed<br />
by your VERTEX STANDARD dealer.<br />
Pin 6: DISC OUT<br />
[ANALOG OUTPUT] (WIDE-BAND: 0 ~ 3,000 HZ)<br />
Received signals with full system deviation produce<br />
350 mVrms audio at this pin. <strong>The</strong> output impedance is<br />
600 Ohm, and is extracted before the de-emphasis and<br />
squelch circuitry. Use shielded cable to connect to this<br />
pin, and connect the shield to GND.<br />
Pin 7: N.C.<br />
No connection.<br />
Pin 8: RSSI<br />
[ANALOG OUTPUT]<br />
A DC voltage proportional to the strength of the signal<br />
currently being received (Receiver Signal Strength Indicator)<br />
is provided on this pin. This low impedance<br />
output is generated by the receiver IF sub-system and<br />
buffered by an internal op-amp. Typical voltages are<br />
graphed as follows:<br />
(DC V)<br />
RSSI Output Voltage<br />
2.5<br />
2.0<br />
1.5<br />
1.0<br />
0.5<br />
0<br />
–60 –70 –80 –90 –100 –110 –120 (dBm)<br />
Input Signal Level<br />
Pin 9: COAX. SW<br />
[LOGIC OUTPUT (ACTIVE LOW)]<br />
This output is intended for controlling an external coaxial<br />
switching relay. It is an open drain output which<br />
can sink approx. 1.5 A when active. This signal only<br />
switches if the repeater has been programmed for “SIM-<br />
PLEX” mode. If programmed for “DUPLEX,” the signal<br />
remains open (high impedance) at all time.<br />
DB-25 PIN NUMBERING<br />
<strong>VXR</strong>-<strong>9000</strong> FM REPEATER OPERATING MANUAL<br />
7
DB-25 CONNECTOR PORT<br />
Pin 10, 13, 15, 16, 17, 18, 19, 21:<br />
PROGRAMMABLE I/O “0” ~ ”7”<br />
<strong>The</strong> <strong>VXR</strong>-<strong>9000</strong> provides eight ports (PIO)<br />
that can be programmed for various<br />
input or output signals, or for control<br />
functions. Each port may be programmed<br />
as to its function, its status<br />
(input or output), and its logic (for output<br />
ports only).<br />
Pin<br />
10 6<br />
13 7<br />
15 4<br />
16 3<br />
17 2<br />
18 1<br />
19 0<br />
21 5<br />
I/O Port<br />
Pin 11: NSQ DET<br />
This is an open-collector, active-low output capable of<br />
sinking about 10 mA. It indicates that the receiver<br />
squelch is open. If the squelch control is properly set,<br />
this indicates a carrier on the receiver channel.<br />
Pin 12: EXT PTT<br />
This input is internally pulled up to 5 VDC. When pulled<br />
low by an external device, it keys the repeater transmitter<br />
while the repeater is operating in the “Remote”<br />
mode. Avoid voltage in excess of 5 V on this pin, or<br />
internal damage to the microprocessor on the repeater<br />
CNTL Unit may result.<br />
Pin 14, 20: GND<br />
Chassis ground for all logic levels and power supply<br />
return.<br />
Pin 23: RXD HIGH<br />
[DIGITAL OUTPUT FOR DATA COMMUNICATIONS]<br />
(Max.: 5 kHz)<br />
This pin is an output for high speed receiving data signals<br />
(typically 9600 bps), with the data being extracted<br />
immediately after the discriminator (prior to any deemphasis).<br />
Pin 24: TXD LOW<br />
[ANALOG INPUT FOR DATA COMMUNICATIONS]<br />
(300 ~ 3,000 Hz)<br />
This pin is intended to be used as a low speed data<br />
signal input to the repeater (typically 1200 bps). This<br />
digital data signal is injected before the transmitter preemphasis<br />
and limiting stages, so excess signal input<br />
levels are clipped.<br />
Pin 25: TXD HIGH<br />
[DIGITAL INPUT FOR THE DATA COMMUNICATIONS]<br />
(0 ~ 5 kHz)<br />
This pin is intended to be used as a high speed digital<br />
data signal input to the repeater (typically 9600 bps).<br />
This digital data signal is injected after the transmitter<br />
splatter filter stage.<br />
Pin 22: RXD LOW<br />
[ANALOG OUTPUT FOR DATA COMMUNICATIONS]<br />
(300 ~ 3,000 Hz)<br />
This pin is an output for low speed receiving data signals<br />
(typically 1200 bps), with the data being extracted<br />
after the de-emphasis and low pass filter stages.<br />
8<br />
<strong>VXR</strong>-<strong>9000</strong> FM REPEATER OPERATING MANUAL
INSTALLATION<br />
Antenna Considerations<br />
<strong>Repeater</strong> operation requires two antennas, one for receiving<br />
and one for transmitting, so that the receiving<br />
antenna does not absorb energy from the transmitting<br />
antenna. <strong>The</strong>re are a number of ways to do this, depending<br />
on the TX/RX frequency separation, and on the<br />
locations available for antenna mounting.<br />
Regardless of the above choice, it is of paramount importance<br />
that the antenna(s) be mounted as high and in<br />
the clear as possible, preferably within line-of-sight to<br />
all repeater users. Furthermore, losses in the feedline(s)<br />
must be minimized, so the feedline(s) should be high<br />
quality, and as short as possible. If a long feedline is<br />
necessary, use coaxial “hardline” cable to reduce losses.<br />
<strong>Repeater</strong> antennas should have an impedance of 50 Ω<br />
at the operating frequency. When separate receive and<br />
transmit antennas are used, high-Q narrow-band types<br />
may serve to minimize interaction.<br />
Equipment Location<br />
<strong>The</strong> <strong>VXR</strong>-<strong>9000</strong> must be installed in a 19-inch Mounting<br />
Rack, which will allow for free air flow around the heat<br />
sink on the rear apron at all times. In warm climates,<br />
the repeater should not be sealed in a small, closed room<br />
without air conditioning.<br />
While the operating temperature range of the <strong>VXR</strong>-<strong>9000</strong><br />
is quite broad, the best location is one in which the air<br />
temperature does not approach the extremes of the<br />
specified range, and one that does not change rapidly.<br />
Protect the <strong>VXR</strong>-<strong>9000</strong> (Mounting Rack) from wind and<br />
rain, and extremes in temperature or humidity that<br />
may shorten the useful life of the equipment. Try to locate<br />
the <strong>VXR</strong>-<strong>9000</strong> (Mounting Rack) in an environment<br />
that is also comfortable for service personnel, if possible.<br />
NEVER TRANSMIT WITHOUT HAVING A<br />
TRANSMIT ANTENNA CONNECTED TO THE<br />
TX ANTENNA JACK OF THE REPEATER.<br />
<strong>VXR</strong>-<strong>9000</strong> FM REPEATER OPERATING MANUAL<br />
9
INSTALLATION<br />
Power Supply<br />
Operation of the <strong>VXR</strong>-<strong>9000</strong> requires a power source capable<br />
of providing at least 12 Amps continuously at<br />
13.6 Volts DC. <strong>The</strong> FP-1023 (23 A) and FP-1030A (30 A)<br />
AC Power Supplies are available from your Vertex Standard<br />
dealer to satisfy these requirements. Other wellregulated<br />
power supplies may be used, as well, if they<br />
meet the above voltage and current specifications.<br />
Use the DC power cable supplied with your repeater<br />
for making power connections to the power supply.<br />
Connect the RED power cable lead to the POSITIVE (+)<br />
power supply terminal, and connect the BLACK power<br />
cable lead to the NEGATIVE (–) power supply terminal.<br />
Backup Power Supply<br />
For uninterrupted operation during power failures, a<br />
12-volt rechargeable type battery (55-Ah or more recommended)<br />
may be connected to the BACKUP terminal<br />
posts on the rear panel. While the repeater is operating<br />
from the Main Power Source a slight charging<br />
current will maintain battery charge. In the event of an<br />
unexpected interruption of the Main Power Source, the<br />
automatic power control circuit will automatically<br />
switch the repeater to the backup battery, and operation<br />
will not be interrupted.<br />
After prolonged operation from the battery, (Backup<br />
Power Source), it should be disconnected from the repeater<br />
and recharged separately before re-connecting,<br />
as the trickle charge is not sufficient for recharging a<br />
completely discharged battery.<br />
To RX Antenna<br />
To TX Antenna<br />
Never reapply the Main Power Source to the repeater<br />
with a discharged battery connected as backup, as the<br />
DC startup current can damage the repeater and battery.<br />
While operating from a backup battery, the repeater<br />
requires approximately 7 amperes at 12 Volts during<br />
transmit.<br />
Never short the “Backup Power Sorce” Terminals,<br />
when the Battery Charge switch (located on the PA<br />
Unit) is set to “ON.”<br />
BACKUP BACKUP<br />
TX<br />
MAIN<br />
RX<br />
INPUT<br />
DC 13.6V<br />
EXT<br />
ACC<br />
GND<br />
RED<br />
BLACK<br />
RED<br />
BLACK<br />
Supplied DC Power Code<br />
Backup Battery<br />
(12 V, 55 Ah)<br />
TYPICALLY SETUP<br />
10<br />
<strong>VXR</strong>-<strong>9000</strong> FM REPEATER OPERATING MANUAL
ACCESSORIS & OPTION<br />
Supplied Accessories<br />
DC Power Cord (T9023499) ............................................ 1<br />
15-A Blade Fuse (Q0000075) ........................................... 1<br />
Knob Cap (RA0506900) ................................................... 1<br />
Operating Manual ........................................................... 1<br />
Optional Accessories<br />
FIF-9 Inline Interface Box<br />
FVP-25 Encryption Unit<br />
FVP-35 Rolling Code Encryption Unit<br />
MD-11A8J Desktop Microphone<br />
MH-27A8J Hand Microphone<br />
<strong>VXR</strong>-<strong>9000</strong> FM REPEATER OPERATING MANUAL<br />
11
SPECIFICATIONS<br />
General<br />
Frequency Range:<br />
Type A : 400 - 430 MHz, Type D : 450 - 490 MHz, Type F : 480 - 512 MHz<br />
Number of channel: 32<br />
Channel Spacing:<br />
5 kHz/6.25 kHz<br />
Operating Voltage: 13.6V DC ±10 %<br />
Current Drain:<br />
12A Maximum<br />
Duty Cycle: Receive : 100 %<br />
Transmit : 100 % (@25 W output)<br />
Frequency Stability:<br />
1.5 ppm<br />
1.0 ppm (30min after wake up)<br />
Operating Temperature Range: –22 °F to +140 °F (–30 °C to +60 °C)<br />
Dimensions (W x H x D):<br />
19 x 3-1/2 x 13-1/2 inch (483 x 88 x 343 mm)<br />
Weight (Approx.):<br />
21.4 lbs. (9.7 kg)<br />
Receiver<br />
Antenna Impedance:<br />
50 ohm<br />
Antenna Connector:<br />
Type-BNC<br />
Receiver Type:<br />
Double-Conversion Superheterodyne<br />
Sensitivity:<br />
0.35 µV (12dB SINAD), 0.45 µV (20dB Noise Quieting)<br />
Selectivity:<br />
83 dB (Wide), 75 dB (Narrow)<br />
Intermodulation:<br />
82 dB (Wide), 78 dB (Narrow)<br />
Image Rejection:<br />
90 dB<br />
Squelch Threshold:<br />
–5 dBµ<br />
Audio Output:<br />
4 W @4 ohm<br />
Audio Distortion: < 3 %<br />
Hum and Noise:<br />
> 50 dB (Wide), > 45 dB (Narrow)<br />
Audio Frequency Response: De-emphasis : 6 dB/oct (From 300 Hz to 3 kHz)<br />
Conducted Spurious:<br />
< –80 dBm<br />
Transmitter<br />
RF Output Power:<br />
Antenna Impedance:<br />
Antenna Connector:<br />
Modulation Type:<br />
System Deviation:<br />
Hum and Noise:<br />
Microphone Sensitivity:<br />
Audio Frequency Response:<br />
Spurious Emission:<br />
Audio Distortion:<br />
Microphone Impedance:<br />
50/25/10 W (High/Mid/Low)<br />
50 ohm<br />
Type-N<br />
16K0F3E/11K0F3E<br />
±5.0 kHz (Wide), ±2.5 kHz (Narrow)<br />
> 46 dB (Wide), > 43 dB (Narrow)<br />
5 mV<br />
Pre-emphasis : 6dB/oct (From 300 Hz to 3 kHz)<br />
70dB below carrier<br />
3.0 % @1 kHz<br />
600 ohm<br />
Specifications subject to change without notice or obligation.<br />
12<br />
<strong>VXR</strong>-<strong>9000</strong> FM REPEATER OPERATING MANUAL
Part 15.21: Changes or modifications to this device not expressly approved<br />
by Vertex Standard could void the user’s authorization to operate<br />
this device.<br />
<strong>VXR</strong>-<strong>9000</strong> FM REPEATER OPERATING MANUAL
Copyright 2004<br />
VERTEX STANDARD CO., LTD.<br />
All rights reserved.<br />
0311J-0E<br />
No portion of this manual may be<br />
reproduced without the permission of<br />
VERTEX STANDARD CO., LTD.<br />
Printed in Japan<br />
E C 0 4 4 U 1 0 0<br />
<strong>VXR</strong>-<strong>9000</strong> FM REPEATER OPERATING MANUAL