

AT-GS950/xxPS PoE Series Installation Guide Rev B - Allied Telesis
AT-GS950/xxPS PoE Series Installation Guide Rev B - Allied Telesis
AT-GS950/xxPS PoE Series Installation Guide Rev B - Allied Telesis

Create successful ePaper yourself
Turn your PDF publications into a flip-book with our unique Google optimized e-Paper software.
<strong>AT</strong>-<strong>GS950</strong>/10PS, <strong>AT</strong>-<strong>GS950</strong>/16PS, and <strong>AT</strong>-<strong>GS950</strong>/48PS Switches <strong>Installation</strong> <strong>Guide</strong><br />
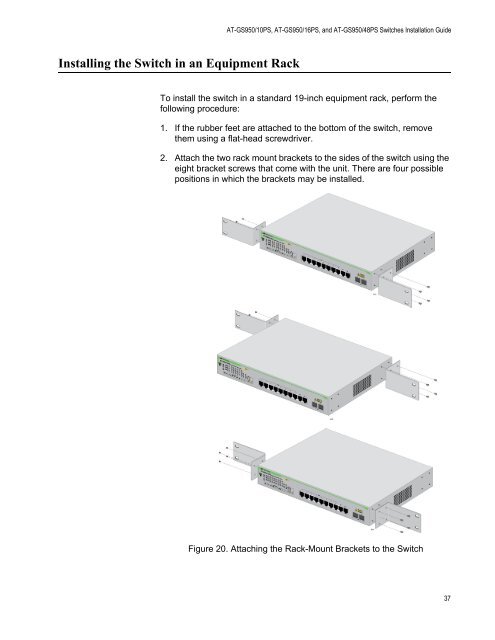
Installing the Switch in an Equipment Rack<br />
To install the switch in a standard 19-inch equipment rack, perform the<br />
following procedure:<br />
1. If the rubber feet are attached to the bottom of the switch, remove<br />
them using a flat-head screwdriver.<br />
2. Attach the two rack mount brackets to the sides of the switch using the<br />
eight bracket screws that come with the unit. There are four possible<br />
positions in which the brackets may be installed.<br />
Figure 20. Attaching the Rack-Mount Brackets to the Switch<br />
37

![AT-8100L/8POE-E [Rev B] - Allied Telesis](https://img.yumpu.com/25714603/1/190x245/at-8100l-8poe-e-rev-b-allied-telesis.jpg?quality=85)


