INSTALLATION INSTRUCTIONS - RIVA Racing
INSTALLATION INSTRUCTIONS - RIVA Racing
INSTALLATION INSTRUCTIONS - RIVA Racing

Create successful ePaper yourself
Turn your PDF publications into a flip-book with our unique Google optimized e-Paper software.
Sea•Doo Heavy-duty Supercharger Clutch Washers<br />
PART# - RS1751-HDW-945, -946 & -948<br />
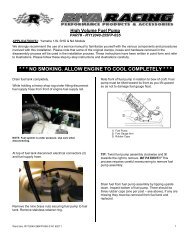
APPLICATION(S): 255hp RXP-X/RXT-X & 215hp RXP/RXT/GTX-SC<br />
Required tools<br />
Part#<br />
Torx Screw Adapter 529 035 938<br />
Impeller Shaft Holder<br />
RS1750-HDW-949<br />
Recommended tools<br />
Part#<br />
Oetiker Pliers C-48550347<br />
Service Manual<br />
Please call<br />
- <strong>INSTALLATION</strong> <strong>INSTRUCTIONS</strong> -<br />
1. Remove D.E.S.S. lanyard.<br />
2. Remove seat bridge (RXT-X, RXT & GTX models) or engine compartment cowling (RXP-X & RXP models).<br />
3. Remove inlet and outlet hoses attached to supercharger unit.<br />
4. Remove exhaust pipe from exhaust manifold. Disconnect muffler restraining strap and slide muffler rearward.<br />
5. Remove the three M6 x 35mm Torx bolts (2 lower/front & 1 upper/rear) that secure supercharger unit to engine.<br />
(see illustration #’s 1&2) NOTE: You will need a special Torx adapter to remove and replace the upper/rear Torx<br />
bolt. This can be purchased though our parts department, at any Sea•Doo Dealer or reputable tool company.<br />
6. Remove supercharger unit from engine. NOTE: It is extremely important that the area utilized to work on the<br />
supercharger unit is very clean. Any foreign debris introduced into the supercharger unit will cause damage.<br />
7. Secure impeller shaft at rear of supercharger unit using Sea•Doo shaft holding tool. Remove impeller shaft nut and<br />
set aside. (see illustration #3)<br />
8. Remove supercharger shaft components and place on a clean surface in order they are removed. NOTE: BRP<br />
recommends that you replace the Supercharger clutch/shaft assembly (to `08 spec). Order part# 420881100.<br />
9. Discard OEM clutch washers. (see illustration #4)<br />
10. Thoroughly clean engine side of supercharger impeller shaft and impeller shaft components using a non-residual<br />
cleaner only. Coat supercharger components to be installed with BRP 4-stroke XPS oil. NOTE: Use only BRP 4-<br />
stroke XPS oil in your supercharged engine.<br />
11. Install <strong>RIVA</strong> HD Clutch Washers:<br />
2008 Models: Install one supplied washer onto supercharger impeller shaft. (see illustration #4) Wrap new needle<br />
bearings around impeller shaft and remove adhesive backing. Install supercharger gear over needle bearings. Install<br />
second supplied washer onto impeller shaft.<br />
2007 & older Models that have not updated to `08 spec shaft: Install supplied ‘L’ washer onto supercharger<br />
impeller shaft. (see illustration #4) Wrap new needle bearings around impeller shaft and remove adhesive backing.<br />
Install supercharger gear over needle bearings. Install supplied ‘S’ washer onto impeller shaft.<br />
12. Install lock washer, spring washers, L-ring and impeller shaft nut. (see illustration #’s 4&5) NOTE: Apply RED Loc-<br />
Tite to threads on shaft. Torque nut to 22 ft•lbs / 30 N•m.<br />
13. Spin supercharger impeller to ensure smooth operation.<br />
14. Inspect o-rings on engine side of supercharger housing. If either is damaged replace both.<br />
15. Coat unpainted area on engine side of supercharger unit with anti-seize. (see illustration #6)<br />
16. Install supercharger unit onto engine. NOTE: It may be necessary to rotate supercharger impeller to allow<br />
supercharger gear to mesh with flywheel gear.<br />
17. Secure supercharger unit to engine using the three M6 x 35mm Torx bolts removed in step 5. NOTE: Use BLUE<br />
Loc-Tite. Torque to 89 lbf•in / 10 N•m.<br />
Word doc. RS1751-HDW-948 © H1 4/23/10 1
18. Replace supercharger inlet and outlet hoses.<br />
19. Replace exhaust hoses removed in step 4.<br />
20. Installation is now complete! Run craft on flush kit to check for leaks and to ensure smooth operation of<br />
supercharger.<br />
Remember, the water belongs to everyone. Please ride responsibly!<br />
Technical Support<br />
For answers to questions regarding installation or trouble shooting <strong>RIVA</strong> Performance Products contact:<br />
<strong>RIVA</strong> Technical Support directly at (954) 247-0705 or by e-mail at tech_support@rivamotorsports.com<br />
Limited Warranty<br />
<strong>RIVA</strong> Heavy-duty Clutch Washers carry a 90-day limited warranty to the original purchaser. They are warranted to be free of defects in materials and<br />
workmanship under normal use and service. Customer modified components will be void of warranty. This warranty is limited to defects in the primary<br />
components only. Finish and/or wear marks in or on primary components are not covered under this warranty.<br />
<strong>RIVA</strong> <strong>Racing</strong>’s liability is expressly limited to the repair or replacement of the components contained within or associated with this kit. <strong>RIVA</strong> <strong>Racing</strong><br />
agrees to repair or at <strong>RIVA</strong>’s option, replace any defective unit without charge, if product is returned to <strong>RIVA</strong> <strong>Racing</strong> freight prepaid within the warranty<br />
period. Any equipment returned which, in <strong>RIVA</strong>’s opinion, has been subjected to misuse, abuse, overheating or accident shall not be covered by this<br />
warranty.<br />
<strong>RIVA</strong> <strong>Racing</strong> shall have no liability for special, incidental or consequential damages or injury to persons or property from any cause arising from the<br />
sale, installation or use of this product.<br />
No other warranty, express or implied, including, but not limited to the implied warranties of merchantability and fitness for a particular purpose, applies.<br />
Various states do not allow for the limitation of incidental or consequential damages and therefore the above exclusion or limitation may not apply to<br />
you.<br />
Warranty does not include the expenses related to freight or transportation of parts or compensation for any inconvenience or loss of use while being<br />
repaired. A copy of the original invoice must accompany all warranty claims.<br />
Warranted replacement parts will be returned freight collect.<br />
- <strong>INSTALLATION</strong> IMAGES -<br />
2<br />
Illustration #1 Illustration #2<br />
Word doc. RS1751-HDW-948 © H1 4/23/10 2
Impeller<br />
Shaft Holder<br />
Impeller Shaft Nut<br />
1- Impeller Shaft Nut<br />
2- L-ring<br />
3- Spring Washers<br />
4- Lock Washer<br />
5- Clutch Washer<br />
(`07 & older – ‘S’)<br />
6- Supercharger Gear<br />
7- Needle Bearings (40)<br />
8- Large ID Clutch Washer<br />
(`07 & older – ‘L’)<br />
Illustration #3 Illustration #4<br />
Spring Washer Order<br />
Apply anti-seize here<br />
Illustration #5 Illustration #6<br />
Word doc. RS1751-HDW-948 © H1 4/23/10 3