DD35A Diesel Locomotive - Lionel
DD35A Diesel Locomotive - Lionel
DD35A Diesel Locomotive - Lionel

You also want an ePaper? Increase the reach of your titles
YUMPU automatically turns print PDFs into web optimized ePapers that Google loves.
72-8311-250<br />
10/11<br />
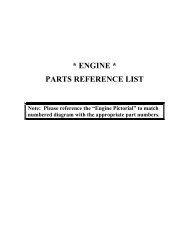
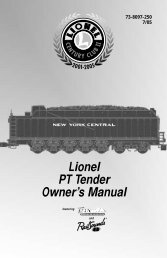
<strong>Lionel</strong><br />
<strong>DD35A</strong> <strong>Diesel</strong> <strong>Locomotive</strong><br />
Owner’s Manual<br />
Featuring
Congratulations!<br />
Congratulations on your purchase of this <strong>Lionel</strong> LEGACY <strong>DD35A</strong> diesel locomotive! On the outside,<br />
this locomotive features numerous details and expert decoration in your favorite livery.<br />
Inside the body, this locomotive is equipped with some of the most advanced sounds and controls in<br />
model railroading. This powerful locomotive is ready for duty on your layout.<br />
Contents of your locomotive box<br />
1 Powered locomotive<br />
2 Replacement traction tires<br />
1 Owner's manual<br />
1 Engine memory module<br />
The following <strong>Lionel</strong> marks are used throughout this Owner's Manual and are protected under law. All<br />
rights reserved.<br />
<strong>Lionel</strong>®, LEGACY, FasTrack, TrainMaster®, Odyssey®, RailSounds®, CrewTalk, TowerCom,<br />
DynaChuff, StationSounds, Pullmor®, ElectroCoupler, Magne-Traction®, CAB-1® Remote<br />
Controller, American Flyer®, <strong>Lionel</strong> ZW®, ZW®, MagniVision®, TMCC®, <strong>Lionel</strong>ville®, Wireless<br />
Tether, Powerhouse, LionMaster®, Conventional Classics, Postwar Celebration Series,<br />
TruRail, PH-1 Powerhouse®, Powermaster®, Powerstation-Powerhouse®, Accessory Motor<br />
Controller, AMC, Accessory Switch Controller, ASC, Action Recorder Controller, ARC,<br />
Track Power Controller 300, TPC 300, Track Power Controller 400, TPC 400, Block Power<br />
Controller, BPC, Operating Track Controller, OTC, FatBoy, <strong>Lionel</strong> Lines®, Joshua <strong>Lionel</strong><br />
Cowen Series, Lockon®, TrainSounds, MultiHorn, MultiHorn, Choo-Choo<br />
2<br />
2
Table of contents<br />
Running your locomotive<br />
LEGACY Control operations 4<br />
TrainMaster Command Control (TMCC/Command) operations 5<br />
Conventional transformer operations 6<br />
<strong>Locomotive</strong> basics<br />
Adding smoke fluid to your locomotive's smoke generators 7<br />
<strong>Locomotive</strong> switch locations 8<br />
Installing the battery 9<br />
Assigning your locomotive a new ID# (LEGACY and TMCC) 10<br />
Lash-ups (for LEGACY operations only) 11<br />
LEGACY Control System operations<br />
The LEGACY CAB-2 Remote Controller 12<br />
The Velocity Throttle 13<br />
The Multi-Controller 13<br />
The Train Brake Slider 13<br />
The Warning Sound Controller 14<br />
The Speed Bar 14<br />
EFX Trim and EFX Bar Graph 15<br />
Leaving the Preset Speed Screen 15<br />
LEGACY RailSounds Sound System operations<br />
LEGACY RailSounds sound system 16<br />
LEGACY RailSounds Sequence Control 17<br />
CrewTalk dialog and TowerCom announcements in the LEGACY environment 18<br />
LEGACY RailSounds sound system dialog on a round trip 19<br />
TrainMaster Command Control operations<br />
CAB-1 Remote Controller commands 20<br />
CAB-1 Remote Controller numeric keypad commands 21-22<br />
Setting the smoke level 22<br />
Conventional transformer operations<br />
Using the LEGACY RailSounds sound system in the conventional environment 23<br />
Activating CrewTalk dialog and TowerCom announcements 24<br />
Locking your locomotive into a single direction 25<br />
Odyssey II Speed Control system operations<br />
Odyssey II Speed Control operations 26<br />
Odyssey II Speed Control LEGACY Control operation 26<br />
Odyssey II Speed Control TrainMaster Command Control operation 26<br />
Odyssey II Speed Control conventional transformer operation 26<br />
Maintaining and servicing your locomotive<br />
Reprogramming your locomotive to restore features 27<br />
Lubricating your locomotive 28<br />
Servicing your locomotive’s lamps 29<br />
Replacing the traction tires 29<br />
<strong>Locomotive</strong> diagnostics 30<br />
Notes 31<br />
<strong>Lionel</strong> Warranty 32<br />
3
Running your locomotive<br />
Note!<br />
Note!<br />
Power your locomotive with an alternating-current (50-60Hz AC) transformer only.<br />
Powering your locomotive with a direct-current (DC) transformer, or in excess of<br />
19 volts AC, may result in damage to sensitive electronic components.<br />
Your locomotive requires <strong>Lionel</strong> or <strong>Lionel</strong>-compatible O-54 or larger track curves.<br />
LEGACY Control operations<br />
For the finest operating experience, your locomotive is fully compatible with the LEGACY Control<br />
System. To operate in LEGACY mode, you need a LEGACY Command Base and LEGACY CAB-2<br />
Remote Controller (6-14295).<br />
Your commands are sent by the CAB-2 Remote Controller to the Command Base, which sends<br />
a digital code through the rails to your locomotive. Your locomotive will not respond until it<br />
recognizes its unique ID#, so you can operate multiple Command-equipped locomotives on the<br />
same track at the same time.<br />
1. Turn off track power, and then plug in the<br />
LEGACY Base and connect it to the track.<br />
2. Place your locomotive on the track.<br />
3. Increase track power voltage to full power<br />
(no more than 19 volts AC). If a circuit breaker<br />
trips when you turn on the <strong>Lionel</strong> power supply, check<br />
the wheels of your locomotive to make sure they are all<br />
securely on the track. Check to make sure the track is free<br />
of all metals that may cause a short circuit.<br />
4. As illustrated in Figure 1, press ENG and 1<br />
(or your selected ENG ID#) to address the<br />
locomotive with your LEGACY CAB-2 Remote<br />
Controller.<br />
5. Press the Start Up button on your LEGACY<br />
CAB-2 Remote, shown in Figure 2. Then,<br />
throttle up and move 'em out! Your engine sound<br />
will start up, and the locomotive-specific touch screen<br />
buttons will populate the remote. For more information<br />
on operating your locomotive with the LEGACY system,<br />
please refer to the LEGACY section of this manual.<br />
Additional information is also found in the LEGACY<br />
System Manual, available online at www.lionel.com.<br />
.<br />
Figure 1. LEGACY engine selection<br />
Figure 2. LEGACY start-up<br />
4
Running your locomotive<br />
Note!<br />
Note!<br />
Power your locomotive with an alternating-current (50-60Hz AC) transformer only.<br />
Powering your locomotive with a direct-current (DC) transformer, or in excess of<br />
19 volts AC, may result in damage to sensitive electronic components.<br />
Your locomotive requires <strong>Lionel</strong> or <strong>Lionel</strong>-compatible O-54 or larger track curves.<br />
TrainMaster Command Control (TMCC) operations<br />
For operation in the TrainMaster Command Control environment, you need a TrainMaster<br />
Command Base (6-12911) and a CAB-1 Remote Controller (6-12868). Refer to your TMCC<br />
System Manual for complete information. To access all the locomotive's features, you<br />
must operate in the LEGACY environment, as discussed on the previous page.<br />
Your commands are sent by the CAB-1 Remote Controller to the Command Base, which<br />
translates the command into digital code. That code is sent through the outside rails to your<br />
locomotive, which will not respond until it recognizes its unique ID#. TrainMaster Command<br />
Control gives you the power to operate multiple Command-equipped locomotives on the same track<br />
at the same time.<br />
1. Turn off track power, and then plug in the Command Base and connect it to the<br />
track.<br />
2. Place your locomotive on the track.<br />
3. Increase track voltage to full power (no more than 19 volts AC). If a circuit<br />
breaker trips when you turn on the <strong>Lionel</strong> power supply, check the wheels of your locomotive to<br />
make sure they are all securely on the track. Check to make sure the track is free of all metals<br />
that may cause a short circuit.<br />
4. Press ENG and 1 (or the ENG ID# you set) to address your locomotive with<br />
your CAB-1 Remote Controller.<br />
5. Throttle up and move ‘em out.<br />
For more information, please refer to the TrainMaster Command Control operations section of<br />
this manual or the TMCC System Manual, available online at www.lionel.com.<br />
5
Running your locomotive<br />
Conventional transformer operations<br />
Note!<br />
Note!<br />
Note!<br />
For Conventional operation, a Command Base must not be powered up anywhere in<br />
the area, even if it is not connected to the track. If a base is detected, your<br />
locomotive will default to Command mode.<br />
Power your locomotive with an alternating-current (50-60Hz AC) transformer only.<br />
Powering your locomotive with a direct-current (DC) transformer, or in excess of<br />
19 volts AC, may result in damage to sensitive electronic components.<br />
Your locomotive requires <strong>Lionel</strong> or <strong>Lionel</strong>-compatible O-54 or larger track curves.<br />
1. With track power off, place your locomotive on the track.<br />
2. Power up the track (8-18 volts AC) Starting voltage will vary based on the<br />
locomotive's load. If a circuit breaker trips when you turn on the <strong>Lionel</strong> power supply, check<br />
the wheels of your locomotive to make sure they are all securely on the track. Check to make<br />
sure the track is free of all metals that may cause a short circuit.<br />
3. Move ‘em out! When the locomotive’s headlight illuminates and the LEGACY RailSounds<br />
sound system starts, press the DIRECTION button on your transformer to sequence your<br />
locomotive through the repeating pattern of operations: neutral, forward, neutral, reverse,<br />
neutral, and so on. You may also briefly turn off track power to advance the locomotive to the<br />
next operating state. Adjust the throttle until your locomotive moves at your desired speed.<br />
Note!<br />
When placing your locomotive on your layout for the first time and after power<br />
interruptions lasting longer than five seconds, it will start out in neutral.<br />
We recommend that you operate your LEGACY locomotive with Odyssey II<br />
Speed Control turned on. You may choose to operate your locomotive without speed control<br />
by placing the Odyssey II Speed Control System switch to the NO ODY position. See Figure 4 on page<br />
8 for the location of the switch.<br />
Use the HORN and BELL buttons on your transformer to activate those features. Adjust the<br />
volume using the volume control knob. Refer to Figure 4 on page 8 for the location of this control.<br />
For more information, please refer to the Conventional transformer operations section of this<br />
manual.<br />
6
<strong>Locomotive</strong> basics<br />
Adding smoke fluid to your locomotive’s smoke generators<br />
Your locomotive is equipped with two smoke generators that produce safe, clean, white smoke<br />
during operation. Add 10-20 drops to each stack (shown in Figure 3) to prime the unit the first<br />
time you run the locomotive or after being stored for an extended period of time, and then add 10<br />
to 20 drops to refill when smoke production decreases. When refilling, DO NOT EXCEED 20 DROPS<br />
as this can cause your smoke units to become oversaturated allowing leakage onto the electronics.<br />
Note that operating your locomotive's smoke units without smoke fluid will cause damage to the<br />
heating elements.<br />
If you prefer to operate your locomotive without smoke, locate the smoke unit switches and slide<br />
them to the NO SMK position. Refer to Figure 4 on page 8 for the location of the switches. Note that<br />
the smoke units are controlled independently so that you can run the locomotive with only one<br />
smoke unit in operation.<br />
Note!<br />
For best performance, we recommend using <strong>Lionel</strong> smoke fluid only. Do NOT use<br />
smoke fluid from ready-to-run train sets.<br />
Add fluid to either<br />
exhaust stack.<br />
FRONT<br />
Figure 3. Smoke fluid locations<br />
REAR<br />
7
<strong>Locomotive</strong> basics<br />
<strong>Locomotive</strong> switch locations<br />
The functions of your locomotive's switches are outlined below. Refer to Figure 4 for the location<br />
of the switches. The instructions below are specific to this particular locomotive;<br />
note that available features (and switches) may differ from other locomotives<br />
and locomotive sets.<br />
Smoke Unit Switches (F/SMK - NO SMK, R/SMK - NO SMK))<br />
Used to turn the smoke unit function on and off.<br />
Program-Run Switch (RUN/PGM)<br />
Used to assign an ID# and to reprogram the locomotive for LEGACY and Command operation<br />
when the switch is in the PGM position. Also used to “lock” your powered locomotive in a single<br />
direction, or neutral, in conventional operation when the switch is placed in the PGM position.<br />
Odyssey II Speed Control System Switch (ODY)<br />
Used to turn the Odyssey II Speed Control System on and off.<br />
Remove front<br />
hatch for access<br />
to switches<br />
Odyssey II<br />
On/Off switch<br />
Smoke unit<br />
On/Off<br />
switches<br />
Command reverse unit<br />
(PGM/RUN) switch<br />
Figure 4. <strong>Locomotive</strong> switch locations<br />
8
<strong>Locomotive</strong> basics<br />
Installing the battery<br />
Although the LEGACY RailSounds sound system is powered through the track, you may choose<br />
to install a nine-volt alkaline battery if you find that the sound system shuts down during<br />
track power interruptions (for example, over a dirty section of track). Follow these steps to install<br />
the battery.<br />
Note!<br />
If the RailSounds sound system turns off during interruptions in track power, you may<br />
need to replace the battery. Use only alkaline batteries.<br />
1. Lift up and remove the rear radiator hatch from the roof of the locomotive.<br />
2. Remove the protective cover from the battery harness.<br />
3. Snap the battery harness onto the nine-volt alkaline battery’s terminals.<br />
4. Slide the battery into the battery holder.<br />
5. Replace the hatch on the locomotive's roof.<br />
Remove rear radiator<br />
hatch for<br />
battery access<br />
Battery holder<br />
Figure 5. Battery installation<br />
9
<strong>Locomotive</strong> basics<br />
Assigning your locomotive a new ID#<br />
For operation in the LEGACY or TMCC environment, you will want to give each unit a unique<br />
ID#. The locomotive will respond to commands associated with its ID# while all other units will<br />
disregard these commands. This procedure is not necessary for conventional (non-<br />
Command) operation.<br />
1. Slide the Command reverse unit switch on your locomotive to the PGM<br />
position. See Figure 4 on page 8.<br />
2. Place the locomotive on the track.<br />
3. Connect the Command Base and plug it in.<br />
4. Power up the track.<br />
5. Press ENG on the CAB-1 or CAB-2 remote.<br />
6. Enter the unique ID#. Choose any number from 1 to 98 that has not been<br />
assigned to another locomotive (ENG). We recommend using a part of your<br />
locomotive’s road number.<br />
Note!<br />
All LEGACY locomotives respond to ENG 99. We recommend that you reserve ID# 99 as a<br />
"universal" ID#.<br />
7. Press SET. The locomotive's horn will sound, or the headlights will flash if the<br />
RailSounds sound system is off.<br />
8. Slide the Command reverse unit switch back to the RUN position.<br />
The locomotive’s ID# has been set. Be sure to record the new ID# for your reference.<br />
10
<strong>Locomotive</strong> basics<br />
Lash-ups (for LEGACY operations only)<br />
In the Command environment, building a lash-up allows you to control your locomotives as<br />
one in a prototypical manner. It is still possible to control any of the engines in the lash-up<br />
individually. When you issue a train command, the individual engine you were controlling<br />
will return to the group. If there is a difference in speed, the individual Engine will return to<br />
the speed of the lash-up at the rate set in the train momentum.<br />
To build a lash-up, assign a unique engine (ENG) ID# to each unit. See page 10 for details.<br />
1. Address the train ID# you wish to create or edit, 1<br />
to 99.<br />
2. Press INFO.<br />
3. Press BUILD softkey (button directly under<br />
BUILD).<br />
4. Enter the front engine number. It is not<br />
necessary to enter ENG, just enter the #. It will<br />
appear in the blinking box.<br />
5. Press ADD to add the front engine. The engine<br />
will move to the right and the blinking box will<br />
be ready for your next engine to be added.<br />
6. Enter the second engine ID# in the blinking box.<br />
7. Press ADD to add the second engine. The engine<br />
will move to the right and the blinking box will be<br />
ready for your next engine to be added.<br />
8. Add all the engines you want in your lash-up in<br />
this manner.<br />
9. To change the direction of an engine in your lashup,<br />
turn the Velocity Throttle to move the engine<br />
you want into the blinking box. Then press DIR to<br />
change the direction of the engine.<br />
10. To delete an engine in your lash-up, turn the red<br />
Velocity Throttle knob to move the engine you<br />
want to delete into the blinking box. Then press<br />
DEL.<br />
11. To save your lash-up, press SET. Watch the<br />
onscreen prompts and wait until you see the<br />
message TRAIN CREATED.<br />
12. Press CTC to exit to the operating screen.<br />
See reference numbers 1 and 2<br />
See reference number 3<br />
See reference number 4<br />
11<br />
See reference numbers 6 and 7
LEGACY Control System operations<br />
The LEGACY CAB-2 Remote Controller<br />
Main Display<br />
Displays real-time information about your railroad<br />
system. Displays real-time feedback of operation.<br />
Scroll Button<br />
Navigates through the entire list<br />
of Engines, Trains, Switches, etc.<br />
Select Button<br />
Performs addressing by<br />
3-4 digit road number.<br />
Touch Screen Key Pad<br />
A group of touch sensitive<br />
keys with icons for each<br />
function. These keys serve<br />
many purposes and their icons<br />
change accordingly.<br />
Train Brake Slider<br />
This slider is used to increase<br />
or decrease the amount of Train<br />
Brake affecting the engine or train.<br />
Train Link Button<br />
Quick select of Train-Link<br />
devices (LEGACY Control<br />
System Version 1.3)<br />
AUX-1/Thru Button<br />
Press to view the Control<br />
Panel while operating.<br />
Controls switch direction.<br />
Emergency Halt Button<br />
Stops everything on<br />
layout; also stops<br />
recording playback.<br />
AUX-2/Out Button<br />
Controls switch direction.<br />
Toggles all lights on/off,<br />
except lights that are wired<br />
to track power.<br />
Record Button<br />
Used to record and play<br />
back events.<br />
Velocity Throttle<br />
Throttle control over<br />
engines, also used to<br />
navigate thru info/options.<br />
Set Button<br />
Used to set Engine address and for<br />
programming.<br />
Info Button<br />
Used to enter/view the info/options of<br />
selected components.<br />
CTC Button<br />
Press and hold to turn your remote<br />
on and off. Tap this button to enter<br />
the remote and base options.<br />
Tap it again to return to the main<br />
screen.<br />
Soft Keys<br />
These keys directly correlate to the<br />
5 selection boxes located at the<br />
bottom of the main display. These<br />
are also used in the info/option<br />
menus to select options.<br />
Warning Sound Controller<br />
Warning Bell and Variable Horn<br />
control. Pull down to sound Horn.<br />
Push up and release to trigger<br />
Warning Bell.<br />
Multi Controller<br />
Boost, Brake, and Direction<br />
control. Rock forward for Boost,<br />
rock backward for engine brake,<br />
and press down for direction<br />
change. Click-hold-and rock for<br />
absolute direction selection.<br />
Front & Rear Coupler Buttons<br />
Fire couplers.<br />
Feedback Button<br />
Toggle ON/OFF the vibration feedback<br />
feature in the CAB-2 Remote.<br />
Official R.R. Speed Control Bar<br />
Toggles the touchscreen display of<br />
R.R. preset speeds and control panel.<br />
Low, Medium, High Momentum Buttons<br />
Used to select the desired momentum of<br />
your addressed engine/train/accessory.<br />
12
LEGACY Control System operations<br />
Note!<br />
This section is a brief overview of the LEGACY Control System. For a more in-depth<br />
explanation of the LEGACY Control System features, please see your LEGACY Control<br />
System Operations Manual, available online at www.lionel.com.<br />
The Velocity Throttle<br />
The Velocity Throttle (the red rotary knob on the bottom of your <strong>Lionel</strong><br />
remote) is used to start your engine moving, slow it down, or speed it up. Use it<br />
simply by turning it clockwise (speed up) or counter-clockwise (slow down).<br />
The Multi-Controller<br />
Direction<br />
The direction of your engine toggles between forward and reverse at the<br />
touch of the Multi-Controller. Press the center of the Multi-Controller once,<br />
and your engine's lights will change directions and the engine will stop until<br />
you throttle up again in the new direction.<br />
Boost & Brake<br />
Boost and brake give you another way to control the speed of your train.<br />
Boost gives your loco a temporary increase in tractive power, and returns to the<br />
previous speed when you release the control, while the brake command slows<br />
you down more quickly than the Velocity Throttle alone.<br />
The Train Brake Slider<br />
The Train Brake is used to slow down and limit the top<br />
speed of your train by adding a load. The more the Train<br />
Brake is applied by pulling the Train Brake Slider down, the<br />
more laboring is heard from the engine. Eventually Train<br />
Brake application will slow down the train and it is even<br />
possible to stop a train by pulling the Train Brake Slider all<br />
the way down. If your smoke unit is turned on, you'll also<br />
see more smoke as the slider is pulled down.<br />
13
LEGACY Control System operations<br />
The Warning Sound Controller<br />
Warning sounds are an important part of <strong>Lionel</strong> Railroading. Your<br />
<strong>Lionel</strong> Legacy Control System equipped engines have a real-time variable<br />
"quilling" horn.<br />
Blow the Horn by pulling down on the Warning Sound Controller.<br />
Notice the difference in intensity of the horn sound.<br />
Strike the bell once by pushing the Warning Sound Controller up and<br />
releasing quickly. To activate continuous bell sounds, push the Warning<br />
Sound Controller up and hold it for 1.5 seconds. To discontinue the bell<br />
sounds, push and hold the Warning Sound Controller up until the bell<br />
stops.<br />
The Speed Bar<br />
The Speed Bar is used to select a new<br />
touch-screen Icon Control set. This set of<br />
touch-screen keys is used to select prototypical<br />
preset speeds. The speed of the engine changes<br />
with each press and release of a different Preset<br />
Speed key.<br />
• Tap a key, and your locomotive will<br />
immediately begin moving to that speed.<br />
• If you hold the key until the dialog is<br />
finished, the engineer will indicate that<br />
he is "increasing to...", "slowing to...", or<br />
"we are at..." the command speed.<br />
You can also use the Velocity Throttle<br />
and other action controls in this mode and<br />
continue to use Preset speeds at the same time.<br />
Press AUX1 to leave the Preset speed mode<br />
and return to the Standard Control Panel.<br />
Press the speed bar to toggle between the Speed<br />
Control Panel and the Standard Control Panel.<br />
Note!<br />
Switcher engines do not have preset speed dialog.<br />
14
LEGACY Control System operations<br />
EFX Trim and EFX Bar Graph<br />
Sound and smoke effects of the engine can be trimmed higher or lower depending on your<br />
operating preference. Pressing the EFX up button will make the engine sound like it is working<br />
harder and will also increase the smoke output (if the smoke unit is turned on). Similarly,<br />
the EFX down button will decrease the laboring sound of the engine and smoke. A RESET<br />
command will return the EFX trim to its default setting.<br />
Notice that the current EFX level is displayed on the remote as a bar graph inside the soft<br />
key to the left of the ROLL button. The height of this graph varies with the EFX keys, throttle<br />
and train brake adjustments.<br />
Leaving the Preset Speed Screen<br />
Use the Speed Bar to leave the Speed Panel and return to the Control panel. Press the Speed<br />
Bar to toggle between the Speed Control Panel and the Standard Control Panel.<br />
15
LEGACY RailSounds sound system operations<br />
LEGACY RailSounds sound system<br />
Volume UP<br />
Raises the overall master volume of the LEGACY<br />
RailSounds sound system. To independently adjust<br />
the level of the background sounds only (e.g., the<br />
diesel roar and brake sounds), tap AUX1 and then<br />
this key.<br />
CrewTalk<br />
Engineer begins radio dialog, dispatcher<br />
replies.<br />
RPM Levels<br />
Adjusts the level of the RPM<br />
sounds.<br />
RPM<br />
RPM<br />
RailSounds Shutdown<br />
Activates the LEGACY<br />
RailSounds sound system<br />
shutdown sequence when<br />
stopped.<br />
Emergency Stop<br />
Activates the emergency stop<br />
feature while in motion.<br />
(Icon will change as the state<br />
of the locomotive changes).<br />
Volume DOWN<br />
Lowers the overall master volume of the LEGACY<br />
RailSounds sound system. To independently adjust<br />
the level of the background sounds only (e.g.,<br />
diesel roar and brakes), tap AUX1 and then this key.<br />
Volume settings are retained when track power is<br />
turned off.<br />
Stops and resets the locomotive<br />
Resets the locomotive's direction to<br />
forward. Press and hold to activate a<br />
fueling sequence. Fueling sounds.<br />
TowerCom<br />
Dispatcher begins radio dialog,<br />
engineer replies. See page 20.<br />
When adjusting the overall volume, you'll hear a single bell hit that gets louder or softer<br />
with each volume adjustment. When the volume is at maximum, additional button presses<br />
have no effect and won't play the bell. When adjusting the background sounds (AUX1, then a<br />
volume key) you'll hear the prime mover volume change without a single bell hit.<br />
16
LEGACY RailSounds sound system operations<br />
LEGACY RailSounds Sequence Control<br />
Your LEGACY-equipped locomotive features Sequence Control. Based on the movement and speed of<br />
the locomotive, Sequence Control automatically plays the sound effects of an entire trip, from departure<br />
to destination, while you run your locomotive. Prototypical horn signals, bell, and radio chatter are<br />
added automatically as you spin your throttle—no need to memorize a sequence of button presses.<br />
To activate the Sequence Control feature, press and hold the AUX1 button for three seconds.<br />
You'll hear a unique bell/horn signal, indicating that Sequence Control is now enabled. Release<br />
the AUX1 key when you hear the sound.<br />
Now, radio chatter, air brake release, and warning signals will play automatically as you move<br />
out, reach cruising speed, and then decelerate for arrival, as illustrated in Figure 6. Plus, you can<br />
still activate CrewTalk communication and TowerCom announcements using your remote.<br />
To discontinue Sequence Control, you must tap AUX1, and then tap the 0 key or the RESET<br />
button. Cycling track power off and back on also turns off Sequence Control mode.<br />
Note!<br />
During sequence control mode operation, speed step 1 is used to trigger departure<br />
effects such are air brake release and departure horn. Therefore your engine will not<br />
begin moving until speed step 2 and the Roll Mode button will bring your engine to a<br />
stop while Sequence Control mode is enabled. For the most realistic operation, medium<br />
or high momentum is recommended when using Sequence Control.<br />
Automatic Sequence Control<br />
The actual dialog will vary.<br />
SEQUENCE CONTROL<br />
ENABLED (hold AUX1 for 3<br />
seconds) - Ding-ding-toot!<br />
AT A STOP, after a long<br />
pause - “Dispatcher, we<br />
have a clear signal.”/ ”Roger<br />
that.”<br />
THROTTLE UP TO STEP<br />
1 - Air brakes release,<br />
RPMs up, departure horn.<br />
TROTTLE UP TO STEP<br />
2 + - Bell on. "Train is<br />
moving."/"Copy.".<br />
1/8 THROTTLE -<br />
Bell off.<br />
1/3 THROTTLE<br />
- Horn signal (in<br />
transit.).<br />
STOP - Bell<br />
off. "We are in<br />
position."/<br />
"Copy.".<br />
SLOW BELOW<br />
1/8 THROTTLE -<br />
Bell on.<br />
Figure 6. LEGACY RailSounds automatic Sequence Control<br />
SLOW BELOW 1/3 THROTTLE<br />
- Horn arrival signal. “We are<br />
arriving,”/ “Roger.”<br />
17<br />
3/4 THROTTLE - Crossing<br />
signal "We are at<br />
maximum authorized<br />
speed.".
LEGACY Control System operations<br />
CrewTalk dialog and TowerCom announcements in the LEGACY<br />
environment<br />
In addition to the automatic triggering of dialog via Sequence Control mode operation (see the previous<br />
section), you may control the dialog manually.<br />
CrewTalk dialog and TowerCom announcements feature a variety of brief radio<br />
conversations between the engineer and dispatcher. CrewTalk dialog is an engineer-initiated<br />
radio conversation with the dispatcher. TowerCom announcements are a dispatcher-initiated<br />
radio conversation with the engineer. Be sure to listen for the different combinations of words<br />
and phrases that comprise these exchanges.<br />
Refer to Table 1 below for the dialog commands. The dialog in the table provides<br />
examples of the conversations you can trigger. The actual dialog will vary.<br />
<strong>Locomotive</strong> Commands Example dialog<br />
Stopped AUX1, 2 Crew: Ask To Depart<br />
Tower: Deny Departure<br />
AUX1, 7<br />
Tower: Ask To Standby<br />
Crew: Acknowledge<br />
2 Crew: Ask To Depart<br />
Tower: Approve Departure<br />
7 Tower: Approve Departure<br />
Crew: Acknowledge<br />
5 or Crew: Shutdown Announcement<br />
AUX1, 5<br />
Shutdown sequence<br />
AUX1, 0 (hold for<br />
several seconds)<br />
Refueling sequence<br />
Crew: My tank is full<br />
Moving 2 (recent departure) Crew: Train is underway<br />
Tower: Acknowledge<br />
2 Crew: Are we clear ahead?<br />
Tower: Acknowledge<br />
AUX1, 2<br />
Crew: Report engine status, including fuel level<br />
7 or Tower: Clear in-bound<br />
AUX1, 7* Crew: Acknowledge<br />
5 or Tower: Emergency stop<br />
AUX1, 5<br />
Crew: Acknowledge<br />
*Activating 7 or AUX1, 7 while the locomotive is in motion enables an arrival<br />
conversation for 30 seconds. If the train stops within this time, pressing 2 will play this special<br />
conversation.<br />
Table 1. LEGACY Remote Controller dialog commands<br />
18
LEGACY RailSounds Sound System operations<br />
LEGACY RailSounds sound system dialog on a round trip<br />
Refer to Figure 7 for a sample dialog script for manually controlled dialog on the locomotive’s<br />
round trip using the numeric keypad. See page 17 for the automatic Sequence Control.<br />
<strong>Locomotive</strong> STOPPED<br />
The actual dialog will vary.<br />
AUX1, 2 - “Are we<br />
clear?”/” No, stand by.”<br />
2 - “Can we go yet?”/”Yes,<br />
you are clear.”<br />
AUX1, 7 - “Stand by.”<br />
7 - “You are clear.”<br />
5 or AUX1, 5 - Crew shutdown<br />
announcement. Shutdown<br />
sequence.<br />
<strong>Locomotive</strong> IN MOTION<br />
The actual dialog will vary.<br />
RECENT DEPARTURE<br />
2 - “Train is<br />
underway.”/“Roger,<br />
you are clear.”<br />
2 - “Still clear ahead?”/<br />
“Roger, you are clear.”<br />
AUX1, 2 - Crew reports<br />
fuel status and speed.<br />
5 or AUX1, 5 - Emergency<br />
stop.<br />
AUX1, 7 - “You are<br />
clear inbound.”<br />
7 - “All clear ahead.”<br />
Figure 7. LEGACY RailSounds sound system dialog on a round trip<br />
19
TrainMaster Command Control operations<br />
CAB-1 Remote Controller commands<br />
The CAB-1 Remote Controller commands are detailed below. The corresponding RailSounds<br />
sound system effects are in bold italic type.<br />
Releases the ElectroCoupler on the front of the<br />
locomotive. Coupler release sound.<br />
Releases the ElectroCoupler on the rear of the<br />
tender. Coupler release sound.<br />
Activates the numeric keypad.<br />
Short air release sound.<br />
Controls switch direction. Toggles all lights on/off,<br />
except lights that are wired to track power.<br />
Accelerates the locomotive with a clockwise<br />
rotation. Decelerates the locomotive with a<br />
counter-clockwise rotation. Speed-dependent<br />
RPM sounds.<br />
Activates the locomotive’s horn. Release the button<br />
to discontinue the sound. Horn sound.<br />
Toggles the bell sound on and off.<br />
Bell sound.<br />
Changes the locomotive’s direction. The locomotive<br />
decelerates to a stop and continues in the opposite<br />
direction when you increase the throttle. Air<br />
release sound.<br />
Increases the locomotive’s speed while the button is<br />
pressed. Release the button to return to the initial<br />
speed. Labored prime mover.<br />
Decreases the locomotive’s speed while the button is<br />
pressed. Squealing brake sounds.<br />
Shuts down all PowerMasters on your railroad. Stops<br />
all TrainMaster Command Control-equipped<br />
locomotives in operation. Use HALT only in<br />
emergency situations.<br />
SET L M H<br />
Odyssey II Momentum<br />
L 32 speed steps with low<br />
momentum<br />
M 100 speed steps with low<br />
momentum<br />
H 100 speed steps with medium<br />
momentum<br />
20
TrainMaster Command Control operations<br />
CAB-1 Remote Controller numeric keypad commands<br />
When you press the AUX1 button on your CAB-1 Remote Controller, you turn the numeric<br />
keypad into ten command buttons. After you press the AUX1 button, you will be able<br />
to press any numbered button until you address a different product. The corresponding<br />
RailSounds sound system effects are in italic type.<br />
Stops and resets the locomotive. Resets the locomotive’s direction to forward. Your<br />
locomotive keeps track of its fuel level. Higher engine speeds and/or heavy labor will use<br />
fuel at a faster rate. Press AUX1, 2 to initiate engine status dialog, including the fuel level.<br />
To add fuel, perform a "long reset." When the fuel level is low (or at any time), you may<br />
choose to press and hold AUX1, 0 for at least three seconds. You will hear the sounds of<br />
fuel flowing into the tank as long as you hold the button. When you release the button, the<br />
sounds will stop and the engineer will confirm that the tank is full. Refueling sequence.<br />
Raises the overall master volume of the LEGACY RailSounds sound system. To<br />
independently adjust the level of the background sounds only (e.g., the diesel roar and<br />
brake sounds), tap AUX1 and then this key. Sound volume increases.<br />
When adjusting the overall volume, you'll hear a single bell hit that gets louder or softer<br />
with each volume adjustment. When the volume is at maximum, additional button<br />
presses have no effect and won't play the bell. When adjusting the background sounds<br />
(AUX1, then a volume key) you'll hear the prime mover volume change without a single<br />
bell hit.<br />
Engineer begins radio dialog, dispatcher replies (see page 18). CrewTalk communication.<br />
Enters manual RPM mode and increases the RailSounds sound system RPM level. If the<br />
LEGACY RailSounds sound system is shut down (see 5 key below), AUX1, 3 activates a full<br />
LEGACY RailSounds sound system start-up while the locomotive is stopped after pressing<br />
AUX1, 5 with track power on.<br />
21
TrainMaster Command Control operations<br />
CAB-1 Remote Controller numeric keypad commands (continued)<br />
Lowers the overall master volume of the LEGACY RailSounds sound system. To<br />
independently adjust the level of the background sounds only (e.g., diesel roar and<br />
brakes), tap AUX1 and then this key. Volume settings are retained when track power is<br />
turned off. Sound volume decreases.<br />
Activates the LEGACY RailSounds sound system shutdown sequence when stopped.<br />
Activates the emergency stop feature while in motion. Note that, in the shutdown<br />
sequence, the smoke unit will turn off if it was already on.<br />
Enters manual RPM mode and lowers the LEGACY RailSounds diesel motor RPM level.<br />
Dispatcher begins radio dialog, engineer replies (see page 18). TowerCom<br />
announcement.<br />
Turns off the smoke units. Air release sound.<br />
Turns on the smoke unit if the smoke unit switch is in the ON position. Be sure to add<br />
smoke fluid before turning on the smoke unit to prevent damage to your locomotive. Air<br />
release sound.<br />
Note!<br />
AUX1, 8 and 9 function only if the locomotive’s smoke unit switch is in the ON position.<br />
Setting the smoke level<br />
You may adjust the level of smoke production using your Remote. Use the sequences below.<br />
Low smoke production:<br />
Medium smoke production:<br />
High smoke production:<br />
AUX2, 9, L, AUX2<br />
AUX2, 9, M, AUX2<br />
AUX2, 9, H, AUX2<br />
22
Conventional transformer operations<br />
Using the LEGACY RailSounds sound system in the conventional<br />
environment<br />
When you first power up your locomotive, you will hear the sounds of the locomotive at rest. As<br />
the locomotive moves, the RPM sounds automatically increase with the locomotive’s speed. In<br />
the conventional environment, the horn and bell sounds are activated by your transformer controls,<br />
if so equipped.<br />
To adjust the volume, use the volume control knob. Refer to Figure 4 on page 8 for the location<br />
of the volume control knob.<br />
For proper operation of the LEGACY RailSounds sound system during track power interruptions<br />
and for the locomotive shutdown sequence, you must install a nine-volt alkaline battery.<br />
In the conventional environment, you will experience several features of the LEGACY RailSounds<br />
sound system.<br />
• <strong>Diesel</strong> motor RPM levels. The level of diesel motor RPM level automatically varies with the<br />
speed of the locomotive.<br />
• MultiHorn. A different horn sound at different speeds.<br />
• Mechanical bell. Press BELL on your transformer to begin the effect, then press BELL a<br />
second time to discontinue the effect.<br />
• CrewTalk dialog and TowerCom announcements. These brief conversations between<br />
the train crew and the tower are triggered by short horn blasts.<br />
• Reverse unit reset sound. Power down your track, wait three seconds, and listen for the<br />
air-release sound, which is the locomotive telling you that its <strong>Lionel</strong> Command reverse unit has<br />
reset to forward (a nine-volt alkaline battery is required).<br />
• Shutdown sequence. When you turn off track power, you have two seconds to power up<br />
again after you hear the reverse unit reset sound. If you do not restore power, you will hear the<br />
realistic shutdown sequence. Because track power is off, a battery is required for this sequence to<br />
function.<br />
23
Conventional transformer operations<br />
Activating the CrewTalk dialog and TowerCom announcements<br />
In the conventional environment, CrewTalk dialog and TowerCom announcements are triggered by<br />
short horn blasts and vary with the state of the locomotive.<br />
• If the locomotive has been stopped for less than 15 seconds, a short horn blast triggers a<br />
“please standby” dialog.<br />
• If the locomotive has been stopped for longer than 15 seconds, a short horn blast triggers a<br />
“cleared outbound” dialog.<br />
• If the locomotive has started moving within the last seven seconds, a short horn blast will<br />
trigger a "train is underway" dialog.<br />
• If the locomotive has been moving for more than seven seconds, a short horn blast will<br />
trigger a "are we clear?" dialog.<br />
24
Conventional transformer operations<br />
Locking your locomotive into a single direction<br />
When the Command reverse unit switch is in the RUN position on the powered unit, your locomotive<br />
sequences through a repeating pattern of operations: forward, neutral, reverse, neutral,<br />
and so on.<br />
To “lock” your locomotive into a single direction (for example, to operate in forward<br />
only), you can deactivate the Command reverse unit’s sequencing function.<br />
1. Use your transformer’s DIRECTION button or interruptions in track power<br />
to get your locomotive moving slowly in the desired direction or into<br />
neutral.<br />
2. Slide the Command reverse unit switch on the powered unit to the PGM<br />
position. At this point, the locomotive is “locked” into your chosen<br />
direction. See Figure 4 on page 8 for the location of this switch.<br />
To restore the forward-neutral-reverse sequence, just slide the Command reverse unit<br />
switch back to the RUN position.<br />
25
Odyssey II Speed Control system operations<br />
Odyssey II Speed Control operations<br />
The Odyssey II Speed Control system is “cruise control” for your locomotive. Once the speed control<br />
is set, your locomotive will maintain a constant speed, no matter what load is placed on the locomotive<br />
or what grades you have on your layout. The Odyssey II Speed Control system also allows for<br />
extremely slow movement that will amaze any scale enthusiast.<br />
Odyssey II Speed Control LEGACY Control operation<br />
I<br />
n LEGACY Control System CAB-2 mode, Odyssey II Speed Control system provides 0-199 speed steps.<br />
For a more in-depth explanation of the LEGACY Control System features, please see your LEGACY<br />
Control System operations manual, available online at www.lionel.com.<br />
Odyssey II Speed Control TrainMaster Command Control operation<br />
When the Odyssey II Speed Control system is activated, changes in the speed of the locomotive<br />
will correspond to each signal from the Command Base. For example, when you address the<br />
locomotive and slowly turn the throttle knob, the first flash of the red light on the Command Base<br />
corresponds to the first speed step, which is the slowest speed of the locomotive. The locomotive will<br />
maintain that speed until you increase or decrease the throttle.<br />
In TrainMaster Command Control CAB-1 mode, Odyssey II Speed Control System now<br />
provides selectable resolution and momentum. See the table on page 20.<br />
Odyssey II Speed Control conventional transformer operation<br />
The Odyssey II Speed Control system is automatically operational when you operate your locomotive<br />
in conventional (non-Command Control) mode, as long as the Odyssey II Speed Control<br />
system switch is in the ON position (see Figure 4 on page 8). This means that your locomotive will<br />
maintain a constant speed, compensating for grades, loads, and turns. Simply use your transformer’s<br />
throttle to adjust the speed of your locomotive.<br />
Note!<br />
Because of the way that speed control operates in conventional mode, you will<br />
notice a slight delay between adjusting your transformer throttle and the change<br />
in the speed of your locomotive. If you desire instantaneous response to throttle<br />
changes, turn off the Odyssey II Speed Control system using the Odyssey II Speed<br />
Control switch (see Figure 4 on page 8).<br />
26
Maintaining and servicing your locomotive<br />
Reprogramming your locomotive to restore features<br />
If your locomotive is unresponsive to your commands in the Command Control environment, we<br />
recommend that you follow this procedure to reset your locomotive. All factory default settings will<br />
be restored when you reprogram the locomotive.<br />
1. Slide the program run switch to the PGM position.<br />
2. Plug in and connect your LEGACY Base or TMCC Command Base.<br />
3. Place your locomotive on the track, then power up the track.<br />
4. Press ENG and enter the locomotive’s ID#.<br />
5. Press SET.<br />
6. Turn off track power and wait ten seconds.<br />
7. Slide the program run switch back to the RUN position.<br />
At this point, your locomotive has been reset. Restore power to the track and operate the<br />
locomotive as usual. Be sure to use the ID# entered in Step 4.<br />
27
Maintaining and servicing your locomotive<br />
Lubricating your locomotive<br />
Help your <strong>Lionel</strong> locomotive lead a long and productive life on your railroad by maintaining<br />
it properly. To keep your locomotive lubricated, we recommend that you purchase a <strong>Lionel</strong><br />
Lubrication and Maintenance Kit (6-62927), available from your authorized <strong>Lionel</strong> dealer.<br />
When you find that the lubrication points illustrated in Figure 8 appear dry, lubricate<br />
your locomotive after you have removed any accumulated dirt and dust. There are two basic<br />
rules to keep in mind when you are lubricating your locomotive: use only a small amount of<br />
lubrication and avoid getting grease or oil on your locomotive’s wheels, roller pick-ups, or the<br />
track.<br />
Lubricate axles with<br />
<strong>Lionel</strong> oil on both sides<br />
sparingly<br />
Lubricate gears with<br />
<strong>Lionel</strong> grease sparingly<br />
Lubricate gears with<br />
<strong>Lionel</strong> grease sparingly<br />
Lubricate axles with<br />
<strong>Lionel</strong> oil on both sides<br />
sparingly<br />
Figure 8. Lubrication points<br />
28
Maintaining and servicing your locomotive<br />
Servicing your locomotive’s LEDs<br />
Note! If the locomotive is powered up and the lights are not on, check that the AUX2<br />
command was not used to turn the lamps off.<br />
Your locomotive is illuminated by several LEDs that are expected to last for the life of the<br />
locomotive. The LED’s are not user serviceable. If service is required, we recommend that<br />
you have your locomotive serviced at a <strong>Lionel</strong> Factory Trained Authorized Service Station.<br />
Replacing the traction tires<br />
Your locomotive is equipped with traction tires (<strong>Lionel</strong> part no. 6208815206) to increase the<br />
tractive effort of your locomotive and allow it to pull more cars at once.<br />
During the course of normal operations, the traction tires may become worn out. To<br />
replace the traction tires, remove the side frame screws from the underside of the trucks and<br />
lift away the side frame. Remove the worn tire, then slip the replacement around the wheel.<br />
Reposition the side frame on the truck and secure it with the two screws.<br />
29
Maintaining and servicing your locomotive<br />
<strong>Locomotive</strong> diagnostics<br />
Your locomotive includes built-in diagnostics to monitor the condition of the main drive motor<br />
and smoke system. If a problem is detected, the locomotive's cab light will blink a diagnostic<br />
code.<br />
If you see the light inside the cab flashing, press RESET (for LEGACY operation), 0 (for<br />
TMCC operation), or DIRECTION/power interruption (for conventional operation to attempt<br />
to clear the problem. The locomotive will immediately check itself again. If the problem<br />
persists, the cab light will blink the code again.<br />
Note that smoke-related errors can be reset a maximum of three times. On the third try,<br />
if the problem still persists, the smoke unit will be shut down and must be returned to <strong>Lionel</strong><br />
Service for repair.<br />
Note!<br />
Turning the smoke unit switch to the off position will disable diagnostic checks of<br />
the smoke system.<br />
Number of Blinks<br />
Diagnostic Code Description<br />
1 Main drive motor stalled.<br />
2 Smoke 1 element problem.<br />
3 Smoke 1 fan problem.<br />
4 Not applicable.<br />
5 Not applicable.<br />
30
Notes<br />
31
<strong>Lionel</strong> Limited Warranty Policy & Service<br />
T<br />
his <strong>Lionel</strong> product, including all mechanical and electrical components, moving parts, motors and structural components, with the<br />
exception of LIGHT BULBS, LED’s & TRACTION TIRES are warranted to the original owner-purchaser for a period of one<br />
year from the original date of purchase against original defects in materials or workmanship when purchased through a <strong>Lionel</strong><br />
Authorized Retailer*.<br />
This warranty does NOT cover the following:<br />
• Normal wear and tear<br />
• Light bulbs or LED’s<br />
• Defects appearing in the course of commercial use<br />
• Damage resulting from abuse/misuse of the product<br />
Transfer of this product by the original owner-purchaser to another person voids this warranty in its entirety. Modification of this product in<br />
any way; visually mechanically or electronically, voids the warranty in its entirety.<br />
Any warranted product which is defective in original materials or workmanship and is delivered by the original owner-purchaser<br />
(this warranty is non-transferrable) to <strong>Lionel</strong> LLC or any <strong>Lionel</strong> Authorized Service Station MUST be accompanied by the original receipt for<br />
purchase (or copy) from an Authorized <strong>Lionel</strong> Retailer*, will at the discretion of <strong>Lionel</strong> LLC, be repaired or replaced, without charge for<br />
parts or labor. In the event the defective product cannot be repaired, and a suitable replacement is not available, <strong>Lionel</strong> will offer to replace the<br />
product with a comparable model (determined by <strong>Lionel</strong> LLC), if available. In the event a comparable model is not available the customer<br />
will be refunded the original purchase price (requires proof of purchase from the Authorized <strong>Lionel</strong> Retailer* it was originally purchased).<br />
Any products on which warranty service is sought must be sent freight or postage prepaid (<strong>Lionel</strong> will refuse any package when postage is due).<br />
Transportation and shipping charges are not covered as part of this warranty.<br />
NOTE: Products that require service that do not have a receipt from an LIONEL AUTHORIZED RETAILER* will be<br />
required to pay for all parts required to repair the product (labor will not incur a charge) providing the product is<br />
not older than 3 years from date of manufacture and is within 1 year from date of purchase. A copy of the original<br />
sales receipt is required.<br />
In no event shall <strong>Lionel</strong> LLC be held liable for incidental or consequential damages.<br />
Some states do not allow the exclusion or limitation of incidental or consequential damages, so the above exclusion may not apply to you.<br />
This warranty gives you specific legal rights and you may have other rights which vary from state to state.<br />
Instructions for Obtaining Service<br />
If service for this <strong>Lionel</strong> LLC product is required; bring the item, along with your DATED sales receipt and completed warranty information<br />
(at the bottom of this page) to the nearest <strong>Lionel</strong> Authorized Service Station. Your nearest <strong>Lionel</strong> Service Station can be found by calling<br />
1-800-4-LIONEL or by accessing the website at www.lionel.com.<br />
If you prefer to send your <strong>Lionel</strong> product directly to <strong>Lionel</strong>, for repair you must FIRST call 586-949-4100 extension 9105 or FAX <strong>Lionel</strong> at<br />
586-949-5429 or write to Customer Service, 26750 Twenty Three Mile Road, Chesterfield, MI 48051-2493. Please have the 6-digit <strong>Lionel</strong> product<br />
number, the date of original purchase, the dealer where the item was purchased and what seems to be the problem. You will receive a return<br />
authorization (RA) number to ensure your merchandise will be properly tracked and handled upon receipt at <strong>Lionel</strong> LLC.<br />
Once you have your Return Authorization (RA) number, make sure the item is packed in its original Styrofoam inner container which is<br />
placed inside the original outer display box (this will help prevent damage during shipping and handling). This shipment MUST be prepaid and<br />
we recommend that it be insured with the carrier of your choice.<br />
Please make sure you have followed all of the above instructions carefully before returning any merchandise for service. You may choose to<br />
have your product repaired by one of <strong>Lionel</strong> LLC’s Authorized Service Stations after its warranty has expired. A reasonable service fee should be<br />
expected once the product warranty has expired.<br />
Warranty Information<br />
Please complete the information below and keep it, along with your DATED ORIGINAL SALES RECEIPT. You MUST present this form<br />
AND your DATED SALES RECEIPT when requesting warranty service.<br />
*A complete listing of <strong>Lionel</strong> Authorized retailers can be found by calling 1-800-4-LIONEL or by visiting our website at www.lionel.com.<br />
Products that are more than 3 years old, from date of manufacture, are not applicable for warranty coverage, even if they have never been<br />
sold prior to this date. (Under no circumstance shall any components or labor be provided free of charge.)<br />
Name _________________________________________________________________________<br />
Address ________________________________________________________________________<br />
Place of Purchase _________________________________________________________________<br />
Date of Purchase __________________________________________________________________<br />
Product Number __________________________________________________________________<br />
Product Description ________________________________________________________________<br />
©2011 LIONEL L.L.C., CHESTERFIELD, MI 48051<br />
UNITED STATES OF AMERICA<br />
PRINTED IN CHINA