Download as PDF - Ruville
Download as PDF - Ruville
Download as PDF - Ruville

You also want an ePaper? Increase the reach of your titles
YUMPU automatically turns print PDFs into web optimized ePapers that Google loves.
MOTOR | Ch<strong>as</strong>sis | Service<br />
EXCELLENCE in PC parts<br />
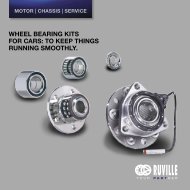
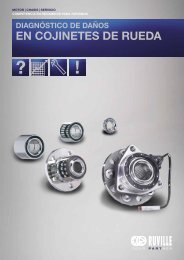
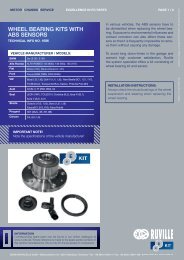
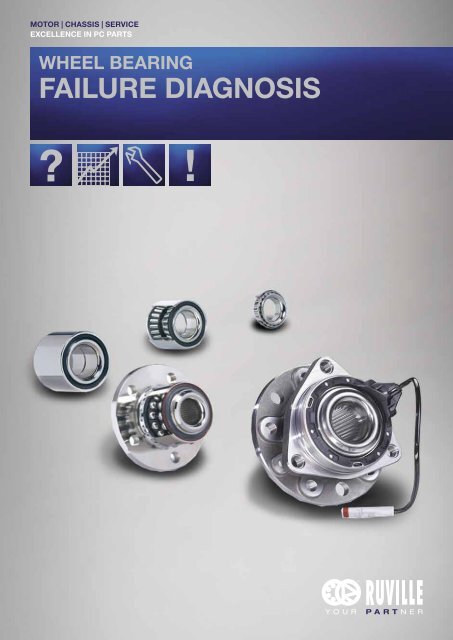
Wheel bearing<br />
failure diagnosis<br />
Y O U R<br />
P A R T N E R
Wheel bearing failure diagnosis 2 | 3<br />
Damage to roller bearings<br />
Contents<br />
Damage to roller bearings 3<br />
Re<strong>as</strong>ons for part failure<br />
Diagnosing bearing damage<br />
Damage 4<br />
Diagnosing oval<br />
deformation damage 5<br />
Wheel bearings are calculated to achieve a mileage of up<br />
to 1,000,000 km without any further ado. Certain generally<br />
abnormal causes can result in premature damage to a<br />
roller bearing with an impact on its service life.<br />
Roller bearings are machine elements with a wide range of<br />
applications. They prove to be reliable components even<br />
under harsh conditions. Premature failures are very rare<br />
occurrences. Roller bearing damage is revealed primarily<br />
Oval deformation damage 6<br />
• In 70% of these c<strong>as</strong>es, the cause is incorrect lubrication:<br />
too much or too little, unsuitable lubricant, etc.<br />
by unusual operating behaviour of the bearing. A wide<br />
range of different characteristics are revealed when<br />
Diagnosing bearing<br />
damage 8<br />
Fitting the wheel bearing<br />
in the steering knuckle 14<br />
Mounting the<br />
wheel hub 15<br />
Installing and adjusting<br />
tapered roller bearings in<br />
motor vehicle wheel hubs 16<br />
• Soiling accounts for a further 18%: this refers to liquids or<br />
solid particles in the bearing. This is why seals are so<br />
important, <strong>as</strong> their failure can cause lubricant to leak from<br />
the bearing, allowing dirt to penetrate.<br />
• Incorrect installation accounts for a further 10%:<br />
installation by force, excessive overheating, incorrect<br />
adjustment and incorrect clearance, excessive tightening<br />
of the tapered sleeve, etc.<br />
General forms of roller bearing damage<br />
damaged bearings are examined. To find the cause of the<br />
damage, simple inspection of the bearing is usually not<br />
sufficient; on the contrary, consideration also h<strong>as</strong> to be<br />
given to the surrounding parts, lubrication and seals,<br />
together with the operating and environmental conditions.<br />
A planned approach makes it e<strong>as</strong>ier to find the causes.<br />
Unusual operating behaviour <strong>as</strong> a sign of damage<br />
Damage to bearings is usually expressed by a gradual<br />
deterioration in operating behaviour. In rare c<strong>as</strong>es, spon-<br />
• Overheating<br />
taneous damage, brought about for example by incorrect<br />
• Broken outer ring<br />
installation or missing lubrication, can cause immediate<br />
• Tilting<br />
failure. Under certain circumstances, it can take several<br />
• Excessively tight fit<br />
months from when the damage begins until actual failure of<br />
• Fatigue<br />
the bearing, depending on the operating conditions.<br />
• Impressions on the roller body<br />
• Soiling<br />
• Lubrication faults<br />
• Corrosion<br />
• Flange fractures<br />
• Wear due to scoring<br />
• Wrong load direction
Wheel bearing failure diagnosis 4 | 5<br />
Damage<br />
Diagnosing oval<br />
deformation damage<br />
Operating behaviour<br />
Possible causes<br />
Effects<br />
Irregular running<br />
Damage to rings and roller bodies<br />
Incre<strong>as</strong>ingly wobbly wheels<br />
Incre<strong>as</strong>ed tilting tendency<br />
Vibration in the steering<br />
Soiling<br />
Incre<strong>as</strong>ed vibrations<br />
Too much bearing clearance<br />
Incre<strong>as</strong>ed jolts<br />
Unusual running noises<br />
Not enough bearing clearance<br />
Whining or whistling noise<br />
Too much bearing clearance<br />
Damage to the rolling surfaces<br />
Soiling<br />
Unsuitable lubricant<br />
Rumbling or uneven noise<br />
Changed bearing clearance<br />
Gradual change in the running noise<br />
Temperature influences<br />
Damaged raceway<br />
Causes of bearing damage and me<strong>as</strong>ures<br />
Wheel bearings are essential parts in motor vehicles. They This can have a negative impact on how wheel bearings<br />
make an important contribution to comfortable, safe driving. work; under unfavourable conditions, the results may include<br />
Wheel bearings are exposed to many different loads, such failure or blocking of the wheel bearing. If the wheel bearing<br />
<strong>as</strong> high wheel speed, hard jolts from uneven road surfaces, blocks while the vehicle is moving, this can result in dangerous<br />
dirt that h<strong>as</strong> been swirled up and extreme temperatures.<br />
traffic situations or accidents!<br />
1. Remove the wheel bearing from the location bore.<br />
2. Check whether there is a dark spot on each of the two<br />
opposite sides of the wheel bearing‘s outer ring surface.<br />
Make sure that there is no damage on the two surfaces<br />
at a 90° angle to the dark spots. If this is the c<strong>as</strong>e, the<br />
location bore is deformed and the steering knuckle needs<br />
to be replaced.<br />
3. Dismantle the wheel bearing to make sure that there h<strong>as</strong><br />
not been any smoothing effect in the ball raceways of the<br />
outer ring. To do so, first remove the seal (e.g. with special<br />
pliers), then dismantle the unit consisting of outer and inner<br />
ring, cage and balls.<br />
4. Clean the raceways of the outer ring and check for any<br />
scratches corresponding to the dark spots on the outside<br />
of the outer ring. These scratches confirm oval deformation<br />
of the steering knuckle.
Wheel bearing failure diagnosis 6 | 7<br />
Oval deformation<br />
damage<br />
Problem<br />
Cause<br />
Remedy<br />
Problem<br />
Cause<br />
Remedy<br />
The wheel bearing starts to make<br />
One of the two inner rings is damaged:<br />
Replace wheel bearing and hub.<br />
Wheel bearing starts to make<br />
Medium oval deformation in the<br />
Replace steering knuckle and wheel<br />
loud noises (grating sounds)<br />
noises after a certain mileage h<strong>as</strong><br />
location bore of the steering knuckle,<br />
bearing.<br />
after it h<strong>as</strong> been fitted during the<br />
1. The wheel hub does not fit because<br />
been completed (500-3,000 km);<br />
that is still enough to restrict the radial<br />
subsequent trial run.<br />
the setting is too narrow.<br />
extreme heat development at the<br />
clearance of the wheel bearing and<br />
start of operation<br />
thus cause the damage described in<br />
2. The wrong tool h<strong>as</strong> been used to<br />
Replace complete wheel bearing.<br />
the previous point.<br />
fit the inner ring so that it is canted on<br />
the wheel hub; the wedge or bushing<br />
Extreme heat development at the<br />
1. Axial clearance of wheel bearing<br />
Check settings of the steering knuckle<br />
is not parallel between the plunger<br />
start of operation<br />
between wheel hub and steering<br />
and wheel hub and readjust if neces-<br />
and the side of the bearing ring.<br />
knuckle is extremely restricted. Parts<br />
sary.<br />
incorrectly adjusted or incorrectly fitted.<br />
3. Excessive oval deformation in the<br />
Replace steering knuckle and wheel<br />
location bore with corresponding ex-<br />
bearing.<br />
2. Incorrect installation of the wheel<br />
Remove wheel bearing and check<br />
treme restriction in the bearing<br />
bearing in the location bore (no circlips<br />
whether circlips are present, replace<br />
clearance of the wheel bearing in the<br />
in the location bores) causes gradual<br />
wheel bearing if necessary.<br />
confined are<strong>as</strong> of the oval deformation.<br />
axial offset of the wheel bearing and<br />
hub. The turning hub rubs against<br />
4. Damaged location bore in the<br />
Rectify minor flaws on the wheel hub<br />
the stationary wheel bearing seat.<br />
steering knuckle.<br />
(e.g. by polishing) or replace wheel hub<br />
This high level of friction incre<strong>as</strong>es the<br />
and bearing.<br />
temperature at the wheel bearing. The<br />
5. Deep scratches or dents, both on<br />
gre<strong>as</strong>e burns and the component fails.<br />
the bearing seat of the wheel hub<br />
Rectify minor flaws on the wheel hub<br />
and on the wheel bearing, caused by<br />
(e.g. by polishing) or replace wheel hub<br />
incorrect removal.<br />
and bearing.
Wheel bearing failure diagnosis 8 | 9<br />
Diagnosing<br />
bearing damage<br />
Overheating<br />
Broken outer ring<br />
Tilting<br />
Excessively tight fit<br />
Cause<br />
Cause<br />
Cause<br />
Cause<br />
• Extreme external heat<br />
• Inadequate support of the rings in the bearing housing<br />
• Sagging shafts<br />
• Peripheral track made by wear on the raceways<br />
• Inadequate heat dissipation<br />
• Inadequate cooling or lubrication<br />
• Initial axial load due to incorrect bearing clearance under<br />
high operating temperatures<br />
• Burrs or dirt on the shaft or housing shoulders<br />
• Shaft threads that are not axially parallel to the bearing<br />
Effect<br />
Effect<br />
• Discolouring of the rings, roller bodies and cages from<br />
Effect<br />
• Normally there will be a uniform fracture in the peripheral<br />
seat<br />
• Shaft nuts whose mating surfaces do not match the<br />
thread axis<br />
• Continuous operation under high load, poor lubrication<br />
and inadequate bearing clearance quickly causes wear<br />
and fatigue<br />
yellow to blue<br />
• Temperatures over 200°C reduce the hardness and load<br />
direction, often accompanied by parts breaking out<br />
• Under axial load, these fractures usually occur just behind<br />
Effect<br />
Remedy<br />
bearing capacity and can thus cause premature failure<br />
• Deformation of the bearing components in extreme c<strong>as</strong>es<br />
• An incre<strong>as</strong>e in temperature can also cause deterioration<br />
or destruction of the lubricant<br />
the middle of the raceway<br />
• Unusual wear pattern on the outside of the outer ring<br />
Remedy<br />
• Traces of wear running diagonally to the raceway edge of<br />
the standing ring<br />
Remedy<br />
• Adjust the bearing clearance and/or the wheel bearing<br />
correctly<br />
Remedy<br />
• Improve installation of the bearing<br />
• Correct bearing clearance<br />
• Inspect the shafts and housing for signs of running errors<br />
at the shoulders and bearing seats<br />
• Temperature or overload checks<br />
• Follow the manufacturers‘ installation instructions.<br />
• Machine the thread and bearing seat<br />
• Adequate heat dissipation<br />
• Use precise shaft nuts
Wheel bearing failure diagnosis 10 | 11<br />
Diagnosing<br />
bearing damage<br />
Fatigue<br />
Impressions on the roller body<br />
Soiling<br />
Lubrication faults<br />
Cause<br />
Cause<br />
Cause<br />
Cause<br />
• Use of the wrong bearing (not visible from the outside,<br />
• Static bearing overload<br />
• Suspended particles of dust, dirt or abr<strong>as</strong>ive substances<br />
• Limited lubrication<br />
possibly the inner design is not suitable for the specific use)<br />
• Heavy impacts on the bearing<br />
from dirty workplaces<br />
• Excessive temperatures<br />
Effect<br />
• Use of a hammer during installation<br />
• Dropping the bearings or mounted components<br />
• Dirty hands or tools<br />
• Foreign additives in lubricants or cleaning solutions<br />
Effect<br />
• Often referred to <strong>as</strong> peeling; caused by cracks in the<br />
bearing surface and constant abr<strong>as</strong>ion from individual<br />
• Fitting a bearing to a shaft by applying force to the<br />
outer ring.<br />
Effect<br />
• Discoloured roller bodies (blue/brown) and traces of wear<br />
on the roller bodies<br />
small material particles from the inner/outer rings or<br />
roller bodies<br />
Effect<br />
• Impressions in roller bodies and raceways cause<br />
vibrations<br />
• Abr<strong>as</strong>ion of the roller bodies, rings and cages<br />
• Total failure<br />
• Peeling is a progressive process which, once begun,<br />
spreads quickly with constant use<br />
• Impressions on the roller body appear <strong>as</strong> dents in the<br />
raceways and incre<strong>as</strong>ed bearing vibrations (noise level)<br />
Remedy<br />
Remedy<br />
• It is always accompanied by a noticeable incre<strong>as</strong>e in<br />
noise levels<br />
• Severe impressions on the roller body can cause<br />
premature failure<br />
• Keep workplaces, tools, equipment and hands clean to<br />
reduce the risks<br />
• Use the right lubricant in the right quantity<br />
• Check the initial tension to reduce the bearing<br />
Remedy<br />
Remedy<br />
• Do not perform any grinding work near to the bearing<br />
installation workplace<br />
temperatures<br />
• Replace the bearing<br />
• Use suitable tools to fit/remove the bearings<br />
• Leave the bearings in their original wrappings until they<br />
• Adequate heat dissipation<br />
• Only apply force to the ring with a stationary fit<br />
are fitted in the vehicle<br />
• Follow the manufacturers‘ installation instructions<br />
• The area should be adequately sealed off from dirty<br />
surroundings<br />
• Cover any open, fitted bearings during work breaks
Wheel bearing failure diagnosis 12 | 13<br />
Diagnosing<br />
bearing damage<br />
Corrosion<br />
Flange fractures<br />
Wear due to scoring<br />
Wrong load direction<br />
Cause<br />
Cause<br />
Cause<br />
Cause<br />
• Bearings were exposed to corrosive fluids or surroundings<br />
• Defective seals or unsuitable lubricants<br />
Effect<br />
• Red/brown discolouring or deposits on the roller bodies,<br />
raceways or cages<br />
• Incre<strong>as</strong>ed vibrations, followed by wear<br />
• Incre<strong>as</strong>ed radial clearance or loss of initial tension<br />
Remedy<br />
• Avoid corrosive fluids in the vicinity of the bearings<br />
• Use a suitable lubricant with corresponding specification<br />
• Unacceptably high axial load, inadequate support for<br />
the flange<br />
• Axial impact load<br />
• Incorrect installation/dismantling<br />
Effect<br />
• Supporting flanges are partly or completely fragmented<br />
or broken<br />
Remedy<br />
• Keep the load within the intended limits<br />
• Comply with the installation instructions and procedures<br />
• Inadequate lubrication under high loads<br />
• Inadequate quantity or consistency of the lubricant<br />
• No hydrodynamic lubricating film between the contact<br />
surface of the rollers and the flange<br />
• Too much initial tension due to thermal expansion<br />
• Rollers canted by raceway wear or tilted rings<br />
Effect<br />
• Partial or large welds and deep scratches in the flanges<br />
and roller contact surfaces<br />
• Coking of the lubricant in this zone<br />
Remedy<br />
• Use a suitable lubricant with corresponding specification<br />
• Angled ball bearings are designed for one load direction.<br />
When load is applied in the opposite direction, low<br />
shoulders cause an elliptic contact surface to be cut away<br />
• This results in a very high load and an incre<strong>as</strong>e in<br />
temperature, followed by incre<strong>as</strong>ing vibration and<br />
premature failure<br />
Effect<br />
• Balls show linear groove wear caused by the balls turning<br />
over the edge of the raceway<br />
Remedy<br />
• Make sure the correct bearing initial tension is used<br />
• Make sure that the angled ball bearings are fitted correctly
Wheel bearing failure diagnosis 14 | 15<br />
Fitting the wheel<br />
bearing in the<br />
steering knuckle<br />
Mounting the<br />
wheel hub<br />
First install the complete wheel bearing in the location<br />
bore of the steering knuckle <strong>as</strong> follows.<br />
1.<br />
1. Place the wheel hub (4) on the b<strong>as</strong>e plate (3) of a press.<br />
Use an installation tool (2) to press on the wheel bearing that<br />
is already fitted in the steering knuckle (5).<br />
1. Press the wheel bearing into the location bore of the<br />
steering knuckle (4) by applying pressure to the bearing outer<br />
Important: the tool must only be applied to the contact<br />
ring. To do so, use a dummy block (1) with groove (2) to<br />
ensure that the pressing force (F) is applied to the outer ring.<br />
The steering knuckle lies on the b<strong>as</strong>e plate (3) of the press.<br />
surface of the inner ring!<br />
1 = Dummy block<br />
F = Pressing force<br />
2. Press the wheel bearing into the location bore of the<br />
steering knuckle (5) by applying pressure to the bearing<br />
2.<br />
Note: in some vehicles, the components are installed in the<br />
reverse order. The steering knuckle lies on the b<strong>as</strong>e plate<br />
outer ring. The steering knuckle lies with its flange side<br />
and the wheel hub is pressed in from above.<br />
centred on the carrying sleeve (3) (arrow). A press drives the<br />
bearing into position, precisely in-line, using a dummy block<br />
(1) with groove (2).<br />
2.1. Finally fit a circlip in the groove in the steering knuckle<br />
using special pliers to secure the wheel bearing in the axial<br />
Important: do not forget the carrying sleeve! It<br />
plane.<br />
2.2. Pay attention to the bevel on one side of the bearing<br />
when fitting the wheel bearing in the location bore. This<br />
bevel must lie in the pressing-in direction to prevent the<br />
4 = Press b<strong>as</strong>e<br />
plate<br />
F = Pressing force<br />
supports the inner ring during the installation procedure<br />
to ensure that no notches are made in the ball<br />
raceways of the wheel bearing outer ring!<br />
1 = Wheel hub<br />
2 = Steering knuckle<br />
3 = Installation tool<br />
4 = B<strong>as</strong>e plate<br />
bearing from tilting while it is being pressed in.<br />
2. Tighten the f<strong>as</strong>tening nut of the wheel bearing using the<br />
Note: the wheel bearing must not be twisted during<br />
torque recommended by the vehicle manufacturer. The<br />
installation, neither in the location bore nor on the wheel<br />
Important: it is essential to ensure that the pressing<br />
nut torque is not only important for f<strong>as</strong>tening the wheel but<br />
hub. Otherwise this could cause considerable damage.<br />
force (F) is always transferred to the balls in the<br />
also ensures that the wheel bearing runs with the optimum<br />
Complete wheel bearing units are available already<br />
bearing! Otherwise this could cause notches to the<br />
clearance. We urgently recommend using a torque wrench<br />
lubricated ex works. They need no additional lubrication<br />
running surfaces that will damage the bearing!<br />
to achieve the right torque.<br />
and must not be cleaned with solvents. Solvents could<br />
cause premature failure of the bearings.
Wheel bearing failure diagnosis 16 | 17<br />
Installing and adjusting<br />
tapered roller bearings in<br />
motor vehicle wheel hubs<br />
General<br />
The procedure for dismantling and fitting a tapered ball<br />
bearing can differ, depending on the vehicle manufacturer.<br />
Generally comply with the instructions issued by the vehicle<br />
manufacturer!<br />
3. Gre<strong>as</strong>e the inner ring of the inner bearing well.<br />
Important: also apply gre<strong>as</strong>e between the cage, inner<br />
ring and rollers (arrows)!<br />
4. Insert the inner ring in the wheel hub.<br />
5. Press the rotary shaft seal into the wheel hub.<br />
Important: the sealing lip must point towards<br />
the bearing!<br />
Car bearing with fitted tapered roller<br />
bearings (non-driving axle).<br />
1. Clean wheel hub body.<br />
2. Lightly oil the seats of the outer rings (arrows). Press in the<br />
two outer rings (1 and 3) with a punch (2).<br />
6. Place the safety cap (1) and the spacer ring (2) on the<br />
steering knuckle.<br />
Important: the safety cap must lie on the full periphery<br />
of the steering knuckle collar (arrows)!<br />
Important: the punch must only act on the contact<br />
surface of the outer ring! The outer rings must lie flush<br />
on the housing shoulders!
Wheel bearing failure diagnosis 18 | 19<br />
Installing and adjusting<br />
tapered roller bearings in<br />
motor vehicle wheel hubs<br />
7. Push the wheel hub onto the steering knuckle.<br />
Important: make sure that the rotary shaft seal is<br />
not damaged!<br />
13. Check that the bearing runs correctly with the right tilting<br />
clearance.<br />
Note: the wheel must turn e<strong>as</strong>ily without any restraint.<br />
Check and adjust the axial clearance of the bearing (use<br />
me<strong>as</strong>uring instrument if necessary).<br />
8. Gre<strong>as</strong>e the inner ring of the outer bearing well.<br />
Important: also apply gre<strong>as</strong>e between the cage, inner<br />
ring and rollers (arrows)!<br />
9. Push the inner ring of the outer bearing onto the steering<br />
knuckle.<br />
14. Turn the c<strong>as</strong>tellated nut back through max. 1/12 turn<br />
until it coincides with the next split pin hole and secure with<br />
a split pin.<br />
Important: comply with the repair instructions issued<br />
by the vehicle manufacturers!<br />
10. Fit the impact plate (1).<br />
11. Screw on the c<strong>as</strong>tellated nut (2).<br />
12. Tighten the c<strong>as</strong>tellated nut while turning the wheel hub<br />
at the same time until you feel a resistance.<br />
15. Fit the cover in position.<br />
16. After the trial run, check to see whether the bearing<br />
clearance h<strong>as</strong> changed. Correct the setting if necessary.
Egon von <strong>Ruville</strong> GmbH<br />
Billbrookdeich 112 • 22113 Hamburg • Germany<br />
Phone: +49 (0)40 73344 - 0 • Fax: +49 (0)40 73344 - 199<br />
info@ruville.de • www.ruville.de<br />
75/073 R392/1.0/5.2010/MA-GB