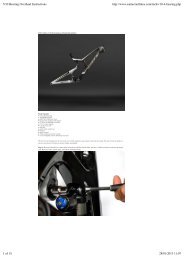
EBB Chameleon - Santa Cruz Bikes
EBB Chameleon - Santa Cruz Bikes
EBB Chameleon - Santa Cruz Bikes

Create successful ePaper yourself
Turn your PDF publications into a flip-book with our unique Google optimized e-Paper software.
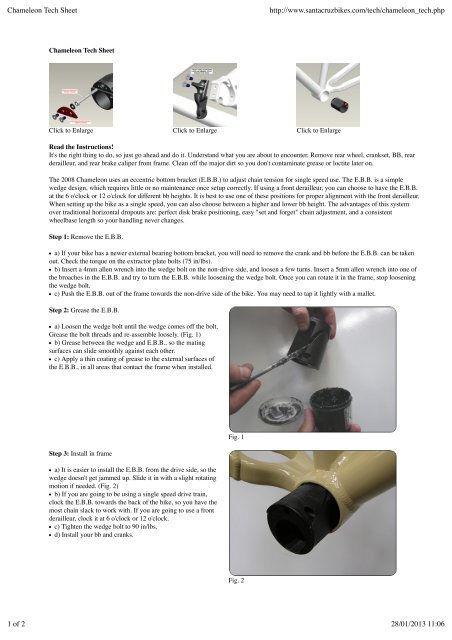
<strong>Chameleon</strong> Tech Sheet<br />
http://www.santacruzbikes.com/tech/chameleon_tech.php<br />
<strong>Chameleon</strong> Tech Sheet<br />
Click to Enlarge Click to Enlarge Click to Enlarge<br />
Read the Instructions!<br />
It's the right thing to do, so just go ahead and do it. Understand what you are about to encounter. Remove rear wheel, crankset, BB, rear<br />
derailleur, and rear brake caliper from frame. Clean off the major dirt so you don't contaminate grease or loctite later on.<br />
The 2008 <strong>Chameleon</strong> uses an eccentric bottom bracket (E.B.B.) to adjust chain tension for single speed use. The E.B.B. is a simple<br />
wedge design, which requires little or no maintenance once setup correctly. If using a front derailleur, you can choose to have the E.B.B.<br />
at the 6 o'clock or 12 o'clock for different bb heights. It is best to use one of these positions for proper alignment with the front derailleur.<br />
When setting up the bike as a single speed, you can also choose between a higher and lower bb height. The advantages of this system<br />
over traditional horizontal dropouts are: perfect disk brake positioning, easy "set and forget" chain adjustment, and a consistent<br />
wheelbase length so your handling never changes.<br />
Step 1: Remove the E.B.B.<br />
a) If your bike has a newer external bearing bottom bracket, you will need to remove the crank and bb before the E.B.B. can be taken<br />
out. Check the torque on the extractor plate bolts (75 in/lbs).<br />
b) Insert a 4mm allen wrench into the wedge bolt on the non-drive side, and loosen a few turns. Insert a 5mm allen wrench into one of<br />
the broaches in the E.B.B. and try to turn the E.B.B. while loosening the wedge bolt. Once you can rotate it in the frame, stop loosening<br />
the wedge bolt.<br />
c) Push the E.B.B. out of the frame towards the non-drive side of the bike. You may need to tap it lightly with a mallet.<br />
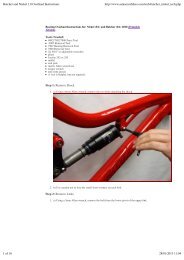
Step 2: Grease the E.B.B.<br />
a) Loosen the wedge bolt until the wedge comes off the bolt.<br />
Grease the bolt threads and re-assemble loosely. (Fig. 1)<br />
b) Grease between the wedge and E.B.B., so the mating<br />
surfaces can slide smoothly against each other.<br />
c) Apply a thin coating of grease to the external surfaces of<br />
the E.B.B., in all areas that contact the frame when installed.<br />
Step 3: Install in frame<br />
a) It is easier to install the E.B.B. from the drive side, so the<br />
wedge doesn't get jammed up. Slide it in with a slight rotating<br />
motion if needed. (Fig. 2)<br />
b) If you are going to be using a single speed drive train,<br />
clock the E.B.B. towards the back of the bike, so you have the<br />
most chain slack to work with. If you are going to use a front<br />
derailleur, clock it at 6 o'clock or 12 o'clock.<br />
c) Tighten the wedge bolt to 90 in/lbs.<br />
d) Install your bb and cranks.<br />
Fig. 1<br />
Fig. 2<br />
1 of 2 28/01/2013 11:06
<strong>Chameleon</strong> Tech Sheet<br />
http://www.santacruzbikes.com/tech/chameleon_tech.php<br />
Step 4: Single speed chain tensioning<br />
a) Install the rear wheel and chain. Make the chain as short<br />
as you can, while still fitting around the rear cog and front<br />
chainring.<br />
b) Loosen the wedge bolt with a 4mm allen wrench until you<br />
can spin the E.B.B. around with a 5mm allen in the broach.<br />
(Fig. 3)<br />
c) If you want a lower bb height, rotate the E.B.B. clockwise<br />
(while looking at the NON-Drive side), until the chain has<br />
appropriate tension. Rotate the E.B.B. counter-clockwise if<br />
you want a higher bb.<br />
d) Make sure you spin the cranks when you reach a good<br />
chain tension, as chainrings aren't always perfectly round. The<br />
cranks should spin freely, even through the tight spots. (Fig. 4)<br />
e) Once in the correct position, tighten the wedge bolt to 90<br />
in/lbs.<br />
Fig. 3<br />
Fig. 4<br />
Bonus: Derailleur Hanger Replacement<br />
a) Use a good fresh 3mm (or 4mm, depending on the ra of<br />
your bike) allen wrench and remove both bolts.<br />
b) Apply loctite 242 to bolts and install new dropout. Hold<br />
hanger straight while you torque the bolts to 80 in/lbs. (Fig. 6)<br />
Fig. 6<br />
2 of 2 28/01/2013 11:06