Tata Indica - V2 - Electromanuals.org
Tata Indica - V2 - Electromanuals.org
Tata Indica - V2 - Electromanuals.org

Create successful ePaper yourself
Turn your PDF publications into a flip-book with our unique Google optimized e-Paper software.
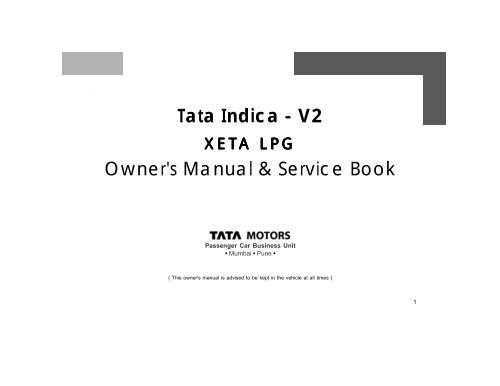
<strong>Tata</strong> <strong>Indica</strong> - <strong>V2</strong><br />
XETA LPG<br />
Owner's Manual & Service Book<br />
Passenger Car Business Unit<br />
• Mumbai • Pune •<br />
( This owner's manual is advised to be kept in the vehicle at all times )<br />
1
• Should any question or query exist regarding any<br />
aspect of your car, please contact the nearest TATA<br />
MOTORS dealers, who will be pleased to assist<br />
wherever possible.<br />
• The recommended routine maintenance servicing along<br />
with any running repairs that may be required, should<br />
be entrusted to TATA MOTORS dealerships or to TATA<br />
MOTORS Authorised Service Centres (TASCs) or<br />
TATA MOTORS Authorised Service Points (TASPs)<br />
to ensure that only latest methods and genuine TATA<br />
MOTORS replacement parts are used for the<br />
continued reliability, safely and performance of the<br />
vehicle.<br />
• In the event of the vehicle being sold, please ensure<br />
that this manual is left in the vehicle for the reference<br />
of the new owner.<br />
• This Owner's manual and service book includes<br />
information of the operation and maintenance of various<br />
equipment installed on the different versions of <strong>Tata</strong><br />
<strong>Indica</strong> <strong>V2</strong> car. Please note that this manual applies<br />
to all the models and explains all equipment including<br />
options not installed on your car.<br />
© Copyright 2004 TATA MOTORS'<br />
All rights reserved. The material in this manual may<br />
not be reproduced or copied, in whole or in part, in<br />
any form without written permission from TATA<br />
MOTORS.<br />
2
Dear Customer,<br />
Thank you for selecting <strong>Tata</strong> <strong>Indica</strong> <strong>V2</strong> XETA LPG - an Eco Friendly car of your choice<br />
We welcome you to the world of advanced automotive engineering in a form especially suited to your operating<br />
conditions. <strong>Tata</strong> indica LPG incorporates the latest generation LPG Injection Technology.<br />
This Supplement gives you all the information necessary for making your ownership of this car a thoroughly<br />
satisfying and enjoyable experience.<br />
To assist you in maintaining your car as per recommended schedule, we have a widespread network of dealers<br />
and service centres. The list is included in this book for your convenience.<br />
If you need any special assistance, please call on our Regional / Zonal level offices which are also listed<br />
in this book.<br />
Please note that by adhering to the correct operating procedures and by availing the scheduled maintenance<br />
services at our authorised service centres, you can obtain the maximum performance from your car.<br />
We request you to go through the book and derive many miles of motoring pleasure.<br />
We wish you Safe and Happy Driving<br />
3
INTRODUCTION 7 MAINTENANCE & CAR CARE 91<br />
CONTENTS<br />
VALUE ADDED SERVICE 9<br />
TAKING CARE OF THE ENVIRONMENT 17<br />
We request you to spend a few minutes in going<br />
through our environmental concern<br />
WARRANTY 19<br />
INFORMATION AT A GLANCE 21<br />
• Filling Station Information<br />
• Car Dimensions<br />
INTRODUCTION - LPG 23<br />
• Know your <strong>Indica</strong> LPG • Safety<br />
• Compliance to Motor Vehicle rules<br />
• Location of LPG system • Location of fuses<br />
BEFORE DRIVING 33<br />
• Controls • Instrument Panel<br />
• Heating, Ventilation & Air Conditioning<br />
• Interiors and Accessories<br />
STARTING & DRIVING THE CAR 75<br />
• Check List • Starting & Stopping<br />
• Preparing to Drive • Fuel Economy<br />
• Driving in adverse conditions<br />
• Driving Petrol cars • Driving safety<br />
• Engine Compartment Lamp<br />
• Windshield Washer<br />
• Air Filter • Engine Cooling System<br />
• Engine Belt Tension • Oil & Oil Filter<br />
• Fuel Filter • Transaxle • Fuel Filling Cap<br />
• Clutch & Brakes • Power Steering<br />
• Battery • Catalytic Converter<br />
• Spark Plug • EGR System (Diesel Engine)<br />
• Fuses & Relays • Wheels & Tyres<br />
EMERGENCY SERVICE TIPS 129<br />
• Engine • Clutch • Transaxle • Brakes<br />
• Steering System • Electrical • Suspension<br />
IMPORTANT INFORMATION 137<br />
• Location of Aggregate Numbers<br />
• Fuel, Coolants & Lubricants<br />
• Technical Specifications<br />
• Service Schedule<br />
• Car Record Sheet<br />
LIST OF LPG FILLING STATIONS 155<br />
CUSTOMER SUPPORT NETWORK 175<br />
• <strong>Tata</strong> Motors Offices & Network<br />
• Names & Address of <strong>Tata</strong> Motors Main Dealers<br />
(MDs), <strong>Tata</strong> Motors Authorised Service Centres<br />
(TASCs), <strong>Tata</strong> Motors Authorised Service<br />
Points (TASPs)<br />
5
6<br />
1-800-209-6688
INTRODUCTION<br />
Congratulations on acquiring the <strong>Tata</strong> <strong>Indica</strong> <strong>V2</strong> XETA<br />
LPG and welcome to the family of <strong>Tata</strong> <strong>Indica</strong> car owners.<br />
This owner's manual has been prepared to acquaint you<br />
with the operation and maintenance of your new <strong>Tata</strong> <strong>Indica</strong><br />
<strong>V2</strong> XETA LPG and to provide you with important safety<br />
information and tips for effective driving. Please refer to it<br />
from time to time for enjoyable, safe and troublefree driving<br />
pleasure.<br />
This manual is an essential part of your car and should<br />
always be kept in the car.<br />
Regular servicing of your car ensures its road worthiness<br />
and troublefree operation.<br />
To assist you in maintaining your <strong>Tata</strong> <strong>Indica</strong> <strong>V2</strong> XETA<br />
LPG we have a network of dealers and Service Centres<br />
throughout the country. The list is included in this manual<br />
for your convenience.<br />
Happy motoring<br />
<strong>Tata</strong> <strong>Indica</strong> <strong>V2</strong> XETA LPG is a safe car designed for<br />
quality performance. In order to maintain the level of<br />
performance and reliability, it is important that only <strong>Tata</strong><br />
Motors genuine accessories are to be fitted. Any accessory<br />
that is fitted or modification that is carried out without<br />
authorisation can hamper the safety & performance of<br />
the car besides depriving you of your warranty benefits.<br />
Use of genuine parts, designed and manufactured to our<br />
exacting standards, is the best way to maintain your <strong>Tata</strong><br />
<strong>Indica</strong> <strong>V2</strong> XETA LPG in peak operating condition. Please<br />
do not use substitutes. They always prove costlier in the<br />
long run.<br />
Failure to use genuine parts can invalidate warranty<br />
claims.<br />
The information and specifications given in this book are<br />
valid as on the date of printing. <strong>Tata</strong> Motors reserves the<br />
right to make changes in design and specifications and/<br />
or to make additions to or improvements in this product<br />
without obligation to install them on products previously<br />
sold.<br />
<strong>Indica</strong>tes "CAUTION"<br />
7
VALUE ADDED SERVICE<br />
Dear Customer,<br />
It is our never ending responsibility and endeavor to ensure that our customer’s expectations are fulfilled<br />
comprehensively. To fulfill your vehicle service needs, we recommend the following :<br />
1) Extended Warranty<br />
2) Anti Rust / Sound Deadening / Engine waxing treatment<br />
3) Iftex Fuel Additive : System D (For diesel) and System G (For Petrol)<br />
4) Car detailing programming : Exterior Enrichment and Interior Enrichment Program<br />
These products shall help maintain optimum vehicle performance and shall enhance vehicle life.<br />
We have tied up with best in the Class companies, who would bring you the above world class products at<br />
affordable prices. The above products are available with all our Dealers, TASCs and TASPs.<br />
Our Dealer Service marketing executive shall explain to you the benefits of the above mentioned products.<br />
9
EXTENDED WARRANTY<br />
<strong>Tata</strong> Motors recommends the purchase of Extended Warranty,a product of M/s Global Administration Services and<br />
United India Insurance.<br />
Coverage : Mechanical + Electrical + Emission<br />
Benifits :<br />
• Insures you against unforeseen break down repair bills.<br />
• Documentation is simple and hassle free.<br />
• Near cashless & speedy claim settlement.<br />
Term :<br />
• 18 + 18 or 150000 kms whichever occurs first (For <strong>Indica</strong>, Indigo & Sumo).<br />
• 18 + 30 or 150000 kms whichever occurs first (For <strong>Indica</strong>, Indigo, Sumo and Safari Dicor).<br />
• 50000 kms + 50000 kms or 36 months whichever occurs first (For Taxis).<br />
• 50000 kms + 100000 kms or 36 months whichever occurs earlier (for Taxis-<strong>Indica</strong>,Indigo,Marina).<br />
EMISSION WARRANTY : Emission warranty is limited to the period of the Extended Warranty or 80,000 kms whichever<br />
is earlier.<br />
Extended Warranty available in the dealership from where you have purchased your vehicle. We strongly recommend<br />
purchase of Extended Warranty at time of purchase of your vehicle. Surcharge applicable on purchase of Extended<br />
Warranty after 30 days of purchase of vehicle. The Dealer Service Marketing Executive shall explain to you the Terms<br />
and conditions, Coverage and Owner’s responsibility.<br />
Extended Warranty Booklet & Cover Note :<br />
The Extended Warranty booklet and cover note is the basis of the contract between United India Insurance Co. and the<br />
Owner of the vehicle shown on the Extended Warranty Cover note. The Customer to retain this booklet and the same to be<br />
produced to the dealer while claiming benefits under Extended Warranty.<br />
10
EXTENDED WARRANTY<br />
Note :<br />
• The 18 / 30 month extended warranty does not follow the 18 month Manufacturer's warranty.<br />
• The extended warranty comes into force once the manufacturer’s warranty expires e.g. after 18 Months.<br />
• It is more restrictive as by the time it comes into force the vehicle is already 18 months old.<br />
What is covered ?<br />
• Mechanical / Emission / Electrical break down as defined in this warranty and confirmed by the dealer within the stipulated<br />
terms and conditions.<br />
• <strong>Tata</strong> Motors dealer shall either repair or replace any part found to be defective with a new part or an equivalent at no<br />
cost to the owner for parts or labour.<br />
• Such defective parts which have been replaced will become property of United India Insurance Company.<br />
• Comprehensive list of parts covered is mentioned in the page 9-12 of the Extended Warranty Booklet.<br />
What is not covered ?<br />
Pages 6 – 7 of the Extended Warranty Booklet provided details of the exclusion list.<br />
Owner’s Responsibility :<br />
• Proper use, maintenance and care of the vehicle in accordance with the instructions contained in the Owner’s<br />
Manual and Service Booklet. The records of the same to be ensured in Owner’s Manual.<br />
• Retention of maintenance service bills.<br />
• Always produce extended warranty booklet while servicing & claim in a waaranty..<br />
I / We have been explained the Terms and conditions, Coverage and Owner’s responsibility by the Dealer Service<br />
Marketing Executive.<br />
I wish to avail / Do not wish to avail extended warranty<br />
Customer’s Sign Dealer’s Sign<br />
11
FUEL ADDITIVES<br />
IFTEX: Triple action diesel additive :<br />
One Additive, multiple benefits<br />
• For diesel cars: Iftex System D • For Petrol cars: Iftex System G<br />
Benefits:<br />
• Cleans injector and fuel system.<br />
• Maintains peak engine performance.<br />
• Saves diesel / petrol and maintenance cost.<br />
• Reduces smoke and harmful emission.<br />
• Helps Smooth running of the engine<br />
• Reduces deposit on intake manifold and combustion chamber.<br />
• Reduces deposit on injector tips.<br />
Approved for use in TATA INDICA, INDIGO, SUMO & SAFARI<br />
TREAT YOUR CAR TO EXPERIENCE, THE ULTIMATE PERFORMANCE<br />
Directions of use :<br />
• Remove cap, squeeze lightly till dispenser fills to 10 ml mark. Add before filling up the tank.<br />
• Use at the rate of 1 ml per litre of fuel. For best results, regular use is recommended.<br />
I / We have been explained the Terms and conditions, Coverage and Owner’s responsibility by the Dealer Service<br />
Marketing Executive.<br />
I wish to use / Do not wish to use this treatment<br />
12<br />
Customer’s Sign Dealer’s Sign
ANTI RUST, SOUND DEADENING & ENGINE WAXING<br />
Why are Corrosion Protection Waxes necessary?<br />
Corrosion is caused by:<br />
Water / salt water acid rain & atmospheric fallouts.<br />
Critical areas are:<br />
Cavities: joints, crevices, spot welds, underbody<br />
• Corrosion is the most important factor when we talk about the vehicle life. If you treat your car you can<br />
prolong the life.<br />
• It is very dangerous to drive around in a corroded car.<br />
• The corrosion creeps onto the car from the inside and from the outside. The most dangerous kind of<br />
corrosion is often not discovered until it is too late.<br />
Benefits of Anti -Rust treatment :<br />
• A professionally applied range of world class products offering real value to the new and used car customer.<br />
• The treatment has been developed to withstand the harshest environmental and climatic conditions (rst.<br />
Pollutants, stone and gravel impact, etc)<br />
• Insulate cabin space from external noises.<br />
• Expensive tin work and Denting / Painting avoided.<br />
• Higher resale value for the car.<br />
• Higher safety – uncorroded vehicle<br />
• Upto 60 months warranty & 10 free checkups available<br />
13
ANTI RUST, SOUND DEADENING & ENGINE WAXING<br />
Engine Wax Treatment :<br />
Engine Wax is a beige coloured transparent lacquer coating on the engine compartment.<br />
• Corrosion Prevention for the Engine compartment<br />
• Neat, clean and New Look to Engine compartment<br />
• No effect on MPFI vehicles<br />
• Engine wax can withstand upto 200 degrees temp<br />
• No need of cleaning the engine compartment with diesel once engine wax is sprayed<br />
• Life of over a year<br />
Sound Deadening System :<br />
Door vibration deadeners - These pads when stuck on the insides of the sheet metal increase sheet metal rigidity,<br />
reduce vibrations and increase riding comfort.<br />
• Used for reducing the sheet metal vibration in a vehicle.<br />
• Product to be used once in the life of the vehicle - Life Time Warranty<br />
• Effect is Life long i.e. until & unless pads are physically removed.<br />
• Negligible increase in Weight & hence no effect on fuel consumption.<br />
• Areas covered - four doors, rear quarter panels & dicky. In case of diesel vehicles, can be used in the bonnet.<br />
<strong>Tata</strong> Motors has tied up with M/s Wuerth and M/s STS Chemicals (Dinitrol for this world class treatment at affordable<br />
prices. This treatment is available in all authorized workshops. The Dealer Service Marketing Executive will<br />
explain to you the benefits and terms and conditions of this treatment.<br />
14<br />
I / We have been explained the Terms and conditions, Coverage and Owner’s<br />
responsibility by the Dealer Service Marketing Executive.<br />
I wish to avail / Do not wish to avail these treatment<br />
Customer’s Sign Dealer’s Sign
Vehicle Exterior Enrichment :<br />
Why vehicles are painted?<br />
• For Corrosion protection of the metal surfaces.<br />
• Ease of application from other corrosion protection treatments.<br />
• Cheaper than other corrosion protection methods eg.galvanizing, anodizing.<br />
• For decoration and identification.<br />
Various Environmental Hazards affecting paints :<br />
• Environmental hazards: destroy your vehicle's finish.<br />
• Even as your new vehicle rolls off the assembly line, the paint is not protected.<br />
The enemy :<br />
Ultraviolet Rays, Pollution, Tree Sap, Bird Droppings, Car Wash Chemicals, Road Salt, Acid Rain.<br />
Benefits: Vehicle Exterior Enrichment<br />
• Removal of medium scratches, orange peel, oxidation , dust nibs etc & swirl marks from painted surface.<br />
• Restoration of original gloss levels UV protection after gloss is restored.<br />
• Cleaning & dressing of tyres, Bumpers & all exterior plastic moldings/trims.<br />
EXTERIOR AND INTERIOR ENRICHMENT PROGRAM<br />
<strong>Tata</strong> Motors has tied up with M/s Opulent (Waxoyl brand) and M/s 3M for this world class treatment at affordable<br />
prices. This treatment is available in all authorized workshops. The Dealer Service Marketing Executive will explain to<br />
you the benefits and terms and conditions of this treatment.<br />
15
EXTERIOR AND INTERIOR ENRICHMENT PROGRAM<br />
Vehicle Interior Enrichment<br />
Why protect your new car’s fabric interior ?<br />
• Someone will soil your vehicle's fabric carpet or seats.<br />
• A significant detractor from your vehicle's resale value.<br />
• A permanent stain on your vehicle's interior fabric.<br />
The enemy :<br />
Drink Spills - Food Stains - Mud - Ultraviolet Rays Pets - Traffic<br />
Benefits: Vehicle Interior Enrichment<br />
• Removal of medium stains and dirt from all interior parts of the car i.e carpet, upholstery and roof lining.<br />
• Cleaning of windshield and all windows (inside and outside)<br />
• Dressing of all internal plastics (eg: door pad trims )and rubber parts.<br />
• The treatment involves cleaning and dressing of All parts of the exposed interiors.<br />
• Specialised protection for seat fabric from liquid spills.<br />
<strong>Tata</strong> Motors has tied up with M/s Opulent (Waxoyl brand and M/s 3M for this world class treatment at affordable<br />
prices. This treatment is available in all authorized workshops. The Dealer Service Marketing Executive will explain to<br />
you the benefits and terms and conditions of this treatment.<br />
I / We have been explained the Terms and conditions, Coverage and Owner’s responsibility by the Dealer Service<br />
Marketing Executive.<br />
I wish to avail / Do not wish to avail these treatment<br />
16<br />
Customer’s Sign Dealer’s Sign
ENVIRONMENTAL PROTECTION Taking Care of the Environment<br />
Taking care of the Environment<br />
<strong>Tata</strong> Motors is committed to producing cars using<br />
environmental friendly technology. A number of features<br />
have been incorporated in our passenger cars which are<br />
specifically designed to ensure environmental compatibility<br />
throughout the life cycle of the car. We would like to inform<br />
you that your car meets Emission norms and is being<br />
regularly validated at the manufacturing stages to keep up<br />
with the stringent emission norms.<br />
As a user you too can protect the environment by operating<br />
your car in a proactive manner. A lot depends on your<br />
driving style and the way you maintain your car. Listed<br />
below are few tips that will help you do so.<br />
WHILE DRIVING :<br />
‣ Avoid frequent and violent acceleration.<br />
‣ Do not carry any unnecessary weight on the vehicle<br />
as it overloads the engine.<br />
‣ Avoid using devices requiring high power consumption<br />
during slow traffic condition.<br />
‣ It is not advisable to warm up the engine during the<br />
first start of the day by idling, as cold temperatures<br />
within the engine could cause rise in the emission<br />
such as CO & HC particulate.<br />
‣ Monitor the car’s fuel consumption regularly. If it shows<br />
a rising trend get the car immediately attended to at<br />
the TATA MOTORS Authorised Service Centre.<br />
‣ Switch off the engine during long stops at traffic jams<br />
or signals. If you need to keep the engine running,<br />
avoid unnecessarily revving or stopping and starting.<br />
‣ Use only unleaded fuel in petrol cars.<br />
‣ It is not necessary to rev up the engine before turning<br />
it off as it unnecessarily burns the fuel.<br />
‣ For petrol cars switch off the ignition only when engine<br />
is at idling and when the vehicle is stationary, not when<br />
the vehicle is running.<br />
‣ Shift to higher gears as soon as it is possible. Use<br />
each gear upto 2/3 rd of it’s maximum engine speed. A<br />
chart indicating gear shifting speeds is given in this<br />
book.<br />
MAINTENANCE OF THE CAR :<br />
‣ Ensure that recommended maintenance is carried out<br />
on the car regularly at the TATA MOTORS Authorised<br />
Service Outlets.<br />
17
ENVIRONMENTAL PROTECTION Taking Care of the Environment<br />
‣ As soon as you notice any leakage of oil or fuel in the<br />
car we recommend that you get it attended<br />
immediately.<br />
‣ Use only recommended brands and grades of<br />
lubricants & coolants and clean/uncontaminated fuels.<br />
‣ Get your vehicle checked for emission periodically<br />
by our authorised dealer and regularly renew the<br />
P.U.C. Certificate.<br />
‣ Ensure that fuel filter, oil filter, breathers are periodically<br />
checked and if required, replace the same using only<br />
genuine recommended brands.<br />
‣ Do not pour used oils or coolants into sewage drains,<br />
garden soil or open streams. Dispose of the used filters<br />
and batteries in compliance with the current legislation.<br />
‣ Do not allow any unauthorised person to tamper with<br />
the engine settings or to carry out modifications on<br />
the car.<br />
‣ Never allow the vehicle to run out of fuel. This will<br />
result in misfiring of the engine and could cause harm<br />
to the catalytic converter.<br />
‣ Parts like brake liners and clutch disc should be<br />
vacuum cleaned. Do not use compressed air for<br />
cleaning these parts which may spread the dust in<br />
the atmosphere.<br />
While carrying out the servicing or repairs of your car,<br />
you should pay keen attention to some of the important<br />
engine aggregates which greatly affect emission. These<br />
components are :-<br />
1. Fuel pump, Injectors / LPG Fuel System<br />
2. Air intake & Exhaust system especially for leakages<br />
3. Cylinder head for valve leakage<br />
4. All filters such as air, oil & fuel filters (check<br />
periodically)<br />
5. Catalytic converter<br />
6. Ignition system - Spark plug gap<br />
This Owner’s Manual & Service Book contains further<br />
information on driving precautions and maintenance care<br />
leading to environment protection. Please familiarise<br />
yourself with these aspects before driving.<br />
18
WARRANTY Terms and Conditions<br />
We WARRANT each <strong>Tata</strong> <strong>Indica</strong> Xeta<br />
LPG car and parts thereof manufactured<br />
by us to be free from defect in material<br />
and workmanship subject to the following<br />
conditions -<br />
1. This warranty shall be for 18 months<br />
from the date of sale of the car<br />
irrespective of the distance covered.<br />
However, for the cars used for<br />
commercial applications (used for<br />
hire or reward viz those operating<br />
with a yellow number plate), the<br />
warranty shall be limited to 18<br />
months or 50,000 kms, whichever<br />
occurs earlier.<br />
2. Our obligation under this warranty<br />
shall be limited to repairing or<br />
replacing, free of charge, such parts<br />
of the car which, in our opinion, are<br />
defective, on the car being brought<br />
to us or to our dealers within the<br />
warranty period. The parts so<br />
repaired or replaced shall also be<br />
warranted for quality and<br />
workmanship but such warranty shall<br />
be co-terminus with this original<br />
warranty.<br />
3. Any part which is found to be<br />
defective and is replaced by us<br />
under the warranty shall be our<br />
property.<br />
4. As for such parts as tyres,<br />
batteries, electrical equipment, fuel<br />
injection equipment,etc.not<br />
manufactured by us but supplied<br />
by other parties, this warranty shall<br />
not apply, but buyers of the car<br />
shall be entitled to, so far as<br />
permissible by law, all such rights<br />
as we may have against such<br />
parties under their warranties in<br />
respect of such parts.<br />
5. This warranty shall not apply if the<br />
car or any part thereof is repaired<br />
or altered otherwise than in<br />
accordance with our standard<br />
repair procedure or by any person<br />
other than from our sales or<br />
service establishments, our<br />
authorised dealers, service<br />
centres or service points in any<br />
way so as, in our judgement which<br />
shall be final and binding, to affect<br />
its reliability, nor shall it apply if,<br />
in our opinion which shall be final<br />
and binding, the car is subjected<br />
to misuse, negligence, improper<br />
or inadequate maintenance or<br />
accident or loading in excess of<br />
such carrying capacity as<br />
certified by us, or such services<br />
as prescribed in our Owner's<br />
Manual and Service Book are not<br />
carried out by the buyer through<br />
our sales or service<br />
establishments, our authorised<br />
dealers, service centres or service<br />
points.<br />
6. This warranty shall not cover<br />
normal wear and tear or any<br />
inherent normal deterioration of<br />
the car or any of its parts arising<br />
from the actual use of the car or<br />
any damage due to negligent or<br />
improper operation or storage of<br />
the car. This warranty shall not<br />
apply to normal maintenance<br />
services like oils & fluid changes,<br />
19
WARRANTY Terms and Conditions<br />
head lamps focussing, fastener<br />
retightening, wheel balancing, tyre<br />
rotation, adjustment of valve<br />
clearance, fuel timing, ignition<br />
timing and consumables like bulbs,<br />
fuel filters & oil filters, etc. This<br />
warranty shall not apply to any<br />
damage or deterioration caused<br />
by environmental pollution or bird<br />
droppings. This warranty shall not<br />
apply to V-belts, hoses and gas<br />
leaks in case of air conditioned<br />
cars.Slight irregularities not<br />
recognised as affecting the<br />
function or quality of the vehicle<br />
or parts, such as slight noise or<br />
vibration, defects appearing only<br />
under particular or irregular<br />
operations are items considered<br />
characteristic of the vehicle.<br />
7. This warranty shall be null and<br />
void if the car is subjected to<br />
abnormal use such as rallying,<br />
racing or participation in any other<br />
competitive sport. This warranty<br />
20<br />
shall not apply to any repair or<br />
replacements as a result of<br />
accident or collision.<br />
8. This warranty is expressly in lieu<br />
of all warranties, whether by law<br />
or otherwise, expressed or implied,<br />
and all other obligations or<br />
liabilities on our part and we neither<br />
assume, nor authorise any person<br />
to assume on our behalf, any<br />
other liability arising from the sale<br />
of the car or any agreement in<br />
relation thereto.<br />
9. The buyer shall have no other<br />
rights except those set out above<br />
and have, in particular, no right to<br />
repudiate the sale, or any<br />
agreement or to claim any<br />
reduction in the purchase price<br />
of the car, or to demand any<br />
damages or compensation for<br />
losses, incidental or indirect, or<br />
inconvenience or consequential<br />
damages, loss of car, or loss of<br />
time, or otherwise, incurred or<br />
accrued.<br />
10. Any claim arising from this<br />
warranty shall be recognised only<br />
if it is notified in writing to us or<br />
to our authorised dealer without<br />
any delay soon after such defects<br />
as covered and ascertained under<br />
this warranty.<br />
11. This warranty shall stand<br />
terminated if the car is transferred<br />
or otherwise alienated by the<br />
buyer without our prior written<br />
consent.<br />
12. We reserve our rights to make<br />
any change or modification in<br />
design of the car or its parts or<br />
to introduce any improvement<br />
therein or to incorporate in the<br />
car any additional part or<br />
accessory at any time without<br />
incurring any obligation to<br />
incorporate the same in the cars<br />
previously sold.
INFORMATION AT A GLANCE Filling Station Information<br />
ENGINE OIL UPTO DIPSTICK MAX.MARK ~ 4.0 Ltrs. FUEL TANK CAPACITY PETROL 37 Ltrs.<br />
LPG 31 Ltrs.<br />
* Premixed ready<br />
to use Engine<br />
Coolant = 6 Litres<br />
Windshield Washer<br />
reservior Capacity= 3.5<br />
Litres (for GLX) and 1.5 Litre<br />
(for GL/GLE/GLS/GLG)<br />
Brake fluid = 0.265 Lires<br />
TRANSAXLE OIL<br />
3.3 Ltrs.<br />
TYRE PRESSURE<br />
33 PSI (2.3 bar) / 30 PSI (2.1 bar)<br />
FRONT / REAR<br />
IMPORTANT : For petrol cars fitted with catalytic converter always use only unleaded petrol with an octane rating not<br />
less than RON 87.<br />
For recommended oil grades and change intervals, refer lubricants chart and service schedule<br />
21
INFORMATION AT A GLANCE Dimensions<br />
22
INTRODUCTION - LPG<br />
• INTRODUCTION - LPG<br />
• KNOW YOUR INDICA LPG<br />
Starting the engine<br />
Fuel (LPG) filling<br />
Running on LPG<br />
Fuel Selector Switch<br />
Shifting the fuel mode<br />
Do’s and Dont’s<br />
• SAFETY<br />
In case of gas leakage<br />
Fire Extinguisher<br />
Manual shut off knob / lever<br />
Level <strong>Indica</strong>tor<br />
• COMPLIANCE TO MOTOR VEHICLE RULES<br />
• LOCATION OF LPG SYSTEM COMPONENTS<br />
• LOCATION OF FUSES<br />
23
INTRODUCTION<br />
In addition to the full capacity of petrol the <strong>Indica</strong> Xeta now<br />
comes with LPG as additional fuel choice.<br />
WHAT IS LPG?<br />
LPG or Liquefied Petroleum Gas is a safe and environment<br />
friendly fuel. It is a liquid under pressure and turns into<br />
gaseous state when exposed to the atmospheric pressure.<br />
LPG is a non-toxic, non-corrosive; lead-free gas and is<br />
produced by refinery fractionation of oil or is stripped from<br />
naturally occurring Natural Gas.<br />
LPG fuel system and the components are as safe as those<br />
in other fuel systems.<br />
For LPG operation, press the Fuel Selector Switch provided<br />
on the dashboard, for approximately 3 seconds. The fuel<br />
change over happens automatically.<br />
The switching between fuels (Petrol-LPG-Petrol) can be done<br />
at any time, even on the move.<br />
Your car always starts in petrol / auto mode only. Hence it<br />
is a must to have petrol at all times during running.<br />
WARNING<br />
DO NOT USE DOMESTIC GAS CYLINDERS IN CAR<br />
because…<br />
• Domestic cylinders are NOT designed for Car<br />
application and this makes them vulnerable in a crash<br />
situation.<br />
• The chemical composition of domestic LPG is different<br />
from that of Auto LPG, which may lead to premature<br />
failure of engine and its related components<br />
• The gas outlet ‘valve’ arrangement on the domestic<br />
cylinder doesn’t meet the car fuel supply standards<br />
and hence makes them more dangerous in the car.<br />
For example the valve is not provided with excess flow<br />
protection.This means that if the valve or supply line<br />
gets disconnected in a crash situation, there will be an<br />
uncontrolled flow of LPG into the car interior.<br />
• When using domestic gas cylinder, your car’s engine<br />
gets less supply of fuel when load on engine is<br />
increased (e.g. while climbing a ghat). This is because<br />
the cylinder cannot supply adequate LPG from the tank<br />
to the engine.<br />
24
KNOW YOUR INDICA LPG<br />
STARTING THE ENGINE<br />
Irrespective of the position of the Selector switch (Petrol<br />
or LPG), your car’s engine will always starts using petrol<br />
by default and switch over to LPG later incase of LPG<br />
mode.<br />
To start, turn the ignition “ON” and crank without pressing<br />
accelerator pedal.<br />
LPG FILLING<br />
LPG filler valve is located at the rear on the right hand body<br />
side of your car. LPG filling will stop automatically once the<br />
LPG tank is filled to 80% of its capacity.<br />
LPG TANK CAPACITY<br />
The LPG cylinder capacity of your car is 31 litres. If the<br />
LPG is filled after service / repairs of the LPG system, please<br />
check all joints for leakage by applying soap solution or by<br />
using an electronic instrument, (Example: Leakator - 10’).<br />
NOTICE<br />
Keep the Ignition switch in “OFF” condition during<br />
LPG refilling<br />
LPG Fuel Filling Cap<br />
PETROL TANK CAPACITY<br />
Your car has a petrol tank having a capacity of 37 litres<br />
25
KNOW YOUR INDICA LPG Running on LPG<br />
RUNNING ON LPG<br />
A Fuel Selector Switch is provided on the dashboard. By<br />
operating this switch you can choose your fuel option for running.<br />
The Fuel Selector Switch has following functions :<br />
1. Fuel mode request (Petrol, LPG).<br />
2. LPG level indication<br />
3. Fuel mode indication<br />
4. LPG System fault indication<br />
The Fuel Selector Switch has two modes :<br />
1. Petrol Mode : The Red LED comes ON<br />
2. LPG Mode: The Amber LED comes ON<br />
In Petrol Mode Engine starts and runs by using petrol as the fuel.<br />
In LPG Mode, the engine starts by using Petrol and switches to<br />
LPG automatically.<br />
IMPORTANT<br />
Ensure that your car has sufficient Petrol in the tank as petrol<br />
is used for starting always<br />
Fuel Selector Switch<br />
LPG<br />
( Amber)<br />
Green<br />
PETROL<br />
( Red )<br />
Fuel Selector Switch<br />
Petrol Mode : Only Red light is ON<br />
LPG Mode : Amber light is ON<br />
26
KNOW YOUR INDICA LPG Fuelling Modes<br />
HOW TO SHIFT THE FUELLING MODES :<br />
Petrol to LPG Mode :<br />
You can switch to LPG fuel mode by pressing and holding<br />
the Fuel Selector Switch at least for 3 seconds till the LED<br />
on the Switch starts toggling between two LEDs. On<br />
completion of the successful transition to the LPG mode,<br />
the Amber (LPG) LED glows permanently, indicating that<br />
the car is now in LPG mode<br />
LPG to Petrol Mode:<br />
Similarly you can switch from LPG to petrol mode by<br />
pressing the Fuel Selector Switch until the red light (Petrol)<br />
on the Fuel Selector Switch starts glowing permanently.<br />
This indicates that car is now running in petrol mode<br />
NOTICE<br />
1. In case of fuel mode switching from Petrol to LPG<br />
mode during normal running, initially the LEDs toggle<br />
indicating the transition and when the LED glows<br />
permenantly, this indicates the completion of the<br />
transition to the required fuel mode.<br />
2. Fast toggling of the LEDs (amber to red) indicates<br />
fault in the LPG system. Car will automatically switch<br />
to Petrol mode. Please get car checked/repaired at<br />
the nearest Authorised TATA service center.<br />
3. Very slow toggling of the LEDs (amber to red) indicates<br />
the empty tank / no LPG supply (loss of pressure).<br />
Get the LPG tank re-filled.<br />
Sr.No. Approximate LPG LED indication on Change Equivalent quantity<br />
Volume (Litres) Over Switch (COS) of LPG in tank (%)<br />
1 Up to 11 Litres Amber Below 25%<br />
2 12 - 15 Litres Amber + 1 Green LED 25%<br />
3 16 - 20 Litres Amber + 2 Green LED 50%<br />
4 20+ Litres Amber + 3 Green LED 80%<br />
27
KNOW YOUR INDICA LPG Do’s & Dont’s<br />
DO’S<br />
• Always get the car repaired/serviced at the Authorised<br />
TATA Service center only.<br />
• Never carry out any repair work on your own or from<br />
any other personnel other than from Authorised TATA<br />
Service center.<br />
• Check LPG fuel system periodically for leakages<br />
Even though the Safety Solenoid valve (on tank &<br />
pressure regulator) closes automatically when you switch<br />
off Ignition, it is recommended to close the manual<br />
service valves during any service/repair activity on the<br />
car.<br />
• Ensure adequate ventilation around the car during repair<br />
works.<br />
• Ensure the LPG in the pipe lines is consumed by running<br />
the engine with closed manual service valves before any<br />
repair work on the gas lines/joints.<br />
• Remove the LPG tank during the welding/brazing work<br />
on the Car.<br />
• Fast toggling of fuel mode LED’s on the Fuel Selector<br />
Switch means fault in the LPG system, please get the<br />
car repaired at the nearest Authorised TATA Service<br />
center.<br />
• Immediately repair/replace any damaged fuel or system<br />
component.<br />
• Use the fire extinguishers provided with the car in case<br />
of unlikely event of fire. These are provided, one near<br />
driver seat and the other one in the boot. Read<br />
instructions on Fire extinguisher to know how to use it.<br />
DON’TS<br />
• Over filling the LPG Tank can cause safety issues<br />
like gas leakage . Please DONOT over fill the tank<br />
beyond its capacity of 31 litres.<br />
• Keep the car away from any Fire source.<br />
• Never use naked flame/fire to check gas leakages.<br />
• Never carry out any welding/brazing on the LPG tanks.<br />
• Avoid direct contact with LPG as it may cause frost<br />
burns.<br />
• Wash instructions - Do not direct high pressure washer<br />
fluid/water jets at electrical devices & their connectors<br />
during washing. This is to prevent malfunction / failure<br />
of electrical system due to water ingress.<br />
• Do not tamper any electrical or mechanical settings.<br />
• Do not scrap / gas cut the LPG cylinder as it contains<br />
pressurised gas which is flamable.<br />
• Do not leave the LPG tank cover open.<br />
For any clarifications please contact the Authorised<br />
TATA Service center<br />
28
KNOW YOUR INDICA LPG Safety<br />
IN CASE OF GAS LEAKAGE :<br />
• Do not panic.<br />
• The ECU automatically switches-off the LPG supply from<br />
the tank.<br />
• As a safety precaution, close the manual shut - off valves<br />
provided on the ‘Multifunction valve’ located on the LPG<br />
tank. Ensure that the tank cover is properly fitted.<br />
• Roll down all the windows and keep the doors fully open.<br />
• The ECU will automatically switch the fuel mode to Petrol.<br />
• The ECU will not allow you to switch to LPG mode until<br />
the leakage is rectified.<br />
• Contact the nearest <strong>Tata</strong> Authorised service station and<br />
get car repaired.<br />
FIRE EXTINGUISHER :<br />
Two fire extinguishers are provided on the car, one near<br />
driver seat and another in the luggage compartment.<br />
Method of operation:<br />
1. Check if the pressure gauge needle in green zone.<br />
2. Hold upright and pull the pin.<br />
3. Press the lever.<br />
4. Direct discharge at base of flame with rapid sweeping<br />
motion.<br />
5. Recharge the fire extinguisher after use.<br />
Maintenance :<br />
Check pressure on the gauge every week, needle should<br />
remain in green region. If it comes to red region, please<br />
send for recharging. The Fire Extinguisher is to be<br />
refilled every three years even if it is not used.<br />
Fire extinguisher near Driver's Seat<br />
Fire extinguisher behind Rear Seat<br />
29
KNOW YOUR INDICA LPG Safety<br />
MANUAL SHUT OFF KNOB / LEVER<br />
This knob is used to shut OFF LPG flow & is located on the<br />
Multifunction valve, on the Auto LPG Tank. This valve should<br />
always be in open position (as per figure), so that there is<br />
unrestricted flow of LPG to the engine. When the valve is in<br />
the closed position, LPG flow to the engine is stopped.<br />
This shut off valve must be closed in case some repairs<br />
need to be carried out on the LPG Tank. Ensure that the<br />
tank’s cover is tightened /closed properly.<br />
LEVEL INDICATOR<br />
A multivalve is mounted on the LPG tank that also has a<br />
gauge that shows LPG level in the tank. LPG level can also<br />
be known by the three green coloured lights on the Fuel<br />
Selector Switch. When the LPG tank is full, all three green<br />
lights will glow. As the level of LPG goes down, the green<br />
lights will also go off one by one.<br />
NOTE : The LED indication is an additional indication of LPG<br />
quantity in tank.<br />
LPG Tank<br />
1. Inlet<br />
2. Outlet<br />
3. Level <strong>Indica</strong>tor (Dial type)<br />
4. Manual Shut Off Valve<br />
30
KNOW YOUR INDICA LPG Compliance to Motor Vehicle rules<br />
Your car’s LPG tank needs to be recertified every five years<br />
as per CMVR (AIS 24, 25 and 26)<br />
Please ensure that it is done by a TATA Authorised<br />
Service Outlet and the new date is engraved on the<br />
plate.<br />
31
KNOW YOUR INDICA LPG Location of LPG system components<br />
32
BEFORE DRIVING<br />
• CONTROLS<br />
• INSTRUMENT PANEL<br />
• HEATING, VENTILATION &<br />
AIR CONDITIONING<br />
• INTERIORS & ACCESSORIES<br />
Rear View Mirrors<br />
Sunvisors<br />
Glove Box<br />
Window Winding<br />
Power Windows<br />
Tray Cover with Coin Holder<br />
Plug Socket<br />
Rear Ashtray<br />
Digital Clock<br />
Roof Mounted Interior Lights<br />
Front Seat & Seat Adjustments<br />
Head Rest<br />
Rear Seat<br />
Seat Belt Adjustment<br />
Tailgate Opening<br />
Fuel Flap Opening<br />
Music System<br />
Electrical Accessories<br />
Fitment<br />
Load Area Lamp<br />
Front Fog Lamps<br />
Head Lamp Leveling Switch<br />
33
BEFORE DRIVING Controls<br />
34
BEFORE DRIVING Controls<br />
Keys :<br />
Your car comes with two identical keys.<br />
With this key, you can operate 1.Door Locks<br />
2.Steering Lock cum ignition switch<br />
3.Tail gate Lock 4. Glove box<br />
It is advisable to keep one of the keys in a safe place for use in<br />
case of an emergency.<br />
Do not use a locally made key, but obtain a duplicate through<br />
your <strong>Tata</strong> Motors dealer.<br />
Do not leave the key inside the car.<br />
Door Locks :<br />
The front doors can be locked and unlocked from outside with the<br />
key or from inside using the door lock lever. In your car, the driver's<br />
door & co-driver's door have separate locking facilities. To lock from<br />
inside turn the lever towards the inner hinged handle.<br />
Where the central locking system is provided, if you lock/unlock<br />
the driver door with the key, the remaining three doors get locked/<br />
unlocked at a time. The tail gate door is not a part of the central<br />
locking provision.<br />
To open the door from outside use the swing handle. After unlocking<br />
the door with the key, pull the swing handle upward. The swing<br />
handles are provided on each door.<br />
To open the door from inside pull the hinged handle outward.<br />
Lock<br />
Hinged handle<br />
To open<br />
Outside swing handle<br />
Unlock<br />
To open<br />
Locking /<br />
Unlocking<br />
lever<br />
Inside door handle<br />
35
BEFORE DRIVING Controls<br />
IN CASE OF EMERGENCY<br />
1) The electirically operated devices (like central locking, power<br />
window) may malfunction in the event of flood/fire, due to temporary<br />
or permanent damage to the device. Excerise approriate<br />
precautions for safety of yourself and other occupants.<br />
2) If the central locking system malfunctions and is unable to unlock<br />
doors electrically, the door can still be opened by manually<br />
unlocking knob '1' and opening the door using lever '2'. The<br />
mechanical system overrides the electrically operated system.<br />
Childproof Lock :<br />
Both the rear doors of the car are provided with childproof locks.<br />
Push the lock lever located on the vertical face near the rear lock<br />
downward before closing the door. The door which has been locked<br />
can no longer be opened from inside.<br />
When child lock on rear door is 'LOCKED', the door can only<br />
be opened from outside. Use front doors to exit or take help of<br />
front occupants<br />
Deactivate the childproof lock when not required.<br />
36
BEFORE DRIVING Controls<br />
Steering lock cum ignition switch :<br />
The steering column lock cum ignition switch has the<br />
following four positions and is operated with the key.<br />
1. LOCK POSITION - The key can be inserted or taken out<br />
only in this position. When the key is removed from the<br />
switch, the steering is locked. To unlock the steering,<br />
insert the key and also turn it to the 'OFF' (Steering unlock)<br />
position.<br />
2. 'OFF' POSITION - In this position, the steering lock opens<br />
and the music system is powered.<br />
Ignition Switch<br />
3. 'IGN' POSITION - This is for switching 'ON' the power<br />
supply to the following items :<br />
• Blower & A/C (if fitted)<br />
• Engine cooling fan<br />
• Horn<br />
• Power Socket<br />
• Power window (if provided)<br />
• Head Lamp Leveling Switch<br />
• Head lamps<br />
• Front fog lamps (if provided)<br />
• Load Area Lamp<br />
• Music system (if provided)<br />
• Digital clock<br />
• Engine ignition & fuel supply<br />
• Turn signal lamps<br />
• Wash and wiper system<br />
• Reverse light<br />
• Instruments and gauges and tell tale warning lamps<br />
• Audio warning unit<br />
• Fog Lamps<br />
4. 'START' POSITION - In this position, which is<br />
momentary, the switch cranks the engine. When the<br />
switch is in this position momentarily, the devices listed<br />
under "Accessories supply" above, are switched 'OFF'.<br />
37
BEFORE DRIVING Controls<br />
The following items are operated/powered without the key in<br />
the ignition switch :<br />
Hazard warning system, Stop lamps, Position lamps, Registration<br />
plate lamps, Illumination of A.C. control panel, Odometer display<br />
(LCD) of Instrument Panel, Roof lamp, Reading lamps, Engine<br />
lamp,Load Area Lamp, Central door locking, Audio warning unit,<br />
Memory of digital clock and Music System, Rear Windshield<br />
Demister.<br />
The switch symbol lamps may come 'ON' without the key in the<br />
'IGN' position on ignition switch.<br />
Note : When the key is returned from 'OFF' position to LOCK<br />
position, the music system continues to be powered until the<br />
key is removed from the switch. This also helps to remind the<br />
driver if the key is inadvertantly left in the vehicle when aligting<br />
from the vehicle, where this is provided.<br />
38<br />
I) Do not remove the key, while the car is in motion, as the<br />
steering will get locked and the car cannot be steered.<br />
II) While turning the key from `LOCK 'position to `OFF'<br />
position slightly rotate steering wheel to relieve pressure<br />
on steering spindle for easy operation of the key. Also<br />
ensure the key is inserted fully before turning the key.<br />
iii) Do not operate to START position when the engine is<br />
running. This may damage the ring gear of the starter<br />
motor.
BEFORE DRIVING Controls<br />
Combi-switch<br />
FLICK WIPE<br />
SPRING RETURN<br />
OFF<br />
WIPER STALK<br />
LIGHT STALK<br />
FLASH HIGH BEAM<br />
SPRING RETURN<br />
DIP BEAM<br />
(NORMAL<br />
POSITION)<br />
HIGH BEAM<br />
FAST WIPE<br />
SLOW WIPE<br />
PUSH SWITCH<br />
FOR WASH & WIPE<br />
OFF<br />
INT. WIPE<br />
OFF<br />
DELAY TIMING FOR<br />
INTERMITTENT WIPE<br />
MIN.<br />
MAX.<br />
OFF<br />
LEFT TURN<br />
(SIGNAL SELF CANCELLING)<br />
LANE CHANGE LEFT (SPRING RETURN)<br />
OFF<br />
LANE CHANGE RIGHT (SPRING RETURN)<br />
LIGHTS CONTROL<br />
SWITCH<br />
RIGHT TURN<br />
(SIGNAL SELF CANCELLING)<br />
39
BEFORE DRIVING Controls<br />
WIPER CONTROL COMBI-SWITCH LEVER - LEFT<br />
LIGHTS CONTROL COMBI-SWITCH LEVER - RIGHT<br />
C<br />
G<br />
E<br />
A<br />
B<br />
F<br />
Selector<br />
F<br />
C<br />
D<br />
E<br />
B<br />
A<br />
D<br />
H<br />
I<br />
Wiper Control Combi-switch Lever - Left<br />
A. Wiper 'OFF' position<br />
B. Slow Wipe<br />
C. Fast Wipe<br />
D. Intermittent wipe *<br />
E. Pull up for windshield wipe<br />
(Flick Wipe Spring Return)<br />
F. Press side knob for wash<br />
* Rotate selector to set delay timing for intermittent wipe<br />
Lights Control Combi-switch Lever - Right<br />
A. Head lamp 'OFF' position<br />
B. Position lamp 'ON'<br />
C. Position lamp & head lamp 'ON'<br />
D. Push down the lever for high beam<br />
E. Pull up the lever (spring return) for high beam flash<br />
F. Lane change left (spring return)<br />
G. Side <strong>Indica</strong>tor - LH<br />
H. Lane change right (spring return)<br />
I. Side <strong>Indica</strong>tor - RH<br />
40
BEFORE DRIVING Controls<br />
Fog lamps : (if fitted)<br />
Selector<br />
Front and Rear fog lamps can be switched ON/OFF by operating<br />
the switch on the Combi-Switch.<br />
Front fog lamp : Rotate the switch clockwise to switch 'ON' the<br />
fornt fog lamp. Front fog lamps are operative only when the position<br />
lamps are switched 'ON'. Rotate the switch to same direction to<br />
switch 'OFF' the front fog lamp.<br />
The indicator on the instrument cluster comes 'ON' when the front<br />
fog lamps are switched 'ON'.<br />
Selector<br />
Rear fog lamp : Rotate the switch anticlockwise to switch 'ON' the<br />
rear fog lamp. Rear fog lamps are operative only when the head<br />
lights are swithed 'ON' or front fog lamps are switched 'ON'. Rotate<br />
the switch to same direction to switch 'OFF' the rear fog lamp.<br />
The indicator on the instrument cluster comes 'ON' when the rear<br />
fog lamps are switched 'ON'.<br />
41
BEFORE DRIVING Controls<br />
Accessory Switches : (if installed)<br />
Accessory switches have been provided on the dash board<br />
near the steering column on the right hand side.<br />
1. Rear windshield demister (unlatched<br />
switch)<br />
The switch is pushed and released to switch<br />
'ON' and the knob returns to the normal<br />
position.The function indicator lights up in amber<br />
indicating that the demister heater is 'ON'. The function<br />
is controlled through a timer and operates for 15 minutes<br />
(approximately) and goes 'OFF' automatically at the end<br />
of the duration. The heater can be switched 'OFF' anytime<br />
by once again pushing and releasing the switch knob.<br />
3. Rear windshield wash & wipe (unlatched switch):<br />
Push and hold the switch knob for the<br />
operation of the wash function on the rear<br />
windshield glass for rear visibility through<br />
glass. The function indicator lights up in<br />
green when wash function in 'ON'. Along with<br />
the wash fluid getting sprayed, the wiper also operate<br />
with a delay to wipe the glass surface, through timer<br />
control unit.<br />
Note : Switching 'ON' and 'OFF' can be done only with<br />
key in 'IGN' position. The demister heater remains 'ON'<br />
even after removal of ignition switch key and goes 'OFF'<br />
at the end of 15 minutes period, In case you are missed<br />
to switched 'OFF'.<br />
2. Rear windshield wiper (latched switch)<br />
Push to switch 'ON' - Push to switch 'OFF'<br />
The function indicator on the knob lights<br />
up in green when the wiper function is 'ON'.<br />
Accessory Switches<br />
42
BEFORE DRIVING Controls<br />
Gearshift lever & Shifting pattern :<br />
The gearshift lever is mounted on the central console between the<br />
two front seats. The gearshift pattern is shown on the gear lever<br />
knob.<br />
The reverse gear should be engaged only when the car<br />
is stationary. Wait for 5 seconds after declutching to<br />
ensure smooth engagement of the reverse gear.<br />
Parking brake :<br />
A mechanical parking brake acting only on the rear wheel is provided<br />
on your car. The parking brake lever is located behind the gearshift<br />
lever. To apply the parking brake, pull the lever up fully . The indicator<br />
light on the instrument panel will come `ON'. To release it,<br />
pull the lever up slightly, press the release button and push the<br />
lever down.<br />
The parking brake indicator on the instrument panel will go<br />
'OFF' when the parking brake lever is fully released.<br />
When parking on level ground, place the gear lever in the 'Neutral'<br />
position. When parking on a downhill gradiant, place the gear lever<br />
in 'Reverse' position. When parking on uphill gradiant, place the<br />
gear lever in the '1st' position<br />
Apply the parking brake properly before leaving the car &<br />
release it before moving. Use the parking brake for holding<br />
the car on a gradient.<br />
Release<br />
Button<br />
Parking Brake Lever<br />
43
BEFORE DRIVING Instrument Panel<br />
INSTRUMENT PANEL<br />
Speedometer<br />
<strong>Indica</strong>tors*<br />
Engine RPM<br />
Meter<br />
Temperature Gauge<br />
LCD<br />
Fuel Gauge<br />
Set Knob Mode Selector<br />
Knob<br />
* All indicators may not be provided on some clusters.<br />
44
BEFORE DRIVING Instrument Panel<br />
Turn Signal and Hazard Warning<br />
I) Turn Signal :<br />
Turn signal lamps can be operated only when the ignition supply<br />
is 'ON by using the turn indicator switch on the combiswitch.<br />
The direction indicator (LHS) and (RHS) on the instrument<br />
cluster flashes along with external indicator lights as selected.<br />
II) Hazard Warning :<br />
This can be operated without ignition 'ON'. Press the hazard<br />
warning switch (red knob) on the centre of the dash board, all<br />
side indicator lights and indicator , LHS and RHS turn<br />
indicators on the instrument cluster will flash simultaneously to<br />
warn the other road users about any hazardous condition of<br />
the car. Depress the knob again to switch 'OFF' the hazard<br />
function.<br />
Note : If light does not blink or blinks rapidly, it is an indication<br />
of fault in the blinker electrical system or the indicator bulb at<br />
front or rear has fused. Get it rectified immediately.<br />
Hazard Warning Switch<br />
45
BEFORE DRIVING <strong>Indica</strong>tors<br />
Parking Brake <strong>Indica</strong>tor cum Low Brake Fluid Warning Light<br />
When the ignition key is turned to the 'IGN' position, the symbols<br />
light up for the following :<br />
i) when the parking brake is applied, and/or<br />
ii) when the brake fluid level in the container is low.<br />
Else the indication goes 'OFF' after few seconds.<br />
If the lamp glows while engine is running, then check the parking<br />
brake or brake fluid oil level.<br />
Do not drive the car if this indicator remains 'ON'. Get the<br />
problem attended to immediately at an Authorised Service<br />
outlet.<br />
High Beam <strong>Indica</strong>tor :<br />
Symbol lights up when the headlamp high beam is 'ON'.<br />
Engine Check <strong>Indica</strong>tor :<br />
This lamp indicates engine condition. When a malfunctioning occurs<br />
in Engine or EMS, this lamp indicates as below :<br />
1. Remains "OFF" in "IGN" position.<br />
OR<br />
2. Remains "ON" in running position.<br />
46
BEFORE DRIVING <strong>Indica</strong>tors<br />
Position Lamp <strong>Indica</strong>tor :<br />
Symbol lights up when the position lamps are switched 'ON'.<br />
Illumination lamps for AC, HVAC or ventilation panel and switch<br />
illumination lamps comes 'ON', when the position lamps are 'ON'.<br />
Position lamps can be used as parking lamps.<br />
Instrument cluster illumination turns 'ON' with key in 'IGN' position<br />
and position lamps 'ON'.<br />
Note : Position lamps also remain 'ON' while head lamps are<br />
'ON' and in this condition instrument cluster illumination lamp<br />
will not be 'ON'.<br />
Low Oil Pressure <strong>Indica</strong>tor :<br />
When the ignition key is turned to the 'IGN' position, symbol lights<br />
up and goes off as soon as the required engine oil pressure is<br />
developed after starting the engine.<br />
If the low oil pressure indicator does not glow or remains<br />
'ON' with the 'IGN' on and engine is running, it indicates a<br />
fault in the electrical circuit/lubrication system. Check &<br />
get the problem attended to at an Authorised Service outlet.<br />
47
BEFORE DRIVING <strong>Indica</strong>tors<br />
Battery Charging <strong>Indica</strong>tor :<br />
Symbol lights up when the 'IGN' is turned 'ON' and should go 'OFF'<br />
after the engine starts.<br />
If it remains 'ON' while the engine is running, it indicates<br />
that the battery is not being charged. Switch off all<br />
unnecessary electrical equipment and get the problem<br />
attended to at an Authorised Service outlet.<br />
Front Fog Lamp <strong>Indica</strong>tor (if provided) :<br />
This symbol lights up when the front fog lamps are switched 'ON'<br />
Rear Fog Lamp <strong>Indica</strong>tor (if provided) :<br />
This symbol lights up when the rear fog lamps are switched 'ON'<br />
48
BEFORE DRIVING Gauges<br />
Speedometer, Main Odometer and Tripmeter (on LCD) :<br />
The speedometer indicates the car speed in km/hr. The odometer<br />
records the total distance the car has been driven. The tripmeter can<br />
be used to measure the distance travelled on each trip or between<br />
fuel fillings.<br />
Keep track of the odometer reading & follow the maintenance<br />
schedule regularly for meeting service requirements.<br />
Odometer, Tripmeter and Illumination intensity control on<br />
instrument panel (LCD) :<br />
The instrument panel has an LCD to display the following :<br />
Main Odometer (Non- resettable)- Counts upto 999999 kms<br />
Tripmeter A (Resettable) - Counts upto 1999.9 kms<br />
Tripmeter B (Resettable) - Counts upto 1999.9 kms<br />
Intensity level of instrument panel illumination - selection among preset<br />
levels.<br />
LCD has two line display.The first line displays the Odometer count.The<br />
second line displays either of Tripmeter A, Tripmeter B, Intensity level<br />
of panel illumination.<br />
The selection and control of functions are done through 'MODE' and<br />
'SET' push buttons (knobs) provided on either side of the LCD.<br />
The 'MODE' knob is used to select one of Tripmeter A, Tripmeter B or<br />
Intensity level of panel illumination. Switching among the above three<br />
functions can be done by pressing the knob.<br />
Over speed warning indicator<br />
Speedometer<br />
Display for Trip - A<br />
Display for Trip - B<br />
49
BEFORE DRIVING Gauges<br />
The 'SET' knob is used to control the chosen function. Pressing the<br />
knob for a few seconds resets the chosen tripmeter and varies the<br />
intensity level of instrument panel illumination.<br />
The panel illumination intensity varies among preset levels as follows :<br />
= Min<br />
= = = = Max<br />
This display returns to Trip A after a few seconds of intensity level<br />
selection, if left in this mode.<br />
NOTICE<br />
Main odometer and tripmeter A indication will remain on display<br />
even if the ignition key is removed.<br />
Reduced contrast in display may occur at low and high temperature.<br />
Intensity Level <strong>Indica</strong>tor<br />
Over Speed Warning<br />
<strong>Indica</strong>tor<br />
Over speed warning indicator (if provided) :<br />
When the vehicle speed reaches more than 120 kmph, over speed<br />
warning indicator will come 'ON'.<br />
50
BEFORE DRIVING Gauges<br />
RPM meter :<br />
The meter indicates engine speed in revolutions per minute (rpm)<br />
Change gears at appropriate engine rpm and car speed to get optimum<br />
fuel economy.<br />
The permitted engine rpm upper limit is the start of Red Zone on the<br />
dial.<br />
If RPM meter does not indicate during initial cold starting, gently raise<br />
the engine rpm till the battery charge lamp goes 'OFF'.<br />
Temperature gauge :<br />
The gauges indicates the temperature level of the engine coolant. The<br />
red zone at 'H' indicates temperatures higher than normal. A visual<br />
warning indication (Red coloured) comes 'ON' indicating that when<br />
the coolant temperature is higher than normal.<br />
Avoid driving, when the pointer is in the red zone. It indicates engine<br />
overheating, which may be due to insufficient coolant in the radiator<br />
or due to any other defect. Take the car to the nearest Authorised<br />
Service outlet for necessary attention.<br />
RPM Meter<br />
Never remove the cap from the coolant reservoir when the<br />
engine is hot. Do not restart the engine until the problem has<br />
been duly attended.<br />
Temperature Gauge<br />
High<br />
Temperature<br />
Warning<br />
51
BEFORE DRIVING Audio Warning<br />
Fuel Gauge :<br />
The fuel gauge indicates the approximate fuel level in the tank.<br />
Refill the fuel tank at the earliest, when the needle touches the red<br />
band (indicating reserve capacity has been reached.), a visual<br />
warning indication (Amber coloured) comes 'ON' indicating the<br />
fuel level is low.<br />
Audio Warning Unit<br />
Seat Belt Reminder (Beeper) : (If installed)<br />
When the key is in the 'IGN' position and the driver's seat belt has<br />
not been fastened, an audio warning comes 'ON'. Please fasten<br />
the seat belt. The warning goes 'OFF' automatically after a few<br />
seconds, even if the seat belt is not fastened.<br />
'Key in' Warning Beeper : (if installed)<br />
When the ignition is turned to 'OFF' position and the key is not<br />
removed from the switch, an audio beep comes on if driver door is<br />
open. The beeper will go 'OFF' after a few seconds automatically if<br />
warning is ignored or if the key is removed/door is closed.<br />
Low<br />
Fuel<br />
War<br />
arning<br />
Fuel Gauge<br />
52
BEFORE DRIVING Audio Warning / Tail Lamps<br />
Lamps 'ON' Reminder (if installed)<br />
An audio warning (beeper) is provided to inform the driver that the<br />
headlamps/position lamps are left 'ON'. This comes 'ON' when the<br />
driver removes the key and opens the door. Switch 'OFF' the lamps,<br />
before leaving the car. However the lamps can be kept 'ON' ignoring<br />
the warning, if desired.<br />
Tail Lamp : The tail lamp assembly incorporates the following-<br />
1. Stop cum position lamp<br />
2. Turn <strong>Indica</strong>tor<br />
3. Reverse Lamp<br />
4. Fog lamp (provided in Deluxe version only)<br />
5. Reflex reflector<br />
High Mounted Stop Lamp<br />
Registration Plate Lamps :<br />
Two concealed lamps are provided for illumination of the rear<br />
registration number plate.<br />
High Mounted Stop Lamp :<br />
High mounted stop lamp is provided at the rear of vehicle and it<br />
glows whenever the service brake is applied.<br />
Registration Plate Lamps<br />
53
BEFORE DRIVING Heating, Ventilation & Air Conditioning<br />
Air Flow Pattern<br />
Towards Windscreen (Defrost)<br />
Side Air<br />
Vents<br />
Central<br />
Air Vents<br />
Towards<br />
Foot Board<br />
Towards<br />
Foot Board<br />
54
BEFORE DRIVING Heating, Ventilation & Air Conditioning<br />
HEATING, VENTILATION & AIR CONDITIONING<br />
(if installed)<br />
A. Temperature Control Knob :<br />
The air temperature in the car can be controlled by operating<br />
the temperature control knob (A) at the left hand side of the<br />
control panel. The temperature can be increased by rotating<br />
the knob towards the red segment and decreased by rotating<br />
it towards the blue segment.<br />
D<br />
E<br />
B. Blower Speed Regulation Knob :<br />
The ventilation system has a three/four speed blower. The<br />
blower speeds can be regulated to any one of the following<br />
speeds by operating the knob (B) at the centre of the control<br />
panel.<br />
LOW • MEDIUM • HIGH • VERY HIGH<br />
A<br />
B<br />
C<br />
HVAC CONTROLS<br />
55
BEFORE DRIVING Heating, Ventilation & Air Conditioning<br />
C. Air Direction Control Knob :<br />
The air flow can be changed by turning the switch (C) to<br />
the desired direction.<br />
Towards face<br />
D<br />
Towards face and feet<br />
Towards feet<br />
Towards feet and windshield<br />
(Recommended for clearing fogging on windshield)<br />
Air demist / defrost windshield<br />
(Recommended for clearing heavy fog and snow)<br />
A B C<br />
A.C. CONTROLS<br />
D. A.C. ON/OFF Switch :<br />
The A.C. can be switched 'ON' by pressing the switch (D)<br />
on the A.C. control panel provided the blower is `ON' and<br />
the engine is running. The indicator lamp will show that the<br />
A.C. is `ON'.<br />
<strong>Indica</strong>tor<br />
D<br />
A.C. ON / OFF Switch<br />
56
BEFORE DRIVING Heating, Ventilation & Air Conditioning<br />
E. Air Circulation Switch :<br />
• In HVAC version to put air circulation mode in<br />
recirculation, press switch 'E'. The indicator lamp will<br />
show air circulation is in recirculation.<br />
To put vehicle in Fresh mode release switch 'E'. <strong>Indica</strong>tor<br />
lamp will be 'OFF'.<br />
• In A.C. version, air circulation mode can be selected<br />
by rotating knob 'E'.<br />
Fresh<br />
Recirculation<br />
• In recirculation mode, air inside the vehicle is circulated<br />
again and again. In Fresh mode, air is taken from<br />
atmosphere and circulated in the vehicle.<br />
Recirculation mode can be used<br />
• While driving in dusty condition<br />
• To avoid traffic pollution<br />
• To get quick cooling/heating as required.<br />
Whenever discomfort is felt switch air circulation mode to<br />
fresh.<br />
Notice : The A.C. can be switched `ON' only if the blower<br />
is 'ON' and engine is running. When A.C. is switched<br />
'ON' engine idling RPM increases marginally, to adjust<br />
to the A.C. compressor load. When desired temperature<br />
is achieved A.C. trips 'OFF' automatically.<br />
<strong>Indica</strong>tor<br />
E<br />
Air Recirculation<br />
Knob<br />
Notice : The A.C. compressor gets switched 'OFF'<br />
automatically when engine gets overheated. The A.C. is<br />
automatically switched 'ON' when the engine cools down.<br />
Normal Cooling :<br />
A.C. - ON<br />
Knob 'B' - Desired speed position<br />
Knob 'C' - Towards face<br />
Switch 'E' - Suitably as explained<br />
Quick Cooling :<br />
If your car is left in the sun with window closed inside<br />
temperature increases.<br />
57
BEFORE DRIVING Heating, Ventilation & Air Conditioning<br />
To achieve quick cooling effect, open the windows briefly<br />
while you operate the air conditioner, with air circulation<br />
switch is in Fresh mode, fan at higher speed and air direction<br />
towards 'FACE'. All vents to be opened completely.<br />
Once temperature inside has come down sufficiently, close<br />
the windows and change air circulation suitably to fresh/<br />
recirculation.<br />
Demisting :<br />
In rainy season or in areas of high humidity, mist formation<br />
inside windshield glass is observed. To clear mist<br />
dehumidified air is passed on the windshield glass.<br />
The position of control knobs should be adjusted as follows:<br />
A.C. - ON<br />
Knob 'B' - Desired speed position<br />
Knob 'C' - Towards windshield<br />
Knob 'A' (for vehicles fitted with HVAC) - at suitable<br />
temperature<br />
Air circulation - at suitable position<br />
Notice : When mist gets cleared switch the knob "C'<br />
position to Face mode.<br />
In high humidity areas, if cold air continues to flow over<br />
windshield, it may cause sudden fogging on outside<br />
surface of windshield.<br />
Defrosting :<br />
(For vehicles fitted with HVAC unit)<br />
In low temperature areas, to clear frost formation outside<br />
the windshield glass, this setting is used.<br />
First start the engine and accelerate to warm up.<br />
Knob 'A' - Maximum hot position<br />
Knob 'B' - Very High<br />
Knob 'C' - Towards windshield<br />
Switch 'E' - Fresh air mode condition<br />
Once the windscreen has become clear, move the fan switch<br />
to desired speed.<br />
Notice : Electric heater coil is provided for demisting of<br />
tail gate glass for deluxe versions.<br />
Normal Heating :<br />
( For vehicles fitted with HVAC )<br />
Knob 'A' - Suitable temperature position<br />
Knob 'B' - Suitable blower speed<br />
Knob 'C' - Towards face & feet<br />
A.C. - OFF<br />
Air Circulation- Fresh switch<br />
58
BEFORE DRIVING Heating, Ventilation & Air Conditioning<br />
Quick Heating :<br />
All settings as explained before except air circulation switch<br />
to recirculation.<br />
Once vehicle is heated, switch back to fresh mode.<br />
CLOSE<br />
OPEN<br />
Ventilator :<br />
The air flow can be adjusted continuously with the rotary<br />
control knob at the vents on the dash board. The air vents<br />
can be adjusted upward and downward. This is common<br />
for HVAC, AC and ventilation.<br />
Air Flow Direction Control<br />
Knob<br />
Notice : Refrigerant charged in the air conditioning<br />
circuit has been identified on the label over front body<br />
member. Use only refrigerant as given in the label for<br />
topping up or recharge, i.e. do not charge R12 (CFC) in<br />
the vehicle earlier charged with R134a (Non CFC) or<br />
vice versa.<br />
Notice : Fresh air is taken from the grill opening provided<br />
at base of windshield glass outside the vehicle. Keep<br />
these openings clear and free from fallen leaves etc.<br />
59
BEFORE DRIVING Interiors and Accessories<br />
REAR VIEW MIRRORS<br />
Door mirrors : Driver side only (alternate) Both sides (if fitted)<br />
The rear view mirror is fitted on the door from the outside and can<br />
be adjusted by the lever provided inside the door. In some versions<br />
the mirrors are provided on both the doors.<br />
Inner Rear View Mirror :<br />
Plain mirror (Alternate)<br />
Antiglare mirror (if fitted)<br />
If an antiglare mirror has been fitted inside the cab. Provision has<br />
been made for two positions :<br />
1. Normal position<br />
2. Antiglare position<br />
Use antiglare position only when necessary, as it reduces rear<br />
view clarity.<br />
Normal Mirror (if fitted)<br />
In some versions, a normal mirror has been fitted inside the cab.<br />
Sunvisors :<br />
Two adjustable sunvisors are provided inside the cab above the<br />
windshield to prevent sun glare.<br />
Lower the sunvisors to protect the eyes from bright sunlight. The<br />
sunvisor also moves sideways towards the door.<br />
A vanity mirror has been provided on the back of the co-driver's<br />
sunvisor.<br />
60<br />
ANTIGLARE MIRROR<br />
(Only on deluxe version)<br />
Vanity Mirror<br />
Operating<br />
Knob
BEFORE DRIVING Interiors and Accessories<br />
When not in use keep the sunvisors in their stowed position<br />
otherwise they may block the driver's vision.<br />
Cup Holders<br />
Glove Box :<br />
The glove box is located on the dash board in front of the codriver's<br />
seat. The glove box can be locked with the ignition key.<br />
Cup holders are provided on the inner face of glove box flap.<br />
Do not use the cup holder while the car is in motion.<br />
Glove Box<br />
Window Winding :<br />
Manually Operated Window Winding :<br />
Window winding in the standard version is manually operated.<br />
Rotate the handle on the door pad to raise or lower the window<br />
glass.<br />
Window Winding Lever<br />
61
BEFORE DRIVING Interiors and Accessories<br />
Power Windows : (if installed)<br />
Four seperate knobs are provided on the switch to operate the<br />
four door window glasses individually and electrically.<br />
To open the door window glass, push the respective knob down.<br />
To close the door window glass, pull the respective knob up.<br />
In the locked position, the rear window switches on rear doors<br />
become inoperative. However the rear windows can be operated<br />
by the switches on the floor console. Illumination on rear window<br />
switches goes 'OFF' in locked position. Press down the lock button<br />
to unlock.<br />
Individual window winding switches have been provided only on<br />
the rear doors.<br />
While raising the glass take care to avoid fingers/hands<br />
getting trapped between the glass and the frame.<br />
Front<br />
Left<br />
Rear<br />
Left<br />
Window Winding Switch<br />
On floor Console<br />
Front<br />
Right<br />
Rear<br />
Right<br />
Push type<br />
Lock/Unlock<br />
button<br />
Window Winding Switch On Rear Door<br />
62
BEFORE DRIVING Interiors and Accessories<br />
Power Socket : (if provided)<br />
Power socket is provided on the floor console behind the gear<br />
shift lever (for standard versions). A Plug socket is provided on<br />
central facia (for Deluxe versions). This can be used for connecting<br />
loads upto 10A maximum like the mobile charger, cigarette lighter<br />
etc. To use this socket, remove the cap first.<br />
Always keep this socket covered with the cap when not<br />
in use.<br />
Power Socket (Deluxe version)<br />
Power Socket (Standard version)<br />
63
BEFORE DRIVING Interiors and Accessories<br />
Rear Ash Tray : (if fitted)<br />
Ash trays are provided on both rear doors for the occupants at<br />
the rear.<br />
To open the rear ash tray press the lid, it will rotate outward.<br />
To remove the ashtray open fully and press down to disengage the<br />
top pivot pin.<br />
To refit the ashtray, locate the bottom piot pin and push the top<br />
pivot pin in to place.<br />
Rear Ash tray<br />
Do not f<strong>org</strong>et to extinguish the cigarette butts, before putting<br />
them in the ash tray.<br />
Do not put paper or other flammable material in the ash<br />
trays.<br />
Digital Clock :<br />
A digital clock is provided in the middle of the dash board. It displays<br />
the time when the steering lock cum ignition switch is in 'IGN'<br />
position.<br />
Three push knobs 'H', 'M' and 'Z' are provided for setting the time<br />
and for resetting the display to zero - 'H' for hours setting, 'M' for<br />
minute setting and 'Z' for setting minutes to zero.<br />
H M Z<br />
64
BEFORE DRIVING Interiors and Accessories<br />
Roof Mounted Interior Light & Reading Lamps :<br />
Interior roof light and reading lamps with inbuilt switches are<br />
provided on the roof near the rear view mirror.<br />
Reading Lamps<br />
The central rectangular toggle switch (1) has three positions :<br />
• When the central rectangular toggle switch is in the MIDDLE<br />
position, the light will come ‘ON’ only when any of the doors are<br />
opened.<br />
1<br />
2 2<br />
• When this switch is in the RIGHT position, the light will remain<br />
‘OFF’ in all conditions.<br />
• When this switch is in the LEFT position, the light will be<br />
continuously ‘ON’ irrespective of whether any of the doors are<br />
open.<br />
Two more triangular push type switches (2) are provided to operate<br />
the individual reading lamps.<br />
Roof Mounted Interior Lamp and<br />
Reading Lamps<br />
65
BEFORE DRIVING Interiors and Accessories<br />
Front Seats and Seat Adjustments :<br />
Front Seats : Both the driver and co-driver seats are of bucket<br />
type to provide maximum riding comfort.<br />
Moving the seats forward and backward :<br />
To adjust the seat position, lift the lever under the seat cushion<br />
front, then move the seat to the desired position and release the<br />
lever.<br />
Make sure the seat is locked in position.<br />
Adjusting the angle of the seat back :<br />
To adjust the angle of the seat back, a lever has been provided on<br />
the sides of the front seats. By lifting the lever, you can adjust the<br />
angle of the backrest.<br />
Do not adjust the seat when the car is in motion.<br />
Always adjust the seat back to an upright position and sit<br />
well back in the seat.<br />
2<br />
Front Seat Adjustment Levers<br />
1. Lever for backward & forward movement<br />
2. Lever for Seat Backrest angle<br />
1<br />
66
BEFORE DRIVING Interiors and Accessories<br />
Head-rest : (Adjustable on the front seat & fixed on the rear seat)<br />
Head-rests are designed to help reduce the risk of neck injuries in<br />
case of accidents. For best protection, adjust the top of the headrest,<br />
so that it is in level with one's ears. To adjust the head-rest pull /<br />
push it to the desired position until it clicks. The head-rest can be<br />
adjusted up to 64 mm in steps of 16 mm.<br />
Release<br />
Button<br />
If headrest is required to be removed (for cleaning fabric etc.) pull<br />
the headrest fully up, then push notch button with a thin punch<br />
while pulling the headrest up. To install proceed in reverse.<br />
Avoid driving the car with the head-rest removed as it is a<br />
safety item. Do not attempt to adjust the head-rest while<br />
driving the car.<br />
Seat Release Latch on 'C' pillar<br />
Rear Seat : (Split 60 : 40)<br />
A cushion bench 60 : 40 split seat has been provided for the rear<br />
passengers. Any one of the split seat back can be folded by<br />
releasing the latch, on both the 'C' pillars simultaneously. For making<br />
more luggage space, the folded rear seat can be somersaulted<br />
further. Before summersaulting ensure that the front seats are at<br />
3/4 the full travel towards rear.<br />
For fixing the seat back upright, just push back the seat in position.<br />
It will get locked by itself.<br />
67
BEFORE DRIVING Interiors and Accessories<br />
SOMERSAULTED POSITION<br />
Lugguage space before somersault<br />
operation<br />
Lugguage space after somersault<br />
operation<br />
68
BEFORE DRIVING Interiors and Accessories<br />
Seat Belt<br />
Seat belts have been provided on the front seats (with micro swtich<br />
on driver's side for the deluxe model)<br />
Always wear seat belts, while driving.<br />
Seat belt adjustment :<br />
1. Pull the tongue across your body and insert it into the buckle.<br />
2. Check and ensure that the belt is not twisted.<br />
3. Position the lap portion of the belt as low as possible across<br />
your hip bone.<br />
4. Pull up the shoulder part of the belt to remove the slack.<br />
5. Make sure that the belt goes over your collar bone and across<br />
the chest.<br />
6. To unlatch the belt, press the red button on the buckle. Guide<br />
the belt to the pillar as it retracts.<br />
7. Each belt should be used by one occupant only (such as front<br />
LH/RH, Rear outboard passenger LH/RH & Rear lap belt-location<br />
as per sketch). The belt must not be put round a child, seated<br />
on passenger's lap.<br />
8. When the belt has been use in a serious accident or shows<br />
signs of severe fraying or of having been cut, replace the belt<br />
kit.<br />
9. The belt must not be altered or modified during use.<br />
10.The belts are meant (intended) for adult occupants only.<br />
Front seat seat-belts arrangement<br />
Rear seat seat-belts arrangement<br />
viewed from rear<br />
69
BEFORE DRIVING Interiors and Accessories<br />
11.The belts if required should be repaired, by authorised<br />
personnel only.<br />
12.The belts should not be disassembled, if required, authorised<br />
personnel only should carry out disassembly and assembly.<br />
Do not wear your seat belt over hard or breakable objects<br />
in pockets or on your clothing. If an accident occurs, objects<br />
such as glasses, pens, etc. under the seat belt can cause<br />
injury.<br />
Tailgate opening<br />
lever<br />
Fuel flap opening<br />
lever<br />
Tailgate opening :<br />
A tailgate opening lever is provided on the floor between the driver's<br />
seat and door.<br />
Pull the lever up to unlock the tailgate.<br />
Lift the tail gate by hand using the recess in the centre, near the<br />
bumper. The two telescopic balancers will open the door<br />
automatically.<br />
To close and lock the tailgate push it down.<br />
The tailgate can also be opened with the key.<br />
While tailgate opening the parcel shelf also gets lifted up by the<br />
lifting cords and parcel shelf closes back while closing the tailgate.<br />
Ensure proper closing of parcel shelf while closing the<br />
tailgate.<br />
70
BEFORE DRIVING Interiors and Accessories<br />
Fuel flap opening :<br />
The fuel flap is located on the left rear side of the car. The fuel flap<br />
can be opened by pulling the opening lever located near the tailgate<br />
opening lever and can be locked by simply closing the flap.<br />
Music System :<br />
A provision has been made for fitment of music system.<br />
An internal antenna comes fitted on the front windshield glass on<br />
the inner side near the rear view mirror. Provision for the installation<br />
of speakers is made on the dash board on both the sides and on<br />
each of the front doors.<br />
If the music system is originally provided in your vehicle, please<br />
refer manufacturer's manual for operation of the music system.<br />
Electrical Accessory fitment :<br />
Provision has been made in your car wiring to fit the following<br />
electrical accessories :<br />
1. Engine Compartment Lamp<br />
2. Front Fog lamp<br />
3. Additional Horn (on LH side)<br />
4. Reversing buzzer<br />
5. Music System<br />
6. Speakers<br />
7. Immobilizer for vehicle security<br />
For details of fitment please contact our nearest authorised service<br />
outlet.<br />
Antenna<br />
Provision for Music System<br />
71
12345678901234567890123456789<br />
12345678901234567890123456789<br />
12345678901234567890123456789<br />
12345678901234567890123456789<br />
BEFORE DRIVING Interiors and Accessories<br />
Load Area Lamp (if installed)<br />
A lamp is fitted in the luggage compartment to illuminate the luggage<br />
area, when required. To operate this lamp, a simple ON/OFF switch<br />
is provided along with this lamp. For the lamp to come 'ON' with the<br />
opening of tailgate, the switch should be in 'ON' position.<br />
OFF<br />
ON<br />
12345678901234567890123456789<br />
12345678901234567890123456789<br />
12345678901234567890123456789<br />
Load Area Lamp<br />
Front Fog Lamps (if installed)<br />
The Front fog lamps are provided with halogen lamps of H11 type<br />
to provide adequate light in the vehicle front. This enables to drive<br />
the vehicle during rains, fog, etc.<br />
Fog Lamp<br />
72
BEFORE DRIVING Interiors and Accessories<br />
Headlamp leveling switch (if installed) :<br />
A motorised headlamp leveling arrangement with the setting knob<br />
at the dash board is provided on the LH side of steering column.<br />
As and when required, head lamp leveling, setting is done by<br />
rotating the knob to select one of the 3 levels marked in the switch<br />
depending upon the loading of the vehicle.<br />
Sl. No.<br />
Loading condition<br />
Sw. position/<br />
Marks assigned*<br />
1 One person in Driver seat 0<br />
2 Driver + One passenger in front 1<br />
3 Driver + One passenger in front +<br />
All the seats at rear occupied 2<br />
4 All the seats occupied 2<br />
5 All the seats at rear occupied +<br />
Luggage in boot space to achieve 3<br />
permissible load on the rear axle**<br />
6 Driver + Luggage in boot space to<br />
achieve permissible load on the 3<br />
corresponding axle**<br />
* Switch position / Marks assigned is for highest ULW.<br />
** If the maximum permissible laden mass is obtained befire the<br />
permissible load on the axle, the loading of the boot shall be<br />
limited to the figure, which enables that mass to be reached.<br />
1<br />
2<br />
0<br />
3<br />
73
STARTING AND DRIVING THE CAR<br />
• STARTING & DRIVING<br />
• Opening & closing the bonnet<br />
• Check list<br />
• Fuel level<br />
• Engine oil level<br />
• Engine coolant level<br />
• Brake fluid level<br />
• STARTING & STOPPING<br />
• Starting the engine<br />
• Stopping the engine<br />
• PREPARING TO DRIVE<br />
• Preparing to drive<br />
• Running in instructions<br />
• Gear shifting<br />
• FUEL ECONOMY<br />
• Instructions to improve fuel economy<br />
• DRIVING IN ADVERSE CONDITIONS<br />
• Driving through water<br />
• Driving on a rainy day<br />
• Night driving<br />
• Towing the vehicle<br />
• DRIVING A DIESEL / PETROL CAR<br />
• DRIVING SAFETY<br />
• CAR SAFETY CHECKS<br />
75
STARTING & DRIVING Opening & Closing the Bonnet<br />
OPENING & CLOSING THE BONNET<br />
Opening :<br />
1. Ensure that the car is in neutral gear with the parking brake<br />
applied.<br />
2. Pull the bonnet release lever located under the right hand corner<br />
of the dash board. The bonnet will pop up slightly.<br />
3. Raise the bonnet slightly and with your finger lift the secondary<br />
lock lever located under the bonnet centre.<br />
4. Lift the bonnet up. Pull the bonnet stay rod from its clip and<br />
insert the free end into the slot in the bonnet, slide stay rod<br />
outward to secure.<br />
Bonnet<br />
release<br />
lever<br />
Closing :<br />
1. To close the bonnet disengage the stay rod & clamp it properly.<br />
2. Lower the bonnet and drop it from a short height to shut.<br />
Ensure that the bonnet is properly locked before driving.<br />
Do not press the bonnet onto the bonnet lock.<br />
Do not leave the engine running in a closed garage.<br />
76
STARTING & DRIVING Check List<br />
Check Adjust Ensure<br />
1. Tyre pressure 1. Front seat 1. Bonnet is fully closed<br />
2. Coolant level 2. Rear view mirrors 2. All doors are properly closed<br />
3. Engine oil level 3. Seat belts are fastened<br />
4. Brake fluid level 4. All switches & lamps are<br />
5. Water in windshield washer reservoir working<br />
6. Power steering oil level (if installed) 5. Gear shift lever is<br />
7. Battery electrolyte level in neutral position<br />
8. Fuel level 6. Parking brake is released<br />
77
STARTING & DRIVING Fuel Level & Engine Oil Level<br />
Fuel Level :<br />
Check fuel level on the gauge in the instrument panel. If the pointer<br />
is in the red zone and/or visual low fuel level warning indicator<br />
(Amber colour LED) glows. , please ensure fuel filling at the earliest.<br />
Avoid driving with fuel at minimum level.<br />
Engine Oil Level :<br />
1. Open the bonnet. Pull out the dipstick and wipe it with a clean<br />
cloth or a paper napkin.<br />
2. Insert it again to its original position.<br />
3. Pull out the dipstick again and observe the oil level on the<br />
dipstick.<br />
4. Top up oil if the oil level is below the mid point of min. and max.<br />
marks.<br />
Note : Oil level should not exceed the max. mark. Always check<br />
the oil level when the car is on level ground and the engine is<br />
cold.<br />
2<br />
1. Engine oil filling cap 2. Dip stick<br />
1<br />
Check the engine oil level if low oil pressure warning comes<br />
'ON' while driving.<br />
78
STARTING & DRIVING Engine Coolant & Brake Fluid Level<br />
Engine Coolant Level :<br />
The coolant level is visible through the translucent reservoir. It should<br />
be between max. & min. marks. If it seems less, add premixed<br />
coolant into the auxiliary tank upto the max. mark. Put the cap<br />
back properly.<br />
Never remove the filler cap when the engine is hot. Use<br />
only branded premixed ready to use coolant.<br />
2<br />
In case of an emergency, normal water can be used, but the system<br />
should be flushed & filled with proper coolant mixture at the earliest.<br />
1<br />
Brake Fluid Level :<br />
The level of the brake fluid must be between the min. & max. marks<br />
on the side of the brake fluid container. If the level falls below the<br />
min. mark, add recommended brake fluid. (Refer chapter - Fuels,<br />
coolants & lubricants)<br />
In case of spongy or hard pedal or low brake efficiency, please<br />
contact the nearest Authorised Service outlet.<br />
1. Engine Coolant filling cap<br />
2. Brake Fluid filling cap<br />
1. Do not allow brake fluid to make contact with the skin or<br />
eyes.<br />
2. Do not allow brake fluid to splash or spill on the paint<br />
surface as it will damage the paint. In case of spillage,<br />
wipe it off immediately.<br />
79
STARTING & DRIVING Starting & Stopping<br />
STARTING THE ENGINE<br />
Before starting the engine :<br />
• Apply the parking brake fully.<br />
• Ensure that the gear lever is in neutral position.<br />
Starting the engine :<br />
• Press the clutch pedal & turn the ignition key to 'IGN' position.<br />
Ensure the "Check Engine" lamp is "ON".<br />
• Do not press the accelerator.<br />
• Crank the engine, if the engine starts but fails to run then repeat<br />
the above procedure. Release the key as soon as the engine<br />
starts to return to IGN position. Ensure the "Check Engine" lamp<br />
is "OFF". This is a normal phenomenon of "Check Engine" lamp.<br />
Parking Brake<br />
Do not crank the engine for more than 10 sec. continuously.<br />
If the engine does not start, wait for 30 sec. before cranking<br />
it again. Release the key immediately after starting the<br />
engine, otherwise the starter motor/flywheel ring may get<br />
damaged.<br />
Starting the engine with a malfunction :<br />
• Press the clutch pedal and turn the ignition key to 'IGN' position.<br />
• Press the accelerator pedal by 1/4th of full travel. Do not depress<br />
the accelerator pedal fully down.<br />
80
STARTING & DRIVING Brake Fluid Level & Stopping the engine<br />
• Crank the engine. If the engine starts, car may be driven<br />
to nearest authorised service outlet, even though "Check<br />
Engine" lamp is indicating a malfunction.<br />
• In the above condition engine may stall if the accelerator<br />
pedal is released back to idle position.<br />
• If engine stalls, repeat the above procedure from<br />
beginning & drive the car without releasing the<br />
accelerator pedal to "Idle" position.<br />
Stopping the Engine :<br />
• Let the car come to a stop and engine to idle.<br />
• Turn the key to 'OFF' position.<br />
Parking :<br />
• Park the car in a safe place. Switch on the indicator<br />
signal before turning to park.<br />
• Apply the parking brake.<br />
• Ensure that all window glasses are closed and all lamps<br />
are turned 'OFF'.<br />
• At night, put on the parking lights if required.<br />
• Remove the key from the ignition switch.<br />
• Place wheel chokes at the wheels if parked on a slope.<br />
Do not leave the key inside the car.<br />
Do not leave children unsupervised in the car.<br />
Avoid parking the car over inflammable materials,<br />
such as dry leaves, grass etc., as the exhaust<br />
system is hot enough to initiate "FIRE".<br />
81
STARTING & DRIVING Preparing To Drive<br />
Preparing to Drive :<br />
The following checks and adjustments should be carried out<br />
before you start driving the car.<br />
• Ensure that the windshield, all mirrors, windows and<br />
outside lights are clean. Check & adjust rear view mirrors.<br />
• Ensure that the windshield washer reservoir is full.<br />
• Ensure that the bonnet is properly closed.<br />
Do not put excessive pressure on top of bonnet to<br />
avoid damage.<br />
• Release the parking brake.<br />
• Check that any items that you may be carrying<br />
inside, are fully secured.<br />
• Check & adjust seat.<br />
• Ensure that all doors are locked properly.<br />
• Fasten seat belt properly.<br />
• Ensure that all gauges and indicator lights are<br />
working.<br />
• Check for blind areas being unobstructed in front<br />
and rear of the car.<br />
• Before driving off check in the rear view mirror,<br />
for oncoming traffic. Switch on side indicator<br />
signal when getting into main stream of traffic.<br />
Running-in instructions :<br />
During running-in period i.e. first 1000 km. follow the runningin<br />
instructions given below :<br />
A. 1. After starting the engine do not rev it up.<br />
Warm up gradually at idling speed.<br />
2. Avoid sudden acceleration and full throttle.<br />
3. It is always preferred not to rev up a cold engine lest<br />
engine bearings get affected.<br />
B. Recommended car speeds during running-in period :<br />
Gear Speed (kmph)<br />
1st 20<br />
2nd 40<br />
3rd 60<br />
4th 80<br />
5th 90<br />
82
STARTING & DRIVING Preparing To Drive<br />
Gear Shifting :<br />
All forward gears being synchronised, provide for easy and<br />
effortless gear shifting. Always remember to press the clutch<br />
pedal fully while shifting the gears and also to release the<br />
clutch pedal gently.<br />
Avoid sudden clutching i.e. abrupt release of depressed<br />
clutch pedal.<br />
Do not shift into reverse gear when the car is moving forward<br />
or when the engine is not at idling r.p.m. A 5 second pause<br />
after declutching will ensure smooth engagement of the<br />
reverse gear. Change gears at appropriate gear change<br />
speeds.<br />
Note : There is an interlock provided between fifth and<br />
reverse gear to prevent accidental shift from 5th gear to<br />
reverse gear. (Shifting from reverse gear to 5th gear is<br />
Appropriate gear change speeds for good pick-up :<br />
Speed (kmph)<br />
Upshift<br />
Speed (kmph)<br />
Downshift<br />
1st to 2nd - 25 2nd to 1st - 15<br />
2nd to 3rd - 50 3rd to 2nd - 40<br />
3rd to 4th - 70 4th to 3rd - 70<br />
4th to 5th - 85 5th to 4th - 80<br />
Recommended maximum speed, during normal<br />
operation.<br />
Gear<br />
Speed (kmph)<br />
1 35<br />
2 60<br />
3 85<br />
4 120<br />
5 125<br />
83
STARTING & DRIVING Fuel Economy<br />
INSTRUCTIONS TO IMPROVE FUEL ECONOMY :<br />
Your car's fuel economy is mainly dependent on your style<br />
of driving.<br />
To operate your car as economically as possible, use the<br />
following driving suggestions.<br />
Avoid Excessive Idling :<br />
Stop the engine and start it again, if you have to wait for<br />
more than a minute while you are stopped.<br />
Avoid fast starts & unnecessary stops :<br />
Start off slowly from traffic lights or stop signs to prevent<br />
increased fuel consumption and shortening of engine life.<br />
Avoid unnecessary deceleration (stopping or slowing down)<br />
and then acceleration which uses more fuel.<br />
Always maintain clean air-cleaner :<br />
The amount of air supplied will reduce due to clogged aircleaner,<br />
resulting in waste of fuel due to incomplete<br />
combustion.<br />
Avoid incorrect tyre pressures :<br />
Under-inflated tyres result in increased running resistance<br />
of the tyres, leading to wastage of fuel.<br />
Always have the engine tuned correctly through<br />
recommended maintenance at an Authorised Service<br />
outlet.<br />
Proper Driving Practices :<br />
Keep a safe distance from other vehicles to avoid braking<br />
suddenly.<br />
Do not rest your foot on the clutch pedal. It does not allow<br />
full engine power to be transmitted to the vehicle and reduces<br />
clutch life.<br />
Fuel economy speeds :<br />
Gear<br />
Speed (kmph)<br />
1st 10<br />
2nd 25<br />
3rd 35<br />
4th 50<br />
5th 60<br />
MPFI System<br />
The multi point fuel injection system has been<br />
designed to meet various load and speed conditions<br />
of the engine and doesn't require any regular<br />
maintenance. MPFI system should be serviced by<br />
authorised service personnel only, if required.<br />
84
STAR<br />
ARTING & DRIVING<br />
Fuel Economy<br />
TIPS RELATED TO FUEL SYSTEM MAINTENANCE :<br />
Basically, the fuel system of the vehicle consists of the<br />
following main components :<br />
1. Fuel tank 2. Fuel Filter 3. Fuel Pump 4. Fuel Rail<br />
5. Fuel pressure regulator and 6. Fuel injector.<br />
The following instructions are to be followed for reducing<br />
problems related to the fuel system.<br />
a) Avoid keeping the fuel tank empty and preferably keep it<br />
topped up as frequently as possible.<br />
Empty fuel tank may lead to inner corrosion of the<br />
tank. The rust particles thus formed may result in<br />
frequent clogging of fuel filters. The rust particles<br />
enter the system, resulting in malfunctioning of the<br />
MPFI system.<br />
b) Replace clogged fuel filters to prevent inconsistent fuel<br />
delivery from the fuel pump.<br />
85
STARTING & DRIVING Driving In Adverse Conditions<br />
Driving Through Water :<br />
• Never venture to drive through water when it flows above<br />
the stone guard or above the tyre centre line.<br />
• The engine may get seriously damaged if attempts are<br />
made to cross through deep water.<br />
• If at all the situation demands that you have to drive through<br />
water even at great risk then,<br />
• Keep the engine in fast idling and 'crawl' in low gear.<br />
• After driving through water apply the brakes several times<br />
to dry the liners and to regain original braking.<br />
• Check the engine and transaxle for any water ingress.<br />
Do not attempt to start the engine if the car gets flooded<br />
due to water.<br />
• Tow the car to a safe place.<br />
• Take the car to the nearest Authorised Service outlet to<br />
check for entry of water in the engine.<br />
• Lubricants in the engine and transaxle need to be changed<br />
in case of water entry.<br />
86
STARTING & DRIVING Driving In Adverse Conditions<br />
Driving on a Rainy Day :<br />
• Check wiper blades for proper functioning.<br />
• Check brakes, steering and windows.<br />
• Check tyres for wear and tyre pressure. Worn out tyres<br />
are unsafe on wet roads.<br />
• Avoid harsh braking and sharp turns. It may cause loss<br />
of steering control and lead to the car skidding.<br />
• For slowing down, shift to lower gears and apply brakes<br />
gently.<br />
• Keep lights on if visibility is poor.<br />
• Use heater and demister if required to clear off mist on<br />
the windshield.<br />
Night Driving :<br />
• Dip the head lamp for oncoming traffic during night driving.<br />
• Maintain a speed such that you can stop within illuminated<br />
distance of the head lamps.<br />
• Use head lamp main/dip beam to alert other users on<br />
turns/cross roads, etc.<br />
• Use side indicators to indicate lane change or turning.<br />
• Put on the hazard warning switch in case of hazardous<br />
parking or if your car is disabled to warn passing traffic.<br />
Put on the fog lamps (for Deluxe version) if required.<br />
87
STARTING & DRIVING Driving In Adverse Conditions<br />
Towing the Vehicle :<br />
• For towing a car, the best way is to use a wrecker.<br />
• Alternatively use a rigid tow bar.<br />
• Avoid using a flexible cable or rope as your car may crash<br />
into the car towing your car when it stops suddenly.<br />
• Switch ‘ON’ the hazard warning signals of both the cars<br />
to warn other road users.<br />
• Where possible, keep the engine idling so that power<br />
steering assistance and brake vacuum are available.<br />
• Limit the speed to 20-30 kmph.<br />
• In case of brake failure, use the parking brake to control<br />
the car.<br />
Front Towing Hook<br />
Rear Towing Hook<br />
88
STARTING & DRIVING Driving Safety<br />
DRIVING SAFETY<br />
Seat-Belt<br />
Seat-belts are life saving equipment<br />
and their use reduces the chance of<br />
injury and severity of injury in case of<br />
an accident. It is strongly<br />
recommended that all the car occupants<br />
should always wear the seat-belt, while<br />
car is in motion.<br />
Influence of Alcohol<br />
Avoid driving under the influence of<br />
alcohol or drugs. Alcohol and drugs will<br />
severely impair your control on the<br />
vehicle and increase the risk of injury<br />
to yourself and others.<br />
Mobile phones<br />
Avoid using mobile phones while driving.<br />
This could divert your attention from<br />
the road and result in an accident.<br />
Fatigue 'Rest Revive Survive'<br />
Do not attempt driving when you feel<br />
tired or sleepy. Long distance driving<br />
can tire you very much and fatigue can<br />
dull your reflexes and judgment. Take<br />
a break and get refreshed at intervals.<br />
CAR SAFETY CHECKS<br />
Windshield/wiper/windshield<br />
washer<br />
Always keep windshield glass clean to<br />
avoid any distraction in visibility. Ensure<br />
proper working of wipers and condition<br />
of wiper blade. Ensure that windshield<br />
washer reservoir is full. Do not operate<br />
wiper alone when the windshield glass<br />
is dry, which would damage the<br />
windshield.<br />
Headlights<br />
Keep headlight lenses clean. Check<br />
for operation of headlamp in both high/<br />
low beam conditions. Check for correct<br />
focusing of headlamps. Use only<br />
recommended type of bulbs. Do not<br />
use the high beam unless it is<br />
inevitable. Its dazzle may glare the<br />
driver of the oncoming car thus causing<br />
an accident.<br />
89
STARTING & DRIVING Driving Safety<br />
Side indicators / Hazard warning<br />
Ensure that all side indicators/hazard<br />
warning lights are always in working<br />
condition and they are used when<br />
required.<br />
Horn<br />
Ensure the horn is working properly.<br />
Horn provides safety to other road<br />
users by alerting your presence.<br />
Brakes<br />
Ensure the brakes are in working<br />
condition. Check brake fluid level in<br />
reservoir. Do not drive the car when<br />
brake warning lamp is 'ON'.<br />
Tyres<br />
Check the condition of tyres for any<br />
abnormalities. Maintain correct tyre<br />
pressure, it is very important<br />
particularly when subjected to extreme<br />
90<br />
conditions, such as high speed, high<br />
load and high outside temperature. Do<br />
not use worn or bald tyres on the front<br />
wheels.<br />
First Aid Kit :<br />
First aid kit is provided in your car.<br />
This is for use in case of minor injuries.<br />
It is to be regularly checked for any<br />
disintegration and should be updated<br />
regularly.<br />
Advance Warning Triangle :<br />
There is an advance warning triangle<br />
provided along with your vehicle. In<br />
case there is a breakdown and the<br />
vehicle is parked at the side of road,<br />
then the triangle is to be kept as per<br />
instructions given below :<br />
Remove advance warning triangle from<br />
case and assemble.<br />
Place the triangle on the road behind<br />
the vehicle when it stranded on the<br />
road. The triangle must be at least 50<br />
meters behind the vehicle in the same<br />
lane of traffic.<br />
Increase the distance to 150 meters<br />
on a highway or if a bad/hill top<br />
obscures the view.
MAINTENANCE & CAR CARE<br />
• MAINTENANCE POINTS<br />
• Engine compartment<br />
• Engine compartment lamp<br />
• Windshield washer<br />
• Air Filter<br />
• Engine cooling system<br />
• Engine oil and oil filter<br />
• Belt tension<br />
• Fuel system<br />
• Transaxle oil<br />
• Cluth & clutch adjustment<br />
• Brake & brake adjustment<br />
• Power steering<br />
• Battery<br />
• Catalytic Converter<br />
• Spark plug<br />
• Carbon canister<br />
• LPG filter<br />
• LPG pressure regulator diaphragm<br />
• Starting the engine with jump leads<br />
• Wheel change<br />
• Wheel alignment<br />
• Wheel balancing<br />
• Tyres & tyre rotation<br />
• Spare wheel<br />
• Repairing a tyre / tube<br />
• Fuses & Relays<br />
• Head lamp and head lamp adjustment<br />
• CAR CARE<br />
• Washing<br />
• Polishing<br />
• Cleaning of carpets<br />
• Cleaning of glass<br />
• Wiper care<br />
• Paint care<br />
91
MAINTENANCE POINTS Engine Compartment<br />
ENGINE COMPARTMENT - INDICA LPG<br />
1 Window Washer Fluid container 2 Engine Coolant Tank 3 Brake Fluid Container<br />
4 Engine Oil Filling Cap 5 LPG Regulator 6 LPG Fuel Filter<br />
7 LPG - ECU 8 Main ECU 9 Battery<br />
10 Air Filter 11 Dip Stick 12 Power Sterring Fluid Container<br />
92
MAINTENANCE & CAR CARE Engine Compartment Lamp & Windshield Washer<br />
ENGINE COMPARTMENT LAMP : (if fitted)<br />
Engine compartment lamp is provided to illuminate the engine<br />
compartment.<br />
A push - pull type switch is provided to operate the lamp.<br />
Do not f<strong>org</strong>et to switch 'OFF' the engine compartment lamp<br />
before closing the bonnet.<br />
A provision has been made for installation of engine compartment<br />
lamp in standard version.<br />
Engine Compartment<br />
Lamp<br />
WINDSHIELD WASHER :<br />
Windshield washer fluid container is located behind the front right<br />
hand side panel and its filler neck is provided near auxiliary tank in<br />
the engine compartment.<br />
Do not add detergent or any solvent in the windshield<br />
washing water.<br />
Windshield Washer Fluid Container<br />
93
MAINTENANCE & CAR CARE Air Filter<br />
AIR FILTER :<br />
The air filter element should be periodically cleaned. Replace the<br />
air filter element with a new one, if necessary.<br />
Always use a genuine air filter element.<br />
The air filter is located on the LH side of the engine compartment.<br />
Replacement of Air Filter Element :<br />
a) Remove the cover of the air filter, by loosening the screws.<br />
b) Remove the air filter element.<br />
c) Clean it gently by tapping. Clean air filter cover and air ducting.<br />
d) Check the element for puncture or pin holes by holding against<br />
a bright light source.<br />
e) If found to be OK, reinstall the filter element. Fit the cover with<br />
screws.<br />
a) When a car is driven under dusty conditions, frequent<br />
replacement of the air-cleaner element is necessitated.<br />
b) Clogged air-cleaners lead to greater intake resistance<br />
and result in increased fuel consumption. Using low<br />
pressure compressed air, blow off dust on the air cleaner<br />
element. If the air cleaner element appears to be choked,<br />
replace it with a new one.<br />
Air Filter<br />
94
MAINTENANCE & CAR CARE<br />
Engine Cooling System<br />
ENGINE COOLING SYSTEM :<br />
If engine overheating occurs, there could be a fault in the cooling<br />
system which may be due to :<br />
1. Insufficient coolant in the cooling system or dirt/scales having<br />
accumulated inside the cooling water passages especially in<br />
the radiator core.<br />
2. Choking or damage of radiator passages.<br />
3. Defective thermostat.<br />
4. Non operation of electrically operated fan. (40 Amp. fuse blown)<br />
5. Coolant leakage.<br />
6. Auxiliary tank cap not sealing properly.<br />
7. A.C. condenser fan not working.<br />
8. Excessive refrigerant charging in the A.C. system.<br />
9. Improper bleeding of the cooling system.<br />
Prevention of Rust Formation :<br />
To prevent rust formation use the branded premixed engine coolant<br />
in the radiator.<br />
This is sufficient to operate the car upto -40 0 C.<br />
Engine Coolant Tank<br />
95
MAINTENANCE & CAR CARE<br />
Engine Cooling System<br />
Replacing Engine Coolant :<br />
The cooling system should be completely drained and refilled with new coolant<br />
at specified intervals<br />
1. Touch the engine and radiator only after ensuring that they are cold.<br />
2. Remove the auxiliary tank cap.<br />
3. Loosen the drain plug at the bottom of the radiator.<br />
4. Remove the auxiliary tank from its holder, drain the coolant and refit it.<br />
5. Flush the radiator by using reverse flow i.e. radiator drain plug to auxiliary<br />
tank with clean water and close the drain plugs.<br />
6. Pour the premixed ready to use engine coolant into the radiator until it is<br />
full.<br />
7. Fill the auxiliary tank upto the 'MAX' mark and fit the cap.<br />
8. Ensure that there is no leakage in the system.<br />
Do not touch the engine and radiator when hot.<br />
96
MAINTENANCE & CAR CARE<br />
Changing of Engine Oil and Oil Filter :<br />
Change the oil and oil filter cartridge at specified intervals<br />
(Engine oil and oil filter cartridge may be changed earlier if<br />
the car is operating in sandy/dusty conditions). Changing of<br />
oil and oil filter requires access from underneath the body.<br />
The car should be raised on a hoist at a service station or<br />
should be parked on a service pit.<br />
1. Run the engine until it reaches normal operating<br />
temperature. Then shut it off.<br />
2. Open the bonnet and remove the engine oil filler cap.<br />
Remove the drain plug of the oil sump from the bottom of<br />
the engine. Drain the oil into an appropriate container.<br />
Take proper care as the engine oil will be hot.<br />
3. Remove the oil filter with the help of a special wrench.<br />
Destroy the filter to avoid reusage of the same.<br />
4. Smear a little fresh engine oil on the rubber gasket of the<br />
new engine oil filter. Hand tighten the engine oil filter and<br />
give a further three fourth turn with the special tool.<br />
Do not over tighten engine oil filter as this may<br />
damage oil filter and oil may leak out.<br />
5. Before filling in fresh oil in the engine, clean the drain<br />
plug and threads on the sump. Apply Maxifix sealant on<br />
the threads.<br />
6. Refit the drain plug using a new sealing washer.<br />
Tighten the drain plug to 3.5 mkg. torque.<br />
Engine Oil & Oil Filter<br />
DIP STICK<br />
OIL FILTER<br />
7. Fill recommended quantity of fresh engine oil in the crank<br />
case and secure the oil filler cap in its place.<br />
8. Start the engine and run for a few minutes. Do not heat<br />
up the engine. The engine oil pressure lamp should go<br />
‘OFF’. after starting the engine.<br />
9. Check for engine oil leakages, rectify if any.<br />
10.Stop the engine and recheck the engine oil level after a<br />
few minutes. If necessary add oil to bring the level to the<br />
upper mark on the dip stick.<br />
Note : Use of reclaimed oil is not recommended.<br />
97
MAINTENANCE & CAR CARE<br />
Engine Belt Tension<br />
Belt Tension :<br />
Check the condition of belts on the engine. Examine the edges<br />
of the belt for cracks or fraying.<br />
Check the tension of the belt by pushing on it with your thumb<br />
midway between the pulleys for the alternator belt, power<br />
steering pump belt and A.C. compressor belt. If the belt tension<br />
is not proper i.e. it gets deflected more than specified, get it<br />
attended to at the nearest Authorised Service outlet.<br />
Belt tension adjustment :<br />
a. Loosen bottom mounting bolt of the alternator.<br />
b. Loosen bolt holding upper mounting of alternator to the<br />
clamping piece.<br />
c. Loosen the lock nut.<br />
d. Adjust belt tension by turning the adjusting nut i.e. by<br />
turning the alternator away from the engine.<br />
e. Tighten lock nut and the bolt holding the clamping piece to<br />
alternator.<br />
f. Tighten bottom mounting bolt.<br />
g. Recheck belt tension.<br />
98<br />
1. Alternator mounting bottom bolt<br />
2. Alternator mounting upper bolt<br />
3. Clamping piece<br />
4. Clamping bolt<br />
5. Adjusting nut<br />
6. Lock nut<br />
10-11mm<br />
Crankshaft<br />
Pulley<br />
Crankshaft<br />
Pulley<br />
8-9mm<br />
A.C. Compressor<br />
Engine with Alternator<br />
Tensioner<br />
Alternator<br />
Power Steering Pump<br />
3<br />
1<br />
4 5 6<br />
2<br />
Alternator<br />
8-9mm<br />
Engine with A.C., Alternator and Power Steering<br />
3<br />
4 5 6<br />
1<br />
2
MAINTENANCE & CAR CARE<br />
Fuel Filter<br />
Changing Fuel Filter Element :<br />
The fuel filter is transparent and located near the fuel tank (under<br />
the body). Inspect and replace the fuel filter at specified intervals.<br />
Replace the fuel filter if dirt is observed in it.<br />
The fuel filter should be replaced at any Authorised Service<br />
outlet as the fuel system is under pressure and petrol can<br />
spurt out from fuel line connections.<br />
Fuel Filter<br />
on Petrol<br />
System<br />
Fuel Filter on LPG System<br />
99
MAINTENANCE & CAR CARE<br />
Petrol Fuel Filling Cap<br />
PETROL FUEL FILLING :<br />
The fuel filler cap is located on the left rear side of the car. The fuel<br />
filler lid can be unlocked by pulling the opening lever located on the<br />
out-board side of the driver's seat and locked by simply closing the<br />
lid.<br />
Remove the fuel filler cap slowly. The fuel may be under<br />
pressure & may spray out, causing injury if the cap is opened<br />
suddenly.<br />
The fuel cap is of the non vented type. Use correct genuine<br />
cap for replacement.<br />
• To remove the fuel filler cap turn the cap anti-clockwise. Turn the<br />
cap slowly to allow any residual pressure to escape.<br />
• To install turn the cap clockwise till a click sound is heard.<br />
STICKER<br />
UNLEADED PETROL ONLY - FOR PETROL<br />
VERSION WITH CATALYTIC CONVERTER<br />
Petrol is extremely flammable. Do not smoke when refuelling and<br />
make sure there are no open flames or sparks nearby.<br />
If you need to replace the fuel cap, use only a cap specified for<br />
your car. Using an improper fuel cap can cause a serious<br />
malfunctioning of the fuel system. You can get the correct<br />
replacement from an Authorised Service outlet.<br />
100
MAINTENANCE & CAR CARE<br />
LPG Fuel Filling<br />
LPG FILLING :<br />
LPG filler valve is located at the rear on the right hand<br />
body side of your car. LPG filling will stop automatically<br />
once the LPG tank is filled to 80% of its capacity.<br />
The LPG cylinder capacity of your car is 31 litres. If the<br />
LPG is filled after service / repairs of the LPG system, please<br />
check all joints for leakage by applying soap solution or by<br />
using an electronic instrument. Example -‘Leakator - 10’.<br />
or equivalent.<br />
NOTICE<br />
Keep the Ignition switch in “OFF” condition during<br />
LPG refilling<br />
STICKER :<br />
DO NOT USE DOMESTIC LPG<br />
FUEL TANK CAPACITY :<br />
Petrol tank capacity<br />
= 37 Litres<br />
LPG Fuel Filling Cap<br />
101
MAINTENANCE & CAR CARE<br />
Transaxle<br />
Transaxle Oil :<br />
Checking of Oil Level :<br />
1. Clean the oil level plug and the surrounding area.<br />
2. Remove the oil level plug and check whether oil is dripping out.<br />
The oil level must not be below the filler plug.<br />
Add oil to bring it to the required level.<br />
3. Tighten the oil level plug to 3 - 4 mkg. torque.<br />
Changing Oil in Transaxle :<br />
1. Let the engine idle for about 5 min. in neutral gear, so that the<br />
Transaxle is warmed up.<br />
2. Clean the oil level plug, drain plug and surrounding area.<br />
3. Place a container under the transaxle to collect the oil.<br />
4. Remove the oil level plug.<br />
5. Remove the drain plug and let the oil drain out fully.<br />
6. Refit the drain plug with a new sealing washer. Tighten the oil<br />
drain plug and fill new recommended oil through the oil level<br />
plug. Tighten both the oil drain plug and oil level plug (with new<br />
sealing washer) to 3 - 4 mkg. torque.<br />
Reverse Light<br />
Switch<br />
Oil Filler / Level Plug<br />
Drain Plug<br />
102
MAINTENANCE & CAR CARE<br />
Clutch & Brakes<br />
CLUTCH :<br />
Your car is provided with a single plate dry friction diaphragm type,<br />
pre-loaded release bearing clutch which is mechanically actuated<br />
by a cable connecting the clutch pedal & the clutch release lever.<br />
There is no free play in the system and hence no clutch pedal free<br />
play adjustment is required although the clutch pedal height from<br />
the floor has to be adjusted as clutch lining wears. The clutch pedal<br />
height from the floor keeps on increasing as the clutch lining wears.<br />
However, ensure that clutch pedal has free movement when lifted<br />
upward<br />
Do not ride the clutch. It will cause premature clutch wear.<br />
Do not release the clutch suddenly.<br />
BRAKES :<br />
Dual circuit, diagonal split hydraulic brakes through tandem master<br />
cylinder have been provided. The front brakes are disc brakes with<br />
floating type calipers while the rear brakes are drum brakes with<br />
automatic adjustment.<br />
No adjustments are required for front & rear brakes.<br />
The parking brake is a mechanical lever type, console mounted,<br />
cable operated, acting on rear wheels.<br />
To operate, pull up.<br />
To release pull up, press the button, lower handle then release the<br />
button & handle.<br />
Pressure reducing valves are provided on both circuits for the rear<br />
brakes to avoid locking of wheels & skidding of the car.<br />
X<br />
103
MAINTENANCE & CAR CARE<br />
NOTE : Vacuum Assistance : The hydraulic brake system of your<br />
car is assisted by a vacuum booster which reduced the effort of<br />
driver during braking. In the unlikely event of disruption in supply of<br />
vacuum to the booster (e.g. stoppage of engine, or failure of vacuum<br />
hose) this assistance will still be available but only for one or two<br />
brake applications to bring the vehicle to a stop. Beyond this, vacuum<br />
assistance will not be felt by the driver and brakes will appear to be<br />
hard/ineffective. In order to stop the vehicle effectively the driver will<br />
have to apply a much higher force on the brake pedal (roughly 5<br />
times the normal effort)<br />
Never drive the vehicle in engine switched "OFF" condition.<br />
BLEEDING PROCEDURE FOR BRAKE SYSTEM :<br />
1. Clean all dirt from around reservoir filler cap.<br />
2. Fill reservoir with fresh brake fluid to lower<br />
edge of filler neck.<br />
3. Attach bleed tube to left front caliper bleed screw and dip the<br />
other end in jar of fresh brake fluid.<br />
4. Start engine and open the bleed screw by 1/2 to 3/4 of turn.<br />
5. Depress foot pedal slowly and fully. After tightening the bleed<br />
screw, allow it to return slowly.<br />
6. Wait for 3-4 seconds before next stroke.<br />
7. Repeat until bubbles stop emanating from bleed tube.<br />
8. Close bleed screw immediately after the last downward stroke<br />
of pedal and hold pedal.<br />
104<br />
Bleeding Nipple<br />
Front wheel<br />
Rear wheel<br />
Clutch & Brakes
MAINTENANCE & CAR CARE<br />
9. Tighten bleed screw and remove tube.<br />
10. Replace dust cap on bleed screw.<br />
11. Repeat same procedure on rear right, front right and then rear<br />
left.<br />
12. If bleeding continues without success it means air is being<br />
drawn in past the bleed screw threads.<br />
13. Close bleed screw at the end of each downward stroke of pedal.<br />
14. Allow pedal to return fully and slowly.<br />
15. Tighten bleed screw finally after last downward stroke of pedal.<br />
16. Replace the dust cap on the bleed screw.<br />
17. Apply brake pedal hard and check for any leaks.<br />
3<br />
FRONT<br />
1<br />
Clutch & Brakes<br />
2<br />
REAR<br />
4<br />
Brake and clutch pedal adjustment :<br />
1. Ensure that clutch pedal height is the same as the brake pedal<br />
height.<br />
2. Connect the front end of the clutch cable to the clutch release<br />
lever and adjust the cable by setting the nut by hand so as to<br />
get clutch pedal height same as brake pedal height, and cable<br />
is tight.<br />
3. Due to wear of the clutch disc, the pedal lever will lift up. Readjust<br />
the pedal height again, using clutch cable.<br />
NOTE : Brake pedal height adjustment is required only in case<br />
of component removal, etc. Adjustment is not required during<br />
normal maintenance.<br />
Clutch Adjustment Nut<br />
105
MAINTENANCE & CAR CARE<br />
Clutch & Brakes<br />
4. Adjust brake light switch, gap of 3 mm to be maintained as<br />
shown in the fig. after loosening the lock nut on the switch.<br />
Tighten the nut after adjustment. This should be done with brake<br />
pedal in complete released condition.<br />
Do not apply tightening force over the switch body/terminal<br />
block as it may damage the switch. Electrical supply for<br />
brake lights is 'ON' without ignition switch. Under normal<br />
condition the switch shall be 'OFF' and the lights are not<br />
glowing.<br />
Any improper adjustment may result in either brake grabbing<br />
unneccessarily or spongy brakes.<br />
3 mm<br />
Lock Nut<br />
Brake Light Switch<br />
106
MAINTENANCE & CAR CARE<br />
Brake Fluid & Power Steering<br />
Brake Fluid :<br />
Check the level of brake fluid in the brake fluid container.<br />
It should be between the Min. and Max. marks.<br />
If not, then add brake fluid. Clean the area surrounding the cap<br />
before opening the cap. Always use fresh brake fluid and tighten<br />
the cap fully, otherwise moisture from the atmosphere will be<br />
absorbed by the brake fluid, making it unserviceable.<br />
In case of spongy or hard pedal or low brake efficiency, please<br />
contact the nearest Authorised Service outlet and get the defect<br />
rectified.<br />
Brake Fluid Container<br />
POWER STEERING (if installed)<br />
Power steering is fitted for lighter steering effort and easy<br />
manoeuverability, during driving and also help absorb the road<br />
shocks. The system consists of steering gear box, hydraulic pump<br />
and hydraulic tank. Pump drive is through the poly ‘V’ belt from the<br />
engine. Power assistance is available during normal operating<br />
conditions. In case of failure in the hydraulic system, the steering<br />
can be operated mechanically to bring the car to an Authorised<br />
Service outlet.<br />
Drive slowly as vacuum assistance for brake would not be available.<br />
Power Steering Fluid Container<br />
Report any external leakage to the nearest Authorised<br />
Service outlet.<br />
107
MAINTENANCE & CAR CARE<br />
Procedure for Oil Filling and Bleeding of Power Steering<br />
(Ensure that the Power Steering fluid reservoir is clean before<br />
starting any work)<br />
1. Fill the reservoir till it is nearly full, when the system is newly<br />
installed otherwise fill up to 'Max' mark on reservoir. Crank the<br />
engine for 10 seconds without allowing it to start (if possible). If<br />
engine does start, shut the engine immediately.<br />
Check & refill the reservoir. Repeat at least three times, each<br />
time checking & refilling the reservoir.<br />
2. Check for any leakage in the system and if noticed take corrective<br />
action.<br />
3. Start the engine & steer the car from full left to full right turn 3-4<br />
times.<br />
4. Add fluid if necessary to maintain the level upto 'Max' mark on<br />
reservoir.<br />
Power Steering<br />
MAX<br />
MIN<br />
Do not force the wheel in lock position either to the extreme<br />
left or right. The power steering pump may get damaged.<br />
Hold it gently.<br />
5. When the engine is at steady speed, check for bubbles or foaming<br />
in the oil. If present it indicates that air is getting sucked into the<br />
system. Check the suction line/fittings and correct if necessary.<br />
Power Steering Fluid Container<br />
108
MAINTENANCE & CAR CARE<br />
6. Once the system is bled properly and free from foaming,<br />
there should not be any appreciable change in the oil<br />
level in the reservoir, when the engine is started or stopped<br />
repeatedly.<br />
7. Now the car is ready to be driven.<br />
Final oil level should be upto 'Max' mark of reservoir.<br />
Do not allow fluid level to drop significantly or run out<br />
of the reservoir during the above operation. This may<br />
induce air into the system.<br />
Severe damage could occur to the power steering<br />
pump due to dry running (Running without sufficient<br />
oil and due to severe cavitation on account of air<br />
entry due to low oil level). This could lead to loss of<br />
power assistance, damage and failure of the power<br />
steering system.<br />
Do not start the engine without oil in the power<br />
steering system. This will result in serious damage<br />
to the pump. In case of an emergency, disconnect<br />
the pump drive belt and then start the engine or drive<br />
slowly as vacuum assistance for brake would not be<br />
available.<br />
Always use recommended oil from sealed<br />
containers. Any contaminated oil poured in the<br />
system will result in damage to the pump and gear<br />
box.<br />
Avoid mixing of different brands of oils.<br />
Power Steering & Battery<br />
BATTERY :<br />
Check the battery for proper electrolyte level and corrosion<br />
on the terminals.<br />
During normal operation, the battery generates gas<br />
which is explosive in nature, a spark or open flame<br />
can cause the battery to explode causing very<br />
serious injuries.<br />
Keep all sparks & open flames and smoking<br />
materials away from the battery.<br />
Getting electrolyte in your eyes or on the skin can<br />
cause severe burns. Wear protective clothing and<br />
a face shield or have a skilled technician to do the<br />
battery maintenance.<br />
The battery contains sulphuric acid (electrolyte)<br />
which is poisonous and highly corrosive in nature.<br />
1. Check the battery for electrolyte level against the marking<br />
on the battery outer case.<br />
2. Check the battery terminals for corrosion (a white or<br />
yellowish powder). To remove it, cover the terminals with<br />
a solution of baking soda. It will bubble up and turn brown.<br />
When this stops wash it off with plain water. Dry off the<br />
battery with a cloth or paper towel.<br />
Coat the terminal with petroleum jelly to prevent future<br />
corrosion.<br />
109
MAINTENANCE & CAR CARE<br />
Battery<br />
Use a proper wrench to loosen and remove cables from the<br />
terminals. Always disconnect the negative (-ve) cable<br />
first and reconnect it last.<br />
Clean the battery terminals with a terminal cleaning tool or<br />
wire brush.<br />
Reconnect and tighten the cables, coat the terminals with<br />
petroleum jelly.<br />
If you need to connect the battery to a charger, disconnect<br />
both cables to prevent damage to the vehicle’s electrical<br />
system.<br />
Note : Charging the battery with the cables connected<br />
can seriously damage your vehicle's electrical/electronic<br />
equipment.<br />
Swallowing electrolyte can cause fatal injury if<br />
immediate action is not taken.<br />
Do not reverse the battery connection on the vehicle<br />
as it may damage the vehicle electricals.<br />
Battery<br />
Note : -ve terminal is connected to the body/cab.<br />
110
MAINTENANCE & CAR CARE<br />
Battery<br />
Starting the Engine with Jump Leads :<br />
The engine with a discharged battery may be started by<br />
transferring electrical power from a battery in another car.<br />
This may be dangerous as any deviation from the following<br />
instructions could lead to personal injury resulting from any<br />
battery explosion, as well as damage to the electrical<br />
systems in both cars.<br />
Do not allow battery electrolyte to come in contact<br />
with eyes, skin, fabrics or painted surfaces. The fluid<br />
contains sulphuric acid which can cause injury and<br />
severe damage. Wear rubber gloves, to avoid risk of<br />
contact.<br />
• To lessen the risk of injury, wear eye protection when<br />
working near any battery.<br />
• Make sure that the battery providing the jump start has the<br />
same voltage as the battery in your car (12 V). Its capacity<br />
must be approximately the same as the original battery<br />
capacity. The voltage and capacity are given on the batteries.<br />
• Do not disconnect the discharged battery from the car.<br />
• Switch off all unnecessary electrical loads.<br />
• Do not lean over the battery during jump starting.<br />
• Do not allow the terminals of one lead to touch those of<br />
the other lead.<br />
• Apply the hand brake. Keep the gearshift lever in neutral.<br />
Connect leads in the order as shown in the sketch :<br />
• Do not connect the lead to the negative terminal of the<br />
discharged battery.<br />
• The connection of the -ve lead point should be as far<br />
away from the discharged battery as possible and close<br />
to the starter motor on engine/transaxle.<br />
• Route the leads so that they cannot get caught by the<br />
rotating parts in the engine compartment.<br />
• The engine of the car providing the jump start can be<br />
allowed to run during starting.<br />
Attempts to start the engine of the car with the discharged<br />
battery should be made at intervals of one minute and should<br />
not last more than 15 seconds. After starting, allow both<br />
engines to idle for approximately 3 minutes with the leads<br />
still connected.<br />
111
MAINTENANCE & CAR CARE<br />
Catalytic Converter<br />
Catalytic Converter :<br />
The catalytic converter is fitted on your car to reduce exhaust<br />
pollution. The catalytic converter will quickly heat up after<br />
starting to ensure that it operates correctly during the warm<br />
up phase of the engine. On a car with a catalytic converter,<br />
the fuel tank filler neck is of reduced diameter<br />
compatible with standard unleaded petrol supply<br />
nozzle.<br />
Even one time use of leaded petrol may cause<br />
permanent damage to the catalytic converter. Hence<br />
use unleaded petrol only.<br />
Care & Maintenance :<br />
• Use Unleaded Petrol only, since use of Leaded Petrol<br />
will damage (poison) the Catalytic Converter permanently.<br />
• Consult an Authorised Service Outlet at the earliest when,<br />
• Engine misfires or runs irregularly, following a cold start,<br />
• A significant loss of Power is noticed.<br />
• In the event of above symptoms, drive the car at slow<br />
speed without rapid acceleration. If the vehicle is<br />
continuously run with misfiring, it may cause overheating<br />
of shell, carpet etc. resulting into fire.<br />
Catalytic Covertor<br />
Avoid<br />
• Push start or tow-starting the vehicle. (Use jump leads).<br />
• Long (not more than 10 sec.) repeat (not more than 3<br />
times) starting of the Vehicle. Investigate the cause for<br />
difficulty in starting & rectify the same.<br />
• Long idling (to warm-up). If the engine is running rough,<br />
after a cold start.<br />
• Switching "off" the ignition when driving down the hill.<br />
(This will not save fuel).<br />
• Fuel tank getting almost empty.<br />
• Idling the engine with any of the Spark Plug Cable<br />
disconnected, manually, during diagnostic test. (Use<br />
appropriate test equipment).<br />
• Pre-Coating/Painting of Catalytic Converter.<br />
112
MAINTENANCE & CAR CARE<br />
Spark Plug<br />
Parking Warning :<br />
Avoid parking the vehicle over inflammable materials, such<br />
as dry leaves, grass, etc., as the exhaust system is hot<br />
enough to initiate "FIRE".<br />
SPARK PLUG (Petrol Engine) :<br />
Spark Plug<br />
- Champion / MICO*<br />
Spark Plug No. - C9YC / FR 6 DC 4<br />
Spark Plug Gap<br />
- 0.7 mm to 0.8 mm<br />
You should inspect the spark plugs periodically for carbon<br />
deposits. When carbon accumulates on the spark plug, a<br />
strong spark will not be produced. Remove carbon deposits<br />
using a spark plug cleaner.<br />
Spark Plug Replacement :<br />
1. Clean up any dirt or oil that is collected around the spark<br />
plug caps.<br />
2. Pull out the spark plug cables by gripping at the<br />
connector.<br />
3. Remove the spark plug with the help of a special socket.<br />
4. Check and adjust the gap, it should be 0.7 mm to 0.8<br />
mm.<br />
5. Replace the spark plug if the gap is more than 1.2 mm.<br />
6. Fix the spark plug and tighten it to the torque of 25 Nm<br />
(dry).<br />
Saprk plug<br />
<br />
<br />
0.7mm to 0.8mm<br />
7. Fit the spark plug cable, until a "click" sound is heard.<br />
Repeat the procedure for the other spark plugs.<br />
Tighten the spark plug carefully. Overtightening can<br />
damage the threads in the cylinder head. A loose<br />
spark plug or loose spark plug cable can affect<br />
combustion and cause damage to engine and<br />
catalytic converter.<br />
113
MAINTENANCE & CAR CARE<br />
Carbon Canister<br />
CARBON CANISTER<br />
As petrol evaporates in the fuel tank, hydrocarbons are discharged<br />
into the atmosphere. The carbon canister stores these hydrocarbons<br />
from the fuel tank.<br />
Air drawn through the carbon canister into the engine should be<br />
controlled to maintain exhaust emissions within desired limits as<br />
well as to ensure good driveability.<br />
The carbon canister should be replaced at an Authorised Service<br />
outlet.<br />
Carbon canister is located LH side crash member in the engine<br />
compartment Replace canister with a new one as per<br />
recommendation.<br />
Carbon Canister<br />
114
MAINTENANCE & CAR CARE<br />
Wheels & Tyres<br />
WHEELS & TYRES :<br />
Always use only the recommended size of wheel rims & tyres. Use<br />
of non-recommended rims and tyres may have an adverse effect<br />
on car safety and furthermore could infringe on car regulations.<br />
Spare Wheel Location :<br />
Your car’s spare wheel is mounted as shown in figure on a cross<br />
member that is located just behind the rear seat and has its<br />
mounting on the rear suspension towers. It is held in place by a<br />
single stud and tightened using a nut. Ensure that the wheel is<br />
seated properly on the bracket & is resting on the plyboard floor.<br />
Spare Wheel removal procedure :<br />
Follow these steps to remove the spare wheel of your car<br />
a. Remove the nut on plate that holds the spare wheel with the<br />
cross member.<br />
b. Once this nut is removed, the wheel that is resting on the ply<br />
board covering the LPG tank is now free.<br />
c. The wheel can now be lifted and taken out.<br />
NOTE : Once the spare wheel is repaired and is ready to be<br />
refitted, keep the direction of the air filling nozzle outwards for<br />
easy air filling.<br />
1. Spare Wheel<br />
2. Spare Wheel Mounting Nut<br />
115
MAINTENANCE & CAR CARE<br />
Wheels & Tyres<br />
Jack removal procedure :<br />
Your car’s jack is located behind the spare wheel and is<br />
mounted on the floor. You can have access to the jack<br />
once the spare wheel is removed. To remove the jack, first<br />
unscrew the hook end. While refitting, position the jack<br />
below the support rod & screw the jack till it is firmly fitted.<br />
Wheel Change :<br />
When changing wheels, use the jack provided with the car.<br />
The jack with handle is located on tailgate inner sill.<br />
• Park the car on a safe level ground. Engage 1st gear<br />
and also apply the parking brake. Place wheel chocks<br />
behind the rear wheels and in front of the front wheels.<br />
• Loosen the wheel pins of the wheel to be changed slightly.<br />
Keep the spare wheel to be fitted nearby.<br />
• Jack up the car by placing the jack at the appropriate<br />
location.<br />
• Remove the wheel pins, the wheel rim cover and the<br />
wheel.<br />
• Fit the new wheel, wheel rim cover and tighten the wheel<br />
pins.<br />
• Lower the jack and tighten the wheel pins to 8 mkg.<br />
torque.<br />
1. Spare Wheel 2. Jack & Handle<br />
116
MAINTENANCE & CAR CARE<br />
NOTE : The jack should never be supported on any of<br />
the body sheet metal components. This can cause<br />
damage to the body.<br />
Do not apply oil on the wheel pins. Wipe off the oil if<br />
present.<br />
• The jack should be placed below the body sill behind the<br />
front wheel tyre for front wheel changing and before the<br />
rear wheel tyre for rear wheel changing. Please refer to<br />
the sticker (Jack location) fixed on the jack.<br />
Do not work under the jacked up car without proper<br />
support.<br />
Wheels & Tyres<br />
Whenever a tyre or wheel rim is changed, the tyre needs to<br />
be balanced.<br />
1. Permissible imbalance for tyre with rim = 125 gm. cm.<br />
(max.)<br />
2. Total balance weight should be within 80 gm on each<br />
side.<br />
3. Relocate the tyre on the wheel rim if the weight required<br />
to balance is more than 80 gm.<br />
4. Balance weights are available from 5 gm to 80 gm, in<br />
steps of 5 gm.<br />
5. Do not use more than one balance weight on one side.<br />
Correct wheel alignment helps to ensure uniform tyre wear.<br />
You should get your car’s wheel alignment checked regularly<br />
as per recommendation.<br />
In case uneven tyre wear is observed, the vehicle’s wheel<br />
alignment should be checked as soon as possible.<br />
Wheel Balancing :<br />
Wheels are balanced at the factory. They may need to be<br />
rebalanced at some time.<br />
The wheels should be checked for balance if a tyre or tube<br />
is repaired.<br />
117
MAINTENANCE & CAR CARE<br />
Wheels & Tyres<br />
Tyres :<br />
Check for inflation and condition of your car tyres periodically.<br />
Inflation :<br />
Check the pressure in the tyres when they are cold.<br />
Refer to the tyre information label fitted on the driver side doorpost<br />
for correct cold tyre pressure.<br />
Recommended Tyre Pressures : (with cold tyres)<br />
Refer page no. 12<br />
You should have your own tyre pressure gauge and use it at all<br />
times. This makes it easier for you to tell if pressure loss is caused<br />
by a tyre problem and not by variation between gauges.<br />
Keeping the tyres properly inflated gives you the best combination<br />
of riding comfort, handling and tyre life.<br />
Over inflation of tyres makes the car ride bumpy and harsh. Tyres<br />
are more prone to uneven wear and damage from road hazards.<br />
Under inflated tyres reduce your comfort in car handling and are<br />
prone to failures due to high temperature. They also cause uneven<br />
wear and more fuel consumption.<br />
EXCESSIVE<br />
SIDE THREAD<br />
WEAR<br />
UNIFORM<br />
TYRE<br />
WEAR<br />
EXCESSIVE<br />
CENTRE<br />
THREAD<br />
WEAR<br />
Inspection :<br />
Every time you check inflation pressure, you should also<br />
examine tyres for leakage, damage, foreign objects & wear.<br />
118
MAINTENANCE & CAR CARE<br />
Wheels & Tyres<br />
You should look for :<br />
• Bumps or bulges in the tread or the side of the tyre.<br />
Replace the tyre if you find either of these conditions.<br />
• Cuts, splits or cracks in the side of the tyre. Replace<br />
the tyre if you notice this on the fabric or cord.<br />
• Excessive tread wear or non uniform tyre wear.<br />
Tyre Rotation :<br />
To help increase tyre life and distribute wear more evenly you<br />
should have tyres rotated at specified intervals or earlier depending<br />
on the operation of car and tyre wear pattern.<br />
The illustration shows how to rotate tyres when a normal spare<br />
wheel is included in tyre rotation.<br />
Tyre Rotation<br />
119
MAINTENANCE & CAR CARE Fuse & It’s Location<br />
Your car’s LPG system is protected against short circuit /<br />
overload by a fuse (15 A) fitted in the fuse box that is located<br />
behind the dash board on the right hand side.<br />
To replace a blown fuse :<br />
1. Open fuse box cover.<br />
2. Identify blown fuse from its melted wire.<br />
3. Remove the blown fuse & replace with one of similar<br />
amperage.<br />
(For location of the fuse refer next page)<br />
WARNING<br />
Always replace blown fuse with a fuse of correct<br />
amperage.Never use a substitute like aliminum coil or<br />
wire to replace a blown fuse.When you replace a fuse<br />
and the new fuse also blows OFF instantly, have the car<br />
inspected at a TATA authorised service centre.<br />
Take your car to a TATA Authorised service centre to find<br />
out the reason for the fuse to blow & repair the problem.<br />
fuse replacment should prefrebly be done only at TATA<br />
Authorised service centre<br />
When the fuse blows OFF, the following may occur<br />
• All LEDs on the switch will go OFF.<br />
• If your car is running in LPG mode when fuse blows<br />
OFF, the LPG system will shut down and will automatically<br />
shift to Petrol mode.<br />
• In such a case, you can start the car only in Petrol<br />
mode<br />
• If your car is running in Petrol mode when fuse blows<br />
OFF it will keep running in the Petrol mode<br />
120
MAINTENANCE & CAR CARE Fuse & It’s Location<br />
121
MAINTENANCE & CAR CARE Fuse & It’s Location<br />
Fuses & Relays :<br />
The electrical circuits in your car have fuses to protect the wiring<br />
from accidental short circuit or sustained overload. Fuses and<br />
relays are located at 3 locations in your car as shown in the sketch.<br />
Circuit connected through fuses and relays and the amperage of<br />
the fuse is printed on the fuse box covers.<br />
Checking and replacing fuses :<br />
If any electrical unit in your car has stopped functioning, the fuses<br />
should be checked first.<br />
• Turn the ignition key to 'LOCK' position.<br />
• Remove the fuse box cover, locate the fuse for the function.<br />
• Remove the fuse & look for the fuse element inside the fuse. If<br />
it is damaged replace it with a fuse of same rating and type.<br />
Push the fuse firmly into the holder.<br />
• Check that all other fuses are firmly in position and fix the<br />
cover back in position. Spare fuses are provided in the fuse<br />
box in the cabin.<br />
If the replaced fuse of the correct rating burns out in short time,<br />
there is probably a serious electrical problem in your car. Get the<br />
car attended to at the nearest our Authorised Service outlet.<br />
If any of the function relays is found defective, replace it by a<br />
genuine relay.<br />
Never use a fuse of higher rating than specified.<br />
Always ensure that spare fuses are replenished.<br />
LOCATION OF FUSE BOX & RELAYS<br />
1<br />
1. Engine compartment.<br />
2. Cabin compartment under dashboard.<br />
3. Cabin compartment under driver's seat<br />
(if installed).<br />
2<br />
3<br />
122
MAINTENANCE & CAR CARE<br />
Head Lamps<br />
Head Lamps :<br />
The head lamps are provided with halogen lamps of H4 type with<br />
double filament for providing straight ahead illumination of the road<br />
for long distance or a dip beam which illuminates the road<br />
immediately ahead for short distance visibility. Use dip beam to<br />
avoid inconvenience / blinding the drivers of oncoming vehicles.<br />
The head lamps must be properly aligned in order to obtain maximum<br />
road illumination and reduced glare for oncoming traffic. It is<br />
recommended to check alignment of head lamp beams periodically.<br />
Focusing of Head Lamps & Front Fog Lamps :<br />
Provision is made for focusing of head lamps and front fog lamps.<br />
This should be done at the Authorised Service outlets.<br />
Head Lamp Bulb Replacement :<br />
• Switch 'OFF' the head lamps & ensure that the bulb is not hot.<br />
• Open the bonnet and remove the lamp connector from the head<br />
lamp bulb.<br />
• Remove rubber cap. Unlock the locking clip and take out the<br />
bulb from the holder. This should be done carefully, otherwise it<br />
may lead to breakage of the bulb holder / holding clip.<br />
• Note the instructions on the bulb carton.<br />
Head Lamp<br />
Fog Lamp<br />
123
MAINTENANCE & CAR CARE<br />
Head Lamps<br />
Replace the bulb with a new one of the same type with right<br />
orientation in the holder.<br />
• Lock the clip, fit the rubber cap and fix the connector.<br />
• Switch 'ON' the head lamps and check the lighting.<br />
Do not clean or touch the head lamp reflector as it will<br />
damage the mirror finish of the surface.<br />
The horizontal and vertical adjustment screws are located on the<br />
back of the reflector.<br />
Precise adjustment can be carried out only in the authorised<br />
workshops.<br />
When replacing the head lamp bulb, handle it by gripping the cap.<br />
Protect the glass from contact with your skin or hard object. If you<br />
touch the glass, clean it with spirit & a clean cloth. After replacement<br />
of the bulb in any emergency get the head lamp adjustment done<br />
at an Authorised Service outlet at the earliest.<br />
Halogen head lamp bulbs get very hot when illuminated.<br />
Oil, perspiration or a scratch on the glass can cause the<br />
bulb to break due to the heat.<br />
124
MAINTENANCE & CAR CARE<br />
Car Care<br />
CAR CARE :<br />
The car is subjected to many external influences such as<br />
climate, road conditions, industrial pollution and proximity<br />
to the sea. These conditions demand regular care of the<br />
car body. Dirt, insects, bird droppings, oil, grease, fuel and<br />
stone chippings should be removed as soon as possible.<br />
Washing :<br />
Do not wash the car in direct sunlight, wash in shade. Spray<br />
the car thoroughly with a cold water jet (car on a washing<br />
pit or hoist). Mix car shampoo in the wash water. No solvent<br />
(fuel, thinners) need be used.<br />
NOTICE<br />
Avoid wiping of painted surface in dry condition as it<br />
may leave scratches on the painted surface.<br />
Use a soft bristle brush, sponge or soft cloth and rinse it<br />
frequently while washing. When you have washed the whole<br />
exterior, dry it with a chamois or soft cloth. After drying the<br />
car, inspect it for chips and scratches that could allow<br />
corrosion to start. Apply touch up paint where necessary.<br />
Polishes :<br />
Polishes and cleaners can restore shine to the painted<br />
surface that has oxidised and become dull. They normally<br />
contain mild abrasives and solvents that remove the top layer<br />
Car on Washing Pit<br />
of the finish coat. Polish your car if the finish does not<br />
regain its original shine after using wax.<br />
Cleaning of Carpets :<br />
Vacuum clean the carpet regularly to remove dirt. Dirt will<br />
make the carpet wear out faster. Periodically shampoo the<br />
carpet to keep it looking new.<br />
Use carpet cleaners (preferably foam type). Follow the<br />
instructions that come with the cleaner, applying it with a<br />
sponge or soft brush. Keep the carpeting as dry as possible<br />
by not adding water to the foam.<br />
125
MAINTENANCE & CAR CARE<br />
Cleaning of Windows, Front & Rear Glass :<br />
Clean the windows inside and outside with commercially<br />
available glass cleaners.<br />
This will remove the haze that builds up on the inside of<br />
windows. Use a soft cloth or paper towels to clean all glass<br />
and plastic surfaces.<br />
Maintaining the car when not in extended use :<br />
Park the car in covered, dry and if possible well-ventilated<br />
premises.<br />
Engage a gear.<br />
Remove the cables from the battery terminals (first remove<br />
the cable from the negative terminal).<br />
Make sure the handbrake is not engaged.<br />
Clean and protect the painted parts using protective wax.<br />
Clean and protect the shiny metal parts using commercially<br />
available special compounds.<br />
Sprinkle talcum powder on the rubber windscreen wiper<br />
and rear window wiper blades and lift them off the glass.<br />
Slightly open the windows.<br />
Cover the car with a cloth or perforated plastic sheet. Do<br />
not use sheets of imperforated plastic as they do not allow<br />
moisture on the car body to evaporate.<br />
Car Care<br />
Inflate the tyres to 0.5 bar above the normal specified<br />
pressure and check it at regular intervals.<br />
Check the battery charge every six weeks.<br />
Do not drain the engine cooling system.<br />
Wiper Care :<br />
FOR CHATTERING & NOISY PROBLEMS<br />
OK<br />
Windshield<br />
Glass<br />
NOT OK<br />
VIEW WITHOUT WIPER BLADE<br />
Wiper blade attack angle on windshield glass should be<br />
90 0 i.e. perpendicular.<br />
Remove wiper blade and root wiper arm on windshield glass<br />
in the centre position. Check the gap between arm strip<br />
and glass.<br />
Adjust by twisting wiper arm as shown in the figure.<br />
126
MAINTENANCE & CAR CARE<br />
FOLLOWING GUIDELINES WILL HELP YOU TO<br />
BETTER PROTECT YOUR CAR FROM CORROSION<br />
PROPER CLEANING :<br />
In order to protect your car from corrosion it is<br />
recommended that you wash your car thoroughly and<br />
frequently in case :<br />
1. There is an heavy accumulation of dirt and mud<br />
especially on the underbody.<br />
2. It is driven in areas having high atmosphere pollution<br />
due to smoke, soot, dust, iron dust & other chemical<br />
pollutants.<br />
3. It is driven in coastal areas.<br />
4. The underbody must be thoroughly pressure washed<br />
after every three months.<br />
In addition to regularly washing your car, the following<br />
precautions need to be taken.<br />
PERIODIC INSPECTION :<br />
1. Regularly inspect your car for any damage in the paint<br />
film such as deep scratches and immediately get them<br />
repaired from an Authorised Service Center, as these<br />
defects tend to accelerate corrosion.<br />
2. Inspect mud liners for damages.<br />
3. Keep all drain holes clear from clogging.<br />
Car Care<br />
PROPER PARKING :<br />
Always park your car in shade to protect it from harsh<br />
sunlight or in a well-ventilated garage so that there is no<br />
dampness on any part of the car.<br />
WASHING YOUR CAR :<br />
Follow these tips while washing your car.<br />
HAND WASH :<br />
1. Always wash your car in shade and when the surface is<br />
at room temperature.<br />
2. Wash with mild car wash soap like "Car Shampoo" and<br />
use a soft 100% cotton cloth to avoid scratches. Please<br />
take help of your dealer to buy the right products.<br />
3. Please be sure that you remove your wristwatch and<br />
wear soft gloves to avoid scratches due to finger rings<br />
or nails.<br />
4. To remove stubborn stains and contaminants like tar,<br />
use turpentine or cleaners like "Stain Remover" which is<br />
safe for painted surfaces. Again your dealer can help<br />
you in selecting the right product.<br />
5. Avoid substances like petrol, diesel, kerosene, benzene<br />
or other solvents that cause damage to paint.<br />
6. Dry your vehicle thoroughly to prevent any damp spots.<br />
7. Rinse all surfaces thoroughly to prevent any traces of<br />
soap and other cleaners as this may lead to the<br />
formation of stains on the painted surface later.<br />
127
MAINTENANCE & CAR CARE<br />
WAXING :<br />
Waxing and polishing is recommended to maintain the gloss<br />
and wet-look appearance of your paint finish.<br />
1. Use a good quality polish and wax for your car.<br />
2. Re-wax your car when the water does not slip off the<br />
surface and collects over the surface in patches.<br />
Further tips for the care of your new INDICA finish :<br />
We recommend that you do not use an automatic car wash<br />
as the stiff brushes or sponges could mar the finish and<br />
damage the surface of your car. Wash the vehicle by hand<br />
with cool and clean water using a soft cloth or sponge.<br />
Please do not use soap but a car shampoo recommended<br />
by your dealer.<br />
Please take the following precautions :<br />
1. Always wash your car in shade, avoiding direct exposure<br />
to sunlight during washing.<br />
2. Dry wiping your car may lead to the formation of<br />
scratches and hence always use a soft cloth and clean<br />
water while wiping your car.<br />
3. Always keep your car parked in a well ventilated shade.<br />
Exposure to heat with entrapped moisture promotes<br />
corrosion.<br />
Car Care<br />
4. Avoid driving on gravel roads, as the possibility of paint<br />
chip off due to the impact of stones is high. If you are<br />
driving on freshly tarred road, check immediately<br />
afterwards for any stains & clean them.<br />
5. External contamination in the form of sap or industrial<br />
fall-out may mar or develop spots on a new finish. Hence<br />
avoid parking your car near trees, which are known to<br />
drop sap, or near factories, which give out heavy smoke.<br />
6. The acid content in bird droppings may damage the<br />
newly painted finish and hence any bird dropping must<br />
be immediately washed off.<br />
7. The paint finish is susceptible to damage in case petrol,<br />
brake fluid, liquid from car battery, oil, antifreeze,<br />
transmission fluid or windshield solvent spills onto the<br />
painted surface. In case of such a spillage immediately<br />
rinse the affected area with water. Avoid wiping the area<br />
far as possible, however if wiping is required, ensure<br />
that you wipe the area gently with soft cotton cloth.<br />
8. Avoid using sharp objects to scrap off tar or mud from a<br />
painted surface as it may develop scratches or may<br />
peel off the paint.<br />
128
EMERGENCY SERVICE TIPS<br />
• ENGINE<br />
• CLUTCH<br />
• TRANSAXLE<br />
• BRAKES<br />
• STEERING SYSTEM<br />
• ELECTRICAL<br />
• SUSPENSION<br />
129
EMERGENCY SERVICE TIPS<br />
Engine<br />
These tips are given for your guidance. These preliminary jobs are to be carried out in an emergency. In normal cases the<br />
problems should be attended to in an Authorised Service outlet by following the repair procedures given in the Workshop<br />
Manual.<br />
SR. NO. PROBLEM OBSERVED PROBABLE CAUSE ACTION TO BE TAKEN<br />
ENGINE (LPG)<br />
1. Engine not cranking Dead battery, loose or improper • Get battery checked and/or changed<br />
battery/electrical connections • Jump start using another battery<br />
• Clean & tighten connections<br />
Engine stop solenoid fuse blown • Replace the fuse<br />
2. Engine overheats Coolant level low, coolant leakages • Check and correct leakages<br />
Top up coolant<br />
Hose collapsed/torn<br />
• Get the hose replaced<br />
Low engine oil level<br />
• Add oil<br />
Cap not sealing properly • Fit the auxiliary water tank cap<br />
correctly<br />
A.C. condenser fan not working • Get defect rectified<br />
Brakes binding<br />
• Get defect rectified<br />
Electric fan not working<br />
• Get defect rectified<br />
High delivery pressure in A.C. • Get defect rectified<br />
refrigerant circuit<br />
Radiator fins clogged<br />
• Clean it<br />
Radiator water passage clogged • Get it rectified<br />
Thermostat defective<br />
• Get it rectified<br />
130
EMERGENCY SERVICE TIPS<br />
Engine<br />
SR. NO. PROBLEM OBSERVED PROBABLE CAUSE ACTION TO BE TAKEN<br />
3. Poor pickup Accelerator cable loose • Get it adjusted correctly<br />
Air in the fuel system<br />
• Remove the air<br />
Clogged fuel filter<br />
• Clean / Replace the element<br />
Clogged air filter<br />
• Clean / Replace the element<br />
Clutch slipping/out of adjustment • Get it rectified<br />
Brakes grabbing<br />
• Get it rectified<br />
4. Does not accelerate Accelerator cable broken • Get cable replaced<br />
Fuel filter choked<br />
• Replace<br />
5. Belt squeal Loose belt • Get belt tension adjusted<br />
Belt glazed<br />
• Get belt replaced<br />
6. Low engine oil pressure indicator Pressure transducer faulty, • Do not run the engine extensively.<br />
'ON' when engine is running even and/or oil pump faulty<br />
Take the car to the nearest<br />
though engine oil level is within<br />
Authorised Service outlet & get<br />
maximum/minimum marking<br />
the fault rectified<br />
7. Engine not cranking Discharged battery, Loose or dirty • Get battery changed / charged<br />
battery connections.<br />
• Clean & tighten battery<br />
connections<br />
8. Engine cranks but does No fuel • Get the unleaded fuel filled<br />
not start Fuel filter chocked • Get the fuel filter replaced<br />
• Check fuse for fuel pump & EMS<br />
Inertia Switch tripped off • Reset Inertia switch<br />
131
EMERGENCY SERVICE TIPS<br />
Engine, Clutch & Transaxle<br />
SR. NO. PROBLEM OBSERVED PROBABLE CAUSE ACTION TO BE TAKEN<br />
9. Check engine lamp continues Some faults are detected by the • Get the vehicle checked and<br />
to glow, even after start fuel injection & ignition system rectified at Authorised Workshop<br />
CLUTCH<br />
1. Clutch slipping Improper pedal travel • Adjust pedal travel<br />
Rusted clutch cable<br />
Oil on clutch disc<br />
• Replace cable<br />
• Clean or replace disc at<br />
Authorised Service outlet<br />
2. Noisy clutch Pressure plate & diaphragm • Get car attended to by<br />
spring rattling<br />
Authorised Service outlet<br />
Release bearing broken/worn out • Replace<br />
Broken damper spring of clutch disc • Replace<br />
TRANSAXLE<br />
1. Gears slipping out of mesh Worn/damaged grooves on shifter • Replace<br />
shaft<br />
Worn shift fork or synchroniser sleeve • Replace<br />
Weak or damaged detent springs • Replace<br />
Worn bearings on input shaft or<br />
layshaft<br />
• Replace<br />
Worn dog teeth on sleeve and gear • Replace sleeve and gear<br />
2. Hard shifting Inadequate lubricant • Replenish<br />
Inadequate clutch pedal travel • Adjust<br />
Distorted or broken clutch disc • Replace<br />
132
EMERGENCY SERVICE TIPS<br />
Brakes<br />
SR. NO. PROBLEM OBSERVED PROBABLE CAUSE ACTION TO BE TAKEN<br />
Damaged clutch pressure plate • Replace clutch cover/disc<br />
Worn synchrocones<br />
• Replace<br />
Worn dog teeth on sleeve or gear • Replace sleeve or gear<br />
Distorted shift shaft/Linkages • Replace<br />
3. Noise Inadequate or insufficient lubricant • Replenish<br />
Damaged or worn bearing(s) • Replace<br />
Damaged or worn gear(s) • Replace<br />
Damaged or worn synchroniser<br />
parts<br />
• Replace<br />
BRAKES<br />
1. Poor brakes Insufficient brake fluid • Get the brake fluid filled<br />
Air in the system<br />
• Get the air removed<br />
Pedal travel excessive due to • Rectify automatic adjuster<br />
excessive shoe gap<br />
Vacuum leakage<br />
• Rectify the leakage<br />
Brake oil (line) leaking<br />
• Replace the leaking line<br />
Oil on the drum/liners<br />
• Get the liners cleaned/<br />
Replace seals if leaking<br />
Worn brake lining<br />
• Get the liners replaced<br />
Defective/worn parts<br />
• Get them replaced<br />
2. Brake pulling to one side Oil on the brake lining • Clean the brake lining<br />
One side shoe/pad worn<br />
• Get the shoe/pad replaced<br />
Loose brake anchor plate<br />
• Tighten the bolts<br />
133
EMERGENCY SERVICE TIPS<br />
Steering System<br />
SR. NO. PROBLEM OBSERVED PROBABLE CAUSE ACTION TO BE TAKEN<br />
One side brake pipe clogged • Get the brake line cleaned<br />
Defective tandem master cylinder • Rectify/Replace tandem master<br />
cylinder<br />
3. Brake Squeal Defective brake lining • Replace<br />
Glazed lining<br />
• Clean or replace lining<br />
Loose rivets.<br />
• Install rivets properly<br />
Wrong lining<br />
• Install correct lining<br />
Shoe return spring broken • Replace<br />
Front pads rubbing on the disc • Get it corrected<br />
STEERING SYSTEM<br />
1. Hard steering (Mechanical) Wheel alignment disturbed • Check & adjust<br />
Rack & pinion need adjustment • Check & replace if necessary<br />
Low tyre pressure<br />
• Adjust to correct value<br />
Grabbing of linkages<br />
• Check & rectify<br />
2. Poor Returnability Grabbing of linkages • Check & rectify<br />
Steering gear disturbed • Check & adjust<br />
3. Excessive play in steering Rack & pinion attachment loose • Get it tightened<br />
4. Hard steering Less fluid in the power • Get the fluid topped up to<br />
(For power steering) steering tank the correct level<br />
Air in the system<br />
• Get the air removed by bleeding<br />
the system<br />
Loose pump belt<br />
• Get the belt correctly adjusted<br />
Low tyre pressure<br />
• Adjust to correct value<br />
134
EMERGENCY SERVICE TIPS<br />
Electrical/Suspension<br />
SR. NO. PROBLEM OBSERVED PROBABLE CAUSE ACTION TO BE TAKEN<br />
ELECTRICAL<br />
1. Battery charge & engine oil Battery terminal loose or • Check connections<br />
pressure lamp in cluster not disconnected<br />
operating when key is in 'IGN' Battery completely dead • Get the battery properly<br />
position<br />
connected<br />
Fuse blown<br />
• Get the battery charged<br />
Loose/open connections<br />
• Get the alternator & charging<br />
circuit checked<br />
2. Non functioning electrical Fuse blown in the circuit • Replace the fuse if blown<br />
accessories such as power Loose connectors. • Get the connection properly<br />
windows, head lamps, fuel &<br />
tightened/Fixed<br />
temperature gauge, RPM meter, Circuit relay/controllers loose in the base • Fix the relay firmly<br />
wiper & washer unit and all Defective components • Get the defective components<br />
lamps etc.<br />
replaced at an Authorised<br />
Service outlet<br />
SUSPENSION<br />
1. Abnormal or excessive tyre wear Tyre out of balance • Check balance and/or adjust if<br />
required<br />
Steering geometry disturbed • Adjust steering geometry<br />
Tyres not adequately inflated • Adjust tyre pressure<br />
135
EMERGENCY SERVICE TIPS<br />
Suspension<br />
SR. NO. PROBLEM OBSERVED PROBABLE CAUSE ACTION TO BE TAKEN<br />
Wobbly wheel or tyre<br />
• Replace wheel or tyre<br />
Defective tyre<br />
• Replace tyre<br />
Hub play not proper<br />
• Adjust hub play<br />
Brake grabbing<br />
• Check and rectify<br />
Excessive braking<br />
• Modify driving habit<br />
2. Abnormal noise from front end Worn, sticky or loose tie • Replace tie rod end, suspension<br />
rod ends, lower ball joints,<br />
arm, tie rod or drive shaft joints<br />
tie rod in side ball joints or<br />
drive shaft joints<br />
Warning noise for pad wear • Replace pad<br />
Damaged struts or mounting • Repair mounting or replace struts<br />
Worn suspension arm bushings • Replace<br />
Loose wheel nuts<br />
• Tighten wheel nuts<br />
Loose suspension bolts or nuts • Tighten suspension bolts or nuts<br />
Broken or damaged wheel bearing<br />
Poorly lubricated or worn strut<br />
• Replace<br />
• Lubricate or replace strut bearings<br />
bearings<br />
Excessive hub play<br />
• Adjust<br />
Loose caliper housing bolts • Check & tighten<br />
3. Ride too soft / bumpy Faulty struts • Replace strut<br />
4. Suspension bottoms Over loaded • Check loading<br />
Faulty struts<br />
• Replace struts<br />
136
IMPORTANT INFORAMTION<br />
• AGGREGATE NUMBERS<br />
• FUEL, COOLANTS & LUBRICANTS<br />
• TECHNICAL SPECIFICATIONS<br />
• SERVICE SCHEDULE<br />
• CAR RECORD SHEET<br />
137
IMPORTANT INFORMATION<br />
Aggregate Numbers<br />
LOCATION OF AGGREGATE NUMBERS<br />
Engine Number<br />
Chassis Number Plate<br />
Transaxle Number<br />
Chassis Number Plate<br />
138
IMPORTANT INFORMATION<br />
Fuel, Coolants & Lubricants<br />
Vehicles with catalytic converter :<br />
Unleaded regular grade petrol conforming to IS 2796-1994/<br />
DIN 51607 (or equivalent) and RON not less than 87 is<br />
recommended to be used as fuel.<br />
Do not use leaded petrol in a car fitted with catalytic<br />
converter. Even single fill of leaded petrol will<br />
seriously damage the catalytic converter.<br />
Filler Neck<br />
Small Dia. Filler Hole<br />
Lubricants : (Petrol)<br />
Engine oil : Recommended grade of engine oil conforming<br />
to API-SF/CC specification and range of ambient<br />
temperature at which these can be used are given in the<br />
table below.<br />
For Unleaded Petrol Version<br />
Ambient temp. in deg. C Engine oil grade<br />
-10 deg. & above SAE 20W/40 or SAE 20W/50<br />
-15 deg. to 40 deg. SAE 15W/40 or SAE 15W/50<br />
-20 deg. to 40 deg. SAE 10W/40 or SAE 10W/50<br />
-35 deg. to 40 deg. SAE 5W/30<br />
139
IMPORTANT INFORMATION<br />
Fuel, Coolants & Lubricants<br />
Brand names :<br />
As per chart given in the manual.<br />
Transaxle :<br />
Use recommended brand of EP 80 gear oil.<br />
Grease for axle bearings :<br />
Lithium base grease IPOL IPLEX LC Grease 2<br />
Brake fluid :<br />
IS 8654/DOT 3<br />
Power Steering :<br />
ATF Type A, Suffix A<br />
Coolants :<br />
Presence of dirt in the coolant chokes up passages in the<br />
radiator, cylinder head and cylinder block, thereby causing<br />
insufficient cooling of engine.<br />
To prevent rust formation and freezing of coolant inside the<br />
passages of radiator, cylinder block and cylinder head,<br />
use branded premixed coolant (ready to use).<br />
140
IMPORTANT INFORMATION<br />
Fuel, Lubricants & Coolants<br />
PLEASE USE ONLY GENUINE ENGINE OILS, COOLANTS, LUBRICANTS, ANTI RUST & SOUND<br />
DEADENING COATS, WINDSCREEN SEALANT, ADHESIVES & FUEL ADDITIVES BRANDED BY<br />
TATA MOTORS FOR OPTIMUM PERFORMANCE OF YOUR TATA INDICA LPG...<br />
ITEM COMPANY BRAND QTY<br />
ENGINE OIL CASTROL Castrol GTX 20 W/40<br />
HPCL HP ESMO 20 W/40<br />
4.0 Litres<br />
COOLANT SUNSTAR Golden Cruiser 1400 M<br />
HPCL HP Thanda Raja P 6 Litres<br />
TRANSMISSION OIL HPCL Gear Oil EP 80<br />
CASTROL Castrol Extreme Pressure 80 EP<br />
3.3 Litres<br />
STEERING OIL HPCL HP ATF<br />
CASTROL Castrol Transpower TQ<br />
1.2 Litres<br />
BRAKE FLUID HPCL Super Duty Brake Fluid DOT-3<br />
CASTROL Castrol Universal Brake Fluid DOT-3<br />
0.265 Litres<br />
HUB GREASE CASTROL Castrol Grease AP2<br />
ANTI RUST TREATMENT DINITROL Dinitrol —<br />
& SOUND DEADENING WUERTH Wuerth —<br />
WIND SCREEN SEALANT ANCHEMCO Terostat 8590 Kit Form —<br />
METAL & PLASTIC ADHESIVE ANCHEMCO Terostat 930 310 ml Cartridge<br />
141
IMPORTANT INFORMATION Technical Specifications<br />
1. ENGINE<br />
Model<br />
Type<br />
No of cylinders<br />
Bore/Stroke<br />
: Bi-fuel (MPFI) TATA 475 SI”58<br />
: Water cooled, Bi-fuel (MPFI)<br />
Petrol Engine<br />
: 4 inline<br />
: 75 mm x 67.5 mm<br />
Capacity<br />
: 1193 cc<br />
Max. engine output : Petrol : 65 PS at 5000 rpm as<br />
per IS - 14599<br />
LPG : 62 PS at 5000 rpm as<br />
per IS - 14599<br />
Max. Torque<br />
Compression ratio : 10 : 1<br />
Firing order : 1-3-4-2<br />
: Petrol : 102 Nm at 2600 rpm<br />
as per IS - 14599<br />
LPG : 100 Nm at 2600 rpm as<br />
per IS - 14599<br />
2. CLUTCH<br />
Type : Single plate dry<br />
friction diaphragm type<br />
Outside diameter : 190 mm<br />
of clutch lining<br />
Friction area : 285 sq.cm.<br />
3. TRANSAXLE : Front wheel drive through<br />
constant velocity joints.<br />
Model : TA65-5 / 4.06 with overdrive<br />
Type : Synchromesh on all forward<br />
gears. Sliding mesh for<br />
reverse gear.<br />
No. of gears : 5 Forward, 1 Reverse<br />
Gear ratios : 1st - 3.64<br />
2nd - 1.95<br />
3rd - 1.27<br />
4th - 0.88<br />
5th - 0.714<br />
Rev. - 3.58<br />
Final drive ratio : 4.06<br />
142
IMPORTANT INFORMATION Technical Specifications<br />
Gear Shift : Floor mounted with<br />
International "H" pattern,<br />
with Fifth and Reverse inline.<br />
with interlock to prevent<br />
accidental engagement from<br />
5th to reverse<br />
4. REAR AXLE : Non driven axle<br />
Independently suspended<br />
5. SUSPENSION<br />
Front : Independent, Lower<br />
wishbone, McPherson Strut<br />
type.<br />
Rear : Independent, Semi-trailing<br />
arm with coil spring<br />
mounted on hydraulic shock<br />
absorbers.<br />
Antiroll bar : At front<br />
6. STEERING<br />
GL / GLE : 1) Manual Rack & Pinion<br />
Version<br />
Steering Gear with<br />
collapsible steering column<br />
GLS / GLG : 2) Hydraulic Power assisted<br />
Version<br />
Rack & Pinion Steering<br />
Gear with collapsible<br />
steering column<br />
Steering Wheel : 380 mm dia<br />
7. BRAKES<br />
Service brakes : Dual circuit, diagonal split<br />
hydraulic brakes through<br />
tandem master cylinder.<br />
Front : 231 mm dia disc brake<br />
Rear : 180 mm dia drum brake<br />
Parking brake : Lever type, Console mounted,<br />
Cable operated mechanical<br />
linkages acting on rear wheels<br />
143
IMPORTANT INFORMATION Technical Specifications<br />
8. WHEELS & TYRES<br />
Tyres : 165/65 R13<br />
Wheel rims : 4.50 J x 13 stylised steel rims<br />
No. of wheels : Front - 2<br />
Rear - 2<br />
Spare - 1<br />
9. FUEL TANK<br />
Capacity : 37 litres (PETROL)<br />
: 31 litres (LPG)<br />
10. BODY : Semi-mono Volume, Mini size<br />
5 door hatch-back, steel<br />
monocoque body.<br />
11. ELECTRICAL SYSTEM<br />
System Voltage : 12 Volts -ve earth<br />
Battery : 12V, DIN 44<br />
Alternator : 12 V 90 Amps<br />
12. PERFORMANCE<br />
Max. speed at rated :<br />
GVW<br />
(kmph)<br />
140 (PETROL mode)<br />
135 (LPG mode)<br />
13. MAIN CHASSIS DIMENSIONS AS PER ISO:612 IN<br />
MM (Nominal) TOLERANCES AS PER<br />
INTEREUROPE STVZO<br />
Wheel base : 2400<br />
Track front : 1400<br />
Track rear : 1380<br />
Front Overhang : 785<br />
Rear Overhang : 490<br />
Overall length : 3675<br />
Max. Width :<br />
Over body : 1665<br />
Over outer rear view mirrors<br />
in open condition: : 1915<br />
Overall height - unladen : 1485<br />
Min. turning circle dia : 9.8 m<br />
Min. turning clearance circle dia : 10.2 m<br />
Ground clearance - unladen : 166<br />
144
IMPORTANT INFORMATION Technical Specifications<br />
14. WEIGHT (kg) (TOLERANCE AS PER EEC 92/21)<br />
Complete Vehicle For GL 1045<br />
kerb weight as per For GLE 1060<br />
ISO : 1176 (with For GLS 1065<br />
sparewheel and tools ) For GLG/GLX 1070<br />
Gross vwhicle weight For GL 1445<br />
For GLE 1460<br />
For GLS 1465<br />
For GLG/GLX 1470<br />
Pay load For all 400<br />
15. PASSENGER CAPACITY : 2 front + 3 rear<br />
16. LUGGAGE SPACE<br />
Net inside loading space : 0.16 cubic metre<br />
upto rear seat backrest<br />
0.55 cubic metre<br />
upto front seat backrest<br />
when rear seat folded<br />
145
IMPORTANT INFORMATION Service Schedule<br />
Service Instructions<br />
The <strong>Tata</strong> <strong>Indica</strong> has been manufactured to give you economical and trouble<br />
free performance. To achieve this please follow the instructions as stated.<br />
Your Car is entitled to four free services (labour only). The free service<br />
coupons are attached to the sales invoice. Please present these<br />
coupons to the servicing dealer while availing free services.<br />
1st free service - At 1000-1500 km. OR 1 month whichever is eariler<br />
2nd free service - At 10000-10500 km. OR 12 months whichever is eariler<br />
3rd free service - At 20000-20500 km. OR 24 months whichever is eariler<br />
4th free service - At 30000-30500 km. OR 36 months whichever is eariler<br />
All services other than free services are chargeable.<br />
Servicing of the car can be done at<br />
any TATA MOTORS Authorised<br />
Dealer Workshop, TATA MOTORS<br />
Authorised Service Centre (TASC)<br />
or TATA MOTORS Authorised<br />
Service Point (TASP). The details of<br />
their locations are given in this<br />
manual.<br />
Warranty claims can be settled by<br />
any <strong>Tata</strong> Motors Authorised Dealer<br />
for all failures, while all warranty<br />
claims excluding the consideration<br />
on the replacement of major<br />
aggregates, can be settled by any<br />
TASC which is authorised for<br />
handling warranty claims. TASPs will<br />
not handle warranty repairs.<br />
146
IMPORTANT INFORMATION Service Schedule<br />
SR.<br />
NO.<br />
OPERATION<br />
FREQUENCY<br />
IN km<br />
1000-1500<br />
10000-10500<br />
20000-20500<br />
30000-30500<br />
40000-40500<br />
50000-50500<br />
60000-60500<br />
70000-70500<br />
80000-80500<br />
90000-95500<br />
100000-100500<br />
GENERAL<br />
1. Wash the vehicle & clean condenser fins Every Service • • • • • • • • • • •<br />
2. Check & top up fluids (if required) : Transaxle oil, coolant, Brake fluid, Every Service • • • • • • • • • • •<br />
Battery Electolyte, Wind screen washer fluid, Power steering oil (if fitted)<br />
3. Check fuel lines for leakages 10000 • • • • • • • • • •<br />
4. Check rubber boots & bushes for damage 30000 • • •<br />
ENGINE ( LPG SYSTEM )<br />
1. LPG lines and joints (LPG leakage) Every service • • • • • • • • • • •<br />
2. Clean the LPG filter • • • • •<br />
First at 10000 km & thereafter at every 20000 km<br />
3. Replace the LPG filter / Cartridge paper 20000 • • • • •<br />
4. Check saftey solenoid valve on vaporiser 10000 • • • • • • • • • •<br />
5. Check pressure regulator for mountings, leakges,damages, proper 10000 • • • • • • • • • •<br />
functioning, Rectify if any<br />
6. Replace the pressure regulator diaphragm 40000 • •<br />
7. LPG rail - check mountings,leakages -Rectify if any • • • • •<br />
First at 10000 km & thereafter at every 20000 km<br />
8. Drain oil if any from regulator • • • • •<br />
First at 10000 km & thereafter at every 20000 km<br />
9. Multifunction valve - Clean ‘O’ Ring & core Assy. 20000 • • • • •<br />
10 Multifunction valve - Replace 100000 •<br />
11. Check filler valve seals 100000 •<br />
147
IMPORTANT INFORMATION Service Schedule<br />
SR.<br />
NO.<br />
OPERATION<br />
FREQUENCY<br />
IN km<br />
1000-1500<br />
10000-10500<br />
20000-20500<br />
30000-30500<br />
40000-40500<br />
50000-50500<br />
60000-60500<br />
70000-70500<br />
80000-80500<br />
90000-95500<br />
100000-100500<br />
ENGINE ( PETROL SYSTEM)<br />
1. Clean air filter element ( more frequently for vehicle operating as TAXI ) 10000 • • • • • • • • • •<br />
2. Change engine oil and oil filter ( 10000 km OR 12 months whichever is earlier) 10000 • • • • • • • • • •<br />
3. Change fuel filter 10000 • • • • • • • • • •<br />
4. Check all drive belts for tension, adjust if necessary 10000 • • • • • • • • • •<br />
5. Check timing belt, adjust tension if necessary, replace if defective 20000 • • • • •<br />
6. Replace air filter element ( more frequently for vehicle operating as TAXI ) 40000 • •<br />
7. Change coolant ( 40000 km OR two years whichever is earlier ) 40000 • •<br />
8. Replace timing belt 100000 •<br />
9. Replace Spark Plug (MPFI) 30000 • • •<br />
TRANSAXLE<br />
1. Change Transaxle oil 20000 • • • • •<br />
BRAKES<br />
1. Check front brake pads and rear brake linings. Replace if necessary 20000 • • • • •<br />
2. Replace brake fluid (OR 2 years whichever is earlier) and check brake system 40000 • •<br />
components for leakages<br />
WHEELS AND TYRES<br />
1. Rotate tyres 20000 • • • • •<br />
FRONT & REAR SUSPENSION<br />
1. Check and adjust wheel alignment 20000 • • • • •<br />
STEERING<br />
1. Repalce power steering oil 80000 •<br />
148
IMPORTANT INFORMATION Service Schedule<br />
SR.<br />
NO.<br />
OPERATION<br />
FREQUENCY<br />
IN km<br />
1000-1500<br />
10000-10500<br />
20000-20500<br />
30000-30500<br />
40000-40500<br />
50000-50500<br />
60000-60500<br />
70000-70500<br />
80000-80500<br />
90000-95500<br />
100000-100500<br />
ELECTRICAL<br />
1. Check specific gravity of battery electrolyte (10000 kmOR Every 6 months) 10000 • • • • • • • • • •<br />
2. Check headlamp focussing 30000 • • •<br />
A.C. SYSTEM<br />
1. Check air-conditioning / HVAC system for satisfactory performance Every Service • • • • • • • • • • •<br />
149
IMPORTANT INFORMATION Service Schedule<br />
Date<br />
Km. reading<br />
Fuel filled Fuel consumption Remarks / Complaints<br />
150
IMPORTANT INFORMATION Service Schedule<br />
Date<br />
Km. reading<br />
Fuel filled Fuel consumption Remarks / Complaints<br />
151
IMPORTANT INFORMATION Record of Services Performed<br />
Recommended Date Odometer Repair Servicing<br />
Service reading Order Dealer's<br />
km. No. Signature &<br />
At km.<br />
Stamp<br />
Recommended Date Odometer Repair Servicing<br />
Service reading Order Dealer's<br />
km. No. Signature &<br />
At km.<br />
Stamp<br />
PDI Free Labour<br />
1,000 *<br />
10,000 *<br />
20,000 *<br />
30,000 *<br />
40,000<br />
50,000<br />
60,000<br />
70,000<br />
80,000<br />
90,000<br />
1,00,000<br />
1,10,000<br />
1,20,000<br />
1,30,000<br />
1,40,000<br />
1,50,000<br />
1,60,000<br />
1,70,000<br />
1,80,000<br />
152<br />
* Labour free, material chargeable
Record of Warranty repairs carried out Chassis No._____________________<br />
Date<br />
Odometer<br />
reading (km)<br />
Repair<br />
Order No. Particulars of Repair Servicing Dealer's Signature & Stamp<br />
153
Record of Warranty repairs carried out Chassis No._____________________<br />
Date<br />
Odometer<br />
reading (km)<br />
Repair<br />
Order No. Particulars of Repair Servicing Dealer's Signature & Stamp<br />
154
LIST OF LPG FILLING STATION<br />
155
LIST OF LPG FILLING STATIONS<br />
ASSAM<br />
Guwahati<br />
1. Indian Oil Corporation Ltd. (IOCL)Dealer :<br />
Kishore & Co.Adabari, Guwahati-12<br />
Phone: 0361-2571490 / 98864027833<br />
GOA<br />
2. Elf Gas India Ltd.Dealer: West Coast Auto<br />
LPG StationNH-4A, By-pass, Bainguinim<br />
Village, Tiswadi (Iihas) Taluk, Old Goa.<br />
Phone: 9326106875<br />
MAHARASHTRA<br />
Ahmednagar<br />
3. Indian Oil Corporation Ltd.(IOCL)Dealer :<br />
Om Matoshri Petroleum,Nagar-Pune<br />
Road,<br />
Phone: 0241-2322971<br />
Nagpur<br />
4. Reliance Industries Ltd. (RIL)Dealer:<br />
Reliance Industries Ltd. (RIL)Survey no.<br />
104/2, Village Bothli, PO Butibori, NH-7,<br />
Wardja Road, Nagpur.<br />
Phone: 07104-329468<br />
5. Company: Vanaz Engineers Limited.Dealer:<br />
Maa Sharda AutoLPG StationPlot no. 1,<br />
Manewada Square, Ullas Nagar, Ring Road,<br />
Nagpur-440 027<br />
Phone: 712-2731964 / 9823026860 /<br />
9370022110<br />
156<br />
6. Hindustan Petroleum Corporation Ltd.<br />
(HPCL)Dealer: Kamal LubesMIDC,<br />
Butibori, Nagpur<br />
7. Vanaz Engineers Limited.Dealer:<br />
Transwell Automall Plot no. 35 A,<br />
Babulban, Old Bagadganj Road, Nagpur<br />
- 440 008<br />
Phone: 0712-2708439 / 3268439 /<br />
9823011639<br />
8. Indian Oil Corporation Ltd. (IOCL)Dealer:<br />
Gargi Automobiles Yerla Islampur<br />
9. Aegis Logistics Ltd.Dealer: Aegis<br />
Logistics Ltd.920, Peth-Sangli Road,<br />
Ashta Naka, Urun, Islampur-415 409, Tal.<br />
Walwa, Dist. Sangli<br />
Khedshivapur<br />
10. Reliance Industries Ltd. (RIL)Dealer:<br />
Reliance Industries Ltd. (RIL)Survey no.<br />
542 & 543, Post -Kelawade Chainage, No.<br />
813/200, At Village, -Kelawade, Taluka-<br />
Bhor, Dist-Pune.<br />
Phone: 02113-284785<br />
Bhayander<br />
11. Company: Reliance Industries Ltd.Dealer:<br />
Reliance Industries Ltd.Old survey no.<br />
365, New Survey no. 71, H. No. 1,7, 21 ,<br />
Bhayander-401 101.<br />
Phone: 022-65143056<br />
Amreli<br />
12. Vanaz Engineers LimitedDealer: Shree<br />
Ganesh Petroleum16,17,18, Varsada<br />
road, Near Utsav Garden Restaurant, PO<br />
Ishvariya, Dist. Amreli.<br />
Phone: 02792-240888 / 9824055333<br />
Mumbai<br />
13. Hindustan Petroleum Corporation Ltd.<br />
(HPCL)Dealer: Lachmandas Service<br />
Stn.S.V.Road, Irla, Ville Parle (W),<br />
Mumbai<br />
Phone: 022-26713698<br />
14. Hindustan Petroleum Corporation Ltd.<br />
(HPCL) Sakinaka Petroleum<br />
Services,Kurla Andheri Rd, Next to Bank<br />
of Baroda, Sakinaka, Mumbai-400 072<br />
Phone: 022-28506025<br />
15. Hindustan Petroleum Corporation Ltd.<br />
(HPCL) Baxi Singh & Co.Next to Kalpana<br />
Cinema, Lal Bahadur Sashtri Margh,<br />
Kurla West, Mumbai- 400 070<br />
Phone: 022-25038468, 25039865<br />
16. Bharat Petroleum Corporation Ltd.<br />
(BPCL)Manhas AutoAcharya Done Marg<br />
(King Edward Road), Sewree, Mumbai-<br />
400 015<br />
Phone: 022-24131240<br />
17. Bharat Petroleum Corporation Ltd.<br />
(BPCL),Chedda Service Station, Shastri<br />
Marg, Mulund, Mumbai-400 080<br />
Phone: 022-25681548
LIST OF LPG FILLING STATIONS<br />
18. Bharat Petroleum Corporation Ltd. (BPCL)<br />
Auro Petroleum305, Sion Trombay Road,<br />
Nr Diamond Garden, Chembur, Mumbai-<br />
400 071<br />
Phone: 022-25575337<br />
19. Bharat Petroleum Corporation Ltd. (BPCL)<br />
Famous AutoSwami Vivekanand Road,<br />
Kapadia Baug, Plot No.1, Survey No. 7,<br />
Borivli (W), Mumbai- 400 092<br />
Phone: 022-28053849<br />
20. Indian Oil Corporation Ltd. (IOCL) Raj<br />
AutoNear Juhu Airport, SV Road,Mumbai<br />
Phone: 022-26133700<br />
21. Indian Oil Corporation Ltd. (IOCL)<br />
Poonam AutoOpp Reliance Park, Nr<br />
Suman Nagar, Sion Trombay, Chembur<br />
Phone: 022-25282052<br />
22. Indian Oil Corporation Ltd. (IOCL)<br />
Joquium Petroleum Deonar Mumbai<br />
Phone: 022-25569948<br />
23. Indian Oil Corporation Ltd. (IOCL)<br />
Intel Carporation, Sahar Airport,<br />
Andheri (E)<br />
Phone: 022-26829353 / 26829247 /<br />
26828353<br />
24. Indian Oil Corporation Ltd. (IOCL) Asha<br />
AutoKurla, Mumbai<br />
Phone: 022-26505338<br />
25. Hindustan Petroleum Corporation Ltd.<br />
(HPCL)Hind Automobiles, 29, Sewri<br />
Vadala Road, Near Arora Cinema, Kings<br />
Circle, Mumbai-400 019<br />
Phone: 022-24096544<br />
26. Hindustan Petroleum Corporation Ltd.<br />
(HPCL)Chaman Automobiles, 277, Reay<br />
Road, Opp Dock Yard Road, Railway<br />
Station, Mumbai-10<br />
Phone: 022 - 23717925<br />
27. Hindustan Petroleum Corporation Ltd.<br />
(HPCL)Cadel AutoCadel Auto, Opp.<br />
Shivaji Park, Dadar, Mumbai<br />
Phone: 022 -24453191, 24467829<br />
28. Hindustan Petroleum Corporation Ltd.<br />
(HPCL)Automobile Resort, Sion Trombay<br />
Road, Deonar, Mumbai - 88<br />
Phone: 022-25580869 / 25558102<br />
29. Bharat Petroleum Corporation Ltd.<br />
(BPCL)Taj Automobiles96, Lamington<br />
Road, Bhadkamkar Road, Mumbai-07<br />
Phone: 022-23084015<br />
Dhule<br />
30. Hindustan Petroleum Corporation Ltd.<br />
(HPCL)SSP S. Sethi & Bros.Agra Road,<br />
Dhule, Maharashtra<br />
31. Aegis Logistics Ltd.Gat no. 322/2, Opp.<br />
Abhay Yuva College, NH 3, Mumbai-Agra<br />
Highway, Dhule-424 001<br />
Ulhasnagar<br />
32. Reliance Industries Ltd. (RIL), DMK Ent.,<br />
Plot no. 3, Sheet no. 30, Vithalwadi<br />
Station Road, Opp. Ramgirdhar Indl.<br />
Estate, Dist. Ulasnagar<br />
Phone: 0251-3257934<br />
Kalyan<br />
33. Reliance Industries Ltd.(RIL), Kalyan<br />
Bhiwandi Road,Village: Kon, Kalyan<br />
Phone: 025522-2645309<br />
Khopoli<br />
34. Reliance Industries Ltd. (RIL), Village Hal<br />
Budrak,Taluka Khalapur, Old NH-4,<br />
(Mumbai-Pune), KopholiPhone: 01292-<br />
320131<br />
Rahata<br />
35. Reliance Industries Ltd. (RIL), Survey no.<br />
229 (P), Nagar Manmmad RD Village,<br />
Pimplas, Rahata , Dist. Ahmednagar<br />
Phone: 02423-329500<br />
Jalgaon<br />
36. Vanaz Engineers Limited. Shree Auto<br />
LPG PumpsGhat no. 2, NH- no. 6,<br />
Nashirabad, Jalgaon-Bhusaval Road,<br />
Jalgaon<br />
Phone: 0257-2232612 / 5623146<br />
37. Aegis Logistics Ltd., Gate no. 88,<br />
Chincholi Shivar Ajanta Road, Jalgaon-425<br />
003<br />
Phone: 9827258690<br />
157
LIST OF LPG FILLING STATIONS<br />
Yavatmal<br />
38. Reliance Industries Ltd. (RIL), 54/1,<br />
Pobaru Layout, Pandharawada Road,<br />
Yavatmal<br />
Phone: 07232-329365<br />
Nasik<br />
39. Bharat Petroleum Corporation Ltd. (BPCL)<br />
Cidco Taj<br />
40. Reliance Industries Ltd. (RIL) Nasik-VI<br />
Survey no. 207/6C/7, Plot no. 6+7A, At<br />
Village-Mhasrul,Taluka-Nasik<br />
Phone: 0253-2532408<br />
41. Reliance Industries Ltd. (RIL), Anandwalli<br />
Shah Road,Satpur , Nasik-422 007<br />
Phone: 0253-2355778<br />
42. Company: Hindustan Petroleum<br />
Corporation Ltd. (HPCL)Dealer: Bela Auto<br />
ServicesDwarka Circle, Nasik<br />
Phone: 0253-2591514 / 3092522<br />
Pune<br />
43. Indian Oil Corporation Ltd (IOCL)Dealer:<br />
Indian OilTirupati Petroleum, Nasik - Pune<br />
Road, Pune.<br />
44. Hindustan Petroleum Corporation Ltd.<br />
(HPCL) Bhosale Petroleum, Chikhali,<br />
Near <strong>Tata</strong> <strong>Indica</strong> Plant, Pune<br />
Phone: 9822041392<br />
45. Vanaz Engineers Limited. Choudhari’s<br />
Auto LPG Gas StationS.No. 130/4/1/1, on<br />
Mumbai-Bangalore By-pass service Road,<br />
Warje, Pune - 411 058<br />
Phone: 9371124136<br />
46. Indian Oil Corporation Ltd. (IOCL) Ganga<br />
Auto, Hadapsar<br />
47 Indian Oil Corporation Ltd. (IOCL) D’ Mello<br />
S/Stn.46, Nagar Road, Pune-14<br />
Phone: 020-27031728<br />
48. Hindustan Petroleum Corporation Ltd.<br />
(HPCL) Shivaji Service StationManjari,<br />
Pune<br />
Phone: 020-26993479<br />
49. Hindustan Petroleum Corporation Ltd.<br />
(HPCL)A.J. Modi & Sons, 206, Wellesly<br />
Road, Mangalwar Peth, Pune -11<br />
Phone: 020-26054020<br />
50. Bharat Petroleum Corporation Ltd.<br />
(BPCL), BP-Pune 1, Near RTO Office,<br />
Wellsely Road, Pune-1<br />
Phone: 020-26059756<br />
51. Hindustan Petroleum Corporation Ltd.<br />
(HPCL)Sangoi Service Station 1, 160,<br />
Ganeshkind Road, Opp, Rahul Theatre,<br />
Shivaji Nagar, Pune- 411 005<br />
Phone: 020-25535651 / 25533573<br />
52. Bharat Petroleum Corporation Ltd. (BPCL<br />
Saraswati Auto, Shankarshet Rd,Pune- 1<br />
Phone: 020- 24441238 / 5264<br />
53. Hindustan Petroleum Corporation Ltd.<br />
(HPCL) Swami Samath EnterprisesPune<br />
Nasik Road, Bhosari, Pune<br />
Ichalkaranji<br />
54. Aegis Logistics Ltd. Plot no. 45, Station<br />
Road, Ichalkaranji-416 115<br />
Chandrapur<br />
55. Hindustan Petroleum Corporation Ltd.<br />
(HPCL)OM Traders, Padoli, Chandrapur,<br />
Maharashtra<br />
Aurangabad<br />
56. Vanaz Engineers LimitedShri Ram Auto<br />
LPG Pump, Gat No.393.Sundarwadi,Jalna<br />
Road,Aurangabad431001.<br />
Phone: 0240-2100217/9422202669/<br />
09960002255<br />
Miraj<br />
57. Reliance Industries Ltd. (RIL) Suyash<br />
Petroleum, Miraj-Sangli Road, Tal-Miraj,<br />
Dist. Sangli<br />
Phone: 0233-3207172 Navi Mumbai.<br />
58. Reliance Industries Ltd. (RIL) Plot No. 7,<br />
Sector-18, Off Palm Beach Road, Besides<br />
Full Stop Mall, Sanpada, Navi-Mumbai<br />
Phone: 9820008753,022-65141745<br />
59. Indian Oil Corporation Ltd. (IOCL) Vashi<br />
Petroleum Sector-17, Vashi, Navi Mumbai<br />
Phone: 022-2767079<br />
158
LIST OF LPG FILLING STATIONS<br />
60. Hindustan Petroleum Corporation Ltd.<br />
(HPCL)Subham Auto, Plot no. 8, Sector<br />
-4A,Koperkhairane, Navi Mumbai<br />
Phone: 022-27552175 / 56161285<br />
61. Hindustan Petroleum Corporation Ltd.<br />
(HPCL)Shree Om Sai Auto Care Station,<br />
P/130, TTC, MIDC Village-Digha, Navi<br />
Mumbai- 400 708<br />
Phone: 022-25401998 / 25397618<br />
62. Hindustan Petroleum Corporation Ltd.<br />
(HPCL)Gain Auto, PlotPlot No. 15,<br />
Sector -25, Nerul, Navi Mumbai<br />
Phone: 022-27718052<br />
Thane<br />
63. Indian Oil Corporation Ltd. (IOCL) Royal<br />
Auto, Kalyan-Bhiwandi Road, Village<br />
Ranjivileegove<br />
Phone: 9820066866 - Mr. Raju<br />
64. Indian Oil Corporation Ltd. (IOCL) Anjur S/<br />
Stn.Village Dapode, Bombay-Agra, NH-3,<br />
Bhiwandi-421 303<br />
Phone: 022-65850596 / Mr. Shukla<br />
65. Hindustan Petroleum Corporation Ltd.<br />
(HPCL)Hind Automobiles, Wada Road,<br />
Shellar, Bhiwandi, District Thane<br />
Phone: 02522-244900<br />
Vasai<br />
66. Reliance Industries Ltd. (RIL) Survey no.<br />
235 & 241, Village Palhar, NH-8, Tal<br />
Vasai, Dist. Thane<br />
Phone: 9890036371<br />
Kolhapur<br />
67. Aegis Logistics Ltd. 1/K , NH-<br />
4,Sarnobatwadi, Tal. Karveer, Dist.<br />
Kolhapur<br />
68. Reliance Industries Ltd. (RIL) Survey no.<br />
335 & 336/1, Kasabe Vadgaon, NH-4, Tal.<br />
Hatkangale, Dist. Kolhapur<br />
Phone: 9422605905 , 0230-6450102<br />
69. Bharat Petroleum Corporation Ltd.<br />
(BPCL)Dealer: Konduskar AutoShivaji<br />
Vidyapeeth Road, 12th Lane,<br />
Rajarampuri, Taluka Karvir<br />
Satara<br />
70. Vanaz Engineers Limited.Gourav Auto<br />
LPG Pump, Gut no. 268/1A/1 of Village,<br />
Taluka Karad, Dist. Satara<br />
Phone: 02162-233957 / 237857 /<br />
9822006474 / 9822755858<br />
71. Vanaz Engineers Limited. Madhavrao Auto<br />
LPGS. no. 44/1A, A/P, Govare Village,<br />
Taluka Karad, Dist. Satara<br />
Phone: 02164-271392 / 9890362783<br />
Ratnagiri<br />
72. Aegis Logistics Ltd. Sr. no. 395, Hissa no.<br />
1/3/3, Opp. Ganesh Colony, MIDC,<br />
Sawant Estate, Hatkhamba-Ratnagiri<br />
Highway, Ratnagiri- 415 639<br />
Phone: 9825244070<br />
Solapur<br />
73. Aegis Logistics Ltd.T.P.N.o. 4, Final Plot<br />
no. 56, Plot no. 21 & 22, Budhwar Peth,<br />
Near Old Pune Naka, Solapur-413 002<br />
Phone: 02164-271392/ 9890362783<br />
GUJARAT<br />
Gandhinagar<br />
74. Hindustan Petroleum Corporation Ltd.<br />
(HPCL)Yogi Petroleum, NH-8C, Sarkhej,<br />
Gandhinagar Highway, Gandhinagar<br />
Phone: 079-23234583<br />
75. Vanaz Engineers Limited.Shreeji Auto<br />
LPG, Block no 195/37, Dhanap, Dist.<br />
Gandhinagar<br />
Phone: 9825563816<br />
76. Vanaz Engineers Limited. Riddhi GasE-<br />
19/10, Electronic Zone, GIDC Sector 26,<br />
Near K7, Gandhinagar,<br />
Phone: 9825328331/ 079-23244321/<br />
09925041331<br />
Baroda<br />
77. Reliance Industries Ltd.(RIL)Baroda<br />
Express Way, Survey No. 437,438,439,<br />
431 & 418 at Village Poicha,Taluka Savli,<br />
Dist. Baroda, Poicha- 3911780<br />
Phone: 02692-325502<br />
78. Reliance Industries Ltd.(RIL)Hightension<br />
Road, SubhanpuraBaroda- 390023<br />
Phone: 0265-3255039<br />
159
LIST OF LPG FILLING STATIONS<br />
Ahmedabad<br />
79. Indian Oil Corporation Ltd.(IOCL)<br />
Dhanalxmi PetroleumNear Sanghvi High<br />
School, Vijaynagar<br />
Phone: 079-27456878<br />
80. Hindustan Petroleum Corporation<br />
Ltd.(HPCL) HP Auto Care Centre, T & E<br />
Station, Bodakdev, Near Satyagrah<br />
Chhavani, Bodakdev, Ahmedabad<br />
81. Reliance Industries Ltd.(RIL) Sardar Patel<br />
Ring Road, Bhopal , Ahmedabad<br />
Phone: 02717-234303<br />
82. Indian Oil Corporation Ltd.(IOCL)<br />
Shreenathji Auto Point,Rakhial,<br />
Ahmedabad<br />
Phone: 079-30980612<br />
83. Reliance Industries Ltd.(RIL) Opp. Old<br />
Nirma Bharat Bobbin, Garibnagar Char<br />
Rasta,Rakhiya,Ahmedabad-380 021<br />
Phone: 079-32988766<br />
84. Reliance Industries Ltd.(RIL) Near Anand<br />
Bus Stand-Satellite, Vejalpur, Ahmedabad<br />
Phone: 079-26930770<br />
85. Reliance Industries Ltd.(RIL) NH-8 (Narol-<br />
Naroda), Isanpur, Ahmedabad<br />
Phone: 079-25735733<br />
86. Hindustan Petroleum Corporation<br />
Ltd.(HPCL)HP COCO Rakhial,<br />
Ahmedabad<br />
Phone: 079-2773072<br />
160<br />
87. Hindustan Petroleum Corporation<br />
Ltd.(HPCL)Jasbhai Patel & Co., Opp.<br />
Halim Khadki, Shahpur, Ahmedabad<br />
Phone: 079-25623246<br />
88. Bharat Petroleum Corporation Ltd(BPCL)<br />
Agarwal Automobiles, Sabarmati-<br />
Chandkheda Road, Opp. ONGC,<br />
Sabarmati, Ahmedabad-5<br />
Phone: 079-27501479 / 9879584170<br />
89. Reliance Industries Ltd.(RIL) Naranpura,<br />
132 ft. Road,Ahmedabad- 380 013<br />
Phone: 079-32985885<br />
90. Indian Oil Corporation Ltd (IOCL) Sharda<br />
Petroleum Highway Road, Chandkheda,<br />
Ahmedabad - 382 424<br />
Phone: 079-23298022/ 23296777 /<br />
232913777/ 9824387777<br />
91. Indian Oil Corporation Ltd (IOCL) Sainik<br />
Seva Services132 Ft. Ring Road, Near<br />
Ashwamegh Bunglows Satelite,<br />
Ahmedabad-380 015<br />
Phone: 079-26924842 / 9227214842<br />
92. Indian Oil Corporation Ltd (IOCL)<br />
Rashtriya Petroleum Behrmpura, Opp.ST<br />
Workshop, Ahmedabad-380 022<br />
Phone: 079-25323576 / 2532357<br />
93 Indian Oil Corporation Ltd (IOCL) Shree<br />
Gokulesh PetroleumNH 8 , Opp.<br />
Transport Nagar, Near Narol Circle,<br />
Ahmedabad-382 405<br />
Phone: 079-25712370/1922 / 9824021861<br />
94. Bharat Petroleum Corporation Ltd.(BPCL)<br />
Neelu Motors, Ashram Road, Nava Wadaj,<br />
Ahmedabad- 13<br />
Phone: 079-27553660 / 9824161069<br />
Mehsana<br />
95. Reliance Industries Ltd. (RIL) Mehsana-<br />
Ahmedabad Highway, Village: Nagalpur,<br />
Mehsana<br />
Phone: 02762-324009<br />
96. Aegis Logistics Ltd. Block no.199/2/P,<br />
Village Heduva-Hanumant, Besides Hotel<br />
Janpath, Opp. ONGC Palavasna, Dist.<br />
Mehsana<br />
Phone: 0452-3203859<br />
Navsari<br />
97. Aegis Logistics Ltd..Survey No. 989,<br />
Itarawa, Navsari-396 424<br />
Deesa<br />
98. Reliance Industries Ltd. (RIL)Survey no.<br />
27/A/2, Near Vishwakarma Temple,<br />
Deesa - Radhanpur Highway, Deesa -<br />
385 535<br />
Phone: 02744-645519<br />
Vadodara<br />
99. Aegis Logistics Ltd.Survey no. 60,<br />
Sayajipura, Near Kamla Nagar, Ajwa<br />
Road, Vadodara-390 019<br />
100. Indian Oil Corporation Ltd. (IOCL) Omkar<br />
PetroleumSubhanpura<br />
Phone: 0265-2399294
LIST OF LPG FILLING STATIONS<br />
Ankleshwar<br />
101. Reliance Industries Ltd. (RIL)Gujarat<br />
Cable Company Compound, Old NH 8,<br />
Ankleshwar<br />
Phone: 02646-320777<br />
Surendranagar<br />
102. Indian Oil Corporation Ltd. (IOCL) Servo<br />
Point, 105 A, GIDC, Wadhwan City<br />
Phone: 02752-241140<br />
Rajkot<br />
103. Vanaz Engineers Limited.Vachhraj<br />
Petroleum, Plot no. 17, 18 & 19, Jamna<br />
Nagar Vanari(Virpur) Tal. Ranavav, Dist.<br />
Porbandar-Rajkot<br />
Phone: 2214331 / 98242270000<br />
104. Vanaz Engineers Limited. Laxmi Auto<br />
LPG, S.No.151(part),At Village: Pithadiya,<br />
on NH-8B, Opp.GEB Stn, Dhareshwar,<br />
Tal:Jetpur, Dist - Rajkot<br />
Phone: 987981544<br />
105. Vanaz Engineers Limited.Dhaka<br />
Enterprises Auto LPG, S.No. 239, P2<br />
Atkot, On Rajkot-Bhavnagar State<br />
Highway no. 25, Near Hotel Taj, Tal.<br />
Jasdan, Dist. Rajkot<br />
Phone: 9825244070<br />
106. Reliance Industries Ltd. (RIL) Reliance<br />
Petro Marketing Pvt Ltd, NH-8,<br />
Ahmedabad- Rajkot Highway, Near Toll<br />
Plaza, Moti Moldi, Taluka Chotila<br />
Phone: 9374119402<br />
107. Reliance Industries Ltd. (RIL), RIL Retail<br />
OutletNear Dhakan Hospital, Kuvadva<br />
Road, Rajkot- 360 002<br />
Phone: 0281-2455780<br />
108. Aegis Logistics Ltd. Patel Estate, Plot no.<br />
24/25, Morbi-Rajkot Highway, At Post<br />
Virpar, Tal. Tankara, Dist. Rajkot-363 650<br />
Phone: 0233-3207172<br />
109. Indian Oil Corporation Ltd. (IOCL) Balahi<br />
S/Stn.80 ft. Ring Road, Sorathiyawadi<br />
Phone: 0281-2224830<br />
Junagarh<br />
110. Vanaz Engineers Limited.Relliable Auto<br />
Gas Filling Pump, Plot no. 1 & 2 Part,<br />
R.S. no. 35/6, Rajkot Highway, Dist.<br />
Junagarh<br />
Phone: 0285-2661316 / 94269157777 /<br />
5541935<br />
111. Vanaz Engineers Limited.Aum<br />
Corporation Auto LPG Gas Station, At Plot<br />
No. 51, Near By Marketing Yard Junagarh<br />
Highway, Keshod Dist - Junagadh 362220<br />
Phone: 09924496699/09825635241 0287-<br />
1233699<br />
Bavla<br />
112. Aegis Logistics Ltd. Plot no. 819/P, NH-<br />
8A, At Rajoda-Bavla, Tal. Bavla, Dist.<br />
Ahmedabad-382 220<br />
Bhavnagar<br />
113. Aegis Logistics Ltd..Plot no. 5, to 10,<br />
Opp. Akhlol Octroi Naka, Bhavnagar-<br />
Rajkot Road, Bhavnagar-364 002<br />
Anand<br />
114. Vanaz Engineers Limited,Ganesh Auto<br />
LPG, Survey no 502+501/ IP, Baroda<br />
Bagodara road, Tarapur chowkdi, Tarapur,<br />
Dist Anand<br />
Phone: 02698- 256807<br />
Naidad<br />
115. Reliance Industries Ltd. (RIL)Survey no.<br />
515, Near Dabhan Bus Station, National<br />
Highway no. 8, Tal. Nadiad, Dist Kheda<br />
Phone: 0268-3291351<br />
Dahod<br />
116. Aegis Logistics Ltd.Plot No. 206, Nani<br />
Sarsi ,Dahod Kasba,NH-59, Near<br />
Muvaliya Farm, Dahod- 389151<br />
Dharmaj<br />
117. Reliance Industries Ltd. (RIL)Survey no.<br />
2405, Straight Highway 8, Milestone 6,<br />
Village Dharmaj, Tehsil Petlad, Dist.<br />
Anand<br />
Phone: 0269-7245958<br />
Vijapur<br />
118. Aegis Logistics Ltd. Survey no. 32/P,<br />
Himmatnagar-Vijapur Highway, Opp. Suraj<br />
Dairy, At Vijapur, Tal. Vijapur, Dist.<br />
Mehsana-382 870<br />
161
LIST OF LPG FILLING STATIONS<br />
Sabarkhantha<br />
119. Vanaz Engineers Limited.Tirupati<br />
Petroleum, Ambiliyar, Ahemdabad State<br />
Highway, Bayad, Dist - Sabarkantha<br />
Phone: 91-9426013692 / 9825590436<br />
120. Vanaz Engineers Limited. Patang Auto<br />
LPG Pump, Plot no. 140/3, Sapawada Tal<br />
Idar, Dist. Sabarkantha<br />
Phone: 02778-253105 / 9427687075<br />
121. Vanaz Engineers Limited.Riddhi Gas<br />
Petro Pvt. Ltd., Block no. 862/2/P, Sayra<br />
Modasa, Modasa, Dist. Sabarkantha<br />
Phone: 9898769944<br />
122. Vanaz Engineers Limited. Dhvanish &<br />
Devang Petro Pvt. Ltd. Block no. 293/P,<br />
Near Sabar Dairy , NH-8, At-Post-Hajipur,<br />
Himmatnagar, Dist. Sabarkantha- 383 001<br />
Phone: 02772-396464 / 9825611308 /<br />
226464<br />
Surat<br />
123. Aegis Logistics Ltd.Phone: T.P.no.21,<br />
F.P.no. 63, Opp. Navin Fluorine Industrial,<br />
Surat-Navsari Road, Bhestan<br />
124. Indian Oil Corporation Ltd. (IOCL) Swati<br />
Petroleum, FP no. 150 , TP no. 5, (Umra<br />
North), Ichchanath, Surat- 395 007<br />
Phone: 2253748 / 2254282 / 9824151909<br />
125. Vanaz Engineers Limited.Roshni<br />
Corporation Plot no. 4, Block no. 160,<br />
Mouse Sarthana Village, Taluka Kamerj,<br />
Surat , Phone: 0261-2572255<br />
162<br />
126. Vanaz Engineers Limited. Shri OM Sai<br />
Auto LPGAt Post Barasadi, Tal Palsana,<br />
NH-6, Kadodara-Bardoli Road, Barasadi,<br />
Dist. Surat-394 310<br />
Phone: 02622-222203 / 9825170775 /<br />
2622-255199<br />
127. Vanaz Engineers Limited. Drasti Group<br />
Filling Station, N.H. 6, Near Nandida<br />
(namdurbar), Char Rasta, Block no. 56,<br />
Tal Bardoli, Dist. Surat<br />
Phone: 02622-228110 / 9824128639 /<br />
9426746159<br />
128. Reliance Industries Ltd. (RIL)NH-8, RS no.<br />
149-152, Kim Char Rasta, Mangrol<br />
Phone: 02621-329940<br />
129. Company: Reliance Industries Ltd.<br />
(RIL)Dealer: Reliance Industries Ltd.<br />
(RIL)Opp. SVR College,Piplod, Surat-395<br />
007Phone: 0261-3204353<br />
Jamnagar<br />
130. Vanaz Engineers Limited.Radhika<br />
Petroleum Agency, Survey no. 48/P,<br />
Ambika Bhuvan, Rajkot-Jamnagar<br />
Highway, Jamnagar<br />
Phone: 0288-2550999 / 9824228232 /<br />
2570444<br />
131. Reliance Industries Ltd. (RIL)Plot no. 16<br />
(City survey 6235 & 6236), Jamnagar<br />
City- 361 008<br />
Phone: 0288-2710178 / 9228002414<br />
KERALA<br />
Alwaye<br />
132. Auto Gas Energy India Ltd.Dealer: Auto<br />
Gas Energy India Ltd., N.H.Road, Alwaye<br />
Allappuzha<br />
133. Indian Oil Corporation Ltd.(IOCL)<br />
Chandra’s, Kerala<br />
Sulthan Bathery<br />
134. Auto Gas Energy India Ltd.Chulliyode<br />
Road, Sulthan Bathery<br />
Changaramkulam<br />
135. Auto Gas Energy India Ltd.N.H.Road,<br />
Changaramkulam<br />
Chenganassery<br />
136. Reliance Industries Ltd. (RIL)Survey no.<br />
32/5 & 32BA, Plot no. 6.7.8,<br />
Chenganassery, Dist. Kottayam<br />
Phone: 0481-3259444<br />
Kanjirappally<br />
137. Auto Gas Energy India Ltd.K.K.Road,<br />
Kanjirappally<br />
Perumbavoor<br />
138. Indian Oil Corporation Ltd. (IOCL), Baby<br />
Verghese Trincole<br />
Phone: 0484-2523247 / 9847042516<br />
139. Auto Gas Energy India Ltd.M.C. Road,<br />
Perumbavoor
LIST OF LPG FILLING STATIONS<br />
Nileshwar<br />
140. Indian Oil Corporation Ltd. (IOCL) NGM<br />
Prabhu, NH-17, Nileshwar<br />
Phone: 0467-2280636 / 9447090636<br />
Perumthuruthy<br />
141. Indian Oil Corporation Ltd. (IOCL) J & J<br />
Auto FuelsMC Road, Perumthuruthy, P.O.<br />
Thiruvalla, Dist. Pathanmthitta<br />
Phone: 0469-2645850 / 9847031646<br />
Harippad<br />
142. Auto Gas Energy India Ltd.Mavelikkara<br />
Road, Harippad<br />
143. Indian Oil Corporation Ltd. (IOCL) Ashoka<br />
Fuels Harippad<br />
Kodimatha<br />
144. Indian Oil Corporation Ltd. (IOCL)<br />
Malyalam Fuels, MC Road, Kodimatha,<br />
Kottayam-686 039<br />
Phone: 0481-3090848 / 9447897359<br />
Challakudy<br />
145. Indian Oil Corporation Ltd. (IOCL), KA<br />
Kumaran & Co<br />
Mannarkad<br />
146. Indian Oil Corporation Ltd. (IOCL)<br />
Srikrishna Petroleum<br />
Muttathara<br />
147. Indian Oil Corporation Ltd. (IOCL) Simi’s<br />
Fuel, NH Bypass, Trivandrum-8<br />
Phone: 2456111 / 2317111<br />
Kottarakara<br />
148. Indian Oil Corporation Ltd. (IOCL)<br />
Raddission FuelsMC Road, Pulamon,<br />
Kottarakara, Quilon<br />
Phone: 0474-2652393 / 9447270190<br />
Palakkad<br />
149. Reliance Industries Ltd.<br />
(RIL)Kalamadapm, Kozhikode Bypass<br />
Road, Manali, Palakkad-678 001<br />
Phone: 0491-3251700<br />
Thodupuzha<br />
150. Auto Gas Energy India Ltd. Muvattupuzha<br />
Road, Thodupuzha<br />
Tripunithra<br />
151. Reliance Industries Ltd. (RIL), EVS Fuels,<br />
30/1084 A, Tripunithra Road, Thykoodam<br />
Vytilla, Cochin- 682 019<br />
Phone: 04822-6462498<br />
Trivandrum<br />
152. Indian Oil Corporation Ltd. (IOCL)Dealer:<br />
Happy Fuels Pallichal<br />
Phone: 0471-2390232<br />
Ernakulam<br />
153. Bharat Petroleum Corporation Ltd.<br />
(BPCL)Thazhekattu Fuels, Ernakulam<br />
154. Hindustan Petroleum Corporation Ltd.<br />
(HPCL)Kwality Auto Service HPC Dealer,<br />
Vytylla, Ernakulam-682 019, Kerela<br />
Phone: 9847054361<br />
155. Hindustan Petroleum Corporation Ltd.<br />
(HPCL)PKC Nair & Co.HPC Dealer,<br />
Tripunthara, Ernakulam- 682 301<br />
Phone: 9847477661<br />
Kottayam<br />
156. Indian Oil Corporation Ltd. (IOCL)<br />
Aswathy FuelsNH-47, Kollam<br />
Phone: 9387319587 / 2533068<br />
Pala<br />
157. Reliance Industries Ltd. (RIL), Lalam<br />
Village, Meenachil Taluk, Palaettumamoor,<br />
Pala Municipality, Pala,<br />
Phone: 04822-2216456<br />
Piravom<br />
158. Auto Gas Energy India Ltd.Kottayam<br />
Road, Piravoam<br />
Angamaly<br />
159. Reliance Industries Ltd.(RIL)On NH-47,<br />
Near Mile Stone 315/0, Karukutty, Aluva,<br />
Ernakulam<br />
Phone: 0484-3226111<br />
160. Auto Gas Energy India Ltd.Bank Junction<br />
Attingal<br />
161. Aegis Logistics Ltd. Venjaramoodu Road,<br />
Attingal<br />
Calicut<br />
162. Elf Gas India Ltd.Dealer: JK LPG<br />
Dispensing StationNH-17, Kolathara,<br />
Calicut-673 655 Phone: 0495-2481766<br />
163
LIST OF LPG FILLING STATIONS<br />
Cherthala<br />
163. Auto Gas Energy India Ltd. Kumaragom<br />
Road, Cherthala.<br />
Thriprayar<br />
164. Auto Gas Energy India Ltd. Thrissur Road,<br />
Thriprayar<br />
Nilambur<br />
165. Auto Gas Energy India Ltd.CNG Road<br />
Oachira<br />
166. Indian Oil Corporation Ltd. (IOCL)<br />
Paranrdhmam Petroleum Oachira<br />
Phone: 0476-2690757 / 9447206918<br />
Perumpilavu<br />
167. Indian Oil Corporation Ltd. (IOCL)<br />
Khayam Petroleum Thrissur-680 519<br />
Phone: 04885-289397 / 9895028020<br />
Kollengode<br />
168. Auto Gas Energy India Ltd. Puthunagaram<br />
Road, Kollengode<br />
Cochin<br />
169. Bharat Petroleum Corporation Ltd. (BPCL)<br />
Kerela Oil Co. Pathirapally, Alappuzha-<br />
688 521<br />
Phone: 0477-2258088<br />
170. Indian Oil Corporation Ltd. (IOCL) Ge<strong>org</strong>e<br />
FuelsNH-47, Aroor, Ernakulam<br />
Phone: 9846030477<br />
164<br />
171. Indian Oil Corporation Ltd. (IOCL), Sree<br />
Narayana Sales & Service, Edapally,<br />
Kochi-24<br />
Phone: 0484-2540647<br />
Malappuram<br />
172. Hindustan Petroleum Corporation Ltd.<br />
(HPCL)Kundupuzhakkal Fuels HPC<br />
Dealers,PO. Okmuri, Vengara,<br />
Malappuram - 676 515 (Kerela)<br />
Phone: 9947300030<br />
173. Hindustan Petroleum Corporation Ltd.<br />
(HPCL) Vee Pee Petroleum HPC Dealers,<br />
Chandakunnu, Nilambur, Malappuram -<br />
679 342 (Kerela)<br />
Phone: 04931-225923 / 9447287283<br />
Moovattupuzha<br />
174. Indian Oil Corporation Ltd. (IOCL) AMA<br />
Transports Neelima Garden, Puthuoppady<br />
P.O.<br />
Phone: 2812328 / 9447315233<br />
Kolenchery<br />
175. Auto Gas Energy India Ltd.NH Road,<br />
Kolenchery<br />
Pathanamthitta<br />
176. Indian Oil Corporation Ltd. (IOCL) Excel<br />
Fuels<br />
Thiruvalla<br />
177. Auto Gas Energy India Ltd.T.K. Road,<br />
Thiruvalla<br />
Tirur<br />
178. Indian Oil Corporation Ltd. (IOCL)<br />
P Hamza Haji Sons, Kuttipuram Rd-1<br />
Phone: 0494-2424126 / 9447125726<br />
Thrissur<br />
179. Indian Oil Corporation Ltd. (IOCL) Anidya<br />
Petrol Café Kalathode, Ollukara, Thrissur-<br />
680 655<br />
Phone: 0487-2370535 / 9895327706<br />
Kayakulam<br />
180. Auto Gas Energy India Ltd.K.P.Road,<br />
Kayamkulam<br />
Ettumanoor<br />
181. Auto Gas Energy India Ltd.MC Road,<br />
Ettumanoor<br />
Kotakkal<br />
182. Reliance Industries Ltd. (RIL)Opp.<br />
Ayurveda College, Edrai Code, Kottaikal,<br />
Malapuram Dist., Kottaikal-676 501<br />
Phone: 0483-32520062 / 2742479<br />
TAMIL NADU<br />
Coimbatore<br />
183. Indian Oil Corporation Ltd. (IOCL) Sri<br />
Santhi Social<br />
184. Bharat Petroleum Corporation Ltd. (BPCL)<br />
VSMErode<br />
185. Bharat Petroleum Corporation Ltd. (BPCL)<br />
Roots Auto Spares, Mettupalaya Road
LIST OF LPG FILLING STATIONS<br />
Chennai<br />
186. Bharat Petroleum Corporation Ltd.<br />
(BPCL)COCO MKB Nagar Kasturi<br />
AgenciesUnit II, Plot No.3 74, West<br />
Avenue, MKB Nagar, Vyasarpadi,<br />
Chennai- 600 039<br />
Phone: 25517444 / 25513536<br />
187. Bharat Petroleum Corporation Ltd.<br />
(BPCL)DS Rajammal Agencies, 10,11, 12<br />
Manall Road, Korukkupet<br />
Phone: 044-25923700<br />
188. Bharat Petroleum Corporation Ltd.<br />
(BPCL)Tamilnadu Lorry Owners<br />
Federation, 16, Poonamalle High Road,<br />
Koyembedu<br />
Phone: 044-24752854<br />
187. Bharat Petroleum Corporation Ltd.<br />
(BPCL)COCO, Ambattur, 94 B,Ambattur<br />
Industrial Estate, Ambattur<br />
Phone: 044-26358411<br />
188. Bharat Petroleum Corporation Ltd.<br />
(BPCL)AG AgencyNo. 2, Old<br />
Mahabalipuram Road, Sholinganallur,<br />
Phone: 044-28602087<br />
189. Hindustan Petroleum Corporation Ltd.<br />
(HPCL)Victory Enterprises, 359/E, C.T.H.<br />
Road, Thirumuliavoyal, Chennai-600 062<br />
Phone: 9884670129<br />
190. Hindustan Petroleum Corporation<br />
Ltd.(HPCL)Brindavan Service Station, No.<br />
2, Gauntz Road, Vyasarpadi, Chennai-<br />
600 039<br />
Phone: 044-25517132<br />
191. Hindustan Petroleum Corporation<br />
Ltd.(HPCL)Sarath Agency, No. 72/123,<br />
Kuntathur Road, Porur, Chennai-600 116<br />
Phone: 9840331975<br />
192. Hindustan Petroleum Corporation Ltd.<br />
(HPCL)Balaji Agencies, New No.<br />
187(R21/2), Ambattur Industrial Estate<br />
Road, Anna Nagar West, Mugappair,<br />
Chennai - 600 101<br />
Phone: 9444620838<br />
193. Bharat Petroleum Corporation Ltd.(BPCL)<br />
DS Rajammal Agencies, 10,11, 12 Manall<br />
Road, Korukkupet<br />
Phone: 044-25923700<br />
194. Bharat Petroleum Corporation<br />
Ltd.(BPCL)Sree Vari Enterprises1/76,<br />
East Coast Road, Kotivakkam<br />
Phone: 044-65256625<br />
195. Indian Oil Corporation Ltd. (IOCL)<br />
Thirumurgan Agencies, 349, Waltax<br />
Road, Chennai-600 079<br />
Phone: 044-25202222 / 25203333<br />
196. Indian Oil Corporation Ltd. (IOCL) Sri<br />
Thirumurugan Agencies, Korukkupet<br />
Kathivakkam High Road, Korukkupet<br />
Phone: 044-25921166<br />
197. Indian Oil Corporation Ltd. (IOCL) Sarojini<br />
Oil Dealers, 90-C Fishing Harbour<br />
Complex, S N Chetty Street, Royapuram,<br />
Chennai- 600 013<br />
Phone: 25951804 / 25978424<br />
198. Indian Oil Corporation Ltd. (IOCL) Pathy<br />
Agencies Nerkundram, Chennai - 600107<br />
Phone : 044-24871706<br />
199. Indian Oil Corporation Ltd. (IOCL) Oviya<br />
F/Stn., Koyambedu, Opposite to Flower<br />
Market, Koyambedu,Chennai-600 107<br />
Phone: 24797317 / 24779447<br />
200. Indian Oil Corporation Ltd. (IOCL) COCO<br />
Ambattur Sree Sakthi Agencies, S.<br />
No.304, MTH Road, Opp. TI<br />
Miller,Ambathur, Chennai- 600 053<br />
Phone: 044-26248567<br />
201. Indian Oil Corporation Ltd. (IOCL) Chennai<br />
Autorickshaw Co.Op. Society, 849,<br />
Periyar EVR High Road, Kilpauk,<br />
Chennai- 600 010<br />
Phone: 044-26411073<br />
202. Hindustan Petroleum Corporation Ltd.<br />
(HPCL)Saran Agencies, No. 120/122, P.H.<br />
Road, Opp MGR Engg. College,<br />
Maduravoyal, Chennai-600095<br />
Phone: 9841290439<br />
203. Hindustan Petroleum Corporation Ltd.<br />
(HPCL)Anna Auto Co-operative Society,<br />
No.242,Ropettah High Road, Royapettah,<br />
Chennai-600 014 Phone: 9380643055/<br />
044-65853081<br />
165
LIST OF LPG FILLING STATIONS<br />
204. Bharat Petroleum Corporation Ltd.<br />
(BPCL)Sridevi Enterprises, 639, MTH<br />
Road, Avadi,<br />
Phone: 044-26380585<br />
205. Bharat Petroleum Corporation Ltd.<br />
(BPCL)MCLOA24 B, Anna Salai, Saidapet<br />
Phone: 044-22353599<br />
206. Bharat Petroleum Corporation Ltd.<br />
(BPCL)Shanmuga Sundaram219,GST<br />
Road,Tambaram Sanitorium, Chrompet<br />
Phone: 044-22402173<br />
207. Bharat Petroleum Corporation Ltd.<br />
(BPCL)Car Care Centre, 97, Anna Salai,<br />
Near LIC<br />
Phone: 044-28602087<br />
Salem<br />
208. Indian Oil Corporation Ltd. (IOCL)Malur<br />
Main Road, Narasothipatti,Salem-636 004<br />
Phone: 0427-2448409<br />
Madurai<br />
209. Hindustan Petroleum Corporation Ltd.<br />
(HPCL) Madurai Filling Station, 159/2,<br />
Kamarajar Salai, Teppakulam, Madurai -<br />
625 009<br />
Phone: 0452-2311106 / 09843050460<br />
210. Hindustan Petroleum Corporation Ltd.<br />
(HPCL)Suganya F/St.RS No. 172/1 BP,<br />
Opp. Maduthavanu Bus Stand, Melur Main<br />
Road, Madurai - 625 007<br />
Phone: 0452-2586055 /4392839/<br />
09842162308<br />
166<br />
211. Bharat Petroleum Corporation Ltd. (BPCL)<br />
MKT MotorsS no. 13/10, Alagarkovil Main<br />
Road, Moondrumavady<br />
Phone: 0452-2560410<br />
212. Indian Oil Corporation Ltd. (IOCL ) Sree<br />
Harivelmurugam Enterprise47-C, T B<br />
Road, Arasaradi, Madurai-10<br />
Phone: 0452-2603902 / 2607039 /<br />
9894866663<br />
213. Reliance Industries Ltd. (RIL)24, TPK<br />
Road, Pasumalai, Madurai-625 004<br />
Phone: 0452-6459094<br />
Melmaruvathur<br />
214. Indian Oil Corporation Ltd. (IOCL),<br />
ACMEC Trust Melmaruvathur- 603 319<br />
Phone: 044-27529384<br />
Kancheepuram<br />
215. Bharat Petroleum Corporation Ltd.<br />
(BPCL)COCO BPT ambaram, Velachery<br />
Road, Gowrivakkam, Post Pallikaranai<br />
Phone: 044-22462590<br />
Erode<br />
216. Reliance Industries Ltd. (RIL) Veerapan<br />
Chathiram Panchayat, Erode Taluka,<br />
Erode Phone: 0424-6454639<br />
Tiruppur<br />
217. Reliance Industries Ltd. (RIL)Bharathi<br />
Nagar, Veerapandi, Tirupur-Palladam<br />
Road, Tirupur-641 605<br />
Phone: 0421-6453581KARNATAKA<br />
Chennaryapatana<br />
218. Reliance Industries Ltd. (RIL) Opp.<br />
Nisarga Dhaba, BM Road,<br />
Chennaryapatana<br />
Phone: 08176-254234<br />
KARNATAKA<br />
Gulbarga<br />
219. Hindustan Petroleum Corporation Ltd.<br />
(HPCL)Gulbarga Auto Links, Gulbarga<br />
Auto Links HPC Dealers, Station Road,<br />
Gulbarga (Karnataka)<br />
Phone: 08472-222026 / 9844049214<br />
Mangalore<br />
220. Indian Oil Corporation Ltd. (IOCL) KG<br />
Bhat Kankanady, Mangalore - 575 002<br />
Phone: 0824-2435314 / 667364<br />
230. Indian Oil Corporation Ltd. (IOCL) Vishnu<br />
Enterprises. NH-17, Panambur - 575 010<br />
Phone: 0824-2409868 / 988161619<br />
231. Hindustan Petroleum Corporation Ltd.<br />
(HPCL)Maco Co-op Society Lower<br />
Bendoorwell Road, Mangalore ,<br />
Phone: 0824 - 2421113<br />
Davangere<br />
232. Aegis Logistics Ltd.No. 856/81, S.J.M.<br />
Nagar, Behind Sitara Hotel, Near<br />
P.B.Road, Davangere-577 002
LIST OF LPG FILLING STATIONS<br />
Shimoga<br />
233. Indian Oil Corporation Ltd. (IOCL)<br />
Bhargavi Motor Fuels Sagar Road,<br />
Shimoga-577 204<br />
Phone: 250888 / 250999 / 9844090888<br />
Puttur<br />
234. Elf Gas India Ltd.Puttur Petroproducts<br />
Nehru Nagar, Puttur - 574 203<br />
Phone: 08251-236105 / 236106<br />
Bangalore<br />
235. Elf Gas India Ltd.Dars Automobiles,<br />
Venkasteshpura, Nagawara Main Road,<br />
Bangalore- 560 045<br />
Phone: 080-25800415 / 25790280<br />
236. Indian Oil Corporation Ltd. (IOCL) Swathi<br />
S/Stn.<br />
237. Indian Oil Corporation Ltd. (IOCL) Bowring<br />
S/Stn.<br />
238. Indian Oil Corporation Ltd. (IOCL) SP<br />
Agencies<br />
239. Indian Oil Corporation Ltd. (IOCL) Jai<br />
Hanuman Fuel Station.<br />
240. Hindustan Petroleum Corporation Ltd.<br />
(HPCL)Srinivasa Service Station, .59/2,<br />
Bansawadi Main Road, Jaibharathinagar,<br />
Bangalore- 560 033<br />
Phone: 080-25474254 / 25479901<br />
241. Elf Gas India Ltd.B M Energy Hosahalli<br />
Main Rd, Vijayanagar, Banglore-560 023<br />
Phone: 9886179988<br />
242. Elf Gas India Ltd.R K Autogs, Magadi<br />
Main Road, Kamakshipalya, Banglore-<br />
560 079<br />
243. Bharat Petroleum Corporation Ltd. (BPCL)<br />
P.R.K. AutoPlot no. 2, Mysore Road<br />
Phone: 9448068599 / 26759499<br />
244. Bharat Petroleum Corporation<br />
Ltd.(BPCL)Shrestha Outer Ring Road,<br />
HRVR layout<br />
Phone: 25496688 / 9448084559<br />
245. Bharat Petroleum Corporation Ltd. (BPCL)<br />
Udaya Fuel Station. Sirsi circle, Bangalore<br />
Phone: 9845722337<br />
246. Bharat Petroleum Corporation Ltd.<br />
(BPCL)Advaitha 4, T Block, Jayanagar,<br />
Bangalore<br />
Phone: 9844013042 / 22443341<br />
247. Bharat Petroleum Corporation Ltd.<br />
(BPCL)ChandersIST Main Road,<br />
Gandhinagar<br />
Phone: 9845013901 / 22263260<br />
248. Bharat Petroleum Corporation Ltd.<br />
(BPCL)Gurukrupa Fuel JunctionSRI,<br />
Gurukrukripa Layout, Nagarvhavi<br />
Phone: 9448537366 / 23218570<br />
249. Indian Oil Corporation Ltd. (IOCL) Jalahalli<br />
Service Station<br />
250. Reliance Industries Ltd.(RIL)Industrial<br />
Suburb, 2nd Stage, Yeshwanthpur,<br />
Nandini Layout, Bangalore-560 022<br />
Phone: 080-64522464<br />
251. Reliance Industries Ltd.(RIL) B.M.<br />
Shankarappa Estate, Sunkadakatte,<br />
Magadi, Rd. Bangalore<br />
Phone: 080-64520178<br />
252. Hindustan Petroleum Corporation<br />
Ltd.(HPCL)Favourite Auto Service,<br />
Madiwala, Koramangala Post,Next to<br />
St.John’s Hospital,Hosur Road,<br />
Bangalore-560 034<br />
Phone: 080-25530397<br />
253. Bharat Petroleum Corporation Ltd.(BPCL)<br />
Federation of Lorry Owners (FLOA) Devraj<br />
Urs Truck Terminal, Peenya Industrial<br />
Suburb, II Stage, Yeshwantpur, Bangalore<br />
Phone: 080-23478898<br />
254. Bharat Petroleum Corporation<br />
Ltd.(BPCL)Anurag Family Trust<br />
Koramangala, Inner Ring Road<br />
Phone: 2705623 / 9845685897<br />
255. Bharat Petroleum Corporation Ltd. (BPCL)<br />
Sri Laxmi Service StationM.s.Ramaiah<br />
Road, Gokula,Jalhalli<br />
Phone: 23452077 / 9 / 886643548<br />
256. Bharat Petroleum Corporation<br />
Ltd.(BPCL)Matushree SS Subbanapalaya<br />
Main Road, Banaswadi<br />
Phone: 9845245186 / 25428868<br />
257. Bharat Petroleum Corporation Ltd. (BPCL)<br />
Kirti Service StationNo. 2, Mission Road,<br />
Near J.C.Road, Town Hall Weigh Bridge<br />
Phone: 9880001926 / 42148803<br />
167
LIST OF LPG FILLING STATIONS<br />
258 Bharat Petroleum Corporation Ltd.<br />
(BPCL)COCO BP-6, No. 17, Ward no. 76,<br />
Richmond Town, Hosur Road<br />
Phone: 25572499 / 9 / 845542989<br />
259. Bharat Petroleum Corporation<br />
Ltd.(BPCL)Gokula Service Station, Old<br />
Madras Road, Doorvaninagar<br />
Phone: 080-28510402 / 28511172<br />
260. Indian Oil Corporation Ltd (IOCL)<br />
Venkateshwara Fuel Station.Yelahanka<br />
Phone: 080-28460616<br />
261. Indian Oil Corporation Ltd (IOCL)<br />
Vardharaja Service Sattion,.596, Dr<br />
Rajkumar Road, Rajajinagar<br />
Phone: 080-23320762<br />
262. Indian Oil Corporation Ltd (IOCL) Mobil<br />
Service Station, 11 km Kanakapura Road,<br />
Konanakunte Cross<br />
Phone: 080-26664392 / 9845017787<br />
263. Indian Oil Corporation Ltd (IOCL)<br />
Lakshmamma & SonsNo.1,Narayanappa<br />
Garden, HD Deve Gowda Road, RT<br />
Nagar-560 032<br />
Phone: 080-23548511 /23638432 /<br />
9845133943<br />
264. Indian Oil Corporation Ltd (IOCL) Engrads<br />
Fuel Station,Opp BHEL, Mysore Road<br />
Phone: 080-26749652<br />
168<br />
265. Indian Oil Corporation Ltd (IOCL)<br />
Karnataka Food & Civil Supplier<br />
Corp.Kamokpura,Main Road,Banasankari<br />
Phone: 080-26553466 / 9845127075<br />
266. Indian Oil Corporation Ltd (IOCL) Kaveri<br />
Fuel Station.Near National Games<br />
Village, Koramangla<br />
Phone: 080-25710236<br />
267. Indian Oil Corporation Ltd (IOCL) Anjandri<br />
Service Station, Chamrajpet<br />
267. Hindustan Petroleum Corporation Ltd.<br />
(HPCL)Highway Auto Needs, 12th<br />
Kilometer, Bellary Road, Allasandra, Opp<br />
Jakkur Airodrome,Yelahanka, Bangalore-<br />
560 064<br />
Phone: 080-28462591 / 28460694<br />
268. Hindustan Petroleum Corporation Ltd.<br />
(HPCL)Gautam Service StationOpp to<br />
MEI, Tumkur Road, Near RNH<br />
Motors,Yeshwanthpur, Bangalore-560 022<br />
Phone: 080-23371331<br />
269. Hindustan Petroleum Corporation Ltd.<br />
(HPCL)Bambaramaba Fuel StationC/o.<br />
HPCL LPG Bottling Plant,<br />
Mahadevapura,White field Road,<br />
Bangalore-560 048<br />
Phone: 080-28511780<br />
270. Bharat Petroleum Corporation Ltd<br />
(BPCL)Nagpal’s Garage, 22, Residency<br />
Road<br />
Phone: 080-25587715<br />
271. Bharat Petroleum Corporation<br />
Ltd.(BPCL)Maruti Service Station<br />
Pantarapalaya, Mysore Road, Bangalore<br />
Phone: 080-28600632<br />
272. Bharat Petroleum Corporation Ltd.<br />
(BPCL)Ramchandra Bros.Brian Square,<br />
Mysore Road<br />
Phone: 080-26708980<br />
273. Bharat Petroleum Corporation Ltd.(BPCL)<br />
Arunodaya Filling Station69/4, Ring Road,<br />
Gangadhar Nagar, J.P. Nagar<br />
Phone: 080-26717223<br />
274. Elf Gas India Ltd. Dars Automobiles<br />
Tumkur Road, Yeswantpur, Banglore- 022<br />
Phone: 080-23377743<br />
Mysore<br />
275. Elf Gas India Ltd.Acme Autogas, Abba<br />
Rd, Nazarbad Mohalla, Mysore- 570 010<br />
Phone: 08212-440508<br />
280. Bharat Petroleum Corporation Ltd.<br />
(BPCL)Shree S S Saraswatipuram<br />
Phone: 09880567272 / 08218940902<br />
Udupi<br />
281. Aegis Logistics Ltd. Survey no. 31/1,<br />
Near Halima S. Auditorium, NH-17,<br />
Udyavara, Udupi-576 118
LIST OF LPG FILLING STATIONS<br />
DELHI<br />
282. Hindustan Petroleum Corporation Ltd.<br />
(HPCL)Anand Service Station,.NH-8,<br />
Delhi-Gurgaon Road, Rangpuri, New Delhi-<br />
110 037<br />
Phone: 011-25654592<br />
283. Hindustan Petroleum Corporation Ltd.<br />
(HPCL)Victory Service StationG.T.Road,<br />
Near Julf-E-Bengal, Opp. Sahni Factory<br />
Shahdara, UP Border, Delhi-110 095<br />
Phone: 011-22116868 / 6969<br />
284. Hindustan Petroleum Corporation Ltd.<br />
(HPCL)HP Auto Care Centre, Najabgarh<br />
road, Adjacent Moti Nagar Police Station,<br />
Moti Nagar, New Delhi-110 015<br />
Phone: 011-25918974<br />
285. Indian Oil Corporation Ltd. (IOCL) Sethi<br />
Service Station, Mangolpuri, Outer Ring<br />
Road<br />
Phone: 011-27524639<br />
286. Indian Oil Corporation Ltd. (IOCL)<br />
Sabharwal Service Station.Sector 5,RK<br />
Puram<br />
Phone: 011-26175440<br />
287. Indian Oil Corporation Ltd. (IOCL)<br />
Rajasthan Highways, NH-8 Kaparshera<br />
Border<br />
Phone: 011-51685238, 9811038654<br />
289. Indian Oil Corporation Ltd. (IOCL)<br />
Rajapath Motors, Geeta Colony<br />
Phone: 011-22049223/ 22457830<br />
290. Indian Oil Corporation Ltd. (IOCL),Queens<br />
Road S/Stn.Near Vasant Vihar Bus<br />
Depot, Outer Ring Road<br />
Phone: 011-26146202<br />
291. Indian Oil Corporation Ltd. (IOCL) Khyber<br />
Service Station.Opp.Gurudwara, Moti<br />
Bagh, Outer Ring Road<br />
Phone: 011-24677937 / 981152225<br />
292. Indian Oil Corporation Ltd. (IOCL), Jubliee<br />
R/O, Near IOC LPG Bottling Plant,<br />
Tikrikalan<br />
Phone: 011-28351456<br />
293. Indian Oil Corporation Ltd. (IOCL) Dalip<br />
Service Station, Near Hotel Radisson,<br />
NH-8, Mahipalpur<br />
Phone: 011-25063633<br />
294. Indian Oil Corporation Ltd. (IOCL) CM<br />
Enterprises, Janakpuri<br />
Phone: 011-25618762<br />
295. Indian Oil Corporation Ltd. (IOCL) Auto<br />
Yard, Mathura Road, Near Apollo Hospital<br />
Phone: 011-26945135<br />
296. Indian Oil Corporation Ltd. (IOCL)<br />
Ahuwalia Service Station, Near Haldiram<br />
Mathura Road<br />
Phone: 011-26959790<br />
297. Hindustan Petroleum Corporation Ltd.<br />
(HPCL)Kundanlal Service Station HPC<br />
Petrol Pump, Shahdara-ISBT Road,<br />
Shastri Park, Delhi- 110 053<br />
Phone: 011- 22192100 / 22193100<br />
ANDHRA PRADESH<br />
Nizamabad<br />
298. Hindustan Petroleum Corporation Ltd.<br />
(HPCL)P.Laskshmikantha Rao & Sons,<br />
Dichapally, Nizamabad, Nizamabad<br />
Phone: 08462-221264 / 9848244444<br />
Hyderabad<br />
299. Indian Oil Corporation Ltd. (IOCL) Sivam<br />
Auto<br />
300. Indian Oil Corporation Ltd. (IOCL) Jubilee<br />
Auto Services,Miyapur.<br />
301. Indian Oil Corporation Ltd. (IOCL) National<br />
Service Station, Opp. Erra Manjil,<br />
Panjagutta Road- 500 082<br />
Phone: 040-23319435 / 23329520<br />
302. Indian Oil Corporation Ltd. (IOCL)Sita<br />
Logistics, 82/1, Agriculture Market Yard,<br />
Bowenpally<br />
Phone: 040-64506775 / 9848455575<br />
303. Hindustan Petroleum Corporation Ltd.<br />
(HPCL)Surya Service Station, Plot Nos. 60<br />
to 65, S.No. 310, Nagaram Village,<br />
Keesara Mandal, Rangareddy Dist<br />
304. Bharat Petroleum Corporation Ltd.<br />
(BPCLMahendra Fuels, S.Nos. 108 &<br />
109(P), Karmanghat Village, Saidabad<br />
Mandal, Ring Road, Hyderabad,<br />
Hyderabad Dist. - 500 079.<br />
Phone: 24077931 / 9848562997<br />
169
LIST OF LPG FILLING STATIONS<br />
305. Company: Bharat Petroleum Corporation<br />
Ltd. (BPCL) Kishan Service Station, S.No.<br />
385, D.No. 41-1/ABC, Moulali Village,<br />
Malkajgiri Mandal, Rangareddy Dist.<br />
Phone: 27140570 / 9393033694<br />
306. Bharat Petroleum Corporation Ltd. (BPCL)<br />
Vamsi Fuel Point, Near Bapu Ghat,<br />
Lungar House, Hyderabad<br />
Phone: 040-23511332<br />
307. Bharat Petroleum Corporation Ltd.<br />
(BPCL)M A Filling Station, 162 / 1 & 2,<br />
East Marebpali, Near Rail Milayan Road,<br />
Secundrabad<br />
Phone: 040-23240679<br />
308. Bharat Petroleum Corporation Ltd. (BPCL)<br />
GKTC10-1, APIIC Auto Nagar, NH-9,<br />
Hyderabad-70<br />
Phone: 040-24025836<br />
309. Bharat Petroleum Corporation Ltd. (BPCL)<br />
Pradeep Agencies“NH-9, Miyapur, RR<br />
Dist. Hyderabad- 500 050<br />
Phone: 040-23041536 / 23045137<br />
310. Bharat Petroleum Corporation Ltd. (BPCL)<br />
S.N.More 19-4-8/1, Dandlaguda,<br />
Chandrayanguda, Hyderabad-500 005<br />
Phone: 6594843 / 24455037<br />
311. Indian Oil Corporation Ltd. (IOCL)<br />
Charminar Chourasta“Opp. Auto Nagar,<br />
S.no. 282, Vanasthlipuram, Hyderabad-<br />
500 070<br />
Phone: 040-24021893 / 9848010026<br />
170<br />
312. Indian Oil Corporation Ltd. (IOCL) Uppal<br />
Industrial Auto Service“Plot no. C-1/1, Sy<br />
no. 581/1, Uppal Khalsa Village, Uppal<br />
Mandal, RR Dist. , Hyderabad-500 039<br />
Phone: 040-27204455<br />
313. Reliance Industries Ltd. (RIL)Survey no. 6/<br />
8, Saroornagar (V) & (M), RR District,<br />
Hyderabad-500 035<br />
Phone: 040-32001929<br />
314. Reliance Industries Ltd. (RIL)Survey no.<br />
198-204, Ranga Reddy Dist., Nacharam,<br />
Hyderabad- 500 076<br />
Phone: 040-32903092<br />
315. Reliance Industries Ltd. (RIL) A-9 & A-10,<br />
AIE , Main Road, beside CITD Balanagar,<br />
Hyderabad- 500037<br />
Phone: 040-39253352<br />
316. Hindustan Petroleum Corporation Ltd.<br />
(HPCL) N.Laxmaiah & Brothers.S.No. 64,<br />
Door No. 3-8-173,Road No. 1,<br />
Mansoorabad Village, L.B. Nagar Ring<br />
Road, Saroornagar Mandal, Hyderabad -<br />
500 074<br />
Phone: 24122292 / 24122074 /<br />
9246539398<br />
317. Bharat Petroleum Corporation Ltd.<br />
(BPCL)Mehmood Filling Station, 8-3-235/<br />
6,Yusufguda, Check-post, Hyderabad-45<br />
Phone: 040-23544562<br />
318. Bharat Petroleum Corporation Ltd.<br />
(BPCL)Dayanand Auto Services. NH 7,<br />
Shamshabad - 501 218, Dist. Ranga<br />
Reddy.<br />
Phone: 08413-222035"<br />
319. Indian Oil Corporation Ltd. (IOCL)“Dealer:<br />
Venkateshwara Fuel Station.Kompally on<br />
Hyderabad -Nizambad Highway<br />
320. Indian Oil Corporation Ltd. (IOCL)“Dealer:<br />
Ravi Weighing Service Station<br />
Goshamahal.<br />
Phone 040-24744670<br />
321. Indian Oil Corporation Ltd. (IOCL) Jubliee<br />
R/O Thimapur , Thimapur on Hyderabad-<br />
Bangalore Highway<br />
Phone: 08548-257960<br />
322. Indian Oil Corporation Ltd. (IOCL) Aruna<br />
Fuel Station,Moualai, Hyderabad<br />
Phone: 040-27122887 / 4848031096<br />
Tirupati<br />
323. Indian Oil Corporation Ltd. (IOCL) Korepati<br />
Petroleum,Chandragiri Road,<br />
Phone: 0877-2249749<br />
324. Elf Gas India Ltd.OM Shakti Auto LPG,<br />
Reningunta Road, Near Hotel Bliss,<br />
Tirupati- 517 501<br />
Phone: 0877-3206755
LIST OF LPG FILLING STATIONS<br />
Vijayanagram<br />
325. Hindustan Petroleum Corporation Ltd.<br />
(HPCL M.Eashwar Rao HPCL Dealer, NH-<br />
5, Maharajulapeta, Rajapulova Post, Dist.<br />
Vijayanagram<br />
Phone: 9989922799<br />
Warangal<br />
326. Vanaz Engineers Limited.Sri Vankata Sai<br />
Enterprises, Survey no. 176/1, Hunter<br />
Road, Shayampeth, Opp. Citizen Club,<br />
Warangal, Andhra Pradesh<br />
Phone: 0870-3091326 / 9866168665<br />
Nalgonda<br />
327. Hindustan Petroleum Corporation Ltd.<br />
(HPCL)B.S. Filling Station HPC Dealers,<br />
S. no. 28, Opp. Textile Park, Malkapur<br />
village, Chowtuppal Mandal, Dist.<br />
Nalgonda<br />
Phone: 08694 - 270343/44/45 /<br />
9866233737<br />
Guntur<br />
328. Hindustan Petroleum Corporation Ltd.<br />
(HPCL)Bharat Service Station. HPC<br />
Dealer, Near Medical Club, GT Road,<br />
Guntur-522 015<br />
Phone: 0863 - 2230943 / 9885164611<br />
329. Hindustan Petroleum Corporation Ltd.<br />
(HPCL) Hima Petrol & Diesel Station,<br />
HPC Dealer, Opp. Microwave Tower, NH-<br />
5, Bypass Road, Budampadu Junction,<br />
Guntur-522 015<br />
Phone: 0863-232636 / 9885268911<br />
Anantpur<br />
330. Vanaz Engineers Limited,Yallamma<br />
Matha Auto LPG“S. no. 344, Gooty-<br />
Anantpur Road, NH no. 7, PO Anantpur,<br />
Phone: 9848389783<br />
Visakhapatnam<br />
331. Hindustan Petroleum Corporation Ltd.<br />
(HPCL) Bh.S.R.Highway Service Station,<br />
HPC Dealer, 28-16-1, Vadalpudi, NH-5,<br />
Gajuwaka Mandal, Vusakhapatnam, Dist.-<br />
530 046 Phone: 9848779999<br />
WEST BENGAL<br />
Kolkata<br />
332. Indian Oil Corporation Ltd. (IOCL) Bye<br />
Pass Service Station, 3B Rash Behari<br />
Avenue Connector, Rajganga, Nabapalli,<br />
Kolkata-700 107<br />
Phone: 033-24427895/ 24427112<br />
333. Indian Oil Corporation Ltd. (IOCL)<br />
Anderson Auto, Belvedere Road, New<br />
Alipore, Kolkata-27<br />
Phone: 033-24499150 / 9830415979 /<br />
9831004444<br />
334. Indian Oil Corporation Ltd. (IOCL) Hirji<br />
Auto Centre“120/2, A P C Roy Road<br />
Phone: 033-23506470<br />
335. Indian Oil Corporation Ltd. (IOCL) Salt<br />
Lake Service Stn, Salt Lake, Sector-1<br />
Phone: 033-23349853 / 23581395<br />
336. Indian Oil Corporation Ltd. (IOCL) Prince<br />
Service Station, Anwar Shah Road<br />
Phone: 033-24731695<br />
337. Hindustan Petroleum Corporation Ltd.<br />
(HPCL) Rajrani Service Station,<br />
Mahamayatala, P.O.Garia, Kolkata-700<br />
084<br />
Phone: 033-24358884<br />
338. Hindustan Petroleum Corporation Ltd.<br />
(HPCL) ITC Ultadanga, 1, Ultadanga<br />
Road, Ultadanga, Kolkata<br />
Phone: 033-25557933 / 255548489"<br />
339. Hindustan Petroleum Corporation Ltd.<br />
(HPCL) Baranagar Service Station,131,<br />
BT Road, Baranagar, Kolkata<br />
Phone: 033-25773229<br />
340. Bharat Petroleum Corporation Ltd. (BPCL)<br />
Superway Service Station, P-527, CIT<br />
Road, Kolkata- 700 054<br />
Phone: 033-23528853<br />
341. Bharat Petroleum Corporation Ltd.<br />
(BPCL)Sreema Service Station, 11 A,<br />
Silpara, D.H.Road, Kolkata - 700 008<br />
Phone: 033-24533294<br />
342. Bharat Petroleum Corporation Ltd.<br />
(BPCL)Raibareiily Service Stn, 33,<br />
Tollygunj Circular Rd, Kolkata - 700 053<br />
Phone: 033-24002651<br />
343. Bharat Petroleum Corporation Ltd. (BPCL)<br />
Amar Service Station, 277, B.T.Road,<br />
Kolkata- 700 036 , Phone: 033-25570196<br />
171
LIST OF LPG FILLING STATIONS<br />
MADHYA PRADESH<br />
Gwalior<br />
344. Indian Oil Corporation Ltd. (IOCL)Shiv<br />
Chand Amol Chand, Jhansi oad, Gwalior.<br />
Phone 0751-2427747,2310972<br />
345. Hindustan Petroleum Corporation Ltd.<br />
(HPCL)Sudarshna Motors,Transport<br />
Nagar, Gwalior<br />
Phone: 0751-2490373<br />
Bhopal<br />
346. Reliance Industries Ltd.(RIL), Khasra No.<br />
234/1/2, Near People General Hospital,<br />
Berasia Road, Bhopal.<br />
Phone: 0755-6456948<br />
347. Indian Oil Corporation Ltd.(IOCL), Auto<br />
House, Piplani<br />
348. Indian Oil Corporation Ltd (IOCL)<br />
Sawntika, Gautam Nagar, Bhel Bhopal<br />
Phone: 0755-2581492<br />
349. Indian Oil Corporation Ltd. (IOCL), Capital<br />
Auto Service, Obaidullahganj Road,<br />
Ahmedpur, Bhopal-462 026<br />
Phone: 0755-5220632<br />
Durg<br />
350. Vanaz Engineers Limited, Banwarilal &<br />
Sons“KH no. 29/1 & 31/1, Mauje-<br />
Nakikhar, Taluka & District Korba<br />
Phone: 9827172151<br />
172<br />
351. Vanaz Engineers Limited, Agrawal Auto<br />
LPG Services, P.H.No.- 8, NH-84 & 85,<br />
Mouza Parasada, PO 23, Dist. Bilaspur,<br />
Khapari, Durg<br />
Phone: 0788-5013261 / 9229522200<br />
Jabalpur<br />
352. Vanaz Engineers Limited, Sanmitra Auto<br />
LPG Services, Village Khasra no 77/1, Set<br />
no 360/230, Tilwara Ghat, Dist Jabalpur<br />
Phone: 9827258690<br />
Indore<br />
353. Hindustan Petroleum Corporation Ltd.<br />
(HPCL) Fazal Khan Peer Khan,<br />
Sanyogita Ganj, Indore<br />
Phone: 9826210201<br />
354. Indian Oil Corporation Ltd. (IOCL), Police<br />
Lines, RAPTC, Airport Road- 452 005<br />
Phone: 0731-2419131<br />
355. Indian Oil Corporation Ltd. (IOCL) Usharaj<br />
Fuels, 10-B, Sch no. 31, Loha Mandi,<br />
Near Navlakha Complex, Indore- 452 001<br />
Phone: 0731-2364364, 2362888<br />
356. Indian Oil Corporation Ltd. (IOCL)<br />
Malaviya Fuel Station, 15-C Scheme 94,<br />
Ring Road, Indore<br />
Phone: 0731-2552222<br />
Burhanpur<br />
357. Vanaz Engineers Ltd. Surya Gas<br />
Point,Gram Fattepur, Dist. Burhanpur<br />
Phone: 0725-52808 / 9826337408<br />
Dewas<br />
358. Indian Oil Corporation Ltd. (IOCL) Swagat<br />
RO, Bilawali, NH-3, AB Road.<br />
Phone: 07272-256260 / 9425093042<br />
PUNJAB<br />
Ludhiana<br />
359. Hindustan Petroleum Corporation Ltd.<br />
(HPCL), Pathak Power Point, M Mundiya<br />
Kalan, Ludhiana<br />
Jalandhar<br />
360. Indian Oil Corporation Ltd. (IOCL) Amar<br />
Highways, G.T.Road, (Ludhiana-Jalandar),<br />
Plot no. 225/5, Pin-144 010.<br />
Phone: 0181-2260214 / 2413776 /<br />
984300147<br />
CHANDIGARH<br />
361. Bharat Petroleum Corporation<br />
Ltd.(BPCL)EEM PEE Motors, Sector- 22<br />
Chandigarh<br />
Phone: 0172-2700386<br />
362. Indian Oil Corporation Ltd (IOCL) M/s.<br />
Allied Service Station.Sector 34-B,<br />
Chandigarh<br />
Phone: 0172-2612728"
LIST OF LPG FILLING STATIONS<br />
CHATTISGARH<br />
Bilimora<br />
363. Vanaz Engineers Limited. Maa Sharada<br />
Auto LPG Pump, 3 Km Stone, Bilaspur-<br />
Raipur Road, Mouza Parasada, PH no.<br />
23, Dist. Bilaspur<br />
Phone: 09425284000 / 9301315181<br />
364. Aegis Logistics Ltd.“Plot no. 374/2,<br />
Gandevi Road,Bilimora-396 320<br />
Raipur<br />
365. Hindustan Petroleum Corporation Ltd.<br />
(HPCL)Jain Auto Petroleum“Amanaka,<br />
Raipur, Chattisgarh<br />
366. Vanaz Engineers Limited. OM Auto LPG<br />
Fuels, P.H.No.- 104, K.no. 63/11,<br />
Mahadev Ghat Road, Village Raipura,<br />
Dist. Raipur<br />
Phone: 0771-6536356 / 09893142114<br />
367. Bharat Petroleum Corporation Ltd.<br />
(BPCL)Topup Centre, Amanaka,<br />
G.E.Road, Raipur, Chattisgarh<br />
Phone: 2253078 / 4039682<br />
368. Indian Oil Corporation Ltd. (IOCL) Abhay<br />
Fuels, Pandri, Raipur<br />
Phone: 0771-2283000 / 2282999 /<br />
9425210100<br />
Bilaspur<br />
369. Indian Oil Corporation Ltd. (IOCL) Laxmi<br />
Service Station, Manla Chowk,<br />
Phone: 07752-320414<br />
UTTAR PRADESH<br />
Lucknow<br />
370. Indian Oil Corporation Ltd. (IOCL),SSR<br />
Filling Station, RingRoad,Jankipuram<br />
Phone: 23615461730"<br />
Kanpur<br />
371. Indian Oil Corporation Ltd. (IOCL)<br />
Engineers Service Station, 9/46, Dr.<br />
Ambedkar Nagar, Bena Jhabar Road<br />
Phone: 0512-2291258<br />
Agra<br />
372. Indian Oil Corporation Ltd (IOCL)“Shahid<br />
Jitendra F/Stn“Kailashpuri<br />
Phone: 0562-2605576<br />
373. Indian Oil Corporation Ltd (IOCL) National<br />
Highway Filling Station, Sikandara<br />
Phone: 0562-2641228<br />
374. Indian Oil Corporation Ltd (IOCL) M/s Auto<br />
Energy, Runkuta, Agra Mathura Road<br />
Phone: 05613-271283<br />
RAJASTHAN<br />
Jaipur<br />
375. Reliance Industries Ltd. (RIL), NH-11, Opp.<br />
New Chungi, Agara Road, Jaipur<br />
Phone: 9314114913<br />
376. Bharat Petroleum Corporation Ltd.(BPCL)<br />
DPS Automotives, 3C, Kamani Road,<br />
Industrial Area, Jhotwara, Jaipur-302 012<br />
Phone: 0141-2340891<br />
377. Indian Oil Corporation Ltd. (IOCL) Shahid<br />
J P Yadav, Subhash Nagar<br />
Phone: 0141-2280971<br />
378. Indian Oil Corporation Ltd (IOCL)Shahid<br />
Bhagwan Singh Filling Station, Heera<br />
Path, Sector 6, Masarovar, Jaipur<br />
Phone: 0141-2783754<br />
379. Indian Oil Corporation Ltd. (IOCL) M/s<br />
Shahid Basti Ram Filling Station, Baiji Ki<br />
Kothi, Jaipur<br />
Phone: 0141-2706803<br />
380. Indian Oil Corporation Ltd (IOCL)<br />
Rajasthan Highways,Transport Nagar<br />
Phone: 0141-2642683<br />
381. Indian Oil Corporation Ltd (IOCL) IOC<br />
Filling Station.Sahakar Marg<br />
Phone: 0141-5120068"<br />
Ajmer<br />
382. Indian Oil Corporation Ltd. (IOCL) Shyam<br />
Balaji Filling Station, Anasagar, Circular<br />
Road, Vaishali, Ajmer.<br />
Phone: 0145-2643388<br />
Kishangarh<br />
383. Reliance Industries Ltd. (RIL), NH-8, CH-<br />
373, 5, Jaipur-Ajmer Highway, Vill-<br />
Madanganj, The- Kishangarh, Dist. Ajmer<br />
Phone: 01463-325751<br />
173
LIST OF LPG FILLING STATIONS<br />
Kota<br />
384. Reliance Industries Ltd. (RIL), Jhalwar<br />
Road, Before Anantpur Circle,<br />
Kota - 324 005<br />
Phone: 0744-6451289<br />
385. Indian Oil Corporation Ltd. (IOCL) Modern<br />
Auto Traders, Aerodrome Circle.<br />
Phone: 0744-2361739 / 9829036739<br />
174