
Create successful ePaper yourself
Turn your PDF publications into a flip-book with our unique Google optimized e-Paper software.
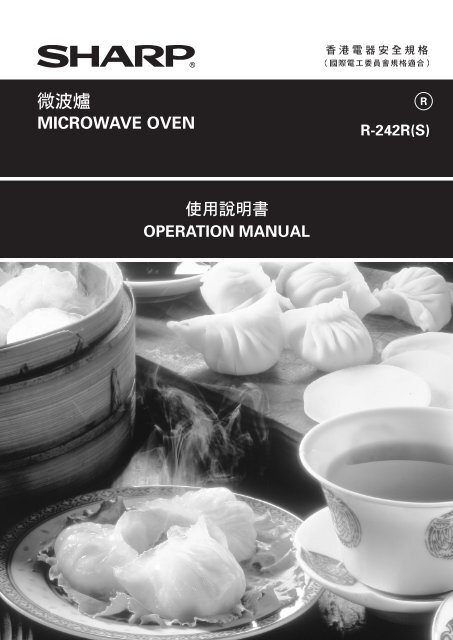
MICROWAVE OVEN<br />
R<br />
R-242R(S)<br />
<br />
OPERATION MANUAL<br />
R-242R(S) [Cover+TOC].indd 1<br />
12/21/09 4:57:57 PM
CONTENTS<br />
Page<br />
Page<br />
Warning .................................................................. E-1<br />
Special Notes and Warning .................................. E-2<br />
Installation Instructions ......................................... E-3<br />
Oven Diagram ........................................................ E-3<br />
Operation of Touch Control Panel<br />
Control Panel Display ......................................... E-4<br />
Touch Control Panel Layout ............................... E-4<br />
Before Operating<br />
Getting Started .................................................... E-5<br />
Clock Setting ....................................................... E-5<br />
Stop/Clear ............................................................ E-5<br />
To Cancel a Programme During Cooking ......... E-5<br />
Microwave Cooking Techniques ........................... E-6<br />
Manual Operations<br />
Microwave Time Cooking .................................. E-7<br />
Sequence Cooking .............................................. E-8<br />
Instant Cook ........................................................ E-8<br />
Slow Cook ........................................................... E-9<br />
Automatic Operations<br />
Notes for Automatic Operations ..................... E-11<br />
Auto Cook .......................................................... E-11<br />
Steam Menu ...................................................... E-13<br />
Reheat ................................................................ E-15<br />
Express Defrost ................................................. E-16<br />
Easy Defrost ...................................................... E-18<br />
Other Convenient Features<br />
Less/More Setting ............................................. E-20<br />
Increasing or Decreasing Time<br />
During the Cooking Programme ..................... E-21<br />
Timer .................................................................. E-22<br />
Alarm ................................................................. E-22<br />
Care and Cleaning ............................................... E-23<br />
Service Call Check ............................................... E-23<br />
Specifications ....................................................... E-23<br />
Cookbook Section<br />
Cookware and Utensil Guide .............................. E-24<br />
Recipes ........................................................E-25~E-30<br />
R-242R(S) [Cover+TOC].indd 2<br />
12/21/09 4:57:59 PM
WARNING<br />
IMPORTANT SAFETY INSTRUCTIONS : READ CAREFULLY AND KEEP FOR FUTURE REFERENCE.<br />
1. To reduce the risk of fire in the oven cavity:<br />
a. Do not overcook food.<br />
b. Remove wire twist-ties from paper or plastic bags before placing bag in the oven.<br />
c. Do not heat oil or fat for deep frying. The temperature of the oil cannot be controlled.<br />
d. Look at the oven from time to time when food is heated in disposable containers made of plastic, paper<br />
or other combustible materials for signs of smoke or burning.<br />
e. If materials inside the oven should ignite, or smoke is observed, keep oven door closed, turn oven off,<br />
and disconnect the power plug, or shut off power at the fuse or circuit breaker panel.<br />
f. After use, wipe the waveguide cover with a damp cloth, followed by a dry cloth to remove any food<br />
splashes and grease. Built-up grease may overheat and begin to cause smoke or catch fire.<br />
2. To reduce the risk of an explosion or delayed eruptive boiling when handling the container.<br />
Your microwave oven is capable of heating food and beverages very quickly, therefore it is very important<br />
that you select the appropriate cooking time and power level for the type and quantity of food to be heated.<br />
If you are unsure of the cooking time and power level required, begin with low cooking times and power<br />
levels until the food is sufficiently heated evenly throughout.<br />
Additionally:<br />
a. Do not place sealed containers in the oven. Babies bottles fitted with a screw cap or teat are considered<br />
to be sealed containers.<br />
b. Do not use excessive amount of time.<br />
c. When boiling liquids in the oven, use a wide-mouthed container.<br />
d. Stand at least for 20 seconds at the end of cooking to avoid delayed eruptive boiling of liquids.<br />
e. Stir the liquid before and during cooking. Use extreme care when handling the container or inserting a<br />
spoon or other utensil into the container.<br />
3. This oven is for home food preparation only and should only be used for heating, cooking and defrosting<br />
food and beverage.<br />
It is not suitable for commercial, laboratory use, or heating therapeutic devices eg. Wheat bags.<br />
4. Never operate the oven whilst any object is caught or jammed between the door and the oven.<br />
5. Do not try to adjust or repair the oven yourself.<br />
It is hazardous for anyone other than a qualified service technician trained by SHARP to carry out any service<br />
or repair operation. Especially those which involve the removal of a cover which gives protection against<br />
exposure to microwave energy are very hazardous.<br />
6. Do not operate the oven if it is not working correctly or damaged until it has been repaired by a qualified<br />
service technician trained by SHARP. It is particularly important that the oven door closes properly and that<br />
there is no damage to:<br />
(1) Door (warped) (2) Hinges and Latches (broken or loosened) (3) Door Seals Sealing Surfaces and oven<br />
cavity (buckled or deformed) (4) Burn marks on the door seal faces.<br />
7. Handle with care when removing items from the oven so that the utensil, your clothes or accessories do not<br />
touch the safety door latches.<br />
8. Never poke an object, particularly a metal object, through a grille or between the door and the oven while<br />
the oven is operating.<br />
9. Never tamper with or deactivate the door safety latches.<br />
10. Always use oven gloves to prevent burns when handling utensils that are in contact with hot food.<br />
Enough heat from the food can transfer through utensils to cause skin burns.<br />
11. Should the power supply cord become damaged, it must be replaced with a special cord supplied by a<br />
SERVICE CENTRE APPROVED BY SHARP. And it must be replaced by a qualified service technician trained<br />
by SHARP in order to avoid a hazard.<br />
12. If the oven lamp fails please consult your dealer or a qualified service technician trained by SHARP.<br />
13. Avoid steam burns by directing steam away from the face and hands.<br />
Slowly lift the furthest edge of a dish's cover including microwave plastic wrap etc., and carefully open<br />
popcorn and oven cooking bags away from the face.<br />
14. Make sure that the power supply cord is undamaged, and that it does not run under the oven or over any<br />
hot surfaces or sharp edges.<br />
15. To prevent the turntable from breaking:<br />
a. Before cleaning the turntable with water, leave the turntable to cool.<br />
b. Do not place anything hot on a cold turntable.<br />
c. Do not place anything cold on a hot turntable.<br />
16. Do not place anything on the outer cabinet.<br />
17. Do not store food or any other items inside the oven.<br />
18. Make sure the utensil does not touch the interior walls during cooking.<br />
19. Only allow children to use the oven without supervision when adequate instructions have been given so<br />
that the child is able to use the oven in a safe way and understands the hazards of improper use.<br />
20. This appliance is not intended for use by persons (including children) with reduced physical, sensory or<br />
mental capabilities, or lack of experience and knowledge, unless they have been given supervision or<br />
instruction concerning use of the appliance by a person responsible for their safety.<br />
21. Children should be supervised to ensure that they do not play with the appliance.<br />
E – 1<br />
R-242R(S) [01 EN].indd 1<br />
12/22/09 8:14:14 AM
SPECIAL NOTES AND WARNING<br />
Eggs, fruits,<br />
nuts, seeds,<br />
vegetables,<br />
sausages and<br />
oysters<br />
Popcorn<br />
Baby food<br />
General<br />
Liquids<br />
(Beverages)<br />
DO<br />
* Puncture egg yolks and whites and<br />
oysters before cooking to prevent<br />
“explosion”.<br />
* Pierce skins of potatoes, apples,<br />
squash, hot dogs, sausages and<br />
oysters so that steam escapes.<br />
* Use specially bagged popcorn for the<br />
microwave oven.<br />
* Listen while popping corn for the<br />
popping to slow to 1-2 seconds.<br />
* Transfer baby food to small dish and<br />
heat carefully, stirring often. Check<br />
for suitable temperature to prevent<br />
burns.<br />
* Remove the screw cap and teat before<br />
warming baby bottles.<br />
After warming shake thoroughly.<br />
Check for suitable temperature.<br />
* Food with filling should be cut after<br />
heating, to release steam and avoid<br />
burns.<br />
* Use a deep bowl when cooking<br />
liquids or cereals to prevent boiling<br />
over.<br />
* For boiling or cooking liquids see<br />
WARNING on page E-1 to prevent<br />
explosion and delayed eruptive<br />
boiling.<br />
DON’T<br />
* Cook eggs in shells. This prevents<br />
“explosion”, which may damage the<br />
oven or injure yourself.<br />
* Cook hard / soft boiled eggs.<br />
* Overcook oysters.<br />
* Dry nuts or seeds in shells.<br />
* Pop popcorn in regular brown bags<br />
or glass bowls.<br />
* Exceed maximum time on popcorn<br />
package.<br />
* Heat disposable bottles.<br />
* Overheat baby bottles.<br />
Only heat until warm.<br />
* Heat bottles with nipples on.<br />
* Heat baby food in original jars.<br />
* Heat or cook in closed glass jars or<br />
airtight containers.<br />
* Deep fat fry food.<br />
* Heat or dry wood, herbs, wet papers,<br />
clothes or flowers.<br />
* Operate the oven without a load (i.e.<br />
an absorbing material such as food<br />
or water) in the oven cavity.<br />
* Heat for longer than recommended<br />
time.<br />
Canned foods * Remove food from can. * Heat or cook food while in cans.<br />
Sausage rolls,<br />
Pies, Christmas<br />
pudding<br />
Meats<br />
Utensils<br />
Aluminium<br />
foil<br />
Browning dish<br />
* Cook for the recommended time.<br />
(These foods have high sugar and / or<br />
fat contents.)<br />
* Use a microwave proof rack or plate<br />
to collect drained juices.<br />
* Check the utensils are suitable for<br />
MICROWAVE cooking before you<br />
use them.<br />
* Use to shield food to prevent over<br />
cooking.<br />
* Watch for sparkling, therefore reduce<br />
foil and keep clear of cavity walls.<br />
* Place a suitable insulator such as a<br />
microwave and heat proof dinner<br />
plate between the turntable and<br />
the browning dish.<br />
* Overcook as they may catch fire.<br />
* Place meat directly on the turntable for<br />
cooking.<br />
* Use metal utensils for MICROWAVE<br />
cooking. Metal reflects microwave<br />
energy and may cause an electrical<br />
discharge known as arcing.<br />
* Use too much.<br />
* Shield food close to cavity walls as<br />
sparkling can damage the oven.<br />
* Exceed the preheating time<br />
recommended by the manufacturer.<br />
Excessive preheating can cause the<br />
glass turntable to shatter and / or<br />
damage internal parts of the oven.<br />
E – 2<br />
R-242R(S) [01 EN].indd 2<br />
1/11/10 5:23:38 PM
INSTALLATION INSTRUCTIONS<br />
1. Remove all packing materials from the oven cavity and the feature sticker from the oven door panel<br />
(if available). Check the unit for any damage, such as a misaligned door, damaged door seals around<br />
the door or dents inside the oven cavity or on the door. If there is any damage, please do not operate<br />
the oven until it has been checked by the SHARP SERVICE CENTRE and repaired, if necessary.<br />
2. Accessories provided<br />
1) Turntable 2) Roller Stay 3) Operation Manual (with Cookbook Section)<br />
3. Place the roller stay in the coupling on the oven floor, then place the turntable on to the roller stay,<br />
ensuring it is located firmly. Refer to OVEN DIAGRAM below. NEVER operate the oven without the roller<br />
stay and turntable.<br />
4. This oven is designed to be used on a countertop only. It should not be installed in any area where heat<br />
and steam are generated, for example, next to a conventional oven unit.<br />
The oven should be installed so as not to block ventilation openings.<br />
Allow space of at least 15 cm from top of the oven for air ventilation.<br />
This oven is not designed to be built-in to a wall or cabinet.<br />
5. Neither the manufacturer nor the distributors can accept any liability for damage to the machine or<br />
personal injury for failure to observe the correct electrical connecting procedure.<br />
The A.C. voltage and frequency must correspond to the one indicated on the rating label on the back<br />
of the oven.<br />
6. This appliance must be earthed:<br />
IMPORTANT<br />
The wires in power supply cord are coloured in accordance with the following code:<br />
Green-and-yellow : Earth<br />
Blue : Neutral<br />
Brown : Live<br />
As the colours of the wires in the power supply cord of this appliance may not correspond with<br />
the coloured marking identifying the terminals in your plug, proceed as follows:<br />
The wire which is coloured green-and-yellow must be connected to the terminal in the plug which<br />
is marked with the letter E or by the earth symbol or coloured green or green-and-yellow.<br />
The wire which is coloured blue must be connected to the terminal which is marked with the letter<br />
N or coloured blue.<br />
The wire which is coloured brown must be connected to the terminal which is marked with the letter<br />
L or coloured brown.<br />
OVEN DIAGRAM<br />
1. Door opening button<br />
2. Oven lamp<br />
3. Door hinges<br />
4. Door safety latches<br />
5. See through door<br />
6. Door seals and sealing surfaces<br />
7. Coupling<br />
8. Waveguide cover (Do not remove)<br />
9. Control panel (see page E-4)<br />
10. Ventilation openings<br />
11. Power supply cord<br />
12. Turntable<br />
13. Roller stay<br />
14. Rating label<br />
E – 3<br />
R-242R(S) [01 EN].indd 3<br />
12/22/09 8:14:15 AM
OPERATION OF TOUCH CONTROL PANEL<br />
The operation of the oven is controlled by pressing the appropriate pads arranged on the surface of the<br />
control panel.<br />
An entry signal tone should be heard each time you press the control panel to make a correct entry.<br />
In addition an audible signal will sound for approximately 2 seconds at the end of the cooking cycle, or<br />
4 times when cooking procedure is required.<br />
Control Panel Display<br />
COOK DEF KG QTY CHECK Indicator<br />
Touch Control Panel Layout<br />
SLOW COOK PAD<br />
Press to cook slowly<br />
and longer time.<br />
POWER LEVEL PAD<br />
Press to select microwave<br />
power setting. If not<br />
pressed, 100% (HIGH<br />
POWER) is automatically<br />
selected.<br />
TIME PADS<br />
Press to enter cooking<br />
time and clock time.<br />
STOP/CLEAR PAD<br />
• Press to clear during<br />
programming.<br />
• Press once to stop<br />
operation of oven<br />
during cooking;<br />
press twice to cancel<br />
cooking programme.<br />
AUTO COOK PADS<br />
Press to cook<br />
3 popular menus.<br />
EASY DEFROST PAD<br />
Press to defrost meat by<br />
entering the weight.<br />
REHEAT PADS<br />
Press to reheat 2 popular<br />
menus.<br />
WEIGHT PADS<br />
Press to enter weight.<br />
LESS/MORE TIME PADS<br />
Press to increase/decrease<br />
the time in one minute<br />
increments during<br />
manual cooking or to<br />
alter the cooking result for<br />
automatic operations.<br />
TIMER/CLOCK PAD<br />
Press to set Timer and<br />
Clock.<br />
INSTANT COOK/START PAD<br />
• Press to start oven after<br />
setting programmes.<br />
• Press once to cook for<br />
1 minute at 100% (HIGH<br />
POWER) or increase by<br />
1 minute multiples each<br />
time this pad is pressed<br />
during cooking.<br />
EXPRESS DEFROST PAD<br />
Press to select the Express<br />
Defrost menu.<br />
E – 4<br />
R-242R(S) [01 EN].indd 4<br />
12/22/09 8:14:15 AM
BEFORE OPERATING<br />
Getting Started<br />
Step Procedure Pad Order Display<br />
1<br />
2<br />
Plug the oven into a power point.<br />
Ensure the door is closed.<br />
Press the STOP/CLEAR pad so that<br />
the oven beeps.<br />
Flashing four eights.<br />
Only the dots will remain.<br />
Clock Setting<br />
* To enter the present time of day e.g. 11:34 (AM or PM).<br />
Step Procedure Pad Order Display<br />
1<br />
Press the TIMER/CLOCK pad.<br />
2<br />
Enter the hours by pressing the TIME<br />
pads.<br />
x1<br />
x1<br />
3<br />
Press the TIMER/CLOCK pad.<br />
4<br />
Enter the minutes by pressing the<br />
TIME pads.<br />
x3<br />
x4<br />
5<br />
Press the TIMER/CLOCK pad again.<br />
This is a 12 hour clock.<br />
Press the STOP/CLEAR pad and re-enter the time of day (Ex. 1:45).<br />
If you wish to know the time of day during the cooking mode, press the TIMER/CLOCK pad. As long as your<br />
finger is pressing the TIMER/CLOCK pad, the time of day will be displayed.<br />
Stop/Clear<br />
Press the STOP/CLEAR pad once to:<br />
1. Stop the oven temporarily during cooking.<br />
2. Clear if you make a mistake during programming.<br />
To Cancel a Programme During Cooking<br />
Press the STOP/CLEAR pad twice.<br />
E – 5<br />
R-242R(S) [01 EN].indd 5<br />
12/22/09 8:14:16 AM
MICROWAVE COOKING TECHNIQUES<br />
Arrange food carefully<br />
Watch cooking time<br />
Cover foods before cooking<br />
Shield foods<br />
Stir foods<br />
Turn foods<br />
Rearrange foods<br />
Allow standing time<br />
Check for doneness<br />
Condensation<br />
Browning dish<br />
Microwave safe plastic wrap<br />
Microwave safe plastic<br />
cookware<br />
Place thickest areas toward outside of dish.<br />
Cook for the shortest amount of time indicated and add more time<br />
as needed.<br />
Food severely over-cooked can smoke or ignite.<br />
Check recipe for suggestions: paper towels, microwave plastic wrap<br />
or a lid.<br />
Covers prevent spattering and help foods to cook evenly.<br />
(Helps keep oven clean)<br />
Use small pieces of aluminium foil to cover thin areas of meats or<br />
poultry in order to avoid overcooking.<br />
From outside to center of dish once or twice during cooking,<br />
if possible.<br />
Foods such as chicken, hamburgers or steaks should be turned over<br />
once during cooking.<br />
Like meatballs halfway through cooking both from top to bottom<br />
and from the center of the dish to the outside.<br />
After cooking ensure adequate standing time.<br />
Remove food from oven and stir if possible.<br />
Cover for standing time which allows the food to finish cooking<br />
without overcooking.<br />
Look for signs indicating that cooking temperature has been reached.<br />
Doneness signs include:<br />
– Food steams throughout, not just at edge.<br />
– Poultry thigh joints move easily.<br />
– Pork and poultry show no pinkness.<br />
– Fish is opaque and flakes easily with a fork.<br />
A normal part of microwave cooking. The humidity and moisture<br />
in food will influence the amount of moisture in the oven. Generally,<br />
covered foods will not cause as much condensation as uncovered<br />
foods. Ensure that the ventilation openings are not blocked.<br />
When using a browning dish or self-heating material, always place a<br />
heat-resistant insulator such as a porcelain plate under it to prevent<br />
damage to the turntable, roller stay and coupling due to heat stress.<br />
The preheating time specified in the dish's instructions must not be<br />
exceeded.<br />
For cooking food with high fat content, do not bring the wrap in<br />
contact with the food as it may melt.<br />
Some microwave safe plastic cookware are not suitable for cooking<br />
foods with high fat and sugar content.<br />
E – 6<br />
R-242R(S) [01 EN].indd 6<br />
12/22/09 8:14:16 AM
MANUAL OPERATIONS<br />
Microwave Time Cooking<br />
When cook under microwave manually, first enter the cooking time, then the power level.<br />
You can programme up to 99 minutes, 90 seconds.<br />
There are 6 different power levels.<br />
Power level<br />
0% 10%<br />
(LOW)<br />
30%<br />
(MEDIUM<br />
LOW)<br />
50%<br />
(MEDIUM)<br />
70%<br />
(MEDIUM<br />
HIGH)<br />
100%<br />
(HIGH)<br />
Display<br />
Examples<br />
Keeping<br />
food warm<br />
Defrost,<br />
Softening<br />
butter<br />
Delicate Food such as<br />
Eggs or Seafood<br />
Raw meat,<br />
Vegetables,<br />
Rice or Pasta<br />
This variable cooking control allows you to select the rate of microwave cooking.<br />
If a power level is not selected, then 100% (HIGH POWER) is automatically used.<br />
* Suppose you want to cook vegetables for 2 minutes 30 seconds on 100% (HIGH POWER).<br />
Step Procedure Pad Order Display<br />
1<br />
2<br />
Enter the desired cooking time.<br />
Press the INSTANT COOK/START pad.<br />
x2 x3 COOK<br />
COOK will flash on and off.<br />
COOK<br />
The timer begins to count down.<br />
To lower the power press the POWER LEVEL pad until the desired power level is displayed.<br />
* Suppose you want to cook Fish Fillets for 10 minutes on 50% (MEDIUM POWER).<br />
Step Procedure Pad Order Display<br />
Enter the desired cooking time.<br />
1<br />
x1<br />
COOK<br />
COOK will flash on and off.<br />
2<br />
Select power level by pressing the<br />
POWER LEVEL pad as required (for<br />
50% press three times).<br />
COOK<br />
x3<br />
Press the INSTANT COOK/START pad.<br />
3<br />
COOK<br />
The timer begins to count down.<br />
If the door is opened during cooking process, the cooking time in the readout automatically stops. The cooking time<br />
starts to count down again when the door is closed and the INSTANT COOK/START pad is pressed.<br />
If you wish to know the power level during cooking, press the POWER LEVEL pad. As long as your finger is touching<br />
the POWER LEVEL pad, the power level will be displayed.<br />
If more than 20 minutes on 100% power is entered, the microwave power will be reduced after 20 minutes to avoid<br />
overheating.<br />
E – 7<br />
R-242R(S) [01 EN].indd 7<br />
1/11/10 5:23:40 PM
Sequence Cooking<br />
Your oven can be programmed with up to 3 cooking sequences, automatically switching from one variable<br />
power setting to the next.<br />
* Suppose you want to cook for 10 minutes on 50% (MEDIUM POWER) followed by 5 minutes on 100%<br />
(HIGH POWER).<br />
Step Procedure Pad Order Display<br />
Enter the desired cooking time.<br />
1<br />
x1<br />
COOK<br />
COOK will flash on and off.<br />
2<br />
Select power level by pressing the<br />
POWER LEVEL pad as required (for<br />
50% press three times).<br />
x3<br />
COOK<br />
3<br />
For second sequence, enter the<br />
desired cooking time. (If power is<br />
not selected the oven will operate<br />
at 100%).<br />
x5<br />
COOK<br />
Press the INSTANT COOK/START pad.<br />
COOK<br />
4<br />
The timer begins to count down.<br />
When it reaches zero,<br />
COOK<br />
the second sequence will appear<br />
and the timer will begin to count<br />
down again.<br />
Instant Cook<br />
For your convenience Sharp’s Instant Cook allows you to easily cook for one minute on 100% (HIGH POWER).<br />
Step Procedure Pad Order Display<br />
1<br />
Press the INSTANT COOK/START<br />
pad.<br />
(Within 3 minutes of closing the<br />
door.)<br />
COOK<br />
COOK will flash on and off.<br />
Press the INSTANT COOK/START pad until the desired time is displayed.<br />
Each time the pad is pressed during manual cooking, the cooking time is increased by 1 minute.<br />
E – 8<br />
R-242R(S) [01 EN].indd 8<br />
12/22/09 8:14:17 AM
Slow Cook<br />
To select SLOW COOK HIGH, press the SLOW COOK pad once.<br />
To select SLOW COOK LOW, press the SLOW COOK pad twice.<br />
The SLOW COOK setting is designed for food which needs longer cooking time. For example, stewing,<br />
braising, boiling soup or Chinese desserts of liquid type. The SLOW COOK setting provides two choices:<br />
SLOW COOK HIGH or SLOW COOK LOW. The maximum cooking time is 2 hours for each choice when cook<br />
manually.<br />
* Suppose you want to cook stew chicken on SLOW COOK HIGH for 1 hour 30 min: —<br />
Step Procedure Pad Order Display<br />
1<br />
Press the SLOW COOK pad once.<br />
x1<br />
2<br />
3<br />
Enter the desired cooking time.<br />
Press the INSTANT COOK/START<br />
pad.<br />
x9<br />
COOK<br />
Cook will flash on and off.<br />
COOK<br />
The timer begins to count down.<br />
NOTE<br />
1. If you need to check the food doneness during cooking, you can open the oven door by<br />
pressing the STOP/CLEAR pad once, then check and stir. After that close the door and press<br />
the INSTANT COOK/START pad to resume cooking.<br />
2. Combination of HIGH and LOW for cooking in 2 stages is possible. But combination between<br />
SLOW COOK and other features is not possible.<br />
3. If you wish to know the level of slow cook during cooking, press the POWER LEVEL pad. As<br />
long as your finger is pressing the POWER LEVEL pad, SC-H (SLOW COOK HIGH) or SC-L<br />
(SLOW COOK LOW) will be displayed.<br />
SPECIAL NOTES ON SLOW COOKING<br />
For better cooking result, always try to:<br />
1. Cut the ingredients into smaller pieces.<br />
2. Add in adequate liquid as medium (eg: water, sauce) and try to submerge the ingredients into the liquid<br />
in order to avoid scorching. This is especially important when stew meat or chicken soup is prepared.<br />
3. When soup or large quantity is prepared, make sure that the water level is at least 1 1 /2 inches (3.8 cm)<br />
from the rim of casserole, otherwise spill over may result.<br />
4. Do not add too much seasonings or salt at the initial stage of cooking. Try to add (especially salt)<br />
soon after or just after finish.<br />
5. Cook with the casserole lid on. Also please do not open the lid during cooking as this may disturb<br />
the cooking sequence.<br />
6. Stir and stand for 10 minutes after cooking.<br />
E – 9<br />
R-242R(S) [01 EN].indd 9<br />
12/22/09 8:14:18 AM
Slow Cook Recipes<br />
Beef Brisket with Daikon<br />
[ Ingredients ]<br />
570 g Beef Brisket<br />
330 g Daikon<br />
2 g Cayenne<br />
2 Aniseed<br />
2 stalks Green Onion (diced)<br />
3 slices Ginger<br />
[ Method ]<br />
1. Preparation –<br />
Cut the beef brisket into pieces. Marinade with salt (1 1 /2 tsp), sugar (1 1 /2 tsp),<br />
soya sauce (2 tsp) and oyster sauce (2 tsp). Skin and cut the daikon into pieces.<br />
2. In a 3-litre casserole heat 3 tbsp of oil uncover on microwave HIGH for 4 minutes.<br />
Then stir in ginger slices and the marinaded beef brisket. Cook with cover on<br />
microwave HIGH for 5 minutes.<br />
3. Add in cayenne, aniseed and 250 to 280 ml of boiling water. Stir well.<br />
Cook with cover on SLOW COOK HIGH for 1 hour.<br />
4. Add in daikon and 200 to 250 ml of boiling water. Stir well. Cook with<br />
cover on SLOW COOK HIGH for another 1 hour 30 minutes.<br />
5. Stir in sauce of cornstarch (2 tsp), oyster sauce (2 tsp), salt ( 1 /2 tsp) and<br />
water (3 tsp). Cook with cover on SLOW COOK LOW for 10 to 30 minutes.<br />
6. Sprinkle the diced green onion on top after cooking.<br />
7. Serve 4 persons.<br />
Portuguese Coconut Chicken<br />
[ Ingredients ]<br />
500 g Chicken pieces<br />
150 g Carrots<br />
200 g Potatoes<br />
160 g Onions<br />
400 ml Coconut Milk<br />
1 tsp Curry Powder<br />
[ Method ]<br />
1. Skin, rinse and cut the carrots, potatoes and onions into pieces.<br />
2. Marinade the chicken pieces with salt (1 tsp), sugar (1 tsp), oyster sauce<br />
(1 tsp), soya sauce (2 tsp), curry powder (1 tsp) and pepper (pinches).<br />
Let stand for a while.<br />
3. In a 3-litre casserole put in carrots, potatoes and 200 ml of coconut milk.<br />
Cook with cover on microwave HIGH for 12 minutes.<br />
4. Add in the marinaded chicken and another 200 ml of coconut milk.<br />
Stir well. Cook with cover on SLOW COOK HIGH for 20 minutes.<br />
5. Add in onions and salt (1 tsp). Stir well. Cook with cover on SLOW<br />
COOK HIGH for another 20 to 30 minutes.<br />
6. Stir well.<br />
7. Serve 4 to 6 persons.<br />
White Fungus with Papaya<br />
[ Ingredients ]<br />
1 Papaya (ripen)<br />
25 g White Fungus<br />
5 g Sweet Almonds<br />
5 g Bitter Almonds<br />
160 g Rock Sugar<br />
[ Method ]<br />
1. Soak the white fungus for at least 3 hours. Tear out the leafy fungus,<br />
then rinse thoroughly and drain well. Discard the stem of white fungus.<br />
2. Skin and remove the pits of papaya after cutting into half. Scoop out<br />
the papaya as balls or cut into dices of 3 cm 3 .<br />
3. In a 3-litre casserole put in white fungus, sweet almonds, bitter almonds<br />
and 500 ml of water. Cook with cover on microwave HIGH for 20 minutes.<br />
Let stand for 10 minutes.<br />
4. Add in papaya dices, rock sugar and 500 ml of boiling water. Cook with<br />
cover on SLOW COOK HIGH for 1 hour 15 minutes to 1 hour 30 minutes.<br />
5. Stir well. Serve 4 persons.<br />
Nutritious Herbal Chicken Soup<br />
[ Ingredients ]<br />
420 g Chicken half<br />
36 g Red Dates<br />
20 g Wai San<br />
20 g Kei Chee<br />
20 g Tung Sam<br />
20 g Pak Kei<br />
20 g Longan<br />
[ Method ]<br />
1. Preparation –<br />
Cut the chicken half into 4 to 6 pieces. Remove the skin. Rinse and soak<br />
all the herbs into 1150 ml of water in a 3-litre casserole for at least 3 hours.<br />
2. In a 2-litre casserole boil 1000 ml of water with cover on microwave<br />
HIGH for 10 minutes. Put in chicken pieces. Boil with cover for another<br />
4 minutes. Then take out and rinse.<br />
3. Put the scalded chicken into the soaking herbs and cook with cover on<br />
SLOW COOK HIGH for 1 hour 30 minutes. Then on SLOW COOK LOW<br />
for 20 to 40 minutes.<br />
4. Add salt (1 tsp or more) as desired. After stir let stand with cover for<br />
5 minutes.<br />
5. Serve 4 persons.<br />
E – 10<br />
R-242R(S) [01 EN].indd 10<br />
12/22/09 8:14:18 AM
AUTOMATIC OPERATIONS<br />
Notes for Automatic Operations<br />
1. When using the automatic features, carefully follow the instructions provided in each Menu Guide to<br />
achieve the best result.<br />
If the instructions are not followed carefully, the food may be overcooked or undercooked.<br />
2. Food weighing more or less than the quantity or weight listed in each Menu Guide, cook manually.<br />
3. To change the final cooking or defrosting result from the standard setting, press the LESS/MORE TIME<br />
pads after selecting desired setting. Refer to page E-20.<br />
4. The final cooking result will vary according to the food condition (e.g. initial temperature, shape, quality).<br />
Check the food after cooking and if necessary continue cooking manually.<br />
5. To avoid children's misuse, each REHEAT function pad can be used only within 3 minutes after cooking<br />
completion, closing the door or pressing the STOP/CLEAR pad.<br />
6. To defrost foods above or below the weights allowed on the EXPRESS DEFROST MENU GUIDE, use<br />
EASY DEFROST or defrost manually.<br />
7. When entering the weight of the food, round off the weight to the nearest 0.1 kg. For example, 0.35 kg<br />
would become 0.4 kg.<br />
If the DOWN ( ) weight pad is pressed the display will count down from the highest weight/quantity each<br />
time the pad is pressed.<br />
If the UP ( ) weight pad is pressed the display will count up from the lowest weight/quantity each time<br />
the pad is pressed.<br />
Auto Cook<br />
Rice Menu<br />
* Suppose you want to cook 2 serves of Rice: —<br />
RICE MENU allows you to cook 2 popular foods.<br />
Follow the instructions provided in the Rice Menu Menu Guide<br />
on page E-12.<br />
Step Procedure Pad Order Display<br />
Press the Rice pad once.<br />
1<br />
QTY<br />
QTY will flash on and off.<br />
2<br />
Press the WEIGHT pads to enter<br />
quantity.<br />
x1<br />
OR<br />
x2<br />
COOK<br />
QTY<br />
COOK will flash on and off.<br />
Press the INSTANT COOK/START<br />
pad.<br />
3<br />
COOK<br />
The cooking time will appear and<br />
count down to zero.<br />
When it reaches zero, the oven<br />
will “beep”.<br />
E – 11<br />
R-242R(S) [01 EN].indd 11<br />
1/18/10 11:38:34 AM
Rice Menu Menu Guide<br />
MENU QUANTITY PROCEDURE<br />
Rice<br />
1-2 serves • Wash rice until water runs clear.<br />
Serving (s) Rice Water<br />
• Place rice and water into a deep casserole<br />
(about 2 ) and soak for 30 mins (stir rice a<br />
1 serve (1-2 persons) 150 g 240 ml few times during soaking).<br />
• Stir and cook with cover.<br />
2 serves (3-5 persons) 300 g 480 ml • After cooking, stir lightly and stand for<br />
5 mins with a cover.<br />
Congee<br />
1-2 serves • Wash rice until water runs clear.<br />
Serving (s) Rice Water<br />
• Place rice and water into a deep casserole<br />
(2 for 1 serve, 3 for 2 serves) and soak for<br />
1 serve (1-2 persons) 50 g 750 ml 30 mins (stir rice a few times during soaking).<br />
• Stir and cook uncovered.<br />
2 serves (3-5 persons) 80 g 1400 ml • After cooking, stir lightly and stand for<br />
5 mins.<br />
Menu Variation<br />
eg:<br />
★<br />
★<br />
Congee with Pallock Fish and Peanuts<br />
Ingredients: 100 g Pallock fish (fried; chopped)<br />
(3-5 persons) 50 g Peanuts<br />
1 slice salted turnip (chopped)<br />
3 spring onions (chopped)<br />
NOTE: The ingredients can be added just after finish, with salted turnip and spring<br />
onions as garnish and sprinkles on top.<br />
Congee with Salted Pork and Preserved Duck Eggs<br />
Ingredients: approx. 230 g ( 1 /2 lb) lean pork (chopped)<br />
(3-5 persons) 2 preserved duck eggs (diced)<br />
NOTE: The ingredients can be added 10 min. before finish.<br />
Porridge<br />
1-2 serves • Wash rice until water runs clear.<br />
Serving (s) Rice Water<br />
• Place rice and water into a deep casserole<br />
(2 for 1 serve, 3 for 2 serves) and soak for<br />
1 serve (1-2 persons) 100 g 1200 ml 15 mins (stir rice a few times during soaking).<br />
• Stir and cook uncovered.<br />
2 serves (3-5 persons) 160 g 2200 ml • After cooking, stir lightly and stand for<br />
5 mins.<br />
Menu Variation<br />
You can enjoy the variation by putting some ingredients into Porridge just after finish or 10 mins before<br />
finish.<br />
eg: ★ Chicken Porridge: 200 g Chicken (cut small pieces, precooked)<br />
(3-5 persons) Spring Onion, cut 3 cm long<br />
★ Fish Porridge: 250 g Fish (precooked)<br />
(3-5 persons) 2 slices Ginger (cut into stripes)<br />
NOTE<br />
1. Water temperature should be about 20°C at initial cooking.<br />
2. 1 tael=38 grams.<br />
E – 12<br />
R-242R(S) [01 EN].indd 12<br />
12/22/09 8:14:19 AM
Steam Menu<br />
1. Fish<br />
2. Meat<br />
* Suppose you want to cook 2 serves of steam meat: —<br />
STEAM MENU allows you to cook 2 popular steam menus.<br />
Follow the instructions provided in the Steam Menu Menu Guide.<br />
Step Procedure Pad Order Display<br />
1<br />
Press the Steam Menu pad<br />
until the desired menu number<br />
is displayed (for meat press<br />
twice).<br />
x2<br />
QTY<br />
QTY will flash on and off.<br />
2<br />
Press the WEIGHT pads to<br />
enter quantity.<br />
x2<br />
OR<br />
x2<br />
COOK<br />
QTY<br />
COOK will flash on and off.<br />
Press the INSTANT COOK/<br />
START pad.<br />
3<br />
COOK<br />
The cooking time will appear and count<br />
down to zero.<br />
When it reaches zero, the oven will<br />
“beep”.<br />
Steam Menu Menu Guide<br />
NO.<br />
1<br />
MENU<br />
Steam Fish<br />
eg: Sea Bream<br />
Red Snapper<br />
Carp<br />
Pomfret<br />
Golden Thread<br />
Black Mullet<br />
Flatfish<br />
Garoupa<br />
etc.<br />
INITIAL<br />
TEMPERATURE<br />
8-12°C<br />
Refrigerated<br />
temperature<br />
QUANTITY<br />
1-3 serves<br />
Serving (s) Weight<br />
1 serve 130-199 g<br />
2 serves 200-300 g<br />
3 serves 301-420 g<br />
Whole fish<br />
or<br />
Fish fillet<br />
(Note: When cooking pomfret, use MORE setting for better result.)<br />
PROCEDURE<br />
• Wash fish thoroughly and<br />
remove scales.<br />
• Make a few slits on the skin of<br />
fish, pierce the eyes of fish.<br />
• Put on a shallow dish,<br />
22-28 cm in diameter.<br />
• Sprinkle lightly with water,<br />
salt and oil.<br />
• Put green onion and ginger<br />
slices on top.<br />
• Cover with microwave wrap<br />
or glass lid.<br />
• After cooking, stand for<br />
2 minutes.<br />
2<br />
Steam Meat<br />
eg: Pork patty<br />
Beef patty<br />
Spare rib cubes<br />
Chicken pieces<br />
etc.<br />
8-12°C<br />
Refrigerated<br />
temperature<br />
1-3 serves<br />
Serving (s) Weight<br />
1 serve 130-199 g<br />
2 serves 200-300 g<br />
3 serves 301-420 g<br />
• Marinate the meat.<br />
• For meat patty, try to make<br />
it a thin layer especially in<br />
the centre.<br />
• Put on a shallow dish,<br />
22-28 cm in diameter.<br />
• Cover with microwave wrap<br />
or glass lid.<br />
• After cooking, stand for<br />
2 minutes.<br />
E – 13<br />
R-242R(S) [01 EN].indd 13<br />
12/22/09 8:14:19 AM
Steam Menu Recipes<br />
Spare Ribs with Black Beans<br />
[ Ingredients ]<br />
320 g Spare Ribs<br />
10 g Black Beans<br />
[ Method ]<br />
1. Marinate the spare ribs with seasonings, then mix with black beans.<br />
2. Cover with microwave wrap and press the STEAM pad twice to Meat.<br />
Seasonings<br />
1 tsp Salt<br />
1 tsp Sugar<br />
1 tsp Light Soya<br />
Sauce<br />
1 /2 tsp Sesame Oil<br />
1 tsp Cornstarch<br />
Chicken Pieces with Mushrooms<br />
[ Ingredients ]<br />
280 g Chicken pieces<br />
40 g Dried Mushrooms (soaked)<br />
Ginger slices<br />
Green Onion slices<br />
[ Method ]<br />
1. Marinate the chicken pieces and soaked mushrooms with seasonings.<br />
Then mix together with ginger and green onion slices.<br />
2. Cover with microwave wrap and press the STEAM pad twice to Meat.<br />
Seasonings<br />
1 /2 tsp Salt<br />
1 /2 tsp Sugar<br />
1 tsp Light Soya<br />
Sauce<br />
1 /2 tsp Cornstarch<br />
1 /2 tsp Sesame Oil<br />
Steamed Whole Fish<br />
[ Ingredients ]<br />
200-300 g Fish<br />
Ginger slices<br />
Green Onion slices<br />
[ Method ]<br />
1. Wash the fish, remove its scales and make several slits on it.<br />
2. Sprinkle lightly with water, salt and oil. Scatter ginger and green<br />
onion slices on top.<br />
3. Cover with microwave wrap and press the STEAM pad once to Fish.<br />
Pork Patty<br />
[ Ingredients ]<br />
330 g Ground Pork<br />
50 g Preserved<br />
Vegetables<br />
1 Salted Egg Yolk<br />
Seasonings<br />
1 tsp Salt<br />
1 tsp Sugar<br />
2 tsp Cornstarch<br />
2 tsp Oil<br />
1 1 /2 tsp Light Soya<br />
Sauce<br />
[ Method ]<br />
1. Marinate the ground pork and preserved vegetables with seasonings,<br />
mix well. Press into patty shape.<br />
2. Cut the salted egg yolk into dices and place on the patty for<br />
decoration.<br />
3. Cover with microwave wrap and press the STEAM pad twice to Meat.<br />
E – 14<br />
R-242R(S) [01 EN].indd 14<br />
1/12/10 3:37:18 PM
Reheat<br />
REHEAT allows you to reheat 2 popular foods.<br />
Follow the instructions provided in the Reheat Menu Guide.<br />
* Suppose you want to reheat 2 cups of beverage: —<br />
Step Procedure Pad Order Display<br />
1<br />
Press the Beverage pad<br />
until the desired quantity<br />
is displayed (for 2 cups<br />
press twice).<br />
x2<br />
QTY<br />
COOK<br />
After about 2 sec.<br />
Cooking starts and the cooking time will begin<br />
counting down. When it reaches zero, the oven<br />
will “beep”.<br />
Reheat Menu Guide<br />
MENU<br />
INITIAL<br />
TEMPERATURE<br />
QUANTITY<br />
PROCEDURE<br />
Bread<br />
20-25°C<br />
Room<br />
temperature<br />
1–4 pieces<br />
1 piece,<br />
( approx. 50g )<br />
• For 1-2 pcs, put onto a paper towel and<br />
cover with another paper towel.<br />
• For 3-4 pcs, put onto a plate lined with<br />
paper towel and cover with another<br />
paper towel.<br />
• When you reheat only one piece of bread,<br />
place it on centre.<br />
(NOTE: Reheating result varies with the kind of bread and its condition.)<br />
Beverage<br />
Coffee<br />
Tea<br />
Water<br />
20-25°C<br />
Room<br />
temperature<br />
1–4 pieces<br />
1 cup,<br />
( approx. 20 ml )<br />
•<br />
•<br />
•<br />
No cover.<br />
Place on centre of turntable (1 cup).<br />
(For 2–4 cups, place along the rim of<br />
turntable.)<br />
After reheating, stir.<br />
E – 15<br />
R-242R(S) [01 EN].indd 15<br />
1/11/10 5:23:42 PM
Express Defrost<br />
1. Minced Meat<br />
2. Chicken Pieces<br />
3. Steak/Chop<br />
* Suppose you want to defrost 0.2 kg of Minced Meat: —<br />
EXPRESS DEFROST rapidly defrosts 3 types of meat in<br />
specific weights.<br />
Follow the instructions provided in the Express Defrost Menu<br />
Guide on page E-17.<br />
Step Procedure Pad Order Display<br />
1<br />
Press the Express Defrost pad<br />
until the desired menu number<br />
is displayed (for Minced Meat<br />
press once).<br />
x1<br />
COOK<br />
DEF<br />
COOK will flash on and off.<br />
Press the INSTANT COOK/<br />
START pad.<br />
2<br />
COOK<br />
DEF<br />
The defrosting time will begin counting<br />
down. When a 4 times “beep” sound is<br />
heard, the oven stops. CHECK will flash<br />
on and off.<br />
3<br />
Open the door. Turn over and<br />
rearrange. Shield the defrosted<br />
portions.<br />
DEF<br />
CHECK<br />
CHECK will flash on and off.<br />
Close the door.<br />
4<br />
COOK<br />
DEF<br />
COOK will flash on and off.<br />
Press the INSTANT COOK/<br />
START pad.<br />
5<br />
COOK<br />
DEF<br />
The defrosting time will continue counting<br />
down. When it reaches zero, the oven will<br />
“beep”.<br />
E – 16<br />
R-242R(S) [01 EN].indd 16<br />
1/12/10 3:37:18 PM
Express Defrost Menu Guide<br />
No. MENU QUANTITY PROCEDURE<br />
1<br />
Minced Meat<br />
Beef<br />
0.2 kg •<br />
•<br />
•<br />
•<br />
Place frozen minced meat on a shallow dish.<br />
The oven will “beep” and stop, CHECK will flash on<br />
and off. Remove defrosted portions, turn over and<br />
shield edges with foil strips.<br />
Press start to continue defrosting.<br />
After defrost time, stand covered with aluminium foil<br />
for 3-5 minutes.<br />
2<br />
3<br />
Chicken Pieces<br />
(Mid-joint of<br />
chicken wings)<br />
0.35 kg •<br />
•<br />
•<br />
•<br />
Place mid-joint of chicken wings on a shallow dish.<br />
The oven will “beep” and stop, CHECK will flash on<br />
and off. Turn over, rearrange and shield the defrosted<br />
portions.<br />
Press start to continue defrosting.<br />
After defrost time, stand covered with aluminium foil<br />
for 5 minutes.<br />
Steak/Chop 0.3 kg •<br />
•<br />
•<br />
•<br />
•<br />
•<br />
Shield thin end of chops or steaks with foil.<br />
Position the food with thinner parts in the centre in a<br />
single layer on a shallow dish.<br />
If pieces are stuck together, try to separate as soon<br />
as possible.<br />
The oven will “beep” and stop, CHECK will flash on<br />
and off. Turn over, rearrange and shield the defrosted<br />
portions.<br />
Press start to continue defrosting.<br />
After defrost time, stand covered with aluminium foil<br />
for 5 minutes.<br />
NOTE<br />
1. When freezing minced meat, shape it into flat even sizes.<br />
2. For chicken pieces, steaks and chops, freeze separately in single flat layers and if necessary<br />
interleave with freezer plastic to separate layers. This will ensure even defrosting.<br />
3. It is also a good idea to label the packs with the correct weights.<br />
E – 17<br />
R-242R(S) [01 EN].indd 17<br />
1/12/10 3:37:18 PM
Easy Defrost<br />
EASY DEFROST will automatically compute the microwave power and defrosting time.<br />
Follow the instructions provided in the Easy Defrost Menu Guide on page E-19.<br />
* Suppose you want to defrost 1.0 kg of Chicken Pieces: —<br />
Step Procedure Pad Order Display<br />
Press the Easy Defrost pad.<br />
1<br />
DEF<br />
KG<br />
KG will flash on and off.<br />
2<br />
Press the WEIGHT pads to<br />
enter weight.<br />
OR<br />
x6<br />
x10<br />
COOK DEF KG<br />
COOK will flash on and off.<br />
Press the INSTANT COOK/<br />
START pad.<br />
3<br />
COOK<br />
DEF<br />
The defrosting time will begin counting<br />
down. When a 4 times “beep” sound is<br />
heard, the oven stops. CHECK will flash<br />
on and off.<br />
4<br />
Open the door. Turn over and<br />
rearrange. Shield the defrosted<br />
portions.<br />
DEF<br />
CHECK<br />
CHECK will flash on and off.<br />
Close the door.<br />
5<br />
COOK<br />
DEF<br />
COOK will flash on and off.<br />
Press the INSTANT COOK/<br />
START pad.<br />
6<br />
COOK<br />
DEF<br />
The defrosting time will continue counting<br />
down. When it reaches zero, the oven will<br />
“beep” .<br />
E – 18<br />
R-242R(S) [01 EN].indd 18<br />
12/22/09 8:14:20 AM
Easy Defrost Menu Guide<br />
MENU<br />
QUANTITY<br />
(MIN. – MAX.)<br />
PROCEDURE<br />
Steaks<br />
Chops<br />
Minced Meat<br />
Beef<br />
Roast Meat<br />
Beef/Pork/Lamb<br />
0.1 - 1.5 kg •<br />
•<br />
•<br />
•<br />
•<br />
•<br />
Shield thin end of chops or steaks with foil.<br />
Position the food with thinner parts in the centre<br />
in a single layer on a shallow dish.<br />
If pieces are stuck together, try to separate as<br />
soon as possible.<br />
Half way the oven will “beep” and stop, CHECK<br />
will flash on and off. Turn over, rearrange and<br />
shield the defrosted portions.<br />
Press start to continue defrosting.<br />
After defrost time, stand covered with aluminium<br />
foil for 5-30 minutes.<br />
0.1 - 1.5 kg •<br />
•<br />
•<br />
•<br />
Place frozen minced meat on a shallow dish.<br />
Shield edges.<br />
Half way the oven will “beep” and stop, CHECK<br />
will flash on and off. Remove defrosted portions,<br />
turn over and shield edges with foil strips.<br />
Press start to continue defrosting.<br />
After defrost time, stand covered with aluminium<br />
foil for 5-30 minutes.<br />
0.5 - 1.5 kg •<br />
•<br />
•<br />
•<br />
•<br />
Shield the edge with foil strips about 2.5 cm<br />
wide.<br />
Place joint with lean side face upwards (if<br />
possible) on a shallow dish.<br />
Half way the oven will “beep” and stop, CHECK<br />
will flash on and off. Turn over and shield the<br />
defrosted portions.<br />
Press start to continue defrosting.<br />
After defrost time, stand covered with aluminium<br />
foil for 10-30 minutes.<br />
Poultry 1.0 - 1.5 kg •<br />
•<br />
•<br />
•<br />
•<br />
Remove from original wrapper. Shield wing and<br />
leg tips with foil.<br />
Place breast side down on a shallow dish.<br />
Half way the oven will “beep” and stop, CHECK<br />
will flash on and off. Turn over and shield the<br />
defrosted portions.<br />
Press start to continue defrosting.<br />
After defrost time, stand covered with aluminium<br />
foil for 15-30 minutes.<br />
NOTE: After standing run under cold water to<br />
remove giblets if necessary.<br />
Chicken Pieces 0.1 - 1.5 kg • Shield the exposed bone with foil.<br />
•<br />
•<br />
Food not listed in the Guide can be defrosted manually using 30%.<br />
•<br />
•<br />
Place chicken pieces on a shallow dish.<br />
Half way the oven will “beep” and stop, CHECK<br />
will flash on and off. Turn over, rearrange and<br />
shield the defrosted portions.<br />
Press start to continue defrosting.<br />
After defrost time, stand covered with aluminium<br />
foil for 5-30 minutes.<br />
NOTE<br />
1. When freezing minced meat, shape it into flat even sizes.<br />
2. For chicken pieces, steaks and chops, freeze separately in single flat layers and if necessary<br />
interleave with freezer plastic to separate layers. This will ensure even defrosting.<br />
3. It is also a good idea to label the packs with the correct weights.<br />
E – 19<br />
R-242R(S) [01 EN].indd 19<br />
12/22/09 8:14:21 AM
OTHER CONVENIENT FEATURES<br />
Less/More Setting<br />
The cooking times programmed into the automatic menus are tailored to the most popular tastes. To adjust<br />
the cooking time to individual preference, use the LESS/MORE time pads to either reduce (less) or add<br />
(more) cooking time.<br />
The Less/More setting can be used to adjust the cooking time of the following features:—<br />
– AUTO COOK<br />
– REHEAT<br />
– EXPRESS DEFROST<br />
– EASY DEFROST<br />
(1) REHEAT<br />
* Suppose you want to reheat 2 cups of beverage for less time than the standard setting.<br />
Step Procedure Pad Order Display<br />
Press the Beverage pad twice.<br />
1<br />
x2<br />
QTY<br />
2<br />
Press the LESS TIME pad once<br />
within 2 seconds.<br />
x1<br />
(2) AUTO COOK, EXPRESS DEFROST, EASY DEFROST<br />
* Suppose you want to defrost 1.0 kg of Chicken Pieces (EASY DEFROST) for more time than the standard<br />
Step Procedure Pad Order Display<br />
Press the Easy Defrost pad.<br />
1<br />
DEF<br />
KG<br />
KG will flash on and off.<br />
2<br />
Press the WEIGHT pads to enter<br />
weight.<br />
x6<br />
OR<br />
x10<br />
COOK DEF KG<br />
COOK will flash on and off.<br />
3<br />
Press the MORE TIME pad once.<br />
x1<br />
COOK DEF<br />
4<br />
Press the INSTANT COOK/START<br />
pad.<br />
COOK<br />
DEF<br />
For EXPRESS DEFROST, select the menu using the EXPRESS DEFROST pad instead of the EASY DEFROST<br />
pad in step 1, and go to step 3.<br />
E – 20<br />
R-242R(S) [01 EN].indd 20<br />
12/22/09 8:14:21 AM
Increasing or Decreasing Time During the Cooking Programme<br />
Cooking time can be added or decreased during a manual cooking programme using the LESS ( )/<br />
MORE ( ) TIME pads.<br />
* Suppose you want to increase the cooking time by 2 minutes during 5 minutes on 50% (MEDIUM<br />
POWER) cooking. (at the moment the remaining cooking time is 1 min. 30 sec.)<br />
Step Procedure Pad Order Display<br />
Enter the desired cooking time.<br />
1<br />
x5<br />
COOK<br />
Cook will flash on and off.<br />
2<br />
Select power level by pressing the<br />
POWER LEVEL pad as required<br />
(for 50% press three times).<br />
x3<br />
COOK<br />
Press the INSTANT COOK/START pad.<br />
3<br />
COOK<br />
The timer starts to count down.<br />
COOK<br />
4<br />
Press the MORE TIME pad twice to<br />
increase the cooking time by two<br />
minutes.<br />
x2<br />
COOK<br />
The timer keeps on counting down.<br />
NOTE<br />
You cannot use this function for SLOW COOK and automatic operations.<br />
E – 21<br />
R-242R(S) [01 EN].indd 21<br />
12/22/09 8:14:22 AM
Timer<br />
Use this feature as a general purpose timer. Examples include:<br />
timing boiled eggs cooked on the stove top; or<br />
timing the recommended standing time of food.<br />
You can enter any time up to 99 minutes, 90 seconds. If you want to cancle the timer during the count down<br />
phase, simply press the STOP/CLEAR pad and the display will return to showing time of day.<br />
* Suppose you want to set the timer to 3 minutes for boiling an egg on the stove top.<br />
Step Procedure Pad Order Display<br />
1<br />
Enter the desired time.<br />
x3<br />
COOK<br />
Cook will flash on and off.<br />
Once the egg has come to the boil in the saucepan you can start the timer.<br />
Press the TIMER/CLOCK pad.<br />
2<br />
The timer begins to count down.<br />
When the timer reaches zero, the<br />
oven will “beep”.<br />
Alarm<br />
Your oven has an alarm function. If you leave food in the oven after cooking, the oven will “beep” 3 times<br />
after 2 minutes.<br />
If you do not remove the food at that time, the oven will “beep” 3 times after 4 minutes and 6 min<br />
E – 22<br />
R-242R(S) [01 EN].indd 22<br />
12/22/09 8:14:22 AM
CARE AND CLEANING<br />
Disconnect the power supply cord before cleaning or leave the door open to inactivate the oven during<br />
cleaning.<br />
CLEAN THE OVEN AT REGULAR INTER VALS - Keep the oven clean and remove any food deposits, or it could lead<br />
to deterioration of the surface. This could adversely affect the life of the appliance and possibly result in a hazardous<br />
situation.<br />
Exterior:<br />
The outside may be cleaned with mild soap and warm water, wipe clean with a damp cloth. Avoid the use of harsh<br />
abrasive cleaners. Keep the ventilation openings free of dust.<br />
Door:<br />
Wipe the door and window on both sides, the door seals and adjacent parts frequently with a damp cloth to remove<br />
any spills or spatters. Do not use abrasive cleaners.<br />
Touch Control Panel:<br />
Wipe the panel with a cloth dampened slightly with water only.<br />
Do not scrub or use any sort of chemical cleaners. Avoid the use of excess water.<br />
Interior walls:<br />
To clean the interior surfaces, wipe with a soft cloth and warm water. After use wipe the waveguide cover in the<br />
oven with a soft damp cloth to remove any food splashes. Built-up splashes may overheat and begin to smoke or<br />
catch fire. Do not remove the waveguide cover. DO NOT USE A COMMERCIAL OVEN CLEANER, ABRASIVE OR<br />
HARSH CLEANERS AND SCOURING PADS ON ANY PART OF YOUR MICROWAVE OVEN. NEVER SPRAY OVEN<br />
CLEANERS DIRECTLY ONTO ANY PART OF YOUR OVEN.<br />
Avoid using excess water. After cleaning the oven, ensure any water is removed with a soft cloth.<br />
Turntable/Roller Stay:<br />
Wash with mild soapy water and dry thoroughly.<br />
SERVICE CALL CHECK<br />
Please check the following before calling for service:<br />
1. Does the display light up? YES _________ NO _________<br />
2. Place one cup of water (approx. 250 ml) in a glass measure in the oven and close the door securely. Press the<br />
INSTANT COOK/START pad twice.<br />
A. Does the oven lamp come on? YES _________ NO _________<br />
B. Does the cooling fan work? YES _________ NO _________<br />
(Put your hand over the rear ventilation openings.)<br />
C. Does the turntable rotate? YES _________ NO _________<br />
(The turntable can rotate clockwise or counterclockwise. This is quite normal.)<br />
D. After two minutes, did an audible signal sound and COOK indicator go off? YES _________ NO _________<br />
E. Is the water inside the oven hot? YES _________ NO _________<br />
If “NO” is the answer to any of the above questions, please check your wall socket and the fuse in your meter box.<br />
If both the wall socket and the fuse are functioning properly, CONTACT YOUR NEAREST SERVICE CENTRE<br />
APPROVED BY SHARP.<br />
NOTE: If you cook the food over 20 minutes on 100% (HIGH POWER), the microwave power will be automatically<br />
reduced to avoid overheating.<br />
SPECIFICATIONS<br />
AC Line Voltage : Refer to the rating label.<br />
AC Power Required : 1.25 kW<br />
Output Power : 800 W* (IEC test procedure)<br />
Microwave Frequency : 2450 MHz (Class B/Group 2)**<br />
Outside Dimensions : 460 mm(W) x 275 mm(H) x 380 mm(D)<br />
Cavity Dimensions : 319 mm(W) x 211 mm(H) x 336 mm(D)***<br />
Oven Capacity : 22 litre***<br />
Cooking Uniformity : Turntable (ø272 mm tray) system<br />
Weight : Approx. 12 kg<br />
* This measurement is based on the International Electrotechnical Commission’s standardised method<br />
for measuring output power.<br />
** This is the classification of ISM (Industrial, Scientific and Medical) equipment described in the International<br />
Standard CISPR11.<br />
*** Internal capacity is calculated by measuring maximum width, depth and height.<br />
E – 23<br />
R-242R(S) [01 EN].indd 23<br />
12/22/09 8:14:22 AM
Cookware and Utensil Guide<br />
Utensil Microwave Steam<br />
Glassware (heat-resistant) o o<br />
Ceramic (heat-resistant) o o<br />
Pottery, Stoneware o o<br />
Metal Cookware, Stainless Steel Cookware x x<br />
Straw, Wicker and Wood Short time x<br />
Plastic Cookware (microwave-safe only) Short time x<br />
Paper Plates/Towel Short time x<br />
Plastic Wrap (microwave-safe only) o x<br />
Aluminium Foil Paper Shielding Shielding<br />
Aluminium Foil Dish x x<br />
NOTE<br />
Measure Standard<br />
1 cup = 250 ml<br />
1 tbsp. = 15 ml<br />
1 tsp. = 5 ml<br />
1 tbsp. = 3 tsp.<br />
E – 24<br />
R-242R(S) [01 EN].indd 24<br />
1/18/10 4:01:49 PM
RECIPES<br />
SOUP<br />
Shrimp Balls and Straw Mushroom Soup<br />
[Ingredients]<br />
230 g Shrimps<br />
40 g Pork fat<br />
1 can Straw mushrooms<br />
few Spring onions (strips)<br />
few Sesame oil<br />
[Seasonings]<br />
(A)<br />
1 tsp Salt<br />
1/2 tsp Monosodium<br />
glutamate<br />
1/2 tsp Pepper<br />
1 Egg white<br />
1/2 tsp Corn flour<br />
(B)<br />
1 tsp Salt<br />
1 tbsp Rice wine<br />
2 tsp Mono sodium<br />
glutamate<br />
3 cups Water<br />
[Method]<br />
1. Remove veins from shrimps, drain and chop. Add<br />
pork fat and seasonings (A), stir well, to make<br />
a thick paste. Use a tablespoon to form shrimp<br />
balls. Set aside.<br />
2. Combine seasonings (B) in large casserole. Cover<br />
and microwave at HIGH for 7 minutes.<br />
3. Add shrimp balls, straw mushrooms and spring<br />
onions. Cover and microwave at HIGH for another<br />
3 to 4 minutes until shrimp balls float. Sprinkle<br />
sesame oil in soup and serve.<br />
Meatballs and Tomato Soup<br />
[Ingredients]<br />
150 g Tomatoes<br />
150 g Ground pork<br />
2 stalks Spring onion<br />
2 slices Ginger<br />
[Seasonings]<br />
(A)<br />
1/2 tsp Salt<br />
1/4 tsp Monosodium<br />
glutamate<br />
1/2 tsp Rice wine<br />
1/2 tsp Soy sauce<br />
1 tsp Cornstarch<br />
1 Egg white<br />
few<br />
few<br />
few<br />
Coriander,<br />
chopped<br />
Celery,<br />
chopped<br />
Sesame oil<br />
(B)<br />
1/2 tsp Salt<br />
1 stalk Spring onion<br />
1/4 tsp Pepper<br />
1/4 tsp Monosodium<br />
glutamate<br />
Broccoli and Minced Fish Soup<br />
[Method]<br />
1. Finely chop spring onion and ginger. Cut tomatoes<br />
into quarters.<br />
2. Mix ground pork with spring onion, ginger and<br />
seasonings (A), then add egg white and cornstarch,<br />
stir well. Use tablespoon to form meatballs.<br />
3. Microwave 3 cups water and tomatoes in a large,<br />
covered bowl at HIGH for 7 minutes. Add meat balls<br />
and seasonings (B), cover, microwave at HIGH for<br />
another 3 to 4 minutes. Garnish with coriander and<br />
celery, sprinkle sesame oil before serving.<br />
[Ingredients]<br />
300 g Fish meat<br />
150 g Broccoli<br />
2 tbsp Ham, chopped<br />
1 tbsp Celery, chopped<br />
[Seasonings]<br />
(A)<br />
1 Egg white<br />
1/2 tsp Salt<br />
1 tsp Rice wine<br />
(B)<br />
1 stalk Spring onion<br />
2 slices Ginger<br />
1 tsp Rice wine<br />
(C)<br />
1/2 tsp Salt<br />
1/4 tsp Monosodium<br />
glutamate<br />
1/4 tsp Pepper<br />
E-25<br />
[Method]<br />
1. Remove fish bones and finely chop fish meat.<br />
Add in seasonings (A), stir slightly.<br />
2. Rinse broccoli and cut into small pieces. Put it<br />
in casserole and add 2 tablespoons of water,<br />
then cover and microwave at HIGH for 2 minutes<br />
30 seconds.<br />
3. In a casserole put in 3 cups of water and<br />
seasonings (B), stir well. Cover and microwave<br />
at HIGH for 7 minutes. Add seasonings (C)<br />
and broccoli. Microwave at HIGH for another<br />
2 minutes 30 seconds.<br />
4. Stir chopped fish mixture into boiling soup, cover<br />
and microwave at HIGH for 1 minute. Garnish with<br />
chopped ham and celery.<br />
R-242R(S) [01 EN].indd 25<br />
12/22/09 8:14:23 AM
Cold Chicken with Chili<br />
MEAT<br />
[Ingredients]<br />
1 3 /5 cups Jellyfish<br />
1 (50 g) Cucumber<br />
230 g Chicken leg<br />
10 cm Green onion<br />
3 slices Ginger<br />
1 tbsp Chinese wine<br />
few Tomato<br />
few Parsley<br />
[Sauce]<br />
3 tbsp Green onion,<br />
chopped<br />
1 tsp Ginger,<br />
grated<br />
4 tbsp Soy sauce<br />
1/2 tsp Sugar<br />
1 tbsp Vinegar<br />
2 tbsp Chili sauce<br />
2 tbsp Sesame<br />
paste<br />
Meatballs with Long Mustard Sauce<br />
[Ingredients]<br />
200 g Pork, minced<br />
10 Mushrooms<br />
2 slices Ginger<br />
300 g Long mustard<br />
1 tbsp Oil<br />
800 ml Water<br />
2 tsp Bicarbonate of<br />
soda<br />
[Seasonings]<br />
[Sauce]<br />
1/2 tsp Salt<br />
1/4 tsp Monosodium glutamate<br />
1/2 tsp Light soy sauce<br />
1/2 tsp Sesame oil<br />
1 tsp Cornflour<br />
dash Pepper<br />
300 ml Stock<br />
1/2 tsp Salt<br />
1/2 tsp Monosodium<br />
glutamate<br />
1/2 tsp Sugar<br />
1 tsp Light soy<br />
sauce<br />
1/2 tsp Sesame oil<br />
1 tbsp Cornflour<br />
dash Pepper<br />
[Method]<br />
1. Soak jellyfish in lukewarm water overnight or for<br />
2 to 3 days. Drain.<br />
2. Pour hot water over jellyfish and mix with fork or<br />
chopsticks. As soon as it shrivels, add cold water,<br />
soak for a while, and drain.<br />
3. Shred cucumber.<br />
4. Cut chicken legs, pierce the skin of each chicken<br />
leg with toothpick, and put them in casserole<br />
with skin facing down. Add green onion, ginger<br />
and wine, cover and microwave at HIGH for<br />
2 minites 30 seconds, let cool and then slice.<br />
5. Place ingredients from 2,3 and 4 on plate.<br />
6. Pour over mixture of sauce. Mix well before<br />
serving.<br />
7. Garnish with tomato and parsley.<br />
[Method]<br />
1. Mix minced pork with all seasonings. Make into<br />
balls and cover, microwave at HIGH for 1 minute<br />
30 seconds.<br />
2. Cut away long mustard leaves and cut into<br />
decorative pieces.<br />
3. Soak in 800 ml water and add 2 tsp bicarbonate<br />
of soda. Drain.<br />
4. Place mustard leaves, ginger and mushrooms in<br />
casserole, sprinkle 1 tbsp oil and cover, microwave<br />
for around 4 to 5 minutes at HIGH. Stir after half<br />
the time.<br />
5. Mix together sauce ingredients and cover,<br />
microwave at HIGH for 2 minutes.<br />
6. Pour sauce over cooked ingredients and serve.<br />
Stuffed Clams<br />
[Ingredients]<br />
8 Clams<br />
40 g Pork, ground<br />
1 tsp Wine<br />
1 tsp Soy sauce<br />
1 tbsp Green onion,<br />
chopped<br />
1/2 Egg, beaten<br />
1 1 /2 tbsp Cornflour<br />
1/4 tsp Ginger juice<br />
1/2 tsp Salt<br />
1/4 tsp Sugar<br />
SEAFOOD<br />
[Method]<br />
1. Soak clams in salt water to remove sand. Clean<br />
clams thoroughly by rubbing shells against each<br />
other.<br />
2. Place clams in casserole, add 70 ml water, cover<br />
and microwave at HIGH for around 3 minites (or<br />
until shells open).<br />
3. Mix all other ingredients together and divide into<br />
8 portions.<br />
4. Stuff each portion into each empty half-shell of<br />
clam.<br />
5. Arrange all 16 half-shells on a platter, add 50 ml<br />
water and cover, microwave at HIGH for around<br />
3 to 3 minutes 30 seconds. Serve hot.<br />
E-26<br />
R-242R(S) [01 EN].indd 26<br />
12/22/09 8:14:23 AM
Fillet of Sole in Lemon Parsley Butter<br />
[Ingredients]<br />
1/2 cup Margarine or<br />
butter<br />
2 2 /3 tsp Plain flour<br />
2 2 /3 tbsp Fresh lemon<br />
juice<br />
1 tbsp Chopped parsley<br />
1/4 tsp Salt<br />
few Pepper<br />
few Celery seed<br />
500 g Sole or flounder fillets, fresh or<br />
frozen, thawed<br />
[Method]<br />
1. Place margarine in rectangular baking dish or<br />
25 cm square casserole. Microwave at HIGH for<br />
1 to 2 minutes until melted. Blend in remaining<br />
ingredients except fish fillets to make into butter<br />
sauce.<br />
2. Coat both sides of fish fillets with butter sauce.<br />
Arrange in the baking dish. Cover with plastic<br />
wrap. Microwave at HIGH for 7 to 8 minutes until<br />
fish flakes easily in centre with fork.<br />
Prawns with Chili Peppers<br />
[Ingredients]<br />
6 Prawns (about 200 g)<br />
2 Green onions<br />
8 Chili peppers<br />
3 tbsp Wine<br />
1 tbsp Cornflour<br />
2 slices Ginger<br />
1 tbsp Oil<br />
[Seasonings]<br />
1 1 /2 tbsp Soy sauce<br />
1 tbsp Sugar<br />
1 tbsp Vinegar<br />
[Method]<br />
1. Clean prawns, slit the back and remove the vein.<br />
Cut each into two or three pieces, and place in<br />
bowl. Sprinkle with wine and leave to marinate.<br />
2. Cut green onion into 5 cm lengths. Halve chili<br />
peppers and remove seeds.<br />
3. Remove prawns from wine, sprinkle with cornflour.<br />
4. Place prawns, green onion, chili pepper and<br />
ginger in casserole, add 1 tablespoon oil and stir<br />
well. Cover and microwave at HIGH for 2 minutes.<br />
Take out and stir. Add seasonings, stir well. Cover<br />
and microwave at HIGH for 2 minutes.<br />
5. Stir, serve hot.<br />
Steam Whole Fish<br />
[Ingredients]<br />
1 (300-400g) Fish<br />
1 stalk Spring onion<br />
3 slices Ginger<br />
[Seasonings]<br />
2 1 /2 tbsp Chinese wine<br />
1 1 /2 tbsp Soy sauce<br />
1/4 tsp White pepper<br />
1/2 tsp Salt<br />
1/2 tsp Sugar<br />
1 tbsp Oil<br />
few Parsley<br />
[Method]<br />
1. Unscale fish, remove the intestines, clean and<br />
drain. Make few slashes on each side of fish.<br />
2. Take half of spring onion, cut into two parts and<br />
pat. Chop the remaining spring onion.<br />
3. Place the patted spring onion in plate, add<br />
several slices ginger. Place fish on it. Top with<br />
mixed seasonings and 2 tablespoons of water.<br />
Cover and microwave at MED HIGH for 6 to<br />
8 minutes.<br />
4. Add 1 tablespoon of boiling oil on the fish.<br />
Decorate with chopped spring onion and parsley<br />
before serve.<br />
E-27<br />
R-242R(S) [01 EN].indd 27<br />
12/22/09 8:14:23 AM
Cold Bean Curd<br />
[Ingredients]<br />
1 block Bean curd<br />
110 g Ground pork or,<br />
ground beef<br />
1/4 cup Onion, chopped<br />
[Seasonings]<br />
1 tbsp Bean paste<br />
1 tbsp Soy sauce<br />
1/2 tbsp Sesame oil<br />
1 1 /2 tsp Sugar<br />
50 ml Water<br />
1 tsp Cornflour mixed with 2 tsp water<br />
Stuffed Potatoes with Mince Meat<br />
VEGETABLES<br />
[Method]<br />
1. Place bean curd in casserole, microwave at HIGH<br />
for 1 minute. Remove and soak in water. Drain<br />
and cut into pieces. Arrange on serving plate.<br />
2. Place meat and chopped onion in casserole,<br />
cover and microwave at HIGH for 3 minutes.<br />
Stir well after half the time, and remove excess<br />
oil. Add bean paste, soy sauce, sesame oil, sugar<br />
and water, stir well. Cover with the lid, microwave<br />
at HIGH for around 3 minutes, stir well after half.<br />
Check the color and doneness while cooking.<br />
3. Pour in the cornflour mixture and stir. Uncover<br />
and microwave at HIGH for another 40 seconds<br />
to 1 minute.<br />
4. Top bean curd with meat mixture. Garnish with<br />
lettuce, shredded green onion and cherries.<br />
[Ingredients]<br />
3 Potatoes (about 600 g)<br />
150 g Onion, minced<br />
100 g Ground beef<br />
50 g Green peas<br />
1 tsp Oil<br />
[Seasonings]<br />
1 tsp Salt<br />
20 g Butter<br />
Vegetable Platter<br />
[Ingredients]<br />
30 g Baby bamboo shoots, canned<br />
6 Cherry tomatoes<br />
6 Champignon mushrooms<br />
6 Baby cornshoots, canned<br />
6 Straw mushrooms, canned<br />
230 g Green vegetable<br />
14 Green asparagus, cut in half<br />
1 Carrot (sliced for decoration)<br />
3 slices Potato<br />
1/2 can Ginko nuts<br />
1 1 /2 tsp Salt<br />
800 ml Vegetable stock<br />
300 ml Stock mix with<br />
1 1 /2 tbsp cornstarch<br />
few Cooked oil<br />
[Method]<br />
1. Wash potatoes and drain. Pierce the skin of each<br />
potato with a fork or skewer to allow steam to<br />
escape.<br />
2. Place potatoes on the turntable, microwave at<br />
HIGH for 8 to 9 minutes, turn over after half the<br />
time. When done, cover with foil and set aside.<br />
3. Place minced onion and 1 teaspoon of oil in<br />
casserole, stir well. Cover and microwave at<br />
HIGH for 2 to 3 minutes. Stir after half the time.<br />
Check the color and doneness while cooking.<br />
4. Stir in ground beef , green peas and salt, cover<br />
and microwave at HIGH for 2 minutes. Stir after<br />
half the cooking time.<br />
5. Cut out the potatoes from the top, then hollow<br />
out potatoes with a spoon.<br />
6. Stuff potatoes with mixture from (4) and cover<br />
openings with potato pieces taken out from (5).<br />
7. Glaze thoroughly with butter. Place on a plate<br />
and microwave at HIGH for 2 minutes 30 seconds<br />
to 3 minutes. Serve hot.<br />
[Method]<br />
1. Clean all the vegetables. Place in casserole with<br />
salt and stock and microwave at HIGH for 1 minute<br />
30 secons to 2 minutes for each kind.<br />
2. Discard the stock each time.<br />
3. Dip tomatoes in boiling water; remove skin.<br />
4. Arrange vegetables colorfully on plate.<br />
5. Heat 300 ml of cornstarch in microwave at HIGH<br />
for 2 to 2 minutes 30 seconds until thicken. Pour<br />
over vegetables, sprinkle cooked fat oil on top<br />
and serve.<br />
NOTE Types of vegetables can vary or adjust<br />
according to personal taste.<br />
E-28<br />
R-242R(S) [01 EN].indd 28<br />
12/22/09 8:14:23 AM
EGGS<br />
Chawanmushi (Japanese Steam Eggs)<br />
[Ingredients]<br />
7 g Mushrooms, soaked, cut into halves<br />
60 g Prawns, shelled and deveined<br />
20 g Fish cake, cut at an angle<br />
80 g Chicken breast, cut into cubes<br />
400 ml Cold dashi soup<br />
4 Eggs<br />
1/2 tbsp Light soy sauce<br />
1/2 tsp Salt<br />
2 tsp “Mirin” (sweet cooking wine)<br />
1 stalk Parsley<br />
[Method]<br />
1. Blend dashi soup, light soy sauce, salt, Mirin,<br />
and eggs; beat lightly.<br />
2. Arrange chicken cubes, fish cake, mushrooms<br />
and prawns into 4 mug-like serving bowls.<br />
3. Strain beaten mixture from (1) into (2).<br />
4. Use a teaspoon to scoop excess bubbles from<br />
the surface of mixture.<br />
5. Cover the bowls with aluminium foil, prick a hole<br />
in the center and microwave on MED for 7 to<br />
9 minutes.<br />
NOTE Make sure that the foil do not touch<br />
each other, the turntable or the oven<br />
wall.<br />
6. Let it stand for 5 minutes.<br />
7. Garnish with parsley.<br />
Poached Eggs<br />
[Ingredients]<br />
4 Eggs<br />
few Oil<br />
[Method]<br />
1. Prepare a couple of small deep-bottomed heat<br />
resistant cooking dishes (such as small soup<br />
bowls). Have the inside of the dishes oiled thinly<br />
and break the eggs into one of each dish.<br />
2. To prevent the eggs in the dishes from bursting<br />
while they are being heated, prick 2 to 3 holes<br />
in the yolks in advance using a toothpick or the<br />
like.<br />
3. Place the dishes on the turntable in a circle,<br />
cover each of them with a cooking wrap, and<br />
microwave on MED LOW for 8 to 10 minutes.<br />
Quantity Cooking Time (MED LOW Power)<br />
1 Egg<br />
2 Eggs<br />
3 Eggs<br />
1’30” to 2’30”<br />
3’ to 4’<br />
5’ to 7’<br />
NOTE<br />
Be careful not to overheat eggs; they may burst.<br />
* The cooking time may vary depending on the<br />
size or freshness of the eggs; adjust the cooking<br />
time by carefully watching how they are being<br />
cooked in the oven.<br />
* When cooking one poached egg, place the dish<br />
in the middle of the turntable.<br />
Scrambled Eggs<br />
[Ingredients]<br />
1 Egg<br />
1 tbsp Milk<br />
[Seasonings]<br />
pinch Salt<br />
pinch Pepper<br />
[Method]<br />
1. Break the egg, put it into a heat-resistant cooking<br />
dish together with the milk, salt and pepper, and<br />
stir them well enough. Then place the dish in the<br />
middle of the turntable of the microwave oven,<br />
and cook, uncovered, on microwave HIGH for<br />
40 seconds to 1 minute.<br />
2. Stir the heated egg to small pieces.<br />
E-29<br />
R-242R(S) [01 EN].indd 29<br />
12/22/09 8:14:24 AM
DESSERTS<br />
Almond Bean Curd<br />
[Ingredients]<br />
2 tbsp Gelatin<br />
600 ml Water<br />
200 ml Milk<br />
3/4 tbsp Almond extract<br />
few Canned mixed fruits (with syrup)<br />
[Method]<br />
1. Put gelatin into casserole, add 600 ml water,<br />
cover and microwave at HIGH for 7 to 9 minutes,<br />
and stir until it dissolves completely.<br />
2. Add milk and almond extract and stir well.<br />
3. Pour into bowl, allow to set, and cool in<br />
refrigerator.<br />
4. Cut into diamond shapes, garnish with mixed<br />
fruits and syrup.<br />
Steam Raisin Cake<br />
[Ingredients]<br />
90 g Flour<br />
3 Eggs<br />
70 g White sugar<br />
50 g Raisins<br />
[Method]<br />
1. Sift flour well and set aside.<br />
2. Beat egg white in bowl until soft peaks form.<br />
3. Gradually add sugar, continue beating.<br />
4. Combine yolks and beaten egg white.<br />
5. Add flour and stir quickly.<br />
6. Add raisins and stir.<br />
7. Pour the mixture into a well greased mold. Cover<br />
with a paper towel and microwave at HIGH for<br />
3 to 4 minutes until the center part is cooked.<br />
Trifle<br />
[Ingredients]<br />
1 packet Port wine jelly crystals<br />
1 1 /2 cups Boiling water<br />
5 1 /3 tbsp Custard powder<br />
375 ml Milk<br />
1/2 cup Sugar<br />
1 tsp Vanilla essence<br />
1 cup Whipped cream<br />
12 Macaroons<br />
1 Madeira cake<br />
1/2 cup Sherry wine<br />
few Strawberries<br />
few Blueberries<br />
[Method]<br />
1. Dissolve jelly crystals in boiling watar. Refrigerate<br />
until partially set.<br />
2. Blend custard powder with milk; add sugar and<br />
vanilla essence. Cook on microwave HIGH for<br />
4 to 6 minutes, stirring twice during cooking.<br />
Cool.<br />
3. Fold half the whipped cream into custard.<br />
4. Arrange macaroons and cake in the base of<br />
4 individual serving dishes. Pour half the sherry<br />
wine over macaroons and cake. Top with a layer<br />
of strawberries, blueberries, jelly and custard.<br />
5. Repeat layers. Chill for 2 to 3 hours.<br />
6. Decorate with remaining whipped cream.<br />
E-30<br />
R-242R(S) [01 EN].indd 30<br />
12/22/09 8:14:24 AM
SHARP CORPORATION<br />
TINSZA208WRRZ-R01<br />
Printed in Thailand<br />
R-242R(S) [01 EN].indd 31<br />
1/18/10 11:38:35 AM