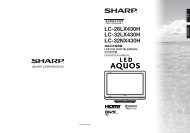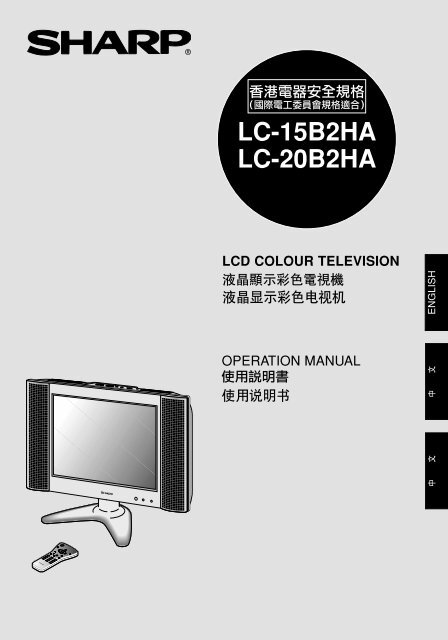
lc-15b2ha lc-20b2ha lcd colour television
lc-15b2ha lc-20b2ha lcd colour television
lc-15b2ha lc-20b2ha lcd colour television

Create successful ePaper yourself
Turn your PDF publications into a flip-book with our unique Google optimized e-Paper software.
MENU<br />
LC-15B2HA<br />
LC-20B2HA<br />
LCD COLOUR TELEVISION<br />
ENGLISH<br />
OPERATION MANUAL
LC-15B2HA<br />
LC-20B2HA<br />
LCD COLOUR TELEVISION<br />
ENGLISH<br />
OPERATION MANUAL<br />
ENGLISH<br />
CONTENTS<br />
Page<br />
DEAR SHARP CUSTOMER ................................ 2<br />
SAFETY PRECAUTIONS ................................2, 3<br />
SUPPLIED ACCESSORIES ................................ 4<br />
PREPARATION ................................................5, 6<br />
Preparing and Using the Remote Control .. 5<br />
Batteries for Remote Control ....................... 5<br />
Power Connection ......................................... 6<br />
Antenna Connection ...................................... 6<br />
LOCATION OF USERS CONTROL ........... 7, 8, 9<br />
BASIC OPERATION ............................. 10, 11, 12<br />
Turning on POWER...................................... 10<br />
Switching TV/VIDEO AV1/AV2/<br />
COMPONENT/TV Mode ............................. 10<br />
Sound Volume .............................................. 11<br />
ON/OFF Standby .......................................... 11<br />
Changing the Channels............................... 12<br />
SELECTING THE MENU ITEMS ....................... 13<br />
Selecting a Menu Item ................................. 13<br />
Page<br />
PRESET................................................. 14, 15, 16<br />
On-Screen Display Language Selection ... 14<br />
Presetting the Channels (AUTO) ................ 14<br />
Presetting the Channels (MANUAL) .......... 15<br />
Channel Setting ............................................ 16<br />
ADJUSTMENT .......................... 17, 18, 19, 20, 21<br />
Adjusting the SLEEP TIMER Setting ......... 17<br />
Adjusting the PICTURE Settings ........ 18, 19<br />
Adjusting the FEATURE Settings ....... 20, 21<br />
NICAM BROADCASTS SELECTION ............... 22<br />
IGR (German stereo system) BROADCASTS .... 23<br />
CONNECTING WITH EXTERNAL<br />
DEVICES ............................................. 24, 25, 26<br />
LISTENING WITH HEADPHONES ................... 26<br />
TROUBLESHOOTING ................................ 27, 28<br />
HOW TO FIX THE CABLES .............................. 28<br />
SPECIFICATIONS.............................................. 29<br />
DIMENSIONAL DRAWINGS ...................... 30, 31<br />
1
DEAR SHARP CUSTOMER<br />
Thank you for your purchase of the Sharp LCD Colour TV product. To ensure safety<br />
and many years of trouble-free operation of your product, please read the Safety<br />
Precautions carefully before using this product.<br />
SAFETY PRECAUTIONS<br />
Electricity is used to perform many useful functions, but it can also cause personal injuries and property<br />
damage if improperly handled. This product has been engineered and manufactured with the highest<br />
priority on safety. However, improper use can result in electric shock and/or fire. In order to prevent<br />
potential danger, please observe the following instructions when installing, operating and cleaning the<br />
product. To ensure your safety and prolong the service life of your LCD <strong>colour</strong> TV product, please read<br />
the following precautions carefully before using the product.<br />
■ Read instructions—All operating instructions must be read and understood before the product is<br />
operated.<br />
■ Keep this manual in a safe place—These safety and operating instructions must be kept in a safe<br />
place for future reference.<br />
■ Observe warnings—All warnings on the product and in the instructions must be observed closely.<br />
■ Follow instructions—All operating instructions must be followed.<br />
■ Attachments—Do not use attachments not recommended by the manufacturer. Use of inadequate<br />
attachments can result in accidents.<br />
■ Power source—This product must operate on a power source specified on the specification label.<br />
If you are not sure of the type of power supply used in your home, consult your dealer or local<br />
power company. For units designed to operate on batteries or another power source, refer to the<br />
operating instructions.<br />
■ Power cord protection—The power cords must be routed properly to prevent people from stepping<br />
on them or objects from resting on them. Check the cords at the plugs and product.<br />
■ If you plan to use a DC power supply unit other than the AC adapter supplied with the product,<br />
make sure the power supply unit provides stable voltage with minimum fluctuations. Unstable<br />
power supply can cause problems in the product.<br />
■ Overloading—Do not overload AC outlets or extension cords.<br />
Overloading can cause fire or electric shock.<br />
■ Entering of objects and liquids—Never insert an object into the product through vents or openings.<br />
High voltage flows in the product, and inserting an object can cause electric shock and/or short<br />
internal parts. For the same reason, do not spill water or liquid on the product.<br />
■ Servicing—Do not attempt to service the product yourself. Removing covers can expose you to<br />
high voltage and other dangerous conditions. Request a qualified service person to perform<br />
servicing.<br />
■ Repair—If any of the following conditions occurs, unplug the power cord from the AC outlet, and<br />
request a qualified service person to perform repairs.<br />
a.When the power cord or plug is damaged.<br />
b.When a liquid was spilled on the product or when objects have fallen into the product.<br />
c. When the product has been exposed to rain or water.<br />
d.When the product does not operate properly as described in the operating instructions.<br />
Do not touch the controls other than those described in the operating instructions. Improper<br />
adjustment of controls not described in the instructions can cause damage, which often requires<br />
extensive adjustment work by a qualified technician.<br />
e.When the product has been dropped or damaged.<br />
f. When the product displays an abnormal condition. Any noticeable abnormality in the product<br />
indicates that the product needs servicing.<br />
■ Replacement parts—In case the product needs replacement parts, make sure that the service<br />
person uses replacement parts specified by the manufacturer, or those with the same characteristics<br />
and performance as the original parts. Use of unauthorized parts can result in fire, electric<br />
shock and/or other danger.<br />
■ Safety checks—Upon completion of service or repair work, request the service technician to<br />
perform safety checks to ensure that the product is in proper operating condition.<br />
■ Wall or ceiling mounting—When mounting the product on a wall or ceiling, be sure to install the<br />
product according to the method recommended by the manufacturer.<br />
2
SAFETY PRECAUTIONS (Continued)<br />
■<br />
Cleaning—Unplug the power cord from the AC outlet before<br />
cleaning the product. Use a damp cloth to clean the product. Do<br />
not use liquid cleaners or aerosol cleaners.<br />
■<br />
Water and moisture—Do not use the product near water, such as<br />
bathtub, washbasin, kitchen sink and laundry tub, swimming pool<br />
and in a wet basement.<br />
■<br />
Stand—Do not place the product on an unstable cart, stand,<br />
tripod or table. Placing the product on an unstable base can<br />
cause the product to fall, resulting in serious personal injuries as<br />
well as damage to the product. Use only a cart, stand, tripod,<br />
bracket or table recommended by the manufacturer or sold with<br />
the product. When mounting the product on a wall, be sure to<br />
follow the manufacturer’s instructions. Use only the mounting<br />
hardware recommended by the manufacturer.<br />
■<br />
When relocating the product placed on a cart, it must be moved<br />
with utmost care. Sudden stops, excessive force and uneven<br />
floor surface can cause the product to fall from the cart.<br />
■<br />
Ventilation—The vents and other openings in the cabinet are<br />
designed for ventilation. Do not cover or block these vents and<br />
openings since insufficient ventilation can cause overheating and/<br />
or shorten the life of the product. Do not place the product on a<br />
bed, sofa, rug or other similar surface, since they can block<br />
ventilation openings. This product is not designed for built-in<br />
installation; do not place the product in an enclosed place such<br />
as a bookcase or rack, unless proper ventilation is provided or<br />
the manufacturer’s instructions are followed.<br />
■<br />
The LCD panel used in this product is made of glass. Therefore,<br />
it can break when the product is dropped or applied with impact.<br />
Be careful not to be injured by broken glass pieces in case the<br />
LCD panel breaks.<br />
■<br />
Heat sources—Keep the product away from heat sources such<br />
as radiators, heaters, stoves and other heat-generating products<br />
(including amplifiers).<br />
■<br />
The LCD panel is a very high technology product with 921,600 thin film transistors, giving you fine<br />
picture details.<br />
Occasionally, a few non-active pixels may appear on the screen as a fixed point of blue, green or<br />
red.<br />
Please note that this does not affect the performance of your product.<br />
3
MENU<br />
SUPPLIED ACCESSORIES<br />
Make sure the following accessories are provided with the product.<br />
LC-15B2HA<br />
LC-20B2HA<br />
LCD COLOUR TELEVISION<br />
ENGLISH<br />
OPERATION MANUAL<br />
Operation Manual (×1)<br />
AC Cord<br />
Wireless Remote Control (×1)<br />
AC Adapter (×1)<br />
“AAA” size (UM/SUM-4) dry battery (×2)<br />
Cable clamp (×2)<br />
Antenna Cable (×1)<br />
4
PREPARATION<br />
Preparing and Using the Remote Control<br />
■ Use the remote control by pointing it towards the remote sensor window.<br />
Objects between the remote control and sensor window may prevent proper<br />
operation.<br />
Cautions regarding use of remote control<br />
■ Do not expose the remote control to shock.<br />
In addition, do not expose the remote control to liquids, and do not place in<br />
an area with high humidity.<br />
■ Do not install or place the remote control under direct sunlight.<br />
The heat may cause deformation of the unit.<br />
■ The remote control may not work properly if the remote sensor window of the<br />
main unit is under direct sunlight or strong lighting. In such case, change the<br />
angle of the lighting or LCD TV set, or operate the remote control closer to<br />
the remote sensor window.<br />
Batteries for Remote Control<br />
If the remote control fails to operate LCD <strong>colour</strong> TV functions, replace the batteries in the remote<br />
control.<br />
1 Open the battery<br />
cover.<br />
2 Insert batteries [two<br />
“AAA” size (UM/SUM-4)<br />
batteries, supplied with<br />
product].<br />
3 Close the battery<br />
cover.<br />
■ Slide the cover while<br />
pressing the ([) part.<br />
■ Place batteries with their<br />
terminals corresponding to<br />
the (+) and (–) indications<br />
in the battery compartment.<br />
– Caution!<br />
Cautions regarding batteries<br />
Improper use of batteries can result in a leakage of chemicals and/or explosion. Be sure to follow the<br />
instructions below.<br />
• Place batteries with their terminals corresponding to the (+) and (–) indications.<br />
• Different types of batteries have different characteristics. Do not mix batteries of different types.<br />
• Do not mix old and new batteries. Mixing old and new batteries can shorten the life of new<br />
batteries and/or cause old batteries to leak chemicals.<br />
• Remove batteries as soon as they are non-operable.<br />
Chemicals that leak from batteries can cause a rash. If chemical leakage is found, wipe with a<br />
cloth.<br />
• The batteries supplied with the product may have a shorter life expectancy due to storage conditions.<br />
• If the remote control is not used for an extended period of time, remove batteries from the remote<br />
control.<br />
5
VIDEO<br />
AV-IN2/OUT<br />
L<br />
AUDIO<br />
R<br />
COMPONENT<br />
Y<br />
PB<br />
PR<br />
VIDEO<br />
L<br />
AV-IN1<br />
AUDIO<br />
R<br />
S-VIDEO<br />
HEAD<br />
PHONE<br />
ANT.<br />
POWER<br />
INPUT<br />
DC13V<br />
VIDEO<br />
AV-IN2/OUT<br />
L<br />
AUDIO<br />
R<br />
COMPONENT<br />
Y<br />
PB<br />
PR<br />
VIDEO<br />
L<br />
AV-IN1<br />
AUDIO<br />
R<br />
S-VIDEO<br />
HEAD<br />
PHONE<br />
ANT.<br />
POWER<br />
INPUT<br />
DC13V<br />
PREPARATION (Continued)<br />
Power Connection<br />
Pull down the hook<br />
to open the cover.<br />
Connect to the DC input<br />
terminal of the product.<br />
VOL CH MENU TV/VIDEO MAIN POWER<br />
Pull down the hook<br />
to open the cover.<br />
Household<br />
power outlet<br />
Plug into AC<br />
outlet.<br />
L<br />
AUDIO<br />
R<br />
To DC input<br />
terminal<br />
AC cord<br />
AC adapter<br />
Note:<br />
• Always turn the main power switch of the LCD TV set to OFF when connecting the AC adapter.<br />
• Always unplug the AC adapter from the product and power outlet when not using for long periods of time.<br />
Antenna Connection<br />
• Using the supplied antenna cable, connect the room<br />
antenna terminal to the antenna input terminal on the<br />
TV set. (Refer to the figure below.)<br />
VOL CH MENU TV/VIDEO MAIN POWER<br />
L<br />
AUDIO<br />
R<br />
Room antenna terminal<br />
(75-ohm type)<br />
Antenna cable (supplied)<br />
To antenna input terminal<br />
6
POWER SLEEP<br />
LOCATION OF USERS CONTROL<br />
Main unit (front view)<br />
Upper control panel<br />
LC-20B2HA<br />
VOL CH<br />
MENU TV/VIDEO MAIN POWER<br />
2<br />
PRESET 1<br />
TV/VIDEO<br />
VOL (-)/(+)<br />
CH( )/( )<br />
MENU<br />
MAIN POWER<br />
LC-15B2HA<br />
2<br />
PRESET 1<br />
VOL CH<br />
MENU TV/VIDEO MAIN POWER<br />
Speaker<br />
Speaker<br />
To change the vertical<br />
angle of the LCD TV set,<br />
tilt the screen up to 5<br />
degrees forward or 10<br />
degrees backward. The<br />
TV set can also be<br />
rotated 50 degrees<br />
horizontally. Please adjust<br />
the angle so that the TV<br />
set can be watched most<br />
comfortably.<br />
Remote sensor window<br />
(The actual location is not visible.)<br />
SLEEP indicator<br />
The SLEEP indicator lights up red when<br />
the SLEEP TIMER is set to on.<br />
Power/Standby indicator<br />
A green indicator lights when the power is on<br />
and a red indicator lights when in the standby<br />
mode (the indicator will not light when the main<br />
power is off).<br />
* The examples used throughout this manual are based on the LC-20B2HA<br />
model. There may be a slight difference in the illustrations, if you are<br />
Note:<br />
• TV/VIDEO, CH ( )/(<br />
using the LC-15B2HA model.<br />
), and VOL (–)/(+) on the main unit have the same functions as the same buttons on the<br />
remote control. Fundamentally, this operation manual provides a description based on operation with the remote<br />
control.<br />
7
VIDEO<br />
AV-IN2/OUT<br />
L<br />
AUDIO<br />
R<br />
COMPONENT<br />
Y<br />
PB<br />
PR<br />
L<br />
AUDIO<br />
R<br />
VIDEO<br />
AV-IN1<br />
L<br />
AUDIO<br />
R<br />
S-VIDEO<br />
HEAD<br />
PHONE<br />
ANT.<br />
POWER<br />
INPUT<br />
DC13V<br />
LOCATION OF USERS CONTROL (Continued)<br />
Main unit (rear view)<br />
VIDEO<br />
AV-IN2/OUT<br />
L<br />
AUDIO<br />
R<br />
COMPONENT<br />
Y<br />
PB<br />
PR<br />
L<br />
AUDIO<br />
R<br />
VIDEO<br />
AUDIO (L)<br />
AUDIO (R)<br />
Y<br />
PB<br />
PR<br />
AUDIO (L)<br />
AUDIO (R)<br />
AV-IN2/OUT<br />
COMPONENT<br />
VOL CH MENU TV/VIDEO MAIN POWER<br />
Carrying handle<br />
AV-IN1<br />
VIDEO<br />
AUDIO (L)<br />
AUDIO (R)<br />
S-VIDEO<br />
VIDEO<br />
AV-IN1<br />
L<br />
AUDIO<br />
R<br />
S-VIDEO<br />
HEADPHONE<br />
HEAD<br />
PHONE<br />
Antenna terminal<br />
ANT.<br />
POWER INPUT<br />
DC 12V(LC-15B2HA)/<br />
DC 13V(LC-20B2HA)<br />
POWER<br />
INPUT<br />
DC13V<br />
8
LOCATION OF USERS CONTROL (Continued)<br />
Remote control<br />
DISPLAY<br />
Press....Displays receiving channel for 10 seconds.<br />
Channel indication reduces in size after<br />
about 10 seconds.<br />
Press again...Removes display.<br />
POWER<br />
POWER<br />
SLEEP<br />
MENU cursor<br />
(Upward/Downward Selection)<br />
SLEEP<br />
DISPLAY<br />
MENU<br />
BRIGHT<br />
MENU<br />
BRIGHT<br />
The brightness can be<br />
switched between 3 levels.<br />
MUTE<br />
Press....Stops sound.<br />
Press again...Returns<br />
sound to previous level.<br />
VOL (+)/(–)<br />
CHANNEL SELECT<br />
VOL<br />
CH<br />
TV/VIDEO<br />
TV/VIDEO<br />
MENU cursor<br />
(Right/Left Selection)<br />
FLASHBACK<br />
Returns to previous channel.<br />
CH ( )/( )<br />
Selects next higher channel.<br />
Selects next lower channel.<br />
MPX -/--<br />
MPX<br />
Switches Audio mode.<br />
9
BASIC OPERATION<br />
Turning on POWER<br />
Control section of main unit<br />
MAIN POWER<br />
1 Press MAIN POWER, located on<br />
the upper part of the main unit to<br />
ON.<br />
2 The POWER/STANDBY indicator<br />
instantaneously changes from red<br />
to green and the main unit is turned<br />
on.<br />
Note:<br />
• Input mode indication disappears after<br />
several seconds.<br />
▼ On-Screen Display<br />
Power/Standby indicator<br />
Switching TV/VIDEO AV1/AV2/COMPONENT/TV Mode<br />
POWER<br />
SLEEP<br />
DISPLAY<br />
MENU<br />
TV/VIDEO<br />
BRIGHT<br />
POWER<br />
TV/VIDEO<br />
1 Turn on the power of the connected<br />
video equipment.<br />
2 Press TV/VIDEO and select the<br />
applicable input source. The screen<br />
displays AV1, AV2, COMPONENT<br />
or TV mode at the upper right<br />
corner each time TV/VIDEO is<br />
pressed.<br />
AV1 mode<br />
I<br />
VOL<br />
CH<br />
MPX -/--<br />
Note:<br />
• AV input mode indication remains for<br />
five seconds.<br />
• AV1: Video equipment connected to<br />
the AV1 input terminals.<br />
An S-video input terminal is<br />
additionally provided for the AV1<br />
input. If both S-video terminal and<br />
normal video terminals are<br />
connected with cables, the S-<br />
video input terminal is selected<br />
as the high priority.<br />
• AV2: AV2 mode is used to adjust the<br />
preset settings and IN or OUT can<br />
be selected. AV2 indication is not<br />
displayed when OUT is selected.<br />
(For details on setting AV-OUT,<br />
see page 21.)<br />
• COMPONENT:<br />
Video equipment connected to the<br />
COMPONENT input terminals.<br />
AV2 mode<br />
COMPONENT mode<br />
COMPONENT<br />
TV mode<br />
I<br />
I<br />
10
BASIC OPERATION (Continued)<br />
Sound Volume<br />
POWER<br />
SLEEP<br />
DISPLAY<br />
BRIGHT<br />
POWER<br />
MUTE<br />
1 Press VOL (+) to increase sound<br />
volume. The segment of indicator<br />
increases.<br />
MENU<br />
TV/VIDEO<br />
VOL<br />
CH<br />
VOL(+)/(–)<br />
2 Press VOL (–) to decrease sound<br />
volume. The segment of indicator<br />
decreases.<br />
MPX -/--<br />
To mute sound<br />
1 Press MUTE to temporarily turn off<br />
the sound.<br />
Screen displays the MUTE mark.<br />
2 Press MUTE or VOL (+)/(–) to turn<br />
the sound back to the previous level.<br />
MUTE is automatically cleared when<br />
the following buttons are pressed:<br />
POWER, VOL (+)/(–), MUTE.<br />
ON/OFF Standby<br />
POWER<br />
SLEEP<br />
DISPLAY<br />
MENU<br />
BRIGHT<br />
POWER<br />
To turn off the LCD TV<br />
Press POWER on the remote control.<br />
The Power/Standby indicator will turn<br />
red. (Standby position)<br />
TV/VIDEO<br />
To turn the LCD TV back on<br />
VOL<br />
CH<br />
Press POWER again.<br />
The Power/Standby indicator will turn<br />
green.<br />
MPX -/--<br />
11
BASIC OPERATION (Continued)<br />
Changing the Channels<br />
Changing channels using CHANNEL SELECT on the remote control<br />
• To handle the increasing number of channels available, this LCD TV set allows you to select up to<br />
100 positions (Channels 0 to 99). One-digit and two-digit methods of selection can be used. Follow<br />
the procedure shown below to select channels.<br />
POWER<br />
DISPLAY<br />
SLEEP<br />
BRIGHT<br />
MENU<br />
TV/VIDEO<br />
VOL<br />
CH<br />
MPX -/--<br />
CH ( )/<br />
( )<br />
CHANNEL<br />
SELECT<br />
To select a one-digit channel<br />
(e.g., Channel 5):<br />
1 Press the button.<br />
2 If “5-” is indicated and the picture<br />
does not change, press the -/--<br />
button to switch over to the 1-digit<br />
select mode and press again.<br />
To select a two-digit channel<br />
(e.g., Channel 15):<br />
1 Press the -/-- button to set the<br />
2-digit select mode.<br />
2 Press the button.<br />
3 Press the button.<br />
Note:<br />
• Complete this procedure within 4 seconds,<br />
otherwise the selection will not be made.<br />
Changing channels with CH ( )/( ) on the remote control.<br />
Press CH ( ) and the channels change in the order shown below:<br />
1 → 2 → 3 → . . . → 98 → 99 → 0 → 1 → 2 → 3 → . . .<br />
Press CH ( ) and the channels change in the order shown below:<br />
3 → 2 → 1 → 0 → 99 → 98 → . . . → 3 → 2 → 1 → . . .<br />
12
SELECTING THE MENU ITEMS<br />
Selecting a Menu Item<br />
• This LCD TV set allows you to adjust the picture and sound, and set the channels and other features<br />
using the On-Screen Display. Select the desired menu item by following the steps below and then refer<br />
to the indicated page for details.<br />
POWER<br />
SLEEP<br />
VOL<br />
DISPLAY<br />
MENU<br />
CH<br />
TV/VIDEO<br />
BRIGHT<br />
<br />
MENU<br />
]/[<br />
1 Press MENU to display the MENU<br />
screen.<br />
2 Press ]/[ to select the desired<br />
menu item.<br />
• The “ ” mark moves up or down.<br />
• The “ ” mark indicates the selected<br />
menu item.<br />
3 Press to enter.<br />
SLEEP TIMER<br />
menu ----------------- Page 17<br />
PICTURE (TV)<br />
RETURN<br />
CONTRAST [ 30]<br />
COLOUR [ 0]<br />
BLACK LEVEL [ 0]<br />
SHARPNESS [ 0]<br />
RED-BLUE [ 0]<br />
GREEN [ 0]<br />
RESET<br />
SELECT: ENTER: EXIT:<br />
MENU<br />
PICTURE menu<br />
(TV mode) ---------- Page 18<br />
MPX -/--<br />
MENU<br />
SLEEP TIMER<br />
PICTURE<br />
FEATURE<br />
CH-SETTING<br />
PICTURE (TV)<br />
RETURN<br />
CONTRAST [ 30]<br />
COLOUR [ 0]<br />
BLACK LEVEL [ 0]<br />
SHARPNESS [ 0]<br />
RED-BLUE [ 0]<br />
GREEN [ 0]<br />
RESET<br />
SELECT: ENTER: EXIT:<br />
MENU<br />
SELECT: ENTER: EXIT: MENU<br />
(AV mode) --------- Page 18<br />
Note:<br />
• The TINT display only appears when<br />
the COLOUR SYSTEM sets N358 or<br />
N443 in the NTSC mode.<br />
• The displayed items differ depending<br />
on the setting conditions.<br />
• The selected item changes to yellow.<br />
• Items in purple cannot be selected.<br />
PICTURE (AV1/AV2/COMPONENT)<br />
RETURN<br />
CONTRAST [ 30]<br />
TINT [ 0]<br />
COLOUR [ 0]<br />
BLACK LEVEL [ 0]<br />
SHARPNESS [ 0]<br />
RED-BLUE [ 0]<br />
GREEN [ 0]<br />
COLOUR SYSTEM [AUTO]<br />
RESET<br />
SELECT: ENTER: EXIT: MENU<br />
FEATURE menu --- Page 20<br />
FEATURE<br />
RETURN<br />
BRIGHTNESS [BRIGHT ]<br />
AUTO POWER [OFF ]<br />
OFF<br />
UPSIDE [NORMAL ]<br />
RIGHT/LEFT [NORMAL ]<br />
AV2 IN/OUT [IN ]<br />
BLUE BACK [ON ]<br />
LANGUAGE<br />
[ENGLISH]<br />
SELECT: ADJUST: EXIT:<br />
MENU<br />
CH-SETTING<br />
menu ---------------- Page 16<br />
CH-SETTING<br />
RETURN<br />
POSITION [CH15 ]<br />
COLOUR SYSTEM [AUTO ]<br />
SOUND SYSTEM [ I ]<br />
SKIP [OFF ]<br />
FINE<br />
[783.25MHz]<br />
[ON ]<br />
NICAM<br />
IGR [ON ]<br />
SELECT: ADJUST: EXIT:<br />
MENU<br />
* The screen indications shown above are larger than actual for easy reading.<br />
13
PRESET<br />
On-Screen Display Language Selection<br />
Upper control panel<br />
VOL CH MENU TV/VIDEO<br />
2 PRESET 1<br />
3<br />
1,2,4<br />
* In this example, the LC-20B2HA<br />
model is used. Refer to page 7<br />
if you are using the LC-15B2HA<br />
model.<br />
■<br />
MENU on the LCD TV set can also<br />
be used to select the language.<br />
1 Press MENU on the upper part of<br />
the LCD TV set for more than two<br />
seconds to display the PRESET<br />
mode screen.<br />
2 Press MENU twice to display the<br />
LANGUAGE select mode screen.<br />
Press MENU again to change the<br />
PRESET mode as shown below.<br />
AUTO → MANUAL → LANGUAGE →<br />
NORMAL<br />
SCREEN<br />
UHF<br />
471.25MHz<br />
Note:<br />
• Instead of pressing MENU for more<br />
than two seconds, you can display the<br />
LANGUAGE select mode by selecting<br />
FEATURE → LANGUAGE on the<br />
Menu screen.<br />
3 Press CH ( )/( ) to select the<br />
language you wish to display.<br />
4 Press MENU to return to the<br />
normal screen.<br />
SELECT:<br />
LANGUAGE<br />
ENGLISH<br />
EXIT:<br />
MENU<br />
Presetting the Channels (AUTO)<br />
Upper control panel<br />
VOL CH MENU TV/VIDEO<br />
2 PRESET 1<br />
2<br />
1<br />
POWER<br />
DISPLAY<br />
SLEEP<br />
BRIGHT<br />
MENU<br />
TV/VIDEO<br />
VOL<br />
CH<br />
MPX -/--<br />
MENU<br />
■<br />
Automatically tunes in and presets<br />
receivable TV stations.<br />
Make sure the antenna cable is<br />
properly connected.<br />
1 Press MENU (PRESET-1) on the<br />
upper part of the LCD TV set for<br />
more than two seconds. The<br />
AUTO mode screen appears.<br />
2 Press VOL (–)/(+) (PRESET-2)<br />
on the upper part of the LCD TV<br />
set.<br />
All the TV stations in your area<br />
that can be received by the LCD<br />
TV set are automatically preset.<br />
3 The screen shows whatever is on<br />
channel 1 when full auto channel<br />
preset is finished.<br />
Note:<br />
• When starting PRESET after setting<br />
the SOUND SYSTEM with MENU of<br />
the Remote Control, the SOUND<br />
SYSTEM for all channels are stored<br />
into memory.<br />
• Unused channels are automatically<br />
skipped.<br />
• The Preset mode is only available in<br />
the TV mode and cannot be operated<br />
in the AV mode.<br />
(Auto mode screen)<br />
Sound System<br />
UHF<br />
471.25MHz<br />
14
➡ ➡<br />
PRESET (Continued)<br />
Presetting the Channels (MANUAL)<br />
Upper control panel<br />
VOL CH MENU TV/VIDEO<br />
POWER<br />
SLEEP<br />
VOL<br />
2 PRESET 1<br />
4<br />
DISPLAY<br />
MENU<br />
CH<br />
MPX -/--<br />
TV/VIDEO<br />
BRIGHT<br />
3<br />
Upper control panel<br />
MENU<br />
1,2,6<br />
VOL(+)/(–)<br />
CH ( )/( )<br />
CHANNEL<br />
SELECT<br />
VOL CH MENU TV/VIDEO<br />
2 PRESET 1<br />
4<br />
1,2,3,5<br />
■<br />
1 Press MENU (PRESET-1) on the<br />
upper part of the LCD TV set for<br />
more than two seconds. The<br />
AUTO mode screen appears.<br />
2 Press MENU (PRESET-1) to<br />
display the MANUAL mode screen.<br />
Press MENU (PRESET-1) again<br />
to change the MANUAL mode as<br />
shown below.<br />
3 Select the channel position using<br />
CHANNEL SELECT or<br />
CH ( )/( ).<br />
4 Press VOL (+)/(–) to locate the<br />
channel you want to preset to the<br />
position. Search is initiated and<br />
when a TV signal is received<br />
during the search, the search<br />
stops.<br />
5 Repeat steps 3 and 4 above, to<br />
preset the channel positions for<br />
other broadcasts, etc.<br />
6 Press MENU (PRESET-1) to<br />
return to the normal screen.<br />
■<br />
Setting a channel to a desired TV<br />
station:<br />
AUTO → MANUAL → LANGUAGE → NORMAL<br />
SCREEN<br />
Note:<br />
• SOUND SYSTEM may not have been<br />
set correctly, if noise can be heard or<br />
if there is no sound.<br />
In such case, reset to SOUND<br />
SYSTEM using MENU.<br />
In a weak reception area, or under<br />
bad reception conditions.<br />
1 Press MENU (PRESET-1) on the<br />
upper part of the LCD TV set for<br />
more than two seconds. The<br />
AUTO mode screen appears.<br />
2 Press MENU (PRESET-1) to<br />
display the MANUAL mode screen.<br />
3 While the MANUAL mode screen<br />
is displayed, press MENU for more<br />
than 2 seconds.<br />
The channel position number<br />
remains in green.<br />
Note:<br />
• While the MANUAL mode screen is<br />
displayed, press MENU.<br />
(The LANGUAGE mode screen will<br />
appear.)<br />
4 Adjust for good reception using<br />
VOL (+)/(–).<br />
5 After finishing the adjustment,<br />
press MENU (PRESET-1) to<br />
continue channel presetting.<br />
UHF<br />
471.25MHz<br />
Sound System<br />
Auto mode screen<br />
UHF<br />
471.25MHz<br />
Manual mode screen<br />
UHF<br />
623.25MHz<br />
UHF<br />
471.25MHz<br />
UHF<br />
471.25MHz<br />
UHF<br />
623.25MHz<br />
LANGUAGE<br />
ENGLISH<br />
Channel position<br />
number<br />
SELECT:<br />
EXIT:<br />
MENU<br />
15
PRESET (Continued)<br />
Channel Setting<br />
POWER<br />
DISPLAY<br />
SLEEP<br />
BRIGHT<br />
MENU<br />
TV/VIDEO<br />
VOL<br />
CH<br />
MPX -/--<br />
<br />
MENU<br />
]/[<br />
CHANNEL<br />
SELECT<br />
1 Press MENU to display the MENU<br />
screen.<br />
2 Press ]/[ to move the cursor to<br />
CH-SETTING.<br />
3 Press to display<br />
CH-SETTING screen.<br />
4 Press ]/[ to select the desired<br />
function mode.<br />
5 Each time you press , the<br />
setting for individual items is as<br />
mentioned under Selected item:<br />
6 Press MENU to return to the<br />
normal screen.<br />
(MENU screen)<br />
MENU<br />
SLEEP TIMER<br />
PICTURE<br />
FEATURE<br />
CH-SETTING<br />
SELECT: ENTER: EXIT: MENU<br />
(CH-SETTING screen)<br />
CH-SETTING<br />
RETURN<br />
POSITION [CH15 ]<br />
COLOUR SYSTEM [AUTO ]<br />
SOUND SYSTEM [ I ]<br />
SKIP [OFF ]<br />
FINE<br />
[783.25MHz]<br />
[ON ]<br />
NICAM<br />
IGR [ON ]<br />
Selected item<br />
• POSITION:<br />
The channel position changes to the upper or lower number.<br />
• COLOUR SYSTEM:<br />
The mode changes in the following order:<br />
AUTO<br />
PAL<br />
SECAM<br />
N358<br />
SELECT: ADJUST: EXIT:<br />
MENU<br />
PAL-N<br />
PAL-M<br />
N443<br />
• SOUND SYSTEM:<br />
The mode changes in the following order:<br />
I D/K M B/G<br />
• SKIP:<br />
The mode changes in the following order:<br />
ON ←→ OFF<br />
Channel numbers with a “| (RED)” mark on the left are set to SKIP.<br />
To turn off SKIP, press CHANNEL SELECT to select the desired channel, and then set<br />
the SKIP mode on the CH-SETTING menu to “OFF”.<br />
• FINE:<br />
The frequency changes to allow fine tuning.<br />
• NICAM:<br />
The broadcast sound system changes in the following order:<br />
ON (NICAM sound) ←→ OFF (Monaural TV sound)<br />
• IGR:<br />
German Stereo system changes in the following order:<br />
ON (IGR sound) ←→ OFF (Monaural TV sound)<br />
Note:<br />
• Switching COLOUR SYSTEM<br />
Set the system to AUTO for normal TV reception. The AUTO mode automatically detects the receiving signal<br />
system and changes the reception system of the LCD TV set. When the picture or sound is not stable, switching to<br />
an appropriate system may improve the picture or sound quality.<br />
• When using FINE tuning, the channel number changes from green to yellow.<br />
• To return the channel to its original frequency setting, follow the manual channel preset procedure. (Please see<br />
page 15 “Presetting the Channels (MANUAL)” for details.)<br />
• In AV mode, items in purple cannot be selected.<br />
16
ADJUSTMENT<br />
Adjusting the SLEEP TIMER Setting<br />
POWER<br />
SLEEP<br />
VOL<br />
DISPLAY<br />
MENU<br />
CH<br />
TV/VIDEO<br />
BRIGHT<br />
SLEEP<br />
<br />
MENU<br />
]/[<br />
To use Direct Key function<br />
1 Press SLEEP to display the<br />
SLEEP TIMER screen.<br />
2 Press SLEEP to set the sleep<br />
timer (in minutes).<br />
• Each time you press SLEEP, the<br />
timer changes as follows:<br />
60 REMAIN<br />
--- 30 60 90 120<br />
MPX -/--<br />
The setting is turned off when --- is<br />
displayed.<br />
3 Press MENU to return to the main<br />
screen.<br />
To use MENU item<br />
1 Press MENU to display the MENU<br />
screen.<br />
MENU<br />
SLEEP TIMER<br />
PICTURE<br />
FEATURE<br />
CH-SETTING<br />
SELECT: ENTER: EXIT:<br />
MENU<br />
2 Press ]/[ to move the cursor to<br />
SLEEP TIMER.<br />
MENU<br />
SLEEP TIMER<br />
PICTURE<br />
FEATURE<br />
CH-SETTING<br />
SELECT: ENTER: EXIT:<br />
MENU<br />
3 Press to display the SLEEP<br />
TIMER screen.<br />
4 Press to set the sleep timer<br />
(in minutes).<br />
The setting can be set in<br />
increment of 30 minutes and in the<br />
range between 30 and 120<br />
minutes.<br />
SLEEP TIMER<br />
RETURN<br />
SLEEP TIMER [120REMAIN]<br />
SELECT: ADJUST: EXIT: MENU<br />
The setting is turned off when --- is<br />
displayed.<br />
5 Press MENU to return to the main<br />
screen.<br />
17
ADJUSTMENT (Continued)<br />
Adjusting the PICTURE Settings<br />
POWER<br />
DISPLAY<br />
<br />
1 Press MENU to display the MENU<br />
screen.<br />
MENU<br />
SLEEP TIMER<br />
PICTURE<br />
FEATURE<br />
SLEEP<br />
BRIGHT<br />
CH-SETTING<br />
MENU<br />
MENU<br />
TV/VIDEO<br />
]/[<br />
SELECT: ENTER: EXIT:<br />
MENU<br />
VOL<br />
CH<br />
MPX -/--<br />
2 Press ]/[ to move the cursor to<br />
PICTURE.<br />
MENU<br />
SLEEP TIMER<br />
PICTURE<br />
FEATURE<br />
CH-SETTING<br />
SELECT: ENTER: EXIT:<br />
MENU<br />
3 Press to display the<br />
PICTURE menu screen.<br />
PICTURE (TV)<br />
RETURN<br />
CONTRAST [ 30]<br />
COLOUR [ 0]<br />
BLACK LEVEL [ 0]<br />
SHARPNESS [ 0]<br />
RED-BLUE [ 0]<br />
GREEN [ 0]<br />
RESET<br />
SELECT: ENTER: EXIT:<br />
MENU<br />
4 Press ]/[ to move the cursor<br />
and select the desired adjustment<br />
item.<br />
All of adjustment items are shown<br />
in the diagram on page 19.<br />
PICTURE (TV)<br />
RETURN<br />
CONTRAST [ 30]<br />
COLOUR [ 0]<br />
BLACK LEVEL [ 0]<br />
SHARPNESS [ 0]<br />
RED-BLUE [ 0]<br />
GREEN [ 0]<br />
RESET<br />
SELECT: ENTER: EXIT:<br />
MENU<br />
5 Press to display the screen<br />
for the selected adjustment item.<br />
RETURN<br />
COLOUR<br />
0<br />
- +<br />
SELECT: ADJUST: EXIT:<br />
MENU<br />
6 Press to make adjustment.<br />
To adjust another item, move the<br />
cursor by pressing ]/[ while the<br />
MENU screen is displayed.<br />
7 Press MENU to return to the main<br />
screen.<br />
18
ADJUSTMENT (Continued)<br />
Selected item Press .<br />
CONTRAST Decrease contrast Increase contrast<br />
TINT Toward purple Toward green<br />
COLOUR Lower <strong>colour</strong> intensity Higher <strong>colour</strong> intensity<br />
BLACK LEVEL Less bright More bright<br />
SHARPNESS Soft picture Hard picture<br />
RED-BLUE More red level More blue level<br />
GREEN Less green level More green level<br />
COLOUR SYSTEM Press > to select COLOUR SYSTEM.<br />
(AV1/AV2) → AUTO → PAL → SECAM → N358 → N443 → PAL-M→ PAL-N → PAL60 ⎯<br />
(COMPONENT) → AUTO → PAL → NTSC ⎯<br />
Note:<br />
• TINT is displayed only when N358 or N443 is selected.<br />
• COLOUR SYSTEM is displayed only in the AV mode.<br />
Switching the COLOUR SYSTEM<br />
Set the system to AUTO for normal reception. The AUTO mode automatically detects the receiving<br />
signal system and changes the reception system of the set.<br />
When the picture or sound is not stable, switching to an appropriate system may improve the picture<br />
or sound quality.<br />
19
ADJUSTMENT (Continued)<br />
Adjusting the FEATURE Settings<br />
POWER<br />
SLEEP<br />
VOL<br />
DISPLAY<br />
MENU<br />
CH<br />
TV/VIDEO<br />
BRIGHT<br />
<br />
BRIGHT<br />
MENU<br />
]/[<br />
To use Direct Key function<br />
1 Press BRIGHT to display<br />
BRIGHTNESS screen.<br />
2 Press BRIGHT to select the<br />
BRIGHTNESS.<br />
• Each time you press BRIGHT, the<br />
BRIGHTNESS changes as follows:<br />
BRIGHT NORMAL DARK<br />
BRIGHTNESS [BRIGHT]<br />
3 Press MENU to return to the main<br />
screen.<br />
MPX -/--<br />
To use MENU item<br />
■ The FEATURE items can be set by<br />
the user.<br />
1 Press MENU to display the MENU<br />
screen.<br />
MENU<br />
SLEEP TIMER<br />
PICTURE<br />
FEATURE<br />
CH-SETTING<br />
SELECT: ENTER: EXIT:<br />
MENU<br />
2 Press ]/[ to move the cursor to<br />
FEATURE.<br />
MENU<br />
SLEEP TIMER<br />
PICTURE<br />
FEATURE<br />
CH-SETTING<br />
3 Press to display FEATURE<br />
screen.<br />
SELECT: ENTER: EXIT:<br />
MENU<br />
4 Check the factory setting of each<br />
item on the FEATURE screen.<br />
The user can change the settings<br />
by using ]/[ and .<br />
FEATURE<br />
RETURN<br />
BRIGHTNESS [BRIGHT ]<br />
AUTO POWER [OFF ]<br />
OFF<br />
UPSIDE [NORMAL ]<br />
RIGHT/LEFT [NORMAL ]<br />
AV2 IN/OUT [IN ]<br />
BLUE BACK [ON ]<br />
LANGUAGE<br />
[ENGLISH]<br />
RESET<br />
SELECT: ADJUST: EXIT:<br />
MENU<br />
5 Press MENU to return to the main<br />
screen.<br />
20
ADJUSTMENT (Continued)<br />
Selected item<br />
BRIGHTNESS<br />
AUTO POWER OFF<br />
(only TV mode)<br />
Factory setting<br />
[BRIGHT] Maximum brightness<br />
[OFF] This feature is inactive.<br />
Setting change<br />
[NORMAL] Brightness 60% → Suitable for<br />
viewing in well-lit areas. Saves<br />
energy.<br />
[DARK] Brightness 20% → Sufficiently bright<br />
when viewing in dim areas.<br />
[ON] The power of the LCD TV set is turned<br />
off when there is no signal for 5 minutes.<br />
UPSIDE<br />
[NORMAL] Normal<br />
vertical image<br />
orientation<br />
[DOWN] Inverted image → To display images<br />
upside down for special uses.<br />
ABC<br />
ABC<br />
RIGHT/LEFT<br />
[NORMAL] Normal<br />
horizontal image<br />
orientation<br />
[MIRROR] Mirror image → To display mirror<br />
images for special uses.<br />
AV2 IN/OUT<br />
[IN]<br />
[OUT<br />
[OUT<br />
] Line Output is selected, Output<br />
volume is fixed, Speaker output is<br />
available.<br />
] Line Output is selected, Output<br />
volume is variable, Speaker output<br />
is Mute.<br />
BLUE BACK<br />
[ON] The screen is turned blue<br />
when there is no signal.<br />
[OFF] This feature is inactive.<br />
LANGUAGE<br />
[ ]<br />
[ENGLISH]<br />
[ ]<br />
■ In BLUE BACK, PICTURE setting displayed in purple cannot be selected.<br />
■ AV2 IN/OUT cannot be selected in AV2 mode. Also, AV2 mode cannot be selected, when selecting AV2 OUT.<br />
21
NICAM BROADCASTS SELECTION<br />
Enables selection of reception mode when receiving a NICAM signal.<br />
POWER<br />
SLEEP<br />
DISPLAY<br />
MENU<br />
TV/VIDEO<br />
BRIGHT<br />
To let you enjoy NICAM broadcasting, this LCD<br />
TV receives NICAM system stereo, bilingual, and<br />
monaural broadcasts.<br />
(When stereo<br />
sound is received)<br />
Stereo<br />
TV set is receiving a stereo broadcast.<br />
• Each time you press MPX, the mode switches<br />
between NICAM STEREO and MONO.<br />
When MONO is selected, the TV sound is<br />
output in monaural.<br />
49<br />
NICAM<br />
STEREO<br />
49<br />
MONO<br />
VOL<br />
CH<br />
MPX -/--<br />
MPX<br />
Bilingual<br />
TV set is receiving a bilingual broadcast.<br />
• Pressing MPX changes the audio mode in the<br />
order shown on the right.<br />
• M1=main sound, M2=sub sound, or<br />
MONO=monaural sound, can be selected.<br />
(When main sound<br />
is selected)<br />
(When sub sound<br />
is selected)<br />
(When monaural<br />
sound is selected)<br />
49<br />
NICAM<br />
M1<br />
49<br />
NICAM<br />
M2<br />
49<br />
MONO<br />
Monaural<br />
TV set is receiving a monaural broadcast.<br />
• Each time you press MPX, the mode switches<br />
between NICAM MONO and MONO.<br />
(When monaural<br />
sound is received)<br />
49<br />
NICAM<br />
MONO<br />
49<br />
MONO<br />
Note:<br />
• If approximately 3 seconds pass without a button being pressed, the mode setting is automatically terminated<br />
and the TV set returns to normal mode.<br />
• The setting can be selected individually for each channel position.<br />
POWER<br />
DISPLAY<br />
SLEEP<br />
BRIGHT<br />
MENU<br />
TV/VIDEO<br />
VOL<br />
CH<br />
MPX -/--<br />
<br />
MENU<br />
]/[<br />
MPX<br />
If the sound quality is poor due to a weak signal or<br />
other problems during NICAM broadcast reception,<br />
set the “OFF” position of the NICAM to change the<br />
TV sound to monaural.<br />
1 Press MENU to display the MENU<br />
screen.<br />
2 Press ]/[ to select<br />
“CH-SETTING”.<br />
3 Press to display the<br />
CH-SETTING menu.<br />
4 Press ]/[ to select “NICAM”.<br />
5 Press to select “OFF”.<br />
When the NICAM sound is set to the<br />
“OFF” position, the TV sound is output<br />
in monaural.<br />
CH-SETTING<br />
RETURN<br />
POSITION [CH15 ]<br />
COLOUR SYSTEM [AUTO ]<br />
SOUND SYSTEM [ I ]<br />
SKIP [OFF ]<br />
FINE<br />
[783.25MHz]<br />
[OFF ]<br />
NICAM<br />
IGR [ON ]<br />
SELECT: ADJUST: EXIT:<br />
MENU<br />
(When off position is selected)<br />
15<br />
NICAM<br />
[<br />
Note:<br />
• When the NICAM sound is set to the “OFF” position, MPX cannot be used<br />
to change the audio mode (stereo and bilingual settings).<br />
22
IGR (German stereo system ) BROADCASTS<br />
Enables selection of reception mode when receiving an IGR Stereo signal.<br />
To let you enjoy IGR broadcasting, this TV receives<br />
IGR system stereo and bilingual broadcasts.<br />
Stereo<br />
(When stereo<br />
sound is received)<br />
49<br />
STEREO<br />
POWER<br />
SLEEP<br />
DISPLAY<br />
MENU<br />
TV/VIDEO<br />
BRIGHT<br />
TV set is receiving a stereo broadcast.<br />
• Each time you press MPX, the mode switches<br />
between STEREO and MONO.<br />
When MONO is selected, the TV sound is output<br />
in monaural.<br />
49<br />
MONO<br />
VOL<br />
CH<br />
Bilingual<br />
MPX -/--<br />
MPX<br />
TV set is receiving a bilingual broadcast.<br />
• Pressing MPX changes the audio mode in the<br />
order shown on the right.<br />
• MAIN=main sound or SUB=sub sound, can be<br />
selected.<br />
(When main<br />
sound is received)<br />
49<br />
MAIN<br />
(When sub<br />
sound is received)<br />
49<br />
SUB<br />
Note: :<br />
• If approximately 3 seconds pass without a button being pressed, the mode setting is automatically terminated<br />
and the TV set returns to normal mode.<br />
• The setting can be selected individually for each channel position.<br />
POWER<br />
SLEEP<br />
VOL<br />
DISPLAY<br />
MENU<br />
CH<br />
BRIGHT<br />
TV/VIDEO<br />
<br />
MENU<br />
]/[<br />
If the sound quality is poor due to a weak signal<br />
or other problems during IGR broadcast<br />
reception, set the “OFF” position of the IGR to<br />
change the TV sound to monaural.<br />
1 Press MENU to display the MENU<br />
screen.<br />
2 Press ]/[ to select<br />
“CH-SETTING”.<br />
3 Press to display the<br />
CH-SETTING menu.<br />
4 Press ]/[ to select “IGR”.<br />
5 Press to select “OFF”.<br />
(CH-SETTING menu)<br />
CH-SETTING<br />
RETURN<br />
POSITION [CH15 ]<br />
COLOUR SYSTEM [AUTO ]<br />
SOUND SYSTEM [ I ]<br />
SKIP [OFF ]<br />
FINE<br />
[783.25MHz]<br />
[ON ]<br />
NICAM<br />
IGR [OFF ]<br />
SELECT: ADJUST: EXIT:<br />
MENU<br />
(When off position is selected)<br />
15<br />
[<br />
MPX -/--<br />
MPX<br />
When the IGR sound is set to the<br />
“OFF” position, the TV sound is<br />
output in monaural.<br />
[ is displayed if IGR is<br />
received when IGR is set to<br />
OFF.<br />
Note:<br />
Note:<br />
• When the IGR sound is set to the “OFF” position, MPX cannot be used to<br />
change the audio mode (stereo and bilingual settings).<br />
23
DVD TUNER/BAND<br />
AUX 1 AUX 2<br />
AUX 3<br />
SURROUND<br />
ON/OFF<br />
VIDEO<br />
AV-IN2/OUT<br />
L<br />
AUDIO<br />
R<br />
COMPONENT<br />
Y<br />
PB<br />
PR<br />
L<br />
AUDIO<br />
R<br />
VIDEO<br />
AV-IN1<br />
L<br />
AUDIO<br />
R<br />
S-VIDEO<br />
HEAD<br />
PHONE<br />
ANT.<br />
POWER<br />
INPUT<br />
DC13V<br />
CONNECTING WITH EXTERNAL DEVICES<br />
You can enjoy picture and sound by connecting a VCR or a home video game system to the terminals<br />
located on the rear of the TV set.<br />
When connecting an external device, turn off the power of the main unit first to prevent any possible<br />
damage.<br />
Example of external devices<br />
that can be connected<br />
Video camera<br />
Home video game system<br />
VCR<br />
DVD<br />
To AV-IN1 or AV-IN2/OUT terminal<br />
* PC connection is not<br />
possible.<br />
* If your external device<br />
has an S-Video terminal,<br />
S-VIDEO connection is<br />
recommended.<br />
VOL CH MENU TV/VIDEO MAIN POWER<br />
DVD, etc.<br />
To COMPONENT terminal<br />
* If you external device has a component<br />
terminal, COMPONENT connection is<br />
recommended (you can view high-quality<br />
pictures). If your external device does not<br />
have a component terminal, S-VIDEO<br />
connection is recommended.<br />
Note: :<br />
• For the cable, use a commercially available audio/video cord.<br />
• Only connect audio/video signals to AV-IN1 and AV-IN2/OUT terminals. Connecting other signals may result in<br />
a malfunction.<br />
• AV-IN1 has 2 video input terminals: VIDEO and S-VIDEO. When you connect external devices to both terminals<br />
(and if you select AV-IN1), you can only view pictures from the S-VIDEO terminal. To view the picture from the<br />
VIDEO terminal, do not connect any external devices to the S-VIDEO terminal.<br />
• For more information about external device connections, see the manuals of your external devices.<br />
24
VIDEO<br />
AV-IN2/OUT<br />
L<br />
AUDIO<br />
R<br />
COMPONENT<br />
Y<br />
PB<br />
PR<br />
L<br />
AUDIO<br />
R<br />
VIDEO<br />
AV-IN1<br />
L<br />
AUDIO<br />
R<br />
S-VIDEO<br />
HEAD<br />
PHONE<br />
ANT.<br />
POWER<br />
INPUT<br />
DC13V<br />
DVD TUNER/BAND<br />
AUX 1 AUX 2<br />
AUX 3<br />
SURROUND<br />
ON/OFF<br />
CONNECTING WITH EXTERNAL DEVICES (Continued)<br />
Connecting a VCR, DVD player or a video camera (AV-IN1/AV-IN2/OUT/COMPONENT)<br />
To AV-IN2/OUT terminal<br />
VIDEO<br />
AV-IN2/OUT<br />
L<br />
AUDIO<br />
R<br />
COMPONENT<br />
Y<br />
PB<br />
PR<br />
L<br />
AUDIO<br />
R<br />
To video/audio output<br />
terminal<br />
To COMPONENT input<br />
(VIDEO) terminal<br />
Video<br />
Audio(L)<br />
Audio(R)<br />
VCR<br />
VOL CH MENU TV/VIDEO MAIN POWER<br />
Y<br />
PB<br />
PR<br />
To COMPONENT input<br />
(AUDIO) terminal<br />
Audio(L)<br />
Audio(R)<br />
To AV-IN1 terminal<br />
DVD Player<br />
VIDEO<br />
AV-IN1<br />
L<br />
AUDIO<br />
R<br />
S-VIDEO<br />
HEAD<br />
PHONE<br />
To video/audio output<br />
terminal<br />
To S-VIDEO input terminal<br />
Video<br />
Audio(L)<br />
Audio(R)<br />
Video camera<br />
ANT.<br />
POWER<br />
INPUT<br />
S-video<br />
VCR<br />
DC13V<br />
To S-video output terminal<br />
Note: :<br />
• If your VCR (or other external devices) has an S-Video terminal, S-VIDEO connection is recommended. (Use an<br />
S-video cord.)<br />
• When you connect external devices to both S-VIDEO and VIDEO terminals (and if you select AV-IN1), you can<br />
only view pictures from the S-VIDEO terminal.<br />
• You cannot view multiple or synthesized pictures by connecting two or more external devices. When connecting<br />
an external device, use care to connect the video and audio cables to the corresponding terminals.<br />
• Do not connect antennas or headphones to AV-IN2/OUT.<br />
25
VIDEO<br />
AV-IN2/OUT<br />
L<br />
AUDIO<br />
R<br />
COMPONENT<br />
Y<br />
PB<br />
PR<br />
L<br />
AUDIO<br />
R<br />
VOL CH MENU TV/VIDEO MAIN POWER<br />
VIDEO<br />
AV-IN1<br />
AUDIO<br />
L<br />
R<br />
S-VIDEO<br />
HEAD<br />
PHONE<br />
ANT.<br />
POWER<br />
INPUT<br />
DC13V<br />
VIDEO<br />
AV-IN2/OUT<br />
L<br />
AUDIO<br />
R<br />
COMPONENT<br />
Y<br />
PB<br />
PR<br />
L<br />
AUDIO<br />
R<br />
VIDEO<br />
AV-IN1<br />
L<br />
AUDIO<br />
R<br />
S-VIDEO<br />
HEAD<br />
PHONE<br />
ANT.<br />
POWER<br />
INPUT<br />
DC13V<br />
CONNECTING WITH EXTERNAL DEVICES (Continued)<br />
Outputting video and audio (video output)<br />
You can output video and audio data from the TV set through the AV output terminals (AV-OUT).<br />
VIDEO<br />
AV-IN2/OUT<br />
L<br />
AUDIO<br />
R<br />
COMPONENT<br />
Y<br />
PB<br />
PR<br />
L<br />
AUDIO<br />
R<br />
Connect a VCR,<br />
Audio amplifier,<br />
etc.<br />
VOL CH MENU TV/VIDEO MAIN POWER<br />
Connect a VCR,<br />
Audio amplifier,<br />
etc.<br />
Note:<br />
• AV2 has 2 OUT modes (see page 21).<br />
• When using the S-VIDEO input for AV-IN1, no video output will be made to the AV output terminal, but audio<br />
output will be made for connection to external audio systems.<br />
• When using the COMPONENT input, no video output will be made to the AV output terminal, but audio output<br />
will be made for connection to external audio systems.<br />
Listening with Headphones<br />
■ Plug the headphone mini-plug into the HEADPHONE jack located on the rear of the TV set.<br />
▼ On-Screen Display<br />
< Rear terminal<br />
VOLUME<br />
60<br />
Note:<br />
Headphones<br />
• The headphones are not included in the supplied accessories.<br />
• No sound will be heard from the main unit speakers when a headphone mini-plug is connected into the<br />
HEADPHONE jack.<br />
26
TROUBLESHOOTING<br />
■ Before calling for repair service, check the following items for possible remedies to<br />
the encountered symptoms.<br />
TV set<br />
Sound<br />
Picture<br />
Picture<br />
Problem<br />
There is no<br />
picture or<br />
sound.<br />
There is no<br />
picture.<br />
There is no<br />
picture from<br />
AV-IN1.<br />
Check item<br />
• Make sure the AC adapter is properly inserted in the<br />
power outlet.<br />
• Reception other than those of broadcasting stations<br />
can be considered.<br />
• Make sure the input mode is set to TV.<br />
• Make sure the MAIN POWER switch of the main unit<br />
is on.<br />
• Make sure the BLACK LEVEL is properly adjusted.<br />
• Fluorescent lamp may have reached the end of<br />
service life.<br />
• Make sure the S-Video terminal is free of connections.<br />
Reference<br />
Pages<br />
6<br />
–<br />
10<br />
10<br />
18, 19<br />
–<br />
25<br />
There is no<br />
sound.<br />
• Make sure the volume is not set to minimum.<br />
• Make sure the sound is not set to mute.<br />
11<br />
11<br />
There is no<br />
picture or<br />
sound, just<br />
noise.<br />
• Make sure the antenna cable is properly connected.<br />
• Bad reception can be considered.<br />
6<br />
–<br />
Picture is not<br />
clear.<br />
• Make sure the antenna cable is properly connected.<br />
• Bad reception can be considered.<br />
6<br />
–<br />
Picture is light<br />
or improperly<br />
tinted.<br />
• Check <strong>colour</strong> adjustment.<br />
(NTSC mode)<br />
18, 19<br />
The picture is<br />
too dark.<br />
• Check if BRIGHTNESS is set to DARK.<br />
• Check CONTRAST and BLACK LEVEL adjustment.<br />
• Fluorescent lamp may have reached the end of<br />
service life.<br />
20<br />
18, 19<br />
29<br />
Remote control does not work.<br />
• Check if batteries in the remote control have sufficient<br />
power.<br />
• Make sure the remote sensor window is not under<br />
strong fluorescent lighting.<br />
5<br />
5<br />
27
TROUBLESHOOTING (Continued)<br />
Antenna<br />
Problem<br />
The picture is<br />
not sharp.<br />
Check item<br />
• The reception may be weak.<br />
• The state of the broadcast may also be bad.<br />
• Make sure the antenna is facing the right direction.<br />
• Make sure the outside antenna is not disconnected.<br />
The picture<br />
moves.<br />
The picture is<br />
doubled or<br />
tripled.<br />
• Make sure the antenna is facing the right direction.<br />
• There may be reflected electric waves from mountains or<br />
buildings.<br />
The picture is<br />
spotted.<br />
• There may be interference from automobiles, trains, high<br />
voltage lines, neon lights, etc.<br />
• There may be interference between the antenna cable and<br />
power cable. Try positioning them further apart.<br />
There are<br />
stripes on the<br />
screen or<br />
<strong>colour</strong>s fade.<br />
• Is the unit receiving interference from other devices?<br />
Transmission antennas of radio broadcasting stations or<br />
amateur radios, and cellular phones may also cause<br />
interference.<br />
• Use the unit as far apart as possible from devices that may<br />
cause possible interference.<br />
■Use in hot and cold rooms (locations)<br />
• When the unit is used in rooms (locations) with low temperature, the picture may leave trails or appear<br />
slightly delayed. This is not a malfunction, and the unit will recover when the temperature returns to normal.<br />
• Do not leave the unit in a hot or cold location. Also, do not leave the unit in a location exposed to direct<br />
sunlight or near a heater, as this may cause the cabinet to deform and the LCD panel to malfunction.<br />
(Storage temperature: –20˚C to +60˚C)<br />
How to fix the cables<br />
• Fix cables and cords with the attached cable clamps<br />
so that they do not get caught when mounting the<br />
cover.<br />
• Connect the cables and cords after fixing the cable<br />
clamps (2 positions).<br />
VOL CH MENU TV/VIDEO MAIN POWER<br />
Cable clamps<br />
28
SPECIFICATIONS<br />
LCD COLOUR TV COMPARISON<br />
ITEMS<br />
LCD panel<br />
MODEL<br />
Number of dots<br />
Video <strong>colour</strong> systems<br />
TV Standard<br />
TV Tuning System<br />
TV STEREO/BILINGUAL<br />
FUNCTION Universal R/C for TV only<br />
AUTO PRESET<br />
CATV<br />
4-LINE DIGITAL COMB FILTER<br />
Brightness<br />
Lamp life<br />
Viewing angles<br />
Audio output<br />
Speakers<br />
Terminals<br />
AV1<br />
AV2 IN/OUT<br />
Component<br />
Headphone Jack<br />
OSD LANGUAGE<br />
Power requirement<br />
Weight<br />
Accessories<br />
LC-15B2HA<br />
15" Advanced Super View & BLACK<br />
TFT LCD<br />
921,600 dots VGA<br />
World multi system<br />
I/DK/M/BG<br />
Auto preset tuning<br />
NICAM-BG, I, DK/IGR-BG<br />
Yes<br />
Yes<br />
~Hyper Band<br />
Yes<br />
430 cd/m 2<br />
60,000 Hours<br />
H: 170° V: 170°<br />
2.1W×2<br />
4×7 cm Oval, 2 pcs<br />
Composite Video, S-Video, Audio<br />
Composite Video/Audio<br />
Y, PB, PR/Audio<br />
3.5 mm ø jack (Rear)<br />
English/Chinese/Arabic<br />
DC 12 V, AC110-240 V, 50/60Hz<br />
5.2kg w/o accessories<br />
R/C, Batteries, Cable clamps, AC<br />
adapter, AC cord, Operation manual,<br />
Antenna cable<br />
LC-20B2HA<br />
19.7" Advanced Super View &<br />
BLACK TFT LCD<br />
921,600 dots VGA<br />
World multi system<br />
I/DK/M/BG<br />
Auto preset tuning<br />
NICAM-BG, I, DK/IGR-BG<br />
Yes<br />
Yes<br />
~Hyper Band<br />
Yes<br />
430 cd/m 2<br />
60,000 Hours<br />
H: 170° V: 170°<br />
2.5W×2<br />
5cm ø 2pcs<br />
Composite Video, S-Video, Audio<br />
Composite Video/Audio<br />
Y, PB, PR/Audio<br />
3.5 mm ø jack (Rear)<br />
English/Chinese/Arabic<br />
DC 13 V, AC110-240 V, 50/60Hz<br />
8.4kg w/o accessories<br />
R/C, Batteries, Cable clamps, AC<br />
adapter, AC cord, Operation manual,<br />
Antenna cable<br />
■ As a part of policy of continuous improvement, SHARP reserves the right to make design and specification<br />
changes for product improvement without prior notice. The performance specification figures indicated are nominal<br />
values of production units. There may be some deviations from these values in individual units.<br />
29
2<br />
PRESET 1<br />
DIMENSIONAL DRAWINGS<br />
LC-15B2HA<br />
Unit: mm<br />
61.1<br />
56.5<br />
VOL<br />
CH<br />
MENU TV/VIDEO MAIN POWER<br />
484<br />
149.5<br />
305.3<br />
381.7<br />
78.7 303<br />
229<br />
POWER<br />
SLEEP<br />
1<br />
301.6<br />
98.8<br />
61.1<br />
100<br />
VIDEO<br />
AV-IN1<br />
L<br />
229.4<br />
VIDEO<br />
AV-IN 2/OUT<br />
L<br />
100<br />
38.2<br />
AUDIO<br />
R<br />
S-VIDEO<br />
AUDIO<br />
366.2<br />
R<br />
COMPONENT<br />
Y<br />
PB<br />
HEAD<br />
PHONE<br />
PR<br />
ANT.<br />
L<br />
AUDIO<br />
R<br />
POWER<br />
INPUT<br />
DC12V<br />
136.8<br />
108.8<br />
27<br />
1<br />
149.5<br />
198<br />
48.5<br />
30
PB<br />
PR<br />
VOL<br />
2<br />
CH<br />
PRESET 1<br />
MENU TV/VIDEO MAIN POWER<br />
POWER<br />
SLEEP<br />
DIMENSIONAL DRAWINGS (Continued)<br />
LC-20B2HA<br />
Unit: mm<br />
72.6<br />
66.6<br />
379<br />
630<br />
188<br />
473.5<br />
92 381.5<br />
193.5<br />
401.3<br />
298.8<br />
107.3<br />
72.6<br />
1<br />
379<br />
100<br />
VIDEO<br />
295.8<br />
VIDEO<br />
AV-IN 2/OUT<br />
L<br />
100<br />
51.5<br />
1.5<br />
AV-IN1<br />
L<br />
AUDIO<br />
R<br />
S-VIDEO<br />
AUDIO<br />
R<br />
COMPONENT<br />
HEAD<br />
PHONE<br />
Y<br />
468.8<br />
L<br />
AUDIO<br />
R<br />
ANT.<br />
POWER<br />
INPUT<br />
DC13V<br />
173<br />
137<br />
30.5<br />
163.9<br />
229.4<br />
65.5<br />
1<br />
31
SHARP CORPORATION<br />
Printed in Japan<br />
Printed on post-consumer recycled paper.<br />
TINS-A008WJZZ<br />
02P04-JKM