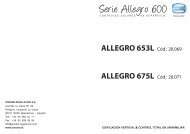
Thermostat EURO - Sonder
Thermostat EURO - Sonder
Thermostat EURO - Sonder

You also want an ePaper? Increase the reach of your titles
YUMPU automatically turns print PDFs into web optimized ePapers that Google loves.
<strong>Thermostat</strong> <strong>EURO</strong><br />
ref. 12.014<br />
<br />
<strong>Thermostat</strong> <strong>EURO</strong> has been designed to offer you comfort and<br />
energy savings.It allows you to programme and adjust your heating<br />
or air conditioning according to 3 temperature levels:<br />
- Comfort temperature:this is the temperature for your hours<br />
of presence.<br />
- Reduce temperature: this is the temperature for your brief<br />
absences or during the night.<br />
- Frost-protection temperature: this is the minimum temperature<br />
for long absences. It protects your dwelling from the risk<br />
of frost.<br />
These 3 pre-recorded programs and a blank programme will<br />
allow you to adapt your heating each day to your life style.<br />
This instruction leaflet introduces you to the different functions<br />
of <strong>Thermostat</strong> <strong>EURO</strong>.<br />
Inserting or re-inserting the<br />
batteries<br />
<strong>Thermostat</strong> <strong>EURO</strong> is equipped with a warning light to<br />
indicate when the batteries need replacing. As soon as<br />
this indicator lights up at the bottom right-hand side of<br />
the display panel,replace the batteries (use two 1.5V UR6<br />
alkaline batteries - life is approximately 18 months):<br />
<strong>Thermostat</strong> <strong>EURO</strong> remains programmed for 60 seconds<br />
while batteries are being replaced.<br />
!<br />
☛<br />
☛<br />
<br />
Before beginning the programming<br />
of the device, please slide cover<br />
down and press RESET with the<br />
tip of a pen.<br />
22 23 24<br />
000<br />
h<br />
Setting current time and day<br />
Res<br />
This procedure applies in two circumstances:<br />
- You are putting the device into<br />
operation for the first time.<br />
- You have just pressed the<br />
RESET (see above).<br />
1 2 3 4<br />
- 12:00 appears and the pointer ▲ flashes under day 1.<br />
+<br />
-<br />
☛<br />
<br />
DAYS<br />
1-7<br />
u<br />
Auto Manu 1 2 3 4 5 6 7<br />
PROG<br />
P1-P4<br />
☛<br />
<br />
MODE<br />
MODE<br />
Set the time using the +/– buttons (the numbers run<br />
off more quickly when the button is pressed continuously).<br />
Set the current day by pressing several times on the<br />
DAYS 1-7 button. A pointer ▲ appears under the corresponding<br />
day (1=Monday, 2=Tuesday, 3=Wednesday,<br />
etc).<br />
Validate with the OK button.<br />
If you wish to change the time or the day: press<br />
the MODE button until the pointer ▲ appears under<br />
the clock sign and continue as above for points , <br />
and .<br />
OK<br />
0000<br />
h<br />
Res<br />
<br />
☛<br />
Temperature setting<br />
Comfort and reduced are pre-set:<br />
Comfort = 20°C, reduced = 16°C<br />
☛<br />
<br />
☛<br />
+<br />
-<br />
Auto Manu 1 2 3 4 5 6 7<br />
c<br />
°c<br />
DAYS<br />
1-7<br />
°c<br />
c<br />
☛<br />
☛<br />
☛<br />
PROG<br />
P1-P4<br />
<br />
<br />
Modification of comfort temperature<br />
Press the comfort button.<br />
Modify the temperature with the +/– buttons.<br />
Validate with OK.<br />
Modification of reduced temperature<br />
Press the reduced button.<br />
Modify the temperature with the +/– buttons.<br />
Validate with OK.<br />
Programming<br />
PROG<br />
P1-P4<br />
You can programme your week according to 4 programme<br />
settings:<br />
P1, P2, P3: are pre-recorded and cannot be modified.<br />
P4: is blank and allows you to create a personalized<br />
programme varying according<br />
to the day of the week.<br />
P1 = Comfort temperature from 6 a.m. till 11 p.m.<br />
Reduced temperature from 11 p.m. till 6 a.m.<br />
The standard allocation of P1 is to 7 days of the week.<br />
If this corresponds to your life style, stay in automatic<br />
mode. Otherwise, continue.<br />
Selection of an existing P1,P2 or P3 programme<br />
for a day of the week (in programming mode all<br />
modifications are automatically validated).<br />
OK<br />
0000<br />
h<br />
Res<br />
MODE<br />
0 1 2 3 4 5 6 7 8 9 10 11 12 13 14 15 16 17 18 19 20 21 22 23 24<br />
P2 = Comfort temperature from 6 a.m. till 8.30<br />
a.m. and from 4.30 p.m. till 11 p.m.<br />
Reduced temperature from 8.30 a.m. till 4.30<br />
p.m. and from 11 p.m. till 6 a.m.<br />
0 1 2 3 4 5 6 7 8 9 10 11 12 13 14 15 16 17 18 19 20 21 22 23 24<br />
P3 = Comfort temperature from 6 a.m. till 8.30<br />
a.m., from 11.30 a.m. till 1.30 p.m. and from<br />
4.30 p.m. till 11 p.m.Reduced temperature<br />
from 8.30 a.m. till 11.30 a.m.,from 1.30 p.m.<br />
till 4.30 p.m. and from 11 p.m. till 6 a.m.<br />
0 1 2 3 4 5 6 7 8 9 10 11 12 13 14 15 16 17 18 19 20 21 22 23 24<br />
P4 = Blank programme allowing you to create 3<br />
comfort temperature periods and 3<br />
reduced periods for each day of the<br />
week.<br />
Example - P2 for Wednesday:<br />
+<br />
-<br />
Auto Manu 1 2 3 4 5 6 7<br />
°c<br />
°c<br />
☛<br />
☛<br />
0 1 2 3 4 5 6 7 8 9 10 11 12 13 14 15 16 17 18 19 20 21 22 23 24<br />
DAYS<br />
1-7<br />
PROG<br />
P1-P4<br />
<br />
Press the PROG P1-4 button to go into programming<br />
mode.<br />
The N° of the programme assigned to the day<br />
flashes on the right-hand side of the display panel.<br />
Press the DAYS 1-7 button until the pointer ▲<br />
appears under the day you wish to programme<br />
(Wednesday in our example).<br />
Press the PROG P1-P4 button until the P2<br />
programme number flashes in the right side of the<br />
screen.<br />
Press the OK button to validate.The following day<br />
is automatically proposed.<br />
Creating a P4 programme<br />
A 24-hour profile composed of 48 thermometers at<br />
the bottom of the display panel allows your programme<br />
composition to be easily viewed.<br />
A half-empty thermometer corresponds to<br />
30 minutes at reduced temperature.<br />
A full thermometer corresponds to<br />
30 minutes at comfort temperature.<br />
Example - programming 3 temperature periods for<br />
Friday: 6 a.m. till 8 a.m., noon till 2 p.m. and 6 p.m.<br />
till 10 p.m.<br />
+<br />
-<br />
☛<br />
From the "Auto" mode press the PROG P1-P4<br />
button.<br />
Press the DAYS 1-7 button until a pointer ▲<br />
appears under the day you wish to programme<br />
(Friday in our example).<br />
Press the PROG P1-P4 button until the P4 programme<br />
number flashes in the right side of the<br />
screen.Your display panel indicates time as 00:00<br />
and the first thermometer flashes on the<br />
24-hour profile.<br />
Press the button several times to obtain 6:00.<br />
The time displayed advances by 30 minutes for each<br />
short press. Continuous pressing accelerates the<br />
time run-off.<br />
OK<br />
☛<br />
Auto Manu 1 2 3 4 5 6 7<br />
°c<br />
°c<br />
DAYS PROG<br />
1-7 P1-P4<br />
☛<br />
2<br />
OK<br />
0000<br />
h<br />
1 2 3 4 5 6 7 8 9 10 11 12 13 14 15 16 17 18 19 20 21 22 23 24<br />
0 1<br />
0000<br />
h<br />
Res<br />
Res<br />
MODE<br />
MODE<br />
MODE<br />
3
☛<br />
☛<br />
+<br />
-<br />
DAYS<br />
1-7<br />
Auto Manu 1 2 3 4 5 6 7<br />
°c<br />
°c<br />
0 1 2 3 4 5 6 7 8 9 10 11 12 13 14 15 16 17 18 19 20 21 22 23 24<br />
PROG<br />
P1-P4<br />
☛<br />
☛<br />
- Press the button several times to obtain 8h00.<br />
- Press the button several times to obtain 12h00.<br />
- Press the button several times to obtain 14h00.<br />
- Press the button several times to obtain 18h00.<br />
- Press the button several times to obtain 22h00.<br />
N.B.If you make a mistake (e.g.11:30 instead of 12:00)<br />
use the + and - buttons to advance or return and correct<br />
with the and thermometer buttons.<br />
Press the OK button.The following day automatically<br />
appears.<br />
Press MODE to return to automatic mode.<br />
Programme reading<br />
You can check your programming.<br />
+<br />
-<br />
From AUTO mode press the PROG P1-P4 button.<br />
With the DAYS 1-7 button select the day from 1 to<br />
7 and check your programming on the 24-hour profile<br />
at the bottom of the display panel (see example<br />
above).<br />
Press MODE to return to automatic mode.<br />
AUTO: automatic mode<br />
You pass into automatic mode by pressing<br />
the MODE button until the pointer<br />
▲ appears under AUTO.<br />
In automatic mode thermostat <strong>EURO</strong><br />
adapts to your life style by running the<br />
programs you have selected.<br />
MANU: manuel mode<br />
Manual mode transforms your device into a simple<br />
thermostat. It allows you to maintain a constant temperature<br />
in your dwelling (set to a temperature of between<br />
5°C and 30°C).<br />
Press the MODE button to position the pointer ▲<br />
under MANU.<br />
Press + or – to adjust to the desired temperature<br />
(for instance 22.5°C).<br />
To quit the Manu mode,press MODE and re-position<br />
the pointer ▲ under Auto.<br />
Temporary temperature<br />
modification<br />
MODE<br />
MODE<br />
In automatic mode this very useful function allows you<br />
to modify ambient temperature temporarily.<br />
- To increase the temperature, press the + button<br />
(several times, if necessary).<br />
- To decrease the temperature press the – button<br />
(several times, if necessary).<br />
The current temperature level indicator (comfort or<br />
reduced) will begin flashing.<br />
OK<br />
☛<br />
Auto Manu 1 2 3 4 5 6 7<br />
°c<br />
°c<br />
DAYS<br />
1-7<br />
☛<br />
PROG<br />
P1-P4<br />
OK<br />
0000<br />
h<br />
0 1 2 3 4 5 6 7 8 9 10 11 12 13 14 15 16 17 18 19 20 21 22 23 24<br />
☛<br />
<br />
0000<br />
h<br />
Res<br />
Res<br />
MODE<br />
MODE<br />
0 1 2 3 4 5 6 7 8 9 10 11 12 13 14 15 16 17 18 19 20 21 22 23 24<br />
+<br />
-<br />
<br />
Auto AutoManu<br />
Manu<br />
°c °c<br />
°c<br />
Auto Manu<br />
°c<br />
MODE<br />
☛MODE<br />
MODE<br />
MODE<br />
<br />
☛<br />
☛<br />
<br />
☛<br />
<br />
☛<br />
☛<br />
This modification ends with the next change in programmed<br />
temperature.<br />
To return to the initial programme press MODE and<br />
re-position the pointer ▲ under AUTO.<br />
The current temperature level indicator (comfort or<br />
reduced) will stop flashing when the temporary modification<br />
comes to an end.<br />
Prolonged absence mode<br />
(hollidays)<br />
This mode protects your dwelling from freezing by<br />
maintaining a minimum adjustable temperature in your<br />
dwelling during your absences (from 1 to 99 days).<br />
You can programme the length of your absence so that<br />
the temperature rises for your return.<br />
+<br />
-<br />
<br />
<br />
Auto Manu 1 2 3 4 5 6 7<br />
°c<br />
0 1 2 3 4 5 6 7 8 9 10 11 12 13 14 15 16 17 18 19 20 21 22 23 24<br />
DAYS<br />
1-7<br />
PROG<br />
P1-P4<br />
Press the case button<br />
Set the length of your absence in days (from 1 to 99<br />
days) with the + and – buttons.The current day<br />
counts as one.<br />
Validate with the OK button.<br />
Set the desired temperature level during your<br />
absence with the + and - buttons.<br />
Validate with the OK button. Remain in this<br />
mode.To cancel and return to automatic Mode,press<br />
MODE<br />
Installation maintenance signal<br />
This mode allows you either:<br />
- to take steps for regular maintenance (change of air<br />
conditioning filter, device cleaning).<br />
or<br />
- to compare your heating or air conditioning<br />
consumption from one year to the next (by comparing<br />
the number of running hours).<br />
+<br />
-<br />
Counting running hours<br />
days<br />
Press the 0000h button.The display panel will indicate<br />
the number of hours your burner, air conditioning,<br />
ventilator-convector, etc. (depending of the<br />
type of device controlled) has been running from the<br />
moment the batteries were inserted.<br />
(By pressing once on + or – you return the counter<br />
to zero).<br />
Press MODE to return to automatic mode.<br />
Programming the regular servicing of your<br />
installation<br />
Press the 0000h time button.<br />
Set the number of running hours after which the warning<br />
signal should flash using the + and – buttons.<br />
Validate with the OK button: the count-down<br />
begins.The message «timer» will appear at the end<br />
of the count-down warning you that servicing is<br />
required.<br />
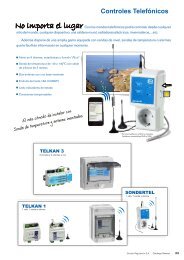
Control by par telephone<br />
Your <strong>Thermostat</strong> <strong>EURO</strong> is equipped<br />
with an input port for heating<br />
control by telephone.<br />
An additional device for telephone<br />
control,required for this to function,<br />
can be connected by the installer.<br />
0000<br />
h<br />
The telephone symbol flashes and your heating passes<br />
automatically to the anti-freezing temperature (stable<br />
6°C) when the telephone control sensor is activated.<br />
Installer’s guide<br />
!<br />
Cut off the power before installation.<br />
The wiring system diagram does not show the<br />
protections. Installation should be carried out by<br />
qualified persons and should comply with current<br />
standards.<br />
OK<br />
0000<br />
h<br />
Res<br />
<br />
0 1 2 3 4 5 6 7 8 9 10 11 12 13 14 15 16 17 18 19 20 21 22 23 24<br />
DAYS<br />
1-7<br />
Auto Manu 1 2 3 4 5 6 7<br />
PROG<br />
P1-P4<br />
timer<br />
0000<br />
h<br />
OK<br />
☛<br />
MODE<br />
☛<br />
☛<br />
Res<br />
4 5 6 7<br />
MODE<br />
MODE<br />
°c<br />
<br />
3 14 15 16 17 18 19 20 21 22<br />
☛<br />
<br />
Your <strong>Thermostat</strong> <strong>EURO</strong> should be installed at least<br />
1.50m above the ground on an inside wall protected<br />
from direct sun rays and from any heat source such as<br />
television, lamp, draughts, etc.<br />
Slide the cover down and unscrew screws .<br />
Carefully take out the front face.<br />
Fix the base to the wall and connect the device<br />
according the diagram below.<br />
Telephone remote control.<br />
Contact mode (between terminals 4 and 5)=anti-freezing<br />
(+6°C).The type of contact should be adapted to low<br />
l<br />
level connection<br />
(e.g.gold-gilded contact).<br />
1<br />
2 3<br />
❄<br />
<br />
Terminal N° 1 = output heating or air-conditioning<br />
Replace the front cover and screw in screw <br />
again.<br />
If your boiler has a thermostat input, eliminate the<br />
shunt resistor linking the 2 thermostat terminals and<br />
connect the 1 and 3 terminals of your thermostat <strong>EURO</strong><br />
to the two thermostat input terminals on the boiler<br />
(the direction of the connection does not matter).<br />
POSSIBLE SETTINGS<br />
Various settings can be made on the back<br />
of the device (when it is not mounted).<br />
Selection of installation type<br />
■<br />
Heating Air conditioning<br />
■<br />
Selection of adjustment mode<br />
■<br />
ON/OFF Proportional<br />
■<br />
The proportional mode is particularly recommended<br />
for radiator heating installations (low or average time<br />
lag) and electric radiant ceilings.<br />
In other cases, the ON/OFF mode is recommended<br />
and will offer you complete satisfaction.<br />
Anti-locking function for the circulation pump (activation<br />
of the pump for 1 minute every 24 hours).<br />
■ Anti-locking<br />
Anti-locking<br />
function off<br />
■ function on.<br />
Technical specifications<br />
Adjustment range for comfort T°C +5°C to +30°C<br />
Adjustment range for reduced T°C +5°C to +30°C<br />
Adjustment range for holiday T°C +5°C to +30°C<br />
Adjustment range for ambient T°C 0°C to +40°C<br />
Static differential:<br />
< 0.3 degrees<br />
Power:<br />
2 standard LR6 alkaline batteries<br />
Breaking power: Change over contact - 8 (3) A/250 V AC<br />
Operating temperature:<br />
0°C to +50°C.<br />
Storage temperature:<br />
–10°C to +65°C<br />
Hygrometry: 85% max at + 20°C<br />
Degree of protection: IP 30<br />
Insulation class:<br />
II (EN 60730 standards)<br />
Connectio : by screwed barrier up to 2.5 mm 2 .<br />
4<br />
5<br />
4