FORMATT VIDEO

Create successful ePaper yourself
Turn your PDF publications into a flip-book with our unique Google optimized e-Paper software.
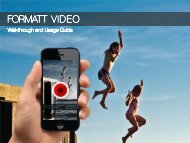
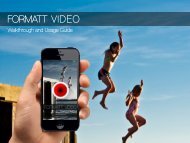
<strong>FORMATT</strong> <strong>VIDEO</strong><br />
Walkthrough and Usage Guide
<strong>FORMATT</strong> <strong>VIDEO</strong><br />
Walkthrough and Usage Guide<br />
The following is a comprehensive guide to the menus, icons,<br />
settings and filters available in the <strong>FORMATT</strong> <strong>VIDEO</strong> app<br />
<br />
Written in two sections, the first covers basic functions and<br />
setting up the app. The second section takes you though<br />
using the <strong>FORMATT</strong> <strong>VIDEO</strong> App. <br />
<br />
All screenshots in this document have been taken from within<br />
the <strong>FORMATT</strong> <strong>VIDEO</strong> App or the <strong>FORMATT</strong> <strong>VIDEO</strong> – no<br />
external post production has been used <br />
<br />
For any questions relating to this app, please contact:<br />
<br />
James Stamp of Formatt-Hitech <br />
+44(0)7583 243622 <br />
ukjames@formatt-hitech.com
<strong>FORMATT</strong> <strong>VIDEO</strong><br />
Contents<br />
1. Title Page<br />
2. Introduction and contact details<br />
3. Contents<br />
4. Front screen functions<br />
5. Status bar functions<br />
6. Gallery functions<br />
7. Settings<br />
8. Settings – Camera and Application<br />
9. Using <strong>FORMATT</strong> <strong>VIDEO</strong> <br />
10. Introduction to Filters<br />
11. Filter Selection<br />
12. Applying and Adjusting Filters<br />
13. Focus and Exposure Lock<br />
14. Live Video Editing<br />
15 – 23. Filter Categories and Descriptions
<strong>FORMATT</strong> <strong>VIDEO</strong><br />
Front screen functions<br />
1<br />
2<br />
3<br />
4<br />
1 Status bar<br />
2 Flash control<br />
3 Filter and density<br />
indicator<br />
4 Camera select<br />
Control bar<br />
Gallery<br />
Settings<br />
5<br />
6<br />
7<br />
Start/Stop recording 8<br />
Adjustments 9<br />
Filter selection 10!<br />
6 7 8 9 10<br />
5
<strong>FORMATT</strong> <strong>VIDEO</strong><br />
Status bar functions<br />
1 2 3<br />
1 Flash control<br />
Tapping the flash icon at the top left of the screen in the<br />
status bar will expand the flash options as follows: <br />
• Off (Lightning icon crossed out) – No light <br />
• Torch (Torch icon) – Flash permanently lit to enable you to<br />
light your subject<br />
<br />
2 Filter and density indicator!<br />
Displays the current filter and filter density where available.<br />
When no filter is applied it shows no Filter.<br />
<br />
3 Camera selection<br />
Allows the user to alternate between front and rear facing<br />
camera. All of the <strong>FORMATT</strong> <strong>VIDEO</strong> App functions work on<br />
the front and rear facing cameras and in portrait or<br />
landscape modes.<br />
<strong>FORMATT</strong> <strong>VIDEO</strong> App - Walkthrough<br />
5
<strong>FORMATT</strong> <strong>VIDEO</strong><br />
Gallery functions<br />
1<br />
2<br />
3<br />
1 "Return to main screen!<br />
Tap the Camera icon to return<br />
to the main screen.!<br />
!<br />
2 "Share<br />
From the gallery share your<br />
videos via email or Facebook.<br />
To close the share menu<br />
swipe down.<br />
<br />
3 "Full Screen!<br />
"The gallery will display a<br />
preview of the most recent<br />
video in the top half of the<br />
screen. A scrollable gallery<br />
view is below. Tap on any item<br />
to view in full screen. <br />
<br />
<strong>FORMATT</strong> <strong>VIDEO</strong> App - Walkthrough<br />
6
<strong>FORMATT</strong> <strong>VIDEO</strong><br />
Settings<br />
2<br />
1<br />
3<br />
4<br />
1 "Settings icon<br />
<br />
2 "Camera settings<br />
<br />
3 Info/Help<br />
Here you will find helpful resources and tips & tricks including the full<br />
Filters Video app manual and feedback/support screens. Also<br />
access our social media pages, “About’ page and a section of quickstart<br />
guides in the form of tool tip overlays (Note: many of these<br />
overlays appear by default when relevant e.g. using an ND Grad filter<br />
effect). <br />
<br />
4 Rate App – Give us your feedback<br />
Takes you to the app page in iTunes App store allowing you to rate<br />
the app and write a review<br />
<br />
Tapping the Settings icon (1) will bring up or close the menu. <br />
<br />
7
<strong>FORMATT</strong> <strong>VIDEO</strong><br />
Settings – Camera and Application<br />
1<br />
2<br />
3<br />
4<br />
5<br />
6<br />
On/off switches shown in the<br />
OFF position<br />
1 Resolution<br />
Select your preferred video<br />
capture size here. Available sizes<br />
for your device are as follows:<br />
Small 360p, Medium 480p,<br />
Large 640p, 720p HD or original<br />
1080p HD<br />
<br />
2 Grid!<br />
Allows you to apply a grid overlay<br />
to aid alignment and<br />
composition. Two sizes available,<br />
standard and modern. <br />
<br />
3 "Color mode!<br />
You can set your iPhone to shoot<br />
video in either full Color or true<br />
Black & White. When setting the<br />
setting is set to B&W, all images<br />
and effects will be in Black and<br />
White.<br />
<strong>FORMATT</strong> <strong>VIDEO</strong> App - Walkthrough<br />
4 "Focus lock!<br />
When set to On; after you<br />
have locked your focus<br />
point, the camera will hold<br />
this focal depth when<br />
moving the camera around.<br />
<br />
5 "Exposure lock!<br />
When set to On; after you<br />
have set your exposure,<br />
the camera will hold this<br />
level of exposure when<br />
moving the camera around. <br />
<br />
6 "Remember last filter!<br />
When set to "On",<br />
<strong>FORMATT</strong> <strong>VIDEO</strong> will<br />
remember the last filter you<br />
used and keep it selected.<br />
Default setting is "Off”.<br />
8
<strong>FORMATT</strong> <strong>VIDEO</strong><br />
Using the <strong>FORMATT</strong> <strong>VIDEO</strong> App<br />
<br />
The following section walks you through all aspects of using the <strong>FORMATT</strong> <strong>VIDEO</strong> from selecting<br />
and applying a filter to setting your exposure and focus points, using the live video editor and<br />
finally sharing the video. <br />
<br />
Please note that all <strong>FORMATT</strong> <strong>VIDEO</strong> App functions operate when using the front and rear<br />
camera and in portrait or landscape mode. When in Landscape mode, while the image will<br />
rotate, the menus will remain in their original position. <br />
<br />
9
<strong>FORMATT</strong> <strong>VIDEO</strong><br />
Introduction to filters<br />
How to apply and adjust filters<br />
P.11 <br />
Full list of filters<br />
P.16 – 24<br />
<br />
RECORDING!<br />
To start and stop recording, press the center button which will turn red to<br />
indicate you are recording. Note that if you exit the app or lock your iOS<br />
device, the recording will be cancelled. <br />
<br />
POSITIONABLE !<br />
The filter’s effect position can be adjusted vertically by swiping your finger up<br />
and down. This is usually, but not always, to adjust the gradient line.<br />
<br />
DENSITY <br />
Where a filter has multiple levels of density, these can be adjusted by<br />
swiping from left to right to increase density or from right to left to reduce<br />
density. The current density will always be shown in the status bar.<br />
<br />
<strong>FORMATT</strong> <strong>VIDEO</strong> App - Walkthrough<br />
10
<strong>FORMATT</strong> <strong>VIDEO</strong><br />
Filter selection<br />
1<br />
1 "Filters!<br />
Tapping the Filter selection icon<br />
will bring up the filter menu. <br />
<br />
2 Filter categories!<br />
From this screen select your filter<br />
category from the scrollable list. <br />
<br />
3 "Filter options!<br />
Option for the filter category will<br />
be listed in the scrollable bar<br />
beneath the categories. If the<br />
lower bar is empty, this is<br />
because the No Filter option is<br />
selected<br />
<br />
NOTE: Filters can be selected,<br />
changed and removed during before<br />
or during recording. <br />
2<br />
3<br />
<strong>FORMATT</strong> <strong>VIDEO</strong> App - Walkthrough<br />
11
<strong>FORMATT</strong> <strong>VIDEO</strong><br />
Applying and adjusting filters<br />
1<br />
After choosing the filter category and<br />
filter option, <strong>FORMATT</strong> <strong>VIDEO</strong> will<br />
apply it to your video in real time.<br />
<br />
1 "Filter adjustments!<br />
Many filters have positional<br />
capabilities. To adjust, typically<br />
move the gradient line up and<br />
down, or in the case of special<br />
effects filters, such as fog, this will<br />
reposition the effect. To increase<br />
filter density (when available), swipe<br />
from left to right on the screen and<br />
to decrease, swipe from right to left.<br />
<br />
Filter density and position controls<br />
work in landscape or portrait modes<br />
and will reorient themselves<br />
according to the device position.<br />
<br />
2 "Time code!<br />
An hour:minute:second time code<br />
while <strong>FORMATT</strong> recording. <strong>VIDEO</strong> App - Walkthrough<br />
2<br />
12
<strong>FORMATT</strong> <strong>VIDEO</strong><br />
Focus and Exposure Lock<br />
1<br />
Focus and Exposure locks are two<br />
of the most exciting features of the<br />
<strong>FORMATT</strong> <strong>VIDEO</strong> app helping<br />
transform your iOS device into a<br />
high quality video camera. <br />
<br />
1 "Focus and Lock!<br />
Tap on the screen to invoke and<br />
set the Focus tool. A target icon<br />
appears and will briefly display a<br />
locked padlock icon at the point<br />
at which focus has been<br />
locked. Focus can be adjusted<br />
before or during recording. <br />
<br />
2 "Exposure and Lock!<br />
Touch-and-hold on the screen<br />
to invoke the Exposure tool.<br />
While holding, drag the icon<br />
around the screen to set<br />
exposure. The exposure of the<br />
entire image is adjusted based<br />
on the chosen exposure at<br />
which your finger leaves the<br />
screen.<br />
2<br />
13
<strong>FORMATT</strong> <strong>VIDEO</strong><br />
Live Video Settings<br />
1<br />
2<br />
4<br />
3<br />
Having the ability to adjust settings during live filming gives immense amounts of<br />
creative control. <br />
<br />
1 "Options!<br />
Choose from Contrast, Brightness, Warmth, Exposure<br />
<br />
2 "Slider<br />
Adjust each option with the slider.<br />
!<br />
3 "Reset!<br />
You can reset each individual slider using the reset icon (indicated) at the far<br />
right or choose Cancel to return to the live view screen. <br />
<br />
4 "Reset All!<br />
Return the sliders to their default position while remaining in the editor screen<br />
Note that the default position for each slider changes dependant upon which<br />
filter is applied. <br />
<br />
Once you are happy with your changes, hit Apply to lock in the effect. <br />
<br />
Note that while recording any changes made will be applied to the live recording.<br />
<br />
<strong>FORMATT</strong> <strong>VIDEO</strong> App - Walkthrough<br />
14
<strong>FORMATT</strong> <strong>VIDEO</strong><br />
Filter Categories and Descriptions<br />
ProFX!<br />
A selection of Neutral Density filters and polarizer. (Note: Due to the fact that these filters are created digitally<br />
without the limitations of the dyeing process, these filters are inherently more neutral than any physical filter. This<br />
gives the <strong>FORMATT</strong> <strong>VIDEO</strong> real power in enabling the creation of professional images on iOS devices. )<br />
!<br />
ND REV!<br />
Postitionable. 3 Levels of<br />
density. Relatively rare in the<br />
physical market, the Reverse<br />
ND is purpose designed for<br />
shooting sunsets and sunrises<br />
and is being used more<br />
frequently for night-time cityscapes.<br />
This filter places the<br />
darkest area of the filter on the<br />
horizon line then graduates up to<br />
reduce glare on cloud<br />
formations and allows you to<br />
preserve all of the visible detail<br />
below the horizon line. <br />
<br />
ND GRAD!<br />
Postitionable. 6 Levels of<br />
density. A soft edge graduated<br />
filter. (Note: Hard edge filters<br />
have been created but are not<br />
currently available due the<br />
limitations of the focal length of<br />
cameras on iOS devices.)<br />
<br />
<br />
<br />
<br />
<br />
<br />
<br />
<br />
ND STD!<br />
11 Levels of density. Applies<br />
neutral density affect to the<br />
entire image. Used where there<br />
is a need to reduce glare but the<br />
overall distribution of light is<br />
even. <br />
<br />
<br />
<br />
<br />
<br />
<br />
<br />
<br />
<br />
Polarizer!<br />
A phenomenal filter which<br />
replicates as closely as is<br />
possible in the digital world, the<br />
real world effects of a polarising<br />
filter. This filter enhances blue<br />
tones and minimises reflected<br />
images to give some remarkable<br />
effects.
<strong>FORMATT</strong> <strong>VIDEO</strong><br />
Filter Categories and Descriptions<br />
PhotoFX!<br />
A selection of effects overlays. Some with density and position adjustment<br />
!Day4Nite!<br />
Variable density control.<br />
An interesting filter that<br />
lets you turn a bright<br />
summery day into dusk<br />
or full night-time. More<br />
refined than simply<br />
applying a blue mask,<br />
scale the image from full<br />
daylight through dusk,<br />
into full night and<br />
everything in between<br />
<br />
Fog!<br />
Positionable. 3 Levels of<br />
density. A brilliant fog<br />
effect with varying levels<br />
of density<br />
HotMist!<br />
3 Levels of density:<br />
Applies a uniform<br />
warming mist effect<br />
<br />
Mist!<br />
3 Levels of density.<br />
Applies a uniform, white<br />
mist effect<br />
<br />
Saturate<br />
Vertical adjustment.<br />
Allows you to gradually<br />
shift the colour balance<br />
from intense colour down<br />
to near black and white<br />
!<br />
!<br />
Smoke!<br />
Positionable. 3 Levels of<br />
density. By applying<br />
colour masks to the fog<br />
effect we have created a<br />
smoke filter that acts in<br />
the same way as fog but<br />
applies the red and<br />
yellow tones you would<br />
associate with smoke<br />
<br />
Swirly<br />
Swipe up and down to<br />
adjust effect. Adjustable<br />
“Warp’ effect<br />
<br />
!<br />
!<br />
WarmMist<br />
Positionable. 3 Levels of<br />
density. As with mist but<br />
applies a slight red hue<br />
<br />
Twilight<br />
Positionable. 3 Levels of<br />
density. A composite of<br />
three different graduated<br />
shades, Twilight soft<br />
edge filters transform a<br />
daytime scene to<br />
stunning dusk with a<br />
dark blue hue blending<br />
down to a pale magenta.<br />
Or go to level three for a<br />
surreal image with vivid<br />
other-worldly colours<br />
Sunset<br />
Positionable. 3 Levels of<br />
density. The sunset filters<br />
starts at the top with an<br />
orange red and<br />
graduates down to soft a<br />
yellow<br />
<br />
!
!<br />
<strong>FORMATT</strong> <strong>VIDEO</strong><br />
Filter Categories and Descriptions<br />
Retro!<br />
A series of era inspired retro filters replicating the appearance of photos taken in the chosen era. This section is<br />
effectively an app in its own right as it contains the largest known variety of retro effects in a single app. <br />
1930s!<br />
This filter is black and<br />
white and emphasises<br />
shadow, use the<br />
exposure lock to create<br />
deep shadows or<br />
overexpose to create a<br />
different effect.<br />
<br />
1940s!<br />
Much of the 40's<br />
imagery was black and<br />
white so despite colour<br />
photography starting to<br />
become more<br />
mainstream in the 30's,<br />
photography in the 40's<br />
and 50's was still largely<br />
black and white. It is this<br />
style of photograph that<br />
we have aimed to<br />
replicate here<br />
1950s!<br />
Images were still<br />
predominantly black and<br />
white but unlike previous<br />
eras the balance<br />
between light and shade<br />
was much better<br />
controlled<br />
<br />
1960s!<br />
Amateur 1960's images<br />
are probably the most<br />
instantly recognisable by<br />
the slightly blurred<br />
imagery and pinkish<br />
hue. <br />
<br />
1970s!<br />
Colour reproduction by<br />
the 70's was much<br />
better but a slight pink<br />
cast was still perceptible<br />
1980s!<br />
The 1980's was a tricky<br />
era to emulate however<br />
we hope we have<br />
achieved it with this filter<br />
which maintains image<br />
sharpness and clarity but<br />
applies a slight green<br />
cast.<br />
<br />
Antique!<br />
Applies a pale brown and<br />
white filter<br />
<br />
Bygone!<br />
Retains more of the<br />
original colour and<br />
shades that Antique, but<br />
still carries a sepia mask.<br />
<br />
!<br />
!<br />
Frontier!<br />
Most reminiscent of the<br />
photography of the “wild<br />
west”.<br />
<br />
Wayback!<br />
Almost Victorian effect<br />
images are delivered with<br />
this filter, albeit some<br />
colour is retained<br />
<br />
Warmer!<br />
A retro inspired diffusion<br />
effect.<br />
<br />
Sharp!<br />
Sharpens the image and<br />
softens colours to give<br />
an almost black and<br />
white/sepia image.
<strong>FORMATT</strong> <strong>VIDEO</strong><br />
Filter Categories and Descriptions<br />
Color!<br />
A series of soft edge graduated color filters. All come with three levels of density and position alignment.<br />
!Apricot!<br />
A graduated apricot<br />
coloured effect.<br />
<br />
Autumn!<br />
A pale orange/brown<br />
graduating through orange<br />
to a mild yellow, a great<br />
filter to bring warmth to<br />
your shots<br />
<br />
Blue!<br />
A filter for a cooling effect<br />
on your images<br />
<br />
Cerise!<br />
Swipe across to level 3 to<br />
adding surreal drama to<br />
cloudy skies <br />
<br />
Cocoa!<br />
At its' highest intensity,<br />
applies a deep brown<br />
hue. Great for enhancing<br />
natural woodwork shades.<br />
<br />
CoolBlue!<br />
As with Blue applies a<br />
cooling hue to the image,<br />
but more intense<br />
<br />
Coral!<br />
A soft orange hue that<br />
adds warmth<br />
<br />
Cyan!<br />
Provides a pale turquoise<br />
at it's lowest intensity and<br />
an almost underwater<br />
effect at it's highest. <br />
Green!<br />
Delivers a graduated<br />
green hue, ideal for<br />
enhancing natural greens<br />
in foliage<br />
<br />
Magenta!<br />
The same magenta used<br />
as part of our twilight<br />
effect, this filter transforms<br />
dull skyscapes.<br />
<br />
Orange!<br />
Fantastic at adding<br />
warmth, the second level<br />
gives the ideal amount of<br />
colour depth while<br />
preserving natural colours<br />
<br />
<br />
Pink!<br />
Delivers a soft to intense<br />
pink effect.<br />
!<br />
Plum!<br />
A subtle plum coloured<br />
effect<br />
<br />
Red!<br />
Great for discreetly<br />
enhancing sunsets.<br />
<br />
Sepia!<br />
A great retro quick fix.<br />
<br />
Straw!<br />
A natural "summery" effect<br />
with mild yellow tones. <br />
<br />
!<br />
Tobac!<br />
Superb at enhancing red/<br />
brown tones. For<br />
example, enhancing the<br />
colour depth of brick<br />
buildings for the<br />
architectural shooter<br />
Violet!<br />
A more intense effect than<br />
the Plum filter<br />
<br />
Yellow!<br />
Creates a delicate warmth<br />
at the lowest level and an<br />
extremely intense yellow<br />
at the top level.
<strong>FORMATT</strong> <strong>VIDEO</strong><br />
Filter Categories and Descriptions<br />
Color - continued!<br />
A series of soft edge graduated color filters. All come with three levels of density and position alignment.<br />
!B2Y!<br />
B2Y (Blue 2 Yellow) works<br />
on hues that sit directly<br />
opposite each other on<br />
the spectrum<br />
<br />
<br />
<br />
<br />
<br />
<br />
<br />
Elec-B!<br />
Gives at its highest<br />
density an extreme blue<br />
hue, but leaves the<br />
brightest areas virtually<br />
untouched<br />
<br />
<br />
<br />
<br />
<br />
<br />
Elec-G!<br />
Gives at its highest<br />
density an extreme green<br />
hue, leaves the brightest<br />
areas virtually untouched<br />
<br />
<br />
<br />
<br />
<br />
<br />
<br />
M2G!<br />
Magenta to Green.<br />
Magenta and green sit<br />
directly opposite each<br />
other on the colour<br />
spectrum and this filter<br />
allows you to swipe up to<br />
emphasis and eventually<br />
saturate green tones<br />
whilst swiping down will<br />
have the same effect with<br />
magenta.
!<br />
<strong>FORMATT</strong> <strong>VIDEO</strong><br />
Filter Categories and Descriptions<br />
B&W!<br />
A Series of black and white contrast filters with many replicating the Formatt-Hitech range of true Wratten black<br />
and white filters . This is the most fully formed collection of black and white filters in any known app.<br />
* Indicates Wratten number most closely replicated by the filter.<br />
<br />
Cocoa!<br />
A good all-round<br />
b/w filter. Colors<br />
are represented as<br />
true shades with<br />
no special<br />
treatment<br />
<br />
DarkBlue<br />
(*47 Blue)<br />
This blue black &<br />
white contrast filter<br />
accentuates haze<br />
and fog, used for<br />
contrast effects.<br />
!<br />
!<br />
!<br />
!<br />
DK Green !<br />
(*61 Deep Green) <br />
This filter is ideal<br />
for scenes where<br />
it is important to<br />
differentiate the<br />
green tonal values<br />
in black and white<br />
photography<br />
<br />
DK Red !<br />
(*29 Deep Red)<br />
A high contrast<br />
filter similar to Dark<br />
Blue, provides<br />
very strong<br />
contrast.<br />
!<br />
!<br />
Green<br />
(*11 Yellow Green)<br />
Darkens blue<br />
skies but<br />
preserves natural<br />
skin tones. <br />
<br />
Light Blue !<br />
(*38 Blue)<br />
For correcting reds<br />
that reproduce too<br />
light under<br />
tungsten<br />
illumination. Skin<br />
tones are more<br />
natural, modelling<br />
is improved.<br />
!<br />
!<br />
Orange<br />
(*23 Orange) <br />
This filter absorbs<br />
a small amount of<br />
green and will<br />
make clouds<br />
brighter.<br />
<br />
Red!<br />
(*25 Red)<br />
Suppresses blue<br />
and green, white<br />
surfaces appear<br />
brilliant. <br />
<br />
Tea Rose!<br />
This filter absorbs<br />
a small amount of<br />
green<br />
Yellow<br />
(*8 Yellow)<br />
Increases contrast<br />
and is particularly<br />
useful for midday<br />
sun and deep<br />
shadow. It<br />
accentuates<br />
clouds, reduces<br />
haze and will<br />
reproduce<br />
distance better<br />
<br />
20
!<br />
<strong>FORMATT</strong> <strong>VIDEO</strong><br />
Filter Categories and Descriptions<br />
Popart!<br />
A collection of artist inspired and light altering effects. This unique collection of filters creates effects that could<br />
never be replicated in live photography. Some are especially effective when used with landscapes, sky and water<br />
whereas others lend themselves to portraiture. <br />
<br />
Blue Ice!<br />
One of three light altering<br />
filters. Blue ice applies an<br />
electric blue mask where<br />
shades of light are<br />
portrayed in waves. Use<br />
exposure to change the<br />
effect.<br />
<br />
Cezanne!<br />
Colors are represented in<br />
overlapping blocks. <br />
<br />
!<br />
Haunted!<br />
Similar to Blue Ice<br />
patches of brightest light<br />
are muted to a grey tone.<br />
The exposure tool also<br />
alters the effect.<br />
!<br />
Klee!<br />
A more intense cubism<br />
effect than Cezanne with<br />
darker tones. <br />
<br />
!<br />
!<br />
Monet<br />
Similar to Klee however<br />
colours are muted to<br />
black and white. <br />
<br />
Oldie<br />
The third of light altering<br />
filters, as with Blue Ice<br />
and Haunted, Oldie gives<br />
an effect never seen<br />
before in a photographic<br />
app. Use exposure to<br />
change the effects. <br />
!<br />
Poster!<br />
A softer effect on<br />
individual colours than<br />
Toons and no bordering<br />
creates a subtle but eyecatching<br />
effect. <br />
<br />
Sketchy<br />
Edges are defined in<br />
blacks and greys to give<br />
an excellent and unique<br />
effect.<br />
<br />
!<br />
Toons<br />
Hard edges are defined in<br />
black and shades are<br />
hardened to create blocks<br />
of colour excellent for use<br />
on buildings and faces. <br />
Warhol<br />
Inspired by the great man<br />
himself, the Warhol filter<br />
mutes down individual<br />
shades to give more<br />
defined blocks of colour.<br />
<br />
21
<strong>FORMATT</strong> <strong>VIDEO</strong><br />
Filter Categories and Descriptions<br />
Portrait!<br />
A collection of diffusion filters tailored specifically for close up portraiture work.<br />
<br />
<br />
!<br />
Blush!<br />
Blush applies a<br />
gentle diffusion<br />
with a pale pink<br />
hue<br />
<br />
Clover!<br />
The more<br />
reflective the<br />
surface, the<br />
greener it<br />
becomes. <br />
Cool!<br />
Applies a gentle<br />
diffusion with a<br />
pale blue hue<br />
!<br />
Cooler!<br />
Replicating<br />
Formatt-Hitechs<br />
Warm 2 <br />
<br />
<br />
!<br />
Diffuse!<br />
Applies a diffusion<br />
effect and<br />
softening of<br />
colours<br />
<br />
Ice Maid!<br />
Applies a dramatic<br />
cooling effect with<br />
diffusion<br />
<br />
!<br />
Lilac!<br />
Diffusion with a<br />
lilac mask.<br />
<br />
Lit Up!<br />
Mutes colours<br />
and enhances<br />
contrast for more<br />
definition of depth<br />
<br />
!<br />
!<br />
Pink!<br />
Enhances and<br />
softens skin tones<br />
<br />
Surreal!<br />
A more intense<br />
diffusion effect.<br />
<br />
22
<strong>FORMATT</strong> <strong>VIDEO</strong><br />
Filter Categories and Descriptions<br />
Lenses!<br />
Adjustable vignette frames, tilt and blur.<br />
<br />
<br />
!<br />
Vignette1!<br />
An adjustable oval black<br />
vignette to create olde<br />
worlde type images. <br />
<br />
<br />
Vignette2!<br />
An adjustable oval white<br />
vignette to create olde<br />
worlde type images. <br />
<br />
<br />
Tilt!<br />
Applies a positionable<br />
horizontal blur with a<br />
central area in focus. <br />
<br />
<br />
Blur!<br />
Create interesting effects<br />
by blurring the outside of<br />
the image. Blur expands<br />
or contracts in an oval<br />
shape.<br />
Gamma!<br />
Swipe vertically to adjust<br />
contrast depth from deep<br />
colour to white-out. <br />
23
<strong>FORMATT</strong> <strong>VIDEO</strong><br />
Thank you !<br />
For more information<br />
Visit us at www.filtersapp.com<br />
Contact us at: support@filtersapp.com