
You also want an ePaper? Increase the reach of your titles
YUMPU automatically turns print PDFs into web optimized ePapers that Google loves.
USER’S GUIDE<br />
<strong>AudioGate</strong> Ver. 2.0
Contents<br />
Introduction . . . . . . . . . . . . . . . . . 3<br />
Supported formats . . . . . . . . . . . 3<br />
Supported file formats . . . . . . . . . . . . . . . . . . . 3<br />
Supported disc formats . . . . . . . . . . . . . . . . . . 4<br />
Items on the screen . . . . . . . . . . . 5<br />
About the level meter and clip indicator . . . . . . 5<br />
Importing to a songlist . . . . . . . . 7<br />
Importing an audio file . . . . . . . . . . . . . . . . . . . 7<br />
Importing an MR project . . . . . . . . . . . . . . . . . . 8<br />
Importing an audio CD/DSD disc . . . . . . . . . . . 9<br />
Exporting in<br />
a different audio format . . . . . 23<br />
Exporting an audio file . . . . . . . . . . . . . . . . . . .23<br />
Creating an audio CD or DSD disc . . . . . . . . .27<br />
Optional settings . . . . . . . . . . . . . . . . . . . . . . .29<br />
Other settings . . . . . . . . . . . . . . . 32<br />
Changing the folder<br />
where temporary files are created . . . . . . .32<br />
Resetting the warnings of all dialog boxes . . .33<br />
List of shortcuts . . . . . . . . . . . . . 34<br />
Song Playback . . . . . . . . . . . . . . 10<br />
Playing back a song . . . . . . . . . . . . . . . . . . . . 10<br />
Contents of the info viewer display . . . . . . . . 10<br />
Transport Controllers . . . . . . . . . . . . . . . . . . . 11<br />
Playback mode setting . . . . . . . . . . . . . . . . . . 12<br />
Repeat playback . . . . . . . . . . . . . . . . . . . . . . 12<br />
Direct Locate function . . . . . . . . . . . . . . . . . . 12<br />
Direct song selection . . . . . . . . . . . . . . . . . . . 13<br />
Audio device settings . . . . . . . . . . . . . . . . . . . 13<br />
Song editing . . . . . . . . . . . . . . . . 14<br />
Basic operation in the songlist . . . . . . . . . . . . 14<br />
Saving a songlist . . . . . . . . . . . . . . . . . . . . . . 14<br />
Opening a songlist . . . . . . . . . . . . . . . . . . . . . 14<br />
Opening a recently-used songlist . . . . . . . . . . 14<br />
Renaming a song . . . . . . . . . . . . . . . . . . . . . . 14<br />
Editing text data . . . . . . . . . . . . . . . . . . . . . . . 15<br />
Changing the attached picture . . . . . . . . . . . . 16<br />
Editing metadata for multiple songs . . . . . . . . 17<br />
Editing the song settings . . . . . . . . . . . . . . . . 18<br />
Dividing a song . . . . . . . . . . . . . . . . . . . . . . . 19<br />
Combining songs . . . . . . . . . . . . . . . . . . . . . . 19<br />
Channel Link function . . . . . . . . . . . . . . . . . . 20<br />
Mark function . . . . . . . . . . . . . . . . . . . . . . . . . 20<br />
Viewing file information . . . . . . . . . . . . . . . . . 22<br />
Other convenient functions . . . . . . . . . . . . . . 22
Introduction<br />
<strong>AudioGate</strong> is an audio file conversion application that supports 1-bit audio. Using <strong>AudioGate</strong>, audio files<br />
recorded by the <strong>Korg</strong> MR series can be converted and exported in the desired format, and you can create audio<br />
CDs or DSD discs. Editing operations such as cut, fade, and normalize are also supported.<br />
Supported formats<br />
Supported file formats<br />
<strong>AudioGate</strong> is able to import/export (input/output) audio files of the following formats.<br />
File format<br />
(extension)<br />
Windows Mac Number of<br />
channels<br />
In Out In Out<br />
Sample rate<br />
Bit depth<br />
PCM WAV (.wav) ● ● ● ●<br />
44.1 kHz, 48 kHz 16 bit, 24 bit<br />
BWF (.wav) ● ● ● ● 1ch 88.2 kHz, 96 kHz 32 bit(float)*1<br />
AIFF (.aif/.aiff) ● ● ● ●<br />
2ch 176.4 kHz, 192 kHz<br />
16 bit, 24 bit<br />
1-bit DSDIFF(.dff) ● ● ● ●<br />
DSF(.dsf) ● ● ● ●<br />
WSD(.wsd) ● ● ● ●<br />
1ch<br />
2ch<br />
2.8224 MHz<br />
5.6448 MHz 1-bit<br />
Irreversible<br />
compression<br />
MP3 (.mp3) ● ❍*3 ❍*1<br />
AAC (.m4a) ❍*1 ❍*1 ❍*1<br />
WMA (.wma) ● ● ❍<br />
*1, *2<br />
1ch<br />
2ch<br />
44.1 kHz, 48 kHz -<br />
WMA Professional<br />
(.wma)<br />
● ● ❍<br />
*1, *2<br />
2ch<br />
44.1 kHz, 48 kHz<br />
88.2 kHz, 96 kHz<br />
Lossless<br />
compression<br />
WMA Lossless<br />
(.wma)<br />
● ● ❍<br />
*1, *2<br />
2ch<br />
44.1 kHz, 48 kHz<br />
88.2 kHz, 96 kHz<br />
16 bit (only 44.1<br />
kHz), 24 bit<br />
Apple Lossless<br />
[ALAC] (.m4a)<br />
❍*1 ❍*1 ❍*1 1ch<br />
2ch<br />
FLAC (.flac) ● ● ● ●<br />
44.1 kHz, 48 kHz<br />
88.2 kHz, 96 kHz<br />
176.4 kHz, 192 kHz<br />
16 bit, 24 bit<br />
*1 Supported if QuickTime7 is installed<br />
*2 Supported if Flip4Mac WMV is installed.<br />
http://www.microsoft.com/windows/windowsmedia/player/wmcomponents.mspx<br />
*3 Supported if Windows Media Player 10 or later is installed<br />
In some cases, it may not be possible to correctly read files that were not created by a <strong>Korg</strong> MR series unit or<br />
by <strong>AudioGate</strong>.<br />
Audio files protected by DRM (Digital Rights Management) cannot be loaded.<br />
3
Supported disc formats<br />
<strong>AudioGate</strong> supports reading and creation of audio CDs and DSD discs.<br />
<strong>AudioGate</strong> can create discs in the following formats.<br />
Disc format Audio CD (CD-DA) DSD discs<br />
Disc media CD-R, CD-RW DVD-R, DVD-RW<br />
DVD+R, DVD+RW<br />
Approximate recording time<br />
Approx. 74 minutes<br />
(when using 700 MB media)<br />
Approx. 100 minutes<br />
(when using 4.7 GB media)<br />
Number of albums<br />
that can be recorded on one disc<br />
Maximum number of tracks<br />
that can be recorded on one disc<br />
1 1<br />
99 99<br />
Recording time for one track Minimum 4 seconds 0 seconds<br />
Maximum Approx. 74 minutes Approx. 100 minutes (4 GB)<br />
Sampling frequency 44.1 kHz 2.8224 MHz<br />
Bit depth 16 1<br />
Number of channels 2 2<br />
Recordable metadata<br />
CD-TEXT format<br />
(alphanumeric only)<br />
• Title<br />
• Artist name<br />
* Not recordable for some drives<br />
ID3v2.3 format<br />
• Title<br />
• Artist name<br />
• Genre<br />
• Date and time of recording<br />
• Attached picture<br />
Writing to dual-layer DVD media is not supported.<br />
A writable CD/DVD drive is required in order to create audio CDs or DSD discs.<br />
What are DSD discs?<br />
DSD discs are a new disc format that was created as a way for an individual to record and playback DSD format<br />
material. This means that the methods used to create audio discs on CD-R or CD-RW media are now also<br />
available for the world of DSD audio. DSD discs can be played on compatible players and enjoyed in their<br />
original high quality.<br />
DSD disc is a disc format that is different than the Super Audio CD. Not all Super Audio CD players will<br />
necessarily be able to play back a DSD disc.<br />
* DSD discs (1-bit; 2.8 MHz) created by <strong>AudioGate</strong> Version2.0 can be played back on players such as the<br />
Sony SCD-XA5400ES Super Audio CD/CD player or PLAYSTATION®3 from Sony Computer Entertainment<br />
Inc. DSD discs to be played on the Sony SCD-XA5400ES require the following conditions. <strong>AudioGate</strong><br />
Version 2.0 meets this conditions. (As of April 1st, 2009, confirmed by KORG Inc.)<br />
- Disc: DVD-R, DVD-RW, DVD+R, and DVD-RW, that are compatible with DVD-ROM specifications<br />
- File extension: dsf<br />
- Folder type: DSD_DISC folder<br />
- Maximum size of a file: up to 4GB<br />
- Channel: 2-channel<br />
- Maximum number of playable files: up to 150 files per folder<br />
4
- Maximum number of playable folders: up to 200 folders per disc<br />
- Maximum number of playable layers: up to 8th layer<br />
- Sampling frequency: 2.8224 MHz<br />
* PLAYSTATION is a registered trademark of Sony Computer Entertainment Inc.<br />
Japan: http://www.jp.playstation.com/<br />
US: http://www.us.playstation.com/<br />
Europe: http://uk.playstation.com/country-selector/<br />
Please check following URL for other countries.<br />
http://www.playstation.com/country-selector/<br />
* “DSD Disc Format” is a trademark of Sony Corporation.<br />
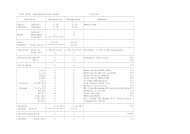
Items on the screen<br />
Menu<br />
Controllers<br />
Clip<br />
Indicator<br />
Info<br />
viewer<br />
Level<br />
meter<br />
Songlist<br />
[EXPORT] button<br />
[BURN DISC] button<br />
About the level meter and clip indicator<br />
During song playback and during export, <strong>AudioGate</strong>'s level meter shows the peak values of the output data following<br />
sample rate conversion.<br />
When playing a song, exporting a PCM file, or creating an audio CD, the units are dBFS relative to full-scale linear<br />
PCM data (0 dB).<br />
Except for when exporting a 32-bit (float) file, the clip indicator will light when there is a signal that would<br />
exceed 0 dBFS, and the signal will be clipped to 0 dBFS and exported.<br />
When exporting a 1-bit audio file and when creating a DSD disc, the units are dB-SACD, with the theoretical<br />
limit of Delta-Sigma conversion defined as +6dB-SACD.<br />
Normally, you will adjust the GAIN (see page 18)so that the peak value of the 1-bit output data stays within<br />
the 0–+3 dB-SACD range.<br />
It is not necessarily the case that the output signal has clipped at the point that 0 dB-SACD or +3 dB-SACD is<br />
exceeded; however when the integrator of the Delta-Sigma modulator reaches a specific amount, the clip<br />
indicator will light and the signal will be output in a clipped state.<br />
5
The conversion algorithm of most PCM DSD converters (including <strong>AudioGate</strong>) is designed so that by<br />
default, 0 dBFS = 0 dB-SACD.<br />
Changing the peak hold time<br />
<strong>AudioGate</strong>'s level meter and clip indicator provide a peak hold function. Here's how to change the length of time<br />
that these indications are held.<br />
1. Right-click (Mac: Control+click) the level meter.<br />
2. Choose “Peak Hold Duration of Level meter >” or “Hold Duration of Clip Indicator >” and select the<br />
desired time from the options shown.<br />
Clearing the peak hold indication<br />
When the level meter is in use, clicking the level meter will clear the hold indicators without waiting for the specified<br />
hold times.<br />
6
Importing to a songlist<br />
Audio files, MR projects, or audio CD/DSD discs can be imported into an <strong>AudioGate</strong> songlist and played within<br />
<strong>AudioGate</strong> or converted to a desired format for export.<br />
In <strong>AudioGate</strong>, each item of audio data in the songlist is called a “song.”<br />
Simply importing an item into an <strong>AudioGate</strong> songlist does not back up the file. Before you proceed, we recommend<br />
that projects recorded on your MR series unit be copied to the hard disk of your computer.<br />
Importing an audio file<br />
• Drag the audio file that you want to import into the songlist.<br />
Alternatively, you can click the [ADD] button and select the desired audio file from the file selection dialog<br />
box.<br />
[ADD] button<br />
drag & drop<br />
7
Importing an MR project<br />
You can import a project that was recorded on a <strong>Korg</strong> MR series unit.<br />
Although it is possible for data recorded on your MR series unit to be imported as an audio file, importing the<br />
data as an MR project will allow the marks that were added during recording to be imported, and even if the<br />
audio files have been divided they will automatically be joined so that they can be handled as a single song.<br />
• Drag the MR project (the entire MR project folder) that you want to import into the songlist.<br />
Alternatively, you can click the [ADD] button and select the .prj file (located in the folder) from the file selection<br />
dialog box.<br />
[ADD] button<br />
drag & drop<br />
8
Importing an audio CD/DSD disc<br />
The tracks from an audio CD/DSD disc can be imported as songs.<br />
You cannot load a DSD disc using a drive that does not support DVD.<br />
1. Insert the disc into your computer's CD/DVD drive.<br />
If another window (a different application) appears, close that window.<br />
2. Choose the [File]-[Open Disc...] command.<br />
A list of the audio discs inserted in your computer's drives will appear.<br />
If your computer does not detect a disc, a message will indicate “No audio discs found.” Wait for a brief<br />
time, and if the disc is still not detected, check whether the drive is correctly connected to your computer<br />
and make sure that there is no problem with the disc that has been inserted.<br />
3. From the list of audio discs, select the disc that you want to import, and click the “OK” button.<br />
If the audio CD you're importing contains embedded CD-TEXT data, the track titles will be used as the song<br />
names.<br />
9
Song Playback<br />
<strong>AudioGate</strong> will play back songs that are imported into the songlist. This provides a useful way to check the content<br />
of a 1-bit audio file, or to specify editing points.<br />
The song playback functionality provided by <strong>AudioGate</strong> is a convenience feature that uses a high-speed filter.<br />
In order to experience the full sound quality of 1-bit audio, please use a device that supports 1-bit audio,<br />
such as the <strong>Korg</strong> MR series.<br />
In <strong>AudioGate</strong>, the song that's playing (or paused for playback) is called the “current song.” The current song<br />
is indicated by a speaker icon in the songlist, and the info viewer will display information about that song.<br />
The current location in the current song is called the “current position”. The current position can be seen in<br />
the time display.<br />
Playing back a song<br />
Double-click a song in the songlist to make it the current song. Playback will begin automatically.<br />
If you experience problems with playback, for example if there is no sound or if there are frequent clicks or<br />
pops in the playback, please refer to "Audio device settings" (page 13).<br />
Speaker icon<br />
Double-click the song<br />
you want to play<br />
Contents of the info viewer display<br />
The info viewer shows information about the current song.<br />
Sample rate of<br />
the audio device<br />
Format<br />
Song name<br />
Text information<br />
[MARK] button<br />
Time information<br />
10
Item<br />
Sample rate of the audio device<br />
Song name<br />
Text data<br />
Format<br />
[MARK] button<br />
Time information<br />
Method<br />
Indicates the sample rate of the audio device. The current song is converted to<br />
this sample rate in realtime as it plays.<br />
Indicates the name of the current song.<br />
Indicates the title and artist name of the current song.<br />
Indicates the file format, number of channels, sample rate, and bit depth of<br />
the current song. When playing files with irreversible compression, the “bit<br />
depth” icon will be the “bit rate” indication (e.g., 128 kbps).<br />
Click the [MARK] button, and the mark editing window will open.<br />
Indicates the playback time and the current playback location of the current song.<br />
Transport Controllers<br />
You can use the following features to control the playback.<br />
REW<br />
FF<br />
Stop<br />
Play<br />
Time wheel<br />
To<br />
From<br />
Time slider<br />
Controller name<br />
[Play/Pause] button<br />
[Stop] button<br />
[FF] button<br />
[REW] button<br />
[To] button<br />
[From] button<br />
Time wheel<br />
Time slider<br />
Action<br />
Switches the current song between playback and pause<br />
Stops playback of the current song.<br />
Changes the current position to the next mark location. If there is no next mark, the<br />
current position will change to the next song in the songlist. By holding down this<br />
button you can fast-forward the playback point.<br />
Changes the current position to the previous mark location. If there is no previous<br />
mark, you will move to the beginning of the song. By holding down this button you<br />
can rewind the playback point.<br />
If you click this while paused, a two-second region ending at the current position<br />
will play.<br />
If you click this while paused, a two-second region starting from the current position<br />
will play.<br />
You can drag this upward/downward to make fine adjustments to the current position.<br />
This graphically indicates the current position. You can change the playback point by<br />
dragging this to left or right.<br />
11
Playback mode setting<br />
The playback mode will change each time you click this.<br />
SINGLE<br />
Only the current song will play.<br />
When the song finishes playing, playback will return to the beginning of the current song, and then stop.<br />
ALL<br />
The current song and all subsequent songs will play consecutively.<br />
When the last song finishes playing, playback will return to the first song of the songlist, and then stop.<br />
SHUFFLE<br />
All songs in the songlist will play in shuffled order.<br />
When all songs have finished playing, playback will stop.<br />
Repeat playback<br />
Repeat playback will turn on/off each time you click this.<br />
(on)<br />
Repeat playback will be used. This setting is valid for all playback modes.<br />
(off)<br />
Repeat playback will not be used. Playback will stop when the song(s) have finished playing.<br />
Direct Locate function<br />
This allows you to specify the current position directly from the keyboard.<br />
1. While a song is playing or stopped, click the counter in the info view.<br />
2. The counter will become an editable field. From the keyboard, enter the new counter position (e.g., 2:30).<br />
You may omit the colon (:), and simply enter “230” (interpreted as “2:30”) or “1204” (interpreted as “12:04”).<br />
Click<br />
Keyboard input<br />
Note that the current position has changed.<br />
12
Direct song selection<br />
This allows you to specify the current song directly from the keyboard.<br />
1. While the song is playing or stopped, enter a new songlist number such as “12” from the keyboard and<br />
press the Enter key to finalize the change.<br />
2. The current song will switch to the one you specified, and playback will start automatically.<br />
If you enter a number that is greater than the number of songs in the songlist, the last song will be selected.<br />
Audio device settings<br />
From the menu, choose [Edit]-[Preferences...] (Mac: [<strong>AudioGate</strong>]-[Preferences...]) to access the audio device settings.<br />
If the song does not play correctly, please check these settings to make sure that each item is configured<br />
properly.<br />
Fast CPU is required for stable playback of 1-bit audio files. If there are frequent clicks or pops in the playback,<br />
you may improve the performance by setting the audio sample rate lower and/or by setting the audio<br />
buffer size larger.<br />
Click<br />
13
Song editing<br />
<strong>AudioGate</strong> lets you divide or combine songs in the songlist. This allows you to export selected regions from an<br />
audio file, or combine multiple consecutively-recorded files into a single file before you export it. You can also<br />
edit the gain, fade, and DC cut settings of each song, and edit text data such as the title and artist name.<br />
Basic operation in the songlist<br />
Operation<br />
Select a song<br />
Remove a song<br />
Rearrange the songs<br />
Method<br />
Click the song. To select multiple songs, hold down the Ctrl key (Mac: Command<br />
key) and click. The selected song will be displayed in focus (highlighted).<br />
Select the song, and click the [REMOVE] button.<br />
Drag the selected song up or down in the list to move it.<br />
Saving a songlist<br />
From the menu, choose [File]-[Save Songlist As...] and specify a file name and a save-location. Songlist files will<br />
have an extension of “.agsl”.<br />
Opening a songlist<br />
From the menu, choose [File]-[Open Songlist...] and specify a songlist file that you saved.<br />
If the current songlist has not yet been saved, a message of “Save the current songlist before opening?” will<br />
appear. Choose [Save] if you want to save the current songlist, or [Don't Save] if you don't want to save it.<br />
If an audio file cannot be found because it has been moved or deleted, the song name is displayed in red. You<br />
can't play or export a song that is displayed in red.<br />
Even if <strong>AudioGate</strong> is not running, you can automatically start up <strong>AudioGate</strong> and load a songlist by dragand-dropping<br />
the desired songlist file (.agsl) onto the <strong>AudioGate</strong> icon.<br />
Opening a recently-used songlist<br />
1. From the [File] menu, choose [Open Recent Songlist >].<br />
A submenu will open, showing [Open Last Songlist] and a list of the recently used songlists.<br />
2. Choose the songlist that you want to open.<br />
Even if you did not save the songlist before exiting <strong>AudioGate</strong>, you can use [Open Last Songlist] to recover<br />
the songlist.<br />
The date and time shown in the songlist are the date and time at which it was last saved.<br />
Renaming a song<br />
When you click the song name in the songlist (or double-click the song name in the info viewer), the text will<br />
become editable. After you've finished editing the name, use the Enter key to finalize the change.<br />
The song name is used as the name of the output file when exporting.<br />
You can't rename a song using the same name as another song in the list.<br />
14
It is possible to enter Japanese (multi-byte text) as the song name, but you should use English alphanumeric<br />
characters if you intend to export as an MR project.<br />
Click the song name<br />
that you want to edit<br />
Enter the new song name,<br />
and press the Enter key<br />
to finalize the change<br />
Editing text data<br />
You can edit the text data of the current song (the song title and the artist name). When a file is exported, this<br />
information is embedded in the header of the exported file.<br />
Embedding to AAC and the Apple lossless file is not supported.<br />
It is possible to enter Japanese (multi-byte text) as text information, but you should use English alphanumeric<br />
characters if you intend to export in a format other than AIFF, DSF, MP3, WMA, FLAC file or DSD Disc. Due<br />
to limitations in the file format, characters other than English alphanumerics will be ignored when exporting.<br />
1. Double-click a song in the songlist.<br />
That song will become the current song, and the song information will appear in the info viewer.<br />
Double-click the<br />
song whose text<br />
data you want to edit<br />
2. In the info viewer, click the TITLE field to make the song title editable. When you're finished editing, press<br />
the Enter key to finalize the change.<br />
Click<br />
Enter the title and press<br />
Enter key to finalize<br />
3. In the same way, click the ARTIST field and edit the artist name.<br />
15
If you click the [INFO] tab in the info viewer, you will also be able to edit the “ALBUM” (album name),<br />
“GENRE” (musical style), “LOCATION” (recording location), “REC DATE” (date of recording), and “REC<br />
TIME” (time of recording) information, but depending on the format of the exported file, this information<br />
may not be embedded in the header.<br />
Click<br />
Changing the attached picture<br />
You can attach a picture to the current song. This picture can be embedded when exporting and when creating a<br />
disc.<br />
Loading a picture<br />
<strong>AudioGate</strong> can load images in the following formats.<br />
· Image files in JPEG or PNG format<br />
· Image files embedded in an AIFF, DSF, MP3, WMA, AAC, Apple lossless, or FLAC format audio file<br />
Exporting a picture<br />
<strong>AudioGate</strong> can embed the picture attached to a file when exporting the following formats.<br />
· AIFF, DSF, MP3, WMA, or FLAC format audio files<br />
· DSD discs<br />
Changing the attached picture<br />
1. In the info view, click the [PICTURE] tab.<br />
The attached picture for the current song will be displayed. If no image is attached, this will show the<br />
<strong>AudioGate</strong> icon and the message “No picture attached.”<br />
2. Click the attached image or <strong>AudioGate</strong> icon shown in the tab.<br />
A file selection dialog box will appear.<br />
Click<br />
16
3. Select the image file that you want to attach, and click [Open].<br />
You can also change the attached picture by dragging an image file into the [PICTURE] tab.<br />
Simply attaching an image file does not embed the image in the audio file. This means that if you move the<br />
image file, it will no longer be displayed in <strong>AudioGate</strong>. In order to embed the picture, you must export the<br />
file or create a disc.<br />
Deleting the attached picture<br />
1. In the info view, click the [PICTURE] tab.<br />
2. Move the mouse pointer onto the image shown in the tab, and click the [X] button.<br />
Click<br />
Deleting the attached picture in <strong>AudioGate</strong> does not delete the original image file.<br />
Editing metadata for multiple songs<br />
You can edit the text information or change the attached picture for the songs selected in the songlist.<br />
1. In the songlist, click a song to select it.<br />
2. Hold down the Ctrl key (Mac: Command key) and click other songs to select multiple songs.<br />
3. From the [Edit] menu, choose [Batch Edit Metadata...].<br />
The metadata editing screen will appear.<br />
4. Click the button at the left of each item you want to edit, so that the desired buttons are selected.<br />
17
5. Edit the data for the items you selected.<br />
Song Name<br />
If [Copy From Title] is selected, the song title will be used as the song name.<br />
If [Insert] is selected, a number will be inserted at the beginning of the song name.<br />
If [Remove] is selected, the number at the beginning of the song name will be deleted.<br />
By clicking the [Separator] field you can edit the text string that is inserted between the number and the song<br />
name.<br />
If you delete the number, the text string you entered in the [Separator] field will also be deleted from the<br />
beginning of the song name.<br />
If the songlist contains songs of the same name, a number will be added to the end of the name; e.g., “Song<br />
name.1”.<br />
Text Information<br />
When you click the text editing field located at the right of an item name, it will become editable. After you've<br />
edited the text, press the Enter key to finalize the change.<br />
Attached Picture<br />
If you want to change the attached image, click the displayed image and then select the desired image file.<br />
If you want to delete the attached image, move the mouse pointer onto the image and click the [X] button.<br />
6. Press the [OK] button.<br />
The metadata editing window will close, and the edits will be reflected in the songlist.<br />
Editing the song settings<br />
Various settings for the selected song are shown at the right of the songlist. You can edit these settings by doubleclicking<br />
them and entering a value (or by making the changes by dragging the mouse up or down in the selected<br />
field). These settings are reflected when you play back or export the song.<br />
Item<br />
GAIN<br />
BALANCE<br />
FADE IN<br />
Method<br />
Specify the volume level of the song in a range of – 60.0 dB...+ 60.0 dB. Adjust this so that the<br />
clip indicator does not light during playback or during exporting.<br />
This adjusts the left/right volume balance of the song within a range of L100...C...R100.<br />
However, the balance of a monaural song is fixed at C (center), and cannot be changed.<br />
This specifies the shape of the envelope used for the fade-in, and the time duration (0.0 seconds--10.0<br />
seconds) for the fade-in to be completed.<br />
FADE OUT This specifies the shape of the envelope that’s used for fade-out, and the time duration (0.0<br />
seconds--10.0 seconds) for the fade-out to be completed.<br />
DC CUT<br />
Normally you will leave this “OFF” (disabled). If the song file contains a DC offset, you can<br />
turn this “ON” to remove the offset. While often inaudible, a DC offset can reduce the available<br />
headroom before clipping, and can affect the sound quality in other ways.<br />
18
Dividing a song<br />
You can divide the current song into two separate songs at any point.<br />
1. Use the song playback functions to move to the point where you want to divide the song.<br />
2. Make sure that the playback is paused, and click the [DIVIDE] button.<br />
You will see that the song has been divided in the songlist.<br />
Text data and song settings will generally be carried over into both songs following the Divide operation.<br />
Move to the<br />
dividing point<br />
First half<br />
Click<br />
Last half<br />
Combining songs<br />
Combining songs splices the end of one song directly to the beginning of another song. Here's how you can combine<br />
two or more songs into a single song.<br />
1. In the songlist, click a song to select it.<br />
2. Hold down the Ctrl key (Mac: Command key), and click other songs to select them.<br />
Click<br />
Hold down the<br />
Ctrl key and click<br />
3. Click the [COMBINE] button.<br />
You will see that the songs have been combined in the songlist.<br />
Click<br />
Combined song<br />
You can use the “Combine” function to join recordings together that were not originally separated by the MR<br />
recorder's automatic split function, but some slight noise may be introduced at the point where the songs are<br />
joined.<br />
19
You can't combine songs of differing formats.<br />
You can't combine songs that are in compression formats such as MP3, AAC, Apple lossless (ALAC), or<br />
WMA.<br />
Text data and song settings will generally be taken from the top song in the list.<br />
Channel Link function<br />
This allows you to handle two monaural songs as a single stereo song. Normally you will use this to link two<br />
songs of the same length.<br />
1. Click one of the songs in the songlist to select it.<br />
2. Hold down the [Ctrl] key (Mac: [Command] key) and click the other song so that both songs are selected.<br />
3. Click the [CH LINK] button. Verify that the songs are linked in the songlist.<br />
You can't link songs of differing formats.<br />
You can't link songs that are in compression formats such as MP3, AAC, Apple lossless (ALAC), or WMA.<br />
If you link songs that are of differing lengths, the resulting length will match the longer song.<br />
Text data and song settings will generally be taken from the upper song in the list.<br />
Click<br />
Mark function<br />
Importing marks<br />
<strong>AudioGate</strong> can load the following marks.<br />
· Marks included in an MR project<br />
· Marks included in the cue-points chunk of a WAV/BWF file<br />
· Marks (track start and index) included in the marker chunk of a DSDIFF file<br />
Exporting marks<br />
<strong>AudioGate</strong> can embed marks when exporting the following file formats.<br />
· MR project format<br />
· WAV or BWF files<br />
· DSDIFF files<br />
Editing marks<br />
Click the mark button in the info view window, and the mark editing window will open.<br />
20
In the mark editing window you can see mark icons shown above the time slider at mark locations.<br />
Operation<br />
Selecting a mark<br />
Adding a mark<br />
Removing a mark<br />
Editing the location of a mark<br />
Removing all marks from the<br />
current song<br />
Dividing the song at mark<br />
locations<br />
Method<br />
Click the mark icon. The mark icon will be selected, and the mark number<br />
and mark location will be displayed in the mark box.<br />
Click the [ADD] button to add a mark at the current position.<br />
You can't add two marks at the same position.<br />
Select the mark that you want to remove, and click the [REMOVE] button.<br />
Select the mark whose location you want to edit, and click the displayed<br />
mark time. The time indication will become editable. Use the keyboard to<br />
enter the desired time, and press the Enter key.<br />
Choose the menu item [Edit]->[Remove All Marks].<br />
Choose the menu item [Edit]->[Divide At Marks].<br />
Moving to a mark location<br />
Operation<br />
Moving to the next<br />
mark<br />
Moving to the previous<br />
mark<br />
Moving to a specified<br />
mark<br />
Method<br />
Click the “FF” button. You will move to the “next mark” relative to the current position.<br />
Click the “REW” button. You will move to the “previous mark” relative to the current<br />
position.<br />
Double-click a mark icon.<br />
Click the “▼,” at the right edge of the mark box, and choose a mark from the list.<br />
21
Viewing file information<br />
You can view the file paths referenced by a song selected in the songlist.<br />
1. Right-click (Mac: Control-click) a song in the songlist.<br />
A menu will appear.<br />
2. From the menu, choose [File Info...].<br />
A dialog box will appear, showing the file path referenced by the song. If the song was created by combining,<br />
or by using the channel link function, the file path for each time region or channel will be shown.<br />
If the file cannot be found because it has been moved or deleted, the file path is shown in red.<br />
3. Right-click (Mac: Control-click) the file path.<br />
4. If you want to copy the file path to the clipboard, choose [Copy File Path]. If you want to open the folder in<br />
where the file is located, choose [Open Parent Folder].<br />
Other convenient functions<br />
Reverting an edit (Undo)<br />
By choosing the menu command [Edit]-[Undo], you can revert to the state prior to executing the most recent<br />
editing operation.<br />
Re-executing the edit (Redo)<br />
By choosing the menu command [Edit]-[Redo], you can re-execute the operation that was reverted by the<br />
Undo command.<br />
22
Exporting in a different audio format<br />
<strong>AudioGate</strong> can convert the songs in the songlist into a desired format and export them as audio files or use them<br />
to create an audio CD or DSD disc.<br />
The MR series does not necessarily support all formats that are supported by <strong>AudioGate</strong>. If you want the<br />
exported file to play on your MR series recorder, the file must be converted to a format that your MR series<br />
recorder supports. For more information, please refer to the owner's manual of your MR series unit.<br />
Exporting an audio file<br />
Here's how to convert the songs in the songlist into a desired format and export them as audio files or as an MR<br />
project. The song name in the songlist will be the name of the exported file.<br />
1. Make sure that the songlist contains the file that you want to export, and then click the [EXPORT] button.<br />
The export file setting screen will appear.<br />
Click<br />
2. Set the conversion source. Choose [All Songs] to export all songs in the songlist, or choose [Selected Songs]<br />
to export only selected songs in the list.<br />
Select<br />
23
3. In the “Destination” area, click the [...] button and choose the export-destination folder.<br />
Click<br />
Select the exportdestination<br />
folder<br />
4. Specify the desired output file format.<br />
Select<br />
5. Specify the desired output file type.<br />
Select<br />
Mono / Dual Mono<br />
A monaural song will be exported as a monaural file, and a stereo song will be exported as a dual mono file.<br />
This is especially convenient if the file is going to be brought into in a DAW after export.<br />
24
Stereo Interleaved:<br />
A channel-interleaved stereo file will be exported. In the case of a monaural song, the L channel and R channel<br />
will contain the same data. If you want to play back the file on the MR series recorder, copy it into the<br />
AUDIO folder.<br />
MR Project:<br />
An MR project folder containing a .prj file and audio file will be exported. This is useful when exporting<br />
very large audio data (exceeding the 4 GB limit of FAT32).<br />
Marks edited by <strong>AudioGate</strong> can be embedded into the MR project. If you want to play back the songs on the<br />
MR series recorder, copy the file to the appropriate location in the MR_PROJ folder. Please refer to the<br />
owner's manual of your MR series recorder for more information.<br />
6. Specify the desired sample rate and bit depth for the exported file.<br />
You can change the detail settings of the conversion algorithm by click [Edit] button in the option field.<br />
For more information, please refer to "Optional settings" (page 29).<br />
Select<br />
Select<br />
7. Click the [OK] button.<br />
A (red circle) will appear in the upper right of the info viewer, and file conversion export will begin.<br />
During the export process, you can stop the processing by clicking the [EXPORT] button once again.<br />
1-bit audio files may contain louder signals than PCM. When converting 1-bit audio files to PCM files,<br />
you might need to set GAIN settings down by approximately – 3.0 dB to avoid clipping (see page 18).<br />
When exporting a song as a 1-bit audio file, a minimal amount of silence may be added to the end of the<br />
exported file.<br />
25
If the input file and the output file have the same sample rates, and if the GAIN and DC CUT settings are<br />
kept to default (see page 18), <strong>AudioGate</strong> may switch to “direct exporting mode” where unnecessary<br />
recalculation is reduced. The level meter will be fixed to 0dB when <strong>AudioGate</strong> is running in “direct<br />
exporting mode.”<br />
Click<br />
8. When the process is finished, a dialog box will appear indicating “Export completed”. Click the [OK] button.<br />
Click<br />
26
Creating an audio CD or DSD disc<br />
You can create an audio CD or DSD disc from the songs in the songlist.<br />
Each song in the songlist will be written as one track on the disc.<br />
If the format of a song does not match the format of the disc, the format will be automatically converted before<br />
writing the song to disc.<br />
1. Make sure that the songlist contains the songs that you want to write to disc, and then click the [BURN<br />
DISC] button.<br />
The disc setting dialog box will appear.<br />
Click<br />
2. Specify the songs that you want to burn to disc. If you want all songs in the songlist to be burned to disc,<br />
choose [All Songs]. If you want only the selected song to be burned to disc, choose [Selected songs].<br />
3. Select the format of the disc that you want to burn.<br />
Select<br />
4. Select the drive you'll use to burn the disc from the list of writable CD/DVD drives.<br />
If you're creating a DSD disc, you must select a drive that can write DVDs.<br />
5. Insert a blank disc or a rewritable disc (CD-RW, DVD-RW, DVD+RW) into the drive that you selected in<br />
step 4.<br />
If any other windows (other applications) are open, close them to exit those applications.<br />
If you're creating an audio CD, you must insert a CD-R or CD-RW disc.<br />
27
If you're creating a DSD disc, you must insert a DVD-R, DVD-RW, DVD+R, or DVD+RW disc, whichever<br />
your drive supports.<br />
6. If you inserted a previously-used rewritable disc, click the [Erase] button to make the disc usable.<br />
Choose “Quick Erase” or “Full Erase”.<br />
Quick Erase<br />
The disc's TOC (Table Of Contents) information will be erased to make the disc usable. This allows faster<br />
processing, but in some cases a larger number of errors may occur, depending on the overwrite performance<br />
of the disc. If you experience problems when creating a disc, we recommend that you use Full Erase.<br />
Full Erase (clear the Quick Erase check box)<br />
The disc will be erased completely to make it usable. This will usually take more time than Quick Erase.<br />
When you erase a disc, all data will be lost. You cannot cancel during this operation, or undo it.<br />
7. Specify the disc writing speed.<br />
If you click [Edit] button in the option field. you'll be able to make detailed settings for the disc and the<br />
conversion algorithm. For more information please refer to “Optional settings.”<br />
8. Click the [Burn] button.<br />
A dialog box will show the progress; format conversion and disc burning will begin.<br />
9. When the disc has been created successfully, the dialog box will indicate “Writing completed. Do you want<br />
to create another disc?”, and the disc will be ejected.<br />
10. If you want to create another identical disc, insert a blank disc and choose [Create].<br />
If you're finished, choose [Don’t create].<br />
28
Optional settings<br />
When exporting audio files or creating a disc, you can click [Edit] in the option field to make detailed settings for<br />
the disc and conversion algorithm. The items that can be set will depend on the output format.<br />
Click<br />
Album Title<br />
This specifies the album title of the audio CD or DSD disc.<br />
This information is embedded in the disc, and can be displayed by players that support it.<br />
When creating an audio CD, this is written as CD-TEXT.<br />
Use alphanumeric characters if you're creating an audio CD. Some drives may not allow you to specify<br />
this item.<br />
Album Artist<br />
This specifies the name of the album artist for the audio CD or DSD disc.<br />
This information is embedded in the disc, and can be displayed by players that support it.<br />
When creating an audio CD, this is written as CD-TEXT.<br />
Use alphanumeric characters if you're creating an audio CD. Some drives may not allow you to specify<br />
this item.<br />
Go Between Songs<br />
This specifies the spacing between songs on an audio CD. For a drive that supports Disc-At-Once, you can create<br />
a gapless CD by specifying “None” as the song spacing.<br />
On some drives, the song spacing you specify might not be applied correctly.<br />
When you create a gapless CD, the location of the track division (the point at which songs are divided)<br />
might be automatically adjusted forward by a maximum of 1/75th of a second.<br />
29
2.8 MHz DSD Filter<br />
Sets the additional filter for the conversion from 1 bit/2.8 MHz songs to 176.4 kHz or 192 kHz PCM files.<br />
Select<br />
Off<br />
The additional filter will not be applied.<br />
Soft Roll-off (– 3 dB @50 kHz)<br />
Applies a low-pass filter with soft roll-off.<br />
Sharp Roll-off (– 3 dB @42 kHz)<br />
Applies a low-pass filter with sharp roll-off.<br />
Normalize<br />
This specifies whether normalization (increasing the level as high as possible without creating distortion) will<br />
be applied. If you enable this, the GAIN of each song will be automatically adjusted to the optimal value.<br />
Select<br />
Off<br />
Normalization will not be applied. The volume level after conversion will be according to the original GAIN<br />
setting.<br />
Individual Songs<br />
Each song will be normalized individually to its respective maximum volume. The original GAIN setting<br />
will be completely ignored.<br />
Current Songlist Selections (avg. level)<br />
The maximum peak from all songs being exported will be found, and the songs will be normalized while<br />
preserving the volume balance between songs.<br />
30
The original GAIN setting will be used to adjust the balance between songs.<br />
When you use normalization, the automatically-adjusted GAIN will be indicated in blue text while the<br />
files are being exported.<br />
In general, converting the sample rate will require samples to be interpolated, possibly causing the peak<br />
levels to be slightly higher than the original data. If the song's peak level was already close to 0 dB before<br />
normalization, the GAIN may be automatically adjusted to below 0 dB.<br />
1-bit audio data may contain loud sounds that exceed the limits of PCM. If normalization is applied when<br />
converting 1-bit audio to PCM, the GAIN may be automatically adjusted to about -3.0 dB.<br />
When exporting in 1-bit audio format, normalization is applied referenced to 0 dB-SACD, but in some<br />
cases the output data may slightly exceed the reference value (i.e., the level meter indication may exceed 0<br />
dB). Even in this case, the signal is far lower than the theoretical clipping level for 1-bit audio, so there will<br />
be no problem with the exported data as long as the clip indicator does not light.<br />
When normalization has completed successfully, and export or disc creation has ended, a dialog box will ask<br />
“Do you want to load the normalized gain setting to the songlist?” If you choose “Load,” the GAIN setting<br />
used for normalization will be applied to the “Song settings” for each song.<br />
By applying the GAIN used for normalization to the “Song settings” of each song, and then exporting<br />
with the Normalize box set to “Off,” you can greatly reduce the processing time for subsequent exports.<br />
However if you've changed the output sampling frequency, the peak values of the output data will change<br />
slightly, so you'll need to execute normalization once again.<br />
Dither<br />
Here is where you can choose the dither settings for exporting the results of the internal high-precision calculations<br />
as 16/24-bit data.<br />
Select<br />
None<br />
The results of the internal calculations are rounded up or down to 16/24-bit data. If the volume of the song is<br />
sufficiently loud, there will be no particular problems even with this setting.<br />
TPDF Dither<br />
Standard white noise dithering will be applied. The noise floor will increase slightly, but distortion components<br />
can be completely suppressed.<br />
Choose this if you'll be continuing to edit using another application after exporting the song.<br />
KORG AQUA<br />
This method takes into account the characteristics of human auditory perception, producing a higher-quality<br />
master by limiting the increase of quantization noise in important frequency regions.<br />
31
Choose this if you're exporting a song as the final master.<br />
<strong>AudioGate</strong> is able to automatically detect situations in which dithering is not necessary. Even if dithering<br />
is set to “TPDF Dither” or “KORG AQUA,” this setting may be ignored in some cases to avoid any<br />
increase in noise.<br />
Other settings<br />
Changing the folder where temporary files are created<br />
<strong>AudioGate</strong> sometimes creates temporary files when creating a disc or importing audio files.<br />
Here's how to change the location where these temporary files are created.<br />
1. From the [Edit] menu, choose [Preferences...] (Mac: [<strong>AudioGate</strong>]-[Preferences...]).<br />
2. Click the [Others] tab.<br />
3. In “Temporary Folder,” click “...” and select the desired folder.<br />
We recommend that you specify a hard disk drive with plenty of free space as the location in which the temporary<br />
file folder is created.<br />
Click<br />
32
Resetting the warnings of all dialog boxes<br />
Some warning dialog boxes have an option “Do not show this massage again.” If this check box is selected, that<br />
warning will no longer appear<br />
Here's how to make these suppressed warnings appear again.<br />
1. From the [Edit] menu, choose [Preferences...] (Mac: [<strong>AudioGate</strong>]-[Preferences...]).<br />
2. Click the [Others] tab.<br />
3. In “Reset All Dialog Warning,” click the [Reset] button.<br />
Click<br />
Regarding the FLAC license<br />
<strong>AudioGate</strong> uses the FLAC library pursuant to the following license.<br />
Copyright (C) 2000,2001,2002,2003,2004,2005,2006,2007,2008,2009 Josh Coalson<br />
Redistribution and use in source and binary forms, with or without modification, are permitted provided that<br />
the following conditions are met:<br />
· Redistributions of source code must retain the above copyright notice, this list of conditions and the following<br />
disclaimer.<br />
· Redistributions in binary form must reproduce the above copyright notice, this list of conditions and the following<br />
disclaimer in the documentation and/or other materials provided with the distribution.<br />
· Neither the name of the Xiph.org Foundation nor the names of its contributors may be used to endorse or promote<br />
products derived from this software without specific prior written permission.<br />
THIS SOFTWARE IS PROVIDED BY THE COPYRIGHT HOLDERS AND CONTRIBUTORS ``AS IS'' AND ANY<br />
EXPRESS OR IMPLIED WARRANTIES, INCLUDING, BUT NOT LIMITED TO, THE IMPLIED WARRANTIES<br />
OF MERCHANTABILITY AND FITNESS FOR A PARTICULAR PURPOSE ARE DISCLAIMED. IN NO EVENT<br />
SHALL THE FOUNDATION OR CONTRIBUTORS BE LIABLE FOR ANY DIRECT, INDIRECT, INCIDENTAL,<br />
SPECIAL, EXEMPLARY, OR CONSEQUENTIAL DAMAGES (INCLUDING, BUT NOT LIMITED TO, PRO-<br />
CUREMENT OF SUBSTITUTE GOODS OR SERVICES; LOSS OF USE, DATA, OR PROFITS; OR BUSINESS<br />
INTERRUPTION) HOWEVER CAUSED AND ON ANY THEORY OF LIABILITY, WHETHER IN CONTRACT,<br />
STRICT LIABILITY, OR TORT (INCLUDING NEGLIGENCE OR OTHERWISE) ARISING IN ANY WAY OUT OF<br />
THE USE OF THIS SOFTWARE, EVEN IF ADVISED OF THE POSSIBILITY OF SUCH DAMAGE.<br />
33
List of shortcuts<br />
Function Windows Mac<br />
New Songlist Ctrl + N Command + N<br />
Open a Songlist... Ctrl + Shift + O Command + Shift + O<br />
Open Last Songlist... Ctrl + R Command + R<br />
Save Songlist Ctrl + S Command + S<br />
Save Songlist as... Ctrl + Shift + S Command + Shift + S<br />
Add Audio Files... Ctrl + O Command + O<br />
Open Disc... Ctrl + Alt + O Command + Option + O<br />
Open Folder... Alt + O Option + O<br />
Remove Songs Delete Delete<br />
Export... Ctrl + Shift + E Command + Shift + E<br />
Burn Disc... Ctrl + Shift + B Command + Shift + B<br />
Exit Ctrl + Q Command + Q<br />
Undo Ctrl + Z Command + Z<br />
Redo Ctrl + Shift + Z Command + Shift + Z<br />
Cut text Ctrl + X Command + X<br />
Copy text Ctrl + C Command + C<br />
Paste text Ctrl + V Command + V<br />
Select All Songs Ctrl + A Command + A<br />
Select All Marks Ctrl + Shift + A Command + Shift + A<br />
Divide Ctrl + D Command + D<br />
Divide At Mark Ctrl + Shift + D Command + Shift + D<br />
Remove All Marks Ctrl + Shift + Delete Command + Shift + Delete<br />
Combine Ctrl + J Command + J<br />
Channel Link Ctrl + L Command + L<br />
Batch Edit Metadata... Ctrl + Shift + I Command + Shift + I<br />
Preference... Ctrl + , Command + ,<br />
Add Mark M M<br />
Edit Song Name F2 F2<br />
Edit Text Data Ctrl + T Command + T<br />
Switch Info Viewer Ctrl + I Command + I<br />
Select song above ↑ ↑<br />
Select song below ↓ ↓<br />
Play selected song Enter Enter<br />
Play/Pause Space Space<br />
Play From... F F<br />
34
Function Windows Mac<br />
Play To... T T<br />
Next Mark Ctrl + Shift + → Command + Shift + →<br />
Previous Mark Ctrl + Shift + ← Command + Shift + ←<br />
Next Song Ctrl + → Command + →<br />
Previous Song Ctrl + ← Command + ←<br />
Fast Forward → (Hold down) → (Hold down)<br />
Rewind ← (Hold down) ← (Hold down)<br />
Move 0.001 second Forward Shift + → Shift + →<br />
Move 0.001 second Backward Shift + ← Shift + ←<br />
Move 0.05 second Forward → →<br />
Move 0.05 second Backward ← ←<br />
Move 1 second Forward Alt + → Option + →<br />
Move 1 second Backward Alt + ← Option + ←<br />
Direct Locate G G<br />
35