Download C19103F Traveller.pdf - Cello
Download C19103F Traveller.pdf - Cello
Download C19103F Traveller.pdf - Cello

Create successful ePaper yourself
Turn your PDF publications into a flip-book with our unique Google optimized e-Paper software.
E<br />
<strong>C19103F</strong><strong>Traveller</strong>-LED
3<br />
4<br />
5<br />
6<br />
7- 8<br />
9<br />
9<br />
10<br />
10<br />
11<br />
11<br />
12<br />
12<br />
13<br />
13<br />
14-15<br />
TV SEETINGS Menu<br />
5V antenna Power<br />
Software Update(USB)<br />
16-18<br />
16<br />
16-17<br />
18<br />
18<br />
18<br />
18<br />
18<br />
18<br />
18<br />
24<br />
25<br />
25<br />
25<br />
Extras Setting<br />
Clock<br />
Sleep Timer<br />
Start Recording<br />
Schedule List<br />
Recorder List<br />
Timer Record<br />
PVR File System(DTV Mode)<br />
PC Setup(PC mode only)<br />
Auto Standby<br />
Options<br />
26<br />
26<br />
26<br />
26<br />
26<br />
26<br />
26<br />
27<br />
27<br />
27<br />
28<br />
29-30<br />
29<br />
29<br />
30<br />
30<br />
1
31<br />
31<br />
31<br />
33<br />
33<br />
33<br />
33<br />
33<br />
Multimedia Operation 34<br />
35<br />
35<br />
36<br />
36<br />
37<br />
38<br />
38-39<br />
39<br />
DVD Operation 40<br />
General Setup<br />
40<br />
Audio Setup<br />
41<br />
Dolby Setup<br />
41<br />
Preference Setup<br />
42<br />
Disc Care 43<br />
45<br />
44-45<br />
46<br />
46<br />
46<br />
46<br />
47<br />
48-49<br />
50<br />
2
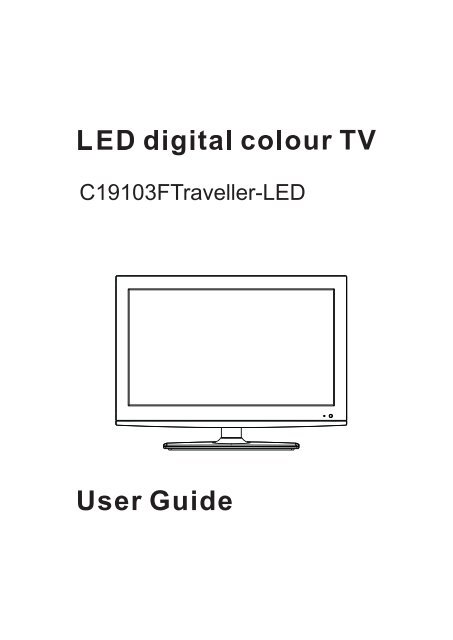
your new 19" HD Ready LED TV.<br />
TV set<br />
Stand<br />
Stand fixing screws<br />
( 3pcs: BB4 x 12)<br />
Batteries<br />
Car-Adaptor to Car-Adapter<br />
GOLDCARE<br />
PLAN<br />
Goldcare Plan<br />
3
LED<br />
LED<br />
To install the base stand first make sure you position<br />
the front of the base stand facing towards the front of<br />
the TV and then use the 3 supplied screws to fix the base<br />
stand to the TV.<br />
The screw holes will only align if the front of<br />
the base stand is facing towards the front of the TV<br />
Remove the stand base before wall mounting the TV.<br />
Remove the 3<br />
screws that secure the stand base to the TV. Remove<br />
the stand base by sliding it out.<br />
Keep all the screws in a safe place, should<br />
you want to attach the stand base at a later date.<br />
100mmx100mm<br />
100mm<br />
100mm<br />
(Screw size M4x12)<br />
4
9<br />
8<br />
7<br />
6<br />
PLAY EJECT<br />
PVR timer<br />
EJECT<br />
PLAY<br />
Eject<br />
Play<br />
SOURCE<br />
DVB/CABLE/SATELLITE/ATV/SCART/YPBPR/DVD/PC/HDMI/AV/USB.<br />
8<br />
9<br />
5
Headphone<br />
out<br />
12<br />
Common Interface<br />
11<br />
DVB-S2<br />
10<br />
TV Aerial<br />
9<br />
Digital<br />
Audio Out<br />
8<br />
POWER<br />
USB<br />
PC<br />
Audio In<br />
1<br />
2<br />
3 4 5 6 7<br />
1<br />
POWER<br />
Connect power supply.<br />
MINI AV<br />
To connect AV output onexternal devices.<br />
TV Aerial<br />
DVB-S2<br />
To connect Satellite signal.<br />
Headphone out<br />
6
Mute Mute sound<br />
Power Turn on or standby<br />
DTV Switch to Freeview Digital<br />
ATV Switch to Analog TV<br />
TV SETTINGS<br />
PICTURE<br />
SOUND<br />
EXTRAS<br />
OPTIONS<br />
LOCK<br />
This displays a page that gives telephone<br />
numbers for service.<br />
Press to enter, press again to exit.<br />
Exit from any menu<br />
Increase and decrease the volume<br />
Increase and decrease the channel<br />
number<br />
The action is shown on the menu and<br />
changes for each menu.<br />
Reserved for MHEG in DTV<br />
DVD Switch to DVD mode<br />
DVD menu in DVD mode<br />
Prev Track, File, Day.(Media, PVR, EPG)<br />
DVD and DTV mode only<br />
Repeat Select the repeat mode<br />
Next Track, File, Day.(Media, PVR, EPG)<br />
Show the keyboard in android mode<br />
DVD Eject<br />
7
Radio Switch between TV and Radio<br />
Quickstart<br />
Searches all ATV and DTV channels<br />
NUMBER BUTTONS<br />
Press 0-9 to select a TV channel directly<br />
when you are watching TV.<br />
HDMI<br />
Select the HDMI mode directly.<br />
Back to last channel<br />
Thumb stick (<br />
/ / / / OK)<br />
Allows you to navigate the on-screen<br />
menus and adjust the system settings to<br />
your preference.<br />
POP MENU POP MENU in blu-ray DVD*<br />
EPG<br />
Press to enter the EPG,and press<br />
again to exit<br />
Timer<br />
Show the Schedule list. (DTV mode)<br />
DVB<br />
CABLE<br />
SATELLITE<br />
ATV<br />
SCART<br />
YPBPR<br />
DVD<br />
PC<br />
HDMI<br />
AV<br />
USB<br />
PVR List<br />
Display List of Recorded Programms<br />
(DTV mode)<br />
USB<br />
Switch to USB mode<br />
Fast reverse<br />
Android *<br />
Switch to Android<br />
Android homepage in Android mode<br />
Fast forward<br />
OSC Show the OSC menu in<br />
blu-ray DVD*<br />
Rec Start recording<br />
8
MINI YPbPr<br />
MINI AV<br />
1366x768p.<br />
POWER<br />
PC<br />
Audio In<br />
10
POWER<br />
PC<br />
Audio In<br />
1366 x 768.<br />
POWER<br />
PC<br />
Audio In<br />
Mini AV cable<br />
Mini YPbPr cable<br />
11
POWER<br />
PC<br />
Audio In<br />
POWER<br />
PC<br />
Audio In<br />
Mini AV cable<br />
12
POWER<br />
PC<br />
Audio In<br />
Audio Cable<br />
Connect your headphones to the TV’s Headphone out socket.<br />
Digital<br />
Audio Out<br />
TV Aerial<br />
13
Digital<br />
Audio Out<br />
TV Aerial<br />
mains power<br />
100- 240V AC 50-60Hz<br />
Car-Adapter 0- 24V DC<br />
POWER<br />
PC<br />
Audio In<br />
ect L<br />
Select your service<br />
14
The first time you turn the TV on,it will go straight into the First Time<br />
Installation menu.<br />
Max Performance Mode<br />
home Installation mode Guide<br />
Select Language<br />
Max Economy mode<br />
Deutsch Francais English Italiano<br />
Select your service<br />
ATV<br />
DVB<br />
Cable<br />
Satellite<br />
Press OK to confirm this mode<br />
Now press<br />
OK<br />
Quick Start<br />
Please ensure the aerial,cable or dish<br />
is plugged into the TV .<br />
Your dish must be oriented to Astra 28.5 East.<br />
To scan other satellites use the Dish set up menu.<br />
Now press<br />
OK<br />
The TV will tune all channels,please wait.<br />
EXIT Quit OK Auto Scan<br />
28.5E<br />
Quick Start<br />
15
TV SETTINGS<br />
5V antenna power<br />
Off<br />
DVB<br />
CABLE<br />
SATELLITE<br />
ATV<br />
SCART<br />
YPBPR<br />
DVD<br />
PC<br />
HDMI<br />
AV<br />
USB<br />
TV SETTINGS<br />
5V antenna power<br />
Off<br />
TV SETTINGS<br />
5V antenna power<br />
Off<br />
Software Update(USB)<br />
CADTV Manual Tuning<br />
TV SETTINGS<br />
5V antenna power<br />
Off<br />
Cable<br />
16
CADTV Manual Tuning<br />
Frequency(khz) 770000<br />
Symbol(ks/s) 6900<br />
QAM Type QAM 16<br />
(s)<br />
(s)<br />
Bad<br />
NO SINGNAL<br />
Normal<br />
Good<br />
(s)<br />
(s)<br />
MOVE<br />
OK Select<br />
MENU EXIT<br />
ATV<br />
Process<br />
474.00 M Hz(TV)<br />
20%<br />
20%<br />
MENU Skip EXIT Quit<br />
(s)<br />
(s)<br />
(s)<br />
(s)<br />
ATV<br />
Process<br />
474.00 M Hz(TV)<br />
MENU Skip EXIT Quit<br />
20%<br />
20%<br />
ATV Manual Tuning<br />
Storage To 1<br />
System BG<br />
Current CH 1<br />
Search<br />
Fine-Tune<br />
Frequency(khz) 865.70 MHz<br />
MOVE Save MENU Quit<br />
DTV Manual Tuning<br />
VHF CH 5<br />
Bad<br />
NO SINGNAL<br />
Normal<br />
Good<br />
MENU<br />
Back EXIT Quit<br />
17
5V antenna Power<br />
Enables or disables the +5V aerial booster.<br />
Software Update(USB)<br />
1.<br />
2.<br />
3.<br />
TV SETTINGS<br />
4. when the updating is completed,the unit will be<br />
reset to standby mode.<br />
0871 288 7345.<br />
(Only available in ATV)<br />
CTI - CAS<br />
SMITCAS System USER MENU<br />
CAM Information<br />
User Management<br />
Mail Management<br />
Smart Card Interface<br />
18<br />
Press OK Select, EXIT return
Satellite<br />
Dish Setup<br />
001 Ku_HOTBIRD 6,7A,8<br />
002 Ku_ASTRA 1H,1KR,1L..<br />
Satellite<br />
001 Ku_HOTBIRD 6,7A,8<br />
002 Ku_ASTRA 1H,1KR,1L..<br />
003 Ku_ASTRA 2A,2B,2D<br />
004 Ku_ASTRA 1E,1G,3A<br />
005 Ku_NILESAT 101,10<br />
006 Ku_EUTELSAT W3A<br />
007 Ku_EUTELSAT W1<br />
008 Ku_BADR-2,3,4/EURO<br />
Quality<br />
TransPonder<br />
001 10723 H 29900<br />
002 10750 H 15000<br />
003 10750 H 30000<br />
004 10775 H 28000<br />
005 10803 H 3333<br />
006 10853 H 27500<br />
007 10892 H 27500<br />
008 10930 H 27500<br />
013.01 Ku_HOTBIRD 6,7A,8<br />
LNB Type 09750/10600<br />
LNB Power<br />
On<br />
22KHz<br />
Auto<br />
Toneburst<br />
None<br />
DiSEqC1.0<br />
None<br />
DiSEqC1.1<br />
None<br />
Motor<br />
None<br />
003 Ku_ASTRA 2A,2B,2D<br />
004 Ku_ASTRA 1E,1G,3A<br />
005 Ku_NILESAT 101,10<br />
006 Ku_EUTELSAT W3A<br />
007 Ku_EUTELSAT W1<br />
008 Ku_BADR-2,3,4/EURO<br />
Move<br />
OK<br />
Select<br />
Add<br />
EXIT<br />
Exit<br />
Delete<br />
Edit<br />
Scan<br />
Edit<br />
NO.<br />
Satel lite Name<br />
Longitude Direction<br />
Longitude Angle<br />
Band<br />
001<br />
HOTBIRD 6,7A,8<br />
East<br />
013.0<br />
Ku<br />
SatName<br />
Extend<br />
Caps On<br />
Back<br />
OK<br />
Cancel<br />
a b c d e f g h<br />
i j k l m n o p<br />
q r s t u v w x<br />
y z < > . l @ $<br />
/ % ( ) _ - +<br />
19
Confirm<br />
Delete<br />
TransPonder<br />
Frequency<br />
Edit<br />
001<br />
10723<br />
OK<br />
Yes<br />
EXIT<br />
No<br />
Symbol (ks/s)<br />
29900<br />
Pol arity<br />
H<br />
Add<br />
NO.<br />
Satel lite Name<br />
Longitude Direction<br />
Longitude Angle<br />
059<br />
ASTRA 1H,1KR,1L..<br />
West<br />
019.2<br />
Confirm<br />
Delete<br />
OK Yes<br />
EXIT No<br />
TransPonder<br />
Add<br />
001 10723 H 29900<br />
002 10750 H 15000<br />
003 10750 H 30000<br />
TransPonder<br />
Frequency<br />
Symbol (ks/s)<br />
001<br />
0000<br />
22000<br />
004 10775 H 28000<br />
Pol arity<br />
H<br />
20
013.01 Ku_HOTBIRD 6,7A,8<br />
LNB Type 09750/10600<br />
LNB Power<br />
On<br />
22KHz<br />
Auto<br />
Toneburst<br />
None<br />
DiSEqC1.0<br />
None<br />
DiSEqC1.1<br />
None<br />
Motor<br />
None<br />
013.01 Ku_HOTBIRD 6,7A,8<br />
LNB Type<br />
09750/10600<br />
LNB Power<br />
On<br />
22KHz<br />
Auto<br />
Toneburst<br />
None<br />
DiSEqC1.0<br />
None<br />
DiSEqC1.1<br />
None<br />
Motor<br />
None<br />
013.01 Ku_HOTBIRD 6,7A,8<br />
LNB Type<br />
09750/10600<br />
9750/10600<br />
9750/10750<br />
05150<br />
05750<br />
09750<br />
10600<br />
10750<br />
013.01 Ku_HOTBIRD 6,7A,8<br />
LNB Type<br />
LNB Power<br />
09750/10600<br />
On<br />
22KHz<br />
Auto<br />
Toneburst<br />
None<br />
DiSEqC1.0<br />
None<br />
DiSEqC1.1<br />
None<br />
Motor<br />
None<br />
013.01 Ku_HOTBIRD 6,7A,8<br />
LNB Type<br />
09750/10600<br />
11300<br />
11475<br />
User Single<br />
User Dual<br />
21
013.01 Ku_HOTBIRD 6,7A,8<br />
LNB Type<br />
09750/10600<br />
LNB Power<br />
On<br />
Move Continue<br />
Move Step<br />
Set West Limit<br />
Set East Limit<br />
Goto Reference<br />
Disable Limit<br />
Set Limit<br />
STOP<br />
STOP<br />
22KHz<br />
Toneburst<br />
DiSEqC1.0<br />
DiSEqC1.1<br />
Motor<br />
Auto<br />
None<br />
None<br />
None<br />
DiSEqC1.3<br />
Set Location<br />
Location<br />
Manual<br />
Longitude Direction<br />
East<br />
Longitude Angle<br />
000.0<br />
Latitude Direction<br />
North<br />
Set Position<br />
Latitude Angle<br />
000.0<br />
Move Auto<br />
STOP<br />
Move Continue<br />
STOP<br />
Move Step<br />
STOP<br />
Store Position<br />
Goto Position<br />
Goto Reference<br />
22
Set Position<br />
Channel Search<br />
Move Auto<br />
STOP<br />
Scan Mode<br />
Default<br />
Move Continue<br />
STOP<br />
Channel Type<br />
All<br />
Move Step<br />
STOP<br />
Service Type<br />
All<br />
Store Position<br />
Polarization<br />
Auto<br />
Goto Position<br />
Goto Reference<br />
Goto X<br />
23
User<br />
Picture Mode<br />
Dynamic<br />
Picture<br />
Adjust<br />
MENU Back EXIT Quit<br />
Medium<br />
User<br />
Color Temperature<br />
Cool<br />
Medium<br />
Adjust<br />
MENU Back EXIT Quit<br />
User<br />
Noise Reduction<br />
Cool<br />
Adjust<br />
MENU Back EXIT Quit<br />
24
User<br />
Surround Sound<br />
Sound<br />
Sound<br />
Sound<br />
Sound<br />
OK Select<br />
EXIT Quit<br />
25
Extras Setting<br />
Allows you to adjust sleep timer, No Action Auto Standby and PC setupt.<br />
EXTRAS menu.<br />
Start Recording<br />
Schedule List<br />
Recorded List<br />
Time Record<br />
Sleep Timer<br />
standby after the prest time has elapsed.<br />
Recorded List<br />
EXIT<br />
EXIT<br />
Recording Schedule<br />
801 BFM TV<br />
Mode<br />
Once<br />
26
Schedule List<br />
Recorded List<br />
Time Record<br />
PVR File System<br />
PC Setup<br />
Auto Standby<br />
On<br />
Formatting,please wait<br />
HD 115 Mins<br />
PC Setup<br />
(PC mode only)<br />
Press the OK button to enter the submenu to adjust the Horizontal/<br />
Vertica position or Size and Phase of the picture.<br />
Clock<br />
Horizontal Pos.<br />
PC Setup<br />
Auto Adjust<br />
50<br />
Vertical Pos.<br />
50<br />
Size<br />
50<br />
Phase<br />
45<br />
Auto Standby<br />
27
Options Setting<br />
Allows you to adjust your OSD language,audio language, subtitle language...<br />
OPTINOS<br />
DVD Setup<br />
OSD Language Press the buttons to select the menu language.<br />
DVD Setup<br />
Audio Language<br />
(DTV mode only)<br />
Press the<br />
buttons to select the audio language.<br />
Subtitle Language<br />
(DTV mode only)<br />
Press the<br />
buttons to select the subtitle language.<br />
Menu Time Out Press the buttons to select the menu display time on screen.<br />
Country<br />
DVD Setup<br />
This function is disabled.<br />
Press OK button to enter the DVD Setup menu.<br />
Restore Setting<br />
Press OK button to enter the submenu(show as right)<br />
DVD Setup<br />
28
8899<br />
Please enter old password<br />
Please enter new password<br />
8899<br />
Confirm new password<br />
29
Lock Channel<br />
8899<br />
8899<br />
30
EPG<br />
EPG<br />
REC<br />
39-40<br />
REC<br />
Mode<br />
Reminder setting<br />
801 BFM TV<br />
Once<br />
Mode<br />
Result<br />
09:08 06-04-2010<br />
Delete<br />
(TO TOP)<br />
Press to BLUE button to can choose title menu.<br />
31
POWER<br />
PC<br />
Audio In<br />
(USB output:DC 5V --- 500mA)<br />
33
Multimedia Operation<br />
DVB<br />
CABLE<br />
SATELLITE<br />
ATV<br />
SCART<br />
YPBPR<br />
DVD<br />
PC<br />
HDMI<br />
AV<br />
USB<br />
34
Rec<br />
Rec<br />
PROGRAMME GUIDE<br />
Rec<br />
RECORDING SCHEDULE<br />
RECORDING SCHEDULE<br />
Mode<br />
Recording Schedule<br />
801 BFM TV<br />
Once<br />
38
Result<br />
Mode<br />
09:08 06-04-2010<br />
Delete<br />
C:\ 1/1<br />
39
DVD Operation<br />
DVD Setup<br />
40
2<br />
43
0871 2887345.<br />
PICTURE<br />
44
8899<br />
45
480i<br />
576i<br />
1080i<br />
1360 x 768<br />
480i<br />
576i<br />
Just Scan<br />
1080i<br />
46
<strong>C19103F</strong><strong>Traveller</strong>-LED<br />
18.5 LED<br />
1366 (H) 768<br />
(V)<br />
200<br />
1000<br />
B<br />
47 18.5<br />
32<br />
35<br />
<<br />
0.5<br />
Vesa Wall mounting size / Screw size 100 x 100mm / M4 x 12<br />
3 3<br />
466 x 49 x 310 mm<br />
466 x 150 x 364 mm<br />
3.6<br />
POWER<br />
MINI YPbPr<br />
MINI AV<br />
DVB-S2<br />
Common lnterface(AUDlO lN)<br />
Earphone(3.5mm)<br />
47
LED<br />
LED<br />
LED<br />
LED<br />
48
50<br />
It fullfils the following EU regulations: