sharing creativity & caring for your business - Stampin' Up!
sharing creativity & caring for your business - Stampin' Up!
sharing creativity & caring for your business - Stampin' Up!

Create successful ePaper yourself
Turn your PDF publications into a flip-book with our unique Google optimized e-Paper software.
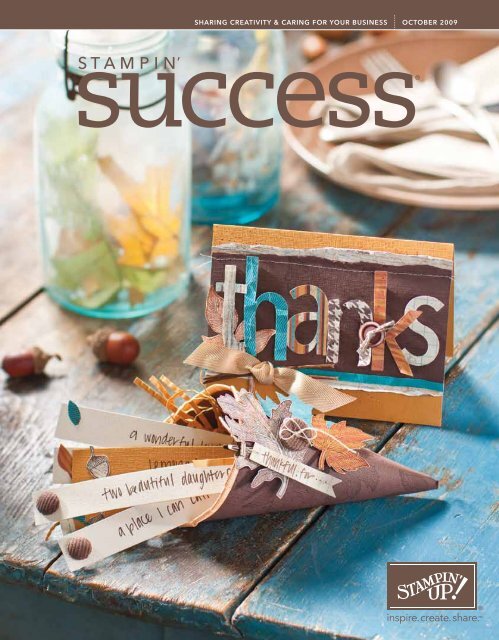
<strong>sharing</strong> <strong>creativity</strong> & <strong>caring</strong> <strong>for</strong> <strong>your</strong> <strong>business</strong> october 2009
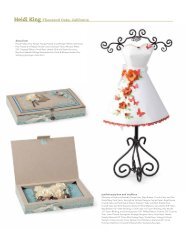
share a moment with shelli<br />
contact in<strong>for</strong>mation<br />
(800) stamp up<br />
Hours: 7:00 am–7:00 pm (mt), Monday–Friday<br />
Demonstrator Support / Phone Orders<br />
(MC, Visa, Discover, Electronic Funds Transfer)<br />
(801) 257-5476<br />
Demonstrator Support / Phone Orders <strong>for</strong><br />
Guam and APO/FPO<br />
(801) 257-5338<br />
Correspondence fax<br />
www.stampinup.com<br />
Stampin’ <strong>Up</strong>! web site address<br />
ds@stampinup.com<br />
Demonstrator Support e-mail address<br />
around this time of year, my thoughts<br />
always turn to the fun task of decorating <strong>for</strong><br />
the holidays—but not this year. Oh, no, I’ve<br />
actually been planning this year’s decorations<br />
<strong>for</strong> months now!<br />
You see, Shanna comes home the first week<br />
of October after being away <strong>for</strong> 18 months,<br />
so October is a special month <strong>for</strong> us this year.<br />
And I’ve known almost since the day she left<br />
that we would be planning a Happy Halloween<br />
Homecoming party <strong>for</strong> family and friends when<br />
she returned.<br />
We’ve had the invitations and many of the<br />
decorations decided <strong>for</strong> months; in fact, you<br />
can see some of them in the current Idea<br />
Book & Catalog (see pages 20 and 21), and we<br />
had some on display during convention (this<br />
ornament was one of those projects). I’ve kept<br />
my eye out and my creative juices flowing all<br />
year long, and while we’re not quite done, we’re<br />
very close—and I can’t wait!<br />
And of course, once the Halloween festivities<br />
are over, we’ll move on to Thanksgiving, and<br />
then Christmas! Does it get better than that?<br />
One wonderful celebration after another, each<br />
one with a different look and feel, which means<br />
plenty of creative options <strong>for</strong> me to personalize<br />
my home décor in a way that fits my style and<br />
personality. No wonder this is one of my favorite<br />
times of the year!<br />
The opportunity to create home décor <strong>for</strong> special<br />
reasons and seasons is one of the things I enjoy<br />
most about Stampin’ <strong>Up</strong>!® The last couple of years<br />
we’ve provided even more decorating options<br />
with our Definitely Decorative® line (the stencils<br />
are my favorite!), and we’ve included a few darling<br />
décor ideas in this issue of Stampin’ Success (see<br />
page 14). I hope you have a fun party or occasion<br />
coming up where you can share <strong>your</strong> creative<br />
home decorating ideas with others!<br />
Send us Starter Kit and<br />
Tax-Exempt Mail Orders to:<br />
Stampin’ <strong>Up</strong>!® Order Entry<br />
PO Box 550<br />
Riverton, UT 84065-0550<br />
(All other mail orders will be returned.)<br />
Send us Exchange Orders to:<br />
Stampin’ <strong>Up</strong>! Order Exchanges<br />
12907 South 3600 West<br />
Riverton, UT 84065<br />
Send Written Correspondence to:<br />
Stampin’ <strong>Up</strong>!<br />
PO Box 550<br />
Riverton, UT 84065-0550<br />
Send Canadian Starter Kit Orders,<br />
Tax-Exempt Orders, Written<br />
Correspondence, and Exchange<br />
Orders to:<br />
Stampin’ <strong>Up</strong>! Canada ULC<br />
330, 2618 Hopewell Place, N.E.<br />
Calgary (Alberta) T1Y 7J7<br />
Canada<br />
Send Contest Entries to:<br />
Contest: [Category Name]<br />
Stampin’ <strong>Up</strong>!<br />
12907 South 3600 West<br />
Riverton, UT 84065<br />
USA<br />
please note<br />
If you try to submit <strong>your</strong> orders or new recruit<br />
Starter Kit Order Forms on the last day of a<br />
commission, incentive, or sales period, you risk<br />
not getting <strong>your</strong> order in be<strong>for</strong>e the deadline due<br />
to heavy order volumes.<br />
Third Party Trademarks<br />
All trademarks not owned by Stampin’ <strong>Up</strong>!<br />
that appear in Stampin’ Success, if any, are the<br />
property of their respective owners.<br />
limited copy permission<br />
Stampin’ <strong>Up</strong>! publications and original artwork<br />
are trademark and copyright protected.<br />
Nevertheless, Stampin’ <strong>Up</strong>!® hereby grants<br />
permission to active demonstrators of the<br />
company to copy pages of Stampin’ Success® or<br />
the Stampin’ <strong>Up</strong>! Demonstrator Web Site <strong>for</strong><br />
personal use (such as copying revised policy<br />
statements from the Demonstrator Manual<br />
or enlarging patterns); <strong>for</strong> training purposes<br />
(<strong>for</strong> Stampin’ <strong>Up</strong>! recruits only); and <strong>for</strong><br />
<strong>business</strong> purposes (as in the distribution of<br />
sales promotion flyers). Pages may not be sold,<br />
licensed or copied <strong>for</strong> distribution to customers<br />
or others without specific permission.<br />
© 2009 Stampin’ <strong>Up</strong>!<br />
2 www.stampinup.com
contents<br />
october 2009<br />
features<br />
24 explore <strong>creativity</strong> with <strong>your</strong> favorite kids<br />
27 celebrate diversity during Hispanic Heritage Month<br />
28 share convention 2009 with our<br />
demonstrator reporters<br />
live it recognition & inspiration<br />
6 art contest winners August 2009<br />
8 title promotions July 2009<br />
9 jan przybylski stamps out<br />
breast cancer—five years running<br />
10 carrie gaskin’s art tickles some funny bones<br />
12 lisa fast reaches a million dollar milestone<br />
11<br />
15<br />
make it projects to create, techniques to try<br />
14 handmade holiday décor to deck <strong>your</strong> halls<br />
16 perfect scrapbook photos: a how-to guide<br />
18 gifts with a handcrafted touch<br />
share it ideas <strong>for</strong> <strong>your</strong> workshops<br />
19 a little help from <strong>your</strong> hostess<br />
—Susan Nygaard’s surefire strategy<br />
20 seasonal projects with Falling Leaves<br />
21 shimmer and shine: the latest look<br />
22 outline <strong>your</strong> workshop with advice from<br />
Tiffany Bauer and Cindi Kugell<br />
23 easy holiday projects to demonstrate and give<br />
18<br />
in every issue<br />
2 Share a Moment<br />
with Shelli<br />
4 Calendar<br />
5 Art Show<br />
30 FYI<br />
31 Make It Happen<br />
25<br />
SPANISH<br />
Articles marked with this logo are available in Spanish on the Spanish<br />
Demonstrator Web Site under Mi empresa>Recursos de mi empresa><br />
Publicaciones de Stampin’ <strong>Up</strong>!>Stampin’ Success>2009>Octubre.<br />
Demo It!<br />
Projects marked with this logo are excellent choices <strong>for</strong> workshop demonstrations.<br />
Cards can be completed in 5–8 minutes, and scrapbook pages in under 15 minutes.<br />
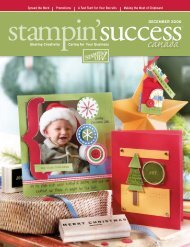
on the cover<br />
Alphabet Simple Bigz die set<br />
Autumn Meadows Designer Series paper<br />
Autumn Splendor set<br />
Orchard Ribbon Originals ®<br />
online extras<br />
You’ll find all of our Online Extras on the Demonstrator Web Site under My Business><br />
My Business Resources>Stampin’ <strong>Up</strong>! Publications>Stampin’ Success>2009>October.<br />
you'll find the complete supply lists and<br />
instructions <strong>for</strong> these projects in this<br />
month’s Online Extras<br />
october 2009 3
calendar<br />
october2009<br />
sunday monday tuesday wednesday thursday friday saturday<br />
catalogs<br />
2009-2010 Idea Book & Catalog sales period<br />
2009 Holiday Mini Catalog sales period<br />
World Card<br />
Making Day;<br />
Quebec City, QC<br />
half-day regional<br />
1 2 3<br />
wichita, ks half-day regionals<br />
4 5 6 7 8 9 10<br />
Thanksgiving Day<br />
(CAN); November<br />
2009 Stampin’ Success<br />
and Holiday<br />
Extravaganza campaign<br />
in<strong>for</strong>mation now online<br />
Who Is in<br />
Pending report<br />
now available;<br />
Hispanic Heritage<br />
Month ends<br />
portland, me half-day regionals<br />
Begin preparing<br />
<strong>for</strong> November<br />
workshops<br />
11 12 13 14 15 16 17<br />
demo tip: “don’t ever be afraid to get involved. if you’re<br />
passionate about something, then you’re meant to follow<br />
that passion.”<br />
– jan przybylski ı moses lake, washington<br />
chattanooga, tn half-day regionals<br />
18 19 20 21 22 23 24<br />
Halloween;<br />
last <strong>business</strong><br />
day of the month;<br />
November Contest<br />
entries due<br />
25 26 27 28 29 30 31<br />
september<br />
2009-2010 Idea Book & Catalog sales period<br />
2009 Holiday Mini Catalog sales period<br />
Just <strong>for</strong> Kids campaign<br />
Growth chart special offer<br />
15 Hispanic Heritage Month begins<br />
16-20 Founder’s Circle Retreat<br />
17 Begin preparing <strong>for</strong> October workshops<br />
19 International Talk Like a Pirate Day<br />
25-26 Coeur D’Alene, ID half-day regionals<br />
30 Last <strong>business</strong> day of the quarter; October<br />
Contest entries due<br />
november<br />
2009-2010 Idea Book & Catalog sales period<br />
2009 Holiday Mini Catalog sales period<br />
2010 Occasions Mini Catalog Mailing Selector period<br />
12 December 2009 Stampin’ Success now<br />
online; 2010 Occasions Mini Catalog and<br />
the 2010 Sale-A-Bration brochure mail to<br />
demonstrators<br />
26-27 Thanksgiving holiday (US): Stampin’ <strong>Up</strong>!<br />
offices closed<br />
30 Last <strong>business</strong> day of the month; December<br />
Contest entries due<br />
december<br />
2009-2010 Idea Book & Catalog sales period<br />
2009 Holiday Mini Catalog sales period<br />
Dec. 1–Jan. 4: 2010 Occasions Mini Catalog and<br />
2010 Sale-A-Bration preorder period<br />
14 January 2010 Stampin’ Success now online<br />
15 Who Is Not Meeting Quarterly Sales<br />
Minimums report now available<br />
25 Christmas holiday: Stampin’ <strong>Up</strong>! offices<br />
closed<br />
31 Last <strong>business</strong> day of the quarter; January<br />
Contest entries due<br />
4 www.stampinup.com
art show<br />
artshow<br />
Halloween Haunting<br />
ah, the sweet smell of candy in October, the<br />
magical month of costumes and childhood fantasy.<br />
But don’t be tricked: Halloween isn’t just <strong>for</strong> kids—it’s<br />
<strong>for</strong> anyone with an imagination . . . like you! This year,<br />
share <strong>your</strong> love <strong>for</strong> that enchanted day of ghouls and<br />
ghosts by counting down with a mysterious advent<br />
calendar. Your family and friends will love discovering<br />
the magic hidden in each pocket.<br />
Get excited about Halloween by creating this month’s Art<br />
Show <strong>for</strong> <strong>your</strong> family—you’ll feel just like a kid again!<br />
For a complete list of supplies and step-by-step<br />
instructions, see this month’s Online Extras.<br />
october 2009<br />
5
live it art contest winners<br />
artcontestwinners<br />
Congratulations To our art contest winners<br />
august 2009<br />
clara sánchez<br />
Forest, Virginia<br />
color craze<br />
Thank You Kindly set; Crushed Curry, Melon Mambo, Rich Razzleberry, Shimmery White, and<br />
Whisper White card stock; Razzleberry Lemonade Designer Series paper; Melon Mambo<br />
Classic Stampin’ Pad; Melon Mambo 1/2" polka-dot grosgrain ribbon; brayer; Scallop Edge<br />
and Eyelet Border punches; Sizzix® Big Shot ; Manhattan Flower Textured Impressions<br />
embossing folder<br />
tip: Use Designer Series paper not only to inspire <strong>your</strong> project but also to pull all<br />
the colors together. Even a small touch of Designer Series paper can tie together<br />
an array of colors beautifully.<br />
pamela downs<br />
Austin, Texas<br />
haunting hellos (us)<br />
Batty <strong>for</strong> You set; Basic Black, Old Olive, Pumpkin Pie, and<br />
Whisper White card stock; Cast-A-Spell Designer Series paper;<br />
Basic Black Classic Stampin’ Pad; Old Olive and Pumpkin Pie<br />
Stampin’ Write® markers; Natural hemp twine; crimper; paperpiercing<br />
tool; Scallop Circle, 1" Circle, 1-1/4" Circle, 1-3/8" Circle,<br />
and 3/16" Corner Rounder punches<br />
tip: When planning holiday projects <strong>for</strong> <strong>your</strong> workshops,<br />
remember to keep the projects as simple as possible because<br />
everyone is so busy during the holidays. Super simple projects<br />
can still be super cute.<br />
kristine burns<br />
Calgary, Alberta<br />
haunting hellos (can)<br />
Eat, Drink & Be Scary set; Basic Black and Pumpkin Pie card<br />
stock; Basic Black Classic Stampin’ Pad; Pumpkin Pie 1/2" striped<br />
grosgrain ribbon; Stampin’ Dimensionals®; Photo Corners, Small<br />
Tag, 3/4" Circle, and 1-1/4" Circle punches; Sizzix Big Shot; Box #2<br />
Bigz XL die; googlie eyes<br />
tip: I plan my workshop projects far enough in advance to show<br />
the samples to my customers in person and on my DBWS. I have<br />
found when my customers know what they will be making it<br />
generates excitement, which often leads to better attendance.<br />
6 www.stampinup.com
live it art contest winners<br />
kay kalthoff<br />
Lino Lakes, Minnesota<br />
clean & simple<br />
Bella’s Bloom set; Medallion background stamp; Soft Suede and Very<br />
Vanilla card stock; Dusty Durango textured card stock; Soft Suede<br />
Classic Stampin’ Pad®; Styled Vanilla Hodgepodge Hardware®; Scallop<br />
Edge punch<br />
tip: To make sure that my cards are balanced, I always go back to<br />
some training I had in photography called the rule of thirds. Imagine<br />
dividing <strong>your</strong> card or scrapbook page into a tic-tac-toe grid. The<br />
perfect spot <strong>for</strong> an embellishment is where the grid lines intersect.<br />
lisa somerville<br />
Manhattan, Illinois<br />
wow! art file (us)<br />
From the Crypt set; Basic Black, Old Olive, and Whisper<br />
White card stock; Cast-A-Spell Designer Series paper;<br />
Basic Black and Going Gray Classic Stampin’ Pads;<br />
Basic Black 1/4" grosgrain and Old Olive 5/8" grosgrain<br />
ribbon; Spooky Treats Rub-Ons; Stampin’ Dimensionals;<br />
Crop-A-Dile; Cutter Kit; Large Oval, Modern Label, and 1" Circle punches;<br />
Sizzix Big Shot; Lots of Tags Sizzlits® die set; sponge daubers; clear<br />
paperweight; test tube<br />
tip: I like to try to coordinate the projects I<br />
demonstrate by using the same Designer Series paper or<br />
stamps throughout. And I think demonstrating a card, a<br />
gift item, and a home décor item is a great way to show<br />
customers just how versatile Stampin’ <strong>Up</strong>! products are.<br />
jodi-danielle kutz<br />
Sarnia, Ontario<br />
wow! art file (can)<br />
Lovely Flowers Bundle; Rich Razzleberry and Whisper White card stock; Rich Razzleberry<br />
textured card stock; Rich Razzleberry 1/2" polka-dot grosgrain and Whisper White 5/8" satin<br />
ribbon; Styled Silver Hodgepodge Hardware; Scallop Edge and 3/16" Corner Rounder<br />
punches; hockey card holders<br />
tip: I am a pastel kinda girl so these new bold In<br />
Colors ® have been a little challenging <strong>for</strong> me.<br />
I’m trying to step up to the challenge by pairing<br />
them up with old favorites. For example, using Rich<br />
Razzleberry and Old Olive where I would normally<br />
pair Perfect Plum and Old Olive.<br />
october 2009 7
live it title promotions<br />
promotions<br />
july 2009<br />
united states<br />
senior manager<br />
Heidi Davenport<br />
Roxanne Mussell<br />
manager<br />
Blythe Klipple<br />
Deena Boos<br />
Kathy Hamrick<br />
Linda Keal<br />
Lori Reid<br />
Mandy Ferg<br />
Ruth Bingle<br />
Stacey Davis<br />
senior<br />
supervisor<br />
Angela Pegram<br />
Bobbie Lawrence<br />
Brenda Collins<br />
Carrie Staege<br />
Charlene Nicol<br />
Christine Bittman<br />
Corris Williams<br />
Della Du Lac<br />
Dianna Lutz<br />
Donna Melcher<br />
Donna Taylor<br />
Elizabeth Ecsy<br />
Heather Whyte<br />
Holly Legare<br />
Jana Edwards<br />
Jeri Cyr<br />
Jessica Brigden<br />
Joanna Banta<br />
Juli Mayers-Whitfield<br />
Julie Howells<br />
Julie Ramos<br />
Julie Wadlinger<br />
Karen Fontinelle<br />
Katharine Zamer<br />
Kathryn Lancetti<br />
Kristen Long<br />
Linda Bailey<br />
Lisa Brown<br />
Lisa Christensen<br />
Lisa Vickers<br />
Lori Smith<br />
Marsha Hosner<br />
Mary Beerman<br />
Melissa Damon<br />
Melissa Huie<br />
Melissa Palmer<br />
Pamela Parto<br />
Patricia Lee<br />
Sally Jercha<br />
Sandra Maciver<br />
Sarah Smart<br />
Shelley Christian<br />
Stephanie Harbin<br />
Stephanie Rodgers<br />
Suzanne Brown<br />
Veronica Scott<br />
Wendi Sands<br />
Wendy Stamey<br />
Yvonne Ambrose<br />
supervisor<br />
Alisha Johnson<br />
Alisha Scheidemantel<br />
Amanda Harrison<br />
Amanda Reed<br />
Amy Led<strong>for</strong>d<br />
Amy Sanders<br />
Amy Williamson<br />
Andrea Cronrath<br />
Angela Courtois<br />
Angela Dell’Erba<br />
Angela Morales<br />
Austin Morris<br />
Barbara Gornick<br />
Brenda Beecher<br />
Brenda Rosenau<br />
Bret Anderson<br />
Carey Payne<br />
Carol Pinkey<br />
Carrie Bryant<br />
Carrie Grillo<br />
Catherine Knight<br />
Catherine Murphree<br />
Cheri Mohatt<br />
Cheryl Braney<br />
Christi Ellenwood<br />
Christina Cummings<br />
Christine Saulnier<br />
Corrina Smith<br />
Cynthia Coutts<br />
Cynthia Elliot<br />
Cynthia Wilkinson<br />
Cynthia Wilson<br />
Dawn Klein<br />
Dawn Thompson<br />
Debbie Hudson<br />
Debbie O’Leary<br />
Deborah Johnson<br />
Debra Easter<br />
Debra Hamilton<br />
Diana Hester<br />
Diane McCornack<br />
Dianne Eure<br />
Donna Matoi<br />
Elaine Abbott<br />
Elaine Lampropolos<br />
Elizabeth Fong<br />
Emily Cannata<br />
Francesca Kennedy<br />
Heather Fishel<br />
Jacklynn McManus<br />
Jane Seely<br />
Janet Moore<br />
Janet Williams<br />
Janice Mengel<br />
Janice Rosenthal Rock<br />
Jennifer Austin<br />
Jennifer King<br />
Jennifer Loper<br />
Jennifer Watson<br />
Jennifer Wiederkehr<br />
Jessica Neigh<br />
Joanne Limb<br />
Joyce Daniel<br />
Julie Rawson<br />
Karin Menghini<br />
Karin Tunnéll<br />
Katherine<br />
Dreadfulwater<br />
Kathleen Candage<br />
Kathleen Restivo<br />
Kathryn Beck<br />
Kay Schwab<br />
Kelli Waters<br />
Kim Jenkins<br />
Kimberly Neuman<br />
Krista Fenton<br />
Laurie Frampton<br />
Lindsey Koerner<br />
Lisa Wright<br />
Lois Zeeman<br />
Loretta Rathert<br />
Lori Nelson<br />
Lorita Moruzzi<br />
Lynn Wilcox<br />
Mandi Moore<br />
Margaret Turpin<br />
Marilyn Mooshagian<br />
Marilyn Van Tassell<br />
Marisa Denboer<br />
Marti Coleman<br />
Mary Melson<br />
Mary Rozell<br />
Melina Rakis-Bischel<br />
Melinda Wahl<br />
Michelle Deslandes<br />
Michelle Ped<br />
Michelli Deckard<br />
Nancy Clark<br />
Pam Wood<br />
Pamela Delcastilho<br />
Patricia Joyce<br />
Paula Turner<br />
Peggy Griffiths<br />
Rachel Harrison<br />
Rebecca Lewis<br />
Roberta Kline<br />
Robin Tipton<br />
Roxanne Staubs<br />
Sandra MacFarlane<br />
Sandy Dean<br />
Shannon Carignan<br />
Shari Ferruzzi<br />
Sharon Click<br />
Shirley Grafton<br />
Stephanie Rendon<br />
Susan Kurzbard<br />
Tabitha Holmes<br />
Tami Fessenden<br />
Tammy Christian<br />
Tammy Dyer<br />
Theresa Winczewski<br />
Therese Donajkowski<br />
Tracy Bradley<br />
Tracy Cline<br />
Vivian Nieves<br />
Vonnie Yoder<br />
Whitney Dawkins<br />
Yvonne Newborn<br />
canada<br />
senior mentor<br />
Christy Harsch<br />
instructor<br />
Donna Wizniuk<br />
senior<br />
coUNSELOR<br />
Carmen Bodnarek<br />
Kerry Waterman<br />
senior<br />
consultant<br />
Anne Sanderson<br />
Brenda Drysdale<br />
Christina Switzer<br />
Elizabeth Holloway<br />
Gayle Hiebert<br />
Jamilla Ivits<br />
Kyla Wright<br />
Leona Roseborsky<br />
Louise Charlton<br />
Sandra Kenly<br />
consultant<br />
Angela Purdue<br />
Becky Hutchison<br />
Chantal Thorburn<br />
Chris Kramer<br />
Gwen Thomas<br />
Janice Adams<br />
Jenny Trudeau<br />
Kathryn Curtis<br />
Katrina Fielding<br />
Kulbir Kirkland<br />
Lori Bennett<br />
Maegan Michel<br />
Margaret Page<br />
Marie-Eve Drouin<br />
Mary Kent<br />
Monica Hornof<br />
Paula Ballard<br />
Stephanie Gillis<br />
Sunita Simon<br />
Susan MacDonald<br />
Terry Montgomery<br />
8<br />
www.stampinup.com<br />
Stripe pattern on page 8 taken from our Cast-A-Spell Designer Series paper. Item 115677. 2009–2010 Idea Book & Catalog, page 161.
live it service<br />
follow<br />
<strong>your</strong> passion<br />
Pictured L to R: Jan Przybylski (event cofounder), Linda Suksdorf, Kris Cruz, Felipa Martinez,<br />
LaRae Parren, Joanie Alvarez, Linda Dennis, Belinda Alaniz (event cofounder), Jan DeBeaumont<br />
(executive director of the Columbia Basin Cancer Foundation), Dr. Mike Graham (president of<br />
the Board of Directors <strong>for</strong> the Columbia Basin Cancer Foundation)<br />
Jan Przybylski<br />
Manager<br />
Moses Lake, Washington<br />
over a decade ago, Connie Oliver from Moses Lake, Washington,<br />
introduced her friend Belinda Alaniz to the craft of stamping. That<br />
simple gesture has enriched many lives, including that of Stampin’ <strong>Up</strong>!<br />
demonstrator Jan Przybylski. Belinda was devastated to lose Connie to<br />
breast cancer in 2004, and she wanted desperately to do something to<br />
help those suffering from cancer. So she and her good friend, Jan, put<br />
their passion <strong>for</strong> stamping to work and organized a Stamp Out Breast<br />
Cancer event to raise funds <strong>for</strong> the Columbia Basin Cancer Foundation,<br />
an organization that provides cancer patients with vouchers <strong>for</strong> various<br />
needs. “[Patients] should be able to go and get their help without<br />
having to think of those little things,” Belinda affirmed (as quoted in<br />
the Columbia Basin Herald, Tuesday, September 23, 2008).<br />
At the 2004 event, they had approximately 45 attendees and raised<br />
$1,500 US. They were extremely pleased with the success and decided<br />
to make it an annual event. “The primary goals of the event are<br />
education and fundraising,” Jan says, “and we’ve found the best way to<br />
do that is by making sure that everyone attending has fun. Then they<br />
spread the word <strong>for</strong> us.” Attendees have obviously had fun, because the<br />
word has spread. Jan and Belinda held their fifth annual fundraiser<br />
in September of 2008 with a goal to raise $10,000 US —which they<br />
exceeded with over 120 attendees!<br />
As the event has grown over the years, volunteers have organized into<br />
committees <strong>for</strong> specific tasks. “Our media committee is probably our<br />
most important committee,” Jan says. And because one of their goals<br />
is to raise money, the group relies solely on donations to market their<br />
event. Local <strong>business</strong>es donate flyers, and their media committee<br />
distributes public service announcements to the area radio stations,<br />
sends press releases to the local periodicals, and requests coverage of<br />
the event by the local newspaper. Then they follow up to make sure the<br />
announcements are aired, the press releases are published, and the local<br />
newspaper is there to cover the event. These tasks are another effective<br />
way volunteers spread the word and increase attendance <strong>for</strong> the event.<br />
Jan and Belinda’s team tried a couple of new things this year that<br />
they found particularly successful. First, they gave their event a<br />
theme: Hollywood Awards Night (like the Oscars). “We’re celebrating<br />
life,” shared Jan about this event (as quoted in the Columbia Basin<br />
Herald, Monday, September 29, 2008). “And we’re celebrating the<br />
lives of women in this community, and we wanted them to feel<br />
special.” The theme helped convey that message of celebration.<br />
Next, the group introduced corporate sponsorship—an idea Jan got<br />
from another local charity. They sent letters to over 80 <strong>business</strong>es<br />
asking them to sponsor a table. From those 80 plus requests, they<br />
received 25 corporate donations adding up to about $3,750 US. Each<br />
sponsor had their own bright pink banner in the center of one of the<br />
activity tables displaying their <strong>business</strong> name <strong>for</strong> all to see. Jan used<br />
her Sizzix Big Shot <strong>for</strong> Stampin’ <strong>Up</strong>! and the Go Go Boots Alphabet<br />
Sizzlits die set to make the banners.<br />
The event included 15 tables where guests could participate in activities<br />
such as card making and other paper crafts, cookie decorating, and<br />
jewelry making. The event also included door prizes, a silent auction,<br />
a quilt raffle, Bunco tournaments, and featured speakers—including<br />
cancer survivors Virginia Capetillo and Charlotte Phillips.<br />
Of her experience with the fundraiser, Jan says, “I’ve received so much<br />
more than I’ve ever given. First, I realize how incredibly blessed I am<br />
to have my good health. I appreciate it and try very hard to protect<br />
it. Second, I know that if I ever get breast cancer, I have an incredible<br />
support group right here in my community. Third, I have made lifelong<br />
friends that I might never have met without participating.”<br />
Find out more about Jan and her second annual fundraiser in On<br />
Stage Volume 6, Issue 5. We’ve posted a copy of this article in this<br />
month’s Online Extras <strong>for</strong> <strong>your</strong> convenience.<br />
october 2009 9
live it artistry<br />
balancing the whole<br />
Carrie Gaskin’s style is perfect <strong>for</strong> any mood<br />
You’d never guess by looking at her adorable projects that senior<br />
counselor Carrie Gaskin joined Stampin’ <strong>Up</strong>! strictly <strong>for</strong> the<br />
<strong>business</strong> opportunity. Initially, she didn’t see paper crafting as a<br />
hobby or a creative outlet–but we all know the power of stamps,<br />
card stock, and ink!<br />
Carrie often finds herself in the middle of a tugof-war<br />
between her creative impulses and her<br />
<strong>business</strong> inclinations. She has, however, found<br />
ways of rebalancing whenever she finds either<br />
her <strong>business</strong> or her art taking away from the<br />
other. After all, Carrie comes from a long line<br />
of number crunchers and has the “accounting<br />
gene” working in her favor. She uses her<br />
Stampin’ <strong>Up</strong>! reports to keep a close watch on<br />
her <strong>business</strong>—her sales, her downline’s activity,<br />
etc.—so she’ll know when her creative side has<br />
started to pull her away from <strong>business</strong> activities.<br />
On the flip side, Carrie makes sure that she<br />
doesn’t neglect her creative side: she keeps<br />
swatches of color, sketches, and other ideas<br />
right on her desk. “It’s like an inspiration book,<br />
but it’s right in my face. I can’t close it,” she<br />
explains. When these project ideas and color<br />
combinations begin to accumulate (to about<br />
four or five), she knows that she needs to take a<br />
little time away from the numbers to stamp <strong>for</strong><br />
fun and explore new ideas.<br />
As Carrie embraces all aspects of her Stampin’<br />
<strong>Up</strong>! <strong>business</strong>, she’s developed a creative style<br />
to her projects that’s a little hard to pinpoint<br />
with words like “clean” or “elegant” or any of<br />
the other ways we describe a person’s style.<br />
Carrie herself found it hard to put words<br />
to. “I’ll go through phases with my style,”<br />
she shares. “I go a lot by my mood; how I’m<br />
feeling in my life. If I’m feeling cluttered and if<br />
there’s a lot going on, I find that my creations<br />
are very clean and simple. If I have an open<br />
calendar with nothing going on, I find that<br />
I’m more intricate in my designs.”<br />
We think of Carrie’s style as “reflective.”<br />
As Carrie balances her life between creative<br />
and analytical, her style per<strong>for</strong>ms its own<br />
balancing act, reflecting whatever Carrie<br />
is feeling. This results in stamped projects<br />
that speak to many people on different<br />
levels, projects to fit any mood and any<br />
personality—even if you’re more of a<br />
number-cruncher than a creative type.<br />
Turn to page 30 <strong>for</strong> the<br />
Stampin’ Supplies.<br />
10 www.stampinup.com
live it artistry<br />
For Carrie, card making is not so much about<br />
what the card looks like as what emotion the<br />
recipient feels when they receive it. This may<br />
be one of the reasons her favorite sets are<br />
often quirky, amusing ones, designed to make<br />
people smile, like Pun Fun, That’s Funny, and<br />
Golden Oldies. So, when we saw our punfilled<br />
Twick or Tweet set in the 2009 Holiday<br />
Mini Catalog, we knew it was just right <strong>for</strong><br />
Carrie! “It is so stinkin’ cute,” Carrie exclaims.<br />
“It’s easy to use. And I’ve never been as<br />
inspired to emboss as I was with this set. Heat<br />
embossing is a ‘wow’ technique that looks<br />
fantastic, but I don’t do it very often. This set<br />
inspired me to emboss as much as possible!”<br />
Carrie’s Creative Finds<br />
1 Look at the shapes: The jack-o’-lanterns image is perfect <strong>for</strong> finishing a “Boo” greeting.<br />
2 Rather than embossing a black skeleton on white card stock and coloring the dog,<br />
flip the colors slightly! Heat emboss <strong>your</strong> skeleton on colored card stock, then color<br />
the image using a gel pen. “It gives a little different dimension to it,” Carrie shares.<br />
The dog is embossed and paper-pieced.<br />
3 Don’t color—paper-piece! “You can show <strong>your</strong> customers that they don’t have to<br />
necessarily color in [line art images],” Carrie explains. “They can use a different color<br />
of card stock and paper-piece the image together. It’s an easy technique that’s<br />
different and fun.”<br />
Carrie was one of the finalists <strong>for</strong> this year’s Artisan Award!<br />
october 2009 11
live it milestones<br />
lisa fast<br />
million dollar achiever: july 31, 2009<br />
if senior manager lisa fast, from Sioux<br />
Falls, South Dakota, seems remarkably<br />
calm and collected <strong>for</strong> someone who has<br />
just reached her Million Dollars in Career<br />
Sales milestone, it’s because she’s very<br />
good at keeping it all together. And that is<br />
just one of the not-so-secret keys to this<br />
demonstrator’s success. Lisa made Stampin’<br />
<strong>Up</strong>! into more than a hobby through her<br />
remarkable determination, her passion <strong>for</strong><br />
stamping, and her outstanding customer<br />
service. All of it, of course, building to this<br />
career milestone.<br />
milestone. I do a lot of figuring!” That<br />
figuring and perseverance paid off in<br />
spades this year during Sale-A-Bration.<br />
Not only did Lisa achieve high sales,<br />
but she built on those Sale-A-Bration<br />
workshops to ensure that she had<br />
bookings <strong>for</strong> the next several months.<br />
“Lisa’s greatest strength as a demonstrator<br />
is her motivation,” says her Service<br />
Account Manager (SAM) and fellow<br />
demonstrator, Max Conrad. “She had her<br />
heart set on reaching her million-dollar<br />
milestone and she has achieved it!”<br />
But while Lisa’s motivation and goalsetting<br />
get her going, her outstanding<br />
customer service keeps her going. It’s<br />
been that way since the first day of her<br />
demonstratorship. “Lisa went to this party<br />
in this little town in South Dakota, signed<br />
up, and immediately began building her<br />
<strong>business</strong> the way she thought it should<br />
be built,” shares Denise Jorgensen, Lisa’s<br />
upline. “She’s always been very customer<br />
and service oriented. For Lisa, it’s not<br />
about good customer service; it’s about<br />
great customer service.”<br />
Indeed, her open and honest relationship<br />
with her customers is legendary. “If I<br />
think something is the greatest thing<br />
since sliced bread, I’ll tell them so. And<br />
they know they can trust me when I<br />
“Every year I would set goals to where<br />
I needed to be <strong>for</strong> the next year,” Lisa<br />
shares. “Every year, I wanted to reach a<br />
“For Lisa, it’s not about good customer<br />
service; it’s about great customer service.”<br />
12<br />
www.stampinup.com
live it milestones<br />
suggest a purchase that might better suit<br />
their needs,” Lisa remarks. And she does it<br />
all with a vivacious and <strong>caring</strong> personality<br />
that both customers and her fellow<br />
demonstrators just can’t help but respond<br />
to! You know what we mean if you saw her<br />
presentation at Convention 2009. “Lisa<br />
always shows professionalism and so much<br />
<strong>creativity</strong> and always encourages us to try<br />
new things,” shares customer Julie Habben.<br />
“At the same time, we have shared laughter<br />
and tears as friends. I am privileged and<br />
blessed to have Lisa Fast in my life.”<br />
Lisa has inspired not only her customers,<br />
but her fellow demonstrators as well.<br />
“Even though we live far away from each<br />
other, we have met each other’s family and<br />
we support each other in our day-to-day<br />
lives. It has been so fun to see Lisa reach<br />
her goals—and who knows what is in store<br />
<strong>for</strong> her <strong>business</strong>,” Michele Pelky says.<br />
Lisa would like to thank her husband Verlyn and<br />
her fabulous kids Nathan, Nicholas, Chelsea, and<br />
Calli <strong>for</strong> all their love and support!<br />
And now that she’s reached her Million<br />
Dollars in Career Sales goal? “I’ll just<br />
keep doing what I’ve always been doing,”<br />
Lisa explains. “I’m not going to get to the<br />
million and say, ‘okay, that’s enough.’ I<br />
don’t know what’s next! I always try to<br />
better my best, and I’ll just do what I need<br />
to do to make it all work with my life.”<br />
Congratulations, Lisa, on this outstanding<br />
achievement! We can’t wait to see what the<br />
future holds <strong>for</strong> you.<br />
Demonstrator Kevin Theesen has watched Lisa build her <strong>business</strong> since they met at their<br />
very first convention in Las Vegas. “If I have one word to describe Lisa, it’s ‘bubbly,’” Kevin<br />
remarks. “And, ever since the first day that I met her, she has stayed the exact same person<br />
from being a new demonstrator to now being a million dollar seller. Her attitude hasn’t<br />
changed—she’s still Lisa. I think she is one of the greatest people that I’ve met through<br />
Stampin’ <strong>Up</strong>! just because of her attitude and her willingness to help. Even though we’re<br />
not in the same upline or downline—we’re not even in the same group—I can call her at any<br />
time and talk about stamping. It’s been a huge blessing in my life to have someone like her<br />
who understands the <strong>business</strong> and who is willing to help. She’s a very positive role model.”<br />
october 2009<br />
13
make it décor<br />
An<br />
extra<br />
Love<br />
touch of<br />
Handcrafted décor <strong>for</strong> <strong>your</strong><br />
home this holiday season<br />
We love decorating our homes <strong>for</strong> the<br />
holidays and we often think about<br />
the decorating traditions that <strong>your</strong><br />
families might enjoy. Maybe, each<br />
Christmas, <strong>your</strong> family gathers around<br />
the table to make <strong>your</strong> own ornaments,<br />
embellish gingerbread people, or string<br />
popcorn and cranberries into garlands.<br />
There’s just something special about<br />
handcrafted holiday decorations—we’re<br />
sure it’s that extra touch of love.<br />
14 www.stampinup.com
make it décor<br />
Making <strong>your</strong> own holiday<br />
decorations can be a bright<br />
spot to <strong>your</strong> holiday festivities.<br />
In fact, we have two fabulous<br />
projects that are sure to deck<br />
<strong>your</strong> halls this season.<br />
Joy Wall Hanging<br />
This project is an excellent gift <strong>for</strong> a hostess,<br />
friend, or family member—and don’t <strong>for</strong>get to<br />
make an extra one you can enjoy in <strong>your</strong> own<br />
home. The Joy wall hanging may look difficult,<br />
but the Big Shot simplifies the job.<br />
1 Use the Big Shot and dies to cut the following:<br />
a. Scallop squares from On Board Book<br />
Basics and <strong>your</strong> choice of card stock<br />
or paper.<br />
b. Letters <strong>for</strong> “Joy” from On Board Book<br />
Basics and <strong>your</strong> choice of card stock<br />
or paper.<br />
2 Adhere card stock or paper scallop squares<br />
and letters to matching chipboard shapes<br />
using 2-Way Glue Pen.<br />
3 Run additional card stock or paper through<br />
the Big Shot using a textured die to create<br />
an embossed pattern. Cut three 3-1/2"<br />
x 3-1/2" squares, and adhere to scallop<br />
squares using 2-Way Glue Pen.<br />
4 Adhere one chipboard letter to each<br />
scallop square using 2-Way Glue Pen.<br />
Decorate letters.<br />
5 Adhere completed squares to <strong>your</strong> choice<br />
of ribbon using 2-Way Glue Pen. Add<br />
button or other embellishments to ribbon.<br />
Christmas Classics set; Brushed Silver, Real Red, and<br />
Whisper White card stock; Old Olive and Whisper<br />
White textured card stock; On Board Book Basics; Old<br />
Olive and Real Red Classic Stampin’ Pads; Jet Black<br />
StazOn® pad; Dazzling Diamonds Stampin’ Glitter; Old<br />
Olive 1-1/4" striped grosgrain ribbon; Fresh Favorites<br />
II buttons; Stampin’ Dimensionals; 2-Way Glue Pen;<br />
Crop-A-Dile; 1/16" Circle punch; Sizzix Big Shot; Serif<br />
Essentials Alphabet Bigz die set; Scallop Square Clear<br />
Bigz die; Backgrounds 1 Texturz Plates; embroidery<br />
thread and needle<br />
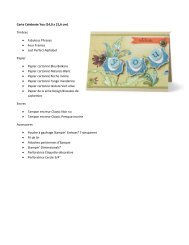
Holiday Ornaments<br />
When you demonstrate these ornaments<br />
at <strong>your</strong> workshop, <strong>your</strong> customers will be<br />
amazed at how easy they really are to make.<br />
Plus, you can let <strong>your</strong> guests try the Big Shot<br />
<strong>for</strong> themselves and make their own holiday<br />
ornament as the Make & Take—this project<br />
should only take about ten minutes. Once<br />
they see how easy the Big Shot is to use, they<br />
won’t want to go home without ordering one!<br />
1 Choose one paper <strong>for</strong> each ornament you<br />
want to make. We recommend Designer<br />
Series paper or stamped card stock.<br />
2 You’ll need eight circles <strong>for</strong> each ornament,<br />
so cut <strong>your</strong> sheet of paper in fourths, and<br />
run one 6" x 6" sheet through the Big Shot<br />
with the Circle 3D Ornament Bigz die, then<br />
another. You’ll have two 6" x 6" sheets left<br />
over <strong>for</strong> someone else to use.<br />
3 Fold each circle at the score lines, and then<br />
adhere eight circles together to <strong>for</strong>m each<br />
ornament. Punch a hole in one flap, thread<br />
ribbon through, and tie.<br />
4 (Optional) To create a tag <strong>for</strong> each<br />
ornament, stamp a sentiment, and punch<br />
out or cut out.<br />
Fundamental Phrases set; French Filigree background<br />
stamp; Whisper White card stock; Real Red textured<br />
card stock; Merry Moments Designer Series paper;<br />
Basic Black Classic Stampin’ Pad; VersaMark® pad; Clear<br />
Stampin’ Emboss® powder; Real Red 1/4" grosgrain<br />
and Old Olive 1/4" grosgrain ribbon; Crop-A-Dile; Sizzix<br />
Big Shot; Circle 3D Ornament Bigz die; crochet thread;<br />
hole punch<br />
We hope you’ll enjoy making these projects<br />
this holiday season and share them with<br />
customers, family, and friends!<br />
october 2009 15
make it scrapbooking<br />
Taking photos <strong>for</strong><br />
<strong>your</strong> scrapbook pages<br />
If you’re like us, you adore looking at<br />
scrapbook pages—it’s all about those<br />
sweet photos. But what makes the<br />
photos so appealing on the page? Our<br />
professional Stampin’ <strong>Up</strong>! photographers<br />
shared several of their tips <strong>for</strong> capturing<br />
the perfect photos <strong>for</strong> <strong>your</strong> scrapbooks.<br />
Start Simple<br />
When you’re taking photos, make sure you have a clean background.<br />
Even something small, like a street sign, can pull the eye away from the<br />
subject, so you want to take note of the surroundings be<strong>for</strong>e you start<br />
snapping. Look at our Lizzie page; the background is full of leafy trees,<br />
but they all blur together to create an ideal backdrop. There is nothing<br />
to divert you from her lovable smile.<br />
We know it’s not always practical to think about the background of a<br />
photo when you’re actually taking it, but that’s what is so great about<br />
digital photos! You can snap pictures from all kinds of angles without<br />
worrying about wasting film on a shot that may not turn out quite<br />
right. No matter what ideas you have in mind, you can take a picture<br />
<strong>for</strong> every possibility. Then when it comes down to it, you can decide<br />
what you really want to do with what you have. Our photographer<br />
caught Lizzie only in the right side of the frame leaving plenty of blank<br />
space on the left—perfect <strong>for</strong> a title. Experiment with <strong>your</strong> own photos<br />
and see what you can do!<br />
lizzie page (8-1/2" x 11")<br />
Circle Circus set; Melon Mambo, Old Olive, Tempting Turquoise, and Whisper White<br />
card stock; Melon Mambo, Old Olive, and Tempting Turquoise Classic Stampin’ Pads;<br />
Old Olive 1-1/4" striped grosgrain ribbon; Button Latte Designer buttons; Styled<br />
Silver Hodgepodge Hardware; Stampin’ Dimensionals; Scallop Circle, 1" Circle, 1-1/4"<br />
Circle, 1-3/8" Circle, and 1-3/4" Circle punches; Sizzix Big Shot; Billboard Sizzlits<br />
Decorative Strip die; crochet thread<br />
To give <strong>your</strong> subjects a more flattering look, stand slightly<br />
above them. This will help you avoid some of the things<br />
we all hate the most about pictures of ourselves (doublechins,<br />
anyone?) and give <strong>your</strong> photos a better look overall.<br />
16 www.stampinup.com
make it scrapbooking<br />
Capturing Kids<br />
As you can see, all three of our scrapbook pages<br />
focus on children. Kids are not camera shy, so if<br />
you’re a budding photographer, a great place to start<br />
practicing is with the kids in <strong>your</strong> life. Take advantage<br />
of their willingness to be models, and practice <strong>your</strong><br />
new skills. Get down on their level and get up close.<br />
You’ll have a lot of fun taking their pictures, and trust<br />
us—they’ll also love seeing every picture you snap.<br />
Children are curious, so it’s not hard to get them<br />
engaged with the camera—our Smiles page is a<br />
fabulous example of what you can do when <strong>your</strong><br />
model is having a good time posing. This can be<br />
more difficult with adults, but if you can get them to<br />
lean toward the camera—ever so slightly—you can<br />
often get a better, more natural looking shot.<br />
smiles page (12" x 12")<br />
Petal Pizzazz set; Whisper White card stock; Melon Mambo and<br />
Whisper White textured card stock; On Board Loads of Letters;<br />
Melon Mambo, Old Olive, and Tempting Turquoise Classic<br />
Stampin’ Pads; Playground and Sherbet Designer buttons;<br />
Stampin’ Dimensionals; Mat Pack; paper-piercing tool; Scallop<br />
Edge punch; crochet thread<br />
For more picture-perfect photo tips, check out<br />
the August 2007 issue of Stampin’ Success.<br />
Daringly Darling<br />
Once you’ve gotten the hang of taking a few good photos, try something a little<br />
different. Our You page uses a photo that captures Porter’s eyes. Don’t worry; you<br />
don’t have to try and frame the photo like this. Simply take a good, close-up picture<br />
and crop it. Be sure to save the original version, and crop it a few different times,<br />
then pick the version you like the most and use it on a page like this—or a page of<br />
<strong>your</strong> own design.<br />
you page (6" x 6")<br />
Favorite Things and Just Perfect Alphabet sets; Melon Mambo, Tempting Turquoise, and Whisper White card<br />
stock; On Board Essentials; Chocolate Chip and Old Olive Classic Stampin’ Pads; Melon Mambo Stampin’<br />
Write marker; Elementary Ribbon Originals; Clips assortment; Stampin’ Dimensionals; sanding blocks<br />
When you’re taking photos, try testing <strong>your</strong> skills by capturing different angles,<br />
cropping <strong>your</strong> photos, and snapping lots of shots of any willing subject. You’ll love<br />
discovering—and developing—<strong>your</strong> style while you create something to treasure!<br />
october 2009 17
make it gifts<br />
gifts to make them<br />
merry<br />
christmas time is coming, filled with all<br />
the joys that the holidays bring. This year,<br />
get started on <strong>your</strong> holiday gifts a little early,<br />
and plan to include a handcrafted touch with<br />
each—a few merry details can go a long way!<br />
Keep It Simple<br />
Pour some tasty bulk candy into a clear takeout<br />
container and embellish it with holiday<br />
Rub-Ons. For this gift, the trick is looking<br />
at the color of the candy, and not worrying<br />
about whether it’s traditional holiday fare.<br />
Or simply send Christmas cards. After all,<br />
a heartfelt greeting is often the best gift.<br />
Step It <strong>Up</strong><br />
We’ve often heard that “presentation is<br />
everything.” This year, take that sentiment<br />
to heart, and package simple gifts with<br />
an eye on presentation. Our sweet Merry<br />
Penguin tag, <strong>for</strong> example, is a festive touch<br />
onto any gift. Add in a few Stampin’ <strong>Up</strong>!<br />
magnetic gift boxes, and <strong>your</strong> presents will<br />
be picture perfect!<br />
Create a Masterpiece<br />
Handcrafted jewelry is certainly in vogue, and<br />
we’re thrilled that we can add a Stampin’ <strong>Up</strong>!<br />
touch to this fun trend. Our Simply Adorned<br />
charms and chains make it easy to create a<br />
gift that’s just her style—and it won’t take you<br />
much time at all.<br />
This year, add a few handcrafted touches to<br />
<strong>your</strong> gift-giving. Your friends and family will<br />
notice and appreciate that you’ve gone the<br />
extra mile.<br />
merry christmas card (3-1/2" x 4-1/4")<br />
Delightful Decorations and Four the Holidays sets;<br />
Chocolate Chip, Old Olive, and Whisper White card<br />
stock; Chocolate Chip, Old Olive, and Ruby Red<br />
Classic Stampin’ Pads; Silver elastic cord; Stampin’<br />
Dimensionals; Ornament punch<br />
merry & bright box<br />
Real Red 5/8"grosgrain ribbon; Merry & Bright Rub-Ons;<br />
clear takeout box<br />
merry penguin gift boxes<br />
Cold & Cuddly set; Old Olive and Whisper White card stock;<br />
magnetic gift boxes; Bashful Blue and Real Red Classic<br />
Stampin’ Pads; Chocolate Chip 1-1/4" striped grosgrain<br />
ribbon; linen thread; Merry & Bright Rub-Ons; Stampin’<br />
Dimensionals; Sizzix Big Shot; Merry Embosslits die<br />
holiday necklace & gift box with tag<br />
Patterned Pines set; Old Olive and Whisper White card<br />
stock; magnetic gift box; Simply Adorned 34" chain;<br />
Simply Adorned 1-1/2" x 2" charm; VersaMark pad;<br />
Dazzling Diamonds Stampin’ Glitter; Merry & Bright Rub-<br />
Ons; Sizzix Big Shot; Timeless Type Junior Alphabet Sizzlits<br />
die set; sewing machine and thread<br />
18 www.stampinup.com
share it hostess coaching<br />
it takes two<br />
Having <strong>your</strong> hostess choose the projects you demonstrate can be a huge help<br />
did you know that you only need two people to jump-start a fun and<br />
successful workshop? It’s true! Your hostess is <strong>your</strong> best helper—<strong>your</strong><br />
partner, if you will—in setting up a positive workshop experience, with<br />
the potential <strong>for</strong> increased sales and future bookings <strong>for</strong> you and more<br />
hostess benefits <strong>for</strong> her.<br />
Creating a partnership with <strong>your</strong> hostess is about more than just the<br />
hostess-coaching basics—it’s about <strong>your</strong> relationship. And one proven<br />
way to strengthen that relationship is by having <strong>your</strong> hostess select the<br />
projects you’ll demonstrate at the workshop.<br />
Susan Nygaard, a manager from Sioux Falls, South Dakota, finds<br />
that involving her hostesses in choosing projects strengthens their<br />
relationship in a number of ways. Most importantly, it increases<br />
the contact she has with the hostess. “If I already know her,” Susan<br />
explains, “then it is a great excuse to e-mail her and then speak in<br />
person. If I don’t know the hostess well, then it provides another<br />
opportunity <strong>for</strong> me to contact her and get to know her better.”<br />
Hostesses are always excited to be involved and included—it makes<br />
the workshop “theirs,” not just <strong>your</strong>s. And when hostesses feel they<br />
have a stake in the event and they’re excited about the projects, they’ll<br />
get their guests excited too!<br />
Let us show you what we mean. Susan has a surefire way to involve her<br />
hostesses in choosing projects that often leads to increased sales and<br />
greater attendance at workshops. She presented these ideas at Founder’s<br />
Circle last year, so the concept may be familiar to some of you already.<br />
Begin by developing a number of projects that you want to demonstrate<br />
in <strong>your</strong> workshops that month. Cut the card stock and get everything<br />
prepped ahead of time. Then, two to three weeks be<strong>for</strong>e each workshop,<br />
e-mail <strong>your</strong> hostess descriptions of the projects you’ve created,<br />
including photos, and ask her to choose three that she’d like to see at<br />
the workshop. “When she makes her decision, then it is so easy <strong>for</strong> me<br />
to just pick up each project, load it into my rolling cart, and off I go,”<br />
Susan shares. “It saves me a lot of re-work and stress and ensures<br />
that I stay enthusiastic and focused.”<br />
Encourage <strong>your</strong> hostess to e-mail the projects to her guests to get their<br />
opinions. This is a great idea <strong>for</strong> three reasons:<br />
1 You’ll know exactly what <strong>your</strong> hostess wants to see.<br />
2 It gives the hostess a fantastic reason to contact her guests to<br />
remind them to attend.<br />
3 It gets the guests excited about the projects they’re going to see at<br />
the workshop. “They have seen a glimpse of the projects, but they<br />
haven’t seen anything in person and they don’t know how to make<br />
anything, but now they are ready to find out!” Susan adds.<br />
Now, you can still demonstrate a project that <strong>your</strong> hostess didn’t<br />
choose—a surprise “wow” technique or a project based on a<br />
promotion, <strong>for</strong> example. But in involving her this way, you show <strong>your</strong><br />
hostess that she matters. And you may even get bookings because<br />
you do this! “My potential hostesses realize that I will do the same<br />
thing <strong>for</strong> them and they really appreciate that I value their opinions.<br />
By sending them an e-mail with descriptions and photographs of the<br />
projects, I also help them to remember that they were interested in<br />
embossing or using the brayer, etc. This way, I can more reliably tailor<br />
their workshop to their needs by focusing on what they are truly<br />
interested in instead of guessing.”<br />
Recently, this process made all the difference in one of Susan’s<br />
workshops. When Susan encouraged her hostess to show the projects to<br />
her guests, the hostess told her that it would probably be a rather small<br />
gathering—just a few close friends. “Well,” Susan continues, “when<br />
she <strong>for</strong>warded the photos to these invited guests, they immediately<br />
<strong>for</strong>warded them on to some of their friends who they thought might<br />
enjoy learning more about stamping and scrapbooking, and by the<br />
time the workshop arrived, the hostess was astonished to report to<br />
me that she was expecting over 15 people to attend. In fact, it was 17.<br />
Moral of the story: never underestimate the power of a woman to spread<br />
the news!”<br />
This month, follow Susan’s lead and have <strong>your</strong> hostess help you choose<br />
the projects you’ll demonstrate. You never know how much <strong>your</strong><br />
hostess can help you out until you get her involved!<br />
october 2009 19
share it stamps<br />
thankful <strong>for</strong> falling leaves<br />
I would maintain that thanks are the highest <strong>for</strong>m of thought;<br />
and that gratitude is happiness doubled by wonder. ~G.K. Chesterton<br />
share <strong>your</strong> thanks and gratitude this<br />
Thanksgiving (and all year round) with<br />
projects made from the contemporary<br />
solid images in the Falling Leaves set. This<br />
set, featured in the 2009-2010 Idea Book<br />
& Catalog, will help you share the things<br />
you’re grateful <strong>for</strong>.<br />
Take a look at the fabulous projects we’ve<br />
created using the Falling Leaves set,<br />
and consider demonstrating the Joyful<br />
candle or Happy Thanksgiving card in a<br />
workshop. These projects take around five<br />
to eight minutes each, which makes them<br />
a great way to showcase the stamp set and<br />
coordinating products while keeping <strong>your</strong><br />
demonstration simple. Your customers<br />
will love seeing both the versatility and<br />
simplicity of the set.<br />
More Uses of Falling Leaves:<br />
• While the Falling Leaves set is considered a<br />
Thanksgiving set, you can use the images <strong>for</strong><br />
any thank-you card. Our So Thankful <strong>for</strong> You<br />
card is a cool example of a project that could<br />
be used year-round.<br />
• Try using leaf images from the Falling Leaves<br />
set on a spring-themed card or scrapbook<br />
page. Swap out the fall colors <strong>for</strong> a spring<br />
palette and use these fun images during<br />
multiple seasons.<br />
Stamping Tips:<br />
• Use the wavy word image as a leaf trail to<br />
simulate a leaf falling.<br />
• With patterned solid images, it’s important<br />
to make sure that <strong>your</strong> stamp has full<br />
and even ink coverage or the words and<br />
patterns won’t be crisp.<br />
Coordinating Products<br />
Bright Blessings Stampin’ Around ® jumbo wheel<br />
item 115626 • $8.50 US/$9.95 CAN<br />
1" Circle punch<br />
item 109046 • $10.95 US/$15.95 CAN<br />
Turn to page 30 <strong>for</strong><br />
the Stampin’ Supplies.<br />
Falling Leaves (set of 9) • item 115368 • $21.95 US/$28.95 CAN<br />
20 www.stampinup.com
share it products<br />
shimmers<br />
look around the beauty aisle of a store, and you’ll see<br />
all kinds of products guaranteed to add a little shimmer to<br />
<strong>your</strong> look. Hair color, body lotion, lip gloss . . . . Why are we<br />
attracted to things that shimmer? Simple—shimmer adds<br />
a vibrant dimension that enhances the look of anything<br />
without actually changing its basic appearance.<br />
That’s exactly what our shimmer paint does. Shimmer<br />
paint is pigment ink, so you can do almost anything with<br />
it that you can do with ink—you can stamp with it, cover<br />
an entire section of card stock or paper with it, or apply it<br />
over a stamped image or Rub-On, like we did on our Happy<br />
Anniversary card. It works on a variety of surfaces: paper,<br />
fabric, wood (such as our Texture Cuts wood sheets), leather,<br />
and more.<br />
Our shimmer paint is available in three colors: Champagne<br />
Mist, Frost White, and Platinum. Champagne Mist and<br />
Frost White are translucent—wash them over <strong>your</strong><br />
project and you’ll get a delicate layer of shine that’s more<br />
understated than glitter. Platinum is opaque—it will cover<br />
<strong>your</strong> surface completely, so you’ll want to use it as an accent<br />
color instead of using it to cover <strong>your</strong> project.<br />
So go ahead—add a little shimmer and glimmer to <strong>your</strong><br />
workshops and watch <strong>your</strong> sales sparkle!<br />
happy anniversary card (3" x 4")<br />
Baroque Motifs and Teeny Tiny Wishes sets; Bermuda Bay, Kraft, and<br />
Melon Mambo card stock; Crushed Curry, Melon Mambo, and Old Olive<br />
textured card stock; Old Olive Classic Stampin’ Pad; Frost White shimmer<br />
paint; VersaMark pad; Old Olive 1/4" grosgrain ribbon; Clips assortment;<br />
Stampin’ Dimensionals; Mat Pack; paper-piercing tool; Full Heart and Heart<br />
to Heart punches<br />
tips:<br />
• To stamp with shimmer paint, apply a thin layer of paint to<br />
the stamp using a sponge dauber and then stamp as usual<br />
(don’t overload the dauber or the paint will seep into the<br />
recessed areas of the stamp). Because Champagne Mist<br />
and Frost White are translucent, images you stamp with<br />
them will be very light. Images stamped with Platinum will<br />
be more dramatic.<br />
• Use a sponge dauber or stamping sponge to apply<br />
shimmer paint to <strong>your</strong> project.<br />
• Shimmer paint dries quickly; you don’t need to heat set it.<br />
Easy <strong>Up</strong>sell Ideas<br />
shimmer paint<br />
Champagne Mist shimmer paint<br />
item 116806 • $5.95 US/$8.50 CAN<br />
Frost White shimmer paint<br />
item 116854 • $5.95 US/$8.50 CAN<br />
Platinum shimmer paint<br />
item 116807 • $5.95 US/$8.50 CAN<br />
Nontoxic. Acid free. Each bottle contains 15 ml of paint.<br />
• For a marbled look like that on the Bermuda Bay heart on<br />
our Happy Anniversary card, apply shimmer paint more<br />
thickly in some areas than in others.<br />
Stamping sponges<br />
item 101610 • $3.50 US/$4.75 CAN<br />
Sponge daubers<br />
item 102892 • $10.95 US/$15.95 CAN<br />
october 2009 21
share it strategy<br />
planning what you’ll say:<br />
a recipe <strong>for</strong> success<br />
be<strong>for</strong>e a chef enters her kitchen to try<br />
a new dish, she has a recipe in hand to tell<br />
her what ingredients she’ll need and how<br />
to cook the dish—it’s her culinary plan.<br />
Much like a recipe, planning a strategy<br />
<strong>for</strong> what you’ll say about products during<br />
<strong>your</strong> workshops helps you identify the<br />
important things to say and the best way to<br />
say it. And it may even increase <strong>your</strong> sales.<br />
Some people may think planning a strategy<br />
<strong>for</strong> what you’ll say means you’re being<br />
insincere or even manipulative. But<br />
planning what you say doesn’t make <strong>your</strong><br />
message less genuine or valuable; public<br />
speakers and per<strong>for</strong>mers do it all the time.<br />
It just means you’ve identified what’s most<br />
important and the best way to say it.<br />
Don’t worry, planning what you’ll say<br />
doesn’t mean you’ll need to abandon <strong>your</strong><br />
enthusiasm <strong>for</strong> products and the creative<br />
ways you use them. In fact, planning <strong>your</strong><br />
words frees <strong>your</strong> mind to focus on other<br />
important aspects of <strong>your</strong> events. Tiffany<br />
Bauer, senior supervisor from Dubois,<br />
Indiana, and 2008 Rising Star, sees the<br />
advantage of making a plan. “Having an<br />
outline of what I’m going to say about<br />
the products gives me a great start to my<br />
workshop. Then I can customize what else<br />
I say once I get going.”<br />
So let’s plan a little strategy.<br />
Learn the Features<br />
Be<strong>for</strong>e you can plan what you’ll share about<br />
a product’s benefits, familiarize <strong>your</strong>self<br />
with them. Tiffany learns about product<br />
in two ways. “If I have questions about<br />
new products, the Product Guide is a great<br />
thing to use. But I’ve found playing with<br />
new product is the best way to familiarize<br />
myself. That way, I see what I can do with it.”<br />
Feature the Benefits<br />
Features will tell customers about a product,<br />
but benefits will sell that product because<br />
they help customers see the product’s value<br />
and encourage them to buy it. Cindi Kugell,<br />
a senior manager from Ox<strong>for</strong>d, Maine,<br />
makes a point to highlight the features<br />
and benefits of a specific product. “I always<br />
play up the benefits of the Many Marvelous<br />
Markers, <strong>for</strong> example,” she shares. “I might<br />
Helping New Crafters<br />
Be<strong>for</strong>e you plan what to say about a<br />
product, step back and look at the product<br />
through a new crafter’s perspective. Ask <strong>your</strong>self what a new<br />
crafter might be thinking when she sees a product. Consider the<br />
results she might be looking <strong>for</strong> and how would the product helps<br />
her achieve those results.<br />
say something like this: ‘Our markers are<br />
double-sided and come in all 48 of our<br />
standard colors as well as a separate set of<br />
our neutrals [features]. You can ink <strong>your</strong><br />
stamps, watercolor, and color line art stamps<br />
with them [benefits].’” Cindi first points out<br />
the features of a product, then outlines how<br />
those features can benefit her customers.<br />
Build a Bridge<br />
Sometimes there is a wide gap in a<br />
customer’s mind between a product’s<br />
features and how those features can benefit<br />
her. Build a bridge over the gap between<br />
features and benefits by helping a customer<br />
see a product’s benefits as the results she<br />
wants to achieve.<br />
Cindi’s <strong>creativity</strong> with products is a strategy<br />
designed to help her customers make their<br />
own connection between the features and<br />
benefits of products. “I had a customer<br />
purchase the Pretties Kit and the new flower<br />
eyelets when she saw that the products in<br />
the kits would be perfect <strong>for</strong> jewelry. She<br />
finally noticed that I was wearing a barrette<br />
and earrings I had made from pieces in the<br />
Pretties Kit. She said, ‘Oh my word! You<br />
used the Pretties Kit to make <strong>your</strong> lovely<br />
barrette and you even made earrings!’ Her<br />
enthusiasm and excitement encouraged<br />
several other ladies to purchase those<br />
same items. She has since purchased many<br />
products from me and even turned a few of<br />
her jewelry-making friends into really good<br />
customers of mine.” In this example, Cindi<br />
pointed out how the benefits of the Pretties<br />
Kit could help her customer achieve<br />
the results she wanted, which inspired<br />
enthusiasm and a purchase.<br />
Rather than “cooking up” a workshop<br />
without a recipe—why not plan the best<br />
way to specifically talk about the features<br />
and benefits of the products you show.<br />
Customers will begin to see a product’s<br />
benefits as the creative results they need.<br />
22 www.stampinup.com
share it wow<br />
the gift of<br />
gift card holders<br />
snowflake<br />
sparkle<br />
with gift cards becoming an increasingly popular and convenient<br />
gift choice, finding cute ways to package them is <strong>your</strong> chance to<br />
personalize the gift! Here’s a simple, but adorable gift card holder you<br />
can demonstrate at a workshop that will get <strong>your</strong> customers excited<br />
about giving the gift of a gift card.<br />
1 Create the gift card holder from Certainly Celery textured card stock<br />
by scoring a 4" x 7-7/8" piece horizontally at 2-3/8" and 5-1/8".<br />
2 Create a 2-1/2 " wide Very Vanilla belly band (7-1/4 " long; score<br />
at 2-1/2" and 5-1/4"). Punch out a scallop border from Ruby Red<br />
textured card stock and adhere it to the belly band.<br />
3 Stamp two ornament hanger images in Chocolate Chip ink on Very<br />
Vanilla card stock; stamp ornament images in Always Artichoke and<br />
Ruby Red ink at ends of ornament hangers.<br />
4 Stamp second ornament in Always Artichoke ink; using a 2-Way Glue<br />
Pen, cover the ornament designs in glue, then cover with Dazzling<br />
Diamonds Stampin’ Glitter. Shake off excess. Cut out ornament and<br />
adhere over original ornament using Stampin’ Dimensionals.<br />
5 Stamp “Christmas Wishes” in Chocolate Chip ink on Very Vanilla<br />
card stock. Wrap card stock around holder.<br />
6 Tie Always Artichoke 1/4" grosgrain ribbon around holder.<br />
Ta-da! Just like that you’ve got a beautiful gift card holder ready<br />
to present to a friend or family member. The best part is this gift<br />
card holder can easily be adjusted <strong>for</strong> all kinds of gifts: birthday,<br />
graduation, anniversary, and more!<br />
christmas wishes gift card holder<br />
Fundamental Phrases and Tree Trimmings sets; Very Vanilla card stock; Certainly<br />
Celery and Ruby Red textured card stock; Always Artichoke, Chocolate Chip, and Ruby<br />
Red Classic Stampin’ Pads; Dazzling Diamonds Stampin’ Glitter®; Always Artichoke<br />
1/4" grosgrain ribbon; 2-Way Glue Pen; Stampin’ Dimensionals; Scallop Edge punch<br />
this merry christmas notecard is perfect to accompany<br />
a gift when you want to say a little more than a tag allows,<br />
but still want to keep it small. It’s also a terrific choice <strong>for</strong> a<br />
workshop demonstration or Make & Take. Your customers will<br />
love how easy it is to make this snowflake sparkle—just like a<br />
real snowflake in the sun!<br />
what you’ll need<br />
Christmas Classics set; Brushed Silver card stock; Real Red<br />
and Whisper White textured card stock; Basic Black Classic<br />
Stampin’ Pad; Dazzling Diamonds Stampin’ Glitter; Old Olive<br />
1/4" grosgrain ribbon; Mini Glue Dots®; Scallop Edge, Jumbo<br />
Snowflake, and 1/16" Circle punches; embroidery floss<br />
how to make it<br />
1 Stamp “Merry Christmas” in Basic Black ink on Real Red<br />
textured notecard (3" x 3").<br />
tip: You can get eight notecards from one sheet of<br />
textured card stock.<br />
2 Punch scallop piece from Brushed Silver card stock (3-1/2"<br />
x 1") using Scallop Edge punch, and adhere to note with<br />
scallops facing top of notecard. Tie Old Olive ribbon (8")<br />
around card below scallop.<br />
3 Punch snowflake from Whisper White textured card stock<br />
(3" x 3") using Jumbo Snowflake punch.<br />
4 Adhere Mini Glue Dots to snowflake as shown, and then<br />
sprinkle with Dazzling Diamonds Stampin’ Glitter.<br />
5 Punch hole in snowflake using 1/16" Circle punch, and tie<br />
snowflake to notecard using embroidery thread (3").<br />
october 2009 23
feature<br />
kreative<br />
imaginative<br />
daring<br />
spontaneous<br />
I know what you’re thinking: Kids + Creativity =<br />
Mess + Chaos. And maybe you’re right. But when<br />
you create with kids, you create memories; the kind<br />
you never <strong>for</strong>get. So maybe it’s time to throw the<br />
rules of adulthood out the window and rediscover<br />
that kid inside of you!<br />
24 www.stampinup.com
feature<br />
Written by: Jessica Couch<br />
Art by: Lindsie Furse<br />
as adults, we sometimes <strong>for</strong>get that we<br />
don’t need a reason to be creative. When I<br />
was little, my sister and I decided it would be<br />
fun to make a kite. We colored the front with<br />
simple designs and taped plenty of string to<br />
the bottom; it was a beautiful creation (in<br />
our eyes). Of course it never flew, and that’s<br />
kind of the point. It’s been years since that<br />
day, and I still remember how much fun we<br />
had making something that in all reality had<br />
no purpose—we were simply being creative.<br />
Recently, I spent an afternoon at the park<br />
with some of the most important kids in<br />
my life—a few of my nieces, a nephew,<br />
and their friends. We spent hours creating<br />
masterpieces from card stock, not <strong>for</strong> a<br />
portfolio or to put on display, just <strong>for</strong> fun.<br />
We started with masks. What better way to<br />
express <strong>creativity</strong> than with a mask? A few<br />
punches here and a little glitter there and<br />
all of a sudden you’re a princess locked in a<br />
tower or a superhero flying off to save the<br />
world. All a child has to do is hold that mask<br />
up to their face and suddenly it’s true. That’s<br />
one of my favorite things about kids; they’re<br />
happy with who they are, but they know they<br />
can be anyone and they can do anything—all<br />
it takes is a little imagination.<br />
With our masks, I wanted the kids to have<br />
every opportunity to create something<br />
unique to express their style because, even<br />
when you’re seven, you have a style. So, I<br />
hung around the picnic table to help out<br />
when I was needed, but they did most of<br />
the work themselves—which sometimes<br />
resulted in mayhem. I watched Tyler pour<br />
an entire container of glitter on one corner<br />
of his mask. He looked up at me and seemed<br />
to ask, “What do I do now?” I giggled a little<br />
at the panic in his eyes and picked up some<br />
glitter with my fingers. Together we spread<br />
the glitter over the rest of his mask. Thanks<br />
to Powder Pals® trays, we saved the day!<br />
That’s one of my favorite things about kids; they’re happy with<br />
who they are, but they know they can be anyone and they can<br />
do anything—all it takes is a little imagination.<br />
Dazzling Diamonds and all. And I even<br />
kept it; it’s still hanging in my cubicle at the<br />
Stampin’ <strong>Up</strong>! home office.<br />
As we finished up with masks, we broke out<br />
the Polaroid cameras. Wow! If you want to<br />
see a kid smile, hand them a camera. They<br />
ran around taking pictures of everything:<br />
each other . . . the photographers . . . me!<br />
It made me laugh to see Katelyn turn the<br />
camera on herself—and snap!—out came a<br />
photo of her cute smiling face. They posed<br />
<strong>for</strong> our photographers as they ran around,<br />
but the best smiles appeared when one of<br />
the other kids took their picture. They had<br />
so much fun together! The next time I take<br />
pictures of kids, I want to be involved in<br />
what they’re doing and capture those same<br />
smiles that they give their friends.<br />
But the best part of taking photos was<br />
their excitement about everything they did.<br />
When we create something we like, we all<br />
get excited. We love to show our friends and<br />
family, and kids are no different. Every time<br />
they took a photo, they ran over to show me<br />
their latest creation. It didn’t really matter<br />
what it looked like—it only mattered that<br />
Every time one of them did need a little<br />
help, I took directions straight from the<br />
boss: “How long do you want this ribbon?”<br />
and “Where would you like the glitter?” But<br />
I wanted to join the fun, too! During my<br />
free moments I created my own mask with<br />
october 2009 25
feature<br />
The next time I take pictures of kids, I want to be involved in<br />
what they’re doing and capture those same smiles that they<br />
give their friends.<br />
it was their photo. Every single one was<br />
their masterpiece. And they actually made<br />
perfect photos <strong>for</strong> a scrapbook page about<br />
our activity.<br />
When the cameras were all packed away, we<br />
pulled out the finger paint. Each child picked<br />
their favorite color of card stock and grabbed<br />
handfuls of paint. There wasn’t much <strong>for</strong> me to<br />
help with at this point, except cleaning up the<br />
rainbow lava oozing between their fingers. But<br />
as I took their miniature hands into mine and<br />
wiped the dripping colors, I listened to their<br />
stories about hand-shaped monsters and oddly<br />
colored mountains. It was so entertaining to<br />
hear the tales that went with their paintings<br />
and it made me think of the stories I used to<br />
tell—something I haven’t done in a long time.<br />
We decided to make an album of all their<br />
projects. Kids love looking at pictures and<br />
scrapbooks of themselves, so I knew they’d<br />
love it even more if they had an album of<br />
their artwork. Every time they look at it they<br />
can remember how much fun it was to finger<br />
paint, make masks, and take pictures. I know<br />
those fond memories will encourage them<br />
to create again and again. And our album<br />
cover with their hand prints was the perfect<br />
finishing touch to the afternoon.<br />
When I make a card or even work on a piece<br />
of writing, I get so focused on finishing,<br />
that I don’t appreciate the process. There’s<br />
nothing wrong with wanting to complete<br />
a project—there’s always a sense of<br />
accomplishment when it’s done. But <strong>for</strong> kids<br />
it’s not all about the finished product like it<br />
often is <strong>for</strong> us. They love seeing their art on<br />
the fridge or in an album, but what matters<br />
most is the experience. When I asked my<br />
nieces and nephew about their favorite<br />
part of our day in the park I heard “glitter,”<br />
“cameras,” and “drawing with my fingers;”<br />
they all gave different answers. But when I<br />
asked what made it special, they said pretty<br />
much the same thing: they’d never done it<br />
be<strong>for</strong>e. Kids love to explore and discover<br />
what they’re capable of—it’s an adventure<br />
every time.<br />
Now, I know that <strong>creativity</strong> can be messy,<br />
especially with kids, but childhood is the<br />
perfect time to discover those creative<br />
abilities. They can spend the rest of their<br />
life refining and developing talents that<br />
many people take years to uncover. So stop<br />
worrying about that glitter or paint (or<br />
whatever it happens to be) that ends up all<br />
over everything, and join the messy fun! Wake<br />
up <strong>your</strong> inner child; you may rediscover that<br />
even a simple piece of card stock can be the<br />
gateway to a world of dreams!<br />
melon mambo mask<br />
The supplies listed here are just one way to create <strong>your</strong><br />
mask—the fun part is experimenting!<br />
Crushed Curry and Melon Mambo card stock; Chunky<br />
Essentials Stampin’ Glitter; Melon Mambo 1/2" polka-dot<br />
grosgrain, Whisper White 5/8" satin, and Whisper White<br />
3/8" taffeta ribbon; Clear Rhinestone brads; Large Oval<br />
and Small Oval punches; wood dowel<br />
art book<br />
Whisper White card stock; On Board 8-1/2" x 8-1/2"<br />
Album and Timeless Type; Chocolate Chip and Yoyo<br />
Yellow Craft Stampin’ Pads; Chocolate Chip 1” doublestitched<br />
grosgrain ribbon; Playground Designer buttons;<br />
crochet thread; finger-paint<br />
cute as a bug page (8" x 8")<br />
Bugs & Kisses set; Bashful Blue, Chocolate Chip, Crushed<br />
Curry, and Whisper White card stock; Chocolate Chip,<br />
Crushed Curry, Old Olive, and Rich Razzleberry Classic<br />
Stampin’ Pads; Chocolate Chip Stampin’ Write marker;<br />
Old Olive 5/8" grosgrain ribbon; Stampin’ Dimensionals;<br />
Scallop Oval and 1-3/4" Circle punches<br />
You’ll find a pattern <strong>for</strong> our simple,<br />
demonstratable mask in this month’s Online Extras.<br />
26 www.stampinup.com
feature<br />
Celebrate our diverse backgrounds September 15–October 15<br />
we’re now in our second year in the Hispanic<br />
market, and there are many of you with thriving<br />
<strong>business</strong>es in Spanish-speaking communities. Can<br />
you believe the time has gone by so quickly? Well,<br />
we’re excited to let you know about an opportunity<br />
to serve <strong>your</strong> Spanish-speaking customers even<br />
better—or to find new ones. In the United States,<br />
September 15 marks the beginning of Hispanic<br />
Heritage Month—a four-week-long celebration of<br />
the diverse cultures and traditions of the Spanishspeaking<br />
population.<br />
Both the United States and Canada are home to a<br />
growing Spanish-speaking population with many<br />
heritages rooted in over 20 different countries. In<br />
2007, the estimated Hispanic population in the<br />
United States was 45.5 million, not including the<br />
residents of Puerto Rico (US Census Bureau, 2008).<br />
And in Canada, there were over 700,000 Spanishspeaking<br />
residents in 2006 (Statistics Canada, 2006).<br />
That’s a lot of people!<br />
That growing population also means an array of<br />
creative cultures and traditions are just waiting<br />
to be explored—through the use of Stampin’ <strong>Up</strong>!<br />
products, of course. Customers in the US can<br />
purchase Spanish-language products through the<br />
supplement, Celebrando Creatividad, and online;<br />
customers in Canada can purchase Spanish-language<br />
products through the 2009-2010 Idea Book & Catalogue<br />
(translated sets are indicated with an “ESP” icon)<br />
and online. We encourage all of you to use Hispanic<br />
Heritage Month as a way to reach another group of<br />
potential customers and grow <strong>your</strong> <strong>business</strong>.<br />
Here are just a few ways you can incorporate<br />
Hispanic Heritage Month into <strong>your</strong> <strong>business</strong>:<br />
• Stamp a card using one of our Spanish-language<br />
sets and send it to a friend, co-worker, or neighbor<br />
who speaks Spanish. They don’t need to be Hispanic<br />
themselves to be interested in these products.<br />
• Volunteer to help <strong>your</strong> child’s teacher talk about<br />
this celebration in his or her classroom—especially if<br />
they’re teaching Spanish—and prepare a Make & Take<br />
project <strong>for</strong> the students.<br />
• Hold a Spanish-language event (even if you don’t<br />
speak Spanish). October 3 is World Card Making Day<br />
(WCMD), so why not combine these two celebrations<br />
by holding an event with an international flavor?<br />
Stamp <strong>your</strong> cards using Spanish-language stamp<br />
sets and tell everyone about Hispanic Heritage<br />
Month. If you don’t want to combine this with<br />
WCMD, make a point to host a workshop where you<br />
demonstrate at least one project using a stamp set<br />
from Celebrando Creatividad.<br />
Our Hispanic market is growing, and you don’t<br />
want to miss out on Hispanic Heritage Month.<br />
What a great opportunity <strong>for</strong> you to reach out to<br />
new customers!<br />
Learn more about Hispanic cultures and Hispanic Heritage<br />
Month—check out these excellent online resources.<br />
Now, you may be wondering<br />
why this “month” begins<br />
halfway through September.<br />
Good question. In 1968,<br />
the United States Congress<br />
chose September 15 as the<br />
beginning of what used to<br />
be Hispanic Heritage Week<br />
because it’s the day five Latin<br />
American countries celebrate<br />
their independence. These<br />
countries are Costa Rica,<br />
El Salvador, Guatemala,<br />
Honduras, and Nicaragua.<br />
Mexico and Chile celebrate<br />
their independence just a few<br />
days later.<br />
Sources Cited:<br />
“CB06-FF.15: Hispanic Heritage<br />
Month 2008: Sept. 15-Oct. 15”. US<br />
Census Bureau. http://www.census.<br />
gov/Press-Release/www/releases/<br />
archives/facts_<strong>for</strong>_features_special_<br />
editions/012245.html. May 29, 2009.<br />
“Hispanic (Spanish speaking)<br />
population in Canada: a<br />
special report prepared <strong>for</strong> the<br />
Canadian Hispanic Congress.”<br />
Statistics Canada. http://<br />
canadianhispaniccongress.ca/pdf/<br />
CENSUS2006.pdf. May 29, 2009.<br />
You’ll find direct links to these<br />
sources in this month’s Online Extras.<br />
Patterns on this page taken from our Kaleidoscope Designer Series paper. Item 115680. IBC, page 161<br />
october 2009<br />
27
feature<br />
Convention 2009 was a rewarding experience <strong>for</strong> all who<br />
attended! Whether or not you were there, you’ll enjoying reading<br />
what this year’s demonstrator reporters thought of the event.<br />
Michelle Breton<br />
Convention is always a great opportunity<br />
to recharge and refocus, and this year was<br />
no exception. The focus on getting back<br />
to basics was exactly what I needed. And<br />
Belinda Ellsworth as our keynote speaker<br />
was absolutely phenomenal! I enjoyed<br />
her the first time she spoke with us, and<br />
I enjoyed her even more this time. Her<br />
suggestions were right-on and easy to follow.<br />
I’m looking <strong>for</strong>ward to Leadership 2010!<br />
Kathy Hamrick<br />
The entire convention experience is just like<br />
getting <strong>your</strong> gas tank filled! You go and get<br />
all these wonderful ideas—both <strong>business</strong><br />
and creative—then you feed off of the<br />
energy of each other while you are there. By<br />
the time it’s over, you are full of new ideas<br />
and ready to travel! The enthusiasm seems to<br />
bounce off of everyone as they head back to<br />
their homes.<br />
Debra Verbosh<br />
Even after 10 conventions, I am never<br />
disappointed. It’s so great to be able to see<br />
and work with a lot of the new products and<br />
accessories so I feel confident to demonstrate<br />
them <strong>for</strong> my customers and answer their<br />
questions. The value of these hands-on<br />
demonstrations is priceless to my <strong>business</strong><br />
and keeps me coming to convention year<br />
after year. Not only that, but the card, gift,<br />
and scrapbook ideas I get at this event give<br />
me at least six months of workshop project<br />
ideas, making convention an event not to<br />
miss! Thank you Stampin’ <strong>Up</strong>! <strong>for</strong> providing<br />
the best tools available to achieve any goal I<br />
set <strong>for</strong> myself. That’s really what convention<br />
is all about.<br />
Tami Gadd<br />
My journey to convention is always a little<br />
different, but however it begins, it always<br />
ends the same: coming home with new<br />
resolve to plan and achieve a successful<br />
upcoming year. This year the return road<br />
trip was filled with discussions about what<br />
we were inspired by, what we wanted to<br />
create when we arrived home, and what<br />
we were determined to share with our<br />
current—and future—customers.<br />
Rose Marie Coleman<br />
Convention 2009 was absolutely amazing!<br />
I loved the way the focus of this year’s<br />
convention was on the workshop. This<br />
truly is where it all begins and it makes<br />
so much sense to focus on this part of our<br />
<strong>business</strong>. It was really great to listen to<br />
top US and Canadian demonstrators talk<br />
about how they run their <strong>business</strong> and<br />
what has been successful <strong>for</strong> them. I can’t<br />
wait to try some of their tips on booking<br />
workshops and recruiting.<br />
Lorna Raczynski<br />
This convention was all about the workshop.<br />
Without a doubt, it is the backbone<br />
of our <strong>business</strong>. We learned about a<br />
buyer’s psychology, how to overcome our<br />
recruiting fears, the best ways to coach our<br />
hostesses, and how to get those bookings<br />
<strong>for</strong> workshops. Terrific speakers, including<br />
Belinda Ellsworth, taught us about great<br />
customer service, how to be a supportive<br />
upline, and the many rewards our success<br />
can bring us!<br />
Hope Heusdens<br />
Attending my second Stampin’ <strong>Up</strong>!<br />
convention was such a rewarding experience!<br />
28 www.stampinup.com
feature<br />
I feel privileged to be associated with this<br />
company and with all of the amazing,<br />
creative, and generous people in it. From<br />
the moment I stepped off the plane, I was<br />
meeting other demonstrators from all over<br />
the US and Canada, and they were nothing<br />
but friendly and fun. And <strong>for</strong> the second<br />
year in a row, I left convention feeling well<br />
prepared with project ideas to take me<br />
through the holiday season, and well into<br />
next year.<br />
Kristyne Brandt<br />
Stampin’ <strong>Up</strong>! threw a party again this year<br />
and we were all invited! Did you attend? I<br />
know I sure did, and once again, as in all<br />
years past, everyone had a blast! There were<br />
Michelle Breton<br />
auburn, maine<br />
swaps, swaps, and more swaps, Make & Takes,<br />
demonstrations, interviews, game shows, and<br />
ideas galore. There is no better way to Inspire,<br />
Create, and Share than to get 3,000 of <strong>your</strong><br />
friends together to P-A-R-T-Y!<br />
Hope Heusdens<br />
castro valley, cali<strong>for</strong>nia<br />
Lorna Raczynski<br />
sherwood park, alberta<br />
Kristyne Brandt<br />
winnipeg, manitoba<br />
Kathy Hamrick<br />
clarksburg, west virginia<br />
Debra Verbosh<br />
cape coral, florida<br />
Rose Marie Coleman<br />
calgary, alberta<br />
Tami Gadd<br />
moose jaw, saskatchewan<br />
october 2009<br />
29
fyi<br />
<strong>for</strong> <strong>your</strong><br />
Tip from the Top: Bookings During the<br />
Holiday Season<br />
heather summers | london, ontario<br />
4th place demonstrator of the year, canada<br />
“When asking a potential hostess to book a workshop, make sure<br />
<strong>your</strong> enthusiasm is contagious. You want <strong>your</strong> hostess to be as<br />
excited, if not more excited, than you are, so she passes it along to<br />
her friends. Let <strong>your</strong> hostess know about any upcoming specials or<br />
deals—like our Holiday Extravaganza campaign. She won’t want to<br />
miss out on this fabulous opportunity!”<br />
Remember: Sign Your IDA by October 1<br />
The deadline <strong>for</strong> signing <strong>your</strong> updated Independent Demonstrator<br />
Agreement is rapidly approaching. If you haven’t already, make<br />
a point to read the new agreement and either indicate that you<br />
accept the terms using the online acceptance tool, or print it off and<br />
send in a signed copy. All demonstrators must have signed the new<br />
agreement by October 1 or risk no longer being able to place orders.<br />
stampin’ supplies<br />
“Balancing the Whole,” page 10<br />
FYI<br />
in<strong>for</strong>mation<br />
boo card (4-1/4" x 5-1/2")<br />
Contempo Alphabet and Twick or Tweet sets; Basic Black, Old Olive, Real Red, Summer<br />
Sun, and Whisper White card stock; Pumpkin Pie Patterns Designer Series paper; Basic<br />
Black Classic Stampin’ Pad; Real Red and Summer Sun Stampin’ Write markers; Pumpkin<br />
Pie 1/2" striped grosgrain ribbon; Cutter Kit; Mat Pack; paper-piercing tool; 1" Circle<br />
punch; Sizzix Big Shot; Backgrounds 1 Texturz Plates die set; stamping sponges<br />
bite card (4-1/4" x 5-1/2")<br />
Just Jawing and Twick or Tweet sets; Basic Black, Close to Cocoa, Old Olive, Real<br />
Red, Summer Sun, and Whisper White card stock; VersaMark pad; Black and White<br />
Stampin’ Emboss powder; Real Red 5/8" grosgrain ribbon; Vintage brads; Mat Pack;<br />
paper-piercing tool<br />
ghostly treat bag<br />
Twick or Tweet set; Basic Black, Old Olive, Real Red, Summer Sun, and Whisper White<br />
card stock; Pumpkin Pie textured card stock; Summer Sun Classic Stampin’ Pad;<br />
VersaMark pad; White Stampin’ Emboss powder; Crop-A-Dile; Scallop Edge punch;<br />
mini paper bag<br />
twick or tweet candy holder<br />
Twick or Tweet set; Basic Black, Old Olive, Pumpkin Pie, Real Red, Summer Sun, and<br />
Whisper White card stock; watercolor paper; More Mustard, Old Olive, Summer Sun,<br />
and Tempting Turquoise Classic Stampin’ Ink refills; VersaMark pad; Black Stampin’<br />
Emboss powder; Real Red 5/8” grosgrain ribbon; White Circle Aluminum Metal Edge<br />
tags; Aqua Painter; Mat Pack; paper-piercing tool; 1-3/4” Circle punch; Sizzix Big Shot;<br />
Pennant Bigz XL die<br />
happy halloween votive candle holder<br />
Teeny Tiny Sayings and Twick or Tweet sets; Neighborhood jumbo Stampin’ Around<br />
wheel; Basic Black, Close to Cocoa, Going Gray, Old Olive, and Summer Sun card<br />
stock; Pumpkin Pie textured card stock; White vellum card stock; Close to Cocoa,<br />
Going Gray, and Pumpkin Pie Classic Stampin’ Pads; Whisper White Craft Stampin’<br />
Pad; VersaMark pad; Going Gray Stampin’ Write marker; Real Red 1/4” grosgrain<br />
ribbon; Scallop Edge, Star, Word Window, 1/16” Circle, and 1-3/4” Circle punches<br />
“Thankful <strong>for</strong> Falling Leaves,” page 20<br />
grateful 4 you page (6" x6")<br />
Defining Alphabet and Falling Leaves sets; Whisper White card stock; More Mustard,<br />
Old Olive, Rich Razzleberry, and Whisper White textured card stock; On Board<br />
Timeless Type; Chocolate Chip, Dusty Durango, More Mustard, and Rich Razzleberry<br />
Classic Stampin’ Pads; VersaMark pad; Old Olive Stampin’ Write marker; Clear<br />
Stampin’ Emboss powder; Old Olive 5/8" grosgrain ribbon; Clear buttons; Stampin’<br />
Dimensionals; Modern Label punch<br />
so thankful <strong>for</strong> you card (4-1/4" x 5-1/2")<br />
Falling Leaves set; Whisper White card stock; Chocolate Chip, Dusty Durango,<br />
More Mustard, Old Olive, Rich Razzleberry, and Whisper White textured card stock;<br />
Chocolate Chip, More Mustard, Old Olive, and Rich Razzleberry Classic Stampin’ Pads;<br />
Chocolate Chip 5/8" grosgrain ribbon; Silver brads; Button Latte Designer buttons;<br />
Stampin’ Dimensionals; Scallop Edge, 1" Circle, 1-1/4" Circle, and 1-3/8" Circle<br />
punches; crochet thread<br />
happy thanksgiving card (5-1/2" x 4-1/4")<br />
Falling Leaves set; Whisper White card stock; More Mustard and Old Olive textured<br />
card stock; Chocolate Chip, Dusty Durango, More Mustard, Old Olive, and Rich<br />
Razzleberry Classic Stampin’ Pads; Chocolate Chip, More Mustard, Old Olive, and Rich<br />
Razzleberry Stampin’ Write markers; Dusty Durango 1/2" polka dot grosgrain ribbon;<br />
linen thread; Stampin’ Dimensionals; 1/16" Circle and 1" Circle punches<br />
joyful candle wrap<br />
Falling Leaves set; Bright Blessings jumbo wheel; Whisper White card stock; More<br />
Mustard and Whisper White textured card stock; Old Olive Classic Stampin’ Pad;<br />
VersaMark pad; Clear Stampin’ Emboss powder; Rich Razzleberry 1/2" polka-dot<br />
grosgrain ribbon; linen thread; Mini Library clips; Autumn Harvest Rub-Ons; Stampin’<br />
Dimensionals; Curly Label punch<br />
celebrate you<br />
congratulations to our talented demonstrators who had<br />
their creations published in consumer magazines!<br />
à la card<br />
Connie Babbert | dublin, ohio<br />
Crafts ‘n’ Things August 2009<br />
Just Cards Summer 2009<br />
Stampers’ Sampler August/September 2009<br />
Cynthia Otto | st. louis, missouri<br />
Take Ten Autumn 2009<br />
Lisa Somerville | manhattan, illinois<br />
Crafts ‘n’ Things October 2009<br />
Michelle Zindorf | west alexandria, ohio<br />
Craft Stamper (UK) September 2009<br />
You’ll find a card created with this<br />
template on page 20.<br />
30 www.stampinup.com
make it happen<br />
contestcategories october<br />
The following Art Contests are <strong>for</strong> the month of October.<br />
Except where contests <strong>for</strong> individual countries are noted,<br />
demonstrators from the US and Canada may enter all contests and<br />
one winner will be chosen <strong>for</strong> each contest, regardless of country.<br />
October Contest winners will be featured in our December issue.<br />
on <strong>your</strong> own<br />
“never underestimate the power of a woman to spread the news!”<br />
—susan nygaard | sioux falls, south dakota<br />
winter wonderland<br />
wow! art file<br />
Projects with a wintery theme<br />
All other projects<br />
Our home décor article, “An Extra Touch of Love,” (page 14) featured simple<br />
paper ornaments perfect <strong>for</strong> demonstrating in <strong>your</strong> workshops this season.<br />
What products would you use to create these adorable decorations? Now, what<br />
are some of the ways you could step up these ornaments? (Stampin’ Glitter<br />
perhaps?) <strong>Up</strong>selling can be just that easy! Be sure to write down all of <strong>your</strong> “step<br />
up” ideas and take them with you to <strong>your</strong> workshops.<br />
monthly contest deadlines<br />
• Contests run <strong>for</strong> a single month at a time, with the deadline<br />
falling on the last day of the month. This October Contest<br />
runs September 1–September 30.<br />
• Entries <strong>for</strong> the October Contest must be received in our<br />
office on or be<strong>for</strong>e September 30, 2009.<br />
• Please pack all entries carefully and label the box or envelope<br />
with the contest month and category. (See address below.)<br />
Contest entries will not be returned.<br />
monthly contest rules and in<strong>for</strong>mation<br />
• Winning projects often share the following features: They<br />
use only one set along with a greeting set, plus backgrounds,<br />
borders, or frames. Use of the Write Me a Memory® Journaling<br />
Fonts CDs is limited to journaling only (not titles). Scrapbook<br />
pages include photos and journaling. We receive more entries<br />
in the Wow! Art File because there are no subject limitations,<br />
so <strong>your</strong> chances of winning are better in the other categories.<br />
• Include a list of Stampin’ Supplies used to make <strong>your</strong> entry:<br />
Specify stamp set or wheel names; the types and colors of<br />
papers, card stock, markers, pens, pads; and any accessories<br />
or tools used. Stamps and accessories used must be in the<br />
current catalog. Give clear directions, if necessary. Also write<br />
<strong>your</strong> name, demonstrator number, the month of the contest,<br />
and the category you are entering. Write this in<strong>for</strong>mation<br />
directly on the back of the card or item, if possible.<br />
• All scrapbook layouts must contain photos. When<br />
submitting photos of you or members of <strong>your</strong> immediate<br />
family, you grant Stampin’ <strong>Up</strong>! the right to publish<br />
those photos. However, if you’d like to submit a project<br />
with photos of individuals other than immediate family<br />
members, please have all main subjects in the photo<br />
fill out a photo waiver <strong>for</strong>m, which can be found on the<br />
Demonstrator Web Site under My Business>My Business<br />
Resources>Copyright. Make sure those photo waivers are<br />
included with any projects you submit to Stampin’ <strong>Up</strong>! Do<br />
not send photos taken by professional photographers unless<br />
you have obtained a release of the copyright in writing.<br />
Please include that release with <strong>your</strong> submission.<br />
• Mail to: Stampin’ <strong>Up</strong>! Contest: [Category Name]<br />
12907 South 3600 West<br />
Riverton, UT 84065<br />
• Submission of artwork to Stampin’ <strong>Up</strong>! constitutes<br />
agreement with Stampin’ <strong>Up</strong>!’s payment policy and<br />
acknowledgment that the artwork becomes the property<br />
of Stampin’ <strong>Up</strong>! to be used by the company as desired.<br />
• Submit as many entries per category as you wish. Do not<br />
submit projects made with patterns or images known to be<br />
copyrighted. Contest winners in each category may select<br />
any three stamp sets (excluding hostess sets) from the<br />
current catalog and/or mini catalog. (Demonstrator Support<br />
will call winners and take their free stamp orders within<br />
10 <strong>business</strong> days of the contest deadline.)<br />
• Stampin’ <strong>Up</strong>! cannot answer inquiries about whether<br />
or not contest entries arrived in the office. If you want<br />
proof of delivery, please send by registered mail or a<br />
similar option.<br />
Susan Nygaard presented her wonderful hostess coaching process this<br />
month in the article “It Takes Two” (page 19). Give her strategy a try with one of<br />
<strong>your</strong> hostesses this month! You never know how much help <strong>your</strong> hostess can be<br />
until you get her involved.<br />
If <strong>your</strong> customers are clamoring <strong>for</strong> some harvest-themed projects this<br />
month, we’ve got just the thing. Take a look at the projects on page 20 featuring<br />
one of our favorite autumn sets: Falling Leaves. Three of these are perfect <strong>for</strong><br />
demonstrating at <strong>your</strong> next workshop and our Happy Thanksgiving card would<br />
be a fabulous Make & Take! Don’t <strong>for</strong>get—you can make these projects even<br />
easier to demonstrate by cutting out the leaves ahead of time.<br />
with <strong>your</strong> downline<br />
“Having an outline of what I’m going to say about the products<br />
gives me a great start to my workshop.”<br />
—tiffany bauer | dubois, indiana<br />
Demonstrators Cindi Kugell and Tiffany Bauer offered some wonderful<br />
tips <strong>for</strong> planning what to say during <strong>your</strong> workshops. After all, a chef never<br />
enters her kitchen without a recipe and a strategy! Discuss these tips with<br />
<strong>your</strong> downline this month and, together, plan a strategy <strong>for</strong> <strong>your</strong> workshops in<br />
November. Don’t <strong>for</strong>get to follow up to find out how each of you did!<br />
September 15–October 15 is Hispanic Heritage Month! With <strong>your</strong> downline,<br />
discuss ways you can celebrate <strong>creativity</strong> and diversity with <strong>your</strong> customers and<br />
Celebrando Creatividad. Plan an event that you can all do together! Turn to<br />
page 27 to learn more about Hispanic Heritage Month.<br />
Our 2009 Holiday Mini Catalog is sparking loads of interest in Stampin’ <strong>Up</strong>!<br />
products and in the <strong>business</strong> opportunity. Work with <strong>your</strong> group and determine<br />
if you would be interested in inviting potential recruits to experience the<br />
inspiration and fun of one of <strong>your</strong> group meetings! This can often be one of the<br />
best ways to turn that “maybe” into a “yes!”<br />
Is there a cause that you’re passionate about? In honor of National Breast<br />
Cancer Awareness Month and the upcoming season of giving, we challenge<br />
you and <strong>your</strong> group to get involved with the charity of <strong>your</strong> choice (like Jan<br />
Przybylski did).<br />
october 2009<br />
31
12907 South 3600 West<br />
Riverton, UT 84065<br />
Make Each<br />
“Thank-You”<br />
Uniquely Yours<br />
With our exclusive artwork, colors, and<br />
templates all in one easy-to-use software<br />
package, <strong>your</strong> customers will love making<br />
their My Digital Studio digital and<br />
hybrid creations uniquely theirs.<br />
Learn more about My Digital Studio on the<br />
Demonstrator Web Site under Products & Promotions.