
You also want an ePaper? Increase the reach of your titles
YUMPU automatically turns print PDFs into web optimized ePapers that Google loves.
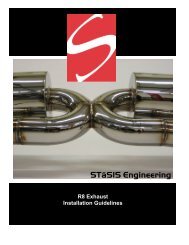
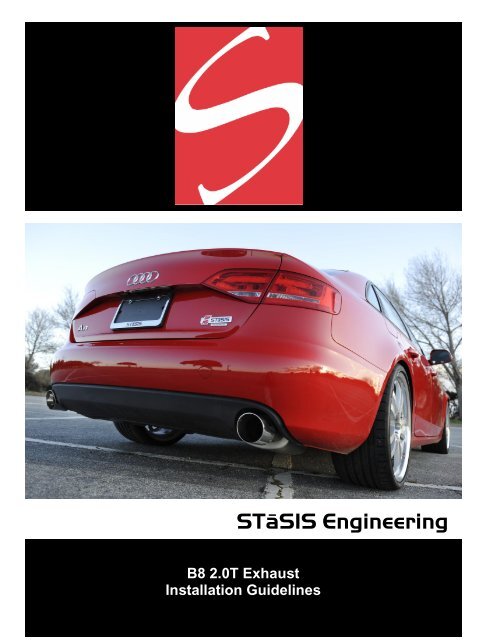
STāSIS Engineering<br />
B8 2.0T <strong>Exhaust</strong><br />
<strong>Install</strong>ation Guidelines
B8 2.0T <strong>Exhaust</strong><br />
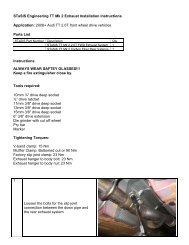
<strong>Exhaust</strong> Kit <strong>Install</strong>ation<br />
Application Table<br />
Description<br />
B8 A4 2.0TFSI <strong>Exhaust</strong> Assembly (Manual and 8-speed Tiptronic)<br />
B8 A5 2.0TFSI <strong>Exhaust</strong> Assembly (Manual and 8-speed Tiptronic)<br />
B8 Q5 2.0TFSI <strong>Exhaust</strong> Assembly (8-speed Tiptronic)<br />
Instructions<br />
1 Raise vehicle and support exhaust system.<br />
2 Loosen the two 13mm nuts on the exhaust clamp<br />
between the front muffler/downpipe assembly and<br />
the center section of the exhaust.<br />
For systems with double sided mufflers, loosen<br />
both clamps.<br />
Page 2 of 10
3 Remove the 13mm bolt holding the front exhaust<br />
hanger on the rear muffler.<br />
4 Remove the 13mm nut holding the rear hanger on<br />
the rear muffler.<br />
For systems with double sided mufflers, remove<br />
the 13mm nut on both sides.<br />
5 Pry off the rubber exhaust hanger on the<br />
passenger side for the middle muffler.<br />
Page 3 of 10
6 Pry off the rubber exhaust hanger on the driver’s<br />
side for the middle muffler.<br />
7 Gently lower the exhaust system. Slide rear<br />
muffler(s) off of the front muffler/downpipe<br />
assembly and remove from vehicle.<br />
8 Remove the rear exhaust hanger from the stock<br />
exhaust. Note orientation. This will be reused on<br />
the driver’s side muffler of the <strong>STaSIS</strong> exhaust<br />
system.<br />
For systems with double sided mufflers, reuse<br />
hangers from both mufflers.<br />
Page 4 of 10
9 Remove the 3 13mm nuts holding the front<br />
muffler/downpipe assembly to the flex joint.<br />
10 Gently lower and remove the front<br />
muffler/downpipe assembly from the vehicle.<br />
11 For vehicles with a single exhaust outlet valence,<br />
gently pull valence from the corner towards the<br />
center to remove.<br />
For vehicles that already have a dual outlet<br />
valence, skip to step 17.<br />
Page 5 of 10
12 Using a 10mm socket, remove the 3 plastic nuts<br />
holding the passenger side cavity cover.<br />
13 Remove the push clip retainer in the rear right<br />
corner of the cavity cover. Remove the cover from<br />
the vehicle.<br />
14 <strong>Install</strong> the supplied exhaust hanger onto the<br />
passenger side muffler of the <strong>STaSIS</strong> exhaust<br />
system. Use the pictured speed nuts in the next<br />
step.<br />
Page 6 of 10
15 <strong>Install</strong> the supplied heat shield for the right side of<br />
the vehicle using the supplied speed nuts.<br />
16 Make sure there is adequate clearance between<br />
the heat shield and the sway bar. The heat shield<br />
should be tight against the chassis. If not, gently<br />
bend the heat shield.<br />
17 <strong>Install</strong> the downpipe using the supplied hardware<br />
and gasket.<br />
Page 7 of 10
18 Support the downpipe during installation of the<br />
center section of the exhaust to minimize stress on<br />
the flex joint.<br />
19 <strong>Install</strong> the center section using the supplied<br />
hardware and gasket.<br />
Page 8 of 10
20 <strong>Install</strong> the driver’s side muffler. Attach the exhaust<br />
hanger previously removed from the stock exhaust<br />
onto the left muffler. Slide one of the supplied<br />
exhaust clamps on before installation. Orient the<br />
clamp nut to be outboard. Tighten the clamp just<br />
enough so you can still adjust the pipe.<br />
(Apply anti seize to all assembly bolts to allow<br />
for ease of removal)<br />
21 <strong>Install</strong> the short intermediate pipe with exhaust<br />
clamp onto the center section. Orient the clamp<br />
nut outboard. <strong>Install</strong> the supplied exhaust hanger<br />
on the right side muffler. <strong>Install</strong> the muffler and<br />
exhaust clamp with the clamp nut oriented towards<br />
the front of the vehicle. Tighten the clamps just<br />
enough so you can still adjust the pipes.<br />
Page 9 of 10
22 <strong>Install</strong> the rear valence appropriate for your vehicle<br />
with twin tips. Start on the outer edges and work<br />
your way inward ensuring the mounting tabs are<br />
firmly seated in the bumper cover.<br />
23 Adjust the mufflers and pipes in order to gain equal<br />
clearance and depth in the exhaust openings. The<br />
<strong>STaSIS</strong> logo should be partly covered when the<br />
exhaust is cold. The system will expand when hot<br />
showing the full logo.<br />
24 Once the adjustment is complete, tighten all the<br />
clamps and install the bridge support bar between<br />
the left muffler and the intermediate pipe. If the<br />
two tabs do not line up, the adjustment is incorrect.<br />
Support bar can be in tension to properly space the<br />
muffler width in the valence.<br />
During and after install, wipe off all assembly<br />
and shipping particles from the exhaust. If<br />
dust is not wiped off, once the exhaust gets<br />
hot, the particles will burn onto the stainless<br />
steel finish and become permanent.<br />
Ensure the exhaust tips on both sides protrude<br />
from the bumper evenly and are not touching<br />
any body panels. Clearance to all body panels<br />
should account for thermal expansion of the<br />
exhaust, up to ½ inch in length.<br />
25 Test drive to ensure there are no abnormal noises.<br />
Minor smoke and aromas are normal with a new<br />
exhaust system. These will fade rapidly under<br />
normal driving.<br />
Page 10 of 10