Caffe Bellissimo - Sunbeam
Caffe Bellissimo - Sunbeam
Caffe Bellissimo - Sunbeam

You also want an ePaper? Increase the reach of your titles
YUMPU automatically turns print PDFs into web optimized ePapers that Google loves.
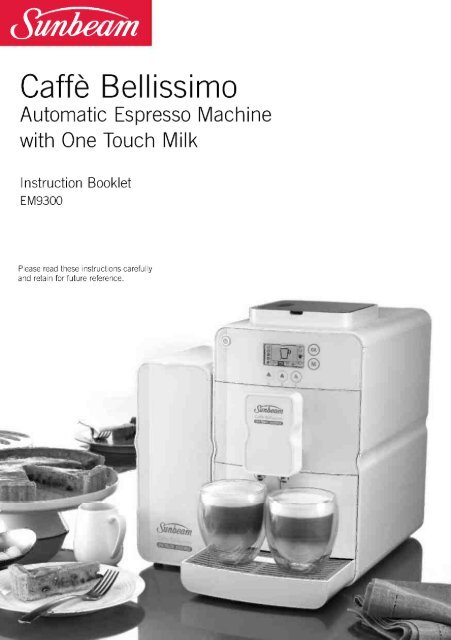
ffmbetriz<br />
<strong>Caffe</strong> <strong>Bellissimo</strong><br />
Automatic Espresso Machine<br />
with One Touch Milk<br />
Instruction Booklet<br />
EM9300<br />
Please read these instructions carefully<br />
and retain for future reference.
<strong>Sunbeam</strong>'s Safety Precautions 2<br />
About espresso coffee 3<br />
Features of your <strong>Sunbeam</strong> <strong>Caffe</strong> <strong>Bellissimo</strong> 4<br />
Symbols 7<br />
LCD menu overview 8<br />
Preparing your <strong>Sunbeam</strong> <strong>Caffe</strong> <strong>Bellissimo</strong> 9<br />
Fitting the bean hopper 9<br />
Connecting the milk system 10<br />
Setting the water hardness 14<br />
Preparing coffee 15<br />
Espresso with beans 15<br />
Espresso with pre-ground coffee 16<br />
Milk-based coffee 18<br />
Hot water function 20<br />
Programming 21<br />
Espresso pour volume 21<br />
Settings for milk-based coffee 22<br />
Grind settings 24<br />
Menu settings 25<br />
Setting and storing the coffee temperature 25<br />
Switching on the additional heating 26<br />
Setting and sorting the shut-off time 27<br />
Resetting the factory default settings 28<br />
Display number of dispensed coffees 29<br />
Cleaning and maintenance 30<br />
Cleaning the coffee brewing unit 33<br />
Milk system cleaning program 35<br />
Running the cleaning program 36<br />
Running the descaling program 38<br />
Trouble shooting guide 41
Important instructions - retain for<br />
future use.<br />
e.,,,S1.11 L.)t-J1 QL.1.14,... I Ail<br />
MI-P.OTS±Llt5r9kfIl3B#M o<br />
,su<br />
Assurez-vous que les precautions ci-dessus relatives a la<br />
securite sont bien comprises<br />
Versichem Sie sich,dass die obenstehenden<br />
SicherheitsmaBnahmen verstanden werden<br />
Bat:moven mac 01 napartavw npocpuKdatc aoxpakciaq<br />
yivovTat Kamm*<br />
Pastikan bahwa tindakan-tindakan keselamatan seperti<br />
di atas dimengerti anda<br />
Accertatevi the le suddette norme di sicurezza siano<br />
comprese a dovere<br />
±1EVIIIIIIC:k
<strong>Sunbeam</strong>'s Safety Precautions<br />
SAFETY PRECAUTIONS FOR YOUR SUNBEAM<br />
ESPRESSO MACHINE.<br />
Always place the unit on a flat level surface.<br />
Do not operate without water in reservoir. Observe<br />
the maximum filling volume is 1.4 litres.<br />
Do not fill the water reservoir with any liquid other<br />
than clean, cold water or cleaning and descaling<br />
solutions specified in this instruction manual.<br />
Do not operate without the drip tray and cup rest<br />
plate in position.<br />
The steam nozzle becomes very hot when preparing<br />
milk. This may cause burns in case of contact,<br />
therefore avoid any direct contact with the steam<br />
nozzle.<br />
<strong>Sunbeam</strong> is very safety conscious when designing and<br />
manufacturing consumer products, but it is essential<br />
that the product user also exercise care when using<br />
an electrical appliance. Listed below are precautions<br />
which are essential for the safe use of an electrical<br />
appliance:<br />
Read carefully and save all the instructions provided<br />
with an appliance.<br />
Always turn the power off at the power outlet before<br />
you insert or remove a plug. Remove by grasping the<br />
plug - do not pull on the cord.<br />
Turn the power off and remove the plug when the<br />
appliance is not in use and before cleaning.<br />
Do not use your appliance with an extension cord<br />
unless this cord has been checked and tested by a<br />
qualified technician or service person.<br />
Always use your appliance from a power outlet of the<br />
voltage (A.C. only) marked on the appliance.<br />
This appliance is not intended for use by persons<br />
(including children) with reduced physical, sensory<br />
or mental capabilities, or lack of experience and<br />
knowledge, unless they have been given supervision<br />
or instruction concerning use of the appliance by a<br />
person responsible for their safety.<br />
Children should be supervised to ensure that they do<br />
not play with the appliance.<br />
The temperature of accessible surfaces may be high<br />
when the appliance is operating.<br />
Never leave an appliance unattended while in use.<br />
Hot coffee, water or milk ejected by the appliance<br />
can cause scalding. Only activate the appliance<br />
when a container is underneath the coffee spouts.<br />
Always unplug the appliance from the power if there<br />
is any problem during the coffee making process or<br />
prior to cleaning and maintenance.<br />
Never put any part of this appliance into the<br />
dishwasher. Never immerse the appliance in water.<br />
Allow the appliance to cool down before cleaning.<br />
Do not use an appliance for any purpose other than<br />
its intended use.<br />
Do not place an appliance on or near a hot gas<br />
flame, electric element or on a heated oven.<br />
Do not place on top of any other appliance.<br />
Do not let the power cord of an appliance hang over<br />
the edge of a table or bench top or touch any hot<br />
surface.<br />
Do not operate any electrical appliance with a<br />
damaged cord or after the appliance has been<br />
damaged in any manner. If damage is suspected,<br />
return the appliance to the nearest <strong>Sunbeam</strong><br />
Appointed Service Centre for examination, repair<br />
or adjustment.<br />
For additional protection, <strong>Sunbeam</strong> recommend<br />
the use of a residual current device (RCD) with a<br />
tripping current not exceeding 30mA in the electrical<br />
circuit supplying power to your appliances.<br />
Do not immerse the appliance in water or any other<br />
liquid unless recommended.<br />
Appliances are not intended to be operated by<br />
means of an external timer or separate remote<br />
control system.<br />
This appliance is intended to be used in household<br />
and similar applications such as: staff kitchen areas<br />
in shops, offices and other working environments;<br />
farm houses; by clients in hotels, motels and other<br />
residential type environments; bed and breakfast<br />
type environments.<br />
2<br />
If you have any concerns regarding the performance and use of your appliance,<br />
please visit www.sunbeam.com.au or contact the <strong>Sunbeam</strong> Consumer Service Line.<br />
Ensure the above safety precautions are understood.
About espresso coffee<br />
<strong>Sunbeam</strong>'s extensive experience in designing<br />
quality, long-lasting appliances has enabled<br />
us to develop a range of espresso machines<br />
that are as beautiful as they are functional.<br />
As well as incorporating the learnings<br />
from commercial machines to ensure café<br />
quality coffee, ease-of-use was an important<br />
dynamic in the design of the <strong>Sunbeam</strong> <strong>Caffe</strong><br />
<strong>Bellissimo</strong>.<br />
The <strong>Sunbeam</strong> <strong>Caffe</strong> <strong>Bellissimo</strong>. is fully<br />
automatic, removing all the guesswork from<br />
making espresso coffee. At the push of a<br />
button the machine will grind the coffee<br />
beans, place the correct dose of coffee grinds<br />
into the filter, tamp it and pump the precise<br />
amount of water needed to produce a shot of<br />
espresso. As a result, each time you make an<br />
espresso with the <strong>Sunbeam</strong> <strong>Caffe</strong> <strong>Bellissimo</strong><br />
you are assured a consistent taste every<br />
time. With the added feature of an automatic<br />
milk frother milk can be textured perfectly<br />
everytime with ease.<br />
As coffee continues to be an integral element<br />
of Australian culture, the demand for the<br />
perfect cup is ever increasing. A growing<br />
favourite for coffee lovers in Australia, at<br />
any time of the day is the <strong>Caffe</strong> Latte. To<br />
accommodate these style of drinks, the<br />
height of the espresso pour spouts are<br />
adjustable. Ideal for all styles of cups - bring<br />
the spouts down for espresso cups and for<br />
those that prefer a <strong>Caffe</strong> Latte or a Long<br />
Black raise the pour spouts for taller cups.<br />
Drinking authentic café quality coffee at<br />
home is guaranteed with a sunbeam espresso<br />
machine. The simple to use design of the<br />
machine allows you to enjoy the sweet aroma<br />
and taste of the perfect shot of espresso with<br />
its signature golden crema every time.<br />
What makes a good coffee?<br />
<strong>Sunbeam</strong> have consulted with experienced<br />
coffee makers and appreciators of coffee<br />
through every stage of design, to ensure the<br />
machine delivers a great espresso coffee<br />
every time. There are many factors that<br />
contribute to the perfect coffee. The words'<br />
`taste' and 'aroma' are consistently used<br />
when describing the perfect cup.<br />
The sweet aroma and taste of the espresso<br />
coffee is largely due to the correct combination<br />
of temperature and pressure during the brewing<br />
process. The 'thermoblock' heating systems<br />
ensure the water is at the correct temperature,<br />
so the full coffee flavour is extracted. Secondly,<br />
the italian made 15 pump ensures the correct<br />
pressure at which the liquid espresso is<br />
released from the pour spouts. The pour should<br />
be steady and consist of both liquid and cream.<br />
This cream is commonly known as the 'crema'.<br />
The perfect 'crema' should be a golden colour<br />
and thick and stable, preserving the coffee<br />
flavour, aroma and temperature.<br />
We hope you have many enjoyable coffee<br />
experiences with your <strong>Sunbeam</strong> <strong>Caffe</strong><br />
<strong>Bellissimo</strong>.<br />
3
Features of your <strong>Sunbeam</strong><br />
<strong>Caffe</strong> <strong>Bellissimo</strong><br />
One touch operation<br />
Prepares your favourite coffee at the touch<br />
of a button - with automatic milk.<br />
Milk Box<br />
With two cold packs, the milk box keeps milk<br />
cold for up to 3 hours.<br />
15 Bar Pump<br />
Italian designed and manufactured, the<br />
machine is fitted with a 15 BAR pump<br />
delivering the pressure required for a complete<br />
extraction of oils, coffee solids<br />
and aroma.<br />
Thermoblock Heating System<br />
The thermoblock heating system heats the<br />
water ensuring the precise temperature is<br />
achieved for each function. Additionally, the<br />
thermoblock is coated with non-stick material<br />
to slow scale build up and reduce<br />
the frequency of cleaning required.<br />
On/Off button<br />
LCD display<br />
Easy-to-use control display allows you to select<br />
your desired coffee type and menu options.<br />
Waste container<br />
Used coffee grinds are ejected into the waste<br />
container, which is removed easily for emptying<br />
and cleaning.<br />
Coffee spouts<br />
Delivers the espresso and milk into your glass.<br />
4<br />
Rest for tall glasses<br />
Allows you to place even the tallest glasses to<br />
prepare a grande latte.
Quick-start guide<br />
Adjustable coffee beans container<br />
The coffee beans container can be increased<br />
to 450g.<br />
Height adjustable dispenser unit<br />
Allows you to place the smallest glass for an<br />
espresso, or the largest glass for a grande<br />
latte by simply sliding up and down, avoiding<br />
messy splashes.<br />
- Water tank<br />
Removable for easy filling, the water tank has<br />
a large capacity of 1.4 litres.<br />
- Retractable and removable drip tray<br />
The drip tray can be pushed back into the<br />
machine and released with a simple push to<br />
allow for tidy and convenient storage. It is<br />
also removable for easy cleaning.<br />
Test strip for<br />
determining the<br />
water hardness<br />
Cleaning tablets<br />
O<br />
O<br />
Saa<br />
Posing<br />
.<br />
Descaling tablet<br />
Measuring spoon with<br />
cleaning brush<br />
0<br />
DessalIng<br />
tablets
Features of your <strong>Sunbeam</strong> <strong>Caffe</strong> <strong>Bellissimo</strong> continued.<br />
TOP VIEW<br />
Pre-ground coffee shaft<br />
Allows you to use pre-ground coffee instead<br />
of coffee beans.<br />
000114,<br />
Grind fineness lever<br />
Adjust the fineness or the grind using the<br />
grind fineness lever.<br />
LCD DISPLAY<br />
OK button<br />
Menu/return button<br />
e<br />
do0<br />
03<br />
EP<br />
D<br />
A button<br />
Select your coffee strength<br />
B button<br />
Select your dispensing function: espresso,<br />
milk-based coffees, hot water or coffee using<br />
pre-ground coffee.<br />
C button<br />
Select your cup size: espresso cup, coffee<br />
cup or coffee mug.<br />
6
Symbols<br />
The below table shows the different LCD<br />
symbols and what they stand for.<br />
El Dispensing coffee<br />
>. El Hot water<br />
CO<br />
0- 01 Pre-ground coffee<br />
v,<br />
5<br />
...,<br />
5- Milk based<br />
CO<br />
.1- El coffees<br />
VI<br />
Cup size<br />
Selection<br />
OP<br />
WI°<br />
Cup mug<br />
Coffee cup<br />
Espresso cup<br />
Cappuccino<br />
Café Latte<br />
Grande Latte<br />
PO Ground coffee quantity<br />
Y75 Milk quick cleaning (Display: upper left of the display)<br />
el<br />
Cappucino<br />
settings<br />
Cup filling quantity<br />
Coffee-Milk<br />
proportion<br />
OPP.<br />
Froth quantity<br />
Settings<br />
Milk-based<br />
Cofffees<br />
Café Latte<br />
Settings<br />
gb<br />
gb<br />
Cup filling quantity<br />
Coffee-Milk<br />
proportion<br />
Froth quantity<br />
Cup filling quantity<br />
Grande<br />
Coffee-Milk<br />
Latte -<br />
proportion<br />
Settings<br />
Froth quantity<br />
Cleaning program<br />
Descaling program<br />
Device<br />
parameters<br />
0<br />
Coffee tempera<br />
ture<br />
Ecomode<br />
Heating system<br />
O Shut-off time<br />
O Info<br />
RESET<br />
Water hardness<br />
Defaultsettings<br />
7
LCD Menu Overview<br />
Multifunction display<br />
In this section, you will find an overview of<br />
the menus and the symbols used to operate<br />
the coffee machine.<br />
The ®selection buttons A-B-C each have<br />
different functions depending on the menu<br />
selected.<br />
To display a service program, repeatedly press<br />
the buttons (A) and (C) until the desired<br />
service program appears in the selection<br />
frame and confirm by pressing the button (B)<br />
or the8 button.<br />
You can select from the following service<br />
programs:<br />
Start display<br />
This menu appears when the coffee machine<br />
is switched on. You can select a function or<br />
make settings for preparing coffee here.<br />
GP<br />
999<br />
A<br />
Pre-ground coffee quantity setting:<br />
"extra light" to "extra strong".<br />
Selection of the dispensing<br />
function:<br />
Espresso, milk based coffee, hot<br />
water or pre-ground coffee.<br />
Cup size setting: espresso cup,<br />
coffee cup or coffee mug.<br />
'<br />
Desca ling<br />
programme<br />
Cleaning<br />
programme<br />
Device parameters<br />
This service program runs the descaling<br />
process. Refer to page 38 for Running<br />
the descaling program<br />
This service program runs the cleaning<br />
process. Refer to page 36 for Running<br />
the cleaning program<br />
In the "Device parameters" service<br />
program, you can select from the<br />
following:<br />
1111<br />
Coffee temperature<br />
Energy-save mode<br />
Shut-off time<br />
Water hardness<br />
Menu button<br />
To display the menu, press the ()menu<br />
button. You can make changes to the<br />
parameters of the coffee machine, start the<br />
service program and retrieve information<br />
here.<br />
X "5,<br />
I- OK<br />
000<br />
A B C C Scroll (right)<br />
A<br />
B<br />
Scroll (left)<br />
Confirm<br />
Quick cleaning for<br />
milk<br />
Milk-based<br />
coffee setting<br />
Info<br />
0RESET Factory settings<br />
You can run this service program<br />
after dispensing a coffee with milk.<br />
Refer to page 35 for Milk System<br />
Cleaning Program<br />
You can make the settings in this service<br />
program for Toffee quantity;<br />
Toffee-Milk proportion" and "Foam<br />
quantity for each individual coffee<br />
type.<br />
Note: The display automatically returns to the<br />
selection menu after 30 seconds if no action<br />
is performed in the service menu.<br />
8
Preparing your <strong>Sunbeam</strong><br />
<strong>Caffe</strong> <strong>Bellissimo</strong><br />
Fitting the tray for tall glasses<br />
The tray enables the use of taller glasses.<br />
To fit:<br />
Push the drip tray with the cup grate into<br />
the coffee machine until it snaps into<br />
place.<br />
Lift the front of the coffee machine<br />
slightly, centre and push the tray from the<br />
front under the coffee machine. Lower the<br />
coffe machine and allow the tray to snap<br />
in. Refer to Figure 1.<br />
Remove the lid (b) of the pre-ground coffee<br />
shaft by opening it to an upright position<br />
and turning to the right or left to pull it out<br />
of its holder. Refer to Figure 2.<br />
a<br />
Figure 2<br />
Place the larger coffee bean container on<br />
top of the smaller bean container.<br />
See Figure 3.<br />
Fitting the coffee bean container<br />
It is possible to increase the capacity of the<br />
coffee bean container to 450g.<br />
To increase the coffee bean container size:<br />
Remove the lid (a) of the coffee bean<br />
container by opening it to an upright<br />
position and pulling it out of its holder.<br />
Figure 3<br />
Note: Make sure that the grinder fineness<br />
levers are on top of each other.<br />
Fit the lid (b) of the coffee powder shaft by<br />
inserting it into the holder and turning it<br />
into position.<br />
9
Preparing your <strong>Sunbeam</strong> <strong>Caffe</strong> <strong>Bellissimo</strong> continued<br />
Fit the lid (a) of the coffee holder by<br />
inserting the hinge into the holder from<br />
above. Refer to Figure 3.<br />
Filling the coffee bean container<br />
Caution:<br />
Make sure that no foreign objects such as<br />
stones get into the coffee bean container.<br />
This will damage your espresso machine.<br />
Fill the coffee bean container only with<br />
coffee beans without sugar coatings or<br />
aromatised constituents.<br />
To fill the coffee bean container:<br />
Fold back the lid of the bean hopper.<br />
Fill the container with fresh coffee beans.<br />
Then close the container again.<br />
Connecting the milk system<br />
The milk system must be connected in order<br />
to dispense milk-based coffees.<br />
Press the left side of the door with the<br />
coffee dispensing unit to open it.<br />
See Figure 4.<br />
Figure 4<br />
nsert the cut end of the milk tube into<br />
the opening on the upper left of the milk<br />
container. See Figure 5.<br />
Put the tapered end through the opening<br />
on the side towards the outside and place<br />
the milk tube into the guide.<br />
See Figure 6.<br />
10
Preparing your <strong>Sunbeam</strong> <strong>Caffe</strong> <strong>Bellissimo</strong> continued<br />
Close the door with the coffee dispensing<br />
unit.<br />
Place a carton of cold milk (5 - 8°C) into<br />
the milk box to the left of the coffee<br />
machine.<br />
Insert the milk tube into the open milk<br />
container.<br />
Note: The slanted tube end must reach the<br />
bottom of the milk container.<br />
Using the milk box<br />
Preparing the cold packs:<br />
Remove the screw plug and rubber<br />
stoppers of the cold pack.<br />
Fill the cold pack with water.<br />
Note: Do not fill the cold pack to the brim to<br />
avoid bursting during freezing<br />
Put the cold pack into the freezer.<br />
Installing the milk box:<br />
Place the milk box to the left of the coffee<br />
machine. Open the lid and put previously<br />
cooled cold packs into the holder.<br />
Insert a milk carton.<br />
Insert the milk tube into the open milk<br />
carton. See Figure 7.<br />
The slanted tube end must reach the<br />
bottom of the milk container.<br />
Put the tube into the recess on the upper<br />
edge and close the lid.<br />
Note: The milk box is supplied with two cold<br />
packs. These can both be used to keep the<br />
milk cold for up to 3 hours. For optimum<br />
results, return milk to the fridge immediately<br />
after use. This will result in the best froth<br />
quality.<br />
Filling with water<br />
Caution: Milk, mineral water or other liquids<br />
can damage the water tank or the coffee<br />
machine.<br />
Only fill the water tank with fresh, cold<br />
water.<br />
Observe the maximum filling level of 1.4<br />
litres.<br />
To ensure a quality coffee, change the water<br />
in the water reservoir daily and wash the<br />
reservoir at least once a week in hot soapy<br />
water and rinse thoroughly.<br />
11
Preparing your <strong>Sunbeam</strong> <strong>Caffe</strong> <strong>Bellissimo</strong> continued<br />
Push the coffee dispensing unit upwards to<br />
its highest position.<br />
Press the water tank and pull it out of the<br />
coffee machine. See Figure 8.<br />
If the following warning appears on the<br />
display, the water tank must be refilled<br />
before the next coffee is dispensed.<br />
Figure 8<br />
Fill the water tank with fresh water up to<br />
its maximum marking shown on the right<br />
hand side of the tank. See Figure 9.<br />
Replace the water tank. Push it until it<br />
clicks in. See Figure 10.<br />
Prior to switching on each time, make sure<br />
there is water in the water reservoir and<br />
replenish if necessary. As the machine<br />
requires water for the automatic rinsing cycle<br />
every time the machine is switched on and<br />
off.<br />
Important: Only operate the machine when the<br />
waste container and drip tray are fitted.<br />
Switching on the coffee machine<br />
Before switching on, always check that the<br />
water tank and the coffee bean container<br />
are full. If necessary, top up with water or<br />
coffee beans. Every time the coffee machine<br />
is switched on or off, it requires water for the<br />
automatic rinsing cycle.<br />
A cup can be placed under the coffee<br />
dispensing unit during the rinsing process to<br />
avoid the drip tray filling too quickly.<br />
Press the ON/OFF button Tto switch on<br />
the coffee machine. During the heating up<br />
process (approximately 45 seconds), the<br />
following appears on the display:<br />
Figure 10<br />
12
Preparing your <strong>Sunbeam</strong> <strong>Caffe</strong> <strong>Bellissimo</strong> continued<br />
When the operating temperature has been<br />
reached, the coffee machine automatically<br />
performs a rinsing cycle. The water flows<br />
into the drip tray. The rinsing cycle is<br />
shown on the display:<br />
I<br />
Switching off the coffee machine<br />
Press the ®l ON/OFF button to switch off<br />
the coffee machine. It will then perform a<br />
rinsing cycle. The following appears on the<br />
display:<br />
Note: Your machine is set to prepare a cafe<br />
latte by default.<br />
When the rinsing cycle is completed, the<br />
coffee machine is ready for operation. The<br />
selection menu appears on the display:<br />
Note: If the water tank is empty or the<br />
required milk system cleaning was not<br />
performed, the switch-off process will be<br />
delayed for 15 minutes.<br />
The coffee machine subsequently prompts<br />
you to empty the waste container. The<br />
following appears on the display:<br />
Important: Empty the waste container after<br />
every use to prevent mould from building up.<br />
The coffee machine automatically switches<br />
itself off after 60 seconds.<br />
Note: If you have prepared a coffee with milk/<br />
milk froth, the coffee machine will prompt<br />
you to clean the milk system after rinsing.<br />
Details for this can be found on page 35<br />
'Milk System Cleaning Program'.<br />
Switching off the coffee machine in an<br />
emergency<br />
In the event of an emergency, you can switch<br />
off the coffee machine by pressing ® ON/<br />
OFF button 2 times. The only time you<br />
cannot turn the machine off is during the<br />
rinsing procedure.<br />
13
Preparing your <strong>Sunbeam</strong> <strong>Caffe</strong> <strong>Bellissimo</strong> continued<br />
Setting the water hardness<br />
Before using the coffee machine for the first<br />
time, it should be set to the appropriate<br />
water hardness for your region. You can<br />
determine the water hardness with the help<br />
of the test strip supplied with the coffee<br />
machine. Proceed as follows:<br />
Dip the test strip into cold water for 1<br />
second and shake off the excess water.<br />
After approximately 1 minute, the water<br />
hardness can read from the pink-coloured<br />
areas.<br />
Water hardness<br />
I Oft<br />
3<br />
medium-hard 2<br />
hard very hard<br />
Press the ()button to select the "Device<br />
parameters" menu.<br />
Press the (A) or (C) buttons repeatedly<br />
until the "Water hardness" menu appears<br />
on the display. The following appears on<br />
the display:<br />
0<br />
411- OK -Po<br />
Press thesbutton to display the "Water<br />
hardness" menu. The following appears on<br />
the display:<br />
Test strip<br />
Setting and storing the water hardness<br />
To set the previously determined water<br />
hardness, proceed as follows:<br />
Press the ()menu button. The following<br />
appears on the display:<br />
I "56 6<br />
6 6<br />
OK<br />
mill<br />
Press the (C) button until the "Device<br />
parameters" menu appears for selection.<br />
The following appears on the display:<br />
091<br />
411- OK -Po<br />
Press the (C) button 1 time for hardness<br />
level 1, 2 times for hardness level 2 etc.<br />
until you have set the determined water<br />
hardness. Store the input by pressing the<br />
"OK" button (B). The stored water hardness<br />
briefly appears on the display.<br />
Press thee button twice to return to the<br />
main screen.<br />
4 6<br />
4 6<br />
+ OK -Po<br />
14
Preparing coffee<br />
Preparing espresso with beans<br />
To prepare espresso with whole coffee beans,<br />
proceed as follows:<br />
Place one or two cups under the coffee<br />
dispensing spout.<br />
In order to reduce heat loss and splashing,<br />
adjust the dispensing spout height to suit<br />
your cup size by moving it up or down.<br />
See Figure 11.<br />
Select the desired ground coffee quantity<br />
by pressing the (A) button. The following<br />
selections are possible:<br />
0 0 0 dt. dt.<br />
0 0 dt. dt. dt.<br />
0 dt. dt. dt. dt.<br />
dt. dt. dt. dt. dt.<br />
"extra "light" "normal" "strong" "extra<br />
light"<br />
strong"<br />
The most recent ground coffee quantity<br />
remains set for each cup size.<br />
The set ground coffee quantity remains<br />
stored even when the coffee machine is<br />
switched off.<br />
Note: If the height adjuster is difficult to<br />
move, clean it following instructions on<br />
page 31, Cleaning the height adjustable<br />
dispenser unit.<br />
Select the desired cup size by pressing the<br />
(C) button. The following selections are<br />
possible:<br />
INP<br />
Coffee mug<br />
Coffee cup<br />
Espresso cup<br />
approx. 190<br />
ml<br />
approx. 120<br />
ml<br />
approx. 40<br />
ml<br />
The set cup filling level remains stored even<br />
when the coffee machine is switched off.<br />
The coffee machine is set for standard<br />
quantities for each cup size by default. If<br />
you wish to change any of the cup filling<br />
quantities, instructions can be found on page<br />
21, Espresso pour volume.<br />
15
Preparing coffee continued<br />
For 1 cup or 2 cups<br />
Press the button once to prepare one<br />
cup. The following appears on the display:<br />
Press thesbutton a second time to<br />
prepare two cups. The following appears on<br />
the display:<br />
Making an espresso with pre-ground coffee<br />
Caution: Ensure that you only use the<br />
measuring spoon supplied and never fill the<br />
container with more than one level measuring<br />
spoon (max. 8 g) of pre-ground coffee.<br />
Do not fill the container with water-soluble,<br />
freeze-dried instant products or other drink<br />
powders.<br />
Pre-ground coffee that is too fine can become<br />
clogged and damage your machine.<br />
To prepare coffee with pre-ground coffee:<br />
Select the "Pre-ground coffee" function by<br />
pressing the (B) button.<br />
The following appears on display:<br />
You can switch between one cup or two cups<br />
during the grinding process by pressing the<br />
8 button.<br />
Important: Two brewing processes are<br />
performed in sequence in two-cup operation.<br />
Only remove the cups when the both brewing<br />
processes are completed.<br />
During coffee preparation, the coffee powder<br />
is moistened with a small amount of water<br />
first for pre-brewing. The actual brewing<br />
process takes place after a short pause.<br />
You can stop coffee dispensing early by<br />
briefly pressing the e menu button.<br />
During preparation of coffee with pre-ground<br />
coffee, the "ground coffee quantity" function<br />
is deactivated. Therefore no information on<br />
the ground coffee quantity appears on the<br />
display.<br />
Only one cup can be prepared with<br />
pre-ground coffee.<br />
Select the desired cup size by pressing the<br />
(C) button. The following selections are<br />
possible:<br />
Coffee mug<br />
Coffee cup<br />
Espresso cup<br />
approx. 190<br />
ml<br />
approx. 120<br />
ml<br />
approx. 40<br />
ml<br />
16
Preparing coffee continued<br />
Note: The standard filling quantities for each<br />
cup size apply to bean, pre-ground coffee<br />
and hot water mode. If you wish to change<br />
the cup filling volume for pre-ground coffee,<br />
instructions can be found on page 21,<br />
Programming the espresso pour volume in<br />
pre-ground mode.<br />
The following appears on the display:<br />
Note: If the height adjuster is difficult to<br />
move, clean it. Follow instructions on page<br />
31, Cleaning the height adjustable dispenser<br />
unit.<br />
Press the 8 button to dispense coffee.<br />
Note: You can stop coffee dispensin<br />
prematurely by briefly pressing the M menu<br />
button.<br />
Li<br />
Li<br />
)<br />
Open the lid of the coffee bean container<br />
and the pre-ground coffee shaft.<br />
Add a maximum of one level measuring<br />
spoon (max.8g) of pre-ground coffee.<br />
Then close both lids again.<br />
Ensure that pre-ground coffee does not clog<br />
the container and that no foreign matter gets<br />
into the container.<br />
Never fill the container with more than one<br />
level measuring spoon of pre-ground coffee.<br />
Place a cup under the coffee spouts.<br />
In order to reduce heat loss and splashing,<br />
adjust the height of the dispenser to suit<br />
your cup size by moving it up or down.<br />
See Figure 12.<br />
17
Preparing coffee continued<br />
Milk-based coffee<br />
The milk system must be connected in order<br />
to dispense milk-based coffees. Refer to page<br />
10, Connecting the milk system.<br />
When the espresso machine is turned on you<br />
can select latte at one touch.<br />
Always use milk from the refrigerator<br />
(5-8 °C) as it produces the best frothing<br />
result for milk-based coffees.<br />
Note: Soy and rice milk do not produce as<br />
good frothing results as regular milk.<br />
Select the "milk-base coffee" function by<br />
pressing the (B) button go.<br />
The following appears on the display:<br />
e<br />
The coffee machine has default factory<br />
settings. If you wish to change these settings,<br />
refer to the instructions on page 22, Settings<br />
for milk-based coffee.<br />
The settings for milk-based coffee (coffeemilk<br />
proportion, coffee filling quantity and<br />
froth quantity) remain stored even when the<br />
coffee machine is switched off.<br />
In order to reduce heat loss and splashing,<br />
adjust the dispensing spout height to suit<br />
your cup/glass size by moving it up or<br />
down. See Figure 13.<br />
1E1 'It .5-<br />
Select the desired milk-based coffee by<br />
pressing the (C) button.<br />
The following selections are possible:<br />
Grande Latte<br />
<strong>Caffe</strong> Latte<br />
1.6 Cappuccino<br />
approx.<br />
270mL<br />
approx.<br />
180mL<br />
approx.<br />
200mL<br />
Place one or two cups under the coffee<br />
dispensing spout.<br />
When preparing Latte Grande, push the<br />
drip tray and the cup grate into the coffee<br />
machine completely and place two glasses<br />
onto the rest for tall glasses.<br />
Note: If the height adjuster is difficult to<br />
move, clean it. Proceed as described on page<br />
31 Cleaning the height adjustor.<br />
Select the desired ground coffee quantity<br />
by pressing the (A) button. The following<br />
selections are possible:<br />
0 0 0 0<br />
0 eitt.<br />
0 0<br />
elt,<br />
eg,<br />
only "extra "light" "normal" "strong" "extra<br />
milk" light" strong"<br />
If you select the coffee ground quantity "0",<br />
you can prepare hot milk.<br />
The last-selected ground coffee quantity<br />
remains set for each drink.<br />
The set ground coffee quantity remains<br />
stored even when the coffee machine is<br />
switched off.<br />
18
Preparing coffee continued<br />
Press the8 button to dispense your<br />
selected milk-based coffee.<br />
Press the® button once to prepare one<br />
cup. The following appears on the display:<br />
Quick cleaning after dispensing a milk-based<br />
coffee<br />
The symbol '77 appears on the above left<br />
of the display after dispensing a milk-based<br />
coffee. This is to remind you to perform<br />
quick cleaning. The following appears on the<br />
display:<br />
Press the8button a second time to<br />
prepare two cups. The following appears on<br />
the display:<br />
You can still switch between one cup or two<br />
cups during the grinding process by pressing<br />
the® button.<br />
Important: A short steam dump will occur<br />
before the milk is dispensed. This is normal<br />
and your cups can be left under the spouts<br />
while this occurs.<br />
Be aware that two brewing processes are<br />
performed in sequence in two-cup operation.<br />
Only remove the cups when the both brewing<br />
processes are completed.<br />
During coffee preparation, the coffee powder<br />
is moistened with a small amount of water<br />
first for pre-brewing. The actual brewing<br />
process takes place after a short pause.<br />
Note: You can stop coffee dispensing<br />
prematurely by briefly pressing thee menu<br />
button.<br />
Press the® menu button.<br />
The following appears on the display:<br />
I LS<br />
4- OK -OP<br />
Press the ® button to perform quick<br />
cleaning. The symbol on on the upper left<br />
of the display disappears.<br />
Notes: If no quick cleaning is performed, the<br />
coffee machine rinses automatically after<br />
about 5 minutes.<br />
19
Hot water function<br />
Important: There is a risk of scalding from hot<br />
splashing water. Avoid direct contact with<br />
skin.<br />
To prepare hot water:<br />
Select the "hot water" function by pressing<br />
the (B) button El. The following appears<br />
on the display:<br />
Note: If the height adjuster is difficult to<br />
move, clean it. Follow the instructions on<br />
page 31, Cleaning the dispensing unit.<br />
Press thesbutton to dispense hot water.<br />
Note: You can stop hot water dispensing<br />
prematurely by briefly pressing the ()menu<br />
button.<br />
1=1)<br />
Place a glass/cup under the coffee<br />
dispensing spout.<br />
Select the desired cup size by pressing the<br />
(C) button. The following selections are<br />
possible:<br />
IN)<br />
Coffee mug<br />
Coffee cup<br />
Espresso cup<br />
a pprox. 190<br />
ml<br />
a pprox. 120<br />
ml<br />
approx. 40<br />
ml<br />
In order to reduce heat loss and splashing,<br />
adjust the height of the dispenser to suit<br />
your cup size by moving it up or down.<br />
See Figure 14.
Programming<br />
Programming the espresso pour volume in bean<br />
mode<br />
The coffee machine is set for standard<br />
quantities by default. However, you can set<br />
the cup filling level individually for each cup<br />
size.<br />
Press the (A) button repeatedly until the<br />
required cup symbol for the desired ground<br />
coffee quantity is displayed.<br />
Note: The cup filling level for one cup is<br />
stored during this process.<br />
Place an appropriate cup under the coffee<br />
delivery spout.<br />
Press the (A) button repeatedly until the<br />
symbol for the ground coffee quantity you<br />
desire is displayed.<br />
Press the oK button and hold it pressed<br />
until the desired cup filling level is<br />
reached.<br />
Release the button. The new cup filling<br />
level is now stored.<br />
Repeat the procedure if you also wish to<br />
change the filling level for the other cup<br />
sizes.<br />
All values remain stored even when the<br />
coffee machine is switched off. Should you<br />
change your cup size, you can adapt the cup<br />
filling level individually at any time or reset<br />
the filling level with a "Reset". The settings<br />
affected are described on page 28, Restoring<br />
the factory default settings<br />
The stored cup filling levels for each<br />
individual cup symbol only applies in bean<br />
mode.<br />
Programming the espresso pour volume in<br />
pre-ground mode<br />
The coffee machine is set for standard<br />
quantities by default. However, you can set<br />
the cup filling level individually for each cup<br />
size. Proceed as follows:<br />
Select the "Coffee powder" function by<br />
pressing the (B) button 1;:l.<br />
Press the (C) button repeatedly until the<br />
required cup symbol for the desired ground<br />
coffee quantity is displayed.<br />
Place an appropriate cup under the coffee<br />
delivery spout.<br />
Add a maximum of one level measuring<br />
spoon (max.8g) of pre-ground coffee.<br />
Then press the oK button and hold it<br />
pressed until the desired cup filling level<br />
is reached.<br />
Release the button. The desired cup filling<br />
level is now stored.<br />
Repeat the procedure if you also wish to<br />
change the filling level for the other cup<br />
sizes.<br />
All values remain stored even when the<br />
coffee machine is switched off. Should you<br />
change your cup size, you can adapt the cup<br />
filling level individually at any time or reset<br />
the filling level with a "Reset". Follow the<br />
steps described on page 28, Restoring the<br />
factory default setting.<br />
The stored cup filling levels for each<br />
individual cup symbol only applies in powder<br />
mode.<br />
21
Programming continued<br />
Programming the espresso pour volume in hot<br />
water mode<br />
The coffee machine is set for standard<br />
quantities by default. You can set the cup<br />
filling level individually for each cup size.<br />
Select the "hot water" function by pressing<br />
the (B) button El.<br />
Press the (C) button repeatedly until the<br />
required cup symbol for the desired ground<br />
coffee quantity is displayed.<br />
Place an appropriate cup under the coffee<br />
delivery spout.<br />
Then press thee button and hold it<br />
pressed until the desired cup filling level is<br />
reached. Button (A), (B) and (C) will flash<br />
on rotation to indicate you are in program<br />
mode.<br />
Release the button. The desired cup filling<br />
level is now stored.<br />
Repeat the procedure if you also wish to<br />
change the filling level for the other cup<br />
sizes.<br />
All values remain stored even when the<br />
coffee machine is switched off. Should you<br />
change your cup size, you can adapt the cup<br />
filling level individually at any time or reset<br />
the filling level with a "Reset". Follow the<br />
steps described on page 28, Restoring the<br />
factory default settings.<br />
Programming settings for milk-based coffee<br />
The standard cup filling quantity, coffee-milk<br />
proportion and coffee froth quantity is set by<br />
default. These settings can be individually<br />
changed and stored for each milk-based<br />
coffee:.<br />
Press the Q menu button. The following<br />
appears on the display:<br />
I LS4 4<br />
4 4<br />
411- OK IIP1<br />
Press (C) button to move the selection into<br />
the "Settings for milk-based coffee" menu.<br />
The following appears on the display:<br />
11111<br />
4<br />
4 4 444<br />
411- OK 411<br />
Press thee button to display the<br />
"Settings for milk-based coffee".<br />
The following appears on the display:<br />
411- OK -10<br />
Press the (C) button until the desired<br />
milk-based coffee settings to be changed<br />
appears in the selection menu and then<br />
confirm selection by pressing thee<br />
button.<br />
The same setting options are available for all<br />
milk-based coffees. The following illustrates<br />
the possibilities using a cappuccino as an<br />
example.<br />
22
Programming continued<br />
The first setting affects the cup filling<br />
quantity.<br />
The filling quantity can be set from 50% to<br />
150%.<br />
Press the (A) or (C) button until the desired<br />
coffee filling quantity is displayed.<br />
Press the8 button to store the settings.<br />
The stored filling quantity briefly appears<br />
on the display.<br />
The next setting affects the coffee-milk<br />
proportion.<br />
50%<br />
e50%<br />
411- OK -Po<br />
The last setting affects the froth quantity.<br />
sb<br />
411- OK -10<br />
The settings for the froth quantity are: none,<br />
low, medium and high.<br />
Press the (A) or (C) button until the desired<br />
froth quantity is displayed.<br />
Press the8 button to store the settings.<br />
The stored froth quantity briefly appears on<br />
the display.<br />
Press thee button twice to return to the<br />
main screen.<br />
Repeat the procedure if you also wish to<br />
change settings for other milk-based coffees<br />
to your personal preference.<br />
You can make individual changes to the<br />
settings at any time or reset them. Follow the<br />
steps described on page 28, Restoring the<br />
factory default settings.<br />
The coffee-milk proportion can be set from<br />
80/20 to 20/80.<br />
Press the (A) or (C) button until the desired<br />
coffee filling quantity is displayed.<br />
Press the® button to store the settings.<br />
The stored coffee-milk proportion briefly<br />
appears on the display.<br />
23
Programming continued<br />
Programming the grind settings<br />
You can set the grinding fineness with the<br />
help of the lever located in the bottom right<br />
hand corner of the coffee beans container.<br />
Caution: Only set the grinding fineness when<br />
the grinder is running. Setting the grinding<br />
fineness when the grinder is not running can<br />
damage your espresso machine.<br />
To set the grinding fineness:<br />
Place a cup under the coffee spouts and<br />
select espresso.<br />
Press the® button to prepare the coffee.<br />
Adjust the grinding fineness with the<br />
grinding fineness lever while the grinder<br />
is running. The coffee is prepared and the<br />
grinding fineness is set.<br />
The following lever positions are possible:<br />
Changing and storing the ground coffee quantity<br />
You can store a different ground coffee<br />
quantity for each cup symbol. However, this<br />
is only possible when using coffee beans.<br />
Proceed as follows:<br />
Press the (C) button until the desired<br />
cup symbol for the desired ground coffee<br />
quantity is displayed.<br />
Then press the (A) button until the desired<br />
ground coffee quantity is displayed. The<br />
value for the ground coffee quantity is<br />
stored.<br />
Repeat the procedure if you also wish to<br />
change the ground coffee quantity for other<br />
cups sizes.<br />
All values remain stored even when the<br />
coffee machine is switched off.<br />
fine ground for "intense taste"<br />
medium ground for "normal taste"<br />
coarse ground for "mild taste"<br />
For light roasted coffee<br />
grinding mechanism to<br />
For dark roasted coffee<br />
grinding mechanism to<br />
beans, set the<br />
"fine".<br />
beans, set the<br />
"coarse".<br />
24
Menu settings<br />
Setting and storing the coffee temperature<br />
You can select from 5 temperature levels:<br />
. 1] II<br />
moderately<br />
warm<br />
warm<br />
Press the (C) button until the<br />
"Temperature" menu appears for selection.<br />
The following appears on the display:<br />
RESET<br />
D o<br />
normal<br />
hot<br />
Press the 8 button to select the<br />
"Temperature" menu.<br />
The following appears on the display:<br />
di<br />
Iextra hot<br />
To set the coffee temperature:<br />
Press the Q menu button. The following<br />
appears on the display:<br />
4 4<br />
4 4<br />
411- OK<br />
Press the (C) button until the "Device<br />
parameters" menu appears for selection.<br />
The following appears on the display:<br />
Press the (A) button until the desired<br />
coffee temperature is set. Store the input<br />
by pressing the 8 button. The stored<br />
temperature level briefly appears on the<br />
display.<br />
After programming, the display automatically<br />
returns to the "Temperature" menu item.<br />
To return to coffee mode, press the menu<br />
button twice or wait approx. 30 seconds until<br />
the coffee machine switches back to coffee<br />
mode.<br />
Press the 8 button to select the "Device<br />
parameters" menu.<br />
25
Menu settings continued<br />
Switching on additional heating<br />
Additional heating of the coffee machine<br />
is preset to energy saving mode. Additional<br />
heating can be switched on as required.<br />
During a brief warming up phase, the<br />
following appears on the display:<br />
Press the ® button to select the "Device<br />
parameters".<br />
Press the (C) button until the "Heating"<br />
menu appears for selection. The following<br />
appears on the display:<br />
p<br />
0 11<br />
411- OK -Po<br />
You can switch on additional heating<br />
permanently to prepare all coffee products<br />
and hot water without a waiting period.<br />
You can choose from the following settings:<br />
1111<br />
Heating system for short preparation times.<br />
(eco-mode)<br />
Heating system with additional heating for short-time<br />
preparation.<br />
To set the heating system:<br />
Press the Q menu button. The following<br />
appears on the display:<br />
6 6<br />
Lir5 6 6<br />
411- OK -Po<br />
Press the (C) button until the "Device<br />
parameters" menu appears for selection.<br />
The following appears on the display:<br />
Press the® button to select the<br />
"Temperature" menu. The following appears<br />
on the display:<br />
411- OK -Po<br />
Press the (A) button until the desired<br />
heating setting is set. Store the input by<br />
pressing the® button.<br />
The stored heating setting briefly appears<br />
on the display.<br />
After programming, the display automatically<br />
returns to the "Heating" menu item.<br />
To return to coffee mode, press the Q menu<br />
button twice or wait approx. 30 seconds until<br />
the coffee machine switches back to coffee<br />
mode.<br />
26
Menu settings continued<br />
Setting and storing the shut-off time<br />
You can select from 5 shut-off times:<br />
Press the (C) button until the "Shut-off<br />
time menu appears for selection. The<br />
following appears on the display:<br />
1 hour<br />
2 hours<br />
3 hours<br />
4 hours<br />
5 hours<br />
To set the shut-off time:<br />
Press the Q menu button. The following<br />
appears on the display:<br />
ta35<br />
4 4<br />
K<br />
Press the (C) button until the "Device<br />
parameters" menu appears for selection.<br />
The following appears on the display:<br />
I<br />
+ O K -110<br />
Press the oK button to select the "Shutoff<br />
time". The following appears on the<br />
display:<br />
411- K -Po<br />
Press the (C) button until you have set the<br />
desired shut-off time. Store the input by<br />
pressing the "OK" button. The stored shutoff<br />
time briefly appears on the display.<br />
After programming, the display automatically<br />
returns to the "Shut-off time menu item.<br />
To return to coffee mode, press the<br />
menu button twice or wait approx. 30<br />
seconds until the coffee machine switches<br />
back to coffee mode.<br />
Press the s button to select the "Device<br />
parameters".<br />
27
Menu settings continued<br />
Restoring the factory default settings<br />
This function resets all previously changed<br />
values to their original factory settings.<br />
The following settings and stored values are<br />
affected:<br />
Water hardness<br />
Programming of cup filling level<br />
Ground coffee quantity to cup filling level<br />
setting<br />
Coffee temperature<br />
Shut-off time<br />
Heating system<br />
Settings for coffee filling quantity, coffeemilk<br />
proportion and froth quantity for milk -<br />
based coffee.<br />
To restore the coffee machine to the factory<br />
settings, proceed as follows:<br />
Press the e menu button. The following<br />
appears on the display:<br />
6 6<br />
Lir5 6 6<br />
+ OK<br />
Press the (C) button until the "RESET"<br />
menu appears for selection. The following<br />
appears on the display:<br />
RESET<br />
411- OK -110<br />
Press the ()button to perform a "Reset".<br />
The coffee machine is reset. The following<br />
appears on the display:<br />
RESET<br />
After programming, the display automatically<br />
returns to the "Reset" menu item.<br />
To return to coffee mode, press the<br />
8 menu button twice or wait approx. 30<br />
seconds until the coffee machine switches<br />
back to coffee mode.<br />
Press the (C) button until the "Device<br />
parameters" menu appears for selection.<br />
The following appears on the display:<br />
OK<br />
4 6<br />
4 6<br />
-Po<br />
Press the® button to select the "Device<br />
parameters".<br />
28
Menu settings continued<br />
Display number of dispensed coffees<br />
(Info menu)<br />
To display the number of dispensed coffees<br />
to date, proceed as follows:<br />
Press the 0 menu button. The following<br />
appears on the display:<br />
Press the ® button to select the "Info"<br />
menu. The following appears on the<br />
display:<br />
6 6<br />
Lir5 6 6<br />
411- K -Po<br />
Press the (C) button until the "Device<br />
parameters" menu appears for selection.<br />
The following appears on the display:<br />
The software version is displayed in the upper<br />
half and the number of dispensed coffees in<br />
the lower half of the display.<br />
+ +<br />
11- OK<br />
Press the ()button to select the "Device<br />
parameters" menu.<br />
Press the (C) button until the "INFO"<br />
menu appears for selection. The following<br />
appears on the display:<br />
RESET<br />
11- OK -110<br />
29
Cleaning and maintenance<br />
Cleaning and maintenance<br />
This section contains important information<br />
on cleaning and maintenance of the coffee<br />
machine. Keep your coffee machine clean at<br />
all times to ensure consistent, high coffee<br />
quality and long life in your appliance.<br />
Safety precautions<br />
Before cleaning your espresso machine:<br />
Switch off the coffee machine and pull<br />
the plug out of the mains socket before<br />
starting cleaning.<br />
Before cleaning, allow the coffee machine<br />
cool down.<br />
Do not use any scratching, abrasive or<br />
corrosive agents. Simply wipe the inside<br />
and outside of the housing with a damp<br />
cloth.<br />
Never immerse the coffee machine itself,<br />
the mains cable or the mains plug into<br />
water or other liquids.<br />
Do not clean the coffee machine or its<br />
parts in a dish washer.<br />
Never pour water into the coffee bean<br />
container or grinding mechanism as this<br />
will cause damage.<br />
Observe the cleaning and descaling<br />
instructions.<br />
Regular cleaning<br />
Clean the external surfaces of the coffee<br />
machine with a damp cloth.<br />
Remove the waste container and the water<br />
tank and clean both with warm water and<br />
a mild washing-up liquid. Wipe both with a<br />
damp cloth.<br />
Empty the drip tray at regular intervals, but<br />
at least when the red filling level indicator<br />
becomes visible through the opening in the<br />
cup grate.<br />
Clean the drip tray and the rest for tall<br />
glasses with warm water and a mild<br />
washing-up liquid.<br />
Wipe the coffee bean container with a dry<br />
lint-free cloth.<br />
Emptying the waste container<br />
After dispensing 16 coffees, the waste<br />
container must be emptied and cleaned. The<br />
following appears on the display:<br />
As soon as you are prompted to empty the<br />
waste container, no more coffee can be<br />
dispensed.<br />
Push the coffee dispensing unit into the<br />
uppermost position.<br />
Press the upper left edge of the waste<br />
container, remove, empty and clean it.<br />
Insert the cleaned waste container back<br />
into the machine and push it until it<br />
stops. The coffee machine is now ready to<br />
dispense coffee again.<br />
30
Cleaning and maintenance continued<br />
Only empty the waste container when the<br />
coffee machine is switched on. The coffee<br />
machine can only detect emptying when<br />
it is switched on. If you empty the waste<br />
container with the coffee machine switched<br />
off, this will not be detected.<br />
This may result in prompting to empty after<br />
dispensing the first coffee when the coffee<br />
machine is switched on again the next time.<br />
The waste container should be cleaned daily<br />
if the coffee machine is used every day. You<br />
will be reminded of this each time by the<br />
following display symbol:<br />
Clean the gaps between the two parts of<br />
the height adjuster with warm water to<br />
remove any coffee residue.<br />
Place the connecting tube back into its<br />
original position and align the dispensing<br />
unit on the holding rails. Gently move<br />
downwards back into position.<br />
See Figure 17.<br />
Cleaning the dispenser unit<br />
To clean the dispensing unit:<br />
Press the left side of the door with the<br />
dispensing unit to open it. See Figure 15.<br />
11111a1111<br />
0<br />
Figure 15<br />
Pull the dispensing unit upwards gently<br />
until it dislodges from its holding rails.<br />
Loosen the connecting tube from the<br />
holder in the door.<br />
See Figure 16.
Cleaning and maintenance continued<br />
Cleaning the nozzle of the milk frother<br />
To clean the nozzle of the milk frother:<br />
Press the left side of the door with the<br />
dispensing unit to open it. See Figure 18.<br />
Remove the milk tube from the milk<br />
frother.<br />
Remove the milk frother nozzle from the<br />
milk frother by inserting the rounded end<br />
of the measuring spoon into the slot of<br />
the milk frother nozzle and turning 45° to<br />
pull it out. The nozzle is lifted up slightly<br />
during turning so that it can removed more<br />
easily. See Figure 21.<br />
Figure 18<br />
Remove the milk tube from the milk<br />
frother. See Figure 19.<br />
Clean the milk frother nozzle with a tooth<br />
pick. See Figure 22.<br />
Figure 19<br />
Fold the lever on the milk frother upwards<br />
and pull the milk frother out towards you.<br />
See Figure 20.<br />
Leave all parts of the milk frother in warm,<br />
soapy water for 5 hours or over night.<br />
Rinse all parts thoroughly under warm<br />
running water afterwards.<br />
Figure 20<br />
32
Cleaning and maintenance continued<br />
Replace the frother nozzle in the milk<br />
frother and lock the nozzle by turning it<br />
45° with the rounded end of the measuring<br />
spoon. See Figure 23.<br />
Figure 23<br />
Replace the cover.<br />
Replace the milk frother in the coffee<br />
machine and push the lever downwards to<br />
lock. See Figure 24.<br />
Cleaning the brewing unit<br />
The brewing unit must cleaned every week.<br />
If used intensively, more regular cleaning will<br />
be necessary. If you do not intend to use your<br />
coffee machine for a longer period of time,<br />
it is necessary to empty the waste container<br />
and the water tank and to clean the brewing<br />
unit thoroughly.<br />
Caution: The dispensing unit may still be hot<br />
if you have recently prepared coffee. Always<br />
allow the brewing unit to cool down before<br />
cleaning.<br />
To clean the brewing unit, proceed as follows:<br />
Press the left side of the door with the<br />
coffee dispensing unit to open it.<br />
See Figure 26.<br />
Figure 26<br />
Figure 24<br />
Fit the milk tube again to the upper left of<br />
the milk frother. See Figure 25.<br />
Remove the waste<br />
the container and<br />
coffee machine.<br />
See Figure 27.<br />
container by pressing<br />
pulling it out of the<br />
Figure 27<br />
33
Remove the brewing unit by gripping the<br />
front from underneath and pulling it out<br />
towards yourself. Use your other hand to<br />
stop it from falling out. See Figure 28.<br />
Replace the brewing unit by turning it into<br />
the right position (the outlet tube facing<br />
downwards and to the front), insert the<br />
brewing unit into the guide grooves and<br />
push it completely into the coffee machine.<br />
See Figure 31.<br />
Turn the brewing unit round. The brewing<br />
unit is open and the ejector folded down.<br />
The two stainless steel screens are now<br />
freely accessible.<br />
If the brewing unit is closed, you can loosen<br />
it on the back with the help of the tool<br />
function on the measuring spoon. Push the<br />
toothed opening on the measuring spoon onto<br />
the pin and loosen it by turning completely at<br />
least 3 times.<br />
Clean the brewing unit under hot running<br />
water. In particular, the stainless steel<br />
screens must be rinsed out well to remove<br />
any coffee residue Use the cleaning brush<br />
attached to the back of the measuring<br />
spoon. See Figure 29.<br />
Push the waste container into the coffee<br />
machine and close the door.<br />
Note: You can only switch on the coffee<br />
machine when the brewing unit is fitted<br />
and the door with coffee dispensing unit is<br />
closed. After switching on, the brewing unit<br />
is adjusted and the normal heating process<br />
starts. During preparation of the first coffee<br />
after cleaning, an increased amount of water<br />
will run into the waste container.<br />
Dry the brewing unit.
Milk system cleaning program<br />
Switch off the coffee machine with the<br />
ON/OFF button. After dispensing a milkbased<br />
coffee, the coffee machine performs a<br />
rinsing cycle and then prompts you to clean<br />
the milk system.<br />
If the coffee machine automatically switches<br />
itself off after dispensing a milk-based<br />
coffee, you are prompted to clean the milk<br />
system after 5 minutes.<br />
If the milk system cleaning is not performed,<br />
the coffee machine will prompt you again<br />
the next time it is switched on. You can only<br />
dispense coffee again when cleaning has<br />
been performed.<br />
The following symbols appear on the display:<br />
The following appears on the display:<br />
After completion, empty the container and<br />
fill it again with 250m1 of warm water.<br />
Insert the milk tube into the container.<br />
Note: The slanted end of the tube must reach<br />
the bottom of the container.<br />
Press the ()button to continue with the<br />
cleaning program.<br />
The water is fed out of the container via the<br />
milk tube and drained into the drip tray. The<br />
following appears on the display:<br />
Fill a container with 250m1 of warm water<br />
and half a capful of <strong>Sunbeam</strong> liquid<br />
descaler. Alternatively, dissolve 1 teaspoon<br />
of bi-carbonate soda into 250mL of warm<br />
water.<br />
Insert the milk tube into the container.<br />
Note: The slanted end of the tube must reach<br />
the bottom of the container.<br />
Press the s button to run the cleaning<br />
program for the milk system.<br />
4 4<br />
The cleaning process is completed<br />
automatically. It will then performs a rinsing<br />
cycle.<br />
The coffee machine subsequently prompts<br />
you to empty the waste container. The<br />
following appears on the display:<br />
The solution is fed out of the container via<br />
the milk tube and drained into the drip tray.<br />
The following appears on the display:<br />
Empty the waste container after every use to<br />
prevent mould from building up.<br />
The coffee machine automatically switches<br />
itself off after 60 seconds.<br />
The cleaning process is completed<br />
automatically.<br />
35
Cleaning and maintenance continued<br />
Running the cleaning program<br />
The cleaning program enables intensive<br />
cleaning of otherwise inaccessible areas.<br />
The cleaning program must be started when<br />
the following symbol appears on the display:<br />
Press the® button to select the cleaning<br />
program. The following then appears on the<br />
display:<br />
Important: The cleaning process takes approx.<br />
8 minutes and should not be interrupted.<br />
Before running the cleaning program, the<br />
metal sieves in the brewing unit must be<br />
clean and wiped dry. Follow steps provided<br />
on page 30 'Cleaning the brewing unit'.<br />
If the water level drops too low during<br />
the cleaning program, the coffee machine<br />
switches off.<br />
To run the cleaning program, follow the<br />
instructions on the display and these steps:<br />
Press the e menu button. The following<br />
appears on the display:<br />
Remove the water tank, fill it with 1 litre of<br />
water and push it back in.<br />
The following appears on the display:<br />
Open the lid of the coffee bean container<br />
and the coffee powder shaft.<br />
Put a cleaning tablet into the coffee<br />
powder shaft.<br />
Then press the 8 button.<br />
The following appears on the display:<br />
6 6<br />
Lir5 6 6<br />
+ OK<br />
4M7/-1<br />
66'<br />
Press the (C) button until the "Cleaning<br />
program" menu appears for selection. The<br />
following appears on the display:<br />
36
I<br />
Cleaning and maintenance continued<br />
The brewing unit is positioned. The following<br />
then appears on the display:<br />
41- -<br />
fr- 11<br />
NI +<br />
fr-<br />
Remove the drip tray and empty it.<br />
Push the drip tray into the coffee machine<br />
as far as indicated on the display.<br />
The drip tray serves the purpose of a<br />
collecting the cleaning water.<br />
Note: Push the drip tray into the coffee<br />
machine to the first stop. If the position of<br />
the drip tray is not correct, the following<br />
appears on the display:<br />
Change the position until the display<br />
disappears.<br />
Press the s button to continue with the<br />
cleaning process.<br />
The program performs several cycles. The<br />
following appears alternately on the display<br />
during the cleaning process:<br />
4111--'<br />
444<br />
I<br />
The brewing unit is positioned. The following<br />
then appears on the display:<br />
fr- 11<br />
I<br />
fr-<br />
41- - NI +<br />
The machine starts rinsing and the following<br />
appears on the display:<br />
44-I III iii<br />
6 6 & 6<br />
At the end of the cleaning process, the<br />
following appears on the display:<br />
fr- 11<br />
II-<br />
41- - NI +<br />
Remove the drip tray and empty it.<br />
Push the drip tray into the coffee machine<br />
as indicated on the display.<br />
Press the ()button to complete the<br />
cleaning process. The following appears on<br />
the display:<br />
(MT)<br />
6 6 6<br />
The cleaning process is completed. The<br />
coffee machine is now ready for operation<br />
again and returns to the last selected coffee<br />
mode.<br />
Note: We recommend disposing the first cup<br />
of dispensed coffee after cleaning.<br />
Remove the drip tray and empty it.<br />
Push the drip tray into the coffee machine<br />
as far as indicated on the display.<br />
Press thesbutton to continue with the<br />
cleaning process.<br />
37
Cleaning and maintenance continued<br />
Running the descaling program<br />
The descaling program enables simple and<br />
effective descaling of your coffee machine.<br />
You should descale the coffee machine<br />
at regular intervals, but at least when the<br />
following symbol appears on the display:<br />
The descaling process runs in 2 phases,<br />
takes approx. 10 minutes and should not be<br />
interrupted.<br />
The frequency of descaling depends on<br />
the hardness of the water in your region.<br />
Therefore do not forget to determine the<br />
water hardness and to set the corresponding<br />
hardness for the coffee machine. Refer to<br />
page 14 Determining the water hardness<br />
and page 14 Setting and storing the water<br />
hardness for instructions on this.<br />
Caution: Avoid skin and eye contact with<br />
descaling solution. Rinse off descaling<br />
solution with clean water. Obtain medical<br />
advice after eye contact. Remove any<br />
splashes immediately of descaling solution<br />
on the appliance as it can damage delicate<br />
surfaces.<br />
To run the descaling program, follow the<br />
instructions on the display and proceed as<br />
follows:<br />
Press the Q menu button. The following<br />
appears on the display:<br />
6 6<br />
I "5 6 6<br />
OK -.<br />
Press the (C) button until the "Descaling<br />
program" menu appears for selection. The<br />
following appears on the display:<br />
Press thesbutton to start running the<br />
descaling program.<br />
L<br />
OK<br />
38
Cleaning and maintenance continued<br />
Phase 1: Descaling<br />
The following appears alternately on the<br />
display:<br />
Remove the water tank.<br />
Add 1 descaling tablet to the water tank<br />
and 250m1 of tap water.<br />
Press thes button to continue with the<br />
descaling program.<br />
The following appears on the display:<br />
00<br />
0000<br />
I m I<br />
10000j<br />
Pull the waste container out and empty it.<br />
Push the waste container back into the<br />
coffee machine.<br />
The following then appears on the display:<br />
fr-<br />
.4- -<br />
N I<br />
D<br />
fr-<br />
+<br />
Remove the drip tray and empty it.<br />
Push the drip tray into the coffee machine<br />
as far as indicated on the display.<br />
Note: Push the drip tray into the coffee<br />
machine to the first stop. If the position of<br />
the drip tray is not correct, the following<br />
appears on the display:<br />
The brewing unit is positioned. The following<br />
then appears alternately on the display:<br />
`r. r<br />
4 4<br />
The program performs several cycles.<br />
Intermittent pausing allows descaling to take<br />
effect. The status is shown on the display.<br />
Note: Part of the descaling solution is fed<br />
into the waste container and the rest via<br />
the coffee spout into the drip tray. You can<br />
place a container under the spout. Empty the<br />
container when the coffee machine indicates<br />
that the drip try must be emptied.<br />
The following then appears on the display:<br />
.4- - NI +<br />
Remove the drip tray and empty it.<br />
Push the drip tray into the coffee machine<br />
as far as indicated on the display.<br />
Note: Push the drip tray into the coffee<br />
machine to the first stop. If the position of<br />
the drip tray is not correct, the following<br />
appears on the display:<br />
I<br />
Change the position until the display<br />
disappears.<br />
Press the 8 button to continue the<br />
descal ing program.<br />
Change the position until the display<br />
disappears.<br />
Press the 8 button to continue the<br />
descaling program.<br />
The following appears on the display:<br />
Remove the water tank and rinse it<br />
thoroughly.<br />
CI<br />
Ct--<br />
39
Cleaning and maintenance continued<br />
Fill the water tank with fresh water and put<br />
it back again.<br />
Press theObutton to continue with the<br />
descaling program.<br />
11 -P -10 =I<br />
The following symbols appear on the display:<br />
Remove the drip tray and empty it.<br />
Push the drip tray into the coffee machine<br />
as far as indicated on the display.<br />
41- -<br />
V- 11<br />
liill i<br />
Cr-<br />
Press thesbutton to complete the<br />
descaling process.<br />
The following appears on the display:<br />
Phase 2: Rinsing<br />
The following appears on the display:<br />
Note: Part of the rinsing solution is fed into<br />
the waste container and the rest via the<br />
coffee spout into the drip tray. You can place<br />
a container under the spout. Empty the<br />
container when the coffee machine indicates<br />
that the drip try must be emptied.<br />
The rinsing process stops automatically.<br />
The following appears on the display:<br />
The descaling program is completed. The<br />
coffee machine is now ready for operation<br />
again and returns to the last selected coffee<br />
mode.<br />
In the event of a power failure during<br />
descaling, the program has to be restarted.<br />
Note: We recommend disposing the first cup<br />
of dispensed coffee after descaling.<br />
Pull the waste container out and empty it.<br />
Push the waste container back into the<br />
coffee machine.<br />
40
Troubleshooting<br />
This section contains important information on possible troubleshooting.<br />
Please observe this information to prevent damage to your espresso machine.<br />
Coffee machine messages, possible causes and solutions<br />
Display<br />
Cause<br />
Water tank is empty<br />
Solution<br />
Fill water tank: see pg 11<br />
Filling with water<br />
Water container is full<br />
Empty and clean the<br />
waste container: see pg<br />
30 Emptying the waste<br />
container<br />
Waste container is<br />
missing<br />
Replace waste container<br />
Number of dispensed<br />
coffees prompts cleaning<br />
Run the cleaning program:<br />
see pg 36 Running the<br />
cleaning program<br />
Number of dispensed<br />
coffee prompts descaling<br />
Run the descaling<br />
program: see pg 38<br />
Running the descaling<br />
program<br />
STOP<br />
Process aborted due to<br />
malfunction or incorrect<br />
operation<br />
Machine goes to normal<br />
standby function<br />
41
Troubleshooting continued<br />
Display Cause Solution<br />
Brewing unit is blocked<br />
(technical reason)<br />
Pull out the brewing<br />
unit and loosen it on the<br />
rear side using the tool<br />
function of the measuring<br />
spoon). Push the toothed<br />
opening on the measuring<br />
spoon onto the pin and<br />
loosen it by turning<br />
completely at least 3<br />
times. Then thoroughly<br />
rinse out the brewing unit<br />
Coffee temperature error<br />
Steam temperature error<br />
Error in motor valve 1<br />
If this message appears<br />
on the display, turn off the<br />
coffee machine<br />
Switch on the machine<br />
again after a cooling-down<br />
period of approx.<br />
30 minutes.<br />
If the message is displayed<br />
again, an error has occurred<br />
that requires technical<br />
assistance<br />
Contact us via our Customer<br />
Service Hotline:<br />
1300 881 861
Troubleshooting continued<br />
Display<br />
Cause<br />
Error in motor valve 2<br />
Solution<br />
Main switch blocked<br />
Clean the brewing unit<br />
See page 33 'Cleaning the<br />
brewing unit'<br />
Error in input voltage<br />
If this message appears<br />
on the display, turn off the<br />
coffee machine<br />
Switch on the machine<br />
again after a cooling-down<br />
period of approx.<br />
30 minutes<br />
If the message is displayed<br />
again, an error has occurred<br />
that requires technical<br />
assistance<br />
Contact us via our Customer<br />
Service Hotline:<br />
1300 881 861<br />
Communication failure<br />
El 0<br />
1<br />
Grinding fineness or preground<br />
coffee is too fine<br />
Set grinding fineness to<br />
a coarser setting or use<br />
coarser pre-ground coffee<br />
43
Troubleshooting continued<br />
Display<br />
Espresso/coffee<br />
not hot enough<br />
Espresso/coffee too weak.<br />
No milk froth or milk not<br />
dispensed<br />
Low quality froth.<br />
Cause<br />
Cups too cold<br />
Not enough pre-ground<br />
coffee used<br />
Milk system not correctly<br />
connected.<br />
Milk tube bent<br />
Milk container is empty<br />
Milk too warm or old<br />
Solution<br />
Warm up cups with hot<br />
water<br />
Increase the coffee<br />
temperature: see pg 25<br />
Setting and storing the<br />
coffee temperature<br />
Measure coffee properly:<br />
top up with 1 level<br />
measuring spoon (max.8g)<br />
of pre-ground coffee<br />
Set ground coffee quantity<br />
higher<br />
Vary grinding fineness<br />
Try a different coffee sort.<br />
Check milk system<br />
connection: see section<br />
pg 10 Connecting the<br />
milk system<br />
Straighten milk tube<br />
Fill milk container<br />
Use fresh, cold milk.<br />
Very loud noise during<br />
grinding<br />
Froth nozzle is clogged.<br />
Milk system is not clean.<br />
Grinding mechanism<br />
clogged by foreign matter<br />
Clean froth nozzle: see pg<br />
32 Cleaning the nozzle of<br />
the milk frother<br />
Clean milk system: see pg<br />
35 Milk system cleaning<br />
program.<br />
Contact our Customer<br />
Service Hotline to locate<br />
your nearest service agent<br />
representative on<br />
1800 881 861<br />
44
Troubleshooting continued<br />
Display<br />
Display shows "Water tank<br />
empty" even though the tank<br />
is full<br />
Cause<br />
Air in system<br />
Solution<br />
Dispense a little hot water:<br />
see pg 20 Hot water<br />
preparation<br />
Brewing unit clogged<br />
Clean the brewing unit<br />
thoroughly: see pg 30<br />
Cleaning the brewing unit<br />
Water system clogged<br />
As a precautionary<br />
measure, run the cleaning<br />
or descaling program:<br />
see pg 38 Running the<br />
cleaning program and<br />
Running the descaling<br />
program<br />
"Empty waste container"<br />
message is displayed after<br />
less than 16 dispensed<br />
coffees.<br />
I<br />
0000<br />
000<br />
0000<br />
000<br />
Waste container was<br />
emptied while the coffee<br />
machine was switched off<br />
Empty the waste container<br />
only when the coffee<br />
machine is switched on<br />
Water in the waste container<br />
Coffee dispensing too slowly<br />
Small amounts of water<br />
get into the waste<br />
container during each<br />
rinsing process, this is not<br />
an error<br />
Grinding mechanism<br />
clogged by foreign matter<br />
Grinding quantity set too<br />
high<br />
None (technical reason)<br />
Contact our Customer<br />
Service Hotline to locate<br />
your nearest service agent<br />
representative on<br />
1800 881 861<br />
Set ground coffee quantity<br />
lower<br />
45
Troubleshooting continued<br />
Display<br />
Cause<br />
Remedy<br />
Water runs into the waste<br />
container instead of through<br />
the coffee spout during<br />
rinsing when switching the<br />
coffee machine on and off<br />
Brewing unit blocked.<br />
I<br />
Adjust the brewing unit.<br />
Push the toothed opening<br />
on the measuring spoon<br />
onto the pin turn it<br />
clockwise 3 times<br />
Coffee machine switches off<br />
after rinsing or dispensing<br />
coffee<br />
Coffee machine cannot be<br />
switched on<br />
Pressure in brewing unit<br />
too high.<br />
Not plugged in<br />
Remove and clean the<br />
brewing unit. If the<br />
brewing unit is closed,<br />
open before cleaning.<br />
Unscrew the brewing unit<br />
at the black tooth pin.<br />
An opened brewing unit<br />
is illustrated in page 30<br />
Cleaning the brewing unit<br />
Insert the mains plug<br />
Coffee dispensing unit not<br />
installed<br />
Brewing unit not fitted<br />
Brewing unit was not<br />
pushed in completely<br />
Install coffee dispensing<br />
unit<br />
Install brewing unit<br />
Push the brewing unit in<br />
until it stops<br />
Note: If you cannot resolve the problem with the steps described above,<br />
please contact customer service on 1300 881 861<br />
46
Notes
Notes
12 Month Repair Guarantee<br />
In the unlikely event that this appliance develops any malfunction<br />
within 12 months of purchase due to faulty materials or<br />
manufacture, we will REPAIR it for you free of charge.<br />
Should you experience any difficulties with<br />
your appliance, please contact our customer<br />
service line for advice on 1300 881 861 in<br />
Australia, or 0800 786 232 in New Zealand.<br />
Alternatively, you can send a written claim to<br />
<strong>Sunbeam</strong> at the address listed below. Upon<br />
receipt of your claim, <strong>Sunbeam</strong> will seek to<br />
resolve your difficulties or, if the appliance is<br />
defective, advise you on how to arrange for it<br />
to be repaired.<br />
Your <strong>Sunbeam</strong> 12 Month REPAIR Guarantee<br />
naturally does not cover misuse or improper<br />
handling, and normal wear and tear. Similarly,<br />
your 12 Month REPAIR Guarantee does not<br />
cover freight or any other costs incurred in<br />
making a claim.<br />
It will be at the discretion of <strong>Sunbeam</strong> whether<br />
to repair or replace any appliance that develops<br />
a malfunction during the REPAIR Guarantee<br />
period. <strong>Sunbeam</strong> is by no means obliged to<br />
replace any appliance if it can be repaired.<br />
If the appliance is irreparable due to any<br />
claimed defect caused by faulty workmanship<br />
or material, then <strong>Sunbeam</strong> will replace the<br />
appliance.<br />
Prior to any repairs being undertaken, a<br />
purchase receipt must be provided as proof of<br />
purchase. <strong>Sunbeam</strong> will not be responsible for<br />
the cost of transport to and from any <strong>Sunbeam</strong><br />
authorized service centre, or any insurance<br />
costs associated with this transport. Similarly<br />
<strong>Sunbeam</strong> will not be responsible for any<br />
damage or loss that occurs during transit to or<br />
from any <strong>Sunbeam</strong> authorized service centre<br />
for reasons not related to the malfunction.<br />
The benefits given to you by this guarantee are<br />
in addition to your other rights and remedies<br />
under any laws which relate to the appliance.<br />
Our goods come with guarantees that cannot<br />
be excluded under the Australian Consumer<br />
Law and under the New Zealand Consumer<br />
Guarantees Act.<br />
In Australia you are entitled to a replacement<br />
or refund for a major failure and for<br />
compensation for any other reasonably<br />
foreseeable loss or damage. You are also<br />
entitled to have the goods repaired or replaced<br />
if the goods fail to be of acceptable quality<br />
and the failure does amount<br />
to a major failure.<br />
Should your appliance require repair or service<br />
after the guarantee period, contact your<br />
nearest <strong>Sunbeam</strong> service centre.<br />
For a complete list of <strong>Sunbeam</strong>'s authorised<br />
service centres visit our website or call:<br />
Australia<br />
www.sunbeam.com.au<br />
1300 881 861<br />
Units 5 & 6, 13 Lord Street<br />
Botany NSW 2019 Australia<br />
New Zealand<br />
www.sunbeam.co.nz<br />
0800 786 232<br />
26 Vestey Drive, Mt Wellington<br />
Auckland, New Zealand
Need help with your appliance?<br />
Contact our customer service team or visit<br />
our website for information and tips on<br />
getting the most from your appliance.<br />
In Australia<br />
Visit www.sunbeam.com.au<br />
Or call 1300 881 861<br />
In New Zealand<br />
Visit www.sunbeam.co.nz<br />
Or call 0800 786 232<br />
crrti-6etin'l<br />
is a registered trademark.<br />
Made in China.<br />
Due to minor changes in design or otherwise,<br />
the product may differ from the one shown in this leaflet.<br />
© Copyright. <strong>Sunbeam</strong> Corporation Limited 2011.<br />
ABN 45 000 006 771<br />
Units 5 & 6, 13 Lord Street<br />
Botany NSW 2019 Australia<br />
Unit 3, Building D<br />
26 Vestey Drive<br />
Mt Wellington Auckland<br />
New Zealand<br />
<strong>Sunbeam</strong> Corporation is a division of GUD Holdings Ltd. 8/11