CAN/ LIN Bus Decoder App - TEquipment.NET
CAN/ LIN Bus Decoder App - TEquipment.NET
CAN/ LIN Bus Decoder App - TEquipment.NET

Create successful ePaper yourself
Turn your PDF publications into a flip-book with our unique Google optimized e-Paper software.
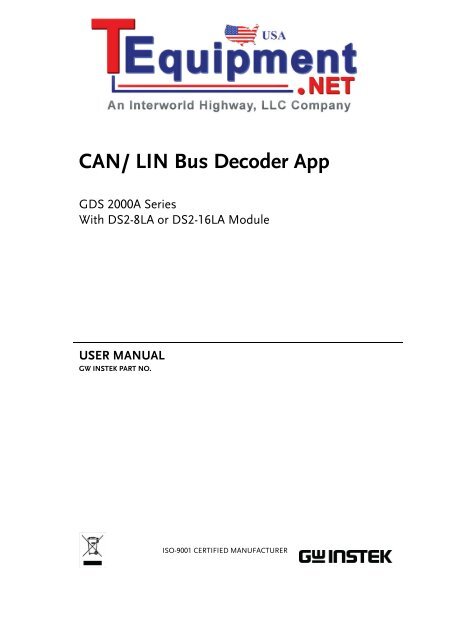
<strong>CAN</strong>/ <strong>LIN</strong> <strong>Bus</strong> <strong>Decoder</strong> <strong>App</strong><br />
GDS 2000A Series<br />
With DS2-8LA or DS2-16LA Module<br />
USER MANUAL<br />
GW INSTEK PART NO.<br />
ISO-9001 CERTIFIED MANUFACTURER
This manual contains proprietary information, which is protected by<br />
copyright. All rights are reserved. No part of this manual may be<br />
photocopied, reproduced or translated to another language without<br />
prior written consent of Good Will Corporation.<br />
The information in this manual was correct at the time of printing.<br />
However, Good Will continues to improve its products and therefore<br />
reserves the right to change the specifications, equipment, and<br />
maintenance procedures at any time without notice.<br />
Good Will Instrument Co., Ltd.<br />
No. 7-1, Jhongsing Rd., Tucheng Dist., New Taipei City 236, Taiwan.
Table of Contents<br />
Table of Contents<br />
INSTALL THE SOFTWARE ................................ 2<br />
UNINSTALL THE SOFTWARE ........................... 4<br />
HOW TO USE THE SOFTWARE ....................... 6<br />
Select a <strong>Bus</strong> <strong>Decoder</strong> Type ................................................... 6<br />
How to Trigger on the <strong>CAN</strong> <strong>Bus</strong> <strong>Decoder</strong> ............................. 7<br />
How to Trigger on the <strong>LIN</strong> <strong>Bus</strong> <strong>Decoder</strong> ............................ 11<br />
APPENDIX ...................................................... 15<br />
<strong>CAN</strong> <strong>Bus</strong> Decode Display Information: .............................. 15<br />
<strong>LIN</strong> <strong>Bus</strong> Decode Display Information: ............................... 15<br />
1
<strong>CAN</strong>/ <strong>LIN</strong> <strong>Bus</strong> <strong>Decoder</strong> <strong>App</strong> User Manual<br />
INSTALL THE SOFTWARE<br />
Step<br />
1. Make sure the optional module<br />
“DS2-8LA” or “DS2-16LA” is<br />
installed in the GDS-2000A.<br />
2. Make sure firmware version is<br />
V1.18 or higher.<br />
3. Insert the USB memory stick with<br />
the <strong>CAN</strong>_Lin<strong>Bus</strong>.gz into the USB<br />
port on the front panel.<br />
4. Press the Utility key.<br />
5. Select File Utilities from the bottom<br />
menu.<br />
2
INSTALL THE SOFTWARE<br />
5. Use the Variable knob to select the<br />
USB memory stick and then press<br />
the Select button.<br />
Up<br />
Down<br />
6. Use the Variable knob to select<br />
<strong>CAN</strong>_ Lin<strong>Bus</strong>.gz and then press<br />
the Select button to select it.<br />
Up<br />
Down<br />
7. Press the Select button again to<br />
start installation.<br />
8. The installation is complete when a message<br />
showing “Please turn off the oscilloscope and<br />
turn on again” is displayed.<br />
3
<strong>CAN</strong>/ <strong>LIN</strong> <strong>Bus</strong> <strong>Decoder</strong> <strong>App</strong> User Manual<br />
UNINSTALL THE<br />
SOFTWARE<br />
Step<br />
1. Press the Test key on the front<br />
panel<br />
2. Press the APP button from the<br />
bottom menu.<br />
3. Use the Variable knob to select the<br />
<strong>CAN</strong> Lin <strong>Bus</strong> APP.<br />
4
UNINSTALL THE SOFTWARE<br />
4. Press the Uninstall button from the<br />
side menu.<br />
5. Press the Uninstall button from<br />
side menu again to start the<br />
uninstallation process.<br />
6. Uninstallation process is complete when a<br />
message showing “Please turn off the<br />
oscilloscope and turn on again” appears.<br />
5
<strong>CAN</strong>/ <strong>LIN</strong> <strong>Bus</strong> <strong>Decoder</strong> <strong>App</strong> User Manual<br />
HOW TO USE THE<br />
SOFTWARE<br />
Select a <strong>Bus</strong> <strong>Decoder</strong> Type<br />
Step<br />
1. Press the B key on the front panel.<br />
2. Select the <strong>Bus</strong> Type button from the<br />
side menu. You can select <strong>CAN</strong> or<br />
<strong>LIN</strong> as the bus decoder.<br />
6
<strong>CAN</strong>/ <strong>LIN</strong> <strong>Bus</strong> <strong>Decoder</strong> <strong>App</strong> User Manual<br />
How to Trigger on the <strong>CAN</strong> <strong>Bus</strong> <strong>Decoder</strong><br />
Step<br />
1. Press the Trigger Menu key on the<br />
front panel.<br />
2. Press the Type button from the<br />
bottom menu.<br />
3. Press the Others button from the<br />
side menu and then select the <strong>Bus</strong><br />
using the Variable knob and Select<br />
key.<br />
Up Down<br />
4. Press the Trigger On button from<br />
the lower menu and then select the<br />
desired Trigger ON condition<br />
using the Variable knob and Select<br />
key.<br />
7
<strong>CAN</strong>/ <strong>LIN</strong> <strong>Bus</strong> <strong>Decoder</strong> <strong>App</strong> User Manual<br />
5. If the Type of Frame option is<br />
selected as the Trigger On<br />
condition, press the Frame Type<br />
button from the lower menu to<br />
select the desired frame type.<br />
6. Select a frame type from the side<br />
menu.<br />
8
HOW TO USE THE SOFTWARE<br />
7. If the Identifier option is selected as<br />
the Trigger On condition, press the<br />
Identifier button from the lower<br />
menu.<br />
8. Select the Format from the side<br />
menu.<br />
9. Press the Identifier button from the<br />
side menu.<br />
10. Enter a binary or hex value with<br />
the Variable knob and Select key.<br />
9
<strong>CAN</strong>/ <strong>LIN</strong> <strong>Bus</strong> <strong>Decoder</strong> <strong>App</strong> User Manual<br />
11. Press the Direction button from the<br />
lower menu and select the desired<br />
direction.<br />
12. If Data option is selected as the<br />
Trigger On condition, press the<br />
Data button from the lower menu.<br />
13. Select the desired parameters from<br />
the side menu.<br />
10
HOW TO USE THE SOFTWARE<br />
How to Trigger on the <strong>LIN</strong> <strong>Bus</strong> <strong>Decoder</strong><br />
Step<br />
1. Press the Trigger Menu key on the<br />
front panel.<br />
2. Press the Type button from the<br />
bottom menu.<br />
3. Press the Others button from the<br />
side menu and then select <strong>Bus</strong><br />
using the Variable knob and Select<br />
key.<br />
Up Down<br />
4. Press the Trigger On button from<br />
the lower menu and then select the<br />
desired Trigger ON condition<br />
using the Variable knob and Select<br />
key.<br />
11
<strong>CAN</strong>/ <strong>LIN</strong> <strong>Bus</strong> <strong>Decoder</strong> <strong>App</strong> User Manual<br />
5. If Identifier, Data, Identifier or<br />
Identifier & Data is selected as the<br />
Trigger On condition, press the<br />
Identifier or Data button from the<br />
lower menu.<br />
6. Select the desired parameters from<br />
the corresponding side menu.<br />
12
HOW TO USE THE SOFTWARE<br />
13
<strong>CAN</strong>/ <strong>LIN</strong> <strong>Bus</strong> <strong>Decoder</strong> <strong>App</strong> User Manual<br />
7. If the Error option is selected as the<br />
Trigger On condition, select the<br />
desired parameters from the<br />
corresponding side menu.<br />
14
<strong>CAN</strong>/ <strong>LIN</strong> <strong>Bus</strong> <strong>Decoder</strong> <strong>App</strong> User Manual<br />
APPENDIX<br />
<strong>CAN</strong> <strong>Bus</strong> Decode Display Information:<br />
Field<br />
Description<br />
Start of frame Start of frame is shown as a white left bracket.<br />
Identifier<br />
DLC (data<br />
length control)<br />
Data<br />
CRC<br />
Missing Ack<br />
End of frame<br />
Bit stuffing error<br />
Error frame and<br />
Overland<br />
The Identifier field is shown as a yellow box.<br />
The DLC field is shown as a purple box.<br />
The Data field is shown as a cyan box.<br />
The CRC field is shown as an orange box.<br />
Missing Acknowledge is shown as a red<br />
exclamation symbol.<br />
End of frame is shown as a white right bracket.<br />
Bit stuffing error is shown as a red box.<br />
Error frame and Overland are shown as a purple<br />
box.<br />
<strong>LIN</strong> <strong>Bus</strong> Decode Display Information:<br />
Field<br />
Description<br />
Start of frame Start of frame is shown as a white left bracket.<br />
Break and Sync<br />
Identifier and<br />
Parity<br />
The Break and Sync fields are shown as a purple<br />
box.<br />
The Identifier and Parity fields are shown a<br />
yellow box.<br />
15
<strong>CAN</strong>/ <strong>LIN</strong> <strong>Bus</strong> <strong>Decoder</strong> <strong>App</strong> User Manual<br />
Data<br />
Checksum and<br />
Wakeup<br />
End of frame<br />
Error type<br />
Sync, Parity,<br />
Checksum<br />
The Data field is shown as a cyan box.<br />
The Checksum and Wakeup fields are shown as<br />
a purple box.<br />
End of frame is shown as a white right bracket.<br />
Error type is shown as a red box.<br />
When a check sum error happens, the<br />
checksum field turns into an Error type<br />
field.<br />
16