store it with stencils - Hobby Lobby
store it with stencils - Hobby Lobby
store it with stencils - Hobby Lobby

You also want an ePaper? Increase the reach of your titles
YUMPU automatically turns print PDFs into web optimized ePapers that Google loves.
free<br />
step-by-step<br />
PROJECT IDEAS<br />
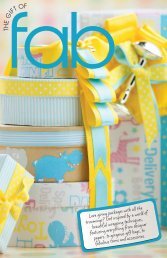
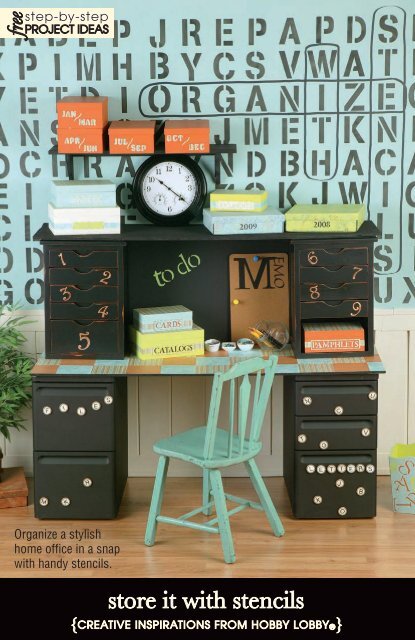
Organize a stylish<br />
home office in a snap<br />
w<strong>it</strong>h handy <strong>stencils</strong>.<br />
<strong>store</strong> <strong>it</strong> w<strong>it</strong>h <strong>stencils</strong><br />
{CREATIVE INSPIRATIONS FROM HOBBY LOBBY ® }
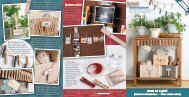
decorative boxes Sleek, decorative<br />
boxes are a pretty alternative to a boring file<br />
cabinet. Stencil coordinating, removable labels to<br />
identify the contents of each box, and change out<br />
the labels when needed.<br />
trash bin Don’t sacrifice your style for an<br />
off-the-shelf trash bin. Stencil your very own<br />
coordinating can. We painted an unfinished<br />
wood container and spelled out “trash”<br />
in a fun and funky pattern.<br />
storage boxes Store your supplies in<br />
display-worthy style. Embellish stacks of colorful<br />
storage containers w<strong>it</strong>h scrapbook paper, and<br />
stencil bold labels to identify their contents.<br />
magnets These letter-perfect alphabet<br />
magnets are a terrific way to display “to do”<br />
lists, reminders, and favor<strong>it</strong>e photographs.<br />
(Learn how to make them on the back panel.)
filing cabinet Number desk drawers and<br />
filing cubbies so you’ll always know where to<br />
find the things you need. We distressed these<br />
stenciled numbers for a hip, antiqued look.<br />
memo board Dress up a plain bulletin<br />
board. We stenciled our lettering directly onto the<br />
cork for a one-of-a-kind, designer look.<br />
organize by month Save the date and save some time. Stencil months of the<br />
year onto cheery scrapbook paper, and cut them out for whimsical, easy-to-read lettering.
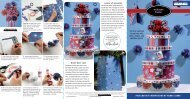
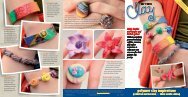
Supplies: Nickel-Size Wooden Disks, Black &<br />
Cream Acrylic Paint, Assorted Paint Brushes,<br />
Black Stencil Paint Creme, Gold Leafing Pen,<br />
Black Permanent Marker, Tacky Craft Glue,<br />
Small Craft Magnets.<br />
1. Cover one side of the disk w<strong>it</strong>h cream acrylic<br />
paint. Allow the paint to dry.<br />
2. When the paint is dry, lay the stencil<br />
across the disk and paint over the stencil<br />
w<strong>it</strong>h black stencil paint creme.<br />
3. Trace a decorative border w<strong>it</strong>h the gold leaf<br />
pen. Allow the border to dry.<br />
4. Trace carefully around the inside edge of the 5. Place a dot of craft glue on the back of the<br />
gold border w<strong>it</strong>h the permanent marker for disk in the very center. Then place a magnet<br />
added dimension.<br />
on top of the glue, and allow <strong>it</strong> to dry fully<br />
before use.<br />
©2009 <strong>Hobby</strong> <strong>Lobby</strong>® - The information in these instructions is presented in good fa<strong>it</strong>h, but no warranty is given, nor results guaranteed, nor is freedom from any<br />
patent to be inferred. Since we have no control over physical cond<strong>it</strong>ions surrounding the application of information herein contained, <strong>Hobby</strong> <strong>Lobby</strong> Stores, Inc.<br />
disclaims any liabil<strong>it</strong>y for results. Follow manufacturer’s instructions in using paints and other materials, keeping them out of reach of children,<br />
since some may be toxic, or otherwise cause injury. Photography by Sanford Mauldin.<br />
www.hobbylobby.com www.getinspiredbyhl.com 285163