Solar Panel Mounting Brackets - Harbor Freight Tools
Solar Panel Mounting Brackets - Harbor Freight Tools
Solar Panel Mounting Brackets - Harbor Freight Tools
You also want an ePaper? Increase the reach of your titles
YUMPU automatically turns print PDFs into web optimized ePapers that Google loves.
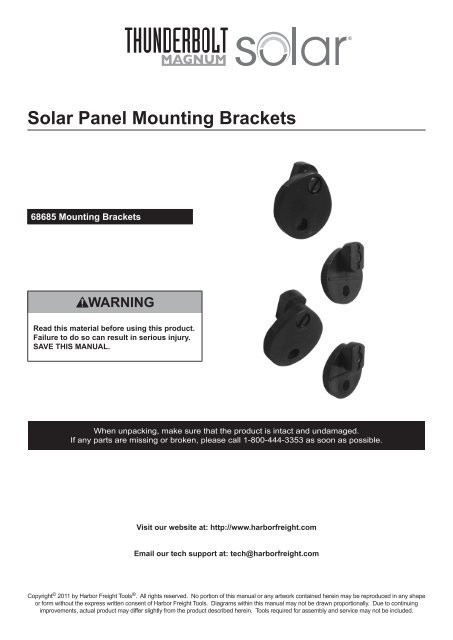
<strong>Solar</strong> <strong>Panel</strong> <strong>Mounting</strong> <strong>Brackets</strong><br />
68685 <strong>Mounting</strong> <strong>Brackets</strong><br />
Read this material before using this product.<br />
Failure to do so can result in serious injury.<br />
SAVE THIS MANUAL.<br />
When unpacking, make sure that the product is intact and undamaged.<br />
If any parts are missing or broken, please call 1-800-444-3353 as soon as possible.<br />
Visit our website at: http://www.harborfreight.com<br />
Email our tech support at: tech@harborfreight.com<br />
Copyright © 2011 by <strong>Harbor</strong> <strong>Freight</strong> <strong>Tools</strong> ® . All rights reserved. No portion of this manual or any artwork contained herein may be reproduced in any shape<br />
or form without the express written consent of <strong>Harbor</strong> <strong>Freight</strong> <strong>Tools</strong>. Diagrams within this manual may not be drawn proportionally. Due to continuing<br />
improvements, actual product may differ slightly from the product described herein. <strong>Tools</strong> required for assembly and service may not be included.
IMPORTANT SAFETY<br />
INFORMATION<br />
needed. See Figure 1, below.<br />
This is the safety alert symbol. It is<br />
used to alert you to potential personal<br />
injury hazards. Obey all safety<br />
messages that follow this symbol<br />
to avoid possible injury or death.<br />
Safety Precautions<br />
1. Wear ANSI-approved safety goggles and heavyduty<br />
work gloves during installation. Do not<br />
wear jewelry or metal watches when working<br />
near solar panels, wiring or batteries.<br />
2. Keep installation area clean and well lit.<br />
Figure 1<br />
4. Rotate the <strong>Mounting</strong> Units outward and fasten<br />
in place with a screwdriver. See Figure 1.<br />
5. WARNING! Do NOT drill through the aluminum<br />
frame. You may damage the frame or break the glass.<br />
6. Foot Units are provided to dissipate heat and to allow<br />
air circulation under the <strong>Solar</strong> <strong>Panel</strong>. Press the Foot<br />
Units into the holes provided in each Corner Bracket.<br />
See Figure 2.<br />
3. Install out of reach of children.<br />
4. Keep bystanders out of the area during installation.<br />
5. Do not install when tired or when under<br />
the influence of drugs or medication.<br />
6. Use only to install individual aluminum solar<br />
panels that come with 90599 <strong>Solar</strong> <strong>Panel</strong> Kit. Do<br />
not use to mount or install any other solar panel or<br />
other piece of equipment. Use as intended only.<br />
7. Inspect before use; do not use if<br />
parts are loose or damaged.<br />
SAVE THESE<br />
INSTRUCTIONS.<br />
Installation Instructions and Maintenance<br />
1. Select a mounting location for <strong>Solar</strong> <strong>Panel</strong>. The<br />
solar panel should face the sun, and not be<br />
blocked by shadows. The location should allow the<br />
panel to be protected from accidental damage.<br />
2. The mounting location should be sturdy enough<br />
to support the weight of the <strong>Solar</strong> <strong>Panel</strong>, and<br />
any additional accessories. Before drilling, be<br />
sure there are no hidden wires or utility lines<br />
that may be damaged during installation.<br />
3. To mount <strong>Solar</strong> <strong>Panel</strong>’s frame, slide plastic <strong>Mounting</strong><br />
Units into the sides of the Aluminum Frame as<br />
Figure 2<br />
7. Mount the <strong>Solar</strong> <strong>Panel</strong> to an appropriate support<br />
or mounting system using Screws and Nuts<br />
(not included) through the <strong>Mounting</strong> Units.<br />
8. Once all four <strong>Mounting</strong> Units are securely in place,<br />
mount the <strong>Solar</strong> <strong>Panel</strong> to an appropriate mounting<br />
area using screws and nuts (not included) through<br />
the <strong>Mounting</strong> Units.<br />
WARNING! Verify mounting area is free of<br />
hidden wires or utility lines before installing.<br />
Procedures not specifically explained in<br />
this manual must be performed by a<br />
qualified technician.<br />
Clean and inspect <strong>Solar</strong> <strong>Panel</strong> MONTHLY, or<br />
more frequently to maintain peak efficiency.<br />
9. Inspect general condition of <strong>Mounting</strong> Frame. Check<br />
for loose hardware, damage or weathering, cracked<br />
or broken parts, loose or corroded contacts, and any<br />
other condition that may affect its safe operation.<br />
10. If you notice any damage, remove <strong>Solar</strong> <strong>Panel</strong> from<br />
<strong>Mounting</strong> Frame and replace Frame immediately.<br />
Do not mount <strong>Solar</strong> <strong>Panel</strong> until Frame is replaced.<br />
SKU 68685<br />
3491 Mission Oaks Blvd. • PO Box 6009 • Camarillo, CA 93011 • (800) 444-3353<br />
For technical questions, please call 1-800-444-3353.<br />
Page 2


