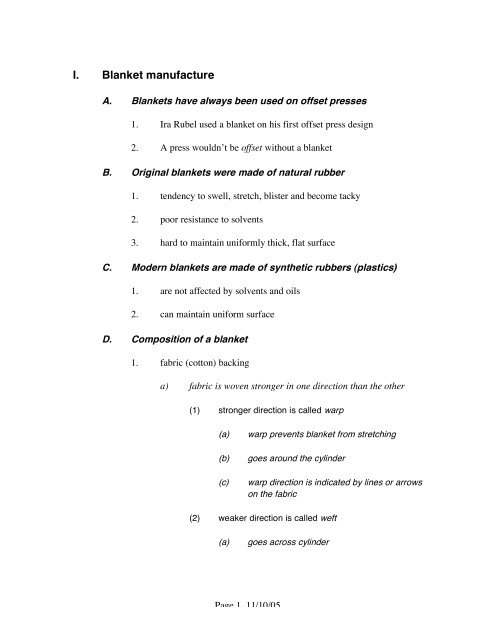
I. Blanket manufacture
I. Blanket manufacture
I. Blanket manufacture

You also want an ePaper? Increase the reach of your titles
YUMPU automatically turns print PDFs into web optimized ePapers that Google loves.
I. <strong>Blanket</strong> <strong>manufacture</strong><br />
A. <strong>Blanket</strong>s have always been used on offset presses<br />
1. Ira Rubel used a blanket on his first offset press design<br />
2. A press wouldn’t be offset without a blanket<br />
B. Original blankets were made of natural rubber<br />
1. tendency to swell, stretch, blister and become tacky<br />
2. poor resistance to solvents<br />
3. hard to maintain uniformly thick, flat surface<br />
C. Modern blankets are made of synthetic rubbers (plastics)<br />
1. are not affected by solvents and oils<br />
2. can maintain uniform surface<br />
D. Composition of a blanket<br />
1. fabric (cotton) backing<br />
a) fabric is woven stronger in one direction than the other<br />
(1) stronger direction is called warp<br />
(a)<br />
(b)<br />
(c)<br />
warp prevents blanket from stretching<br />
goes around the cylinder<br />
warp direction is indicated by lines or arrows<br />
on the fabric<br />
(2) weaker direction is called weft<br />
(a)<br />
goes across cylinder<br />
Page 1, 11/10/05
(b)<br />
across-cylinder direction not affected by<br />
stretch.<br />
b) Before the rubber is applied, the warp is stretched tightly to<br />
further elongation stretch on the press<br />
c) Additional pre-stretched fabric layers are adhered to the<br />
first one<br />
(1) a three-ply blanket has three layers of fabric and is<br />
about .062–.066 inches thick.<br />
(2) a four-ply blanket has four layers of fabric and is<br />
about .072–.076 inches thick<br />
2. Between 60–80 individual coats of synthetic rubber are applied to<br />
the cemented fabric layers.<br />
a) temperature-controlled, dust-free atmosphere necessary to<br />
maintain thickness tolerance<br />
(1) standard tolerance in thickness is ±.0005 inches.<br />
3. Finished blanket is cured (vulcanized—heated in presence of<br />
sulfur) to increase the durability and elasticity of the rubber.<br />
a) has tensile strength of ±300 lb./sq. in<br />
b) will stretch less than 2.5% around-the-cylinder<br />
II.<br />
Performance requirements<br />
A. Release<br />
1. the readiness of the blanket to give up the paper after it leaves the<br />
printing nip.<br />
2. very smooth blankets have poor release<br />
a) most commercially-available blankets have a slightly<br />
grained surface<br />
3. soft-surface blankets have poor release<br />
Page 2, 11/10/05
B. Resilience<br />
a) hard to measure durometer of blankets due to thin layer of<br />
rubber<br />
1. ability of a blanket to return to its original thickness after being<br />
compressed<br />
a) normal compression at the nip<br />
2. smash-resistance<br />
C. Durability<br />
a) ability to recover from the application of a momentary<br />
extra-high pressure<br />
1. ability to withstand the pressure, tension, and physical abuse it<br />
undergoes on the press.<br />
D. Smoothness<br />
1. Rougher blankets release better but impact the quality of the<br />
printed image.<br />
2. Rougher blankets help remove excess water from the plate.<br />
3. Smoother blankets give best ink fidelity<br />
4. Rougher blankets require more thorough washing to remove ink<br />
and other substances from pores.<br />
E. Solvent Resistance<br />
1. Surface must like ink, but must resist ink vehicles and solvents<br />
2. Surface must not swell when washed with solvent<br />
F. Stretch Resistance<br />
1. <strong>Blanket</strong>s should stretch less than 2.5%<br />
2. A new blanket, when first run, will stretch some<br />
Page 3, 11/10/05
a) After 3000–4000 impressions, the blanket should be<br />
retightened.<br />
b) Quality blankets should not need to be tightened again<br />
(become dimensionally stable).<br />
3. If a blanket continues to stretch, printing pressure (packing) may<br />
need to be constantly altered leading to difficulty maintaining<br />
uniform conditions during the pressrun.<br />
III.<br />
Compressible, conventional and self-adhesive blankets<br />
A. Conventional blankets have plies of fabric covered by<br />
synthetic rubber.<br />
B. Compressible blankets have one or more layers of<br />
compressible material between the fabric backing and the<br />
surface. (use overhead)<br />
1. Benefits of compressible blankets<br />
a) wider packing latitude<br />
(1) because the compressible layer compresses, an<br />
increase in packing does not lead to as great an<br />
increase in pressure compared to a conventional<br />
blanket.<br />
(a)<br />
the increased pressure caused by the<br />
packing is absorbed by the compressible<br />
layer.<br />
(2) packing recommendations still are important, but a<br />
little variation is possible.<br />
b) Reduced deformation of the dot at the printing nip (use<br />
overhead)<br />
(1) a conventional blanket bulges at each side of the<br />
nip, causing slippage between the plate and<br />
blanket.<br />
(a)<br />
the slippage causes slurring<br />
Page 4, 11/10/05
(2) a compressible blanket compresses at the nip,<br />
preventing bulging and the resultant slur.<br />
c) Longer plate life<br />
(1) reduced slippage between plate and blanket<br />
reduces wear on the plate.<br />
d) Resistance to smashing<br />
(1) compressible blankets recover from minor smashes<br />
in a few sheets.<br />
e) Minimization of thickness variation effects<br />
(1) A small variation in blanket thickness can be<br />
absorbed by the compressible layer at the nip.<br />
f) Print quality improvements caused by compressible<br />
blankets<br />
(1) sharper dots (and, thus, halftones) due to less slur<br />
(2) less paper distortion (due to less blanket bulging)<br />
(3) better register (due to less paper distortion)<br />
(4) fewer washups<br />
C. Self-adhesive blankets<br />
1. Do not use blanket reels—stick to cylinder instead<br />
a) No accommodation for packing<br />
2. Used especially on web presses to minimize the “wasted” space<br />
caused by the gap.<br />
3. Very difficult to remove—acetone used to dissolve adhesive<br />
4. Very thin blanket<br />
Page 5, 11/10/05
IV.<br />
<strong>Blanket</strong> selection<br />
A. Size<br />
1. Long enough for blanket bars to properly engage reel rods<br />
2. Wide enough to run from gutter to gutter (not quite to bearers)<br />
B. Hardness<br />
1. Three varieties: Hard, Medium and Soft<br />
2. Use harder blankets for harder/smoother papers (coated) and softer<br />
blankets for softer paper (vellum)<br />
3. Hardness measures are becoming increasingly purposeless because<br />
compressibility and thinness of blanket rubber layer render<br />
durometer tests inaccurate.<br />
C. Release Properties<br />
1. Rougher blankets release paper easier than smoother ones<br />
2. Smoother blankets do a better job of reproducing fine dots and<br />
smooth solids, but do not release as well as rougher blankets.<br />
D. Thickness<br />
1. Choose a thickness that minimizes the number of packing sheets<br />
necessary for a “normal” run.<br />
2. The thickness markings on blankets are not necessarily accurate<br />
a) Necessary to measure in several spots with a Cady Gauge<br />
and take the average<br />
b) Use the average thickness when computing packing<br />
c) If the difference between the highest and lowest<br />
measurements exceeds the specified tolerance, the blanket<br />
should be returned to the supplier.<br />
Page 6, 11/10/05
V. Proper care of blankets<br />
A. Storage<br />
1. Rolled-up<br />
2. Flat<br />
a) preferred method<br />
b) stored standing in a tube<br />
a) on shelf<br />
b) stack rubber to rubber or fabric to fabric<br />
3. Store in a cool, dark place to prevent cracking of the rubber surface<br />
a) away from sunlight and fluorescent lighting<br />
b) away from heat<br />
B. Cleaning blankets<br />
1. Type of solvent<br />
a) Solvent must remove ink without swelling the rubber of the<br />
blanket (use overhead)<br />
b) Solvent should be nontoxic<br />
c) Solvent should have a flash point above room temperature<br />
d) Solvent should dry fairly rapidly<br />
(1) slow drying rate slows restarting of press after<br />
cleaning blanket<br />
(2) slow drying rate increases amount of solvent<br />
retained in blanket pores that increases the<br />
stickiness of the blanket (reduces ability to release)<br />
e) Do not use a new solvent without first checking with your<br />
roller and blanket <strong>manufacture</strong>rs.<br />
Page 7, 11/10/05
2. Cleaning process<br />
C. Reconditioning<br />
a) Clean blanket essential to quality printing<br />
b) Should be scrubbed, not just washed<br />
(1) helps remove contaminants in the pores beneath<br />
the surface<br />
(2) helps remove hardened substances, such as gum<br />
c) Care should be taken to not get solvent on edges of the<br />
blanket where it can be absorbed and cause swelling.<br />
d) Cleaning requires both solvent and water<br />
(1) solvent to remove the ink<br />
(2) water to remove the gum<br />
e) Do not use abrasives such as pumice or Ajax because these<br />
substances scratch the blanket surface.<br />
1. The blanket should be removed on occasion so the back can be<br />
cleaned.<br />
a) After cleaning, soak the blanket in a mixture of 1 part<br />
glycerin to 4 parts water to recondition the fabric backing<br />
b) Hang the blanket to dry for several days until it is<br />
completely dry before replacing on the press.<br />
2. Put a spare blanket on the press during reconditioning<br />
VI.<br />
<strong>Blanket</strong> mounting bars<br />
A. Preparing a blanket to attach mounting bars<br />
1. The blanket must be cut perfectly square before attaching the<br />
mounting bars<br />
Page 8, 11/10/05
a) Necessary to achieve equal tension when blanket is<br />
mounted on the press.<br />
2. Use a large carpenter’s square.<br />
3. Sides of blanket should be parallel to the warp threads.<br />
4. <strong>Blanket</strong> bars must be mounted perpendicular to the warp threads so<br />
that the warp is mounted around the cylinder.<br />
5. Sometimes blankets come prepunched to match the holes in the<br />
blanket bars.<br />
a) Usually, however, you must punch the holes yourself using<br />
a special blanket punch.<br />
B. To increase downtime, several blankets should be prepared in<br />
advance, including the attachment of blanket bars.<br />
VII.<br />
<strong>Blanket</strong> mounting<br />
A. Packing<br />
1. Should be tympan paper, not plastic<br />
a) some press <strong>manufacture</strong>rs design the blanket cylinder<br />
undercut to require an “underlayer” blanket, in addition to<br />
the printing blanket and packing.<br />
2. Attach packing to cylinder before mounting blanket<br />
3. Should be narrower (1/8”) than the blanket to prevent plate from<br />
touching ends of blanket—causes<br />
a) water from plate to seep under edge of blanket<br />
b) ink to build up on edge of blanket<br />
4. Should be long enough to extend into the cylinder gap on both<br />
ends so that the blanket helps hold the packing in place and prevent<br />
packing creep.<br />
Page 9, 11/10/05
B. Tightness<br />
1. Use only the tool that came with the press or a Torque Wrench to<br />
tighten blankets.<br />
2. Retighten a newly installed blanket after 500 sheets have been<br />
printed.<br />
3. All blankets on a press (indeed all blankets in a plant) should be<br />
tightened the same amount.<br />
4. To determine proper tightness:<br />
a) Locate a blanket on a press that is printing high-quality<br />
b) Use a Torque Wrench to ascertain current tightness of that<br />
blanket (exact procedure is in the text)<br />
c) Set all other blankets the same<br />
5. This procedure assumes that you’re using the same type and brand<br />
of blankets throughout the press (you should).<br />
VIII. Recovering from a blanket smash<br />
A. If a smash occurs, don’t fix it on press—change the blanket to<br />
keep downtime low.<br />
B. Local patching<br />
1. Surface repair<br />
a) A paint-remover-like substance that temporarily swells the<br />
rubber surface of the blanket<br />
b) Good only to get a few more sheets off the press (for<br />
example, if the smash occurs a few sheets before the job is<br />
over).<br />
c) A short-term-temporary fix.<br />
2. Local packing<br />
Page 10, 11/10/05
a) Ink plate solid, then print to the blanket—low spot will be<br />
obvious<br />
b) Remove one end of the blanket from the cylinder.<br />
c) Use a pencil to trace the smash onto the backside of the<br />
blanket.<br />
d) Tear sheet(s) of packing (feathered) to match size and<br />
shape of low spot.<br />
e) Adhere the torn packing to the blanket.<br />
f) Reattach blanket to press<br />
g) See if the patch helps.<br />
h) This is a permanent patch<br />
3. Local patching<br />
a) do a-c above<br />
b) apply Varn blanket saver (name?) and rub it in to the<br />
fabric<br />
c) the saver will swell the fabric, not the surface rubber.<br />
d) reattach the blanket<br />
e) this is a permanent patch<br />
4. Reconditioning<br />
a) Use the procedure described in Proper Care of <strong>Blanket</strong>s<br />
(above)<br />
b) Often this permanently repairs a smashed blanket.<br />
Page 11, 11/10/05
IX.<br />
Using damaged blankets for scoring/perfing<br />
A. Damaged blankets that cannot be repaired can be used when<br />
a job requires perfing or scoring.<br />
1. Perfing or scoring on the press destroys the blanket on the unit that<br />
does the perfing or scoring.<br />
2. You might as well destroy a damaged blanket rather than a good<br />
one.<br />
B. The procedure for setting up a unit for perfing or scoring is<br />
given in the text.<br />
1. Print a sheet<br />
2. Attach the perfs or scores to a printed sheet in the proper<br />
location(s)<br />
3. Run the paper through the press (off impression)<br />
4. Adhere the sheet to the impression cylinder of the appropriate unit.<br />
5. Trim off area under grippers (so press sheets can be properly held)<br />
6. Run the job.<br />
7. When the job is done, remove the press sheet and perfs from the<br />
cylinder.<br />
Page 12, 11/10/05