
You also want an ePaper? Increase the reach of your titles
YUMPU automatically turns print PDFs into web optimized ePapers that Google loves.
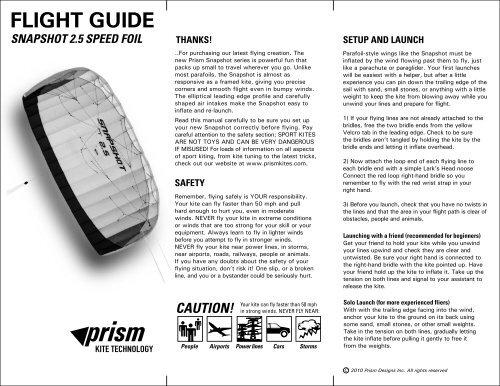
FLIGHT GUIDE<br />
SNAPSHOT <strong>2.5</strong> SPEED FOIL<br />
THANKS!<br />
..For purchasing our latest flying creation. The<br />
new Prism <strong>Snapshot</strong> series is powerful fun that<br />
packs up small to travel wherever you go. Unlike<br />
most parafoils, the <strong>Snapshot</strong> is almost as<br />
responsive as a framed kite, giving you precise<br />
corners and smooth flight even in bumpy winds.<br />
The elliptical leading edge profile and carefully<br />
shaped air intakes make the <strong>Snapshot</strong> easy to<br />
inflate and re-launch.<br />
Read this manual carefully to be sure you set up<br />
your new <strong>Snapshot</strong> correctly before flying. Pay<br />
careful attention to the safety section; SPORT KITES<br />
ARE NOT TOYS AND CAN BE VERY DANGEROUS<br />
IF MISUSED! For loads of information on all aspects<br />
of sport kiting, from kite tuning to the latest tricks,<br />
check out our website at www.prismkites.com.<br />
SAFETY<br />
Remember, flying safely is YOUR responsibility.<br />
Your kite can fly faster than 50 mph and pull<br />
hard enough to hurt you, even in moderate<br />
winds. NEVER fly your kite in extreme conditions<br />
or winds that are too strong for your skill or your<br />
equipment. Always learn to fly in lighter winds<br />
before you attempt to fly in stronger winds.<br />
NEVER fly your kite near power lines, in storms,<br />
near airports, roads, railways, people or animals.<br />
If you have any doubts about the safety of your<br />
flying situation, don’t risk it! One slip, or a broken<br />
line, and you or a bystander could be seriously hurt.<br />
CAUTION!<br />
Your kite can fly faster than 50 mph<br />
in strong winds. NEVER FLY NEAR:<br />
People Airports Power lines Cars Storms<br />
SETUP AND LAUNCH<br />
Parafoil-style wings like the <strong>Snapshot</strong> must be<br />
inflated by the wind flowing past them to fly, just<br />
like a parachute or paraglider. Your first launches<br />
will be easiest with a helper, but after a little<br />
experience you can pin down the trailing edge of the<br />
sail with sand, small stones, or anything with a little<br />
weight to keep the kite from blowing away while you<br />
unwind your lines and prepare for flight.<br />
1) If your flying lines are not already attached to the<br />
bridles, free the two bridle ends from the yellow<br />
Velcro tab in the leading edge. Check to be sure<br />
the bridles aren’t tangled by holding the kite by the<br />
bridle ends and letting it inflate overhead.<br />
2) Now attach the loop end of each flying line to<br />
each bridle end with a simple Lark’s Head noose<br />
Connect the red loop right-hand bridle so you<br />
remember to fly with the red wrist strap in your<br />
right hand.<br />
3) Before you launch, check that you have no twists in<br />
the lines and that the area in your flight path is clear of<br />
obstacles, people and animals.<br />
Launching with a friend (recommended for beginners)<br />
Get your friend to hold your kite while you unwind<br />
your lines upwind and check they are clear and<br />
untwisted. Be sure your right hand is connected to<br />
the right-hand bridle with the kite pointed up. Have<br />
your friend hold up the kite to inflate it. Take up the<br />
tension on both lines and signal to your assistant to<br />
release the kite.<br />
Solo Launch (for more experienced fliers)<br />
With with the trailing edge facing into the wind,<br />
anchor your kite to the ground on its back using<br />
some sand, small stones, or other small weights.<br />
Take in the tension on both lines, gradually letting<br />
the kite inflate before pulling it gently to free it<br />
from the weights.<br />
C<br />
2010 Prism Designs Inc. All rights reserved
FIRST FLIGHT<br />
Pull smoothly back on both lines. Assuming there is<br />
enough wind, the kite will fly upwards to the top of<br />
the wind window. Keep both hands together to fly<br />
the kite straight up overhead. For easiest control,<br />
keep your arms straight in <strong>front</strong> of you and your<br />
hands close together.<br />
To turn, pull gently with one hand. The kite will<br />
turn towards that hand until you stop pulling and<br />
return your hands to the neutral, even position.<br />
Then it will fly straight in whatever direction it’s<br />
pointed. The farther you pull back on one line, the<br />
tighter the kite will turn.<br />
If you turn repeatedly in one direction, your lines will<br />
be twisted around each other. You can still control<br />
the kite because the slippery lines slide easily past<br />
each other. To untwist, make some turns in the<br />
other direction.<br />
If you’re having trouble keeping the kite in the air<br />
and under contol after a bit of practice, it’s most<br />
likely that you need better wind conditions.<br />
Turbulent wind flowing over trees, hills, and<br />
buildings is the #1 cause of kiting frustration. In<br />
turbulent or gusty wind any kite becomes difficult to<br />
control. Even if it takes a bit longer to get there,<br />
pick a flying spot that has smooth wind blowing<br />
across water or a wide open land area. Beaches<br />
with wind coming from off the water are best<br />
for your first flights.<br />
FOUR-LINE CONVERSION<br />
Your <strong>Snapshot</strong> <strong>2.5</strong> can be flown as either a twoline<br />
or a four-line kite. Two-line control is easiest for<br />
beginners. Four lines allow more control but require<br />
more practice to learn as well as additional flying line<br />
and specialized four-line handles.<br />
Two-line configuration<br />
The <strong>2.5</strong> comes from the factory ready to fly<br />
with two lines already connected to the bridles. In<br />
two-line mode you control the kite with two webbing<br />
wrist straps attached to your lines.<br />
Four-line configuration<br />
To fly in four-line mode you’ll need to attach an<br />
additional set of flying lines (brake lines) to the two<br />
bridle webs that go to the back edge of the kite. The<br />
bridles join up at two leaders secured at the two tie<br />
points for your main lines. Simply loosen the two pigtails<br />
where the bridles come together and free the<br />
leaders on either side from the bundle. Then<br />
Lark’s Head the brake lines to the ends of the<br />
leaders. Move your attachment point up or down the<br />
leader depending on your flying style and the length<br />
of your handles.<br />
We suggest using 150# Spectra in the same length<br />
as your main lines for brake lines. You will also need<br />
a set of quad-line handles so you can attach your<br />
main lines to the top and the brake lines to the<br />
bottom end of each handle.<br />
FLYING LINES<br />
Spectra flying lines can wear and break if you fly in fine<br />
sand or strong winds. For a quick field repair, retie<br />
the two ends using a blood knot or tie a new<br />
loop in the end using a double overhand loop if it<br />
breaks at the end. Then stretch both lines out<br />
together and tie a new end loop in the longer line so<br />
that your two lines are once again equal in<br />
length (within ½").<br />
The Double Overhand Loop- for retying end loops:<br />
1.<br />
The Blood Knot- for splicing broken Spectra lines:<br />
2.<br />
Brake lines and quad handles<br />
are available online at<br />
www.prismkites.com or<br />
some specialty kite retailers.<br />
3.<br />
SPECS:<br />
Wing Span:<br />
86.5” (220cm)<br />
Sail Area: <strong>2.5</strong> sq. m.<br />
Wind Range:<br />
4-25mph / 7-40 km/h<br />
Sail Material:<br />
Ripstop Nylon<br />
Recomended Lines: 100'x300 lbs Spectra<br />
REPAIRS<br />
At Prism we engineer our parafoils to handle the<br />
rigors of serious flying. However, like most<br />
things light enough to fly they are not indestructible. If<br />
crashed hard enough or dragged over rough ground<br />
they can be damaged, and we cannot provide a<br />
guarantee against tears in the sail.<br />
However, most damage can be easily repaired<br />
without replacing the kite. Small tears are quickly<br />
fixed using our special Tedlar repair tape, available<br />
from your retailer or direct from our website at<br />
www.prismkite.com. For larger or more complicated<br />
repairs, we suggest you send us the kite so we can<br />
get you a quote and take care of it for you. There<br />
are very few mishaps that can't be effectively fixed<br />
by our talented in-house repair team. To send in a<br />
repair, download our repair form from the website<br />
and include it with your sail so we know who you<br />
are and how we can help.<br />
CONTACT US<br />
Feel free to contact us as you discover sport<br />
kiting. We love to hear about your adventures and<br />
we're always happy to help if you need technical<br />
support of any kind.<br />
Smooth winds and happy flying!<br />
Prism Designs Inc.<br />
4214 24th Ave W.<br />
Seattle, WA 98199<br />
206-547-1100<br />
206-547-1200 fax<br />
info@prismkites.com<br />
www.prismkites.com