how to do a little bit of everything - Roseville Area Schools
how to do a little bit of everything - Roseville Area Schools
how to do a little bit of everything - Roseville Area Schools

Create successful ePaper yourself
Turn your PDF publications into a flip-book with our unique Google optimized e-Paper software.
Technology<br />
Handbook
Mac OS X<br />
Version 10.4.6 Tiger<br />
Mac OS X is an operating system. An operating system controls HOW your computer works.<br />
The OS X MAC Desk<strong>to</strong>p:<br />
1<br />
4<br />
2<br />
3<br />
5<br />
6<br />
8<br />
7<br />
9<br />
1. Apple Menu – system settings, recent items, restart or shut <strong>do</strong>wn computer.<br />
2. View But<strong>to</strong>ns – as icons, in lists or in columns. This han<strong>do</strong>ut assumes a Columns view.<br />
3. Search Field – highlight folder you want searched, then type file name and press Return.<br />
4. Win<strong>do</strong>w But<strong>to</strong>ns (Colored Circles) – red = close win<strong>do</strong>w; yellow = minimize<br />
win<strong>do</strong>w <strong>to</strong> the Dock; green = resize win<strong>do</strong>w.<br />
5. Sidebar – Click icon <strong>to</strong> go <strong>to</strong> item.<br />
6. Home – contains personal folders for your login. NEVER rename these<br />
folders. You CAN add or rename new folders within these, <strong>how</strong>ever.<br />
7. Dock (cus<strong>to</strong>mizable) – Icons <strong>to</strong> open applications, <strong>do</strong>cuments, folders and minimized win<strong>do</strong>ws.<br />
8. Finder Icon – Opens Finder win<strong>do</strong>w so you can see what is on your computer.<br />
9. Trash - Drag items <strong>to</strong> trash <strong>to</strong> delete them.<br />
August, 2006 OS X Tiger 1 <strong>of</strong> 4
Use the Finder features <strong>to</strong> navigate <strong>to</strong> different parts <strong>of</strong> your computer.<br />
10<br />
11<br />
13<br />
12<br />
10. Application Menu – S<strong>how</strong>s name <strong>of</strong> program that is active. Use <strong>to</strong> set application’s<br />
preferences or quit program.<br />
11. Disk(s) – Macin<strong>to</strong>sh HD always, and then any peripherals or CD-ROMS you insert.<br />
12. Folder – Containers <strong>to</strong> organize your files and applications. Double-click a folder <strong>to</strong> see what is<br />
inside. Choose “New Folder” from File menu <strong>to</strong> create one.<br />
13. Document – File you create using s<strong>of</strong>tware applications. Can be opened by <strong>do</strong>uble clicking on<br />
name or by having the s<strong>of</strong>tware application open it (File > Open).<br />
August, 2006 OS X Tiger 2 <strong>of</strong> 4
Dock and Toolbar<br />
1<br />
2<br />
3<br />
4<br />
1. Toolbar – Back/Forward arrows, View but<strong>to</strong>ns, Action options, Search.<br />
2. Sidebar – Click the icons <strong>to</strong> navigate around computer.<br />
3. Dock Applications – Icons <strong>of</strong> frequently used programs and win<strong>do</strong>ws that have been<br />
minimized.<br />
4. Triangles – small black triangles under an icon indicate that application is open.<br />
The Dock <strong>do</strong>es NOT contain icons for every program. You can find other programs by clicking on<br />
Applications in the Sidebar and then scrolling through the list <strong>of</strong> programs in the next column.<br />
To add a program <strong>to</strong> your Dock, drag the application’s icon from the Finder column <strong>do</strong>wn <strong>to</strong> the<br />
Dock. To remove a program from your Dock, drag the application’s icon <strong>of</strong>f <strong>of</strong> the Dock and let go.<br />
To cus<strong>to</strong>mize further, see the pictures on the next page.<br />
August, 2006 OS X Tiger 3 <strong>of</strong> 4
Cus<strong>to</strong>mize your Dock:<br />
Under the Apple Menu<br />
• Choose Dock /<br />
Dock Preferences<br />
Cus<strong>to</strong>mize your Toolbar:<br />
• Under Finder’s View<br />
Menu, choose<br />
“Cus<strong>to</strong>mize Toolbar.”<br />
• Drag items <strong>to</strong> the<br />
Toolbar.<br />
Choosing “System<br />
Preferences”<br />
under the Apple<br />
Menu accesses<br />
System<br />
Preferences<br />
August, 2006 OS X Tiger 4 <strong>of</strong> 4
District Standard S<strong>of</strong>tware<br />
And Online Subscription Resources<br />
Standard s<strong>of</strong>tware is that which has been purposefully chosen for use throughout the district by curriculum,<br />
technology services, instructional media services, or by a particular team/department in the district such as<br />
Special Education or cus<strong>to</strong>dial staff. Support and training is provided for this s<strong>of</strong>tware.<br />
There is a district procedure for acquisition and use <strong>of</strong> s<strong>of</strong>tware; see Technology Purchase Process in the<br />
<strong>Roseville</strong> <strong>Area</strong> <strong>Schools</strong> Media and Technology Services (online at<br />
http://www.isd623.org/edc/ps/it/mediatechpolicies.cfm). The following chart outlines current standards.<br />
Program<br />
Description<br />
iPho<strong>to</strong><br />
Import, organize, edit, print, and share your digital pho<strong>to</strong>s.<br />
Mac &<br />
OSX only<br />
iPho<strong>to</strong><br />
(Micros<strong>of</strong>t<br />
Office*)<br />
Word<br />
Word (word processing) equipped with templates and wizards <strong>to</strong> help create useful <strong>do</strong>cuments.<br />
Some uses for Word include:<br />
• Creating reports, newsletters, business cards, labels and letters with illustrations<br />
• Tables and clip art in Word can be used for pr<strong>of</strong>essional looking <strong>do</strong>cuments such as<br />
brochures and newsletters<br />
• Language <strong>to</strong>ols: Spell and Grammar checking and Readability Statistics<br />
• Can create <strong>do</strong>cuments with the following extensions: .<strong>do</strong>c, .rtf, .html, .pdf<br />
Additional material can be found at http://<strong>of</strong>fice.micros<strong>of</strong>t.com/en-us/default.aspx and<br />
http://<strong>of</strong>fice.micros<strong>of</strong>t.com/en-us/FX011000841033.aspx.<br />
(Micros<strong>of</strong>t<br />
Office*)<br />
Power Point<br />
PowerPoint (presentations)<br />
Micros<strong>of</strong>t PowerPoint can be used <strong>to</strong> design effective presentations that can be delivered<br />
electronically, with overheads, or in paper form.<br />
Some uses <strong>of</strong> PowerPoint include:<br />
• Multimedia presentations and han<strong>do</strong>uts<br />
• Web-delivered presentations (great for distance learning)<br />
• Slide s<strong>how</strong>s and informational kiosks (a presentation that continually runs without human<br />
intervention)<br />
• Jeopardy and game-s<strong>how</strong> type boards<br />
Additional material can be found at http://<strong>of</strong>fice.micros<strong>of</strong>t.com/en-us/default.aspx and<br />
http://<strong>of</strong>fice.micros<strong>of</strong>t.com/en-us/FX011000841033.aspx.<br />
(Micros<strong>of</strong>t<br />
Office*)<br />
Excel<br />
Excel (spreadsheets)<br />
Micros<strong>of</strong>t Excel is used largely for organizing, manipulating, and charting numerical and<br />
information data (spreadsheets and ledgers). You can use Excel <strong>to</strong> sort and chart both simple<br />
and complex data.<br />
Some uses for Excel include:<br />
• Organizing classroom and student information<br />
• Creating and tracking budgets<br />
• Sorting and charting data<br />
Additional material can be found at http://<strong>of</strong>fice.micros<strong>of</strong>t.com/en-us/default.aspx and<br />
http://<strong>of</strong>fice.micros<strong>of</strong>t.com/en-us/FX011000841033.aspx.<br />
August 2007 Standard High School S<strong>of</strong>tware page 1
Inspiration*<br />
Inspiration v. 8 (Grades 6-12)<br />
• Pre-writing Outlines<br />
• Graphic Organizers<br />
• Drawing and Presentation<br />
• Creates .isf files; Using Export, <strong>do</strong>cuments can be many other types.<br />
View Inspiration Quick Tour on publisher’s website:<br />
http://www.inspiration.com/productinfo/Inspiration/interactive_demo/index.cfm<br />
World Book<br />
World Book Online Reference Center<br />
Web version <strong>of</strong> popular encyclopedia. Don’t miss the Educa<strong>to</strong>r’s Tools that correlate content with<br />
Minnesota Academic Standards.<br />
http://www.worldbookonline.com/<br />
Login ID: isd623 Password: worldbook<br />
Making the<br />
Grade X<br />
A<strong>to</strong>mic<br />
Learning<br />
Making the Grade X<br />
An electronic grade book that helps teachers manage class lessons. This program is compatible<br />
with our Teacher Web Publishing service, School Center.<br />
Visit the publisher’s web site at http://www.gradebusters.com<br />
A<strong>to</strong>mic Learning for S<strong>of</strong>tware Training and Lesson Plans<br />
3 sections:<br />
• Computer s<strong>of</strong>tware training films for PCs<br />
• Computer s<strong>of</strong>tware training films for Macs<br />
• Curriculum Tools (Fantastic stuff!)<br />
www.a<strong>to</strong>miclearning.com<br />
Username: rosevilleisd Password: isd623 (Subscription for all students and staff <strong>of</strong> ISD 623.)<br />
School Center<br />
A host for teacher web sites that can be managed from any computer with an Internet<br />
connection. Visit their web site at http://www.worldbookonline.com/.<br />
Contact your media specialist <strong>to</strong> have an account activated for you or your grade level.<br />
iMovie<br />
Garage<br />
Band<br />
iMovie<br />
Video editing/production s<strong>of</strong>tware for digital movies and slide s<strong>how</strong>s. Mac and OS X only.<br />
Garage Band<br />
Audio editing/production s<strong>of</strong>tware for music, podcasts, and more. Mac and OS X only.<br />
SasiXP<br />
Student record-keeping attendance and grade reporting s<strong>of</strong>tware.<br />
* License allows teachers <strong>to</strong> have copy on home computer as long as employed by ISD 623. Check out<br />
installation CDs from your Library Media Center.<br />
August 2007 Standard High School S<strong>of</strong>tware page 2
Non-standard S<strong>of</strong>tware<br />
S<strong>of</strong>tware is considered “non-standard” if it no longer being updated, has been chosen by an individual or is<br />
needed by only a small group <strong>of</strong> people <strong>to</strong> meet their work, teaching, or learning needs. Individual users <strong>of</strong> “nonstandard”<br />
s<strong>of</strong>tware will generally need <strong>to</strong> be responsible for their own support and training.<br />
To insure system stability, the acquisition and use <strong>of</strong> non-standard s<strong>of</strong>tware also follows the district Technology<br />
Purchase Process (mentioned previously). District technology support staff need <strong>to</strong> determine any possible<br />
system conflicts. In addition, the s<strong>of</strong>tware owner needs <strong>to</strong> furnish tech support with packaging and license<br />
information. Copyright guidelines respected.<br />
Some <strong>of</strong> our non-standard s<strong>of</strong>tware still commonly installed is as follows:<br />
Appleworks<br />
Word Processor, Drawing,<br />
Paint, Database,<br />
Spreadsheet, &<br />
Presentation.<br />
Keynote<br />
New Apple<br />
presentation<br />
s<strong>of</strong>tware. Mac and<br />
OS X only.<br />
Pages<br />
New Apple word<br />
processing<br />
s<strong>of</strong>tware. Mac<br />
and OS X only,<br />
Safari<br />
Apple Internet<br />
browser<br />
s<strong>of</strong>tware. Mac<br />
and OS X only.<br />
Preview<br />
Apple .pdf<br />
reader<br />
s<strong>of</strong>tware. Mac<br />
and OS X only.<br />
August 2007 Standard High School S<strong>of</strong>tware page 3
Web Mail Basics<br />
Your email can now be accessed through Outlook Web Mail Access.<br />
• To access your Outlook Email Account via the Web, Go <strong>to</strong> http://webmail.isd623.org<br />
• At the login page, enter your username<br />
after AD\. AD\ tells the server where <strong>to</strong><br />
look for your account information and must<br />
be provided along with your username.<br />
Enter your password in the box below that,<br />
then click on the Log On but<strong>to</strong>n.<br />
• Public computers will log out au<strong>to</strong>matically,<br />
and will not retain your login information.<br />
Private computers will cache your user<br />
information, allowing any one who uses<br />
your computer account access <strong>to</strong> your e-<br />
mail.<br />
Once you log in you should see a screen with your email messages on the right and the Outlook Web<br />
Access menu on the left.<br />
August, 2008 Web Mail Basics 1 <strong>of</strong> 5
Web Mail Tool Bar<br />
Hover the mouse arrow over each icon (but <strong>do</strong> not click) <strong>to</strong> see what each icon is for.<br />
“Hovering” is a good way <strong>to</strong> get more icon information.<br />
The <strong>to</strong>ol bar will change <strong>to</strong> match the context it appears on. If you are viewing your calendar,<br />
the <strong>to</strong>ol bar will display functions related <strong>to</strong> your calendar, and e-mail <strong>to</strong>ols when viewing your<br />
inbox.<br />
Sending a New Message<br />
Open a new message <strong>to</strong> send by clicking<br />
on “new message” in the upper left corner <strong>of</strong><br />
the screen, while in a mail folder.<br />
The easiest way <strong>to</strong> address an e-mail is <strong>to</strong><br />
type your recipient’s name in the To… Field.<br />
You only need <strong>to</strong> include enough <strong>of</strong> the<br />
person’s name <strong>to</strong> identify them uniquely. For<br />
example: typing B P will search for all people<br />
in your address book with the initials BP or<br />
PB. For multiple recipients, separate the<br />
names by a semi-colon. Click on the Check<br />
Names but<strong>to</strong>n. Any ambiguities will be<br />
presented <strong>to</strong> you in a dialog on the left.<br />
You may also use the address book <strong>to</strong> select a recipient for a new message<br />
by clicking on “To”. This will open the Address Book. The address book contains a list <strong>of</strong><br />
all district employees, sorted by last name.<br />
*Note: The process is the same for including a copy (cc) <strong>of</strong> the email for another person(s) or for a Blind<br />
Carbon Copy (bcc). BCC is a useful feature for emailing a group <strong>of</strong> people (parents for example) where<br />
the email address <strong>of</strong> the recipients should remain private.<br />
Click on “Close” <strong>to</strong> go back <strong>to</strong> the message.<br />
August, 2008 Web Mail Basics 2 <strong>of</strong> 5
Add an Attachment <strong>to</strong> an Email Message<br />
Open a new email message.<br />
Click on “attachments”<br />
Click on “Browse”<br />
Navigate <strong>to</strong> the file <strong>to</strong> be attached and click “Open”<br />
Click on “Attach” but<strong>to</strong>n.<br />
The file <strong>to</strong> be attached should<br />
then s<strong>how</strong> on the list under<br />
“Attachments.”<br />
Repeat process <strong>to</strong> send<br />
multiple attachments.<br />
Click on “Done” <strong>to</strong> return <strong>to</strong> your message.<br />
August, 2008 Web Mail Basics 3 <strong>of</strong> 5
Receiving an attachment:<br />
Open the email with attachment<br />
In “Attachments” area <strong>of</strong> the email, click on the name <strong>of</strong> the attachment.<br />
There are two ways <strong>to</strong> open the attachment:<br />
1. Click on the attachment. This may<br />
open a blank Internet win<strong>do</strong>w along with<br />
this pop up win<strong>do</strong>w.<br />
Choose “open with” <strong>to</strong> see the file, or<br />
“Save <strong>to</strong> Disc”<br />
Click “ok”<br />
OR<br />
2. CONTROL CLICK on the attachment (hold<br />
<strong>do</strong>wn the “ctrl” but<strong>to</strong>n on the keyboard and click<br />
the mouse on the attachment) you will get a menu<br />
with choices.<br />
Choose ”Save link as….” and navigate <strong>to</strong> the<br />
folder where you would like <strong>to</strong> save the<br />
attachment.<br />
August, 2008 Web Mail Basics 4 <strong>of</strong> 5
Add a new contact<br />
Select Contacts from the Outlook Web Access Menu<br />
on the left hand side <strong>of</strong> the screen.<br />
Click “New Contact”<br />
Enter First and Last Name,<br />
“Display” name and email<br />
This information is required.<br />
The other fields are<br />
optional.<br />
Click “Save and Close” in<br />
the upper left hand corner.<br />
August, 2008 Web Mail Basics 5 <strong>of</strong> 5
En<strong>to</strong>urage Basics<br />
The district has a<strong>do</strong>pted Micros<strong>of</strong>t En<strong>to</strong>urage as the<br />
default application for accessing your email from an OS<br />
X computer. In order <strong>to</strong> make this work for you, you<br />
will need <strong>to</strong> setup en<strong>to</strong>urage by following a step by script. Please launch “En<strong>to</strong>urage<br />
Setup.app” the first time you want <strong>to</strong> check your mail.<br />
Once you log in you will be greeted with a screen that is very similar <strong>to</strong> Micros<strong>of</strong>t<br />
Outlook.<br />
Your inbox is hidden<br />
in your<br />
Mailbox at first<br />
TO View your mailbox, click on the triangle by your mailbox.<br />
The Toolbar<br />
The <strong>to</strong>olbar is active when you highlight a message. Hover your mouse over any icon<br />
(but <strong>do</strong>n’t click) <strong>to</strong> find out what the icon is for.<br />
New Message<br />
Open a new message by clicking on the new Message but<strong>to</strong>n.<br />
Then type the name or a part <strong>of</strong> the name <strong>of</strong> the recipient. A pop-up box will list all <strong>of</strong><br />
the addresses in your address book that matches this name.<br />
When you select a name you can add more<br />
names or click on the<br />
subject field <strong>to</strong> continue writing the message. In the message body you will notice that<br />
misspelled words are underlined with a red-wavy line.
Add an Attachment<br />
To add an attachment, first click on the message’s attachment triangle <strong>to</strong> reveal this part<br />
<strong>of</strong> the message.<br />
Within the attachments section <strong>of</strong> the message there is an add but<strong>to</strong>n.<br />
When you click this but<strong>to</strong>n a dialog box opens that asks you <strong>to</strong> locate the file. When you<br />
find the file that you would like <strong>to</strong> attach click on this and then click the choose but<strong>to</strong>n.<br />
Receiving an Attachment:<br />
When you are reading your email, messages that have attachments will have a paperclip<br />
in the bot<strong>to</strong>m right edge <strong>of</strong> the message. Click on the message.<br />
On the right-hand pane <strong>of</strong> en<strong>to</strong>urage you will see an attachment section. Highlight the<br />
attachment and choose save.<br />
BEWARE! Attachments can, and <strong>of</strong>ten <strong>do</strong>, contain viruses. Open attachments only<br />
when you expect <strong>to</strong> receive them.
Add a New Contact<br />
To organize your contacts you will need <strong>to</strong> click on the address book.<br />
To add a new contact, first select your mailbox on the list <strong>of</strong> mailboxes in the left-0hand<br />
pane.<br />
Then click on the new contact but<strong>to</strong>n in the <strong>to</strong>olbar.<br />
Then you will need <strong>to</strong> fill out the name and email address <strong>of</strong> the new<br />
contact in your book and choose save:<br />
Make a Distribution List<br />
To add a new distribution list, first select your mailbox on the list <strong>of</strong> mailboxes in the<br />
left-hand pane.<br />
In the address book click on add group.<br />
Name the group. And then enter the names <strong>of</strong> each member just as you would an email<br />
message.
Using Micros<strong>of</strong>t Word for<br />
Word Processing<br />
Opening Word for new <strong>do</strong>cument<br />
• Click W icon on <strong>do</strong>ck located at edge <strong>of</strong><br />
desk<strong>to</strong>p<br />
• Project Gallery will open<br />
• Word Document is highlighted<br />
• Click on open but<strong>to</strong>n at lower right<br />
Saving a new Word <strong>do</strong>cument<br />
• Click on File drop <strong>do</strong>wn menu (located at <strong>to</strong>p)<br />
• Drag <strong>do</strong>wn <strong>to</strong> click on Save As<br />
August, 2006 Using Micros<strong>of</strong>t Word 1 <strong>of</strong> 3
• A Save As win<strong>do</strong>w will appear where you can type in the title <strong>of</strong> your <strong>do</strong>cument.<br />
• Click on highlighted Save but<strong>to</strong>n<br />
Retrieving Saved Files<br />
• Find Documents icon on <strong>do</strong>ck or<br />
sidebar<br />
• Click <strong>to</strong> open<br />
• Scroll <strong>to</strong> find file name<br />
• Double click on file title<br />
Making a PDF<br />
A PDF is a portable <strong>do</strong>cument format that is viewable by anyone with a computer using .pdf reader programs<br />
such as “A<strong>do</strong>be Acrobat Reader” or “Preview.” Mac OS X allows most word processing <strong>do</strong>cuments <strong>to</strong> be turned<br />
in<strong>to</strong> .pdf <strong>do</strong>cuments. You would <strong>do</strong> this if you wanted <strong>to</strong> post a <strong>do</strong>cument on your web site. Computers with<br />
Internet connectivity most all have .pdf readers, so the viewer <strong>do</strong>es not have <strong>to</strong> have the type <strong>of</strong> s<strong>of</strong>tware in<br />
which the <strong>do</strong>cument was created.<br />
• With your <strong>do</strong>cument open, go under the File menu and select Print . (Trust us, this<br />
works! You are not really going <strong>to</strong> Print, you’re going <strong>to</strong> Save As PDF.)<br />
• When the Print win<strong>do</strong>w opens, select “Save as PDF” from the PDF drop-<strong>do</strong>wn menu in<br />
the lower left corner <strong>of</strong> the win<strong>do</strong>w.<br />
• Name your the <strong>do</strong>cument and save it <strong>to</strong> your <strong>do</strong>cuments folder.<br />
August, 2006 Using Micros<strong>of</strong>t Word 2 <strong>of</strong> 3
Transitioning Away from AppleWorks<br />
As long as AppleWorks continues <strong>to</strong> function with Mac OS X, it will remain available for staff and student use.<br />
However, AppleWorks is a program that will not be updated anymore, so eventually it will probably s<strong>to</strong>p working.<br />
This is why the district no longer supports it as part <strong>of</strong> District Standard S<strong>of</strong>tware, and we recommend that you<br />
begin <strong>to</strong> use Micros<strong>of</strong>t Office (Word, PowerPoint or Excel).<br />
Word processed<br />
<strong>do</strong>cuments transfer easily<br />
<strong>to</strong> MS Word. AppleWorks<br />
may let you choose a Word<br />
format when you use “Save<br />
As”. In the lower left corner<br />
<strong>of</strong> the Save As win<strong>do</strong>w, go <strong>to</strong><br />
File Format and look through<br />
your choices. If you can,<br />
select Word Mac 98, 2001,<br />
<strong>do</strong>cument.<br />
Then click Save.<br />
If that fails, try <strong>to</strong> copy the<br />
content <strong>of</strong> your AppleWorks<br />
<strong>do</strong>cument and pasting it in<strong>to</strong><br />
a blank Word <strong>do</strong>cument.<br />
As a 3 rd option, the district<br />
has purchased the new<br />
Apple suite that has Pages, a word processing program that can open and read .cwk files and Keynote a new<br />
Apple presentation s<strong>of</strong>tware. You can try these programs, but you will find that MS Office programs are much<br />
more universally found on computers than the Apple programs. Your students are more likely <strong>to</strong> be familiar with<br />
Office if they have a home computer. Office <strong>do</strong>cuments <strong>do</strong> go between platforms easily (Mac <strong>to</strong> PC and vice<br />
versa).<br />
Spreadsheets also transfer quite easily in<strong>to</strong> MS Excel <strong>do</strong>cuments. Again, you can first try <strong>to</strong> get AppleWorks<br />
<strong>to</strong> “Save As” Excel. If that is unsuccessful, copy and paste your content from the AppleWorks spreadsheet <strong>to</strong> a<br />
blank Excel <strong>do</strong>cument.<br />
Drawing and Painting <strong>do</strong> not have an Office equivalent, though Word and PowerPoint <strong>do</strong> have drawing<br />
ability. If you want <strong>to</strong> ensure always being able <strong>to</strong> open these <strong>do</strong>cument types, you can save them as .jpeg<br />
images. (Again, this is an option from AppleWorks ”Save As” “File Format” dialog. But keep in mind that .jpegs<br />
are not editable images.<br />
And <strong>do</strong>n’t forget <strong>to</strong> try out the drawing and painting features <strong>of</strong> Kid Pix,<br />
Kidspiration or Inspiration <strong>to</strong> see if they will meet your needs.<br />
August, 2006 Using Micros<strong>of</strong>t Word 3 <strong>of</strong> 3
Firefox Basics<br />
What is a browser?<br />
• A browser is a s<strong>of</strong>tware program that allows you <strong>to</strong> look at sites on the Internet.<br />
• Internet Explorer and Netscape are browsers we have used in the past.<br />
• Firefox is the browser currently recommended and supported by the district. Either<br />
Macs or Win<strong>do</strong>ws computers can use it.<br />
This is the icon for Firefox that is in your <strong>do</strong>ck.<br />
The Toolbar is at the <strong>to</strong>p <strong>of</strong> your Firefox browser win<strong>do</strong>w.<br />
Back/forward<br />
Navigation<br />
Reload<br />
S<strong>to</strong>p<br />
Home<br />
Address Bar<br />
Internet<br />
Search<br />
Setting Your Homepage:<br />
1. Start Firefox by clicking on the icon in the <strong>do</strong>ck.<br />
2. Once the program loads, type the URL (address) <strong>of</strong> the webpage you<br />
would like <strong>to</strong> have as your homepage, such as www.isd623.org.<br />
3. Under the Firefox menu, pull <strong>do</strong>wn <strong>to</strong> select Preferences.<br />
4. In the <strong>to</strong>p <strong>of</strong> the Preferences win<strong>do</strong>w, select Use Current Page<br />
5. At the bot<strong>to</strong>m <strong>of</strong> the Preferences win<strong>do</strong>w, click on OK<br />
August, 2006 Firefox Basics 1 <strong>of</strong> 3
Adding Bookmarks<br />
1<br />
Find Webmail in the staff collection<br />
on the Navigation bar on most District<br />
Websites<br />
2<br />
Choose the menu Bookmarks<br />
Bookmark this page<br />
3<br />
To return <strong>to</strong> the bookmark, select<br />
bookmarks and select your new<br />
email bookmark from the menu<br />
August, 2006 Firefox Basics 2 <strong>of</strong> 3
Add a Bookmark <strong>to</strong> the Bookmark Toolbar<br />
(Another way <strong>to</strong> make a bookmark!)<br />
1 Repeat steps 1 through 3 for adding a bookmark listed on the previous page<br />
2<br />
After you select<br />
“bookmark this<br />
page”, click on the<br />
drop <strong>do</strong>wn menu<br />
arrows<br />
3<br />
Select “Bookmarks<br />
Toolbar Folder”<br />
and click “Add”<br />
4<br />
The link should<br />
appear in the<br />
Firefox Bookmarks<br />
Toolbar<br />
August, 2006 Firefox Basics 3 <strong>of</strong> 3
Logging on <strong>to</strong> CLASSXP<br />
To use the Classxp attendance system there are two levels <strong>of</strong> security. The first step is <strong>to</strong> login<br />
<strong>to</strong> your computer. Only staff have access <strong>to</strong> use Classxp.<br />
For security reasons please logout before allowing students <strong>to</strong> use .your computer<br />
To Logon:<br />
Step 1<br />
Login in <strong>to</strong> your computer by entering your login name and password<br />
Step 2<br />
Find the ClassXP Icon on your <strong>do</strong>ck, and click it <strong>to</strong> open ClassXP<br />
Step 3<br />
The next screen is the login <strong>to</strong> Classxp This is the second<br />
level <strong>of</strong> security. Use your standard login name. Your<br />
password is the same as your user ID . Be sure <strong>to</strong> change<br />
your password from the default! You can change your<br />
password by clicking the Change Password box.<br />
•Click the mouse in the user ID box and enter user ID.<br />
•Hit tab <strong>to</strong> move <strong>to</strong> the password box.<br />
•Enter your password which is the same as your User ID.<br />
•Press return or Click Login box.<br />
Step 4<br />
Choose the hour you wish <strong>to</strong> work with<br />
by <strong>do</strong>ubleclicking.<br />
Click this box <strong>to</strong> change the classes<br />
displayed. You can view entire year<br />
classes or Semester classes<br />
.
Taking Attendance<br />
To take attendance:<br />
Step 1<br />
Go the the Class Menu and Choose Take attendance<br />
.<br />
Use the mouse <strong>to</strong> select the student. you wish <strong>to</strong> work with.<br />
Click once on the student’s name <strong>to</strong> mark absent or UNV for unverified.<br />
Click twice <strong>to</strong> mark the student tardy<br />
Click three times <strong>to</strong> return the student’s status <strong>to</strong> present.<br />
Step 2<br />
When you are finished taking attendance go <strong>to</strong> the <strong>to</strong>p <strong>of</strong> the screen and click on the<br />
<strong>to</strong> s<strong>to</strong>p taking attendance. Your class attendance is immediately recorded.
Student Information in CLASSxp<br />
CLASSxp gives teachers access <strong>to</strong> information on the students in their class(es).<br />
To view information on a student, click once<br />
on the student picture so they are highlighted in red.<br />
Then click the Personal menu <strong>to</strong> look up student<br />
information.<br />
You have access <strong>to</strong> the following areas <strong>of</strong> student information:<br />
Demographic<br />
This area gives basic student information, such as primary<br />
phone number, address, and parent/guardian name.<br />
Class Schedule<br />
Contains the class schedule <strong>of</strong> the student for the school year.<br />
Period Attendance<br />
You can view a student’s attendance across all class periods<br />
for the year in this win<strong>do</strong>w.<br />
Click the Days <strong>of</strong> Activity, Reason Totals, and Type Totals<br />
tabs at the <strong>to</strong>p <strong>of</strong> the screen <strong>to</strong> see summaries <strong>of</strong> the<br />
student’s absences.<br />
Parent/Guardian<br />
This win<strong>do</strong>w contains information on a student’s parents,<br />
emergency contacts, and other relevant persons.<br />
Click the numbered sidebar <strong>to</strong> scroll between records for<br />
each student.<br />
The Emergency, Health, and Discipline selections<br />
on the Personal menu are not used.<br />
Several reports can also be run from the Personal menu that you may find useful.<br />
Please note that the information presented in these reports is only for the current class selected.<br />
Reports from Period Attendance, Period-Attendance menu:<br />
ATP13, Report by Student -- Gives an attendance summary, per student.<br />
Reports from Student Demographics, Student menu:<br />
STU02, Student Direc<strong>to</strong>ry -- A list <strong>of</strong> students with parent/guardian and contact information.<br />
STU25, Birthday Listing -- Students and birthdates, sorted by month.<br />
STU41, Class Roster w/ Schedule -- Prints students and their schedules.
Editing Attendance Information<br />
Important note:<br />
Please <strong>do</strong> not change an absence reason other than UNV (Unverified) and TDY (Tardy). Even if<br />
you know a student was absent for another reason, it is the responsibility <strong>of</strong> the attendance <strong>of</strong>fice<br />
<strong>to</strong> record this.<br />
To change <strong>to</strong>day’s attendance:<br />
CLASSxp will allow you <strong>to</strong> take attendance more than<br />
once on the same day. Go <strong>to</strong> the Class menu and<br />
choose Take Attendance as usual.<br />
To change yesterday’s attendance:<br />
Go <strong>to</strong> the Class menu, and select Class Attendance.<br />
You may change only the previous school day’s attendance!<br />
Additional Tips and Tricks<br />
To quickly print a class roster:<br />
1. Go <strong>to</strong> the Class menu and choose S<strong>how</strong> Student List.<br />
2. Go <strong>to</strong> the File menu, and choose Print.<br />
3. Change the Prin<strong>to</strong>ut Title <strong>to</strong> something descriptive,<br />
like, “1st Hour Math.” Select “An expanded table” and<br />
check <strong>of</strong>f “Print Row Dividing Lines.” Click OK.<br />
Note: This will print a blank sheet after your class roster.<br />
This is normal.<br />
To print your current seating chart:<br />
As you know, the Seating Chart Report in CLASSxp has never worked. Here is another way <strong>to</strong><br />
print the layout <strong>of</strong> your seating chart.<br />
1. Open the class.<br />
2. Hold <strong>do</strong>wn - SHIFT - 4 at the same time. Your mouse pointer will turn in<strong>to</strong> a cross.<br />
3. Drag a box around your seating chart. When you let go <strong>of</strong> the mouse but<strong>to</strong>n, your computer<br />
will make the sound <strong>of</strong> a camera shutter.<br />
4. Open your staff <strong>do</strong>cuments folder on the server. A file called, “Picture 1” will be there. Doubleclick<br />
it, and a picture <strong>of</strong> the seating chart will open. Go <strong>to</strong> the File menu, and Print. Then go <strong>to</strong><br />
the File Menu, and Quit.<br />
5. Delete “Picture 1” from your <strong>do</strong>cument folder. Repeat steps 1-5 for each class.<br />
To export a class list:<br />
1. Go <strong>to</strong> the Class menu, and choose S<strong>how</strong> Class Attendance.<br />
2. Go <strong>to</strong> the Data menu, and choose Export List. Choose your save location, and give the file a<br />
name. Hit Save.<br />
3. Another Save box will appear. Click CANCEL.<br />
Your student list can be opened in ClarisWorks, or imported in<strong>to</strong> Making the Grade.
ClassXP Seating Chart Information<br />
How <strong>to</strong> Use the S<strong>how</strong> Students Entering Function<br />
SASIxp Classroom au<strong>to</strong>matically displays<br />
the names <strong>of</strong> students entering a class<br />
when you first bring up the class.<br />
To add new students <strong>to</strong> your seating chart.<br />
Click and hold the mouse but<strong>to</strong>n on<br />
each students’ name and drag the name<br />
from STUDENTS ENTERING list <strong>to</strong> the<br />
seating chart.<br />
To remove and change students displayed in the chart<br />
Go the CLASS menu and Choose S<strong>how</strong> student list<br />
TO ADD A STUDENT<br />
Select a student from the STUDENTS OUT<br />
OF CHART by clicking on the name and<br />
drag it <strong>to</strong> the seating chart<br />
TO REMOVE A STUDENT<br />
Select the student you want <strong>to</strong> remove<br />
from the IN CHART LIST and drag the<br />
name <strong>to</strong> the OUT OF CHART list
Creating and Modifying Seating Charts<br />
To change the size <strong>of</strong> the seating chart grid<br />
1.<br />
Go <strong>to</strong> Class Menu and choose Preferences.<br />
and select CLASS...<br />
2. The default size is 6 x7. You can increase the<br />
rows and columns <strong>to</strong> display larger class sizes<br />
To have the changes take effect you must leave<br />
close and reopen the class.<br />
3. After you reopen the class you will have <strong>to</strong> resize the<br />
seating chart win<strong>do</strong>w <strong>to</strong> see the large chart grid<br />
To Create a New Seating chart<br />
1. Select Seating Chart.... from the Class menu.<br />
2. Enter a new name for the chart and select ADD<br />
3. After the blank chart is created. Click Student List<br />
<strong>to</strong> display all students names.<br />
4. Select each students name and drag on<strong>to</strong><br />
the chart in the order you wish
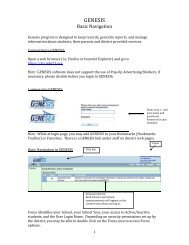
Initial Making the Grade Setup - Importing Student name from Classxp<br />
To use Schoolcenter you MUST have student ID # configured in Making the Grade.<br />
Below are instructions for exporting student ID# from Classxp.<br />
These steps must be <strong>do</strong>ne for every class<br />
1. Open Classxp and choose a class<br />
2. Double click on the In Folder in the lower right corner<br />
3. Double - click on the MakingtheGrade export icon<br />
4. Choose Export from the Query Win<strong>do</strong>w<br />
5. Choose Ok from the Export win<strong>do</strong>w<br />
6. Choose where you would like <strong>to</strong> save the file and type the name <strong>of</strong> the class and<br />
hour you are exporting then Choose Save.<br />
You have now saved a text file with student names and ID #. The next step is<br />
<strong>to</strong> import this file in<strong>to</strong> Making the Grade.<br />
7. Open Making the Grade and create a new gradebook file for your class<br />
8. Follow the setup screens<br />
A. Make sure you enter a course number<br />
B. Choose Your Own Numbers from Step 2 Student setup win<strong>do</strong>w<br />
C. On the student ID setup screen Choose Import<br />
D. Choose ASCII/Text from the selection win<strong>do</strong>w<br />
9. Locate the file you exported from Classxp and choose import<br />
10. You should now see your student names and IDs displayed.<br />
Choose Done.<br />
Your have now setup Making the Grade so it will properly interface with Schoolcenter!<br />
For specific directions on <strong>how</strong> <strong>to</strong> upload grades <strong>to</strong> Schoolcenter refer <strong>to</strong> the<br />
Uploading Grades Han<strong>do</strong>ut.
Uploading Grades <strong>to</strong> SchoolCenter Web Site<br />
Note :You must be using version 9.4 or higher <strong>of</strong> Making the Grade <strong>to</strong> upload.<br />
Before you upload grades <strong>to</strong> SchoolCenter you must complete a one time setup step<br />
in the Making the Grade file <strong>of</strong> each class.<br />
Setting up Making the Grade<br />
Before you can upload grades <strong>to</strong> Schoolcenter your Making the Grade files must have<br />
Sasixp student IDs entered for each student and a course ID entered for each class..<br />
Entering Student IDs<br />
If you have not already entered student IDs or imported student IDs from Sasixp follow the<br />
directions below:<br />
Open Making the Grade file and Go <strong>to</strong> the Edit Menu<br />
Choose Setup Info- Class Information - Student Numbers<br />
Choose your own numbers at the next screen<br />
Enter Sasixp student IDs from your class roster sheet for each students.<br />
Setting up Course IDs<br />
Open your existing Making the Grading file<br />
1. Go <strong>to</strong> Edit Menu - Setup- Class Information- Class Title<br />
2. Enter the Sasixp course # <strong>of</strong> the class in the Course Number.<br />
You can find the course # at the <strong>to</strong>p left hand corner <strong>of</strong> your absences lists<br />
3. Save your changes and open your next grading file<br />
You must enter a course # for each class you wish <strong>to</strong> upload <strong>to</strong> SchoolCenter.
Uploading Grades <strong>to</strong> SchoolCenter<br />
PART ONE :Export Grades <strong>to</strong> an XML file from Making the Grade<br />
Step 1 Open a Making the Grade Class<br />
Go <strong>to</strong> FIle-Export Student Data<br />
Choose SchoolCenter<br />
Step 2<br />
Select the Making the Grade Classes you<br />
wish <strong>to</strong> upload<br />
If you only want <strong>to</strong> upload only the class displayed Select Next<br />
If you wish <strong>to</strong> add additional Making the Grade Classes<br />
Select Add<br />
Navigate <strong>to</strong> the other Making<br />
the Grade files you wish <strong>to</strong> upload<br />
Select Include<br />
Select Done when you have added all classes<br />
When you have added all <strong>of</strong> the classes you wish <strong>to</strong> upload Select Next<br />
After you select Next from the upload screen you will be prompted<br />
Save the Making the Grade Class - Choose Yes<br />
You should now get the Message that the export was successful<br />
The SchoolCenter.xml file will be saved in the<br />
SAME FOLDER AS YOUR MAKING THE GRADE FILES.<br />
Do NOT rename this file it must be named SchoolCenter.xml.
PART TWO: Uploading <strong>to</strong> SchoolCenter web site<br />
Open Internet Explorer and Login <strong>to</strong> Schoolcenter.<br />
http://roseville.mn.schoolwebpages.com/admin<br />
After you have logged in you should see a blue bar on the right side<br />
Click on the small + on the blue bar<br />
When the menu displays Choose Grades<br />
Choose Upload Grades from the next screen<br />
Choose Browse from the Upload Grades win<strong>do</strong>w<br />
Locate the SchoolCenter.xml file and choose Open. The file should be<br />
saved in the same folder as your Making the Grade class files.<br />
The screen should now display a preview <strong>of</strong> your class grades<br />
FINAL STEP Scroll <strong>to</strong> the bot<strong>to</strong>m <strong>of</strong> the preview win<strong>do</strong>w and select<br />
the Blue FINISH link <strong>to</strong> complete the upload.<br />
Note: There is a s<strong>of</strong>tware bug in some web browser where you <strong>do</strong> not see the preview<br />
win<strong>do</strong>w. However, the upload functions correctly.<br />
Verifying your Upload<br />
To verify your upload select Manage Classes.<br />
All <strong>of</strong> your classes should be listed. To view and check grades within a class click on the<br />
class title.
Where can I find<br />
technology training?<br />
1. A<strong>to</strong>mic Learning<br />
A<strong>to</strong>mic Learning is a web site with a self-directed training videos and curriculum<br />
resources. Tu<strong>to</strong>rials are available for both Win<strong>do</strong>ws and Mac computers.<br />
To access A<strong>to</strong>mic Learning on a district computer:<br />
Open a web browser. Go <strong>to</strong> www.a<strong>to</strong>miclearning.com.<br />
Near the <strong>to</strong>p <strong>of</strong> the win<strong>do</strong>w, click on Win<strong>do</strong>ws Tu<strong>to</strong>rials, Macin<strong>to</strong>sh Tu<strong>to</strong>rials or<br />
Curriculum Tools.<br />
Scroll or use the search box <strong>to</strong> find a tu<strong>to</strong>rial.<br />
Video clips are arranged in an outline format. Clips are short, from 45 seconds <strong>to</strong> 3<br />
minutes.<br />
To access A<strong>to</strong>mic Learning from outside the district:<br />
Open a web browser . Go <strong>to</strong> www.a<strong>to</strong>miclearning.com<br />
Login with the following:<br />
Username: rosevilleisd Password: isd623<br />
2. Media/Tech Pr<strong>of</strong>essional Development Web Page<br />
http://www.isd623.org/edc/ps/it/mtpr<strong>of</strong>dev.cfm<br />
3. Contact your Library Media Specialist!
Getting Help<br />
Reporting Issues:<br />
District Technology Support Request System<br />
Most issues should be reported online using the Technical Support Request system<br />
located at www.isd623.org/technology/help.cfm. This system is intended <strong>to</strong> allow<br />
District Technology Support <strong>to</strong> efficiently assist as many staff as possible.<br />
Technology Support Hotline<br />
Urgent issues may be reported by calling the helpdesk at 651-604-1476.<br />
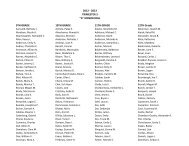
District Technology Services Staff<br />
Contact Position Phone # Description<br />
Tina Clasen District Technology<br />
Services Supervisor<br />
604-1476 • Technology Services<br />
Project Coordination<br />
Bran<strong>do</strong>n Peterson District Helpdesk<br />
Manager<br />
604-1476 • Helpdesk Manager<br />
John Bailey<br />
Clint Foster<br />
Mike Koopman<br />
Jon McCullough<br />
Jason Meyer<br />
Sean Thao<br />
District Helpdesk<br />
Specialist<br />
District Helpdesk<br />
Specialist<br />
District Helpdesk<br />
Specialist<br />
District Helpdesk<br />
Specialist<br />
District Network<br />
Manager<br />
District Audio-Video<br />
Specialist<br />
604-1476 • Macin<strong>to</strong>sh Support &<br />
Repair<br />
604-1476 • Computer Support &<br />
Hardware Repair<br />
604-1476 • Win<strong>do</strong>ws Support &<br />
Hardware Repair<br />
604-1476 • Macin<strong>to</strong>sh Support &<br />
Repair<br />
604-1476 • Network Management<br />
604-1476 • AV Equipment Check Out<br />
& Repair<br />
• Video Production Support<br />
• Telephone/Voicemail<br />
Support